DIY 03/04 Sedan reverse light (red line) removal
#16
 08-25-2010, 03:38 AM


#17
09-28-2010, 09:01 AM

The trunk portions of my blacklines do not to seem to want to seat properly in the opening. The wide edge with the tabs is securely attached to the trunk lid, just like in longtran's picture, but the inner edge of the taillight, even though the nut is fully tightened, still sticks out from the rest of the lid. This is on both the left and right units. What's wrong? Does it have something to do with the long white plastic piece that the nut screws on to? I couldn't figure out for the life of me what that piece is supposed to do. I don't see how it anchors the taillight to the inside of the trunk lid. It all just seems to be one self-contained assembly, held in place only by the wiring harness. Please help!! Thanks!
Just figured it out. After completely removing the trunk lid liner and getting up close and personal with the taillight cavity, I saw that the long white piece clamps over a metal lip holding the inner edge in place. Problem solved, and now everything looks great!!
******************
movig to nyc
MN Real Estate Search
#19
10-16-2010, 09:22 PM
Just did this mod it took me about 15 minutes. I preheated my oven to 200 degrees used a flat head to pop the liner locks out, and a 5/16th deep socket to get the four nuts off then heated my covers up. I used my Index finder to work the pieces out after the glue got warm and they popped right out. Install is reverse of removal. This is a 15 minute project easy, not an hour.


#21
01-21-2011, 02:13 PM

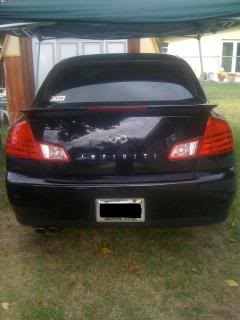
i did mines lol =D
http://i196.photobucket.com/albums/a...i2/backnew.jpg
<a href="http://s196.photobucket.com/albums/aa300/305boii2/?action=view&current=backnew.jpg" target="_blank"><img src="http://i196.photobucket.com/albums/aa300/305boii2/backnew.jpg" border="0" alt="Photobucket"></a>
http://i196.photobucket.com/albums/a...i2/backnew.jpg
<a href="http://s196.photobucket.com/albums/aa300/305boii2/?action=view&current=backnew.jpg" target="_blank"><img src="http://i196.photobucket.com/albums/aa300/305boii2/backnew.jpg" border="0" alt="Photobucket"></a>

#24
03-10-2011, 04:35 PM


#25
03-10-2011, 04:47 PM
its really easy ..
steps -
1. open hood --- (lol)
2. unhook all lil black clips
3. unhook the blk lever (pull)
4. unscrew out lights.
5. push out light
6. if you want to .. you dont have to .( heat up light with hair dryer)
7. grap red stripe .( u can use ur finger. )
if finger dont fit Plyers ..
8. pull till it brakes off.
9. pull till all of it comes out
ALL DONE N ENJOY
#28
03-11-2011, 02:08 PM
#29
03-19-2011, 09:26 PM

Registered User
#30
04-09-2011, 06:34 PM

Did mine this afternoon. Took all of 20 minutes. How in the hell did you guys get your finger in the hole? (insert joke here) My hands aren't huge, but there's no way my fingers were fitting in there.
I dug at it with a flatend screw driver and pulled them out with needlenose pliers. I didn't bother placing them in the oven to loosen the glue; I just went to town on them with pliers.
I dug at it with a flatend screw driver and pulled them out with needlenose pliers. I didn't bother placing them in the oven to loosen the glue; I just went to town on them with pliers.