DIY- 19 Rays Stockers to -->> Gunmetal
#1
 05-20-2008, 12:04 AM


DIY- 19 Rays Stockers to -->> Gunmetal
Alright guys, as the title says this is a DIY for rim/wheels paint. Remember boys and girls this is meant as a GUIDE ONLY, I am not responsible for your mistakes and or finish product, damage etc. DO this at your own risk!
Well to make a long story short I searched a lot throughout the forums and found 2 people whom have done wheel re-finish and it has come out awesome! One of those people being Vodka and the other Express. Well I took it upon myself to do it as well with my OEM 19�s I had freshly bought. What you are about to see next is my work and how I was able to get it accomplished. Thanks to Express and Vodka for their awesome DIY.
You might ask why I am doing a DIY if there are already 2? Well in the others there is no procedure on how to remove bubbling, roughness, and orange peal while painting. I have tried my best to describe the full process.
List of Materials I used:
1: 3 inch Blue painter tape ( 3M is the best IMO )
2: Painter paper cover ( it comes in a brown roll )
3: Sandpaper, I used a lot ! 220 2 sheets 400 10 sheets, 600 grit 8 sheets, 1000 1 sheet
4: Bondo any type is fine, as long as its for METAL WORK
5: Plastic spatula and blade
6: 3 cans of primer Duplicolor which can be sanded is great!
7: 6 Cans of Duplicolor Graphite ( you can do w/e color you want )
8: 2 cans of Duplicolor clear.
9: Micro fiber towels/Cotton towels ( I prefer micro fiber s they don�t leave lint )
I did this in a storage unit I rented because I don�t have a clean garage to do it in. My garage is full of ish and it would have been a mess. I recommend a well ventilated area and closed in ( not completely ) from the outside. Think of it as a mini paint booth, just not sealed in. I left the storage door half open all the time and put a fan in there to not die!
Start by cleaning your rims thoroughly, this means everything! Use de-greaser, Eagle one or whatever just get them CLEAN! This is very important as you don�t want any oils or contaminants which can ruin the finish.
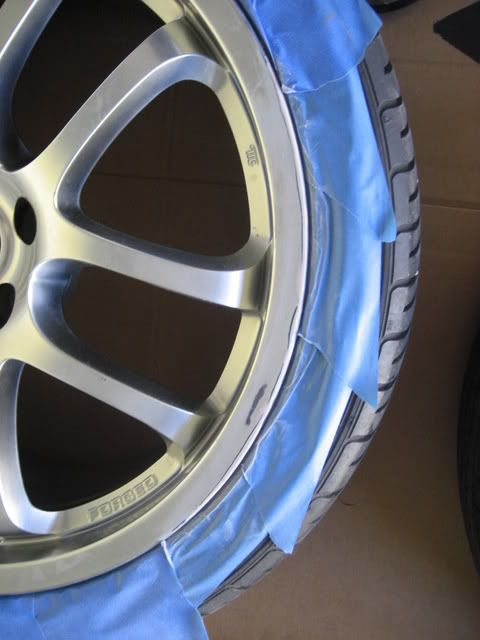
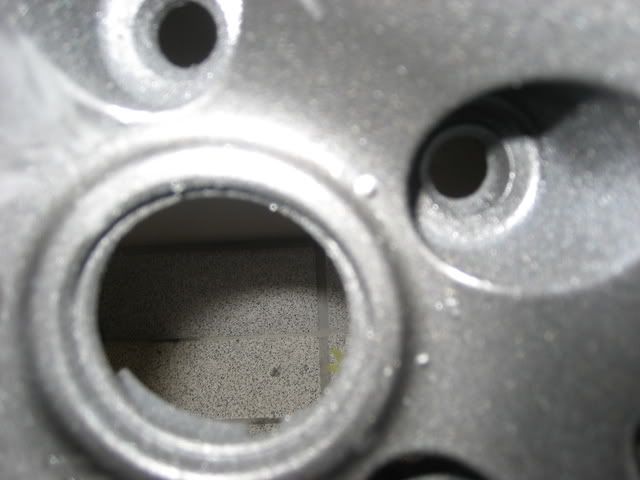
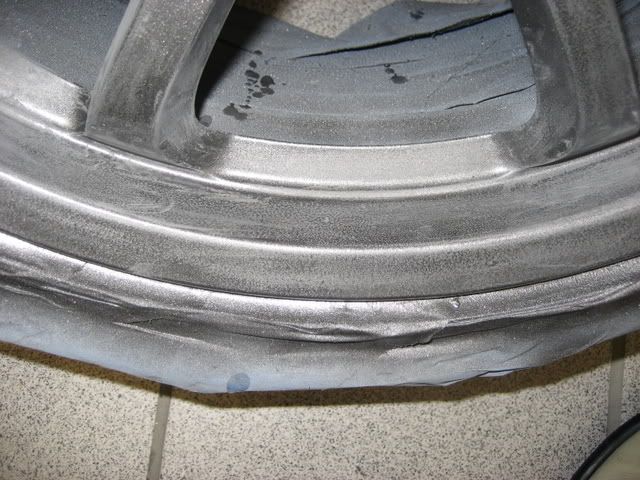
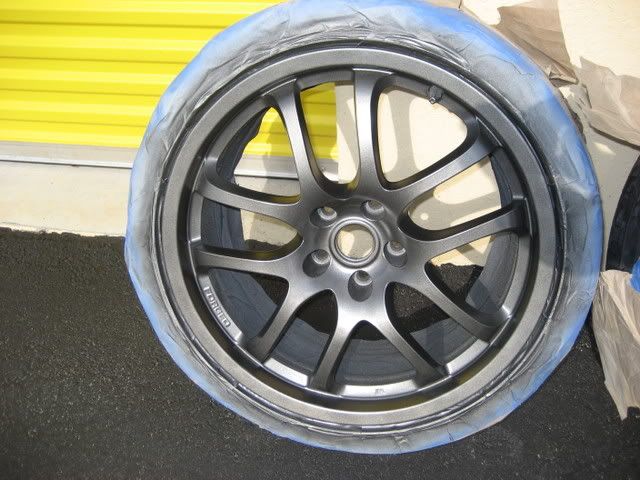
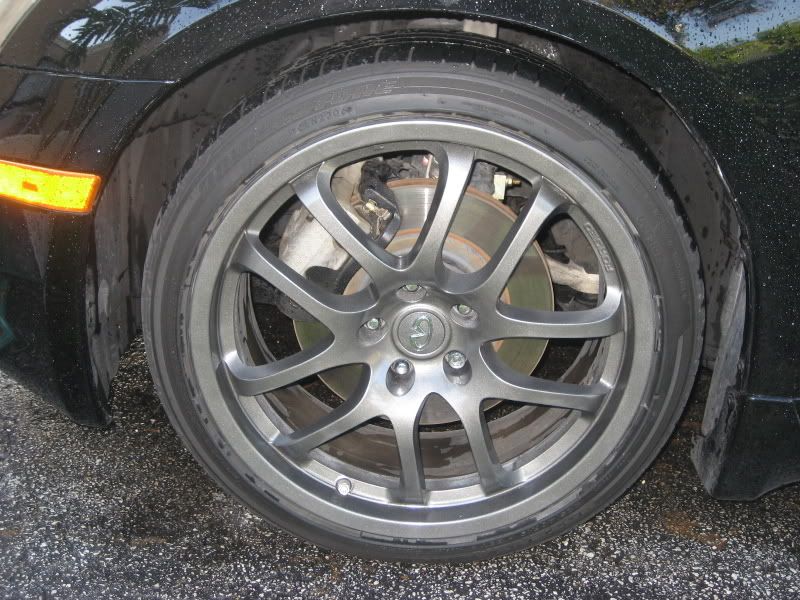
Once you have them clean go ahead and tape up areas where you will apply bondo ( areas where there is rash or scratches deeper than 1/16 inch ). Once taped off ( Tires ) start to sand down your rash areas with 220 grit and get the rash off. It doesn�t matter if you expose the black basecoat of your rims, but I would avoid it as much as possible. Once you have leveled off as much as possible go ahead and apply bondo on affected areas. Bondo will dry quickly so work fast. Use your plastic spatula to apply once you have the bondo ready and allow to dry for at least 20 minutes. After it dries go ahead and sand it down with 400 grit until you get desired finish ( should be smooth and even to the rest of wheel ). If you still don�t feel its smooth give it another coat and just repeat the process until it comes out flush and nice. Once you have that ready to go it should look like this.

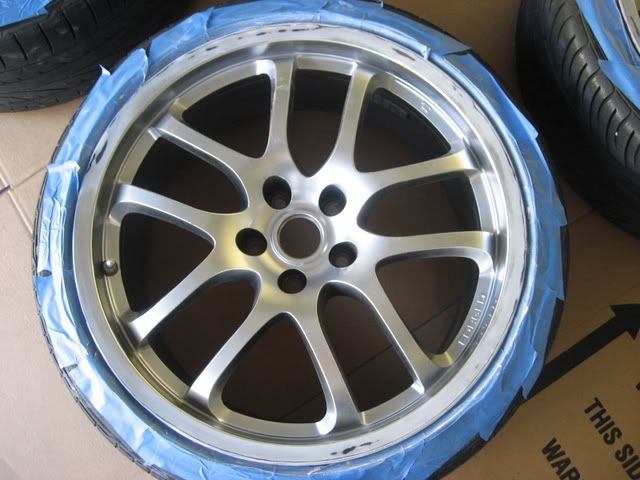
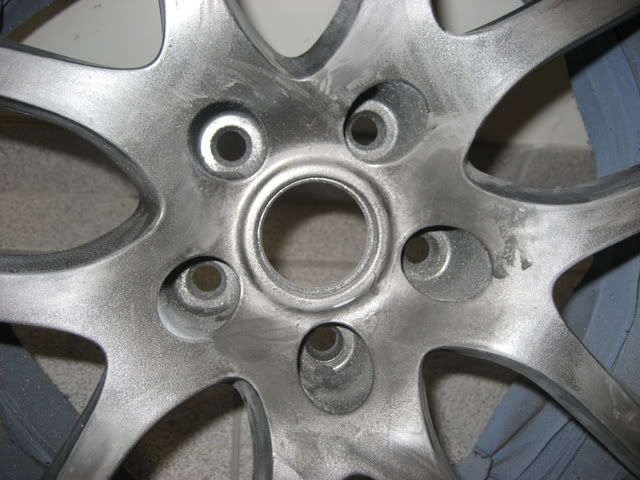
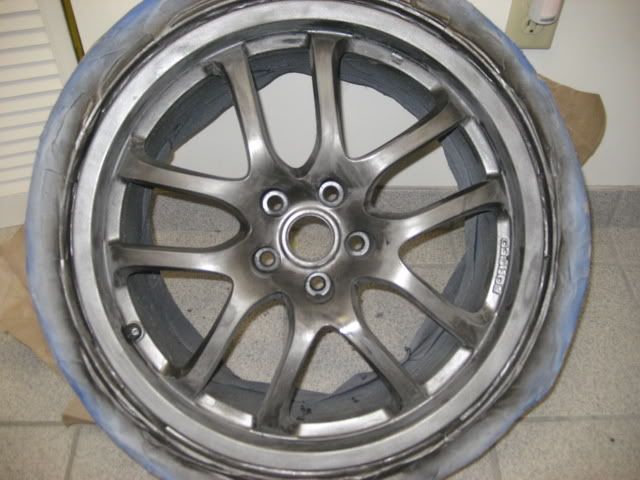
Now its time to scuff the crap out of your rims! Use the 400 grit and get in there, every little hole, bend, curve you name it sand it. You don�t want to take off the silver paint, you just want to scuff it enough ( taking clear off ) so the primer grabs on. It should look like this.
Sorry i had to borrow this pic from EXPRESS !
Once they are nice and ready to go wipe them down with a wet micro fiber towel. Wipe and clean every single part of the rim. Once they are nice and clean, repeat process with Pain Thinner and your micro fiber towel. This step is crucial as you will leave your rims super clean and ready for the primer coat.
Set them out to dry for a bit, I did about 5 minutes in the sun as the thinner evaporates rather quickly.
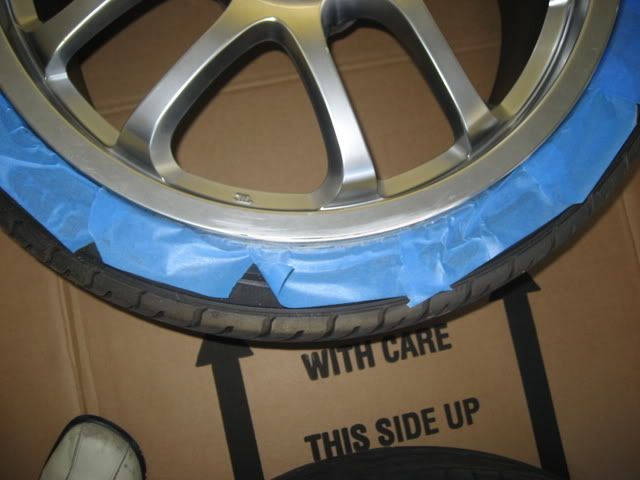
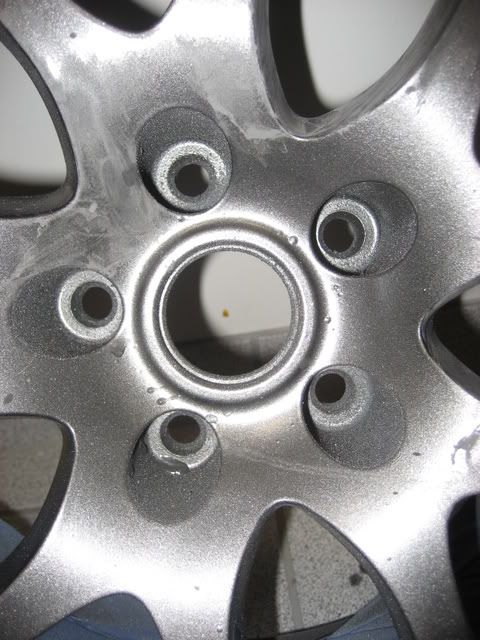
Once dry bring them back in to your paint spot and masking them off. Cover the tires completely unless you want colored tires. I also covered the inside of the wheels to avoid ugly splatters on the inside, not necessary but I am ****. Now start shaking the primer and read the can AND follow the directions. I shook can for about 1 minute and then got ready to go. Apply just a light coat of primer for the first run. Let that dry for about 15 minutes, then apply another coat this one a little heavier but still keep it light. You should not be able to see the surface under ( bondo, silver, black etc ). You should have a nice 2 coats of primer like this.


Now that you have primed them set tem outside in the sun for about half an hour. Bring them back in and wait another half hour. Once the full hour has gone by go ahead and get sanding again! You will use the 400 or 600 grit ( your call ) to LIGHTLY scuff the primer. This will help with adhesion of the paint coats to come. DON�T SAND YOUR PRIMER OFF! If you do you will have to re-apply in the steps mentioned above.
Now repeat the micro fiber with the paint thinner procedure and get them clean clean clean. I recommend the micro fiber because it doesn�t lint as much as other cloths. This will be very important as you will see them on your paint coats as spots, bubbles etc which can later on lift the paint. The small lint the micro fiber left I just got real close to the rim and blew it away with some dust cleaner ( for keyboards etc ) and got them VERY clean! Set them out to dry for about 5 mins and get ready to paint�
Ok now you are ready for the color coats! Make sure you apply very thin layers of paint. You want the paint to go on evenly and smoothly. If you put too much it will run and it�s a paint to fix. By the time I got to the second coat I see BUBBLES! AHHHHHH.......
Don�t panic, its ok. Don�t apply anymore coats at this time, this will make it almost impossible to eliminate as you will seal the bubble with another coat. Let the paint dry for at least an 45 mins to an hour. Once its dry go ahead and grab a small cup of water and your 600 grit. Lightly go over the bubbles with your wet sandpaper and slowly sand it out.
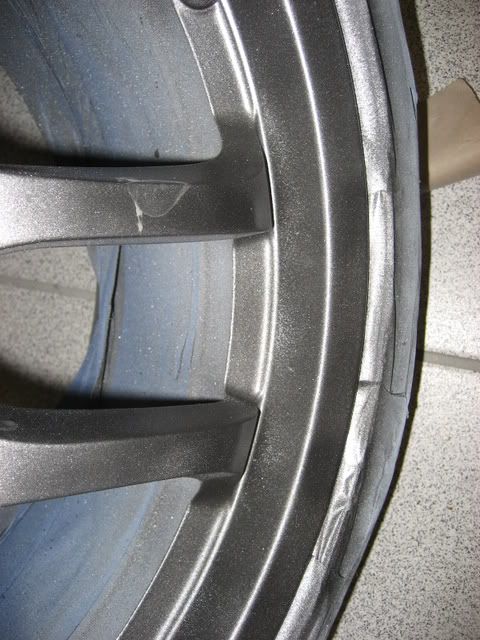
You might also get rough spots as you start to paint. Like me this is my first time so I was spraying kind of far. This caused the paint to get sandy and ugly, it wasn�t even sticking. This is also fine and it will look like this.
For this you might want to use 400 grit and get that out, remember to keep it WET and sand it out. Once this is done it should look like this.
Bubbles should also be gone and it should look like this.
By now your wheels look like crap again, it looks like you should have never got into this in the first place�� DON�T WORRY its ok just clean them off with some paint thinner (lightly) and allow to dry. Once the wheels are dry they are ready for more coats.
Try to apply the colors coats about 15-20 minutes in between coats. The can might say less but I did it like this and it came out just fine.
I experienced orange peal and bubbles throughout the process. It turned out the bubbles were caused by a defective tip on one of my cans which killed it on the second coat of al my wheels! I realized this once that can was over it had a spill in front of it and it was blowing chunks into the wheels. Basically I was shooting blobs at my wheels! Well I had a lot of 600 grit and wet sanding in between coats 2 and 3 .
As far as orange peal or small little craters don�t worry just repeat the steps as above, wet sand with 600 grit and wipe clean the spot with paint thinner and you are ready to go for the next coat. Don�t forget that before you sand any imperfections your coat of paint should be dry! At least 45 mins!
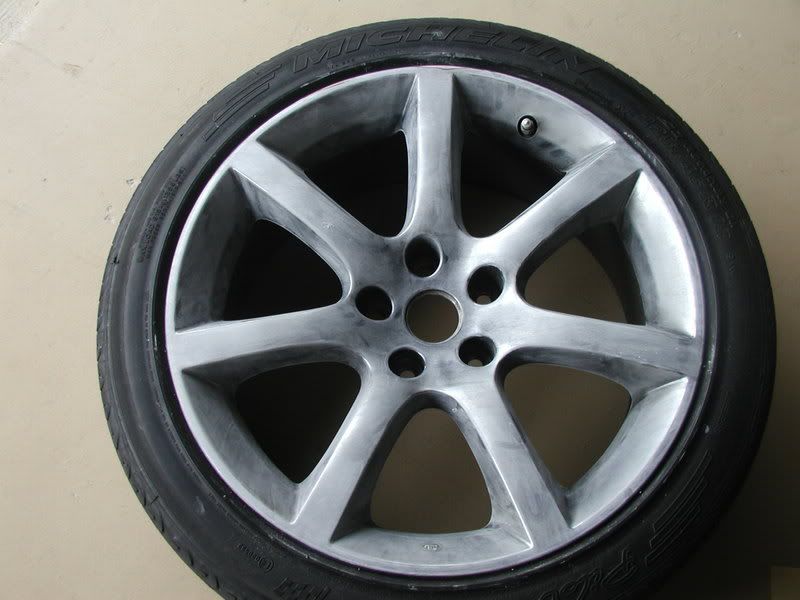
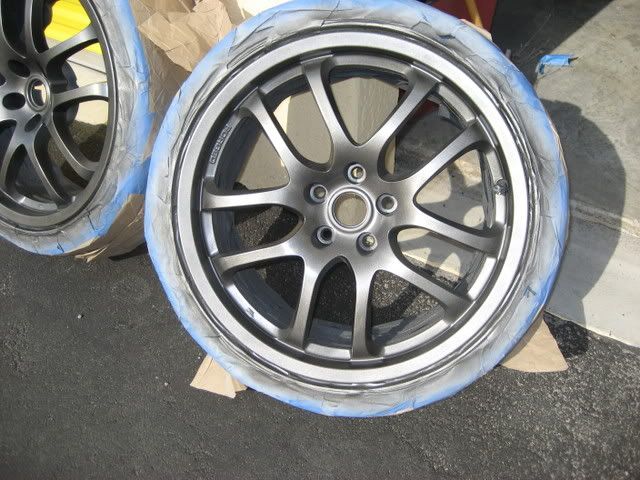
By the 5 coat I thought it was enough and they ended up looking like this.
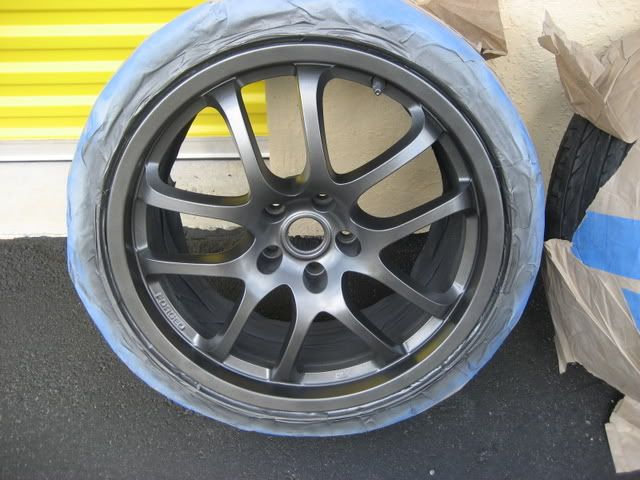
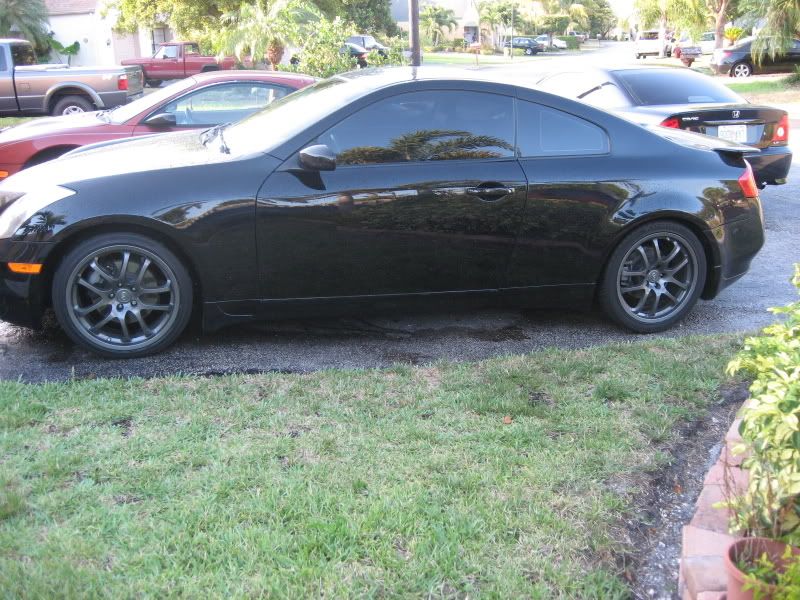
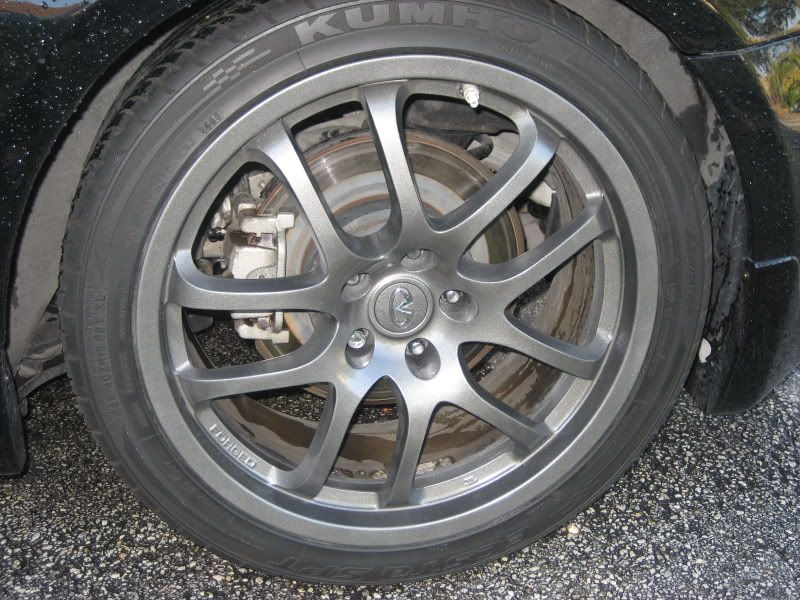
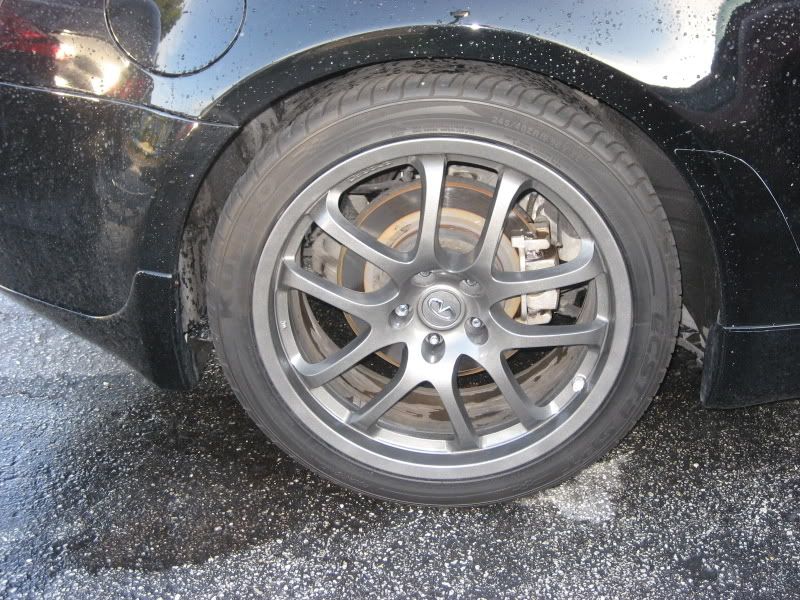
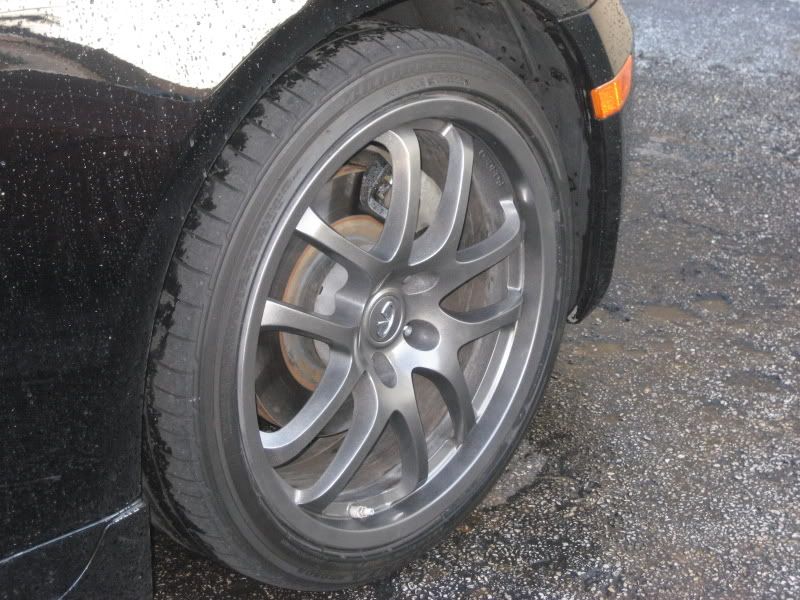
Now its on to the clear. The cans say you can clear within the hour, DON�T. I waited a full day and it worked out just fine. Apply about 2-3 coats of clear and if you want you can sand between each coat with a wet 1000 grit for maximum BLING BLING. This is what he finished product look like.
Well guys that�s it, wait at least one more day before you slap the wheels on and you should be fine.I hope this helped good luck guys and if you have any questions feel free to ask.
GUNMETAL BABY FTMFW
Well to make a long story short I searched a lot throughout the forums and found 2 people whom have done wheel re-finish and it has come out awesome! One of those people being Vodka and the other Express. Well I took it upon myself to do it as well with my OEM 19�s I had freshly bought. What you are about to see next is my work and how I was able to get it accomplished. Thanks to Express and Vodka for their awesome DIY.
You might ask why I am doing a DIY if there are already 2? Well in the others there is no procedure on how to remove bubbling, roughness, and orange peal while painting. I have tried my best to describe the full process.
List of Materials I used:
1: 3 inch Blue painter tape ( 3M is the best IMO )
2: Painter paper cover ( it comes in a brown roll )
3: Sandpaper, I used a lot ! 220 2 sheets 400 10 sheets, 600 grit 8 sheets, 1000 1 sheet
4: Bondo any type is fine, as long as its for METAL WORK
5: Plastic spatula and blade
6: 3 cans of primer Duplicolor which can be sanded is great!
7: 6 Cans of Duplicolor Graphite ( you can do w/e color you want )
8: 2 cans of Duplicolor clear.
9: Micro fiber towels/Cotton towels ( I prefer micro fiber s they don�t leave lint )
I did this in a storage unit I rented because I don�t have a clean garage to do it in. My garage is full of ish and it would have been a mess. I recommend a well ventilated area and closed in ( not completely ) from the outside. Think of it as a mini paint booth, just not sealed in. I left the storage door half open all the time and put a fan in there to not die!
Start by cleaning your rims thoroughly, this means everything! Use de-greaser, Eagle one or whatever just get them CLEAN! This is very important as you don�t want any oils or contaminants which can ruin the finish.
Once you have them clean go ahead and tape up areas where you will apply bondo ( areas where there is rash or scratches deeper than 1/16 inch ). Once taped off ( Tires ) start to sand down your rash areas with 220 grit and get the rash off. It doesn�t matter if you expose the black basecoat of your rims, but I would avoid it as much as possible. Once you have leveled off as much as possible go ahead and apply bondo on affected areas. Bondo will dry quickly so work fast. Use your plastic spatula to apply once you have the bondo ready and allow to dry for at least 20 minutes. After it dries go ahead and sand it down with 400 grit until you get desired finish ( should be smooth and even to the rest of wheel ). If you still don�t feel its smooth give it another coat and just repeat the process until it comes out flush and nice. Once you have that ready to go it should look like this.
Now its time to scuff the crap out of your rims! Use the 400 grit and get in there, every little hole, bend, curve you name it sand it. You don�t want to take off the silver paint, you just want to scuff it enough ( taking clear off ) so the primer grabs on. It should look like this.
Sorry i had to borrow this pic from EXPRESS !
Once they are nice and ready to go wipe them down with a wet micro fiber towel. Wipe and clean every single part of the rim. Once they are nice and clean, repeat process with Pain Thinner and your micro fiber towel. This step is crucial as you will leave your rims super clean and ready for the primer coat.
Set them out to dry for a bit, I did about 5 minutes in the sun as the thinner evaporates rather quickly.
Once dry bring them back in to your paint spot and masking them off. Cover the tires completely unless you want colored tires. I also covered the inside of the wheels to avoid ugly splatters on the inside, not necessary but I am ****. Now start shaking the primer and read the can AND follow the directions. I shook can for about 1 minute and then got ready to go. Apply just a light coat of primer for the first run. Let that dry for about 15 minutes, then apply another coat this one a little heavier but still keep it light. You should not be able to see the surface under ( bondo, silver, black etc ). You should have a nice 2 coats of primer like this.
Now that you have primed them set tem outside in the sun for about half an hour. Bring them back in and wait another half hour. Once the full hour has gone by go ahead and get sanding again! You will use the 400 or 600 grit ( your call ) to LIGHTLY scuff the primer. This will help with adhesion of the paint coats to come. DON�T SAND YOUR PRIMER OFF! If you do you will have to re-apply in the steps mentioned above.
Now repeat the micro fiber with the paint thinner procedure and get them clean clean clean. I recommend the micro fiber because it doesn�t lint as much as other cloths. This will be very important as you will see them on your paint coats as spots, bubbles etc which can later on lift the paint. The small lint the micro fiber left I just got real close to the rim and blew it away with some dust cleaner ( for keyboards etc ) and got them VERY clean! Set them out to dry for about 5 mins and get ready to paint�
Ok now you are ready for the color coats! Make sure you apply very thin layers of paint. You want the paint to go on evenly and smoothly. If you put too much it will run and it�s a paint to fix. By the time I got to the second coat I see BUBBLES! AHHHHHH.......
Don�t panic, its ok. Don�t apply anymore coats at this time, this will make it almost impossible to eliminate as you will seal the bubble with another coat. Let the paint dry for at least an 45 mins to an hour. Once its dry go ahead and grab a small cup of water and your 600 grit. Lightly go over the bubbles with your wet sandpaper and slowly sand it out.
You might also get rough spots as you start to paint. Like me this is my first time so I was spraying kind of far. This caused the paint to get sandy and ugly, it wasn�t even sticking. This is also fine and it will look like this.
For this you might want to use 400 grit and get that out, remember to keep it WET and sand it out. Once this is done it should look like this.
Bubbles should also be gone and it should look like this.
By now your wheels look like crap again, it looks like you should have never got into this in the first place�� DON�T WORRY its ok just clean them off with some paint thinner (lightly) and allow to dry. Once the wheels are dry they are ready for more coats.
Try to apply the colors coats about 15-20 minutes in between coats. The can might say less but I did it like this and it came out just fine.
I experienced orange peal and bubbles throughout the process. It turned out the bubbles were caused by a defective tip on one of my cans which killed it on the second coat of al my wheels! I realized this once that can was over it had a spill in front of it and it was blowing chunks into the wheels. Basically I was shooting blobs at my wheels! Well I had a lot of 600 grit and wet sanding in between coats 2 and 3 .
As far as orange peal or small little craters don�t worry just repeat the steps as above, wet sand with 600 grit and wipe clean the spot with paint thinner and you are ready to go for the next coat. Don�t forget that before you sand any imperfections your coat of paint should be dry! At least 45 mins!
By the 5 coat I thought it was enough and they ended up looking like this.
Now its on to the clear. The cans say you can clear within the hour, DON�T. I waited a full day and it worked out just fine. Apply about 2-3 coats of clear and if you want you can sand between each coat with a wet 1000 grit for maximum BLING BLING. This is what he finished product look like.
Well guys that�s it, wait at least one more day before you slap the wheels on and you should be fine.I hope this helped good luck guys and if you have any questions feel free to ask.
GUNMETAL BABY FTMFW
Last edited by Da-G-SpoT; 05-20-2008 at 07:04 PM.
The following users liked this post:
Jmforgey (03-31-2013)

#7
05-20-2008, 09:52 PM
Trending Topics

 then I would paint my rims
#9
05-21-2008, 10:32 AM
Join Date: May 2008
Location: Hinesville GA
Posts: 990
Likes: 0
Received 0 Likes
on
0 Posts
#10
05-21-2008, 11:42 AM
#11
05-21-2008, 11:43 AM
Originally Posted by 1180G35black
looks great I may end up doing this on mine


#14
05-30-2008, 01:02 AM

great write up man. Looks great...my stock rims are jacked...someone splashed brake fluid all over my car....Ivory pearl soo i had to get it repainted....but as for the rims....no haps...they had crazy curb rash...soo insurance wouldnt cover it due to "previous damage" but neways I had a question on the clear coat your using, or which one is the best...is it enamel, lacquer, I was at the autoshop and there was about 3 different types the enamel one was in a black can, and theres to types of lacquer, one was a blue can and the other one was like a gray can with a pic of a trunk on it or sometype of car....I pretty much tryed all of them and the enamel one was really nice it was clean and smooth at the end...but i found out that it a lil yellow like not clear coat..haha it might have been the can..but the other ones like the lacquer ones...it really didnt dry and didnt cure...its was still soft..I use it on like my Iphone cell phone case and my Wii remotes that I tryed to paint. And the clear didnt look that great....I tryed wet sanding with 1500 grit....but then it made it loook like a flat so I used wax to buff...but it really didnt do nething. Like the orange peal was shiny...could I be using compound? I mean i dont know it bondo, paint, prim, and clear but i onno what im doing wrong...i guess its bec it was cold out...or i didnt let it dry...thats why the clear wasnt cureing... I did a full paint job on my boys bike....and it turnd out great.
http://rides.webshots.com/album/559255203mcnGnm
http://rides.webshots.com/album/559255203mcnGnm
#15
05-30-2008, 07:28 PM
