Diy: Sticky For Window Motor Repairs/door Panel Removal

#1
 05-22-2008, 02:41 PM

Diy: Sticky For Window Motor Repairs/door Panel Removal
My Window Motor removal and replacement DIY for anyone wanting to tackle this.
Tools required:
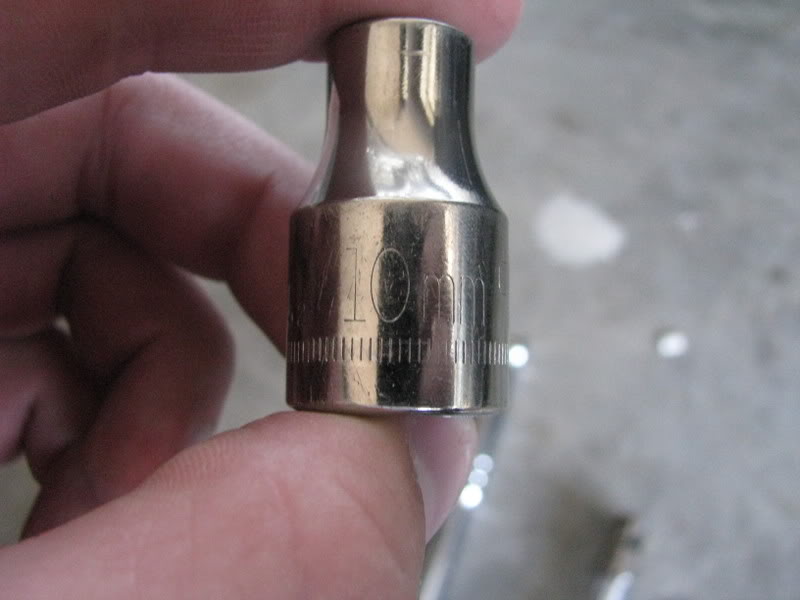
1. Socket Wrench I used 1/2 Inch, both 10mm and 12mm sockets. You can use an air socket wrench if you have one but I would suggest hands since this is delicate metal....
2. Philips screw Driver....power or not...doesnt matter.
3. Flat head screwdriver.
4. Needle Nose Pliers or some form.
anyways lets get started. In the pics you will see I have already removed the door panels but I am still showing you the process.
STEP ONE: Removing the Door Panel
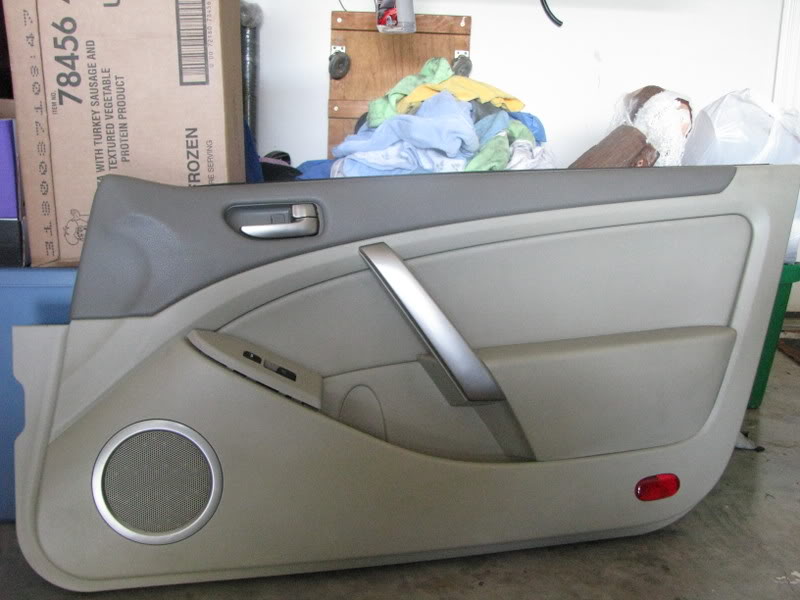
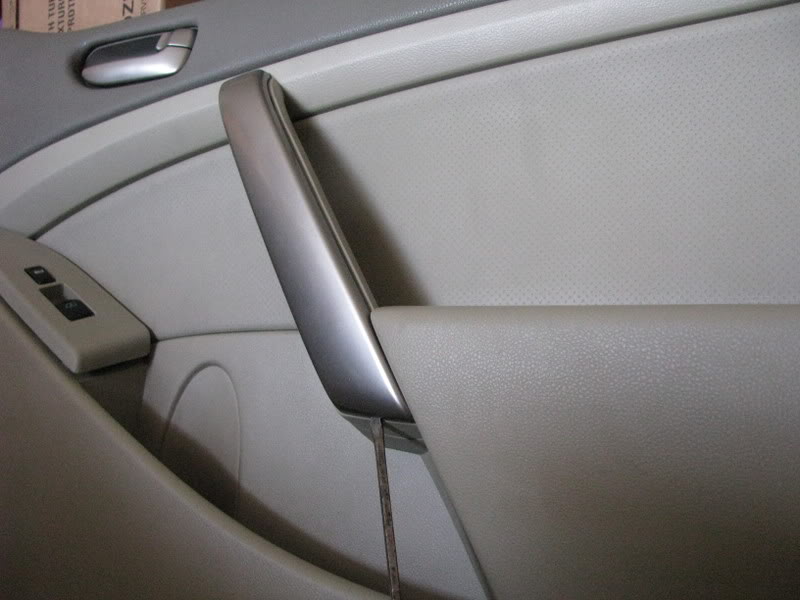
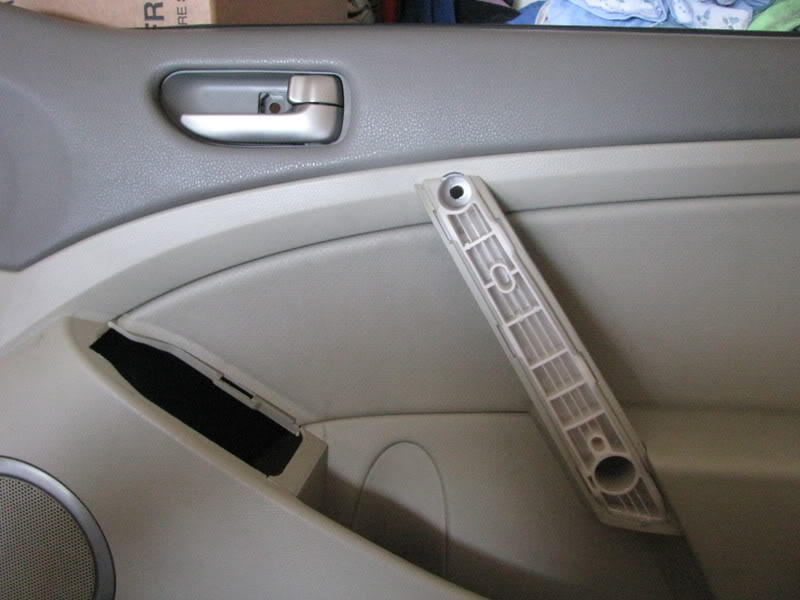
here is what the door panel would look like on your car.
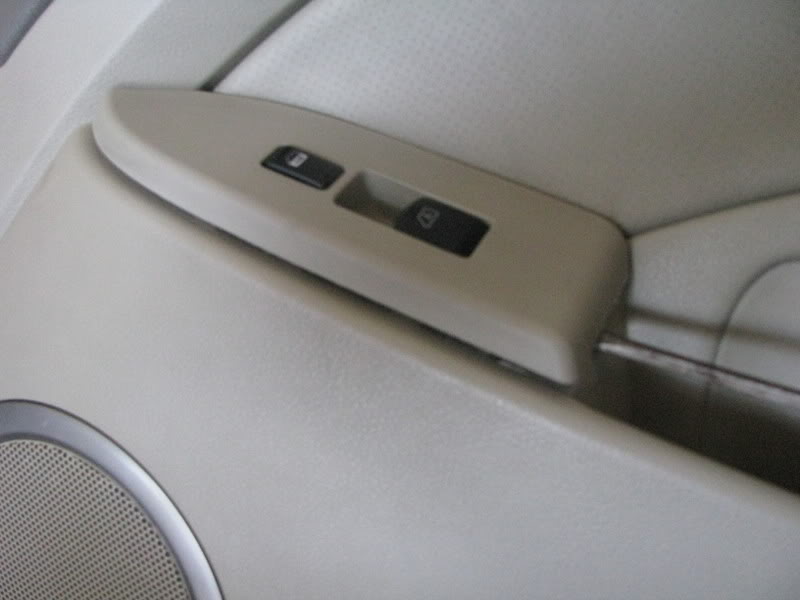
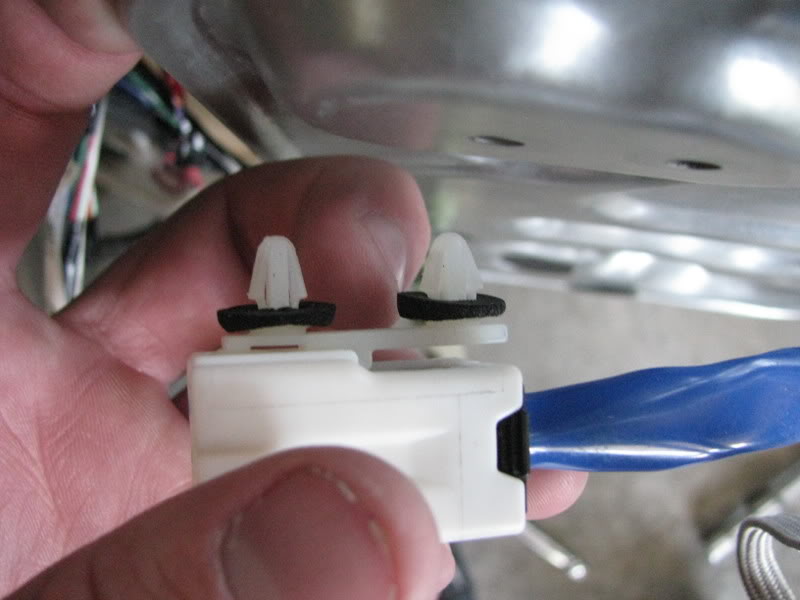
Pulling off the window button panel.
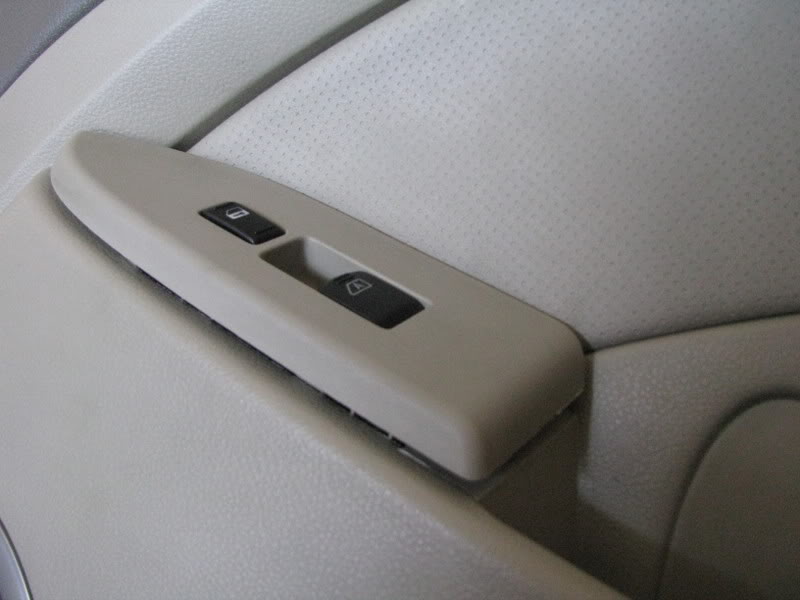
Slide the screw driver underneath to pop the windows buttons off.
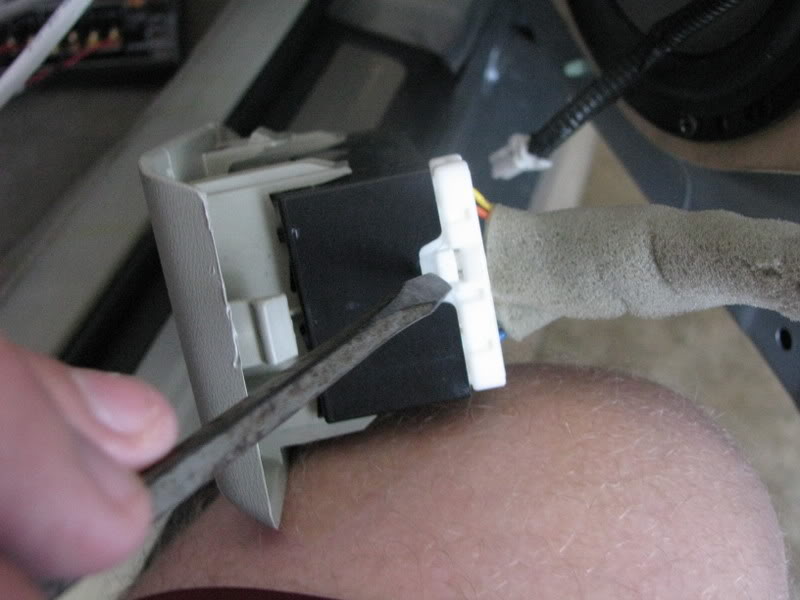
Unplug the Harness using your flathead screwdriver.
Next step is to pop off the aluminum trim to access the screws to the door panel.
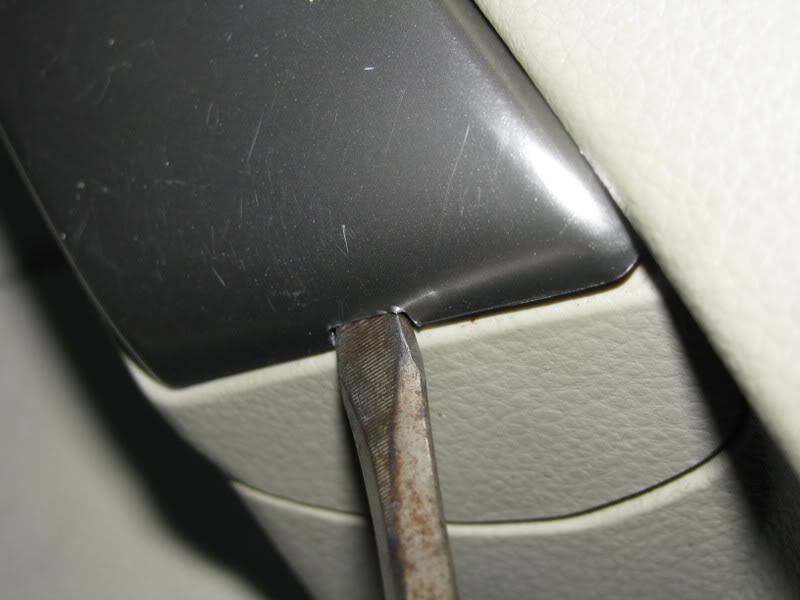
On the bottom side there should be a little slot. Stick the flathead into this slot and twist your screw driver or pull out on it.
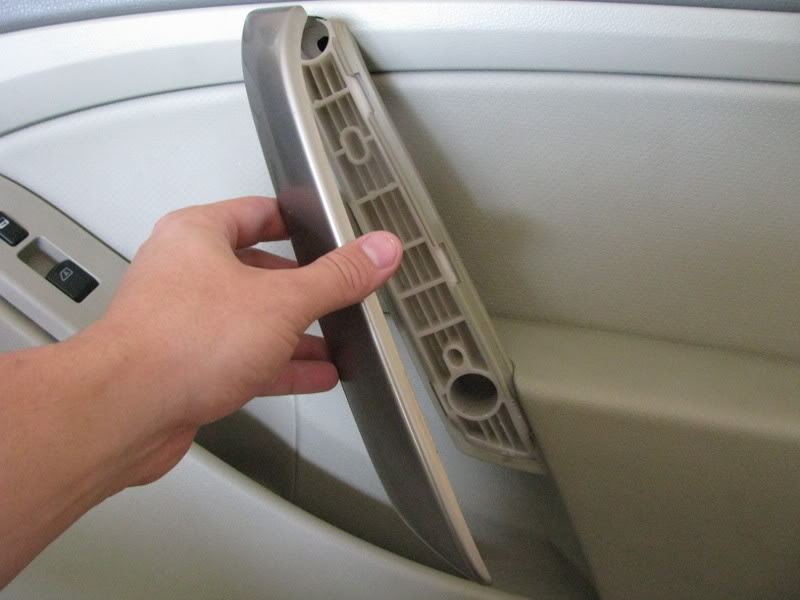
Once popped off you should see this. Now you can remove the 2 screws.
the last thing you do before removing the panel is pop off the little clip inside the inner door handle area.
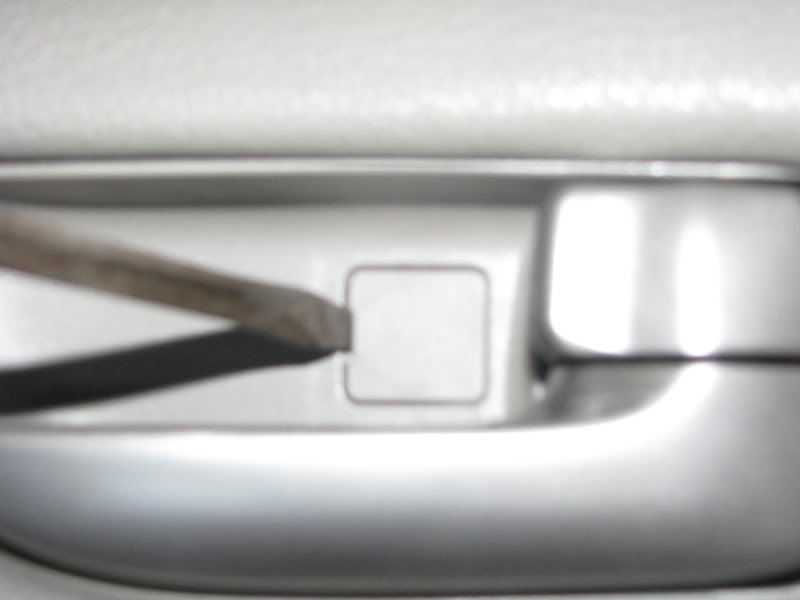
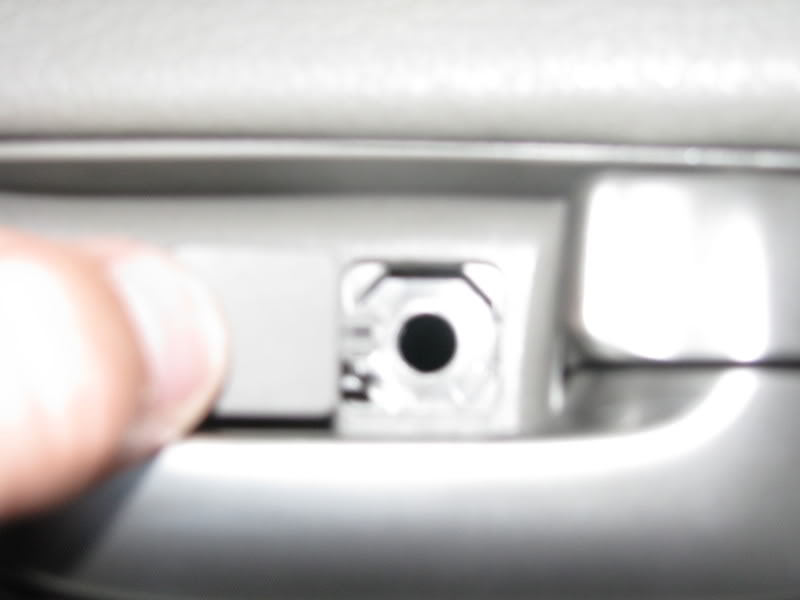
Stick the flathead into the little slot you see and pop it off. you should have this. Now remove the screw behind it.
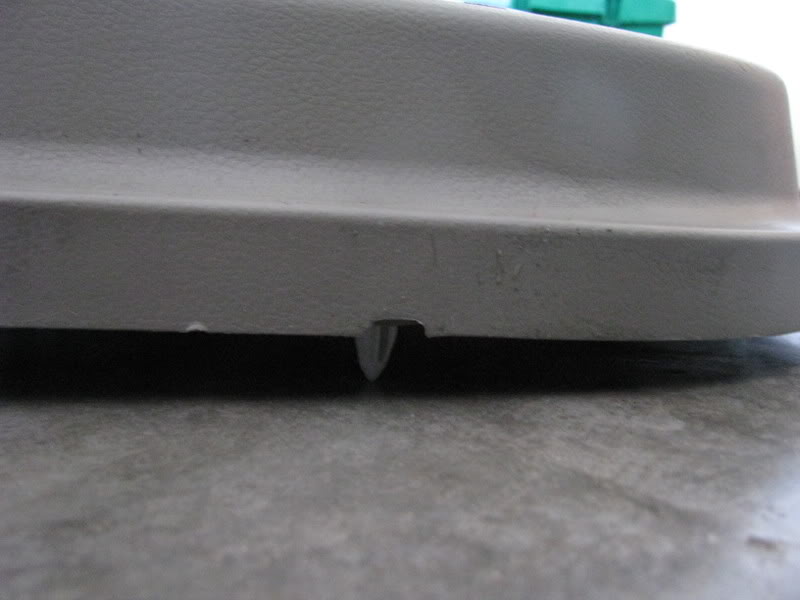
Once the door panel screws are removed you want to get down on your back and look at the bottom of the door panel. There should be slots that run along the bottom. Stick your Screw driver in those slots and pull outward to pull the door panel loose from the door itself.
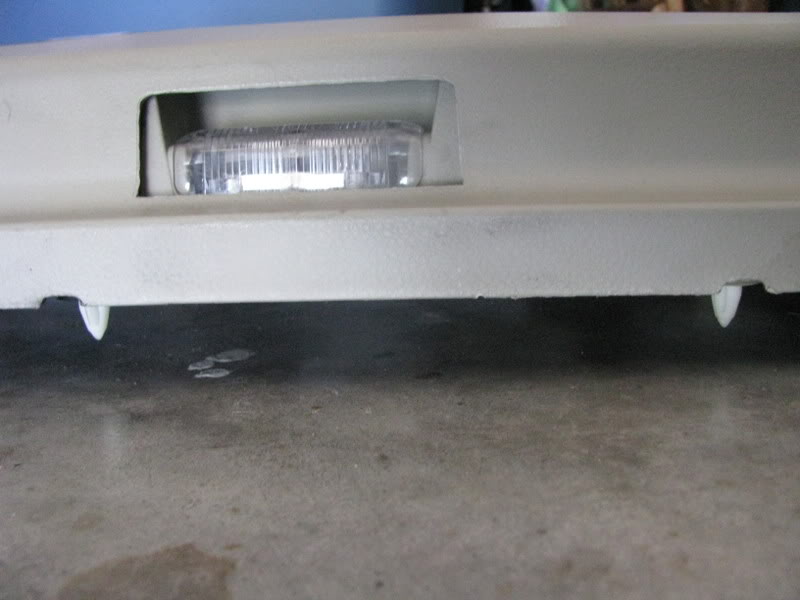
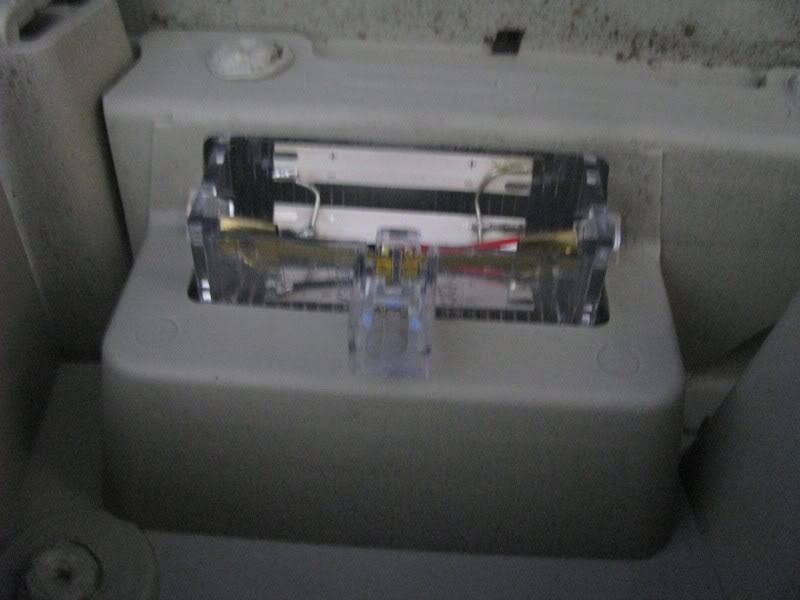
Next step before you get up is to un-hook the door map light harness.
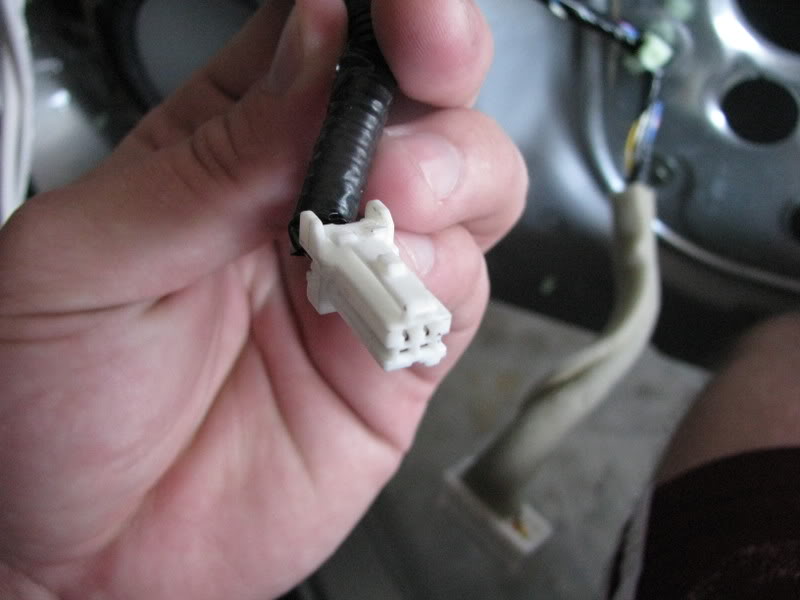
Once this wire harness is removed you are able to remove the door panel. By doing so you just lift up on it and it shold come right off. At this point to remove the door panel all the way you will want to remove the door lock wires. I found it easier to just move it out of the way.
you should see this.
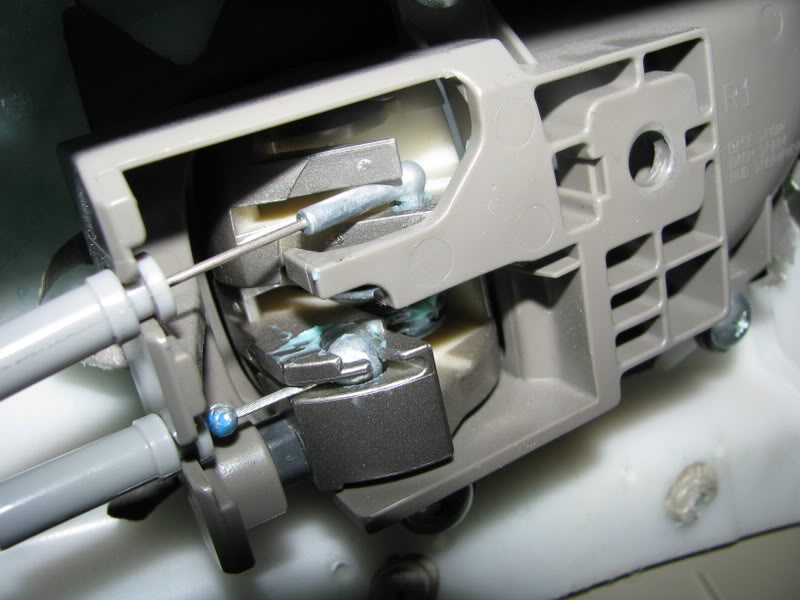
your first step is to pop off the front part of the wires that are locked into that hold the clips in place on the door lock.
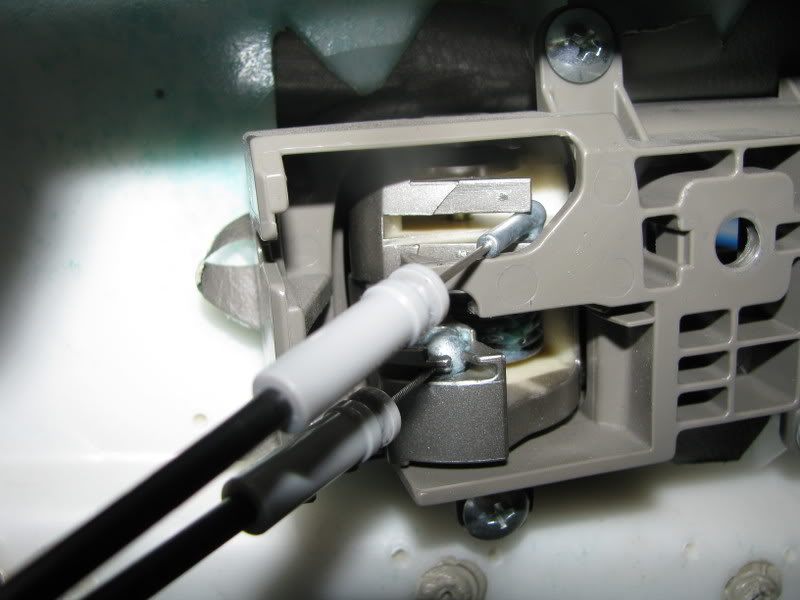
Once popped off you just remove the wires with the clips that are hooked into the door lock. Fairly simple step.
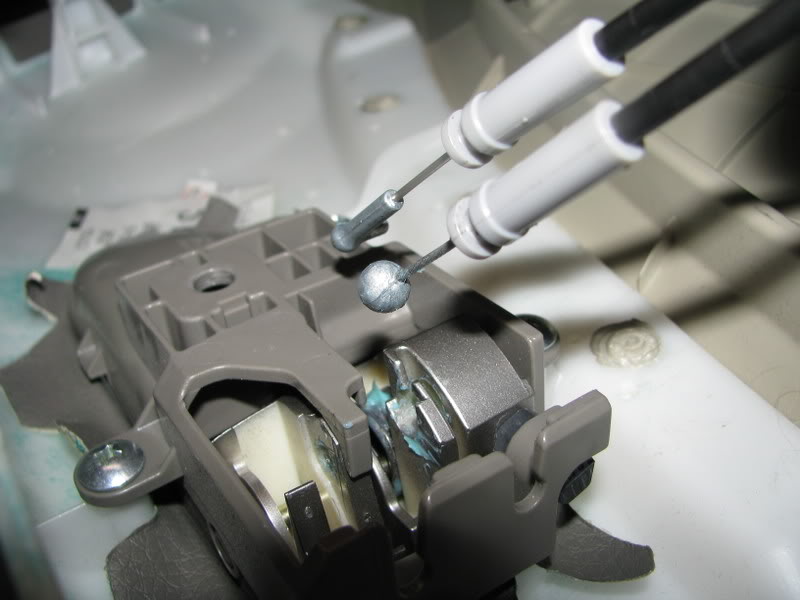
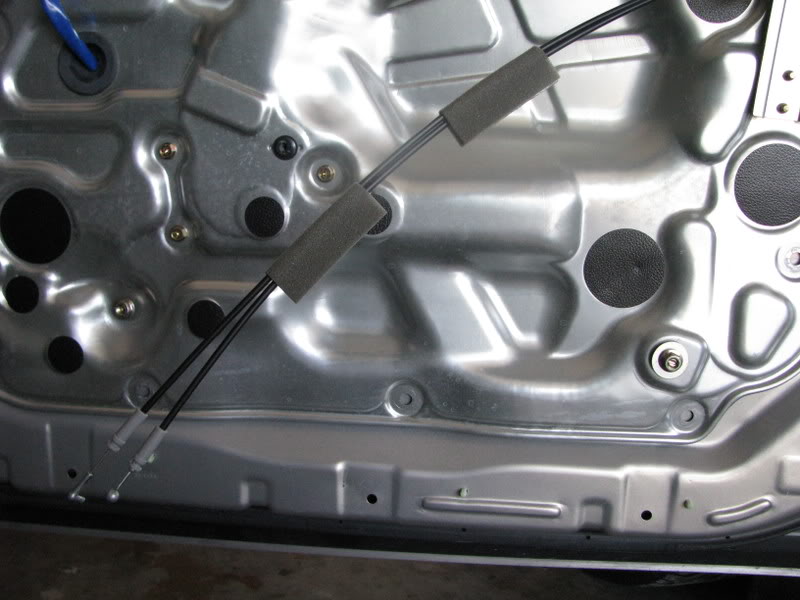
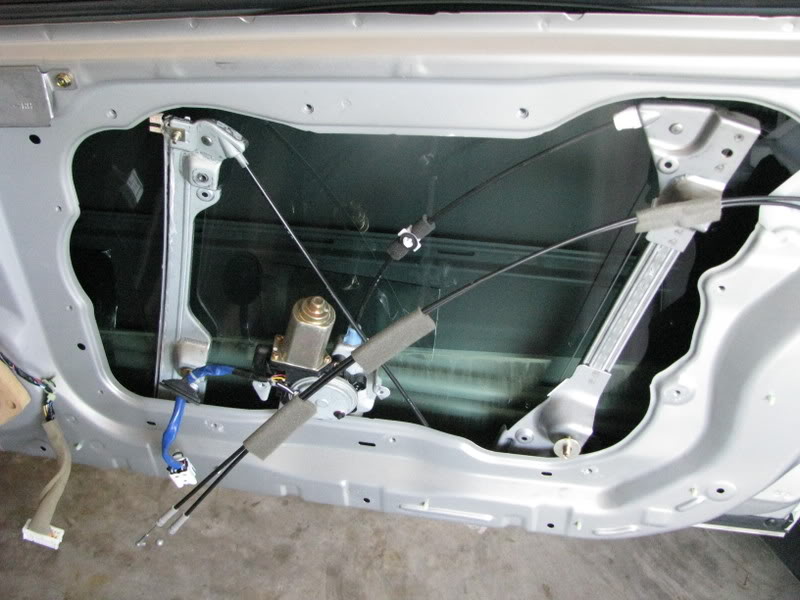
once you have removed the door lock wires you should be able to set aside the door panel and you should be looking at this.
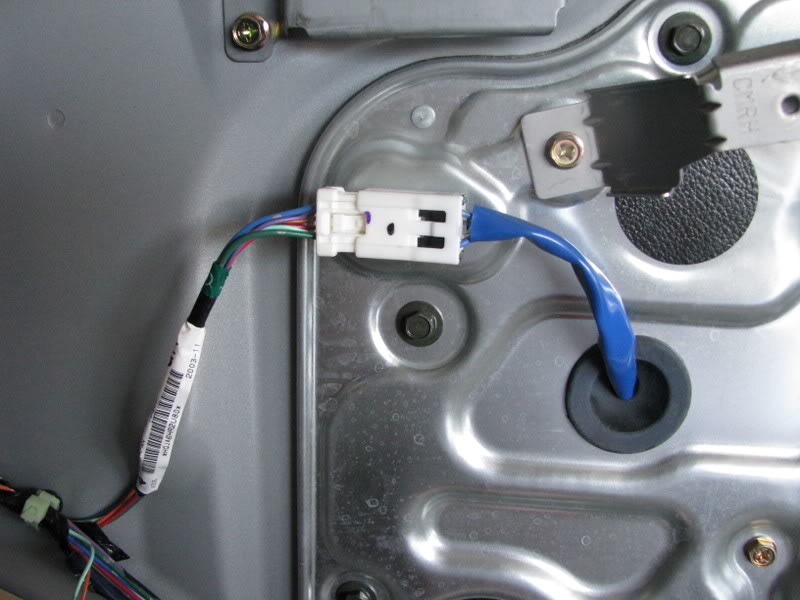
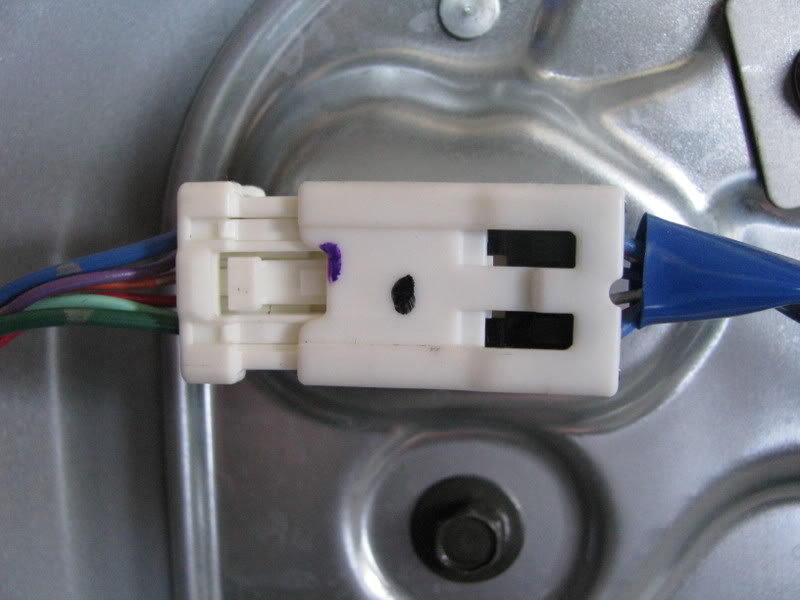
Now the first step to remove the window motor and metal panel is to unplug the wiring harness to the motor itself. Stick the flathead into the screwdriver and pull back.
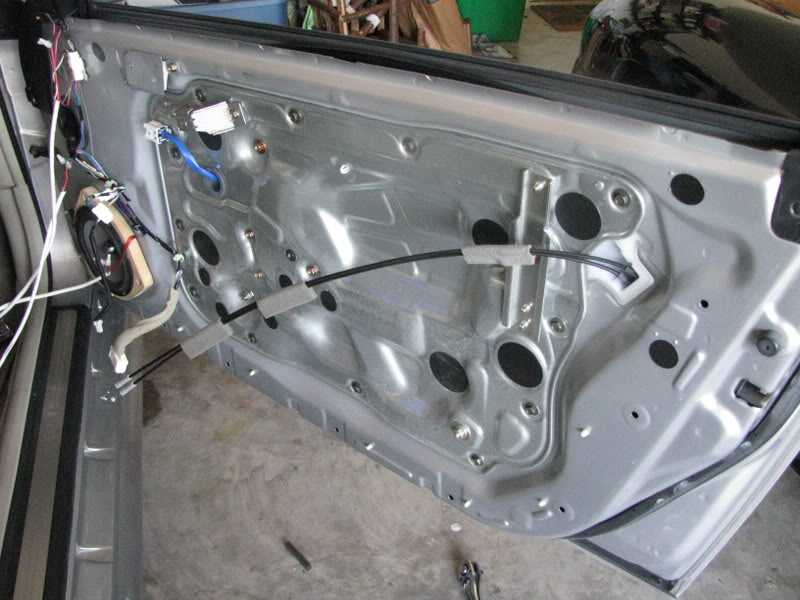
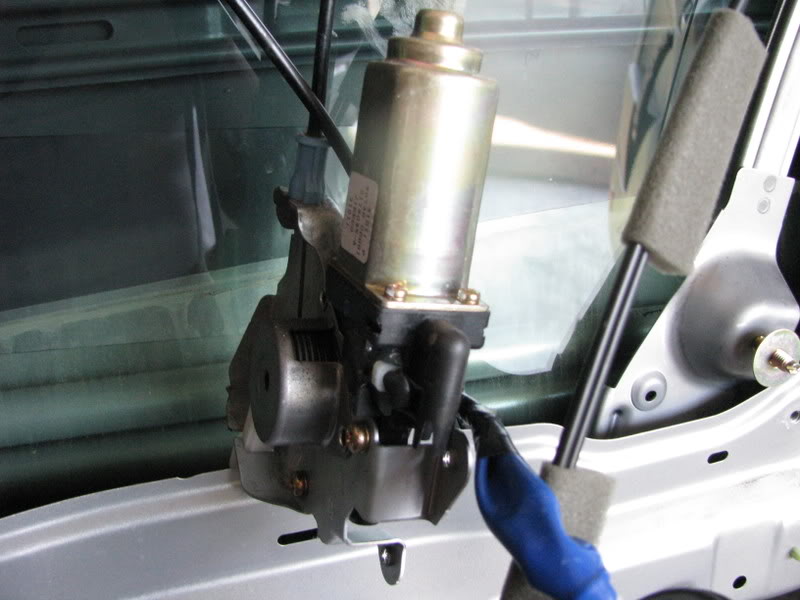
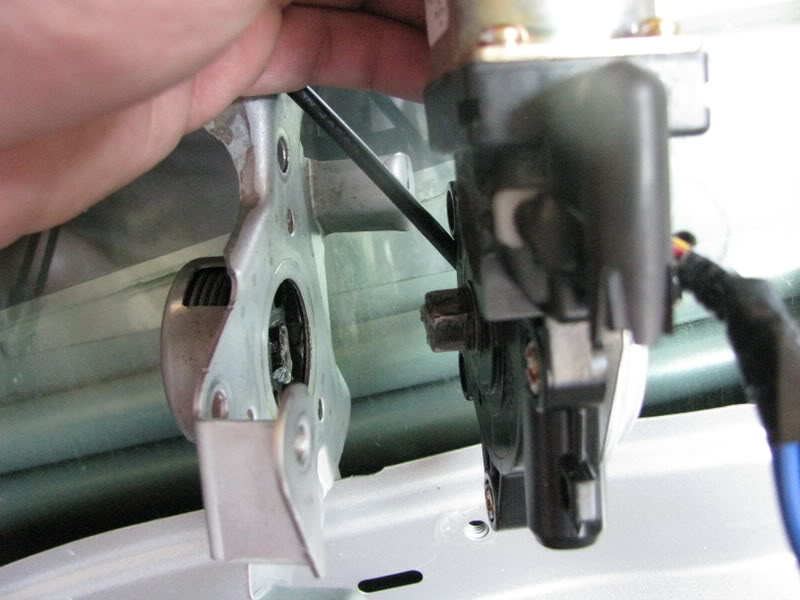
The next step I did was to remove all of the Green Bolts around the door..I found once you get around the top to remove the bracket that sticks out...if you look in the pic it should be handing down.
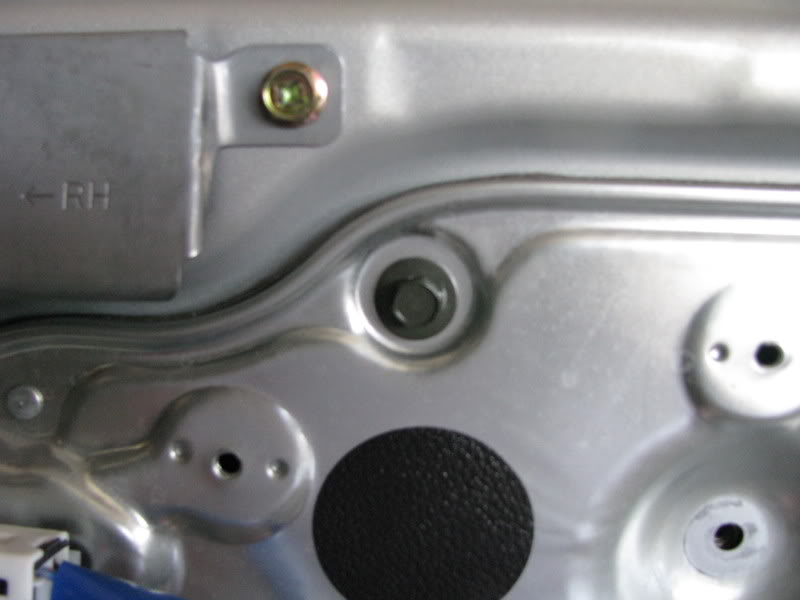

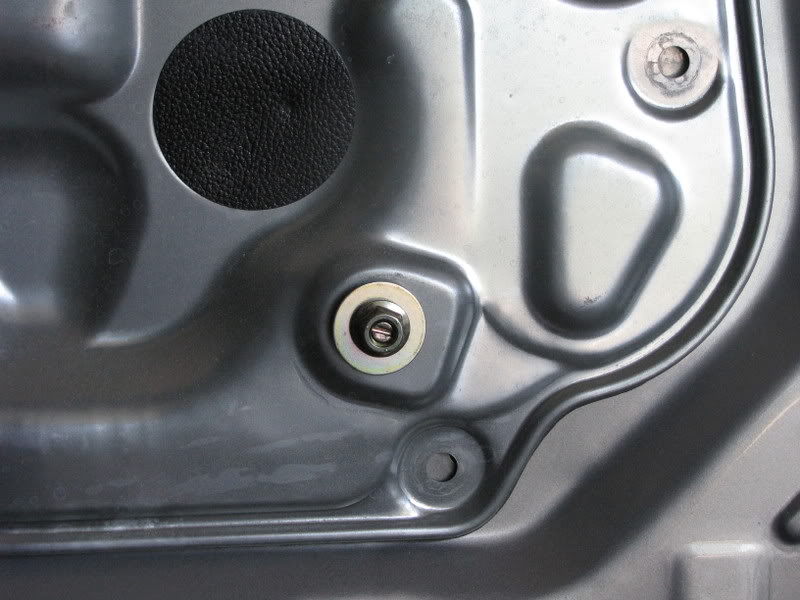
the next step you want to remove the 2 bolts with washers around them. These 2 screws are holding the window actuator to the metal frame.


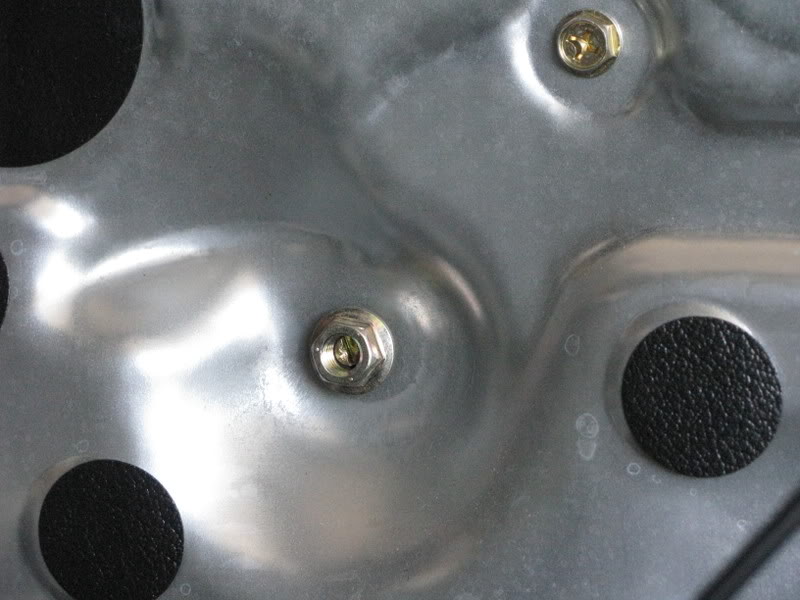
The next step is to remove the 2 nuts using your 13mm socket wrench towards the bottom of the door panel.
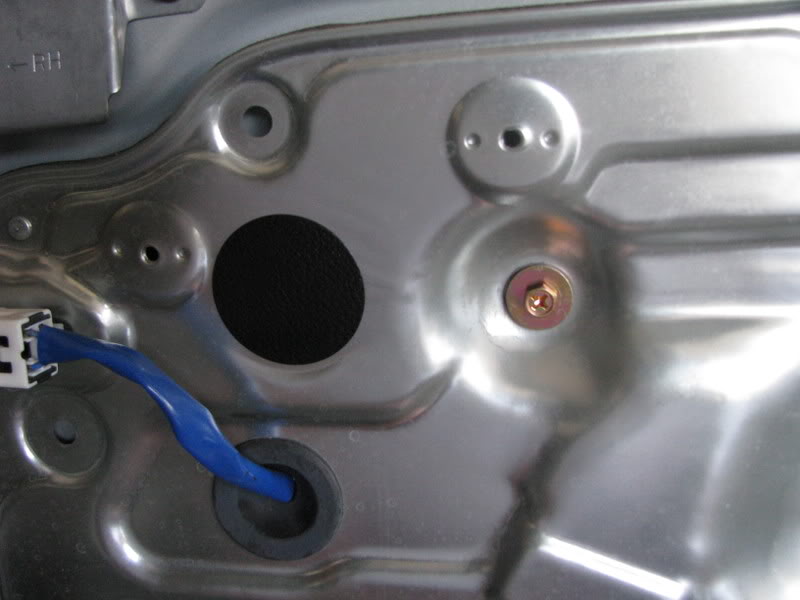
Now you want to remove the 3 bolts that hold the window motor to the metal frame. Once removed you want to take your flathead around the metal door frame and pry out on it to break loose the sticky part that helps bond it to the door panel. Once pulled off you want to de-tech the clips around the door.
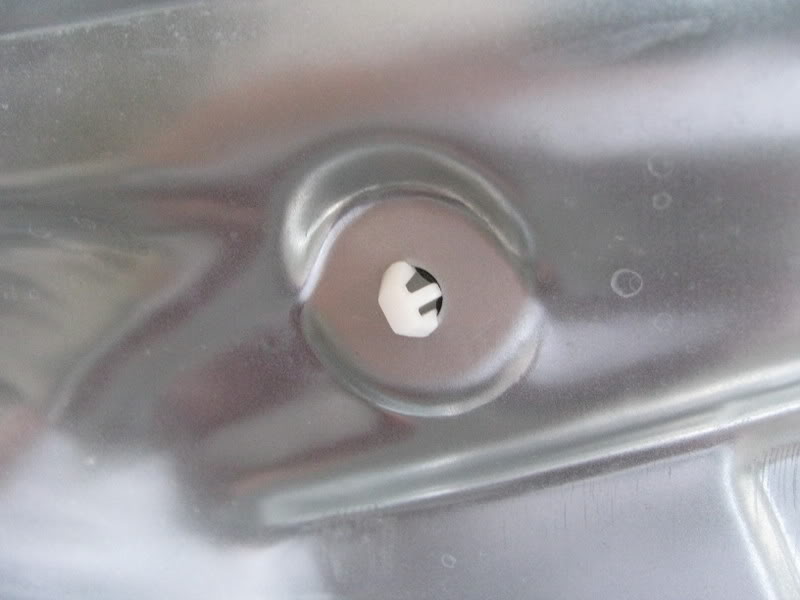
This one is located toward the top.
Located to the left side where you unplug the window motor harness. There should be one more clip underneath this one at the bottom. At this point push the wiring harness grommet through.

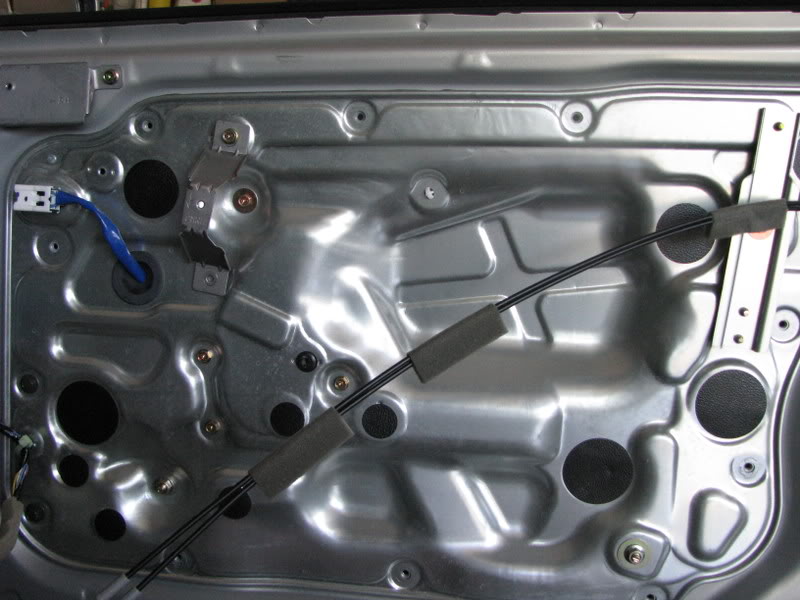
Once the clips are removed you should see this.
UPDATED: 4/28/2009
Once you get to this STEP you do not have to remove the window motor to just clean it. Proceed to CLEANING PART BELOW to see how to remove the Metal cover on the window motor
at this time you will want to remove the 3 bolts on the back side of the window motor. Shown below. these were pretty tuff the first time I tried to break them lose.
Here is what it should look like once the window motor is removed. To install the new window motor you just back track the steps the same way. One thing to mention when install the window motor back make sure to remove these black circles on the metal panel. These allow you stick your fingers in and position the window back in the correct spot to bolt up to the door frame.
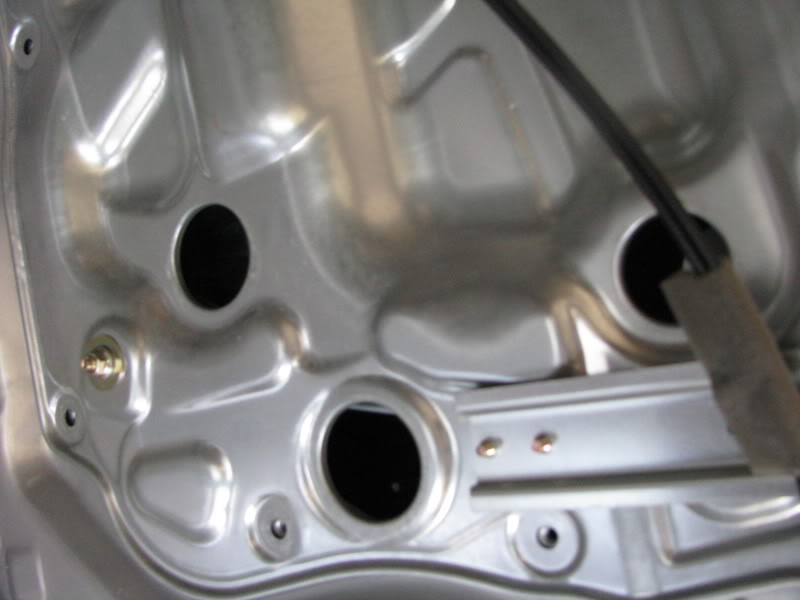
also the metal frame it self has to *****/metal circles that stick out to line it up into the door itself.
CLEANING PHASE OF THE MOTOR:
One thing I have seen and read about around the forum is that sometimes your window motor may not be mad...there is just alot of carbon build-up preventing your window electricity to make contact between the copper...anyways with that being said I have alittle instruction on how to clean that portion.
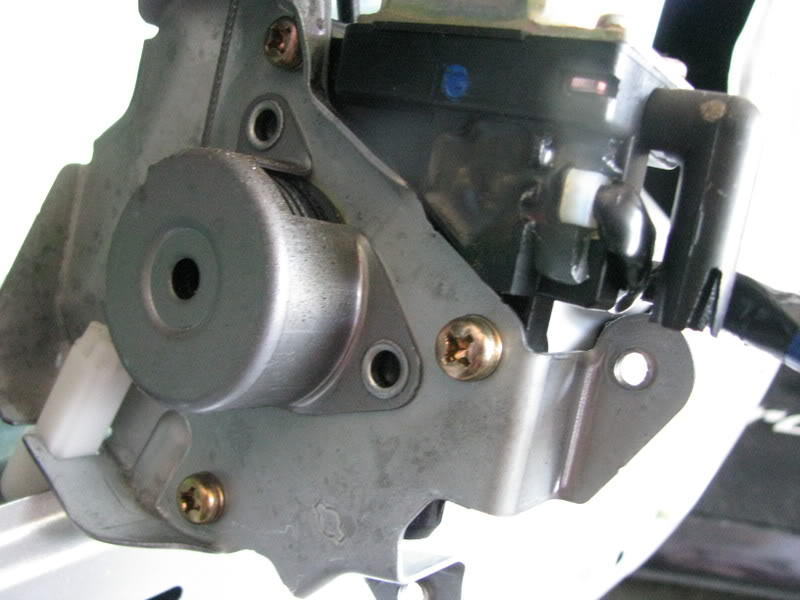
First off you remove the 3 bolts on the top side of the window motor. by the way this metal top is a magnet.
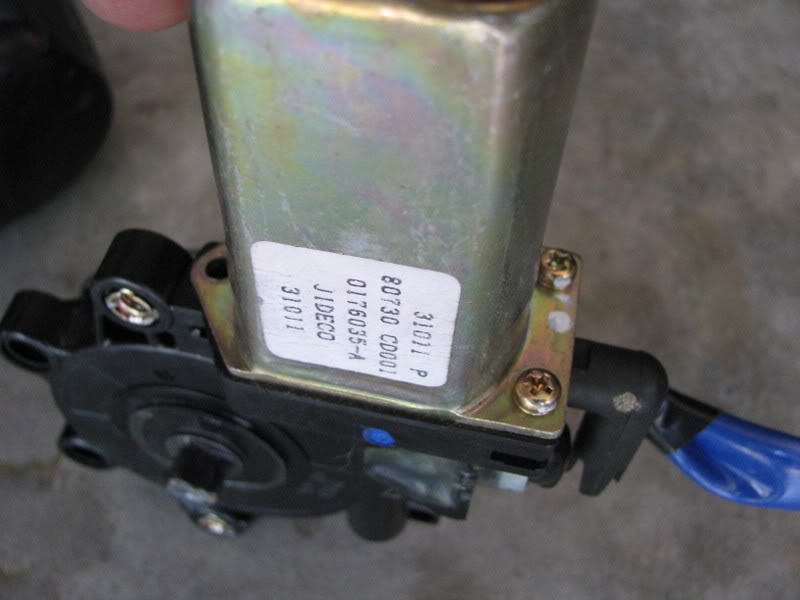
once the screws are removed you should be able to pull out the internal part of the motor and see this. you can then pull out the whole metal peice. In these 2 pics you see in the first pic the carbon build-up around the copper.
Before cleaning:
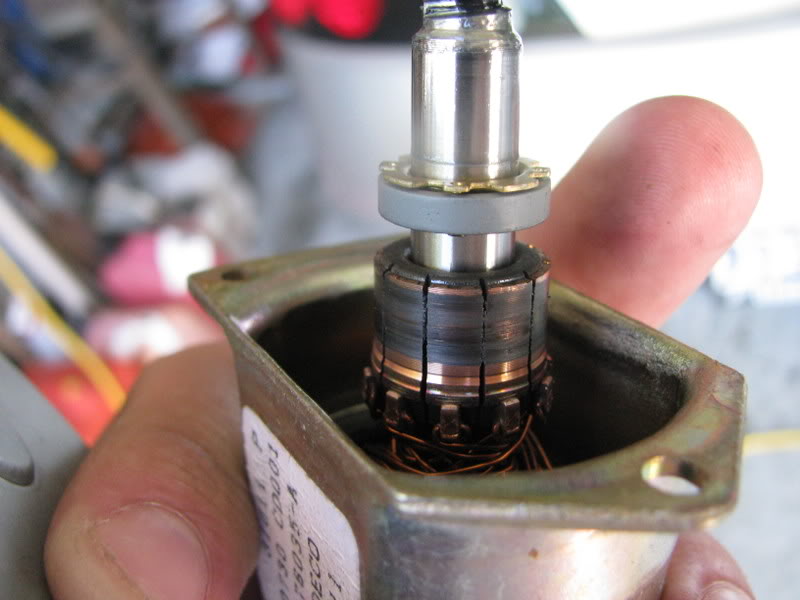
this is the inside of the motor itself.

This is after cleaning the motor with rubbing alcohol and que-tips as well as using a toothpick in between the spaces of the copper.

Once cleaned install the metal door frame by bolting back up a view bolts around the metal frame. Ensure that you have bolted the window motor back in place and the window regulators back in place to test. I would advise to do this before putting the whole door back together. If the window functions better than proceed with installing all the parts following the procedures above. Note to yourself that you just saved $200.00. If the motor did not repair itself go back up to the instructions that you skipped over to get to the cleaning part and proceed with removing the (BAD Window MOTOR) and installing the new one you pick up.
Hope this helps
UPDATE: 3/15/2010
Additonal Video for those that like to watch a video. (courtesy of bythabay)
http://infinitihelp.com/diy/gcoupe/p..._procedure.htm
Tools required:
1. Socket Wrench I used 1/2 Inch, both 10mm and 12mm sockets. You can use an air socket wrench if you have one but I would suggest hands since this is delicate metal....
2. Philips screw Driver....power or not...doesnt matter.
3. Flat head screwdriver.
4. Needle Nose Pliers or some form.
anyways lets get started. In the pics you will see I have already removed the door panels but I am still showing you the process.
STEP ONE: Removing the Door Panel
here is what the door panel would look like on your car.
Pulling off the window button panel.
Slide the screw driver underneath to pop the windows buttons off.
Unplug the Harness using your flathead screwdriver.
Next step is to pop off the aluminum trim to access the screws to the door panel.
On the bottom side there should be a little slot. Stick the flathead into this slot and twist your screw driver or pull out on it.
Once popped off you should see this. Now you can remove the 2 screws.
the last thing you do before removing the panel is pop off the little clip inside the inner door handle area.
Stick the flathead into the little slot you see and pop it off. you should have this. Now remove the screw behind it.
Once the door panel screws are removed you want to get down on your back and look at the bottom of the door panel. There should be slots that run along the bottom. Stick your Screw driver in those slots and pull outward to pull the door panel loose from the door itself.
Next step before you get up is to un-hook the door map light harness.
Once this wire harness is removed you are able to remove the door panel. By doing so you just lift up on it and it shold come right off. At this point to remove the door panel all the way you will want to remove the door lock wires. I found it easier to just move it out of the way.
you should see this.
your first step is to pop off the front part of the wires that are locked into that hold the clips in place on the door lock.
Once popped off you just remove the wires with the clips that are hooked into the door lock. Fairly simple step.
once you have removed the door lock wires you should be able to set aside the door panel and you should be looking at this.
Now the first step to remove the window motor and metal panel is to unplug the wiring harness to the motor itself. Stick the flathead into the screwdriver and pull back.
The next step I did was to remove all of the Green Bolts around the door..I found once you get around the top to remove the bracket that sticks out...if you look in the pic it should be handing down.
the next step you want to remove the 2 bolts with washers around them. These 2 screws are holding the window actuator to the metal frame.
The next step is to remove the 2 nuts using your 13mm socket wrench towards the bottom of the door panel.
Now you want to remove the 3 bolts that hold the window motor to the metal frame. Once removed you want to take your flathead around the metal door frame and pry out on it to break loose the sticky part that helps bond it to the door panel. Once pulled off you want to de-tech the clips around the door.
This one is located toward the top.
Located to the left side where you unplug the window motor harness. There should be one more clip underneath this one at the bottom. At this point push the wiring harness grommet through.
Once the clips are removed you should see this.
UPDATED: 4/28/2009
Once you get to this STEP you do not have to remove the window motor to just clean it. Proceed to CLEANING PART BELOW to see how to remove the Metal cover on the window motor
at this time you will want to remove the 3 bolts on the back side of the window motor. Shown below. these were pretty tuff the first time I tried to break them lose.
Here is what it should look like once the window motor is removed. To install the new window motor you just back track the steps the same way. One thing to mention when install the window motor back make sure to remove these black circles on the metal panel. These allow you stick your fingers in and position the window back in the correct spot to bolt up to the door frame.
also the metal frame it self has to *****/metal circles that stick out to line it up into the door itself.
CLEANING PHASE OF THE MOTOR:
One thing I have seen and read about around the forum is that sometimes your window motor may not be mad...there is just alot of carbon build-up preventing your window electricity to make contact between the copper...anyways with that being said I have alittle instruction on how to clean that portion.
First off you remove the 3 bolts on the top side of the window motor. by the way this metal top is a magnet.
once the screws are removed you should be able to pull out the internal part of the motor and see this. you can then pull out the whole metal peice. In these 2 pics you see in the first pic the carbon build-up around the copper.
Before cleaning:
this is the inside of the motor itself.
This is after cleaning the motor with rubbing alcohol and que-tips as well as using a toothpick in between the spaces of the copper.
Once cleaned install the metal door frame by bolting back up a view bolts around the metal frame. Ensure that you have bolted the window motor back in place and the window regulators back in place to test. I would advise to do this before putting the whole door back together. If the window functions better than proceed with installing all the parts following the procedures above. Note to yourself that you just saved $200.00. If the motor did not repair itself go back up to the instructions that you skipped over to get to the cleaning part and proceed with removing the (BAD Window MOTOR) and installing the new one you pick up.
Hope this helps
UPDATE: 3/15/2010
Additonal Video for those that like to watch a video. (courtesy of bythabay)
http://infinitihelp.com/diy/gcoupe/p..._procedure.htm
Last edited by g35man04; 03-15-2010 at 02:44 PM.
The following 20 users liked this post by g35man04:
A-Ram (09-03-2011),
Andrei2k (11-16-2017),
Bengins (08-01-2013),
ErikNYC (09-03-2011),
Fresh&SoClean (08-21-2023),
and 15 others liked this post.


#4
05-22-2008, 02:49 PM
#5
05-22-2008, 02:52 PM

#6
05-22-2008, 03:30 PM
#7
05-22-2008, 03:45 PM

Yeah I have an 03 and my driver side stopped working sparatically a while ago. I found out when i opened my door the window wasnt dropping like it should and that if i just lightly push it down then it would "register" and work fine. Recently though, it's been going out of whack and going down when i push up and vise versa. Dont wanna spend a lot of cash on this but it looks like im going to have to soon...
This seems like a pretty common G problem but i guess at least its nothing with the engine..
This seems like a pretty common G problem but i guess at least its nothing with the engine..
The following users liked this post:
bluranver6 (05-04-2012)
Trending Topics
#8
05-22-2008, 04:54 PM

Thanks for the write up!!!! My driver's side motor is going. Just an FYI if someone has a window that is acting up and either doesn't have time or cash to get it fixed right away:
I have found that if I do not let it go all the way down, it will work fine. If I forget and use the auto down or just hold the button too long so that the window goes inside the door, then I'm screwed. Then I have to open the door, hold the up switch and slam the door at the same time to get the window up.
With this write up, I'll probably try to clean the motor soon. Thanks again!!!
The following users liked this post:
shishidosan (10-20-2011)


#11
05-22-2008, 06:58 PM
I was going to do a DIY for this a while back, but i was to lazy, good stuff man, I hope this encourages some people to do it on there own and save some money. Not that hard if you're patient and take your time to do it. I cleaned the motor at first too and it just ended up dieing a few weeks later and ended up buying a new motor to install. Good luck to all who try this, let me know if you guys need motors!

#14
05-23-2008, 12:02 AM
you are all welcome guys! by the way I picked up my car today from infiniti to come and find out that my master window switch buttons were not supplying power to the passenger side window causing it to not go up and down....I was suprised to hear this from them since I assumed it was the window motor. Luckily I got everything covered underneath warranty so no more issues there.


