DIY: Tie rod (inner & outer) replacement

#1
 03-26-2009, 03:56 AM


DIY: Tie rod (inner & outer) replacement
Today, I replaced my left inner and outer tie rods.
The service manual only prescribes the procedure to do this when the entire rack is removed from the vehicle. This is unnecessary, and here is a step-by-step with photos on the procedure for replacing the tie rods with the rack mounted in place. I believe I may be one of the first people to have tie rod problems, as I haven't found anyone that's posted about replacing them. I'm sure as the older G's get up there in miles more replacements will be necessary, so I hope this helps you guys out.
Tools required: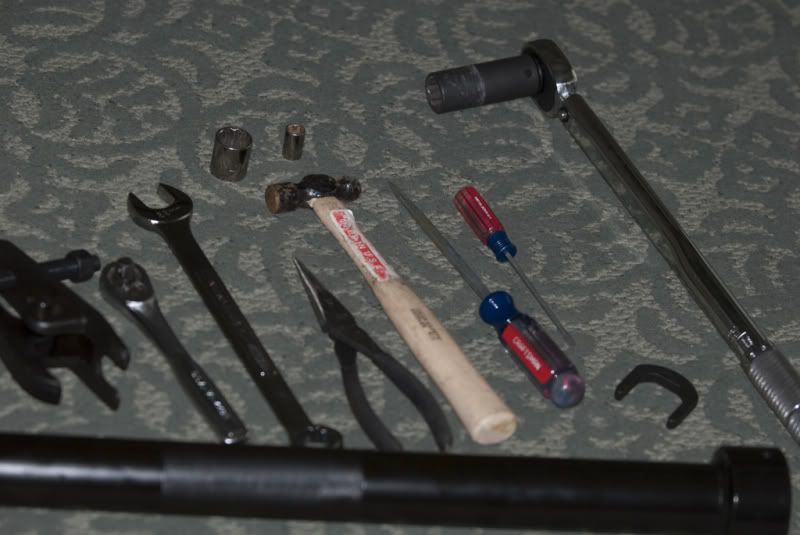
Notes: Neither the Inner Tie Rod Tool from Harbor Freight nor Auto Zone work right out of the box. You'll need to cut down and weld the one from Harbor Freight, because it's way too long to get into the space we need, or simply use the "Saginaw Tie Rod Tool" from Auto Zone with a big wrench (monkey wrench, etc) on the end. Space is limited down there. Personally, I just tossed a monkey wrench right on the old one and unscrewed it, because it was being thrown out and didn't care if I messed up the surface of it.
Parts you may need, depending on what you're replacing.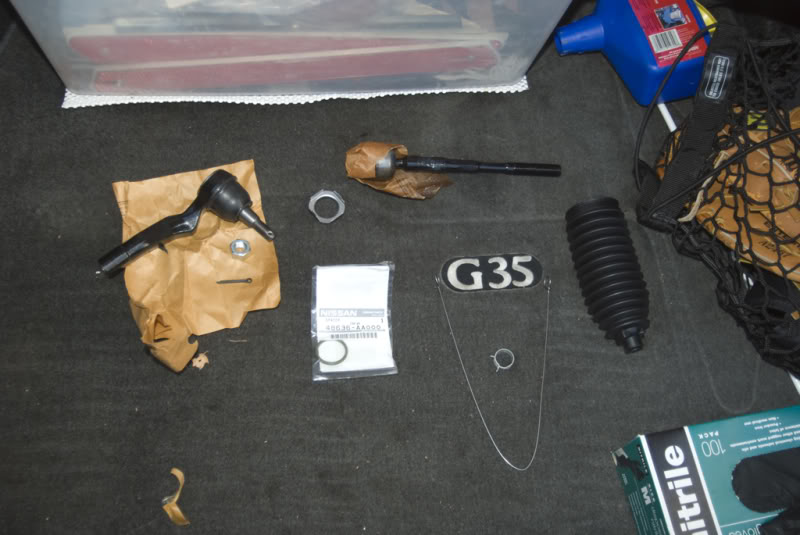
Here are some before / after pics of old vs new parts https://g35driver.com/forums/brakes-...r-tie-rod.html
The service manual only prescribes the procedure to do this when the entire rack is removed from the vehicle. This is unnecessary, and here is a step-by-step with photos on the procedure for replacing the tie rods with the rack mounted in place. I believe I may be one of the first people to have tie rod problems, as I haven't found anyone that's posted about replacing them. I'm sure as the older G's get up there in miles more replacements will be necessary, so I hope this helps you guys out.
Tools required:
- Jack & stands
- Lugnut Wrench
- 10mm socket
- 19mm socket
- 22mm wrench
- Flathead screwdriver (large)
- Small screwdriver (any type)
- Hammer
- Needle-nose Pliers
- Blue threadlock
- Inner Tie Rod Tool w/ 33.6mm "Crow's Foot" attachment
Available from Harbor Freight for $39.99 (see note below), or loan from Auto Zone - Ball Joint Separator
Available from Harbor Freight for $19.99
Notes: Neither the Inner Tie Rod Tool from Harbor Freight nor Auto Zone work right out of the box. You'll need to cut down and weld the one from Harbor Freight, because it's way too long to get into the space we need, or simply use the "Saginaw Tie Rod Tool" from Auto Zone with a big wrench (monkey wrench, etc) on the end. Space is limited down there. Personally, I just tossed a monkey wrench right on the old one and unscrewed it, because it was being thrown out and didn't care if I messed up the surface of it.
Parts you may need, depending on what you're replacing.
- Outer tie rod (includes new 19mm bolt and new cotter pin)
- Individually purchased cotter pin if you're not replacing outer tie rod.
- Boot kit (includes boot and both new clamps)
- Inner tie rod
- Lock Plate
- Spacer Ring
Here are some before / after pics of old vs new parts https://g35driver.com/forums/brakes-...r-tie-rod.html
- Jack up the car and place it on jack stands. Never work on a car supported by just a jack.
- Remove transmission undercover (four 10mm bolts)
- Turn the steering wheel all the way to the side opposite that which you are working on, so that the tie rods you're replacing are easier to work on.
You may find it easier to perform some steps by moving the steering wheel in one direction or another, especially when threading on the new inner tie rod or when affixing the new boot.
- Using 22mm open-end wrench, loosen locknut for outet tie rod.
Note: You will actually turn it clockwise, since you'll be threading it up the rod towards the center of the car.
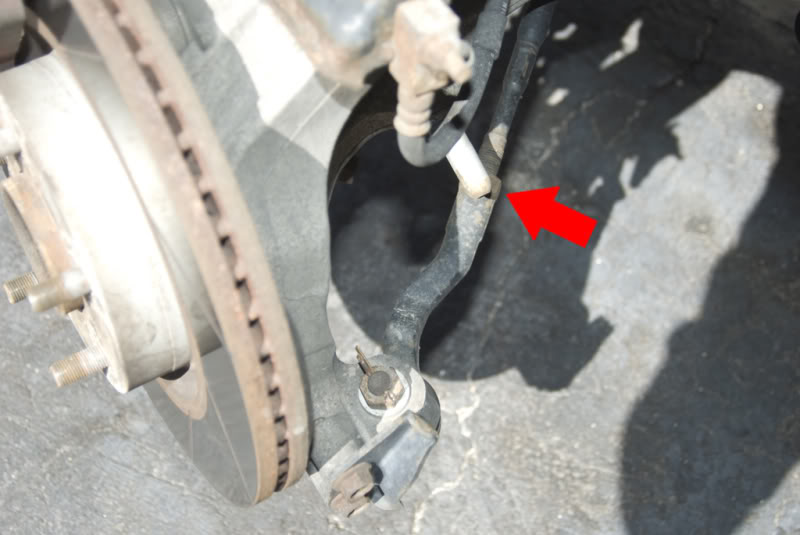
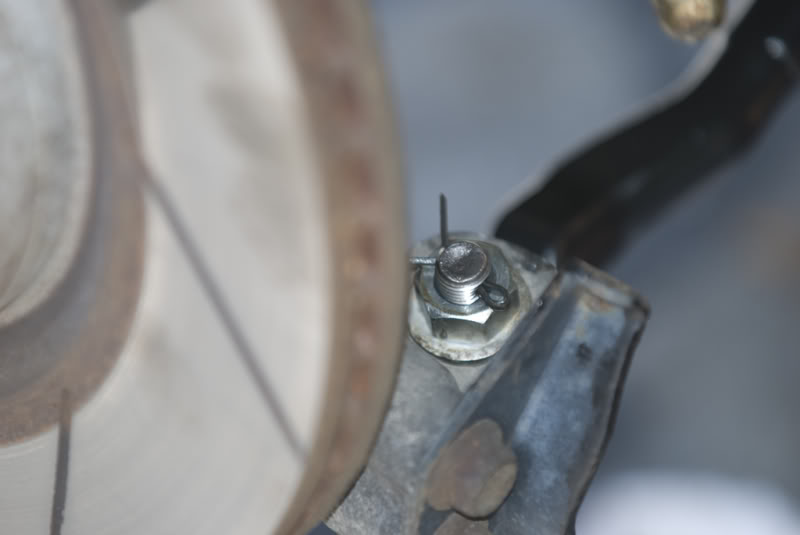
- Remove the cotter pin on the steering knuckle and discard. Never reuse cottor pins. It cost ~$1.60 from Infiniti.
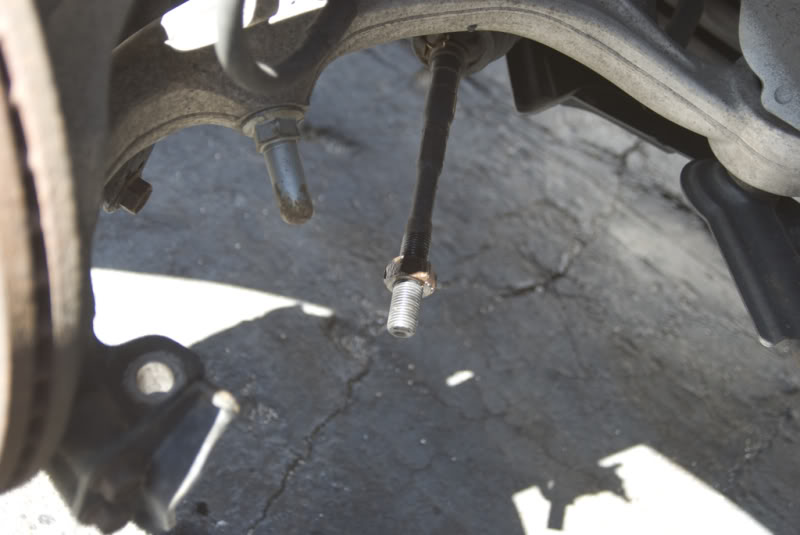
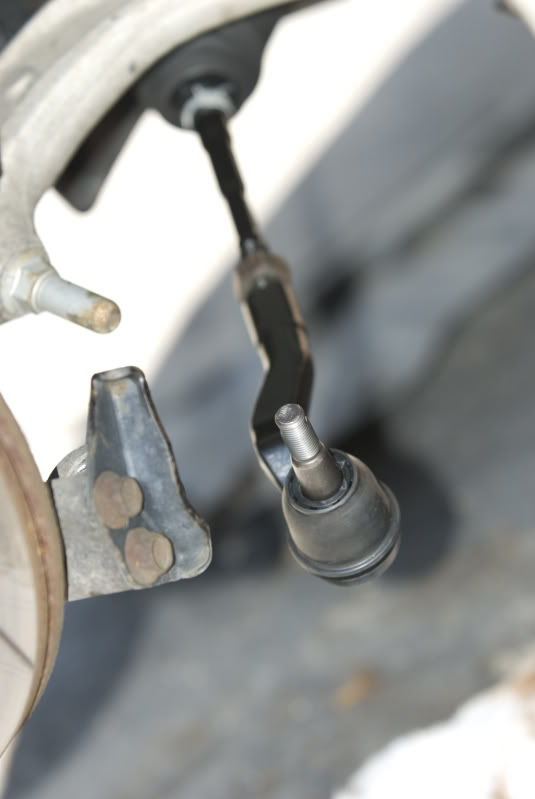
- Loosen and almost remove the bolt on top of the outer tie rod, leaving ~2 threads still connected.
Note: This is essential because when using the ball joint separator, the ball joint will suddenly detach and violently pop out of the steering knuckle. This will destroy your inner tie rod ball joint which you may not be planning on replacing.
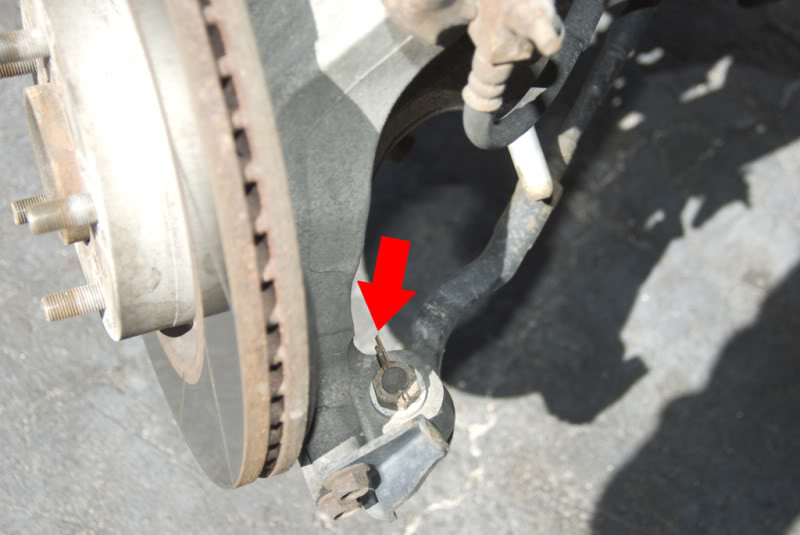
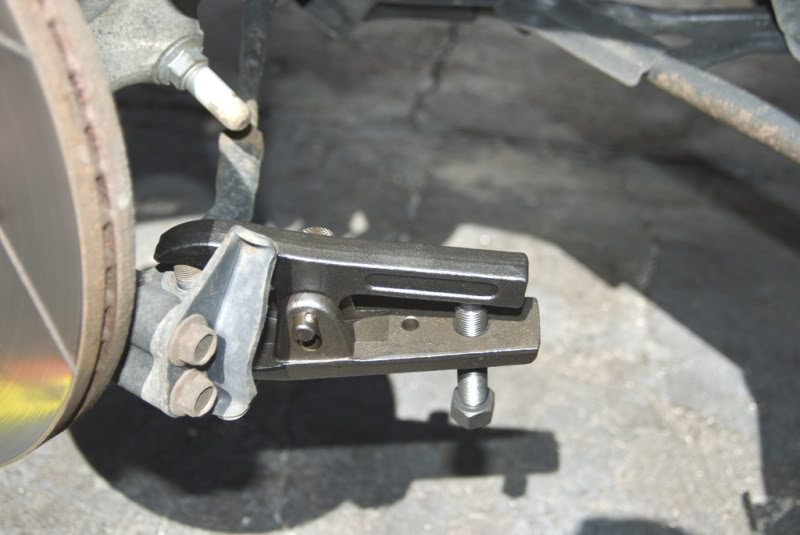
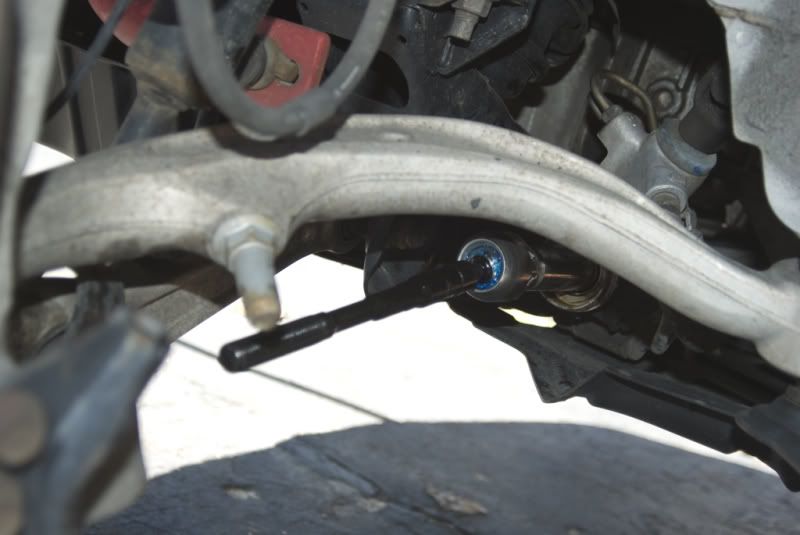
- Affix the ball joint separator, and break free the ball joint.
Note: There is a washer on the top of the steering knuckle: this needs to be reused.
NOTE: You may also use a hammer or other striking tool if you aren't worried about damaging the outer tie rod and want to chance damaging the steering knuckle.
- Counting the number of turns it takes to remove, remove the outer tie rod. (13 3/4 turns in my case). Then remove 22mm locknut you just loosened from inner tie rod.
NOTE: IF you are only replacing the outer tie rod, skip to step 18 now.
- Remove outer boot clamp w/ needle-nose pliars.
Note: Do not reuse this clamp.
- Remove inner boot clamp w/ small screw driver, by passing it through booth loops and rotating it opposite the direction which it is wound.
Note: Do Not reuse this clamp.
- Remove the boot by sliding it down the inner tie rod.
Note: Do Not reuse this boot.
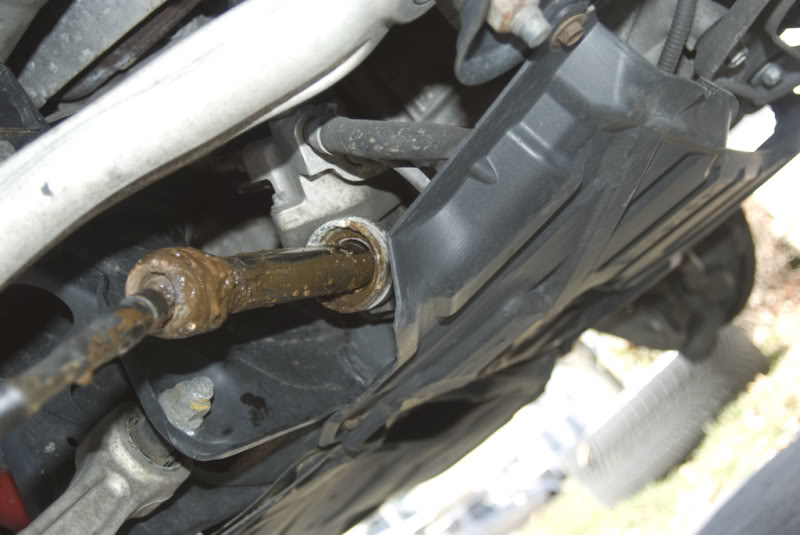
(Yours may not be as messy as this. This is from a torn boot letting water get in, causing corrosion thus destroying the tie rod. What you see is NOT leaking power steering fluid)
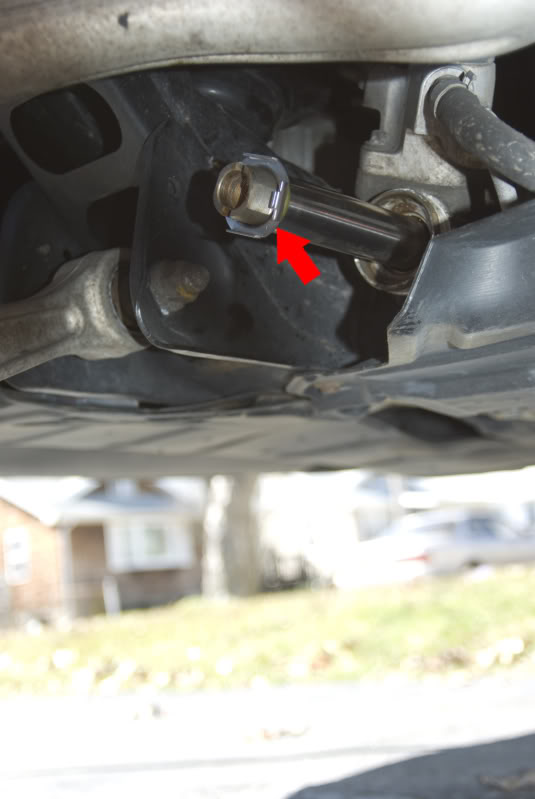
- Using the large flat-blade screwdriver and hammer, bend out the four sides of the lock plate.
Note: Lock plate and spacer ring are must not be reused.
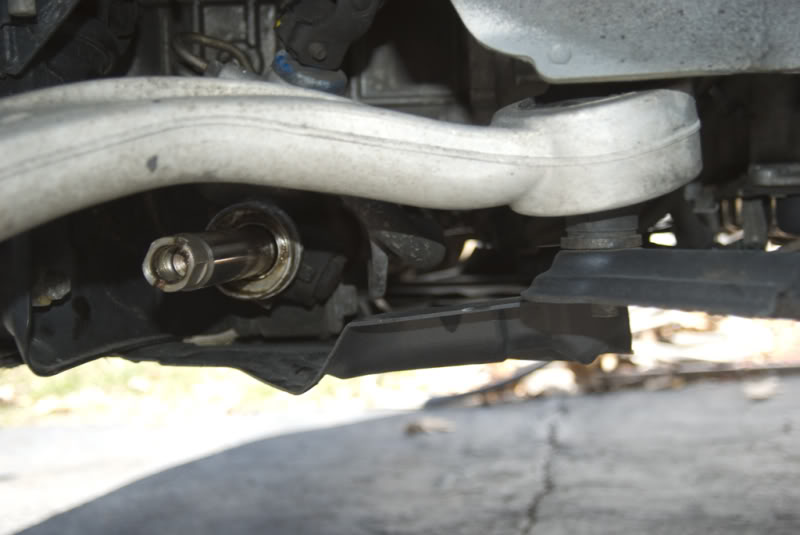
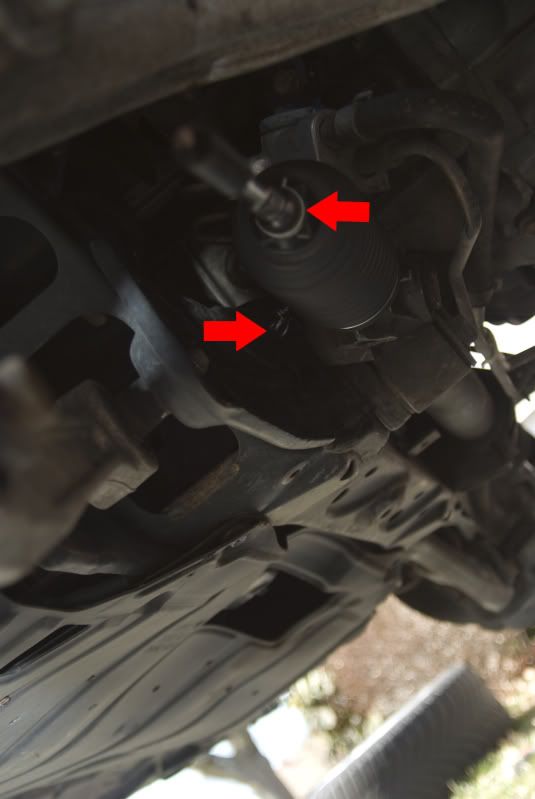
- Using the tie rod tool of your choice, unscrew inner tie rod from the rack, and clean the rack area.
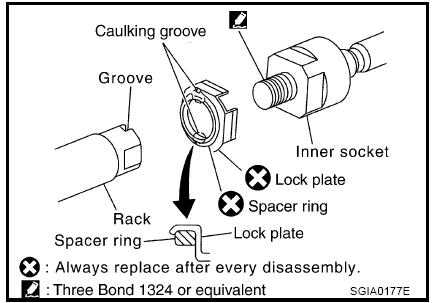
- Attach spacer ring to lock plate, and slide onto rack.
NOTE: The lock plate is rotated 90 degrees in this picture. The "tabs" that have protrusions must be on the top and bottom, not the sides
- Apply BLUE threadlock to threads of new inner tie rod end, and screw in. Tighten with tie rod tool to 59-72 ft-lbs.
- Pull locking plate with attached spacer ring onto the ball joint. Apply caulk to two groves to lock in place.
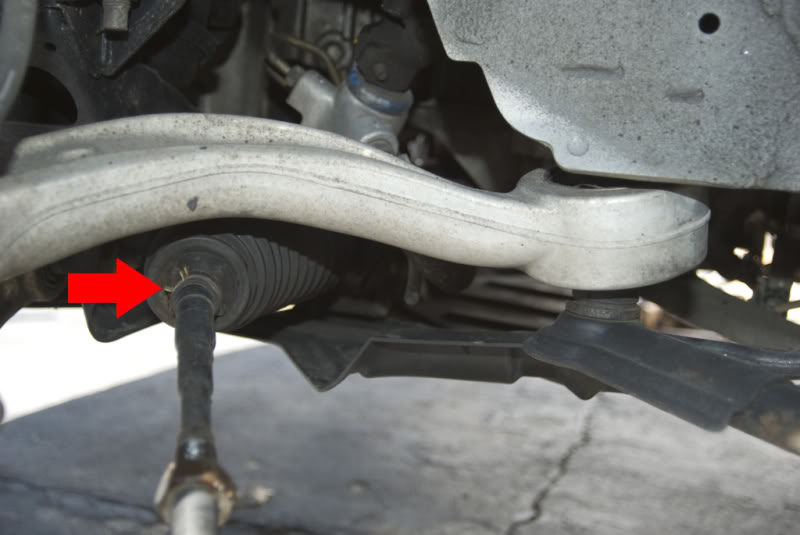
- Slide new boot in place, and affix with two new clamps (included with boot when purchased from Infiniti). There is a groove on the rod for the smaller end of the boot to lock into, and the larger end afixes to the flange on the rack.
NOTE: You do not have to grease the joint. It comes pre-packed with a specific blue colored grease from Infiniti)
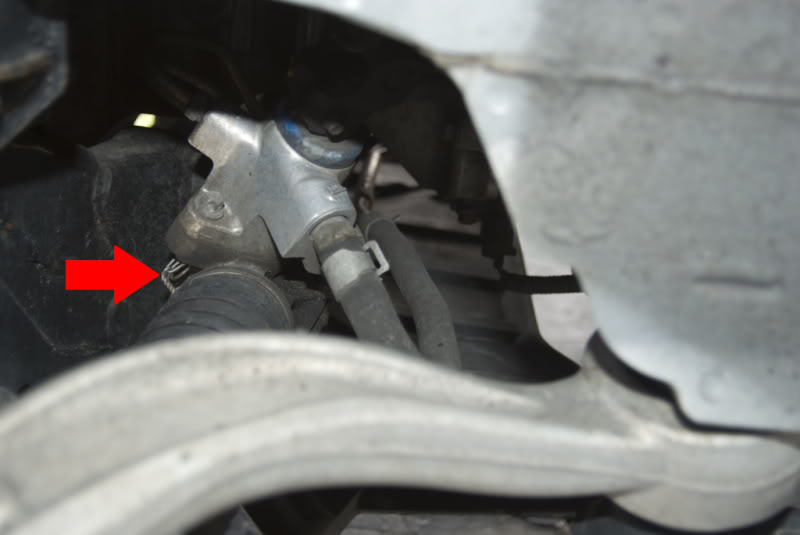
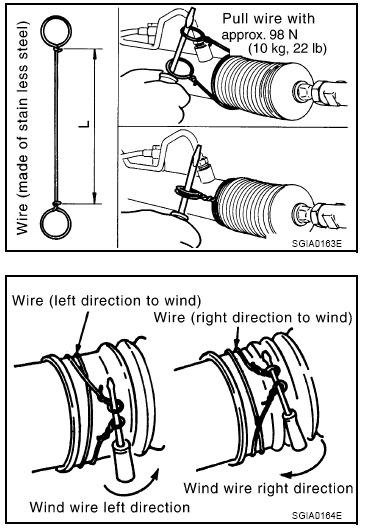
NOTE: Pay special attention to the winding method of the inner clamp (pictured below), being sure that there are no crosses in the wire on the boot itself)
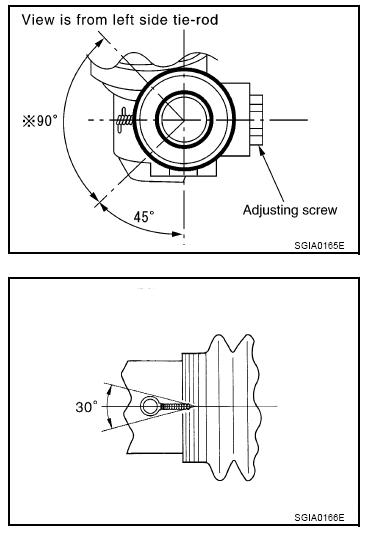
NOTE: Be sure the part you are twisting is in the same location as was the one you removed; do not put the twist elsewhere on the boot. This will be difficult because space is limited in that spot, but this is per the service manual
NOTE: Be sure the "twists" are straight, not rolled into a big ball. Bend at the top 90 degrees to inhibit untwisting.
HINT: The wire clamp comes in a "U" shape. Pre-form it into a round shape, and slide it onto the proper side of the boot before sliding the boot onto the tie-rod. It is hard to form the wire in place.
- Thread 22mm locknut onto inner tie rod.
- Affix outer tie rod end, turning an equal amount of twists as you did to remove
- Thread ball joint through steering knuckle, attach 19mm nut, apply BLUE threadlock (tighten to 22-28 ft-lbs), and attach NEW cotter pin.
- Tighten 22mm locknut (tighten 59-72 ft-lbs).
- Attach transmission under cover.
- Attach wheels and torque lugnuts to 72-87 ft-lbs.
- Take vehicle off stands.
- Get an alignment, as it WILL be off.
Last edited by G35 Mass; 03-26-2009 at 04:27 AM.
The following 9 users liked this post by G35 Mass:
BentHimself (05-23-2017),
Black Betty (11-26-2014),
blAk mAx (04-17-2015),
daffy12 (10-10-2011),
DougJones (07-13-2012),
and 4 others liked this post.


#7
03-02-2011, 05:26 PM

Trending Topics
#8
03-10-2011, 12:24 PM


#10
08-11-2011, 11:11 AM


#13
10-10-2011, 02:38 PM

#15
03-26-2012, 02:31 PM
