
DIY: Ichiba V2 Wheel Spacer Installation


Thread Starter
|
Registered User
Joined: Dec 2008
Posts: 56
Likes: 1
From: Orlando, FL
Mine didn't come with any instructions, but these are pretty straight forward to install. I figured I would share some tips and tricks I learned along the way.
Tools you will need:
Estimated time:
30-60 minutes
1. Loosen lugs on tire, jack car up and remove tire.
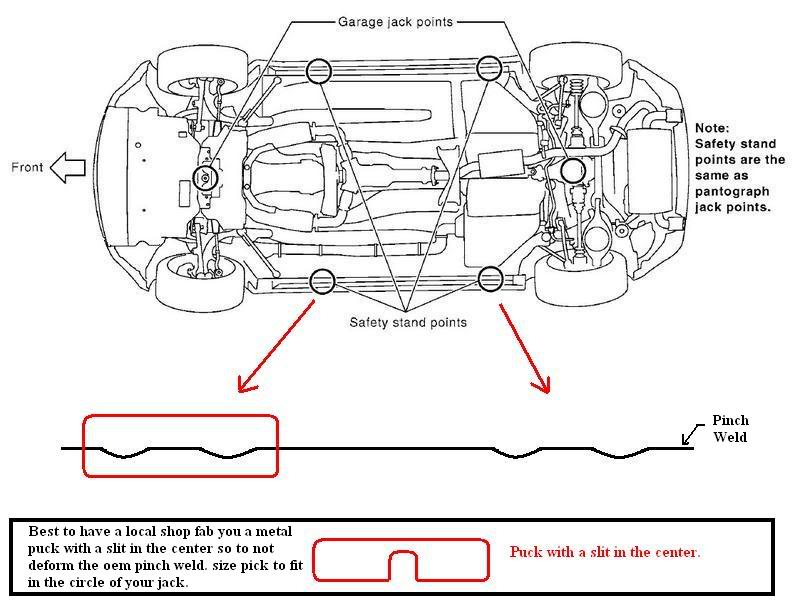
The jack points are located on the pinch weld about a foot before the front tire, and a foot after the rear. You will see two sort-of notches in the pinch weld about an inch or two apart - this is the right spot. Try not to smash your pinch weld when jacking the car. If you don't have the floor jack adapter, you can rig one by cutting a slot half-way through something hard and using it as a spacer (like a hockey puck). My floor jack actually accommodated the pinch weld, so I didn't have to worry.
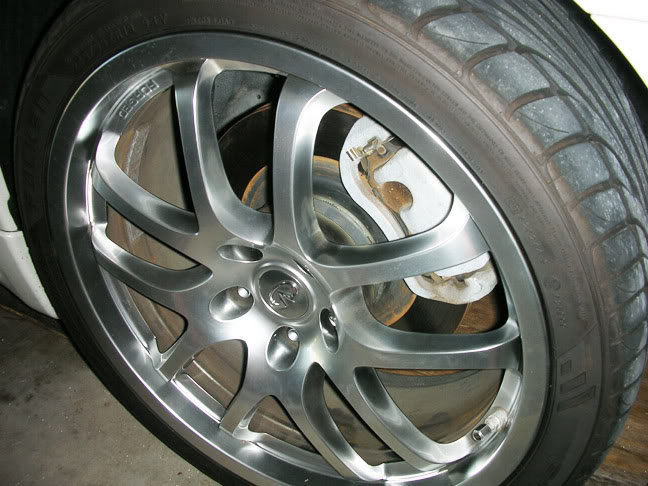
2. Remove dummy bolt.
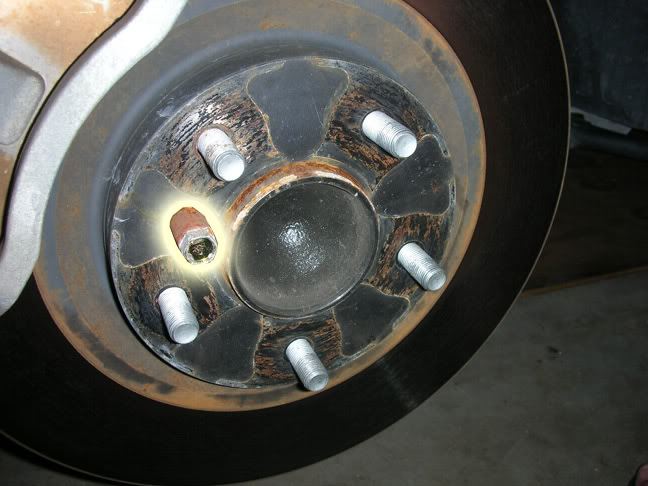
After wheel removal, on the front tire hubs only, you may see a small bolt that looks like it has no earthly business being there. I've highlighted it in the picture. Remove this and throw it into the nearest trashcan. It's a dummy-bolt (as in, hey, you dummy!) intended to keep you from mounting the rear wheels on the front. The spacers won't fit with this in the way, so remove it and sh*t-can it (pliers or small socket).
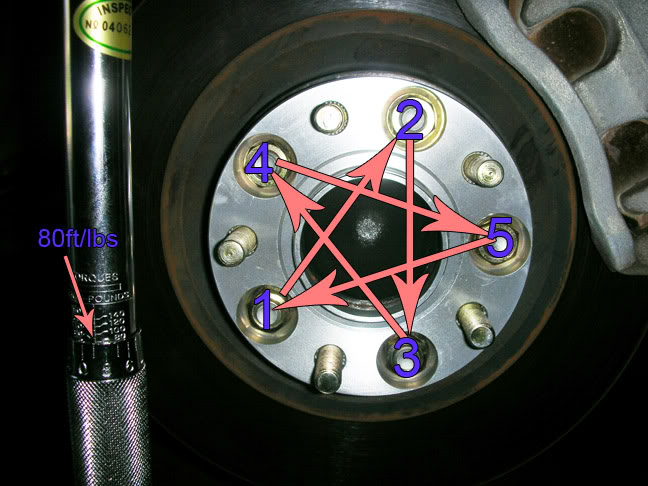
3. Spacer on, tighten the included nuts to 80 ft/lbs.
Use a star pattern when tightening them. I've diagrammed a suggested route on the picture. I like to go over them once and snug them down by hand, then go back over in the same star pattern and torque them down to spec. This is so everything is tightened evenly. It is very important to torque to spec, you do not want these coming off a week later.
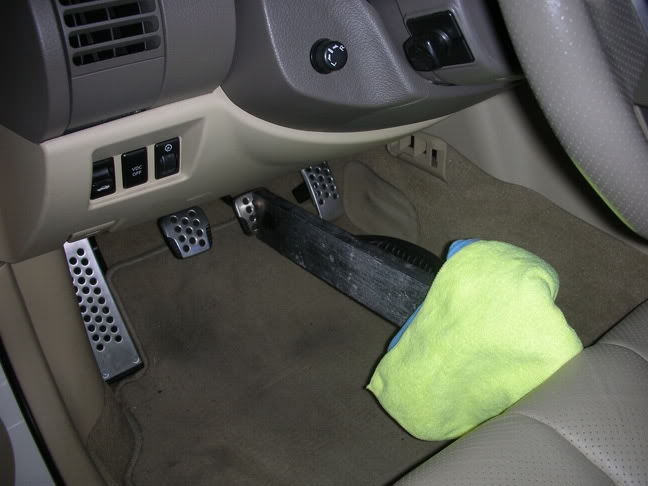
At this point you're probably cursing, trying to figure out how to tighten nuts to 80lbs on a hub that is free spinning. If someone is home, have them push on the brake while you torque them down. No one was home in my case, so I did the following: I took a board/pole about 2 feet long and pushed the brake down, I then moved the seat forward and, using some towels to protect the leather, wedged the board between the brake and seat. Tada, ghetto-fabulous.
4. Put the wheel back on.
Re-torque these lugs to spec, 80ft/lbs, using the same star-pattern metioned in step 3.
Repeat for the other 3 tires and enjoy your more aggressive stance.
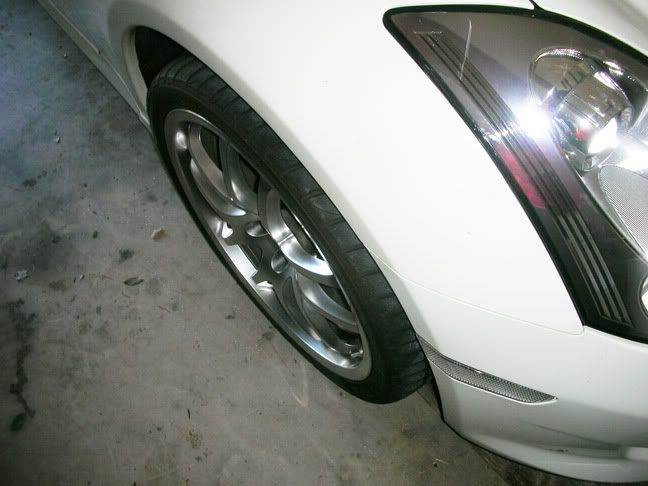
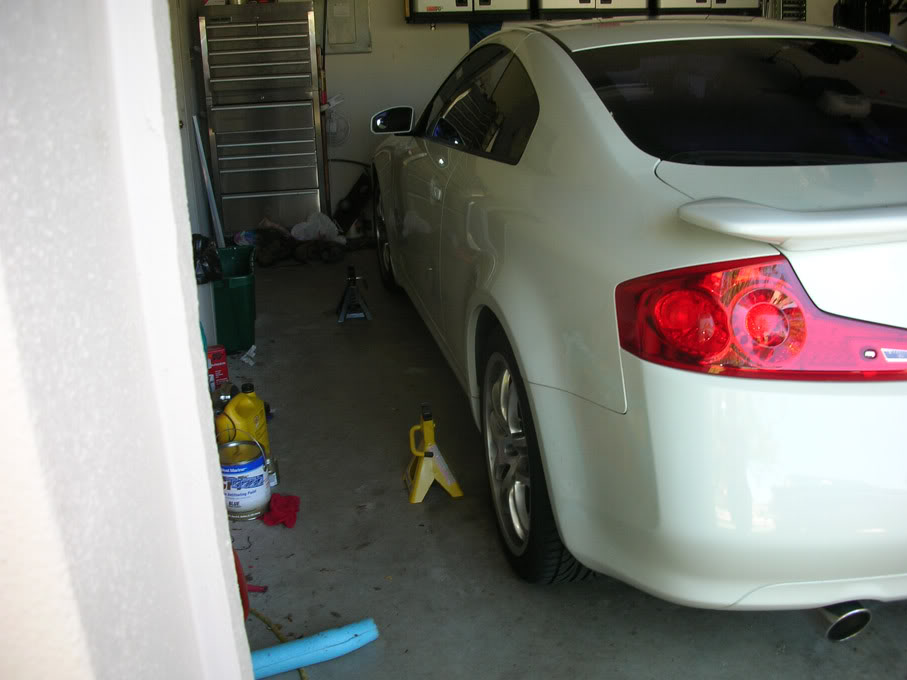
Some pictures for comparison:
Right side, 25mm spacers installed.
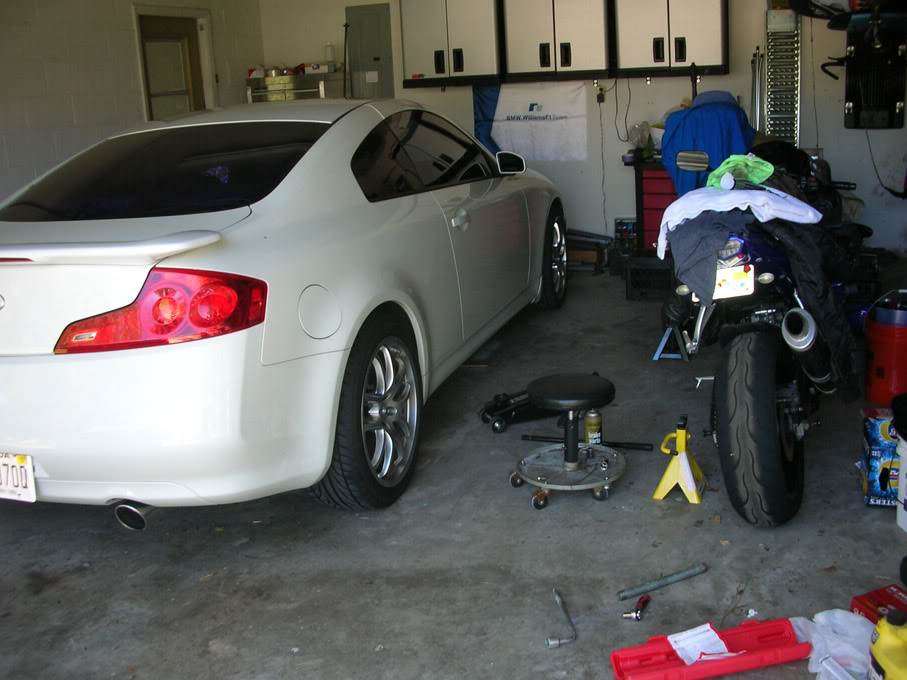
Left side, NO SPACERS INSTALLED
Additional notes:

I'm sure I've forgotten something, feel free to make corrections, additions, or PM me for clarification/further info.
Tools you will need:
- Lug Socket
- Key Socket (if you still have the OEM lock lug)
- Tire Iron (for removal)
- Breaker Bar
- Torque Wrench (ft/lbs)
- Two Cold Beers
Estimated time:
30-60 minutes
1. Loosen lugs on tire, jack car up and remove tire.
The jack points are located on the pinch weld about a foot before the front tire, and a foot after the rear. You will see two sort-of notches in the pinch weld about an inch or two apart - this is the right spot. Try not to smash your pinch weld when jacking the car. If you don't have the floor jack adapter, you can rig one by cutting a slot half-way through something hard and using it as a spacer (like a hockey puck). My floor jack actually accommodated the pinch weld, so I didn't have to worry.
2. Remove dummy bolt.
After wheel removal, on the front tire hubs only, you may see a small bolt that looks like it has no earthly business being there. I've highlighted it in the picture. Remove this and throw it into the nearest trashcan. It's a dummy-bolt (as in, hey, you dummy!) intended to keep you from mounting the rear wheels on the front. The spacers won't fit with this in the way, so remove it and sh*t-can it (pliers or small socket).
3. Spacer on, tighten the included nuts to 80 ft/lbs.
Use a star pattern when tightening them. I've diagrammed a suggested route on the picture. I like to go over them once and snug them down by hand, then go back over in the same star pattern and torque them down to spec. This is so everything is tightened evenly. It is very important to torque to spec, you do not want these coming off a week later.
At this point you're probably cursing, trying to figure out how to tighten nuts to 80lbs on a hub that is free spinning. If someone is home, have them push on the brake while you torque them down. No one was home in my case, so I did the following: I took a board/pole about 2 feet long and pushed the brake down, I then moved the seat forward and, using some towels to protect the leather, wedged the board between the brake and seat. Tada, ghetto-fabulous.
4. Put the wheel back on.
Re-torque these lugs to spec, 80ft/lbs, using the same star-pattern metioned in step 3.
Repeat for the other 3 tires and enjoy your more aggressive stance.
Some pictures for comparison:
Right side, 25mm spacers installed.
Left side, NO SPACERS INSTALLED
Additional notes:
- Yes, I know my car is dirty at the time of these pictures.
- It looks like it's sitting a little high in the installed pics, after i set it down and released the parking brake, the ride settled down to normal height.
- It has been recommended to check torque after a few days of driving, after everything has settled.
- I used 25mm all around. I have noticed no rubbing in the back so far. I also never carry rear-seat passengers either. The tires are Falken 452 245/35/19 in the front, 255/40/19 in the rear. I love em, highly recommend em.
- On the rear tires you can use the parking brake to hold the hubs in place while you torque everything down.
- I used some brake cleaner to clean the surface of the hub before putting the spacer on, just to be sure it was a nice clean fit.
- Righty (clockwise) tighty, lefty (counter-clockwise) loosey.
- DO NOT OVER-TORQUE. See picture below.
- Our stock lug thread size is M12-1.25 in case you accidentally hulked it like me...

I'm sure I've forgotten something, feel free to make corrections, additions, or PM me for clarification/further info.

 Where did you get the spacers?

Thread Starter
|
Registered User
Joined: Dec 2008
Posts: 56
Likes: 1
From: Orlando, FL
I bought them from a vendor on here. Shop around and you can get a nice deal from them. Just make sure to get Ichiba v2 for the no hassle no worry install.
Thanks, I try to be thorough. A lot of people do 20/25, but I wanted to try to keep the natural stagger, and just bring it out more. On a personal note, I like the look of the front, I don't know how to accurately describe it, but it gives it sort of a "euro racer" or wide-body look. And honestly, 5mm (we're talking half of a centimeter) isn't going to make or break the look or feel. Anyone in the area is welcome to check it out and judge for themselves 
I'll also try to get some new pictures up after she has a proper bath.
I'll also try to get some new pictures up after she has a proper bath.

Hey,
Nice write up!
I'm still waiting for my V2's to arrive and this is exactly how I would've installed.
Only difference being, I ordered 20/25.
My front tires are FK452, 245/35/19
&
My rear tires are FK452, 245/40/19
Also, since you're using OEM Rays Wheels... if you feel any vibrations, you may want to do this to the Hub Centric piece in the middle of the Spacer: https://g35driver.com/forums/v36-diy...ation-fix.html
Did you apply any anti-seize grease to the back part of the spacer to hub face and the front part of the spacer to wheel face?
Thread Starter
|
Registered User
Joined: Dec 2008
Posts: 56
Likes: 1
From: Orlando, FL
Also, since you're using OEM Rays Wheels... if you feel any vibrations, you may want to do this to the Hub Centric piece in the middle of the Spacer: https://g35driver.com/forums/v36-diy...ation-fix.html
Did you apply any anti-seize grease to the back part of the spacer to hub face and the front part of the spacer to wheel face?
Did you apply any anti-seize grease to the back part of the spacer to hub face and the front part of the spacer to wheel face?
Trending Topics
The Version 2 Spacers are direct plug and play... simple and straight forward, as you can see from the DIY above.


I have to add something, when you tighten the lug nuts to the spacer make sure you use lock tight or something equivalent to it. Once they are on you can't see them because your rim will be blocking it. So it is a good idea to do this so your not rolling down the street and they become loose and something bad happens.


