Walbro 255 Installation DIY
#1
 12-01-2007, 01:21 AM


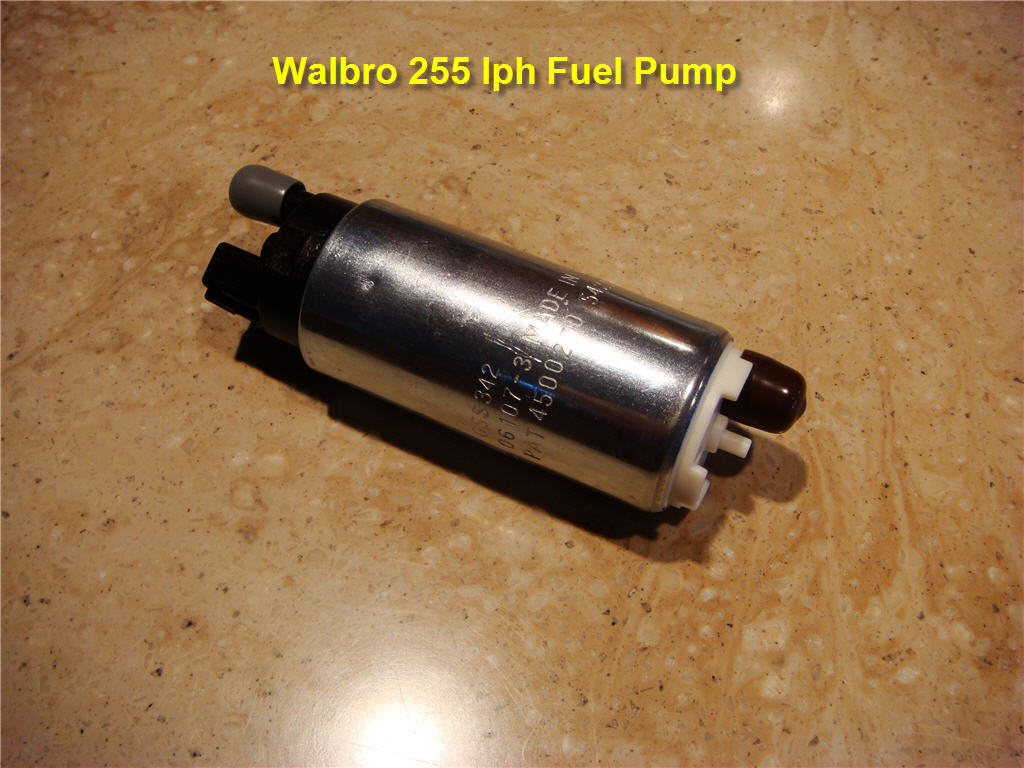
Walbro 255 Installation DIY (3.4 Mb)
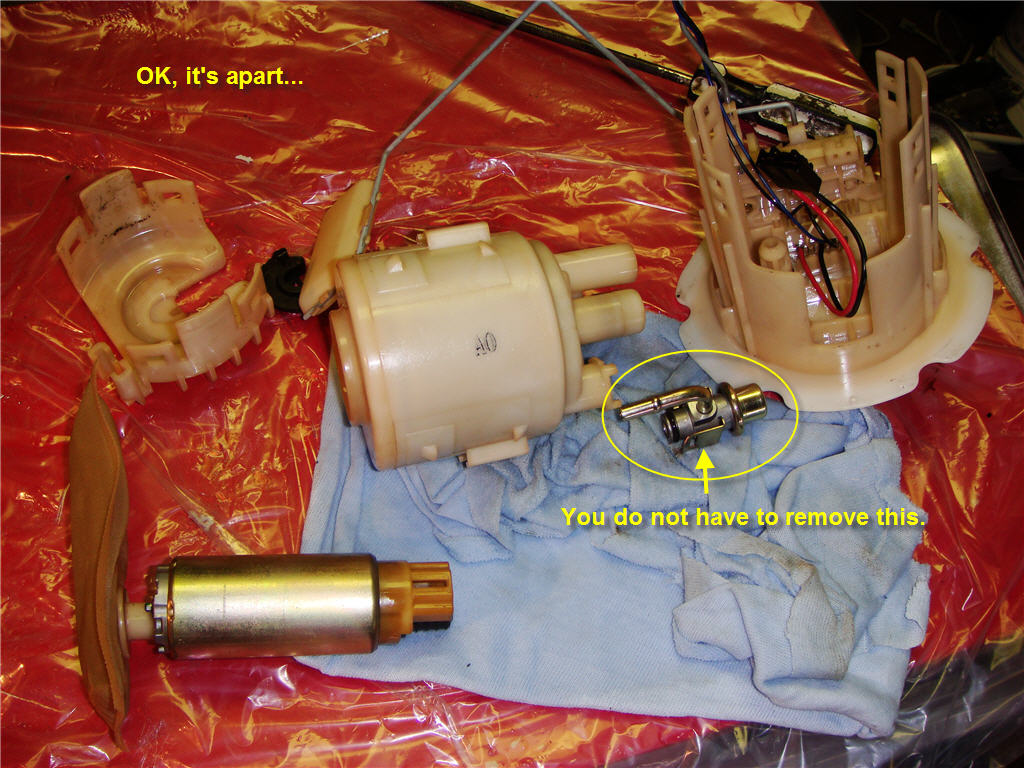
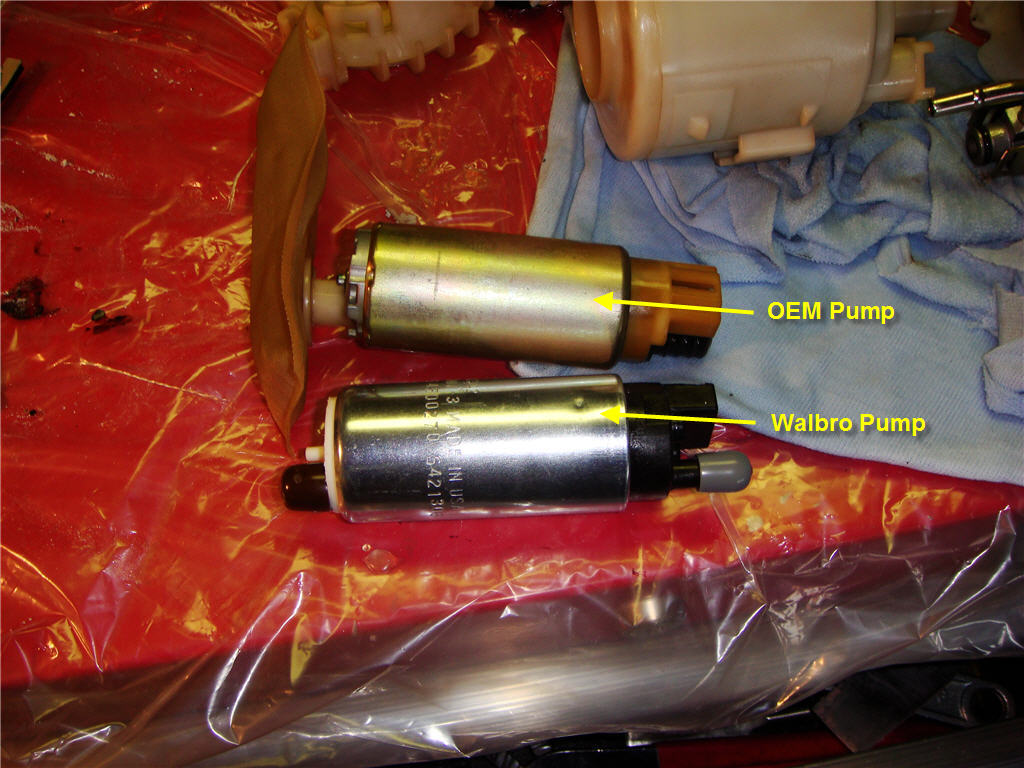
I replaced my stock fuel pump with a Walbro 255 lph. I searched this site over and over to get some information on how to do this and came up with just a few scattered snippets. I thought I would document my adventure for the next guy. Here goes...
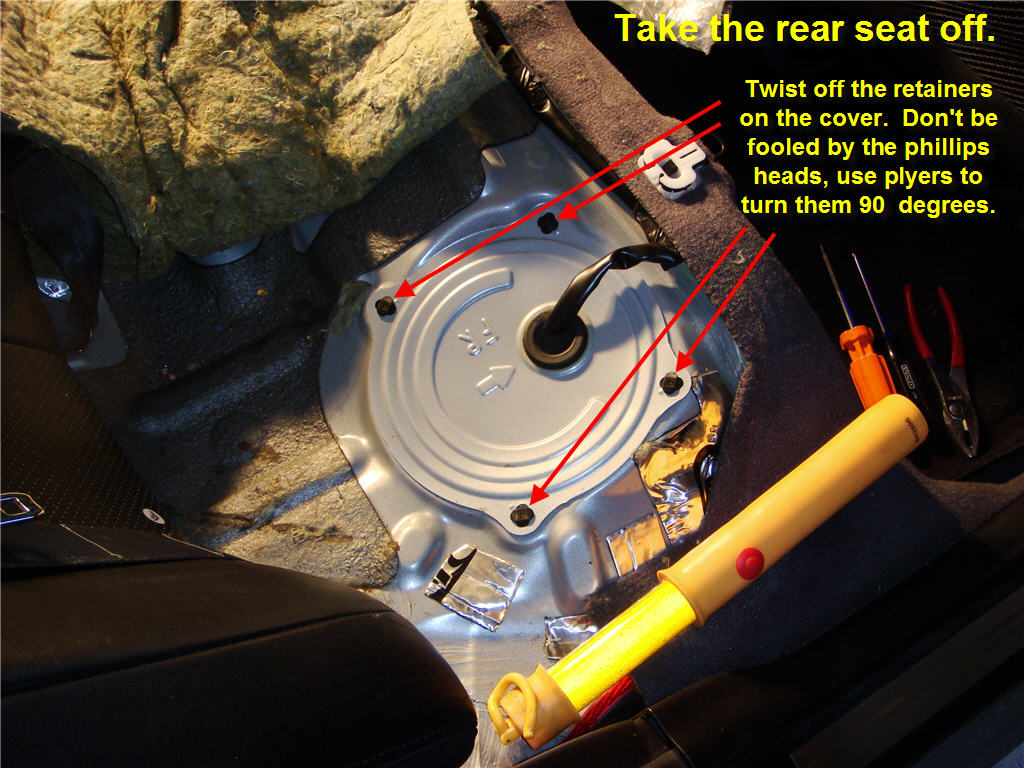
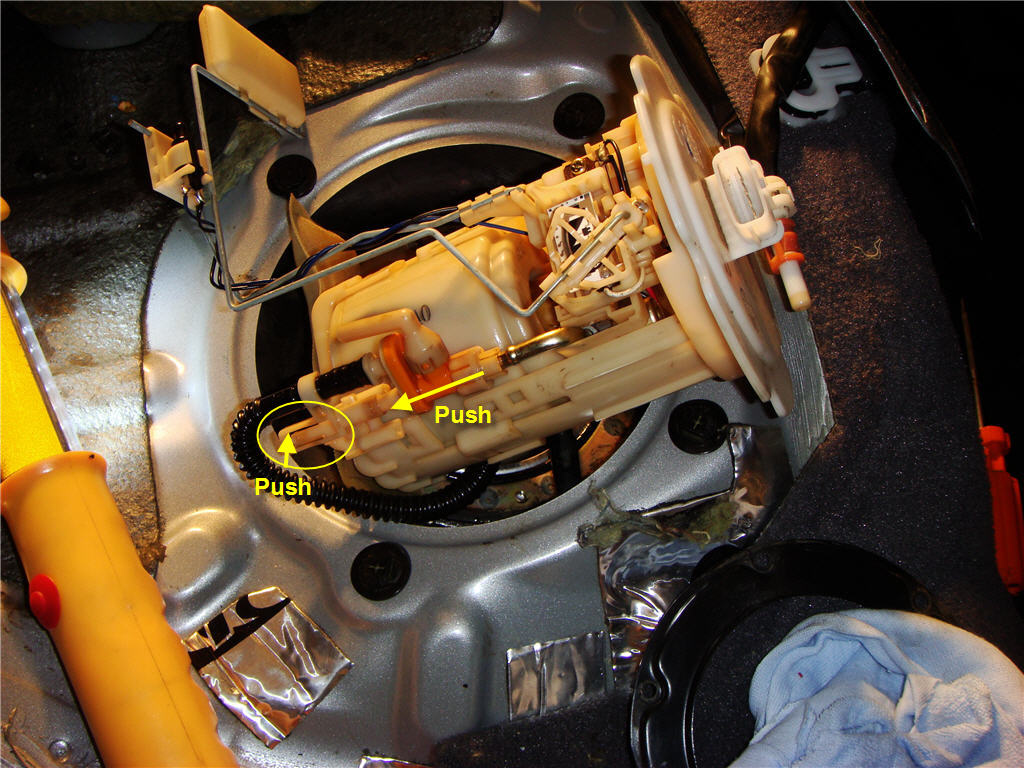
First - Remove your back seat. The pump is on the passenger side.
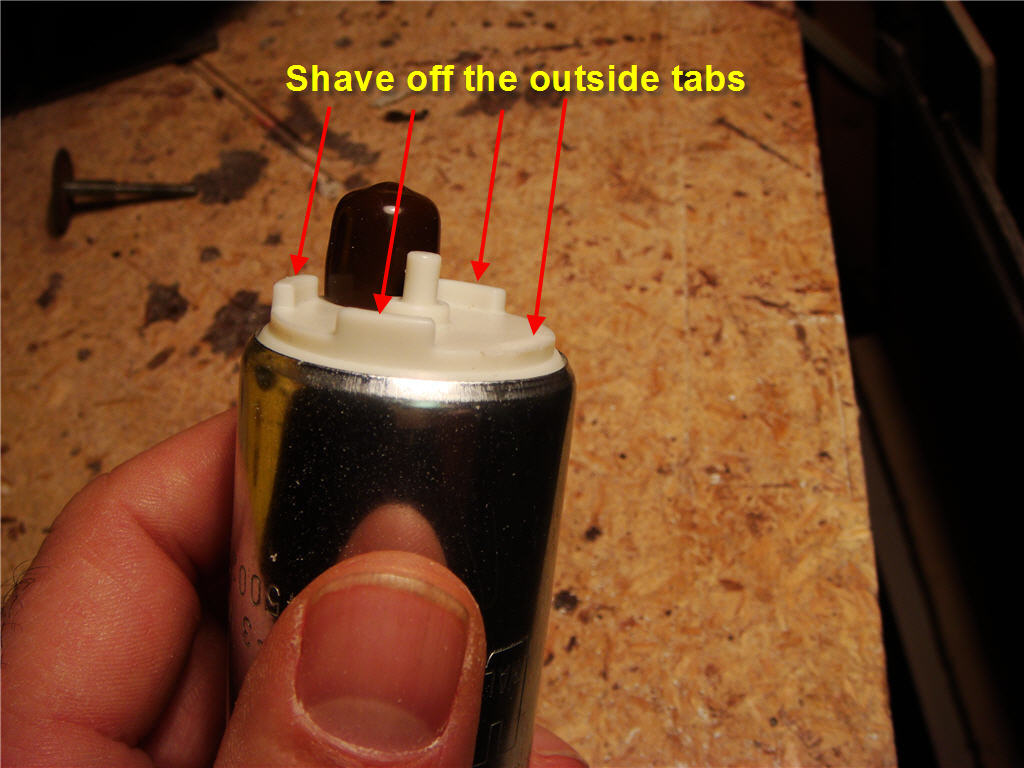
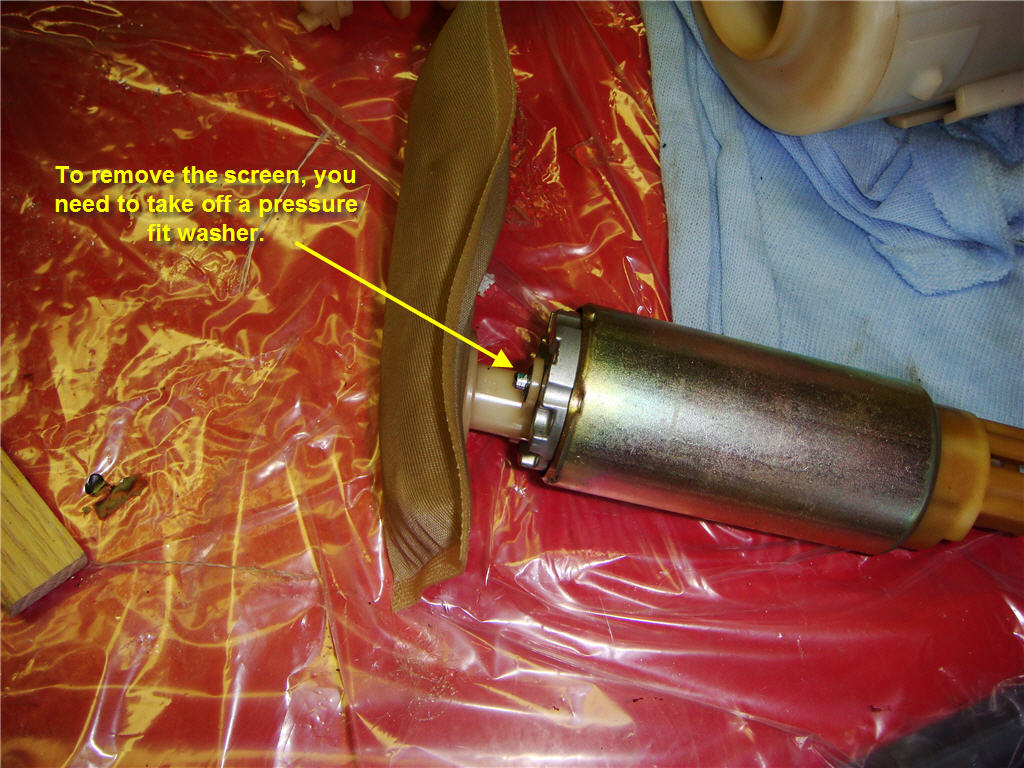
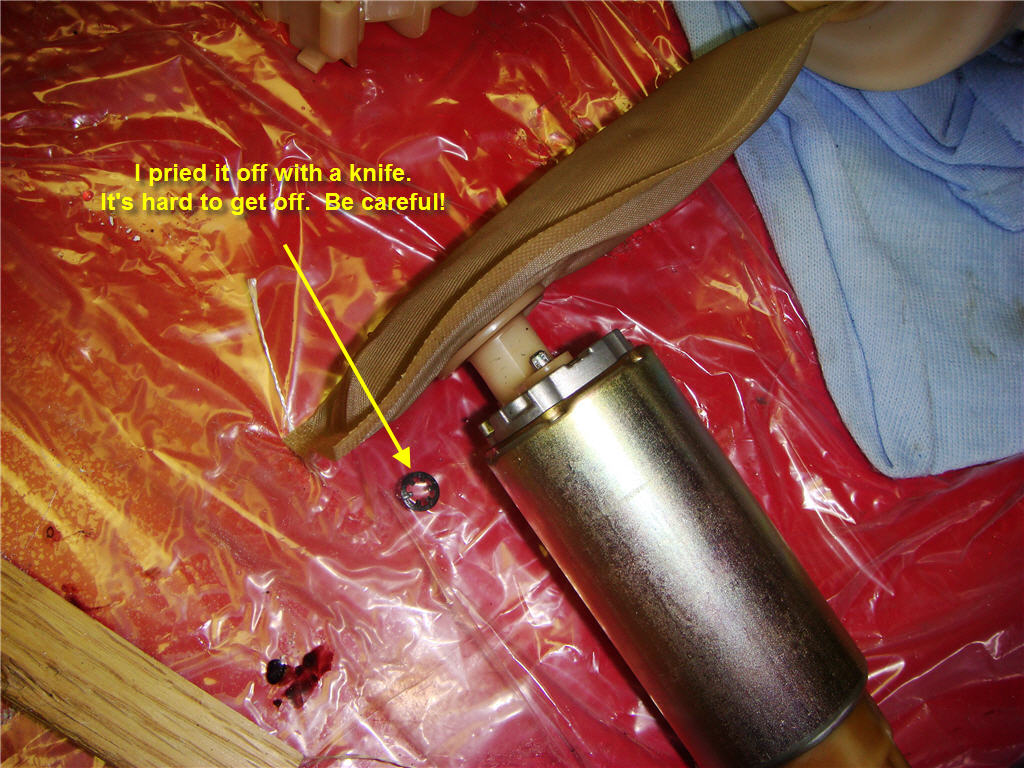
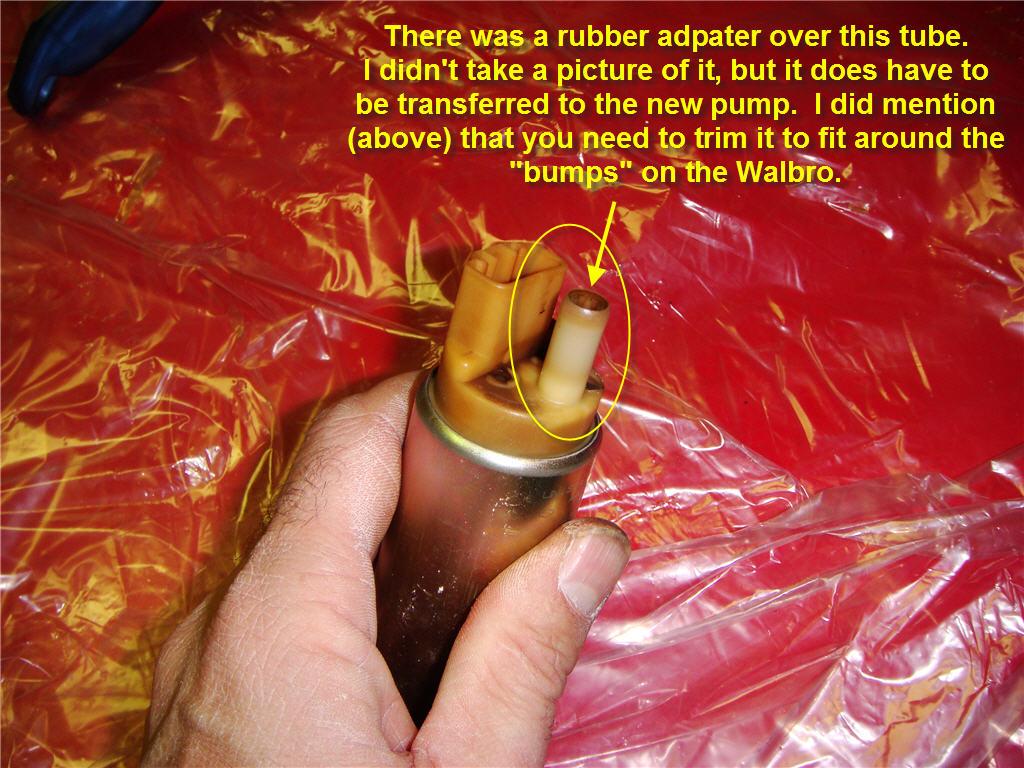
Remember to never force anything. All these parts are made of plastic and easy to break.

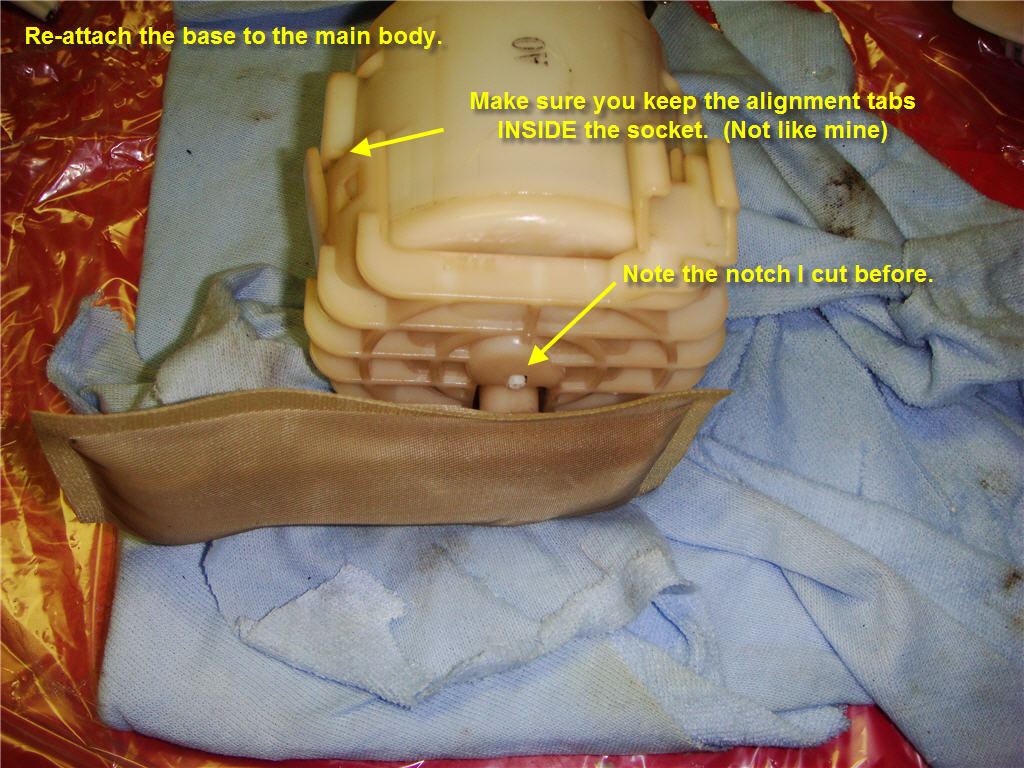
Put the assembly back in the car the same way you took it out.
That's it. It should take less than an hour to pull this off.
First - Remove your back seat. The pump is on the passenger side.
Remember to never force anything. All these parts are made of plastic and easy to break.
Put the assembly back in the car the same way you took it out.
That's it. It should take less than an hour to pull this off.
Last edited by sliderg35; 12-01-2007 at 01:26 AM.
The following 8 users liked this post by sliderg35:
black_gst (07-17-2014),
CandlestickPark (04-25-2013),
ibelonginprison (06-07-2011),
JaE35 (12-18-2012),
MikeGrote (02-21-2012),
and 3 others liked this post.


#4
12-01-2007, 06:40 AM

Join Date: Jan 2004
Location: 626!
Posts: 3,874
Likes: 0
Received 0 Likes
on
0 Posts
#5
12-01-2007, 07:23 AM

Registered User
Join Date: Nov 2007
Location: Davie, FL
Posts: 48
Likes: 0
Received 0 Likes
on
0 Posts
#6
12-01-2007, 01:13 PM
Originally Posted by krnn1cenamja
wow awesome write up.. but what does this walbro 255 do?
Originally Posted by Good & Tight
Great write up Did you need to replace the OEM power connector to the pump?
Did you need to replace the OEM power connector to the pump?
#7
12-01-2007, 07:50 PM
Registered User
Join Date: Nov 2007
Location: Davie, FL
Posts: 48
Likes: 0
Received 0 Likes
on
0 Posts
Trending Topics
#8
12-01-2007, 08:03 PM


#10
12-02-2007, 03:30 AM
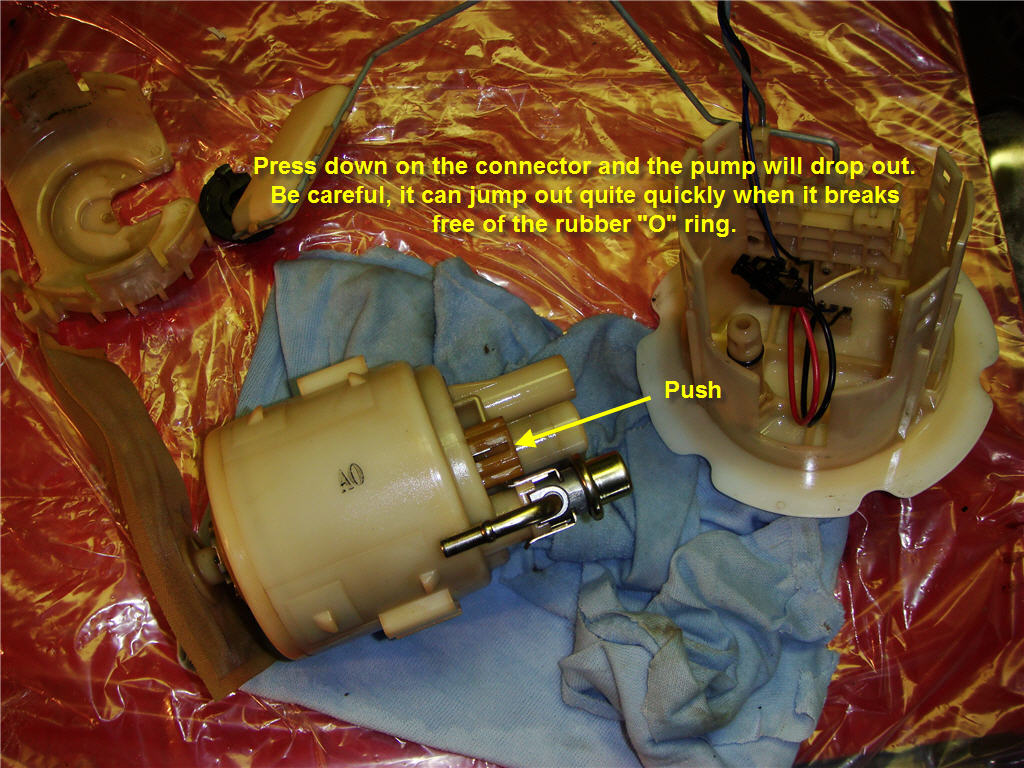
Originally Posted by rookie
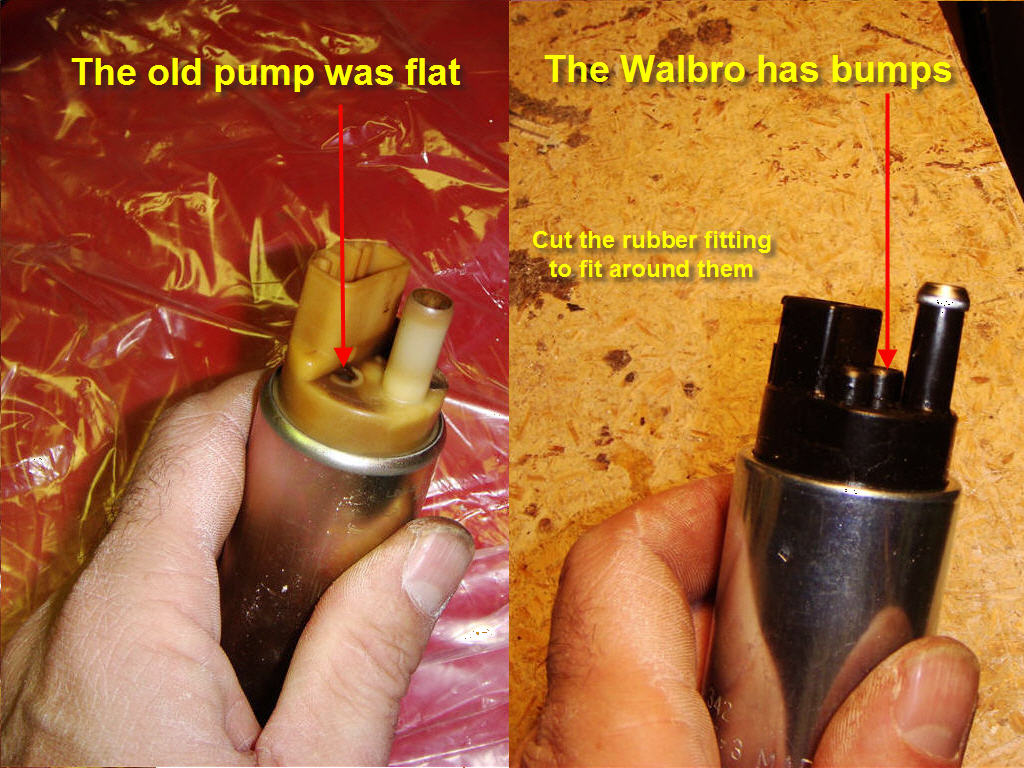
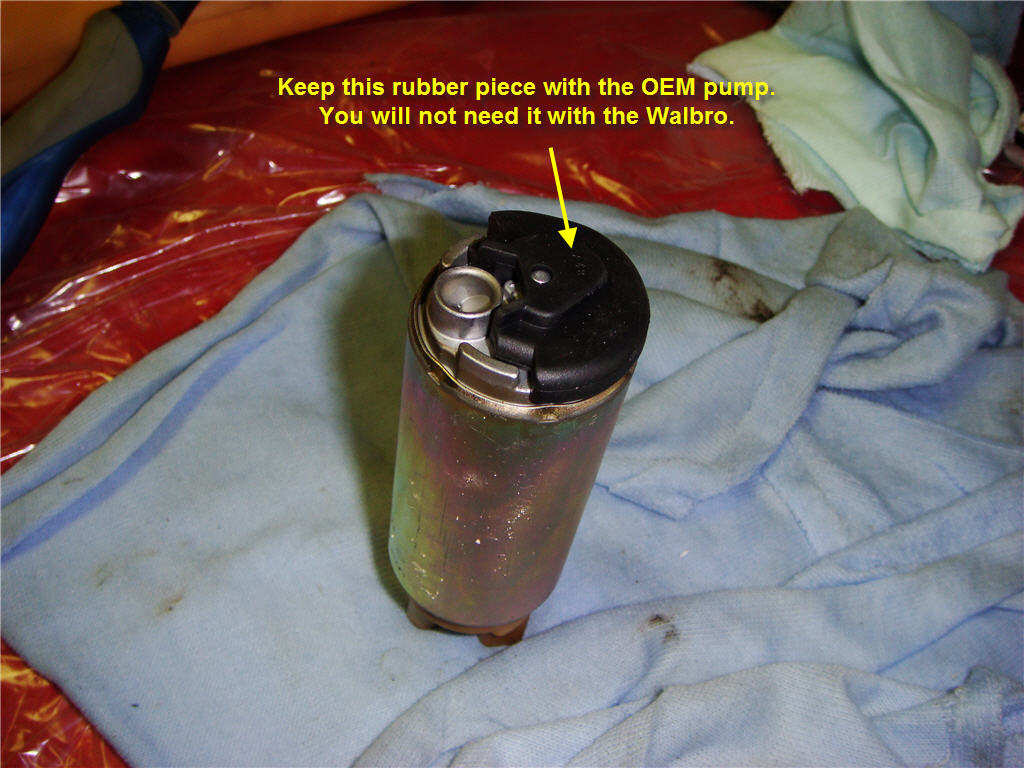
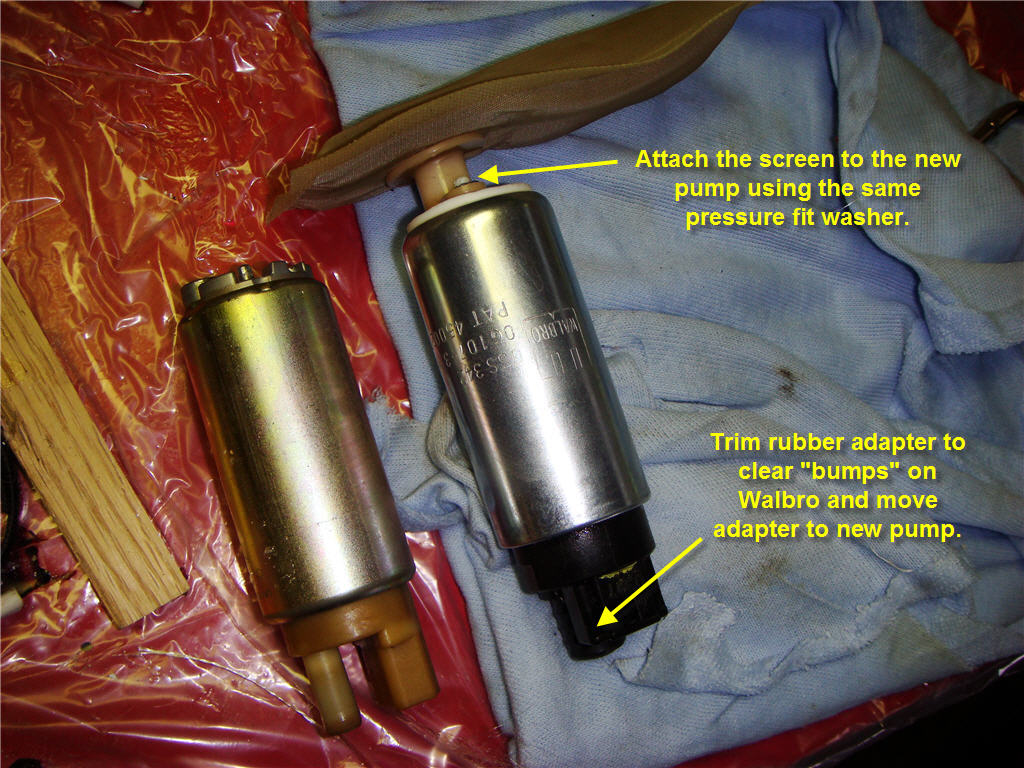
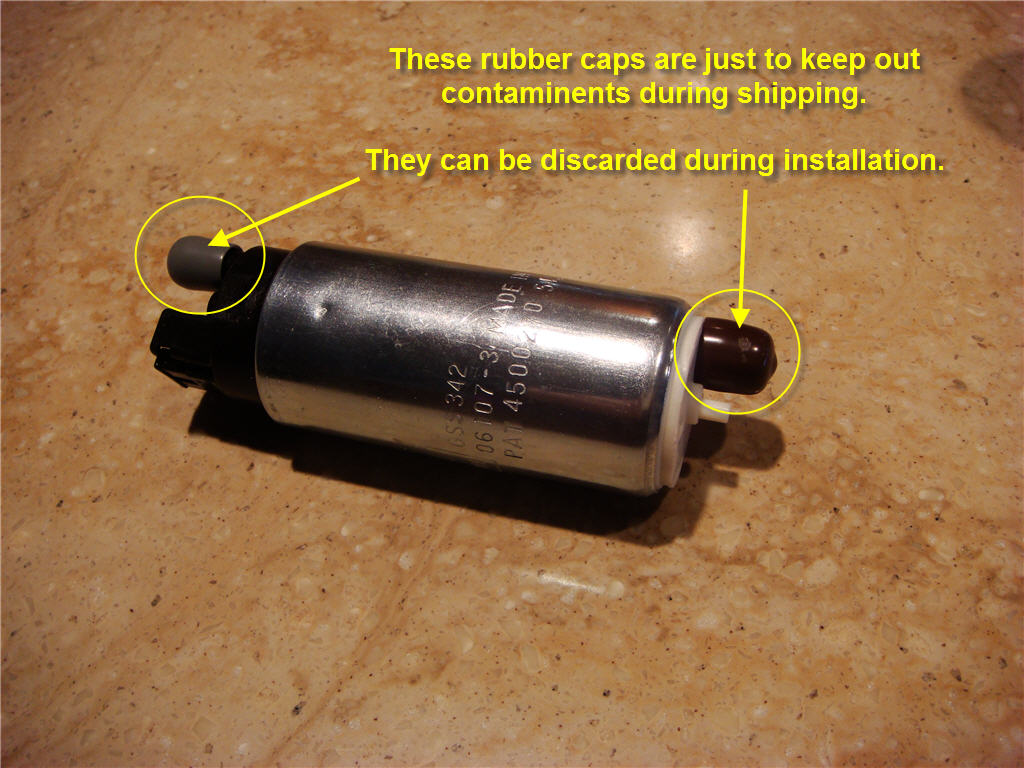
The black rubber piece on the oem pump in this picture. (opposite end of the screen, the walbro has the grey cover over it's new location)
Is transferred to the new pump, which you did do. I just didn't see mention of it.
Is transferred to the new pump, which you did do. I just didn't see mention of it.


#14
12-05-2007, 08:04 PM

