When you click on links to various merchants on this site and make a purchase, this can result in this site earning a commission. Affiliate programs and affiliations include, but are not limited to, the eBay Partner Network.
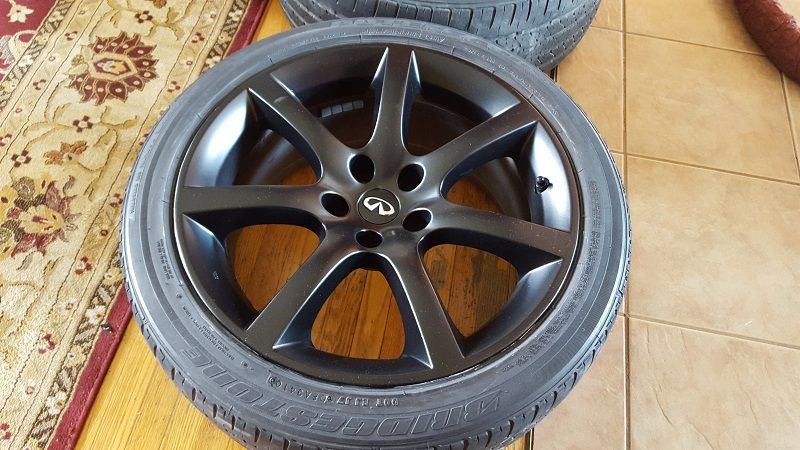
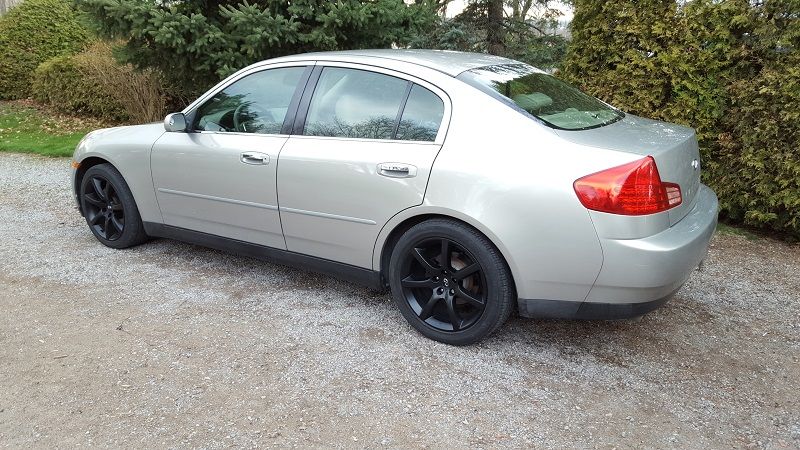
Finally finished the refinishing of my wheels today and mounted them.
This is what I had to start with. 2005 Coupe staggered setup. Paid next to nothing for the wheels and tires, and I was overdue for a good DIY attempt.
I did all matte black and matte clear-coat originally but the finish wasn't what I desired. It was too matte and just didn't suit the car. Matte wheels tend to have a finish that lacks the "quality look" in my opinion.
SO, I switched to Satin, using the same matte clear-coat and the finish was exactly what I wanted.
There's dust on the wheels. They aren't paint defects
I need some opinions. New EBC drilled and slotted rotors are on the way, along with some stainless braided brake lines. I'm leaning towards doing a quality paint job on the calipers. I'm thinking I want to do red to add some color to the car because it lacks "pop?" Not sure, maybe gunmetal or black? I'm trying to avoid the "riced" look at all costs.
The car will be lowered soon FINALLY
Looks good Josh! My name is Josh too. Lol. I would say red. It looks a little bland now. I'm sure with the drop and red calipers it'll give it some pop.
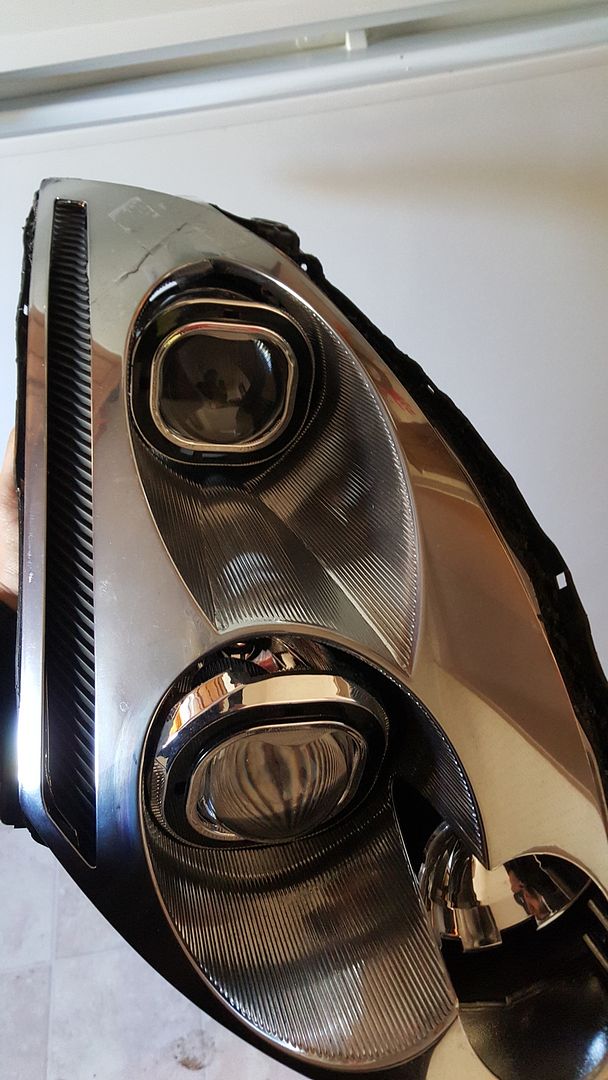
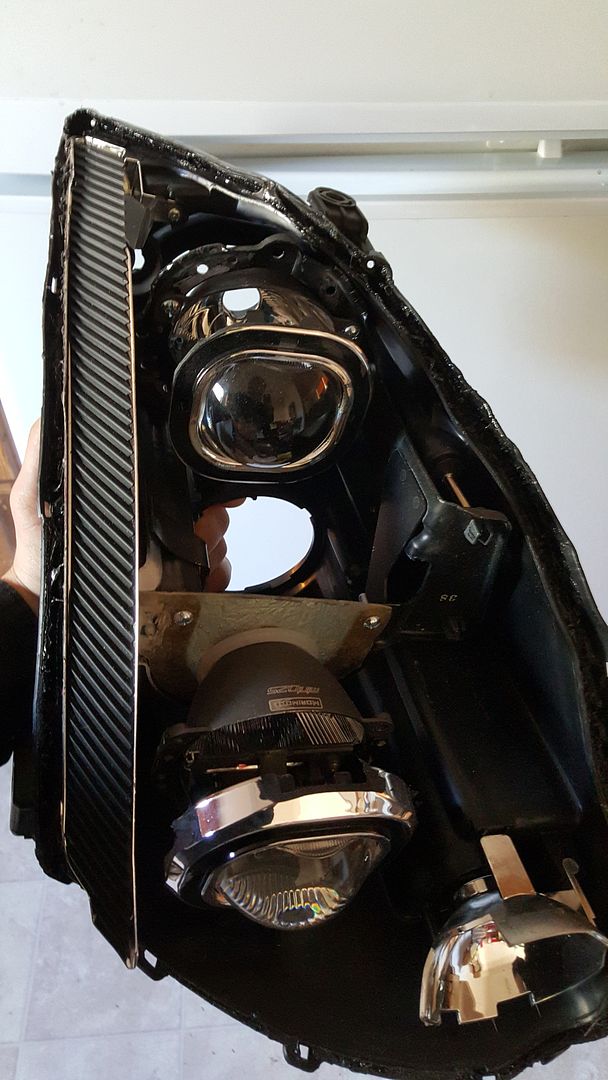
Slowly working away on my quad projector retrofit. nothing about this was as easy as I thought lol. Custom mounting, trimmed shrouds. eventually the shrouds will be fiberglassed to the bezel and the bezel will attach to the lights, rather than the lens. This will make it look much cleaner and no cheesy gaps between the shrouds and the bezel. All will be re-painted and topped off with switchback halo's and fogged projector turn-signals.
Morimoto Mini D2S Square Projectors
Morimoto XSB Square Halo's
will be interesting to see how squares blend with a round car, but I have over $600 invested into this so no turning back now!
that looks good.
you got a write up thread on the parts and the process and parts that were used?
I did not get it from r1 autoworks, theres some guy out here in cali that also does them, I ordered from strictly business motorsports, real cool guy responds right away. They have the fiber glass trunks in stock, CF takes about 5 days to be ready. Did local pick up in Sante Fe springs. Fitment is 9/10, need to adjust a bit. Here are some more pics.
I didn't take pics cause I'm a dumbass but I did the manual shift direction mod. Pulling back to upshift feels so much better. I had been reading about it for a few weeks now and thought it wasn't worth the trouble but I've been in the process of helping my dad buy a bmw and it shifts this way and after driving it a few times I like pulling back to shift so much better and had to do the mod.
The hardest part was depinning the harness and removing it from it from the clipped in position. Simply cause there's not a lot of room.
Fixed my passenger seat power switches which have been flaky since I bought the car a couple of years ago. It was easy all the way up to the point of trying to stuff the switch parts back into the housings and snap the tops on. The springs weren't cooperating and I could always get one but not both springs inside before the little ball bearings would pop out of position. Then to top it all off I lost one of the springs. Had to make a replacement out of a ball point pen spring. Feels great like I installed some kind of luxury power upgrade considering I had resigned myself to having a seat that wouldn't move.
Added some ebay clear sidemarkers. Installing them noticed my bumper is slightly off where it connects to the fender on the driver side. Hopefully get it fixed soon when the weather decides to be good.
Added some ebay clear sidemarkers. Installing them noticed my bumper is slightly off where it connects to the fender on the driver side. Hopefully get it fixed soon when the weather decides to be good.
Nice, looks good. Who did you buy your clear corners from on Ebay? Are they the "bump" style or do they fit flush? I am looking for a set myself but do not want the "bump" style which is all I have been able to find so far.
Added some ebay clear sidemarkers. Installing them noticed my bumper is slightly off where it connects to the fender on the driver side. Hopefully get it fixed soon when the weather decides to be good.
Looks great!
How's the fitment on the eBay clear corners? Which ones did you buy? Do you mind posting a link?
 04-22-2016, 10:36 PM