DIY: Rear Heated Seats
#1
 07-02-2011, 11:07 PM


DIY: Rear Heated Seats
Have you ever been in the back your friends car on a cold day? and had to freeze until the engine warmed up so the car could even start kicking out warm air? all the while you're are glaring at the two in the front seat, who simply turned on the heaters and have been warm well before the heat started blowing. or maybe you just want a more luxurious look to your ride? Well this DIY is going to show you how to install seat heaters in the rear seats! I'm sorry for you sedan users, if i had a sedan to work with i would make a DIY for you too  but i only had my coupe. its a 2003 BTW so idk how the back seats maya change throughout the years.
UPDATE: My parents just got an 06 G sedan so if i can talk them into giving me the car for a weekend to do it then I'll update the DIY with instructions for sedan drivers also. but they are pretty hellbent on keeping the thing 100% OEM so idk how far im going to get with this...
NOTE: as said in many other DIY's plz dont claim it as your own, its low but its bound do happen, so im not gunna stress. but after going throught all of this i understand why people put this same "plea" in the beginning. making these things can suck at times, but its well worth it in the end
Just an FYI / Things to consider:
1. MOST IMPORTANLY: your seat heaters instructions know what is good and safe for them! if they tell you to do something different than what i am, obviously go with them. I AM NOT AN ELECTRICIAN and i dont want you to lose a seat heater/backseat/car :P
2. you might wanna test your heater b4 u install it
3. my heaters called for 1/2in of foam inbetween your heater and the upholstry, the g35 has about a 1/2in piece of foam under the leather, so far my heaters have been taking a liking to it and no burnt bum bums or upholstry :P
4. as i was a ways into the project when i decided to do an DIY for it, so i dont have pics for everything :/
5. at the end of this process, you will have extra hog rings, if you are concerned with your seats somehow coming undone(extremely unlikely) or you're one of those people who are 100% OEM then this DIY isnt for you
6. you will be drilling holes into the plastic for the switches, if you dont feel comortable doing this, you must find an alternative. if you cant, then again, this DIY may not be for you.
7. if you find something works better, feel free to post it! i did this just using what i have on hand. i live in the barracks here on base(size of a small studio appt) so i dont have a lot of room to work nor a vast selection of tools at my disposal :]
Things you will need:
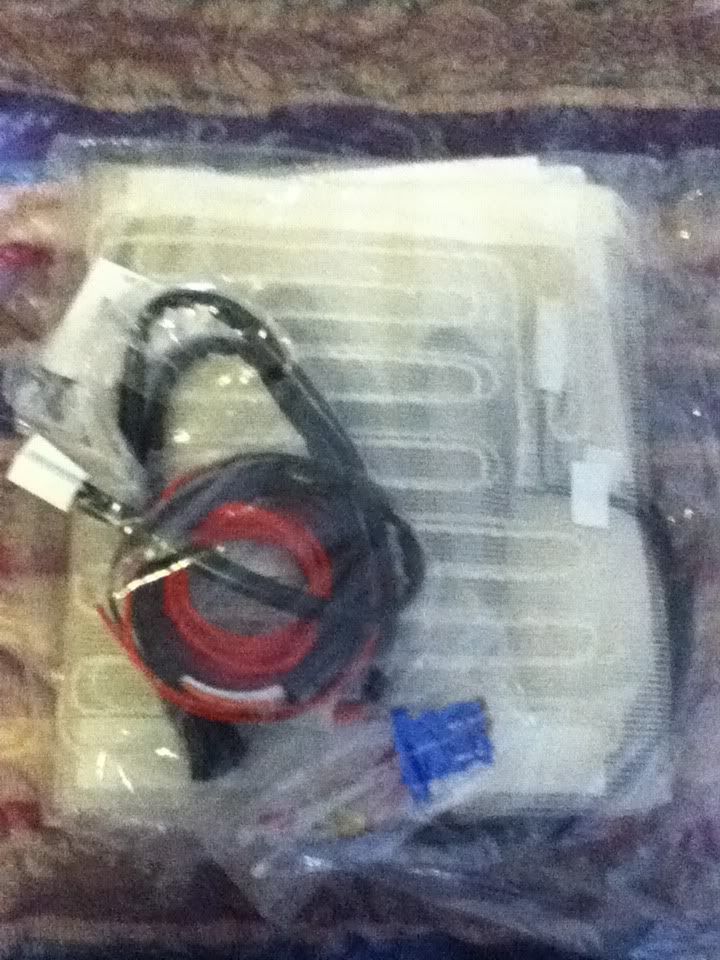
(2) Universal Seat Heaters(got mine off ebay from "Comfort Zone" for like $75 a pop for my Z, right b4 i totaled it :| )
Note: i got the sets with 2 heating elements so it warms your back up too, not just your booty
(2) Needle nose pliers
(1) Normal Pliers
(8) tubes of super glue(all depends on how much adhesive you want between the foam and the heater)
(1) pair of wire strippers
(1) wire terminal kit
(1) roll of electrical tape
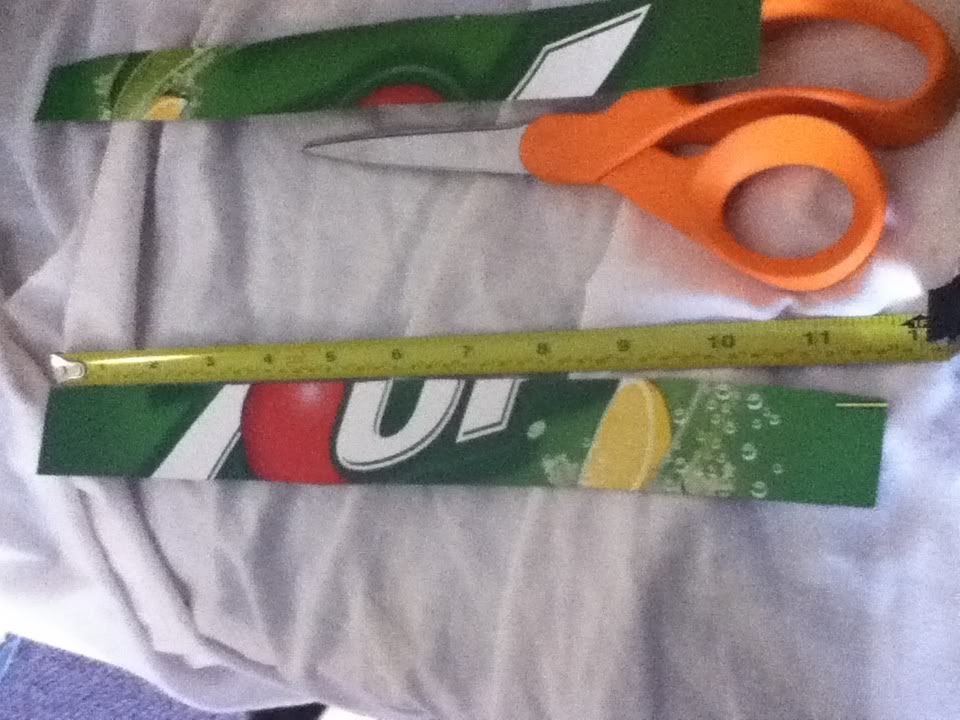
(1) small cardboard box(12 pack of 7up was MORE than enough for me)
(1) pair of scissors
(16) medium sized zip ties
(1) Phillips Screwdriver
(1) ratchet w/ a 12mm bit
(1) Drill w/ multiple bits(since most likely wont be buying the same kit i did, i cant say how big the hole for your switches will need to be. but it will all be in your instructions)
Optional tools:
(1) set of dikes(wire cutters)
(1) Hog Ring tool(apparently it makes the job a million times easier)
(1) multimeter (i got a $10 mini multimeter from Fry's and i love it)
(1) grocery bag
(2) 12v 30a relays w/ extra wire(if you choose to go that route)
(1) ruler or tape measure
Ok lets get started, first things first a lil prep b4 we rip anything out!
Step 1: Arts and Crafts Time!
First, take that cardboard, zip ties, electrical tape and your heaters.
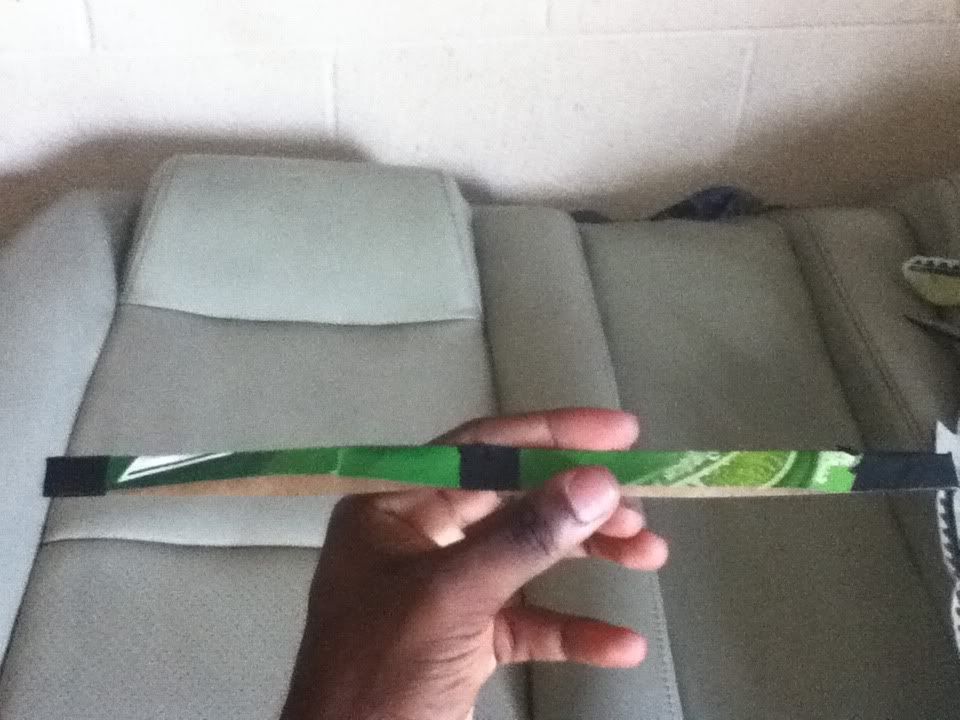
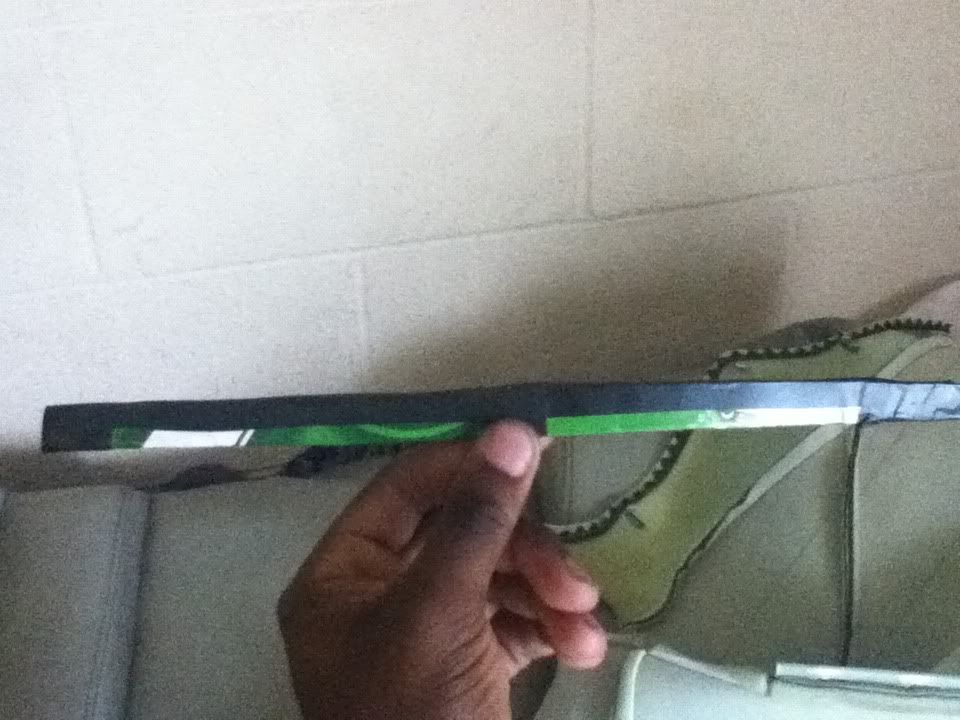
you are going to need to cut the cardboard into 2 rectangles, approx 1in by 11in. no need to be exact on the 11in side, as it will be trimmed later. fold them in half, so you now have .5in by 11in rectangles. wrap em both up in electrical tape and set them aside.
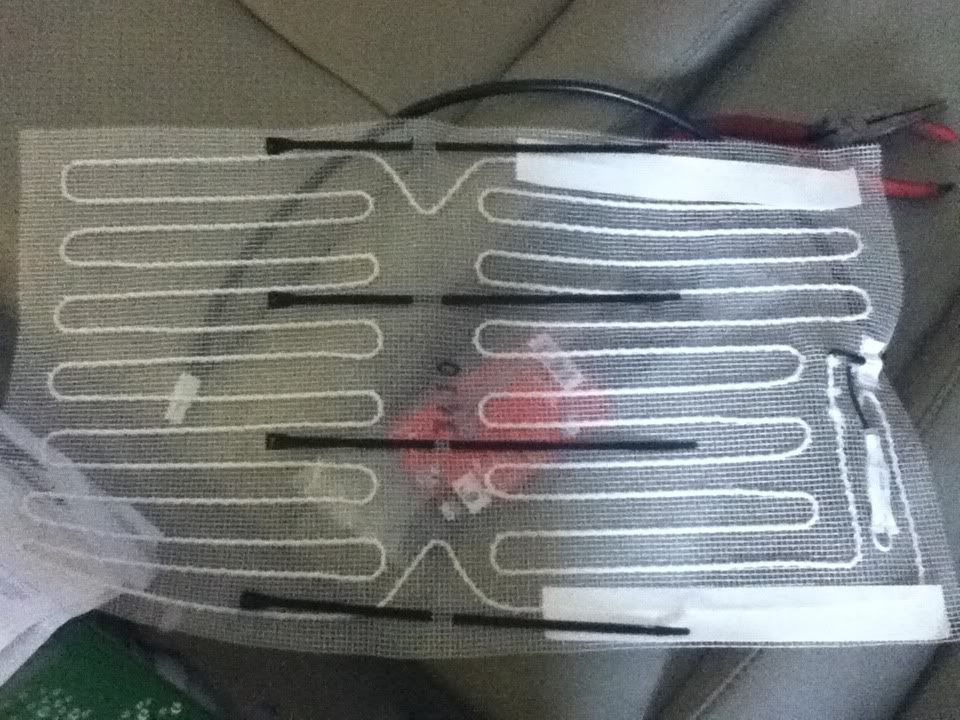
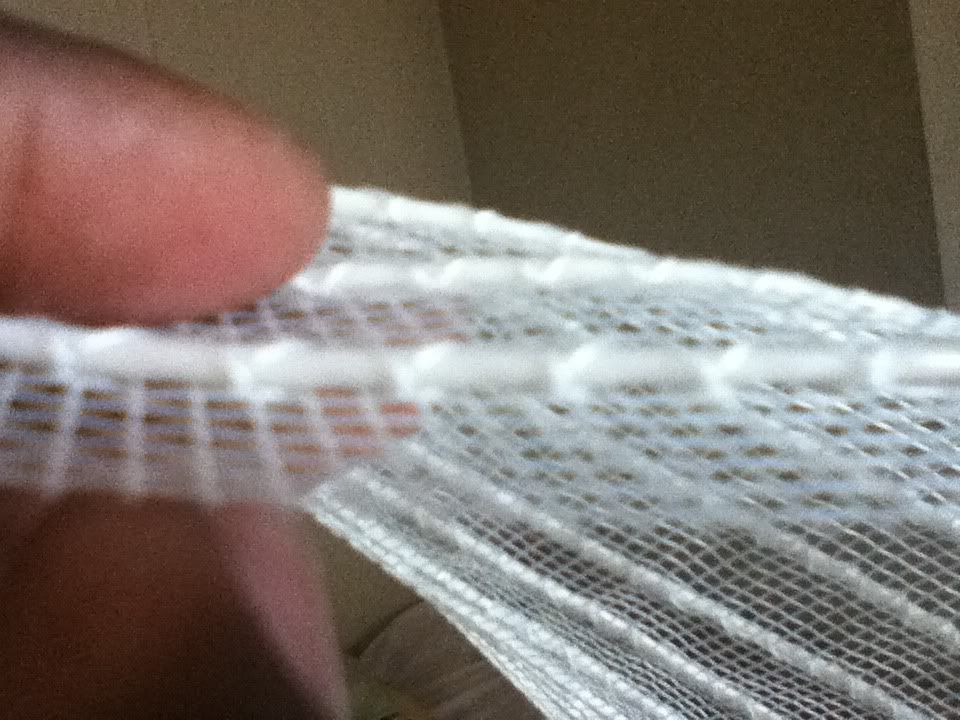
now cut 8 slits in your seat heaters for the zip ties to go through(as shown below).
make sure your seat heaters are "upside down" for this step. the side with teh metal portion of the heater protruding is the downside.
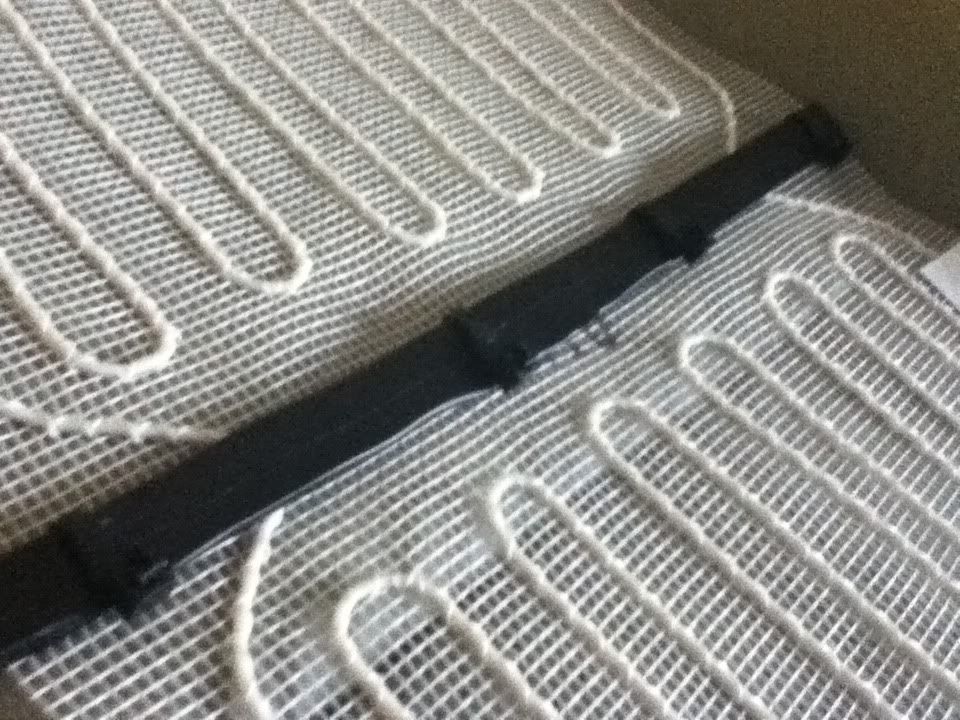
place a cardboard peice on your heater and zip tie it down(this will provide the heater with extra support so it doesnt move as well as protection from a possible short)
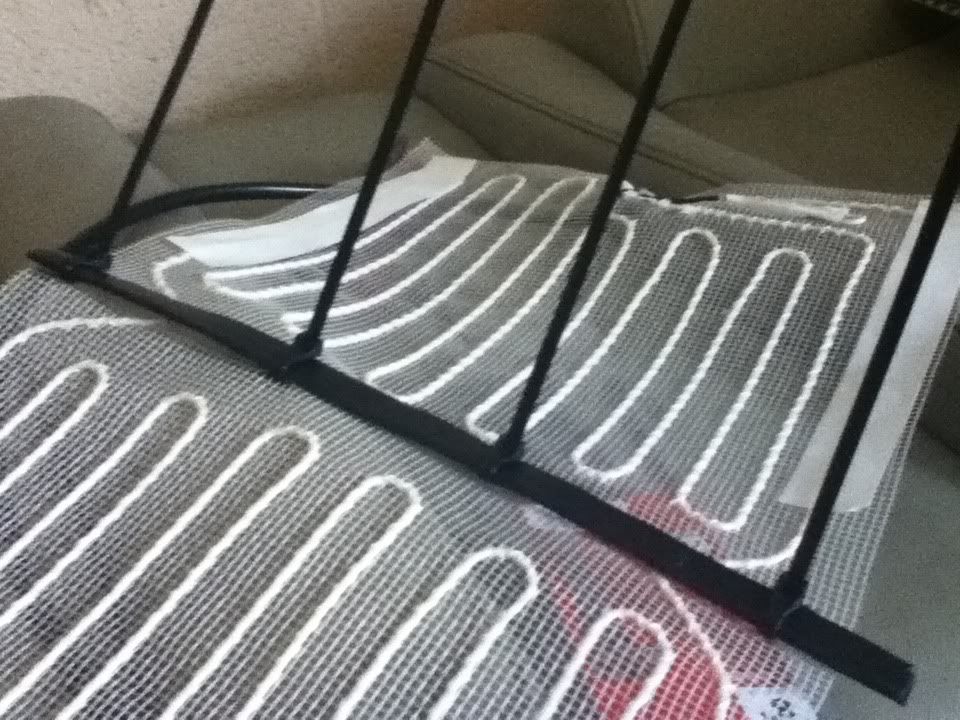
after its attached i trimmed my edges so it was even w/ my seat heater, i also trimmed my zip ties down and made sure my zip tie stubs were on very bottom.
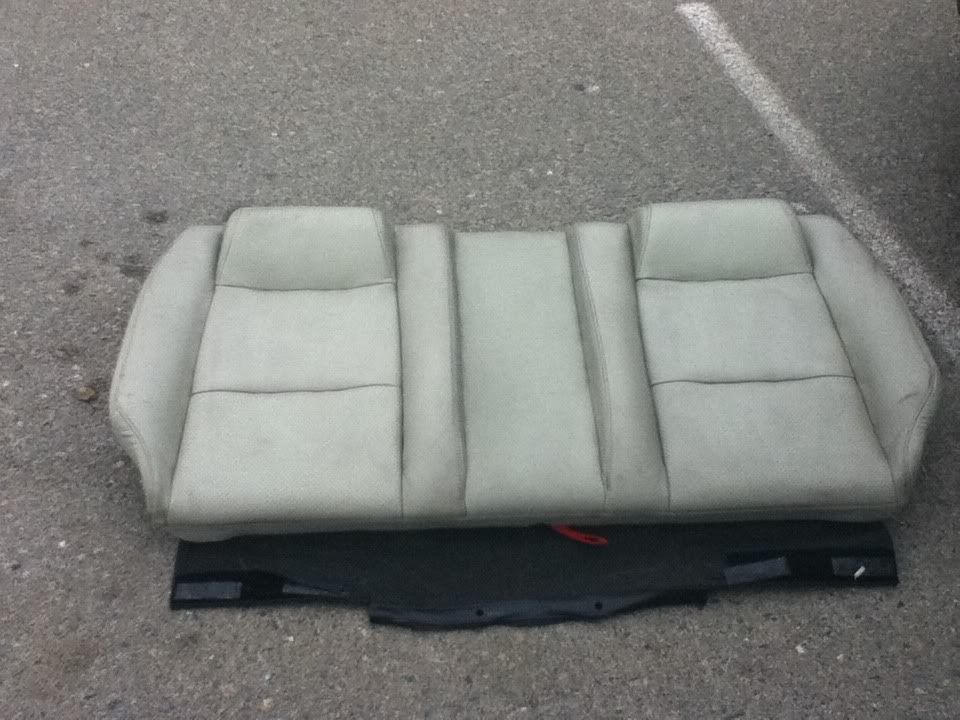
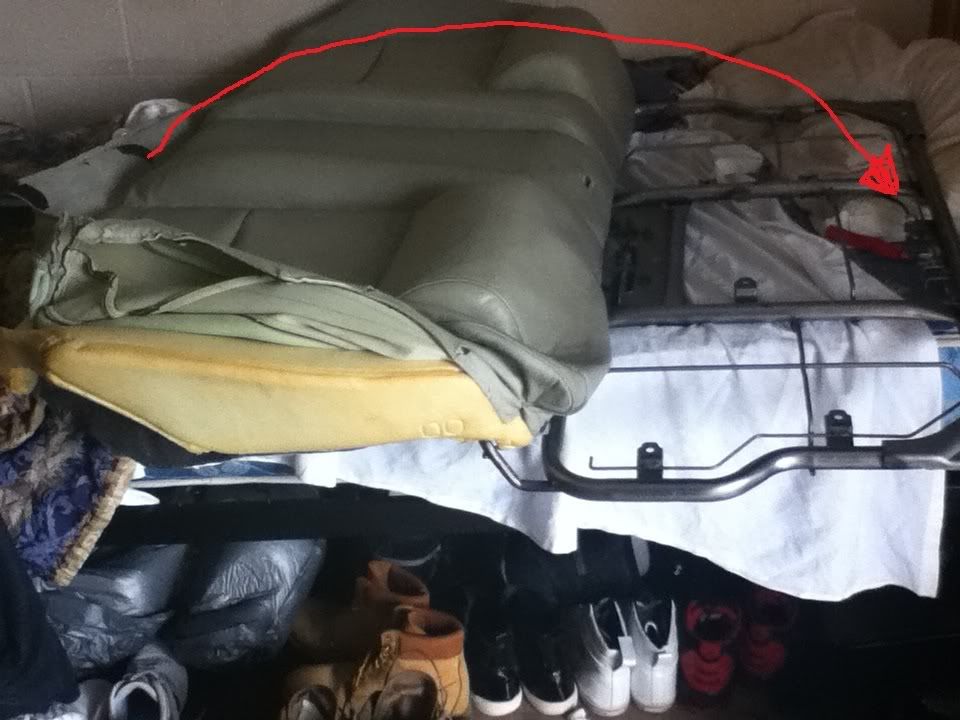
Step 2: Seat Removal
I removed my lower seat first, but either way works
Lower seat removal:
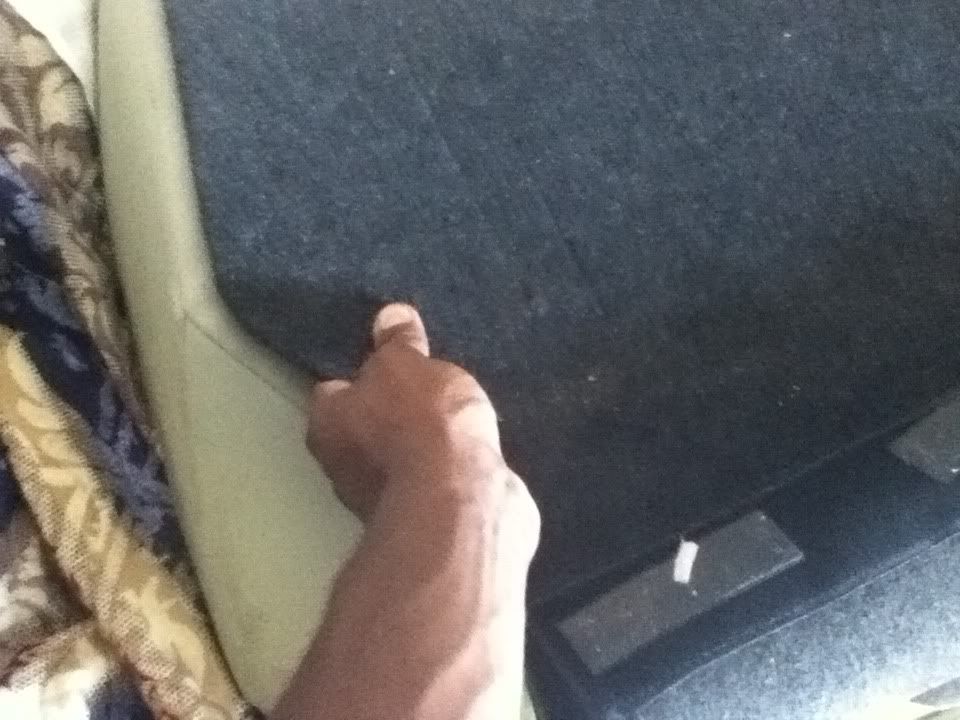
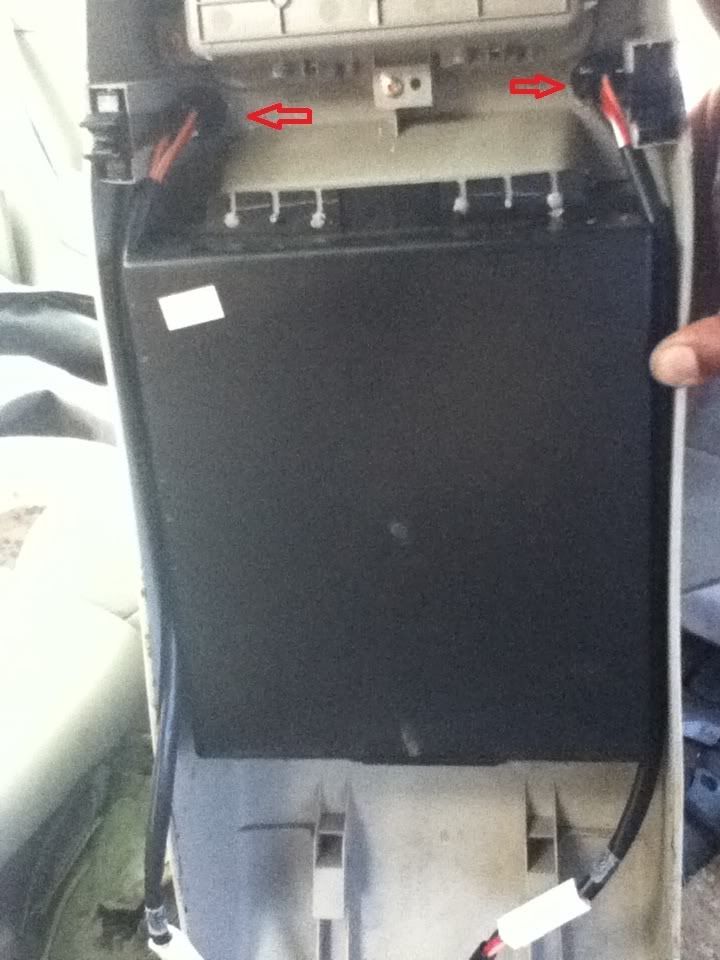
First remove the rear center console by pulling up on the front of it, and then pulling it forward(no this is not my car, decided to make the DIY late into the project)

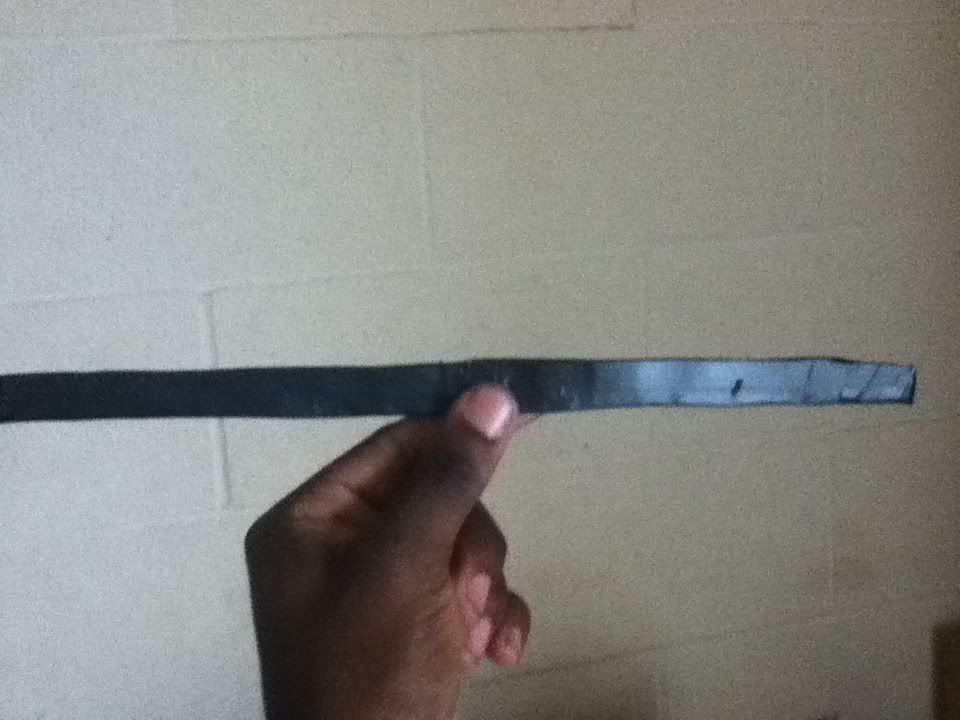
Now for the seat cushion, pull up HARD on the spots shown below, then slide the whole thing forward. yes, it will feel like there is some resistance, shove your seat belt receivers throught their holes and it will go away. and again, no this is not my car, way to clean :P

Upper Seat removal:
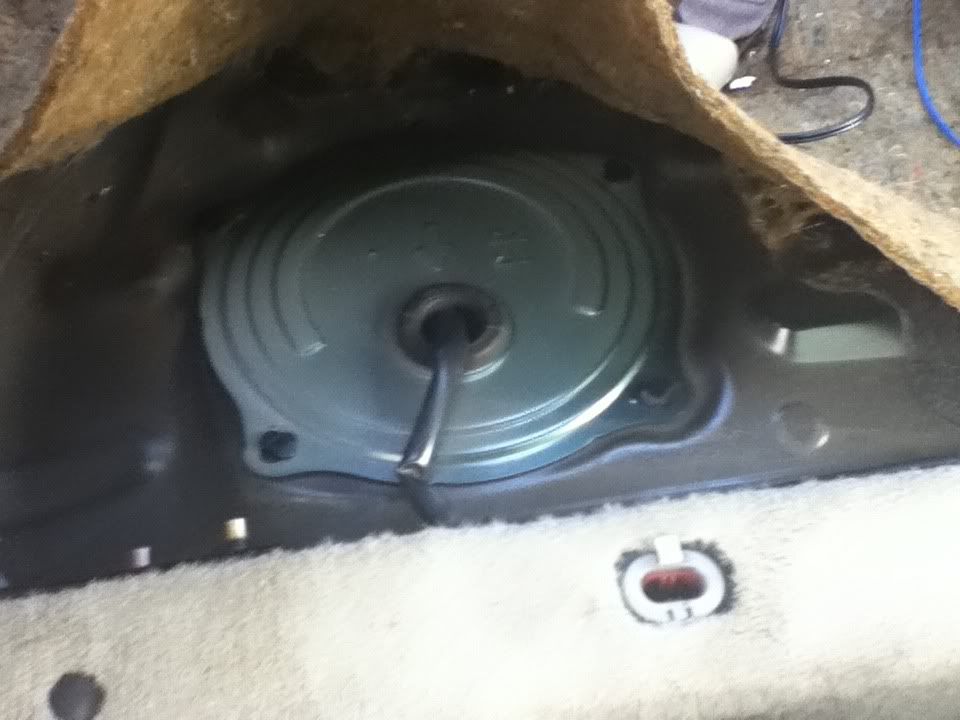
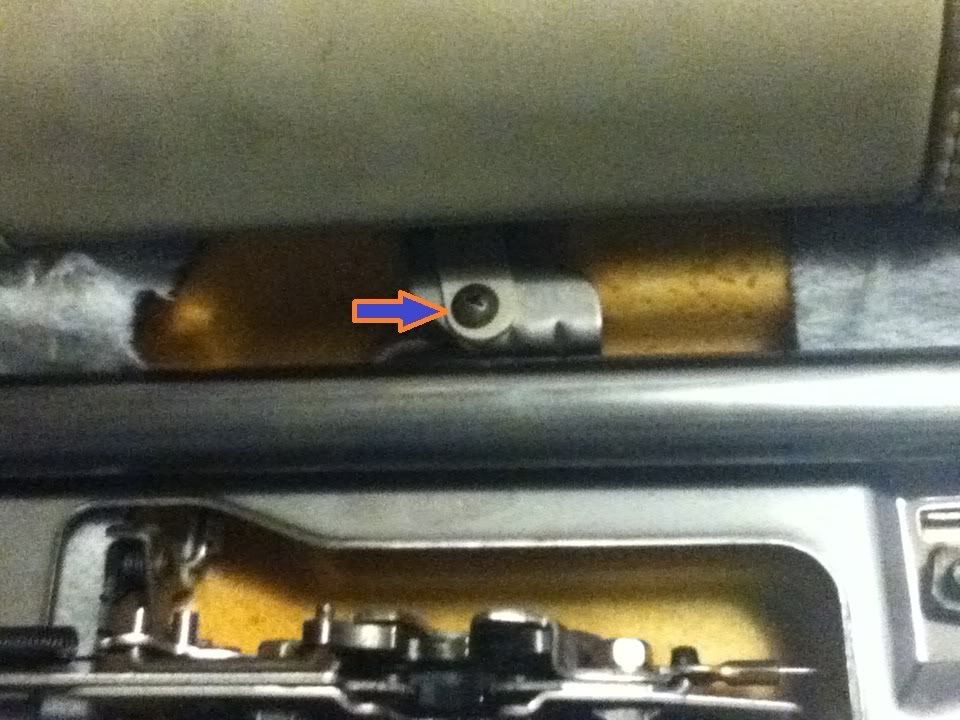
lay down your backrest via the button on top, the red tab on bottom(now more exposed) or the pull switch in the trunk. while your seat is now laying down, pull the cloth forward(mine was velcroed on at teh bottom) until two bolts are exposed on the very ends.
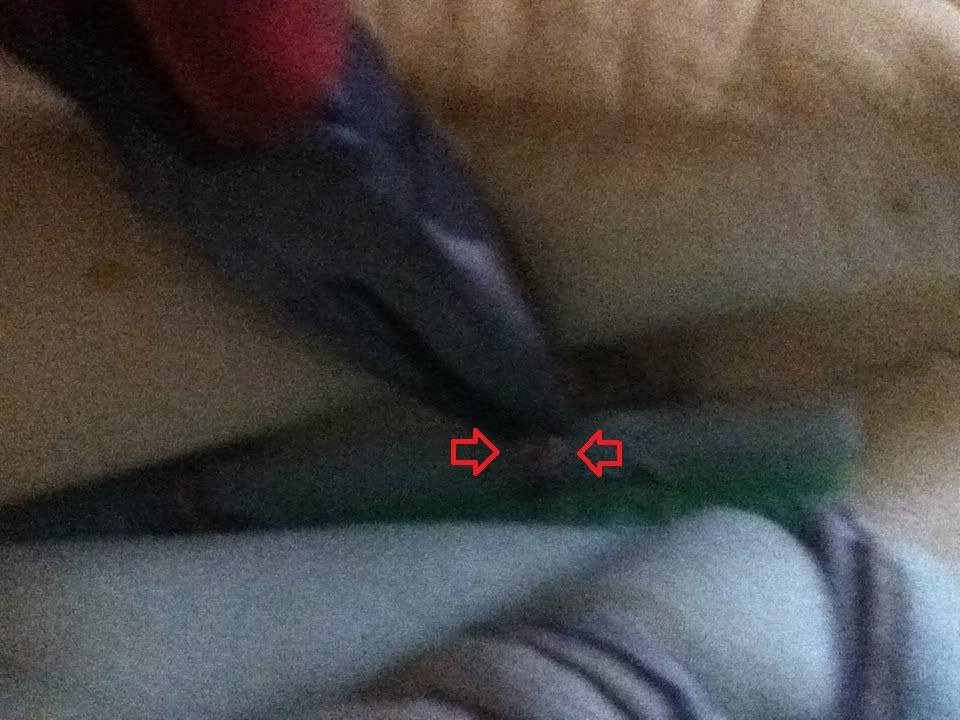
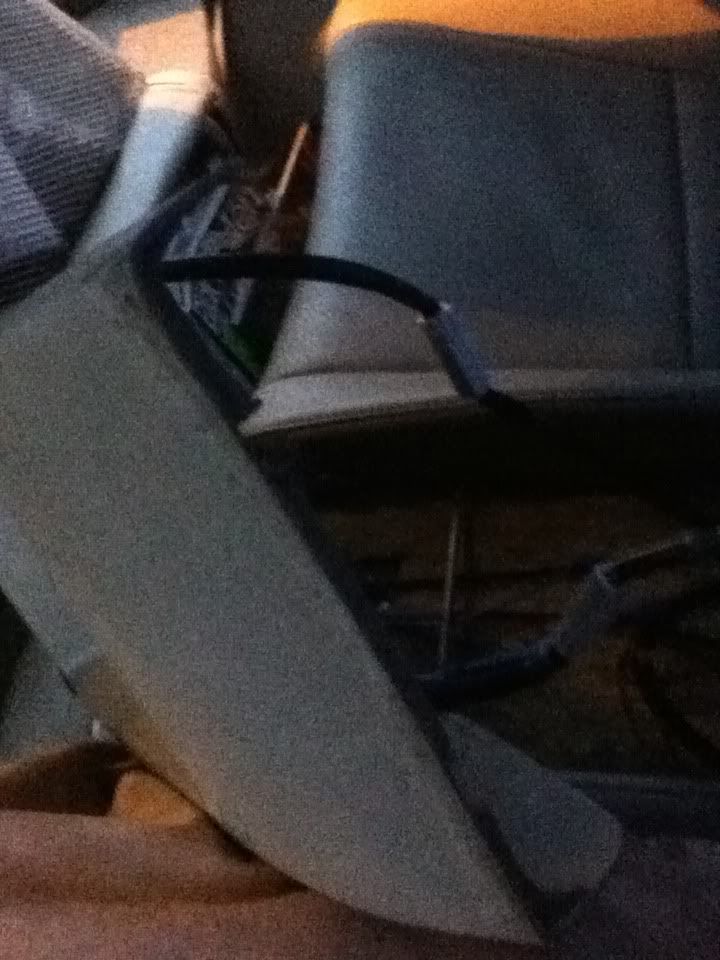
you will need to temporairly remove the trunk pull switch for lowering your backrest, first pull the ball down and towards you as shown below.
then pull it out of its brace and remove it.
tuck it in your trunk for later
now disconnect the bolts.

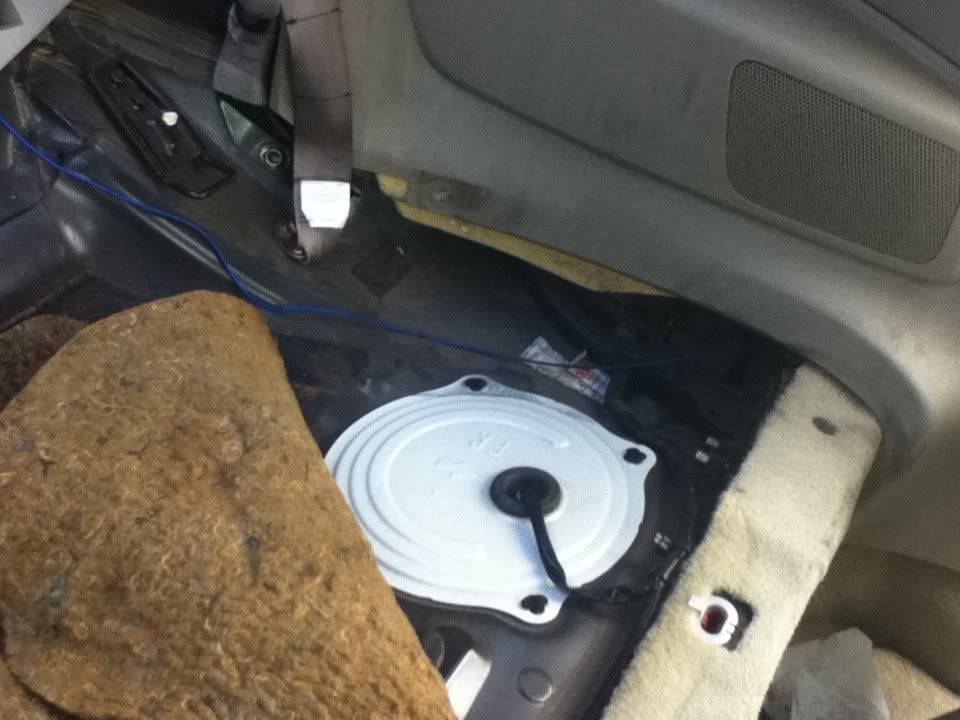
now your seat should be detached from its hinges, pull it out of the car also.
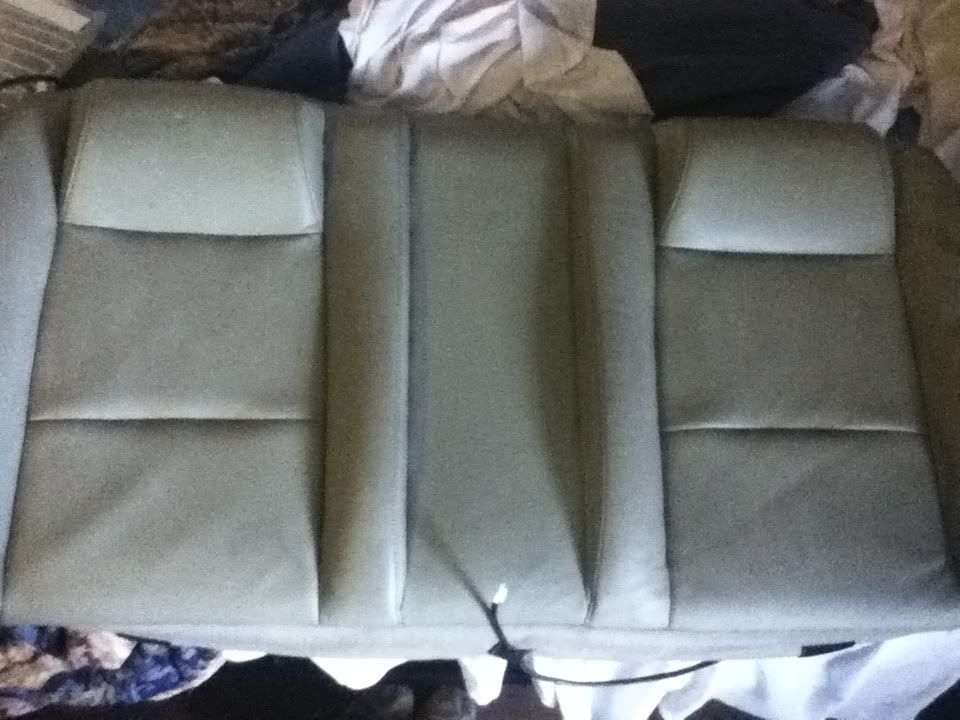
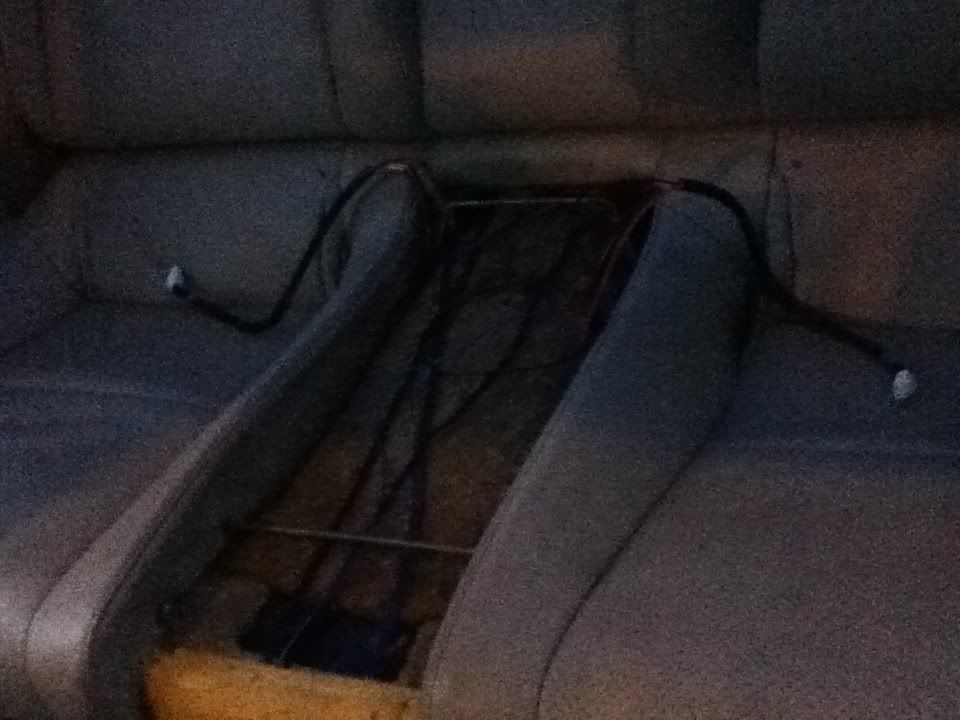
sorry for the mess, i un-zip tied everything when i dismounted my amps and capacitor. but anyways, this is what your rear will look like with your back seat removed.
Looking for those fuel pumps to replace and/or clean for a faulty gas gauge? I suggest u read post 85 on page 6, worked for me :]
https://g35driver.com/forums/g-spot/...irdness-6.html
but i only had my coupe. its a 2003 BTW so idk how the back seats maya change throughout the years.UPDATE: My parents just got an 06 G sedan so if i can talk them into giving me the car for a weekend to do it then I'll update the DIY with instructions for sedan drivers also. but they are pretty hellbent on keeping the thing 100% OEM so idk how far im going to get with this...
NOTE: as said in many other DIY's plz dont claim it as your own, its low but its bound do happen, so im not gunna stress. but after going throught all of this i understand why people put this same "plea" in the beginning. making these things can suck at times, but its well worth it in the end
Just an FYI / Things to consider:
1. MOST IMPORTANLY: your seat heaters instructions know what is good and safe for them! if they tell you to do something different than what i am, obviously go with them. I AM NOT AN ELECTRICIAN and i dont want you to lose a seat heater/backseat/car :P
2. you might wanna test your heater b4 u install it
3. my heaters called for 1/2in of foam inbetween your heater and the upholstry, the g35 has about a 1/2in piece of foam under the leather, so far my heaters have been taking a liking to it and no burnt bum bums or upholstry :P
4. as i was a ways into the project when i decided to do an DIY for it, so i dont have pics for everything :/
5. at the end of this process, you will have extra hog rings, if you are concerned with your seats somehow coming undone(extremely unlikely) or you're one of those people who are 100% OEM then this DIY isnt for you
6. you will be drilling holes into the plastic for the switches, if you dont feel comortable doing this, you must find an alternative. if you cant, then again, this DIY may not be for you.
7. if you find something works better, feel free to post it! i did this just using what i have on hand. i live in the barracks here on base(size of a small studio appt) so i dont have a lot of room to work nor a vast selection of tools at my disposal :]
Things you will need:
(2) Universal Seat Heaters(got mine off ebay from "Comfort Zone" for like $75 a pop for my Z, right b4 i totaled it :| )
Note: i got the sets with 2 heating elements so it warms your back up too, not just your booty
(2) Needle nose pliers
(1) Normal Pliers
(8) tubes of super glue(all depends on how much adhesive you want between the foam and the heater)
(1) pair of wire strippers
(1) wire terminal kit
(1) roll of electrical tape
(1) small cardboard box(12 pack of 7up was MORE than enough for me)
(1) pair of scissors
(16) medium sized zip ties
(1) Phillips Screwdriver
(1) ratchet w/ a 12mm bit
(1) Drill w/ multiple bits(since most likely wont be buying the same kit i did, i cant say how big the hole for your switches will need to be. but it will all be in your instructions)
Optional tools:
(1) set of dikes(wire cutters)
(1) Hog Ring tool(apparently it makes the job a million times easier)
(1) multimeter (i got a $10 mini multimeter from Fry's and i love it)
(1) grocery bag
(2) 12v 30a relays w/ extra wire(if you choose to go that route)
(1) ruler or tape measure
Ok lets get started, first things first a lil prep b4 we rip anything out!
Step 1: Arts and Crafts Time!
First, take that cardboard, zip ties, electrical tape and your heaters.
you are going to need to cut the cardboard into 2 rectangles, approx 1in by 11in. no need to be exact on the 11in side, as it will be trimmed later. fold them in half, so you now have .5in by 11in rectangles. wrap em both up in electrical tape and set them aside.
now cut 8 slits in your seat heaters for the zip ties to go through(as shown below).
make sure your seat heaters are "upside down" for this step. the side with teh metal portion of the heater protruding is the downside.
place a cardboard peice on your heater and zip tie it down(this will provide the heater with extra support so it doesnt move as well as protection from a possible short)
after its attached i trimmed my edges so it was even w/ my seat heater, i also trimmed my zip ties down and made sure my zip tie stubs were on very bottom.
Step 2: Seat Removal
I removed my lower seat first, but either way works
Lower seat removal:
First remove the rear center console by pulling up on the front of it, and then pulling it forward(no this is not my car, decided to make the DIY late into the project)
Now for the seat cushion, pull up HARD on the spots shown below, then slide the whole thing forward. yes, it will feel like there is some resistance, shove your seat belt receivers throught their holes and it will go away. and again, no this is not my car, way to clean :P
Upper Seat removal:
lay down your backrest via the button on top, the red tab on bottom(now more exposed) or the pull switch in the trunk. while your seat is now laying down, pull the cloth forward(mine was velcroed on at teh bottom) until two bolts are exposed on the very ends.
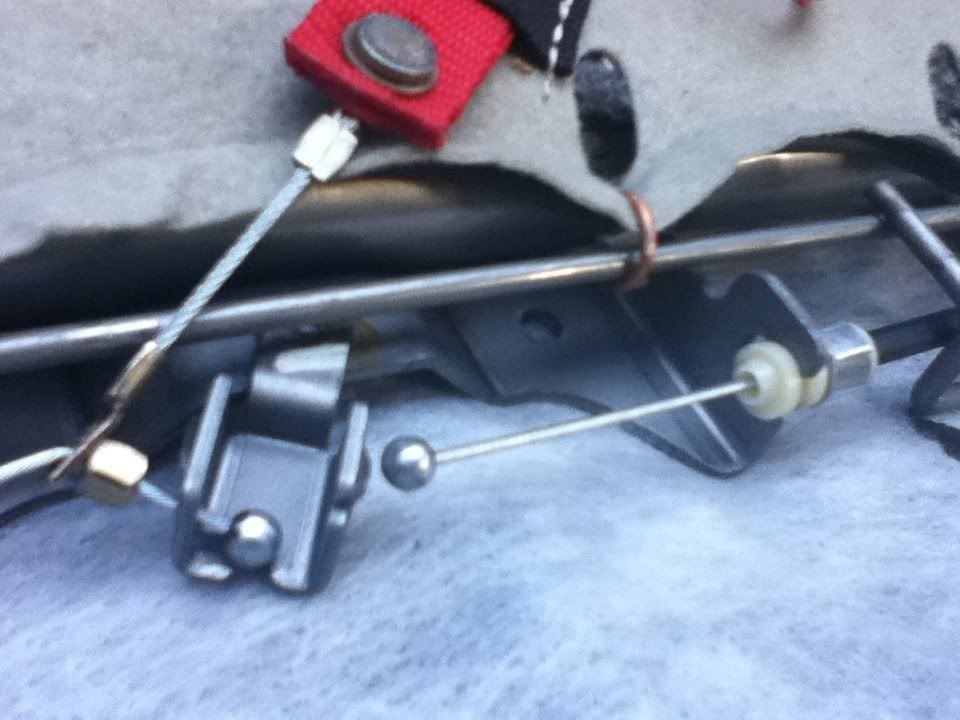
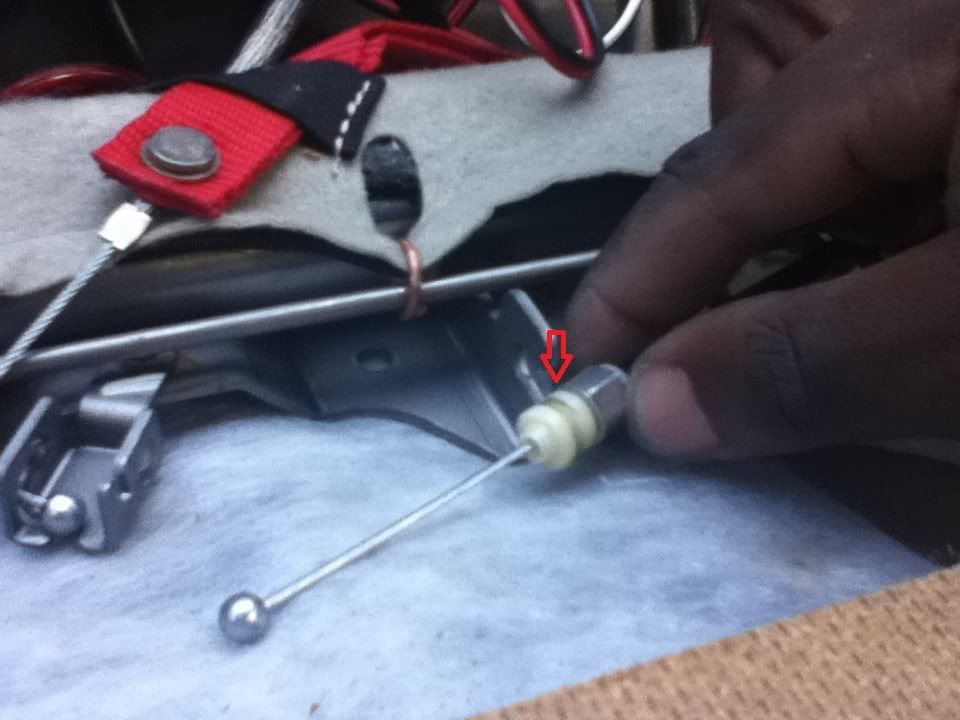
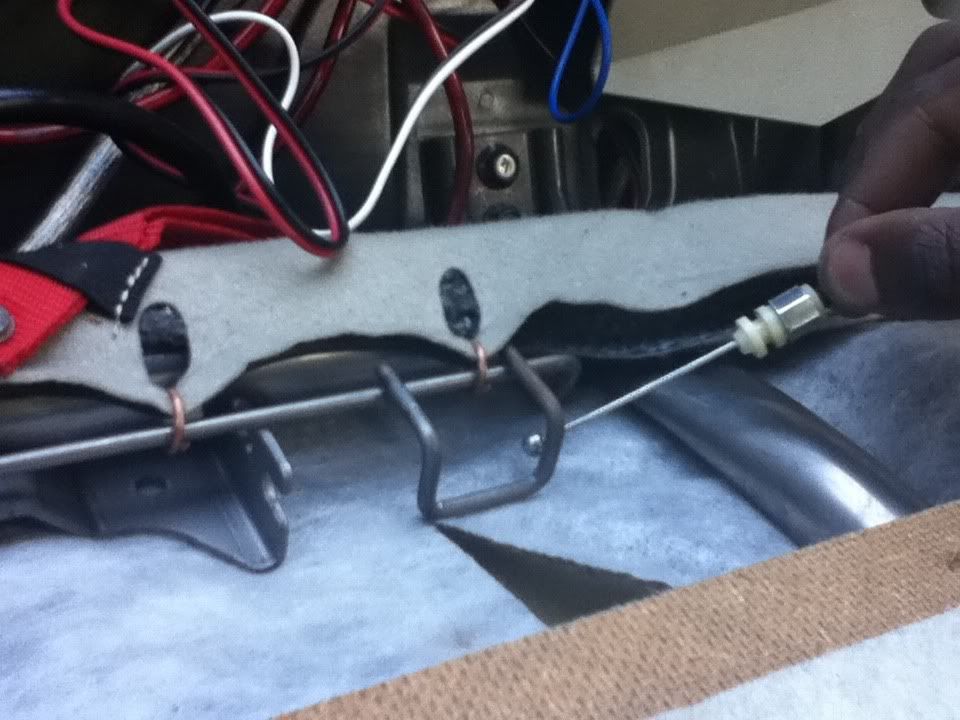
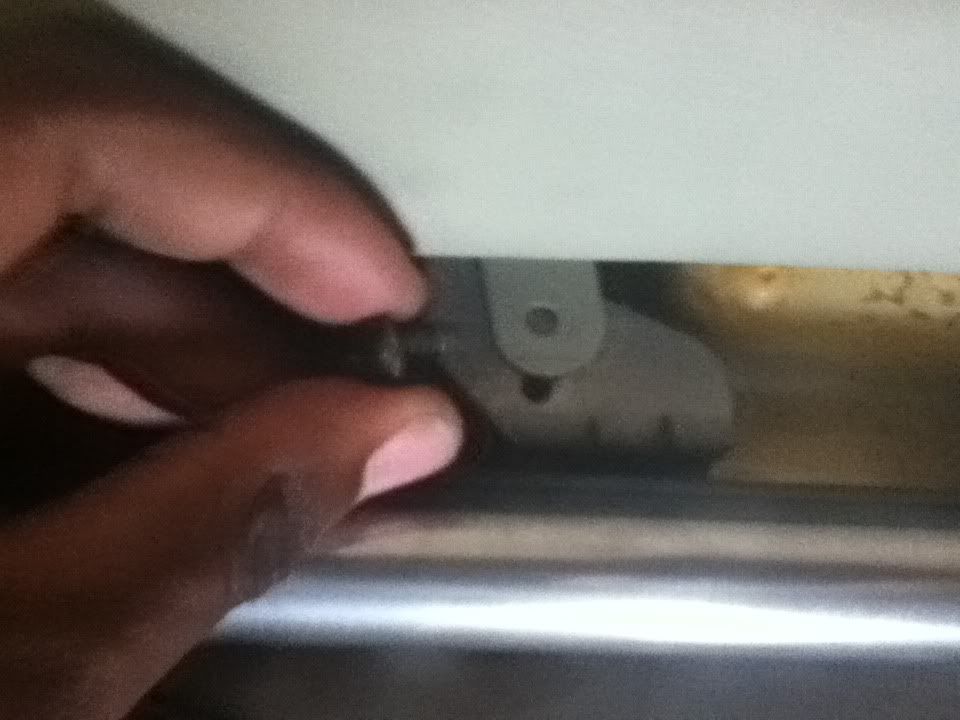
you will need to temporairly remove the trunk pull switch for lowering your backrest, first pull the ball down and towards you as shown below.
then pull it out of its brace and remove it.
tuck it in your trunk for later
now disconnect the bolts.
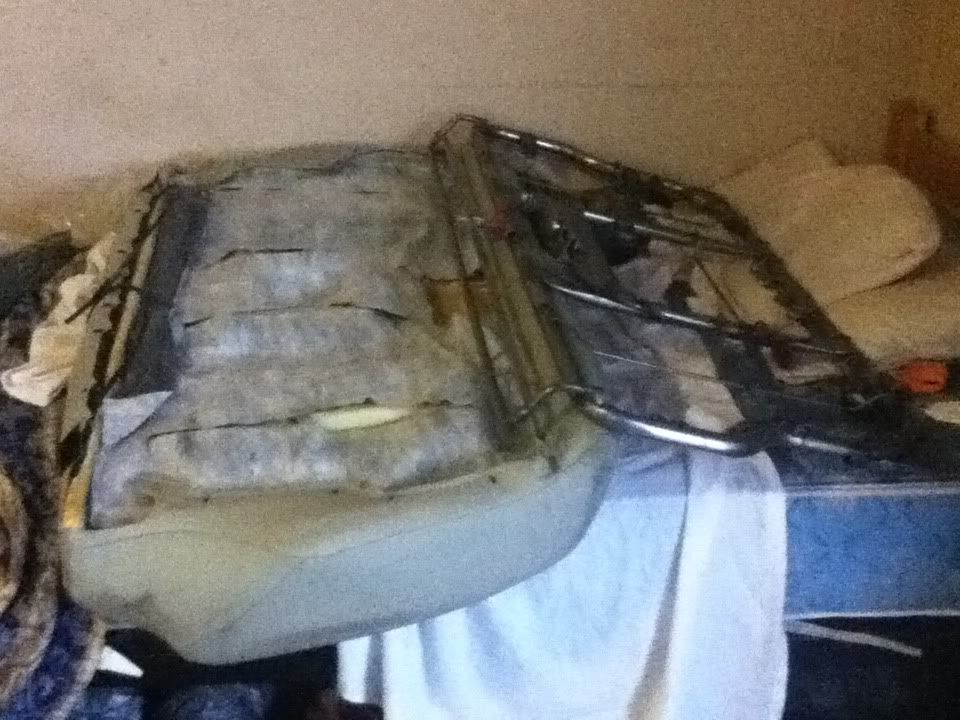
now your seat should be detached from its hinges, pull it out of the car also.
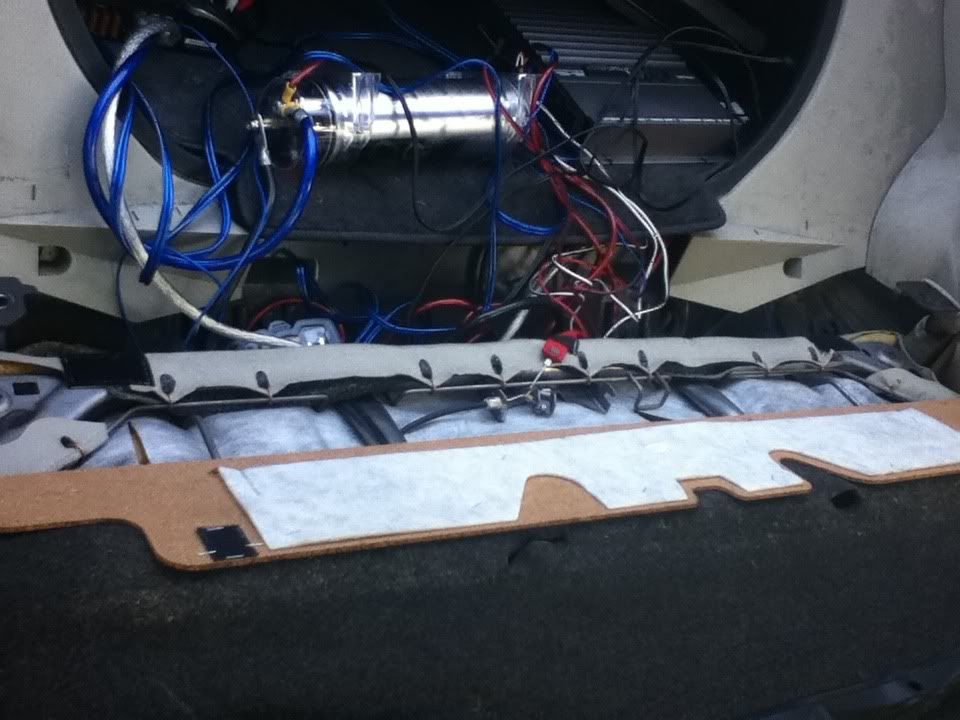
sorry for the mess, i un-zip tied everything when i dismounted my amps and capacitor. but anyways, this is what your rear will look like with your back seat removed.
Looking for those fuel pumps to replace and/or clean for a faulty gas gauge? I suggest u read post 85 on page 6, worked for me :]
https://g35driver.com/forums/g-spot/...irdness-6.html
Last edited by Trickstyle; 12-27-2011 at 07:37 PM. Reason: spelling
#2
07-02-2011, 11:09 PM
Step 3: Heater Instalation
I installed these into my lower seat first, but i didnt start taking pics till i was on my backrest so ill start on that one.
The Backrest:
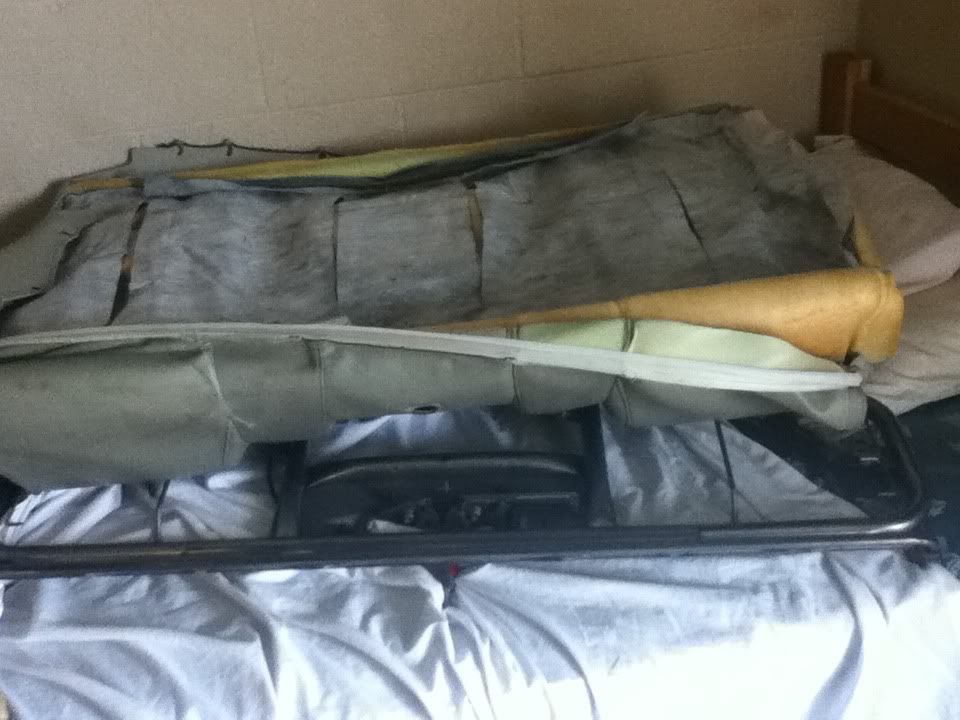
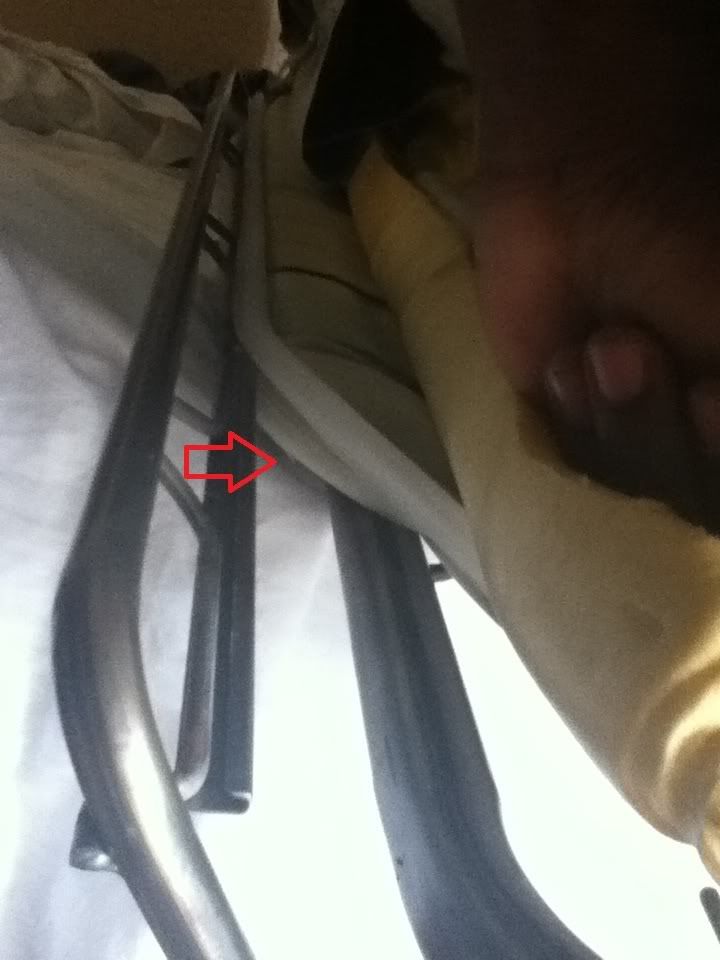
pull up on the cloth in back until not only the screw holes are exposed again but also a section of your particle board should flip over(it wont break, a part of it is sectioned). once you have that up pull forward on each of the spots shown below, and then again in the middle once you have the corners off, then set it aside
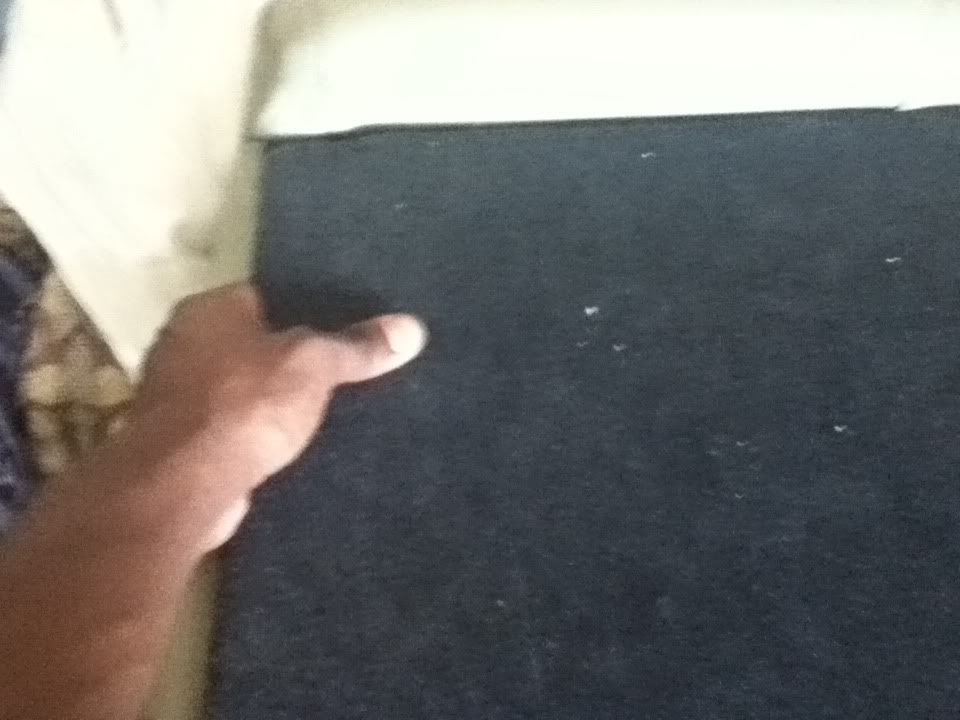


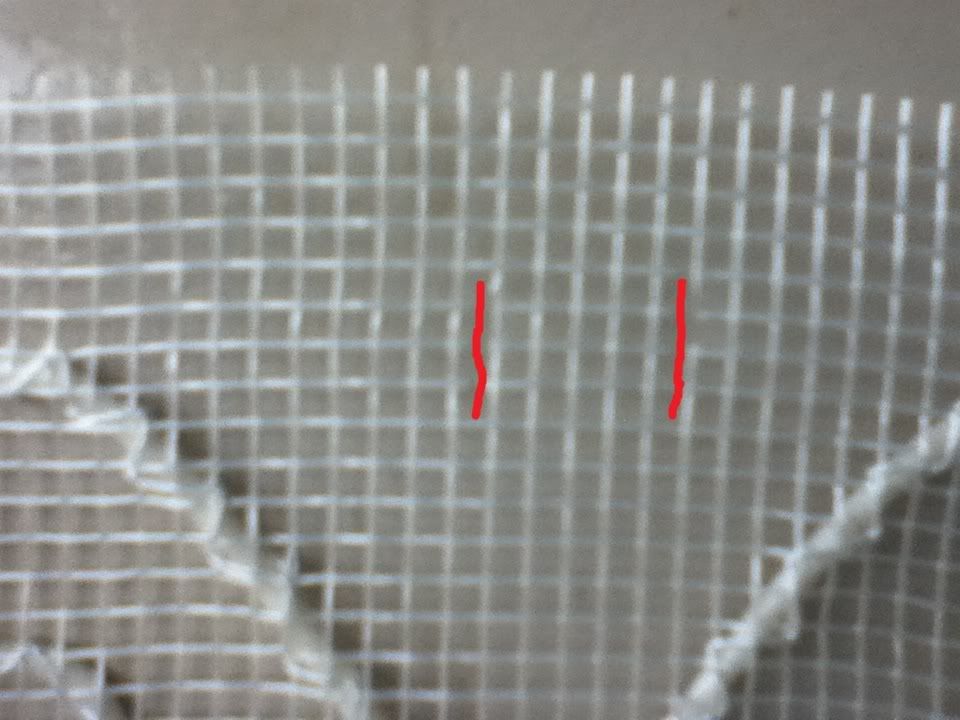
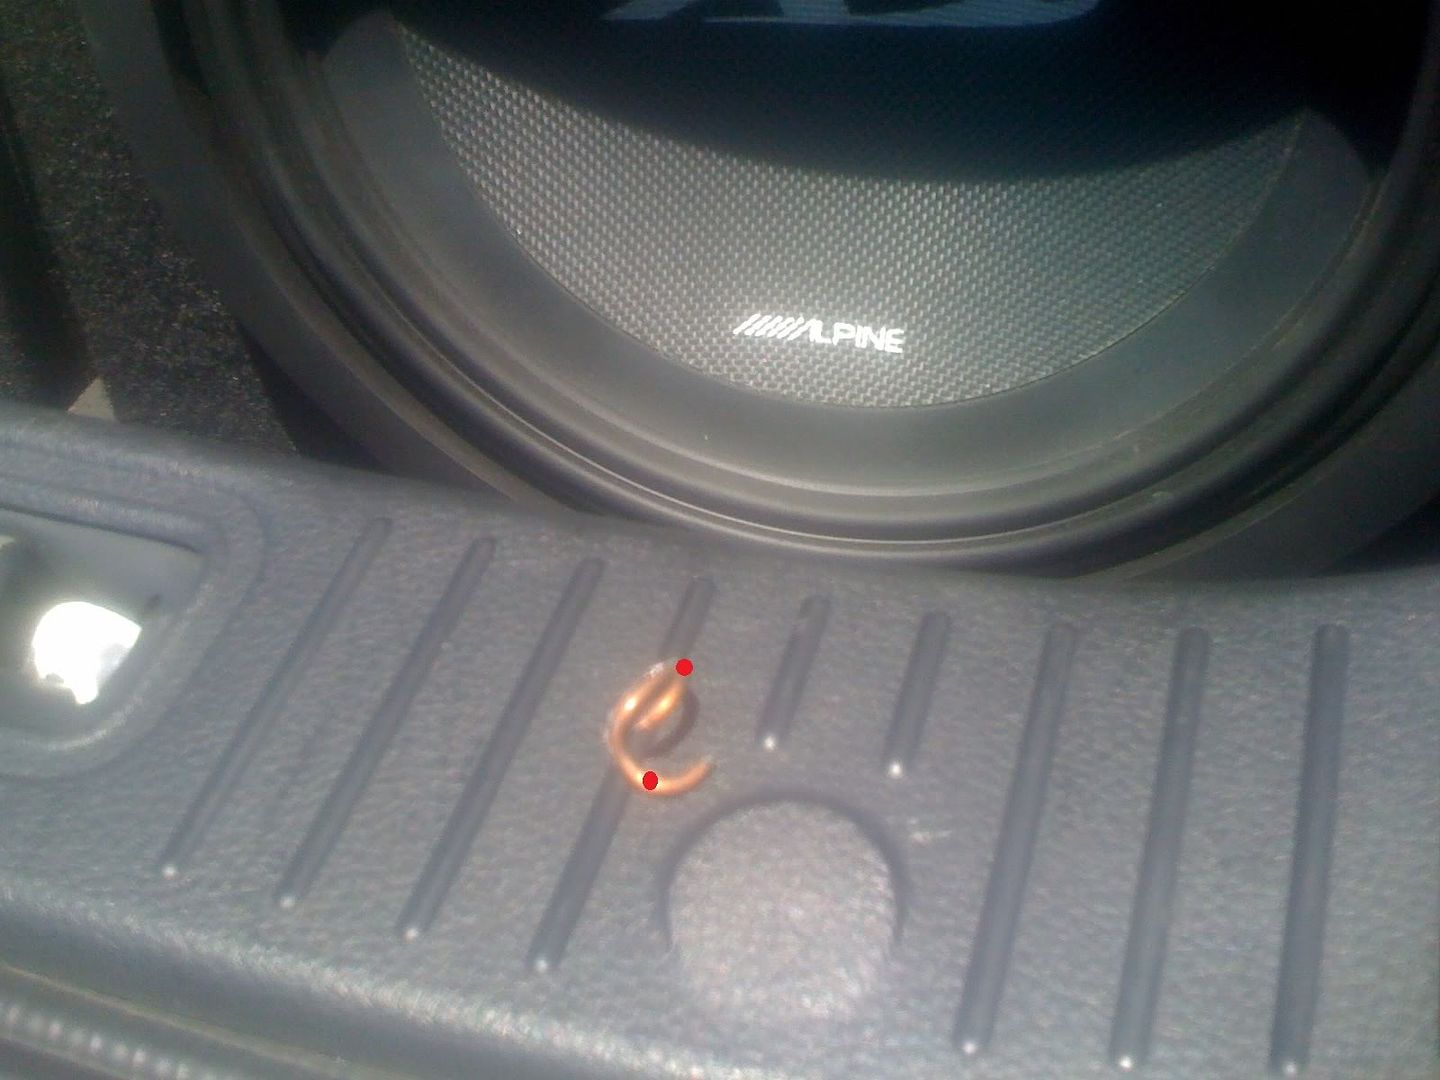
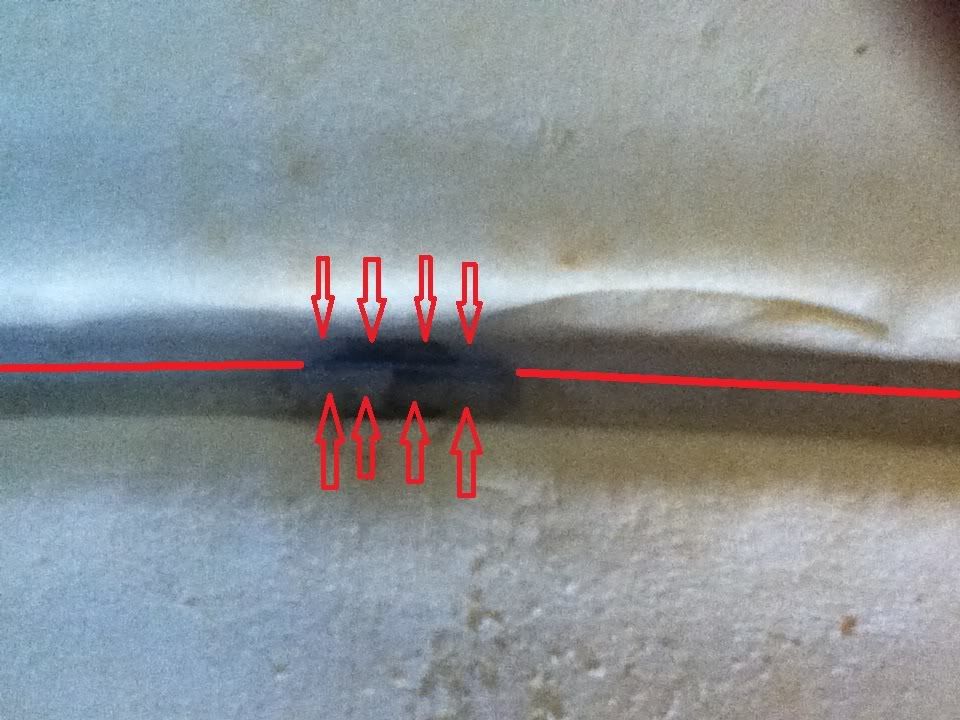
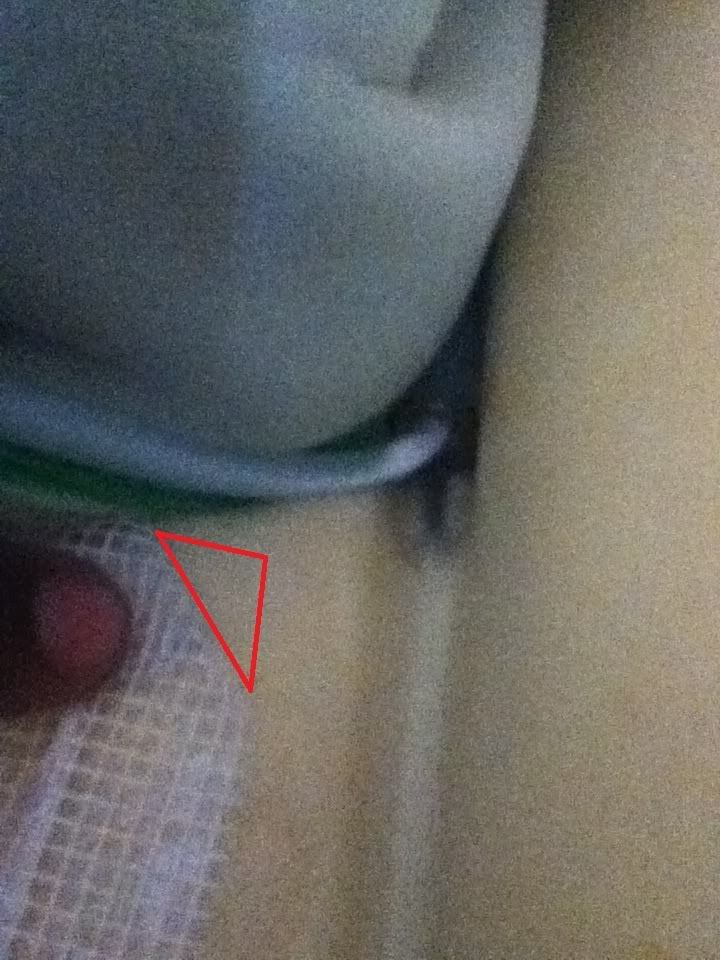
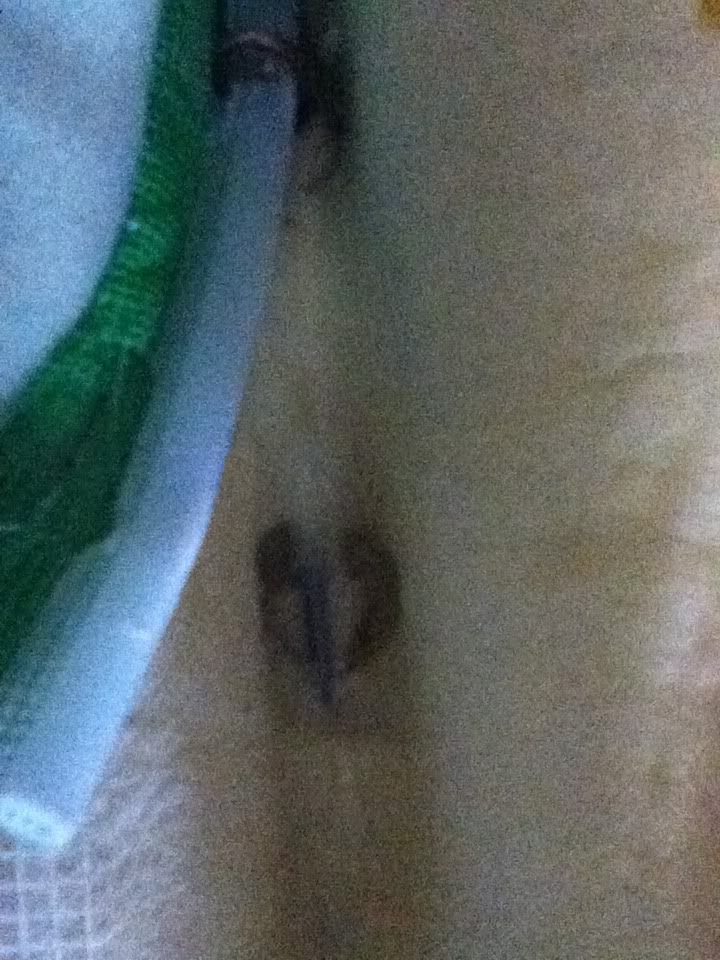
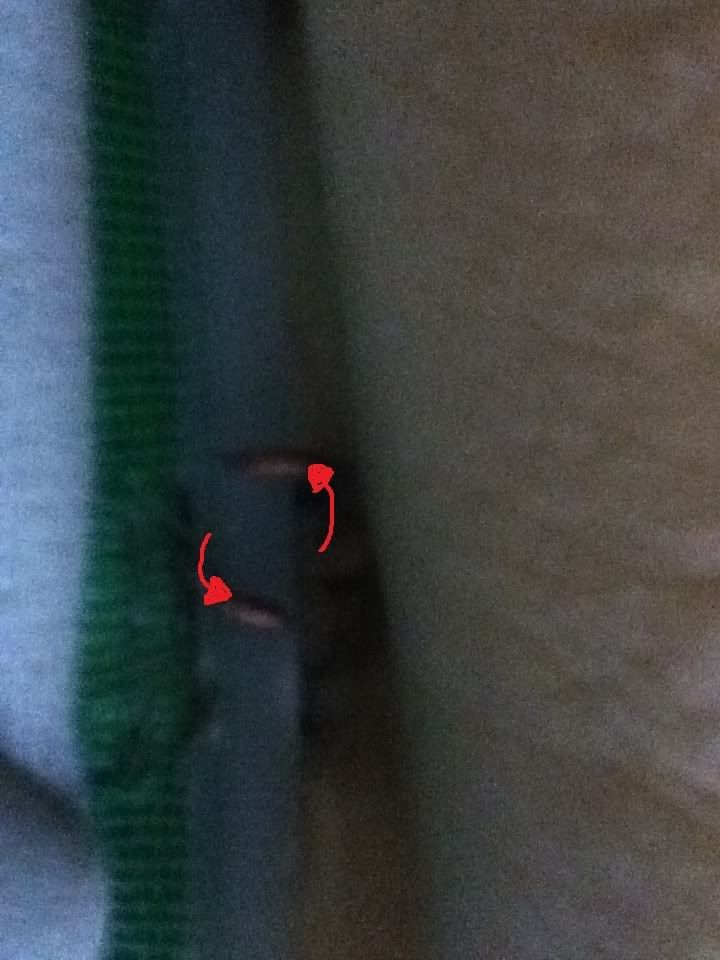
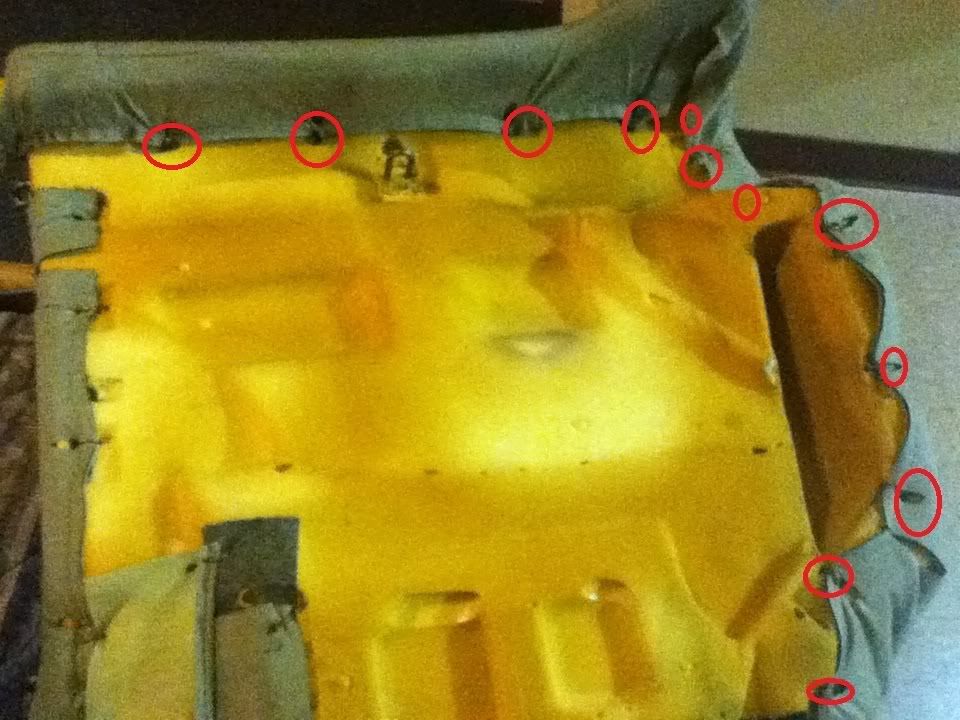
now all of the hog rings are exposed, you have to remove ALL of them. this is an excellent palce to start learning how to remove them because its soooo much easier back here. what i did was took my needle nose pliers and pulled them apart. i did not grab them where the two parts were touching, but right after that.(where the red dots are) i used one set of pliers on each side and pulled. its a PITA and unfortunately hog rings are a LARGE part of this job :/
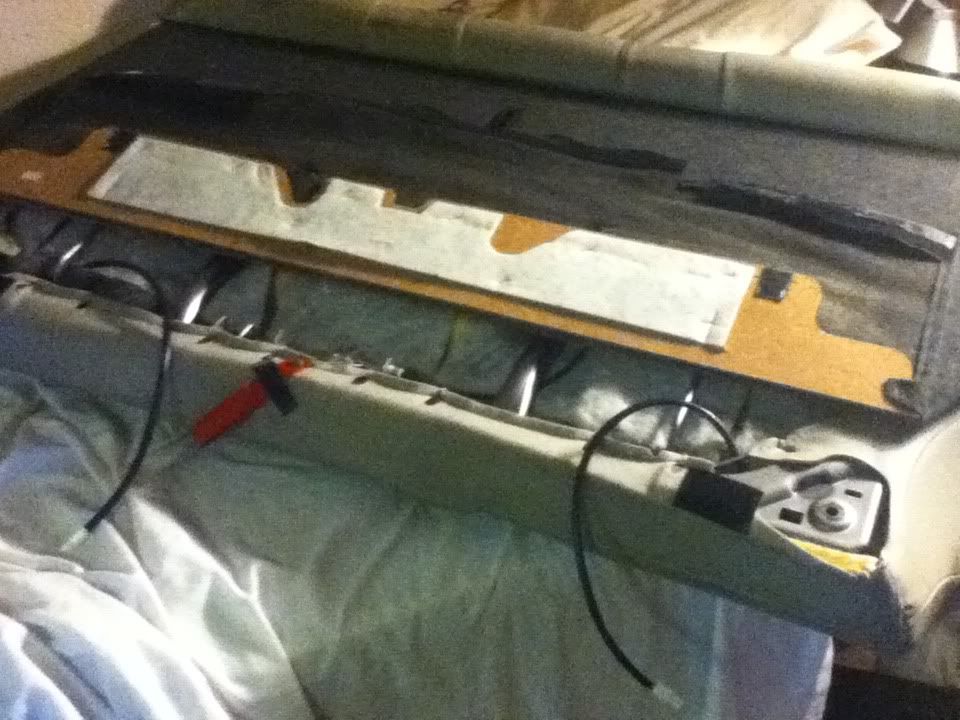
Unscrew the screw at top that is going into the foamy side, then pull the plastic peice from the top of your seat(your seat release button)
even though all hog rings are removed, it will still be attached at the top, lay it down as shown below
then move the cushion up @ a 90 degree angle, you should see the plastic piece connecting it to the frame.
fold it down once more and pull back on the plastic and it should peel off. then set the frame aside.
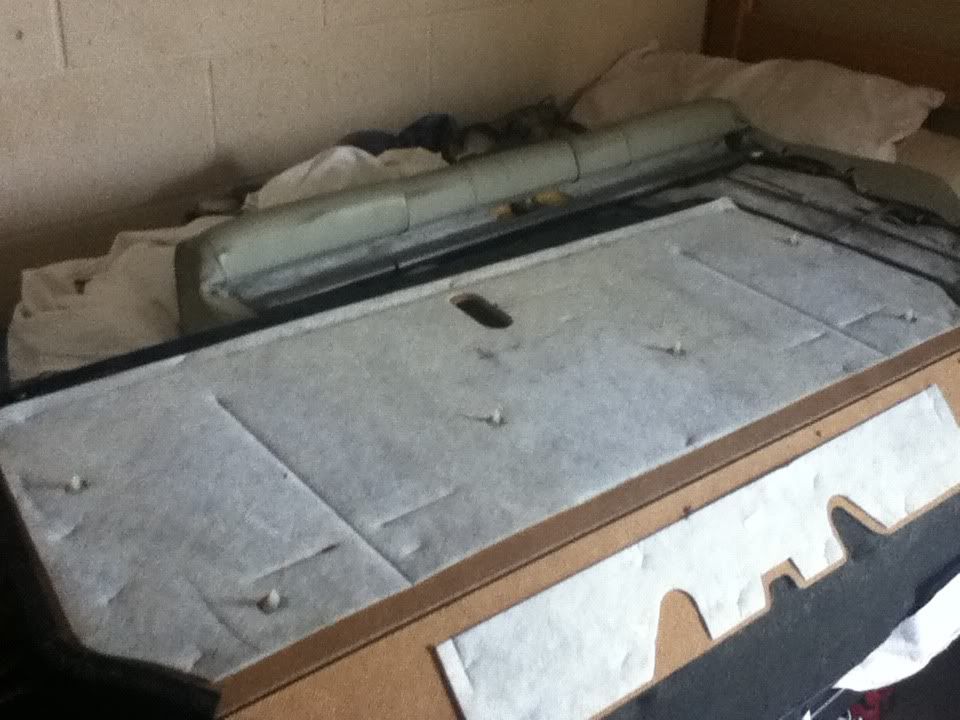
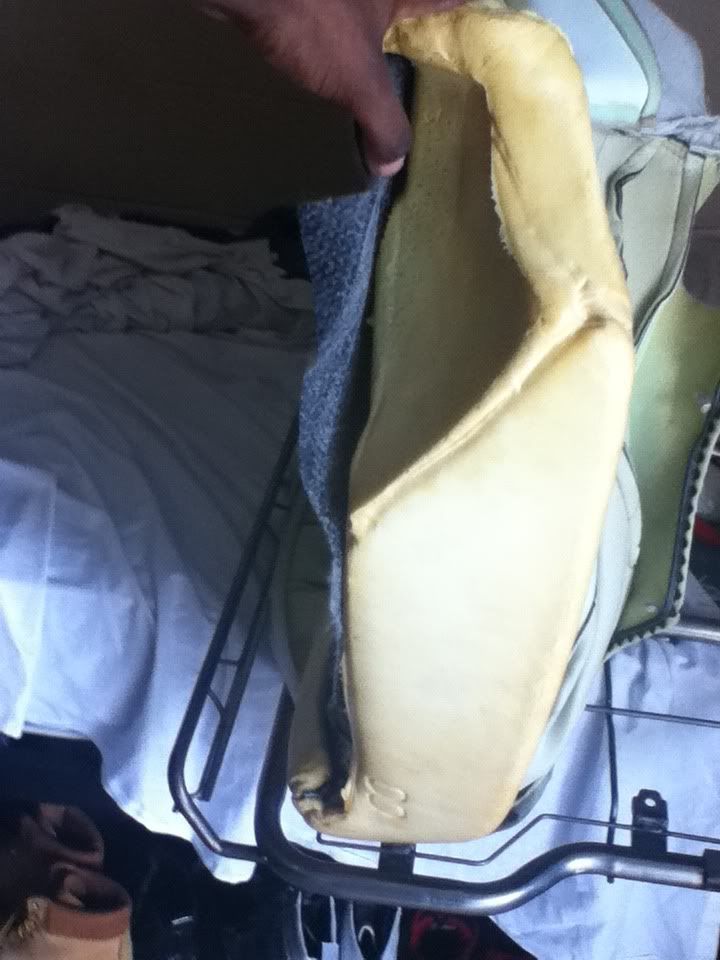
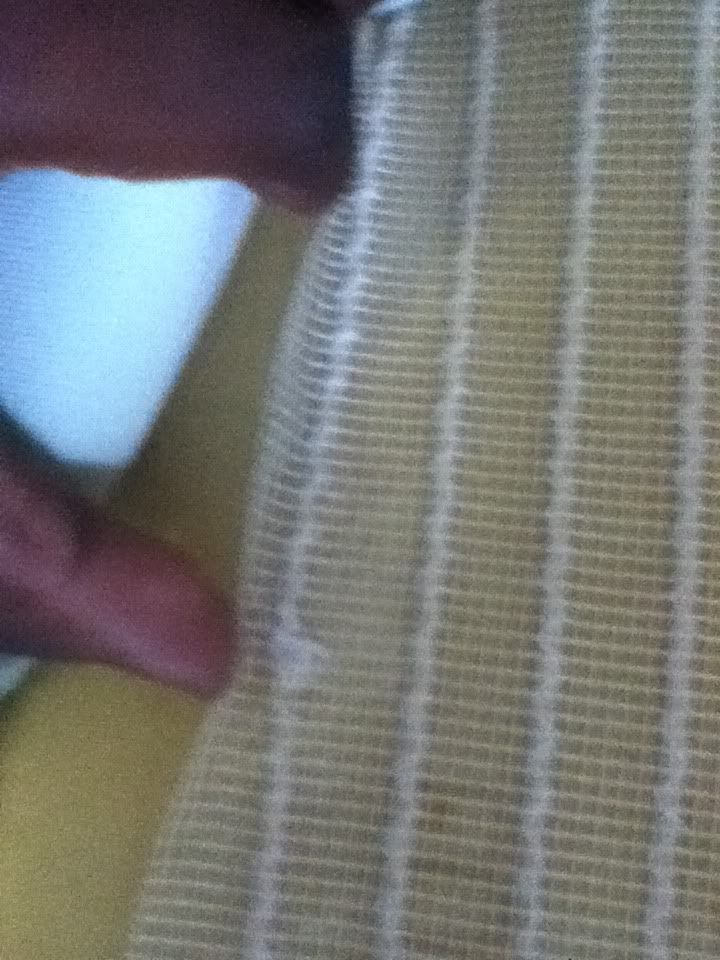
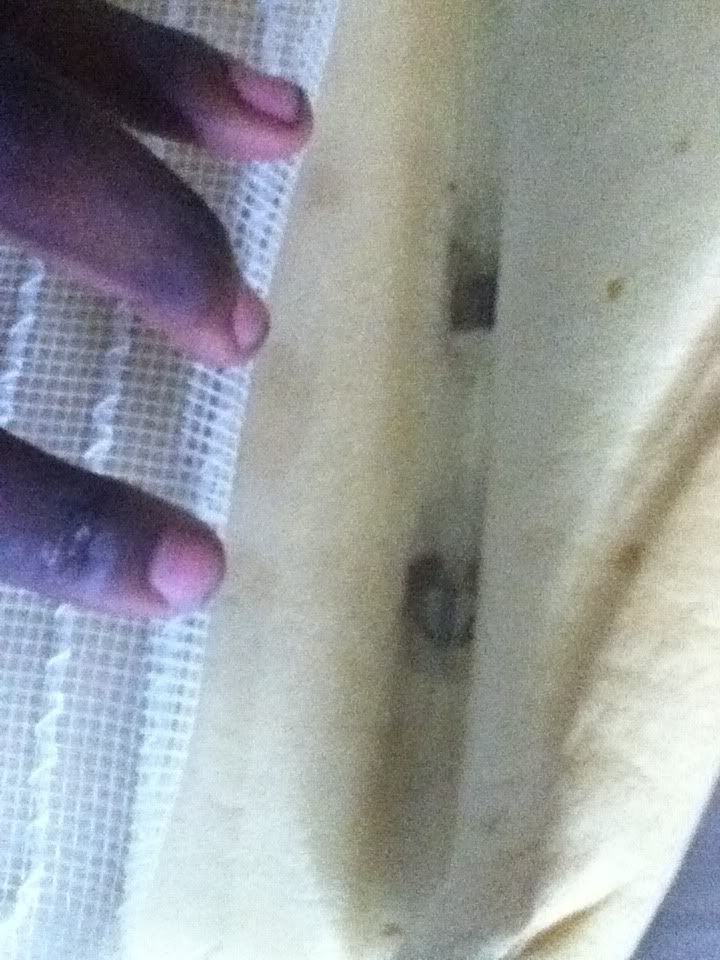
next, peel your upholstry up from the bottom corner(i started from teh right side) until you get some resistance, you will see green mesh looking things connected to white plastic. those connect the upholstry to the small metal beams in your seat cushion... by hog rings
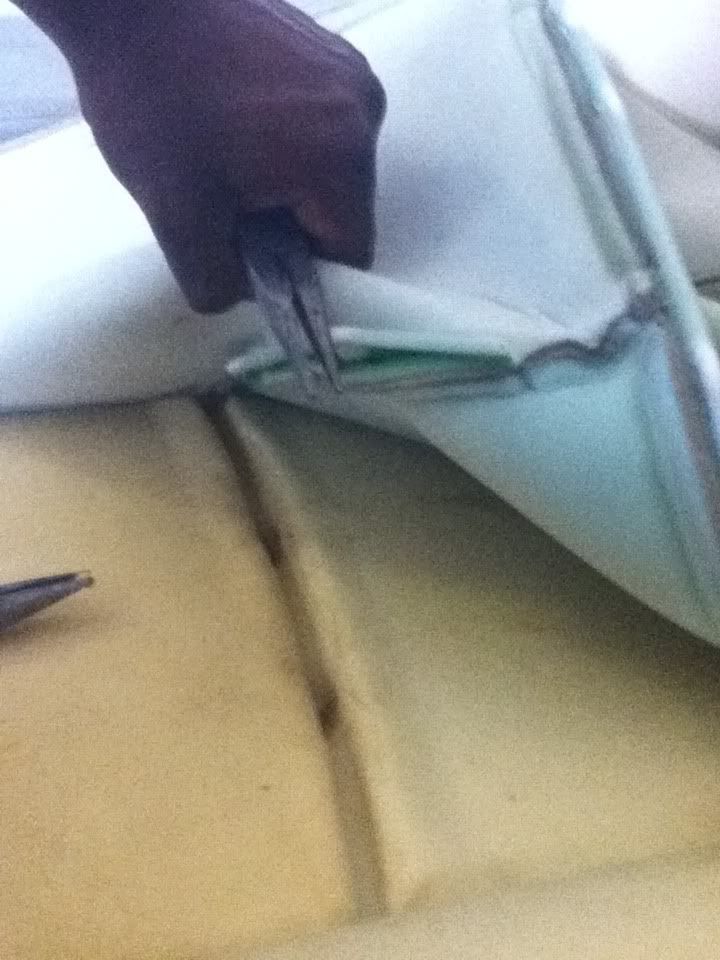
so remove outer hog rings as shown below(yes they are frustrating but take your time and concentrate, proper lighting helps too)
then you will see more in the center, take em out
and feel free to take out the rest on the left side, i just hate hog rings so i wasnt even going to mess with that side.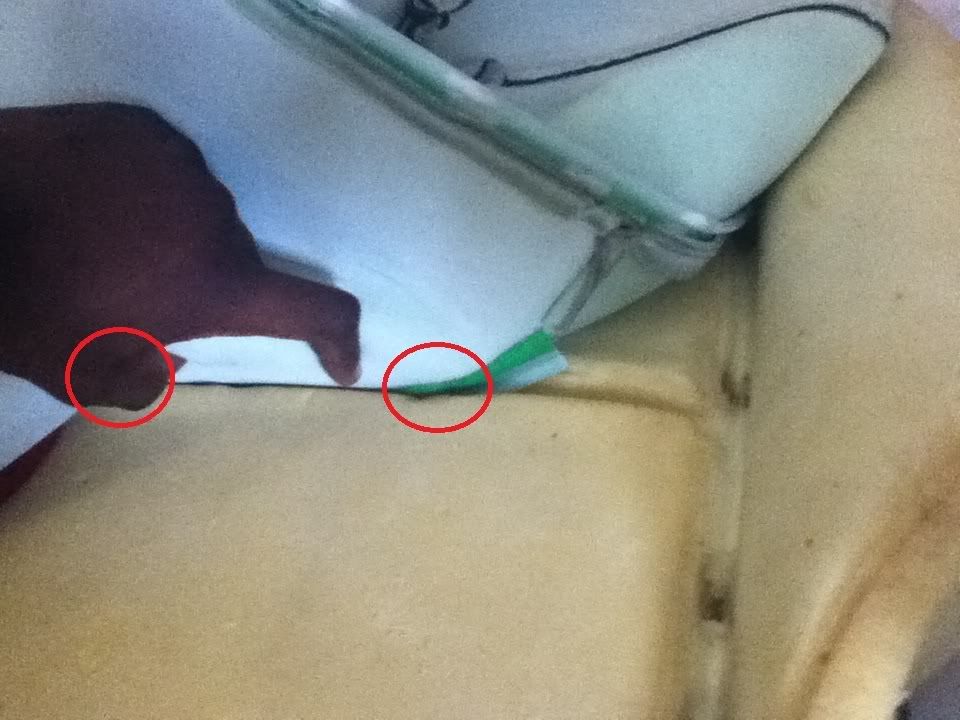
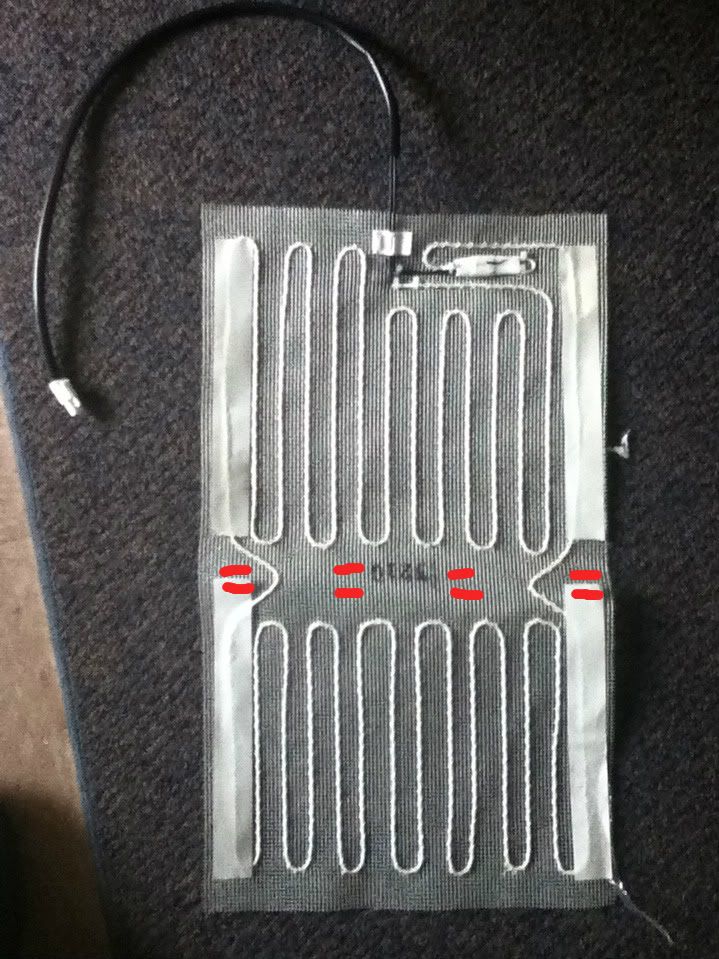
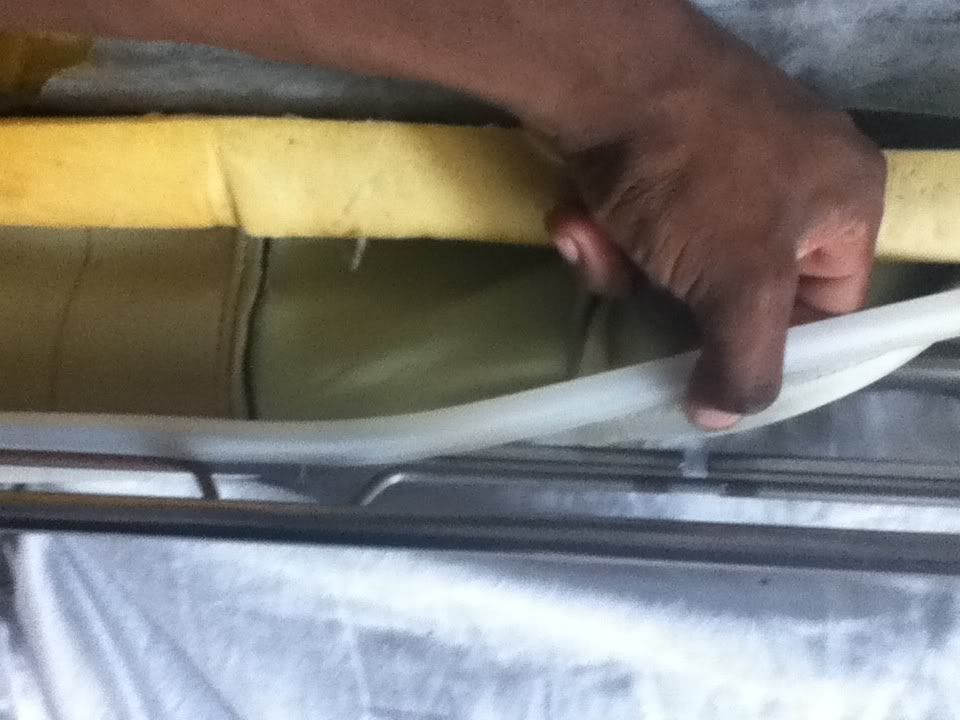
now go back n grab one of your seat heaters, and pull the paper off the adhesive(if it comes w/ some) also make sure the cord is facing downward. when you insert your seat heater make sure it is face down on the cushion(black cardboard peices should be on your downside if you did it right) and stick the black part into the little crevice where you just removed the last set of hog rings, this black piece will help insure the metals wont touch, possibly causing a short. as well as provide extra stability
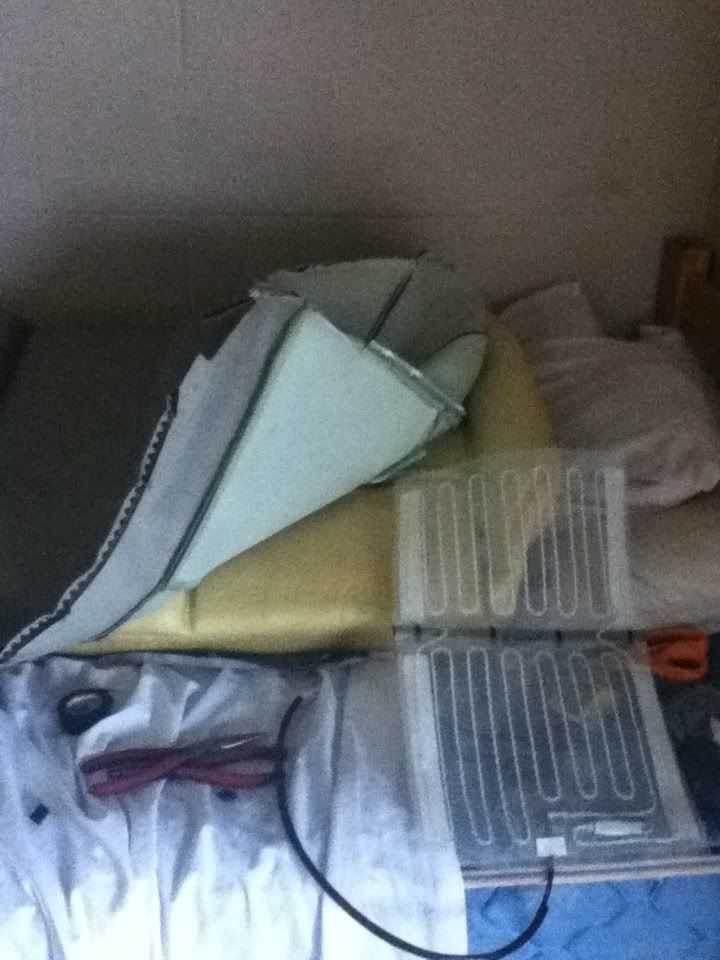

now its in, i used super glue with the adhesives. first i glued the corner, and then the lower left and right sides(you can get teh upper left if you remove more hog rings). after you lift the edges to apply the glue, put the edges back down with a plastic bag on your hand. firmly and rapidly move your hand back and forth on the edge and make sure the heater stays down while the glue is drying.
**WARNING: as it states on the super glue bottle, as the glue comes in contact with cloth or fabric(or foam in our case) it will heat up!! be careful so your dont burn yourself, and also i would advise you to make sure the glue is cooled down and fully dryed so you dont accidently adhere the foam or seat heater to the upholstry.

now its time to close it up! obviously you wont be "hogging"(for lack of better words) down the middle, and no, you wont feel a bump on ur butt or back from the plastic portion that is there.
In order to reapply the hog rings you must stick the hog ring through the metal beam with the opening facing up
then bring the white plastic portion down to it and rotate the hog ring 90 degrees so it connects the two parts together.
then take a normal pliers or the needle nose and clamp it together
but hog down the rest of the right side and you are done with 1/4 of the heating element install!!!
the left side will be the exact same, but mirrored obviously.

when both sides are done lay the frame back on the seat and re-attach the plastic piece from the upholstry to the frame. and the screw with its plastic peice for the seat release button

fold it back to its regular state and reconnect all of the hog rings. When that is done, replace the particle board cover and your backrest is finished!
The Lower Seat:
the lower seat is much easier than the backrest.
First, flip over your seat and get to work at those hog rings
peel up the upholstry and remove the outer set of hog rings as you have done with the backrest, then remove the middle set of hog rings as you have done with the backrest.
>>>Sorry no pics, but it looks almost the exact same as the backrest, i have faith you can figure this out
while you are installing the seat heater make sure you have it facing the rear and again, ensure that your electrical taped carboard addition is INSIDE the crevice. once its where you want it, run the wire through the back(you will see a hole leading to the back)
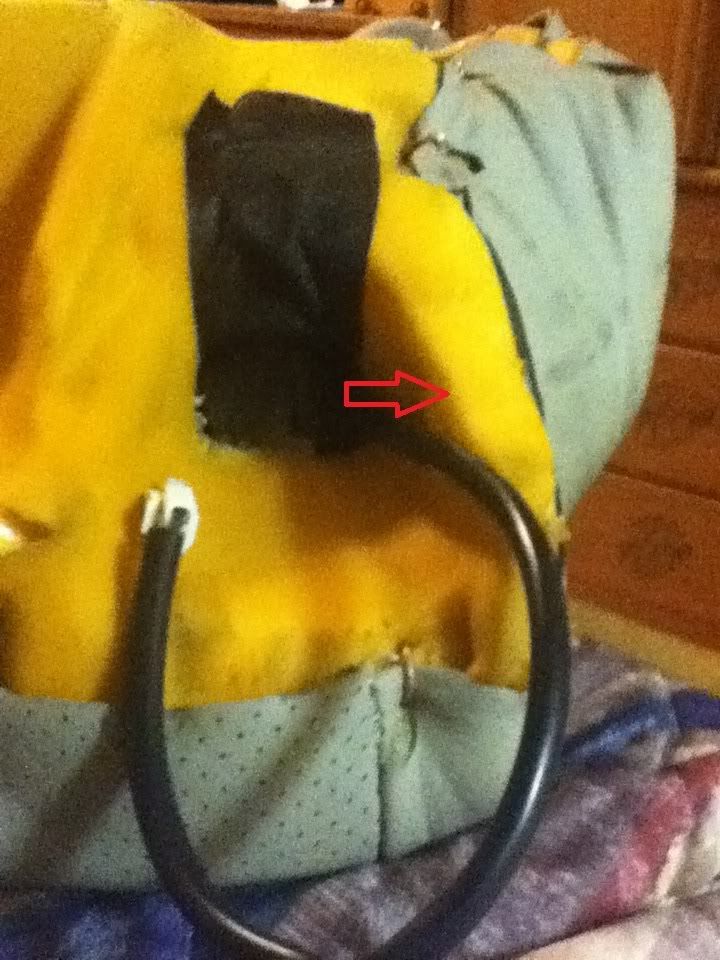
again, do the same for the other side, remember to snake the cord out of the hole in the rear.

now that both heating elements are properly installed, replace the hog rings to their original places.
Last edited by Trickstyle; 02-10-2012 at 10:46 AM.
#3
07-02-2011, 11:10 PM
Step 4: Give it Power!!!
Be aware that your kit may be different and tell you to do things differently, if so, i advise you follow their instructions. unless you feel comfortable with your own work!
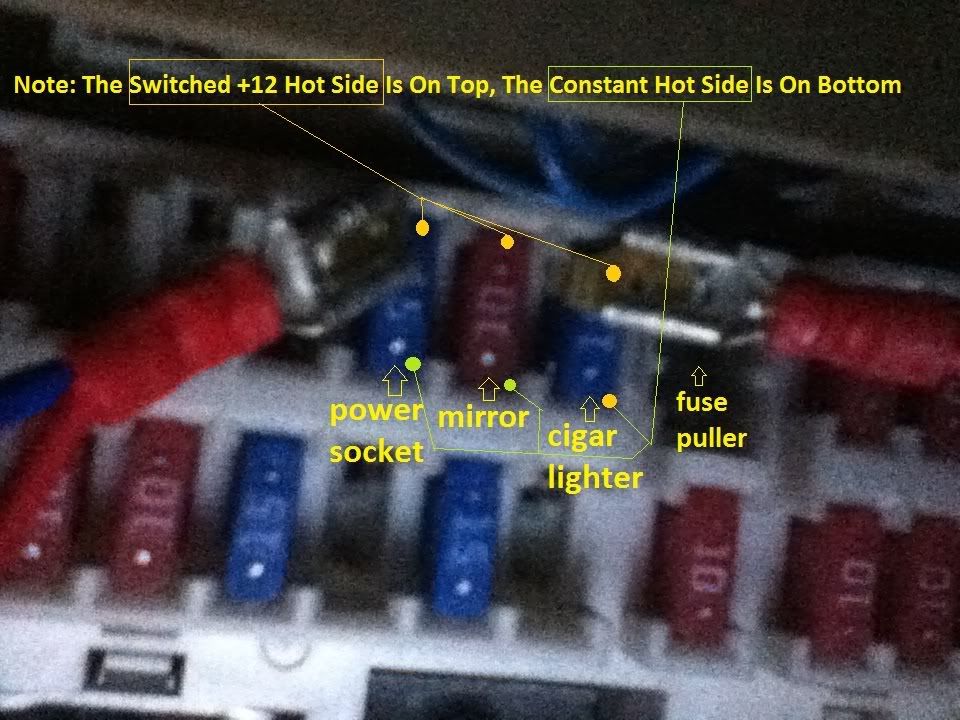
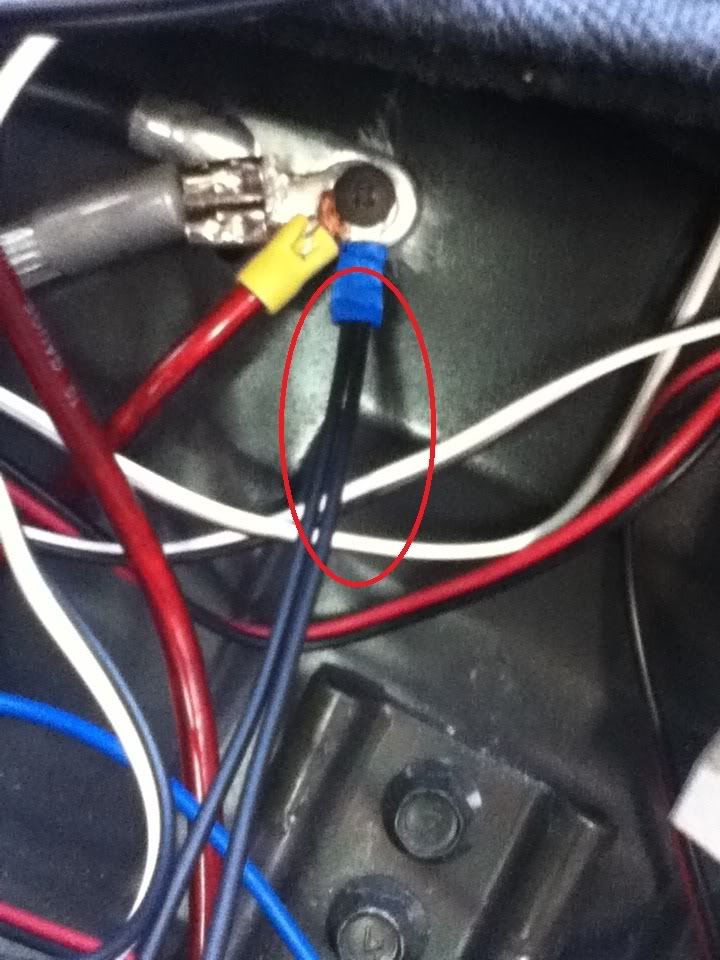
My kit asked me to find a 12v source that was switched on with my ignition(so if a passenger leaves the switch on, it doesnt kill your battery overnight) that is on a 20amp fuse. so i used the fuse taps they gave me and tapped power off the switched hot side of my power socket and cig lighter fuses. YES, those are 15a fuses but considering i only pull a maximum of 1.5a from either one(iPod charger on one side and a iPhone charger on the other) i have plenty of play w/ my 15a fuse. but of course, do so at your own risk. PLEASE BE CAREFUL THOUGH!!! they are 15a fuses for the cig lighter function, creating heat demands a lot of power(seat heaters, cig lighters and space heaters draw A LOT of amps) yes, your cig lighter will heat it up but it may not pop it out when its hot, which can be an issue. i dont smoke so im not worried about it. if you do not like the idea of this there is still hope for you
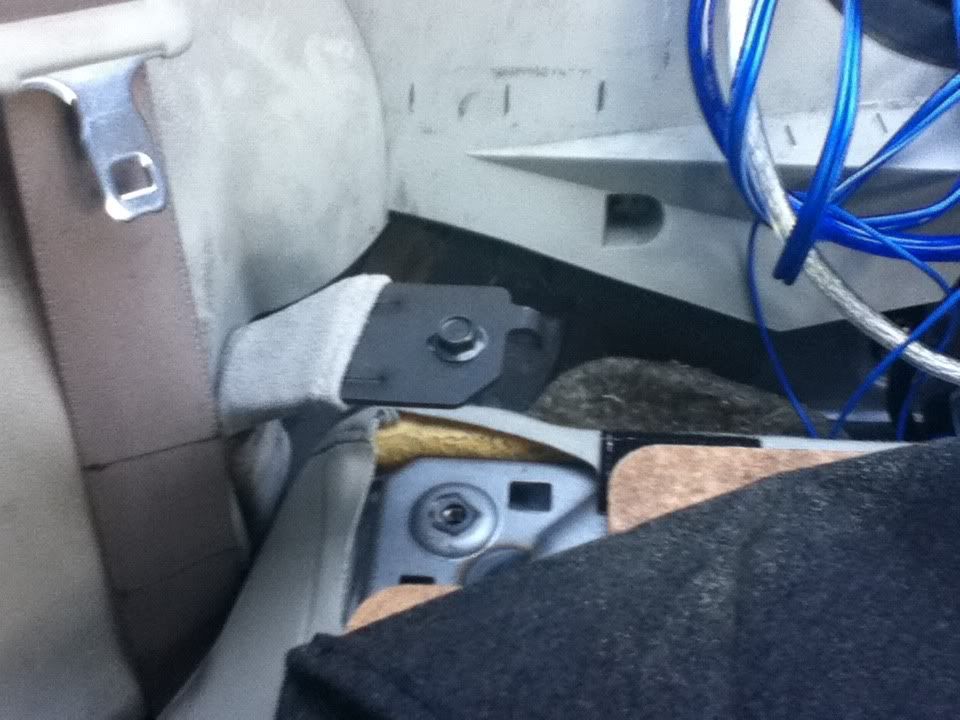
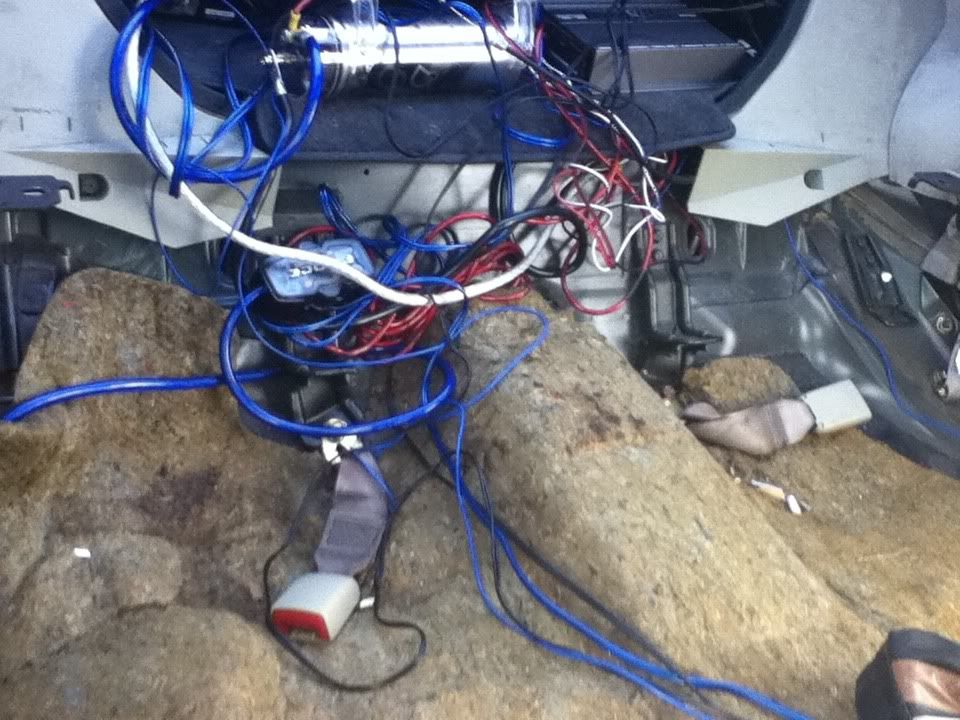
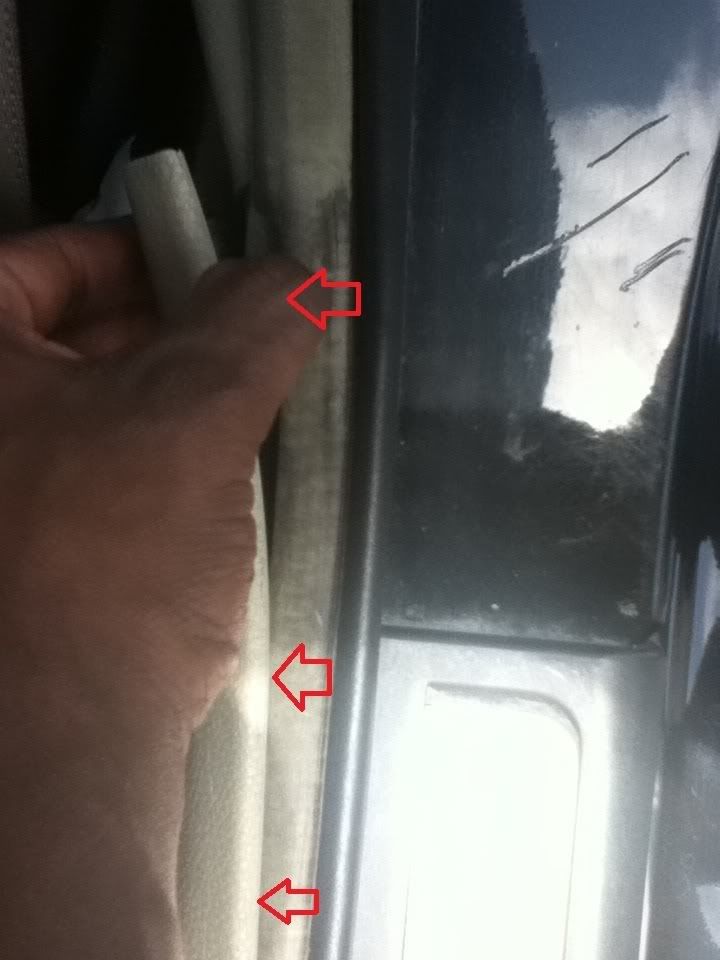
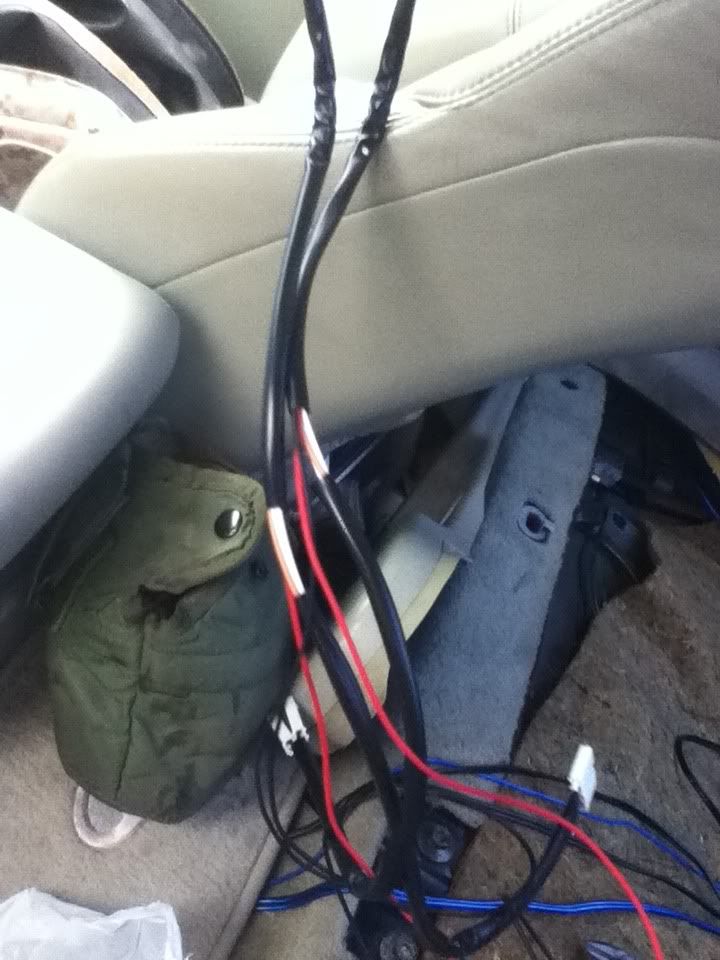
you can tap off the switched hot side of the fuse and instead of running that line to be your power, run it to power a relay, then run the relay from a 12v constant. I have a power distribution block going to my amps so i may just tap off of there. make sure u still throw a 20a fuse(or w/e ur kit calls for) in the 12v constant line though if you go that way. in order to run it to theback, i needed to pull up on the molding down by my "infiniti" door sills(still saving for the skyline ones) and once that is off run the line back from the fuse to the back seat, you can also hide it under the side molding directly behind the door jamb.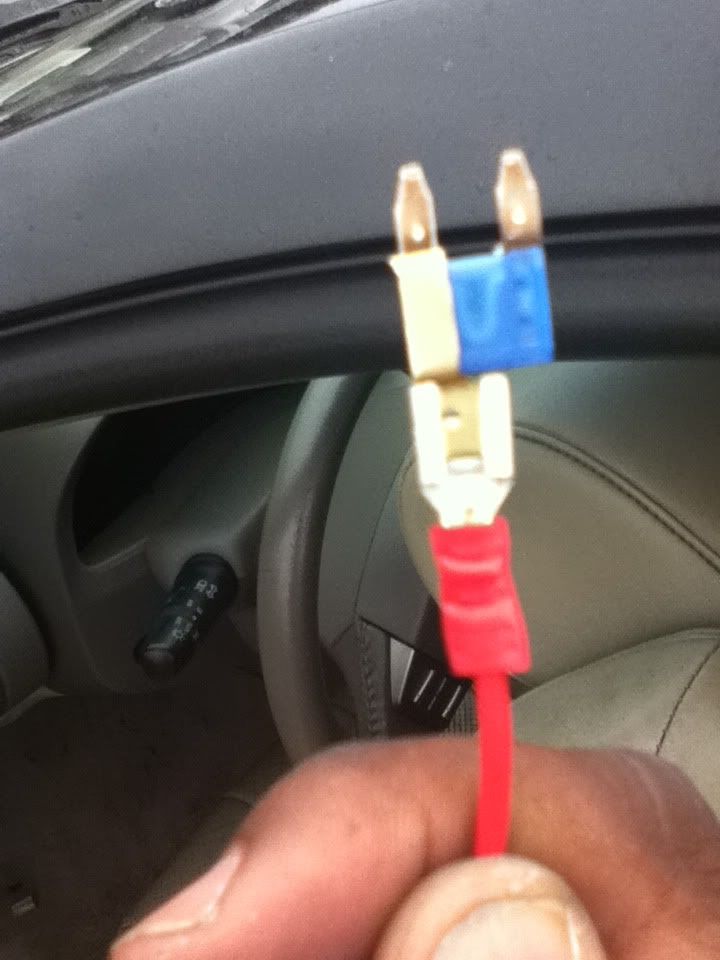
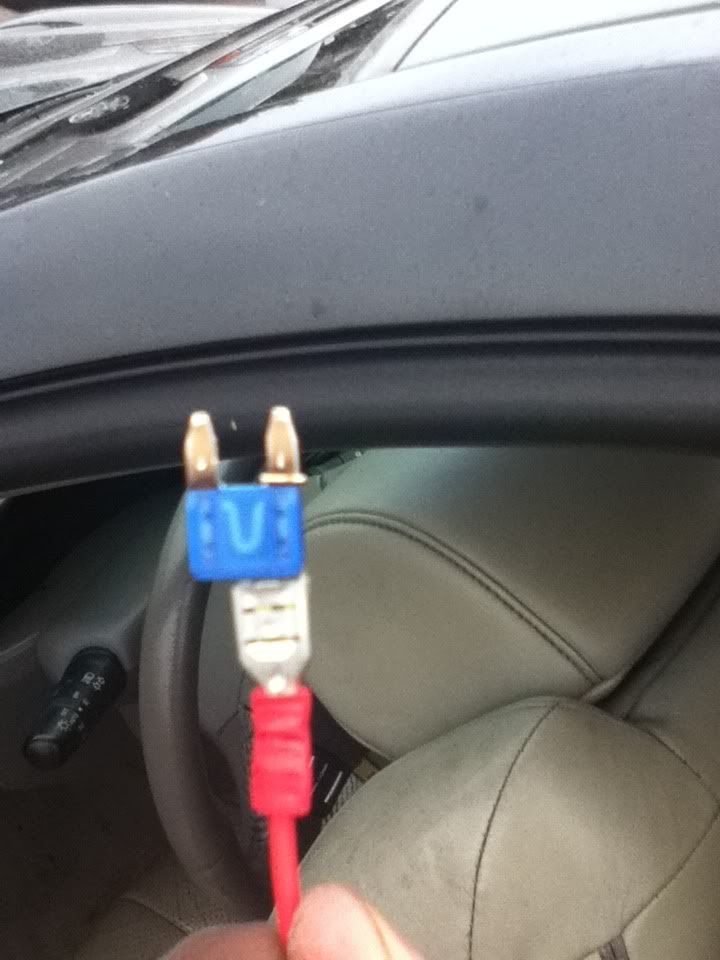
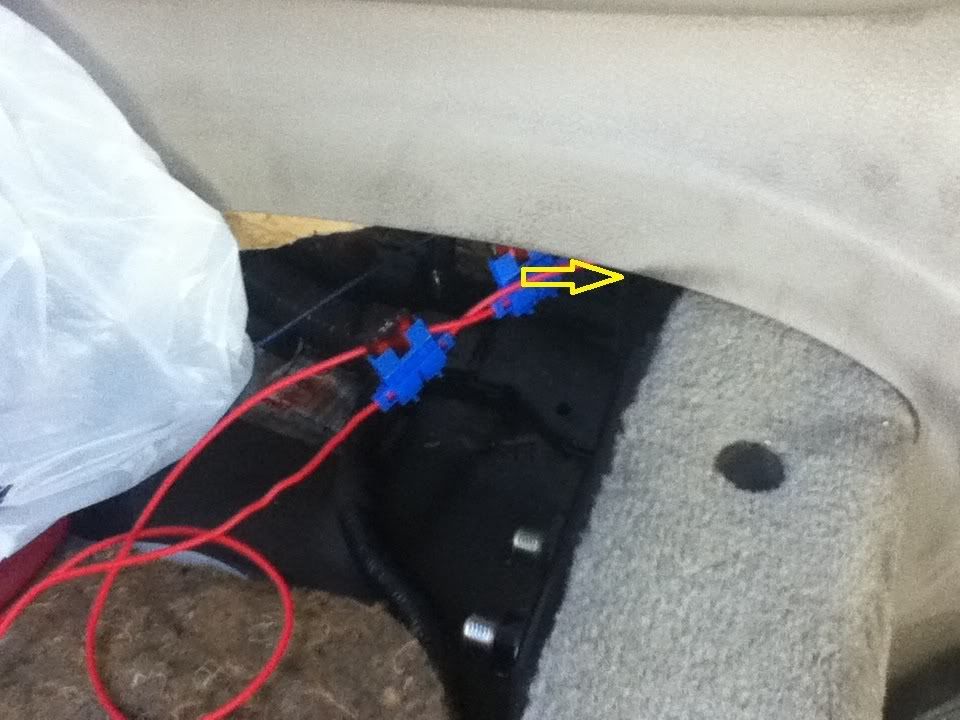
now that you have a switched power source of some kind, my kit demanded another inline fuse rated at 7.5A which it came with, simple plug n play setup, snap, snap and it was done. that ran to the red input of the seat heater wiring. and if you are going with the relay route make sure you run that 7.5a fuse in line with the 12v constant line. there was also a black line that i grounded to the same point that i have my amps and capacitor.
note: i did 2 of these, one for each side. my kit stressed that you DO NOT use one line for both heater sets(2 heating elements per set)
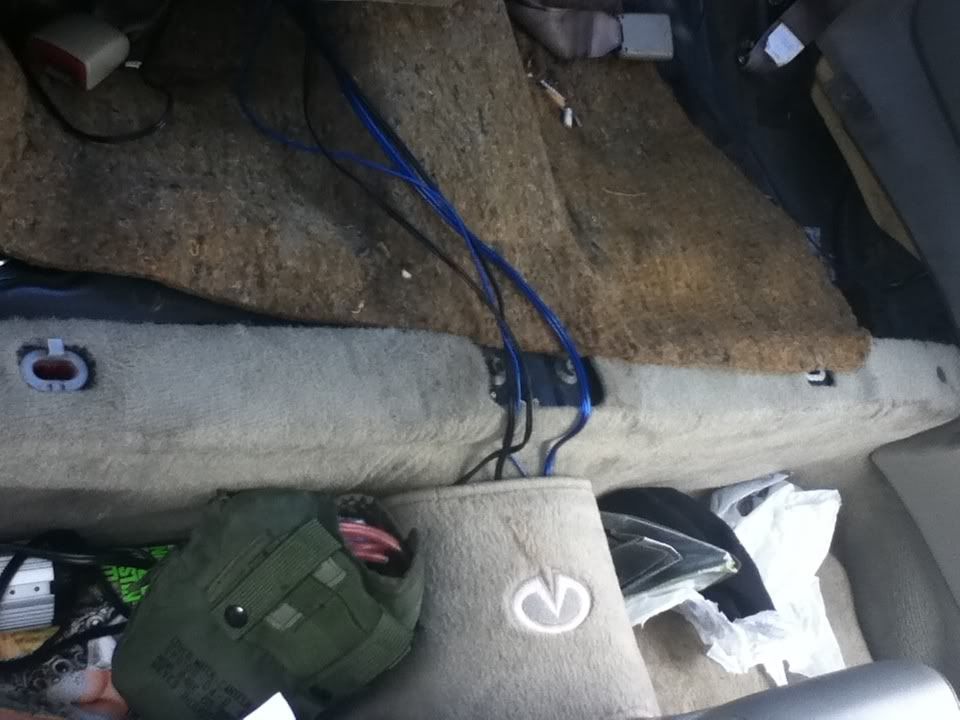
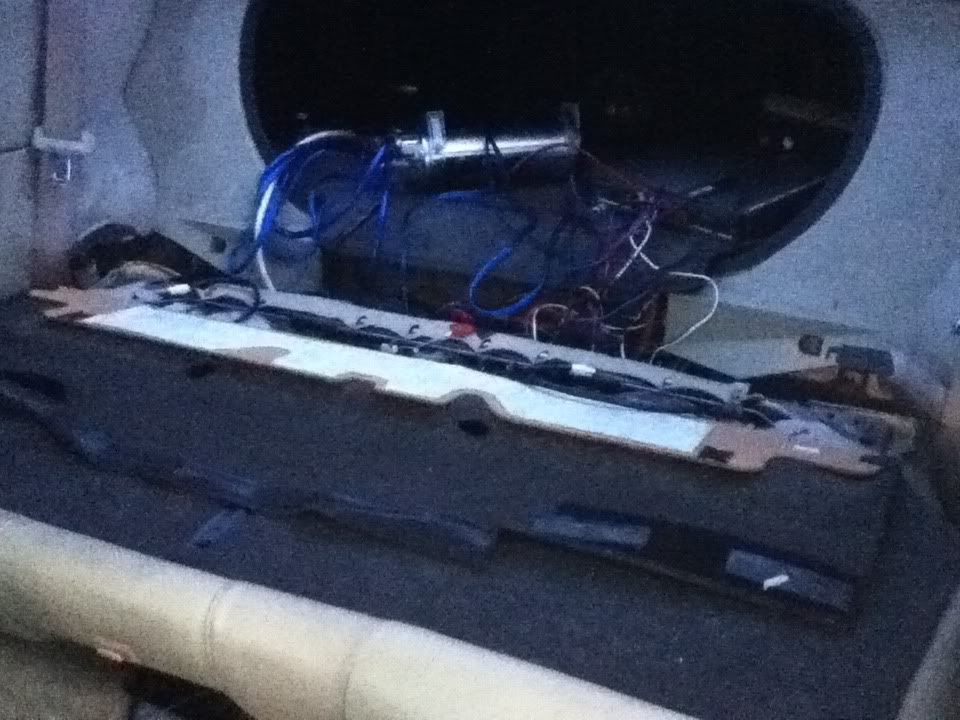
now that the power is all wired in you may put the seats back in. i suggest you start with the backrest(dont forget the trunk lever for lowering your seat), and then do the bottom seat(dont forget your seatbelt recievers). after you put in the backrest, connect it to the harness(make sure you connect the correct side to the correct harness). and when you put in the bottom cushion, connect the heaters up and make sure the last open connectors on the harness(the part that goes to the switch) is through the middle of the seats. reinstall the seat, push it back and push down at the 2 locking points. (feel free to plug in your switches and enjoy your hard work thus far, just make sure ur car is on, AND DONT FORGET YOUR SEATBELT RECIEVERS)

Yeah, I forgot to bring my seat belt receivers through...
Step 5: Switch Mounting
I initially wanted to put my switches on my side panels(right above my rear speakers) but there wasnt enough space
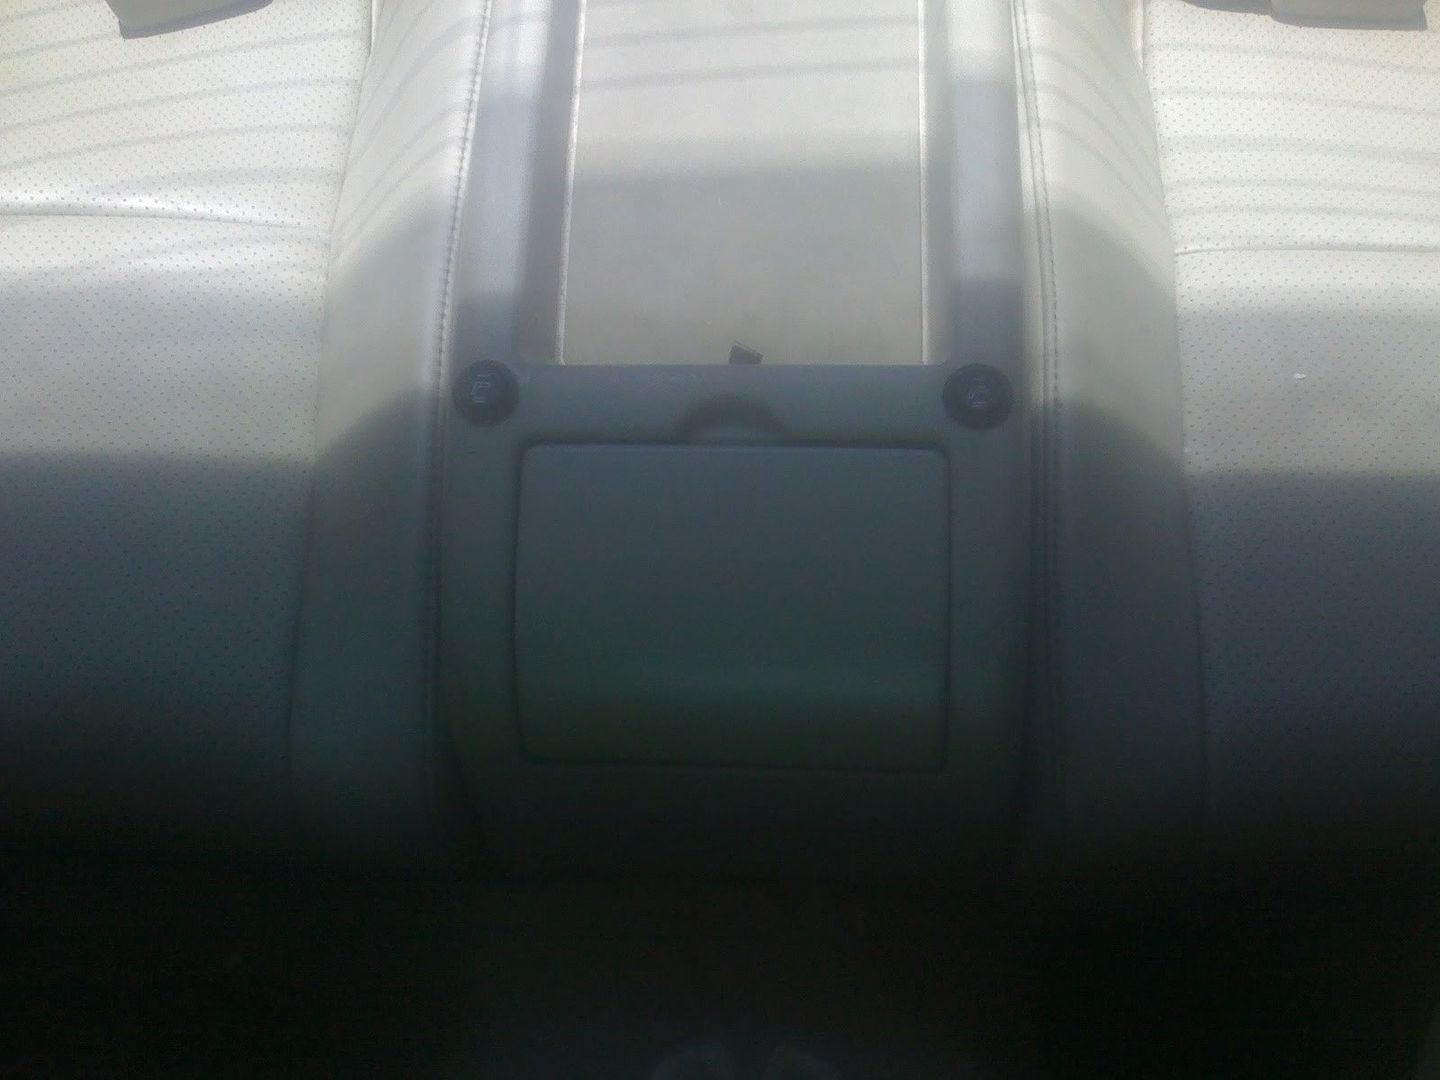
 so i decided to put them in my rear center console. my flip thing for my cup holders is broken so ima permanently close it one of these days, until then, ill just tell people not to have drinks in the cup holders. My kit came with the standard HI/OFF/LOW rocker switches, unfortunately they are non LED but thats an easy hotswap. per my instructions i was given, i drilled (2) 22mm holes. I suggest you drill a very small pilot hole in the center of where you want you switch to sit, and then slowly use bigger bits until you reach your 22mm
FYI: i did not have a 22mm bit, i only had access to my roomate's 8mm bit... so heres what i did, i found my central point(11mm diameter), and hammered a nail into the point. then i took my bit and slowly and forcefully drilled my hole, from there i held my rear center console inbetween my feet(do so at your own risk!!!) and while the drill was running i ran it in circles while putting pressure on the edges of my 8mm hole until it grew to a 22mm hole(periodically checking to see if the switch would fit along the way). if your switch hole is to small, your switch may not work properly, if its too big then it could fall through or become loose. I HIGHLY SUGGEST YOU DO IT THE RIGHT WAY!!!! i was $h1771ng bricks the whole time lol as it was my first time ever drilling holes that required precision
 and if your drill has a setting for it, choose torque over speed! it will be much easier for you!
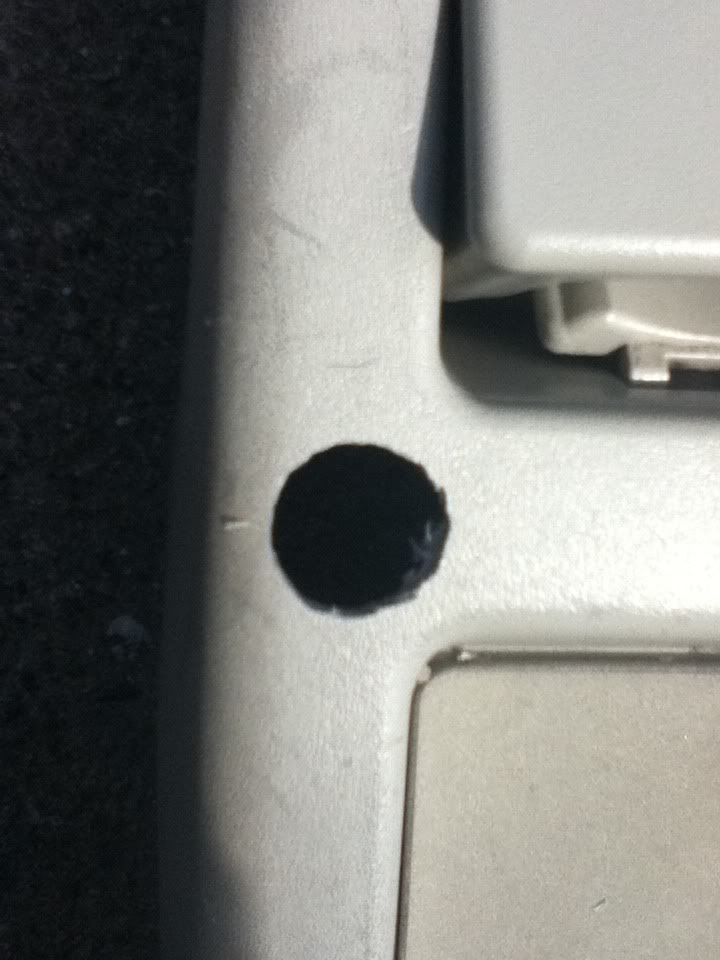
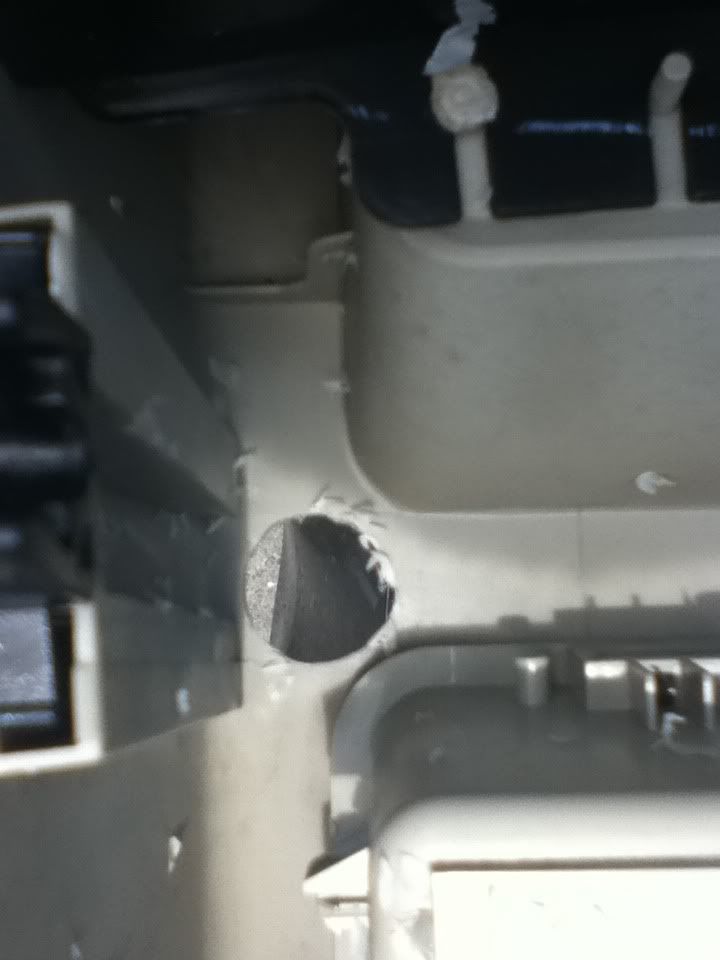
after the proper holes are drilled, put the switches in the rear center console. then connect them to the harness and put the console back in.
You are finished! sure you may not be able to enjoy this feature but on the bright side you can show it off to your friends AND may have just raised the value of your car

Last edited by Trickstyle; 02-10-2012 at 10:48 AM. Reason: sizing
The following users liked this post:
haynV35 (09-29-2020)
#4
07-02-2011, 11:44 PM


#6
07-03-2011, 09:50 PM
#7
07-03-2011, 10:12 PM
Trending Topics
#8
07-03-2011, 10:17 PM
#10
07-03-2011, 10:27 PM
haha well truth be told, i dont have many back seat passengers either. but when i got my G, my buddy got his 2002 A6 n my other friend got his 2005 325ci, so we have been at eachother's throats at whos car is better/more luxurious :P at first we agreed that i was winning, then the A6 got its Devil eyes n now im back in the lead w/ my rear heated seats i guess its just a pride thing for me
i guess its just a pride thing for me
#11
07-07-2011, 09:15 AM

#12
07-07-2011, 01:59 PM


 it's quite a long process..
