Repair minor dash cracks with DAP roofing caulk
#1
 08-03-2014, 12:32 AM


Repair minor dash cracks with DAP roofing caulk
Hello all, this is an interesting thing that I came across with my car. My car is a 2005 G35x that started showing minor cracks in various places. Disclaimer: it will never be exactly the same and won't fix major damage, but it might make you feel better and have it look a little better.
Where I live in North Carolina it gets very hot and humid in the summer which unfortunately turns the dash surface soft and pliable. Light pokes, rubs, or other objects that come into contact with it will just scrape, smudge, or cut a chunk out like play-doh. It all started one day when I was sitting in my car and reached to my dash for something, accidentally hitting the dash with my fingernail which subsequently took out a small chunk. After that, I started thinking of options of what I could do to fill that damaged spot as it was an eyesore and I'm a bit compulsive.
DAP roofing caulk.
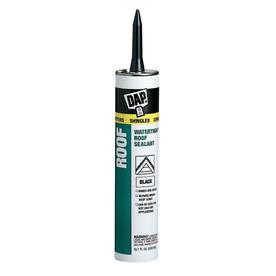
This stuff is obviously used for roofing applications all the time. It just so happens it also is - when dry - the exact color of the dash and hardens with a flexible consistency to boot. It will bond (within moderation, not a true adhesive), seal, and fill any crack or chunk since it is caulk. I thought this would be perfect to try.
Here is how I used it. The caulk tube comes with an applicator on the end in which you usually load as a cartridge into a caulk gun and then apply it. If you have that around you can try squeezing it as you need it, OR you can cut the applicator clean off and use the tube as a bucket to dip the product from. I recommend using a putty knife, flat-head screwdriver, kitchen knife, or really any flat surfaced tool of choice that is small enough to work in the dash area. Once you have the product accessible apply it to your tool. If you have a crack, try and separate the crack with your hands and "push" the caulking into the crack to fill the seam as much as possible. Once you work some product into the crack apply a layer on the crack surface then smooth it out flat with your tool. This really won't take that much. The product will be tack-free (not sticky) in one hour, but will take two to four weeks to fully cure and harden. Considering the dash is not normally touched the curing time shouldn't be a problem, just know that after applying and smoothing the product you should leave the area alone for up to two to four weeks. After that time get some 2500-3000 grit sand paper and lightly sand the area to create a nice flat surface.
After you're done with this process, I'd highly suggest taking it from me and investing in a quality dash cover to avoid exposure as much as possible. Here are some options to give you an idea.
Where I live in North Carolina it gets very hot and humid in the summer which unfortunately turns the dash surface soft and pliable. Light pokes, rubs, or other objects that come into contact with it will just scrape, smudge, or cut a chunk out like play-doh. It all started one day when I was sitting in my car and reached to my dash for something, accidentally hitting the dash with my fingernail which subsequently took out a small chunk. After that, I started thinking of options of what I could do to fill that damaged spot as it was an eyesore and I'm a bit compulsive.
DAP roofing caulk.
This stuff is obviously used for roofing applications all the time. It just so happens it also is - when dry - the exact color of the dash and hardens with a flexible consistency to boot. It will bond (within moderation, not a true adhesive), seal, and fill any crack or chunk since it is caulk. I thought this would be perfect to try.
Here is how I used it. The caulk tube comes with an applicator on the end in which you usually load as a cartridge into a caulk gun and then apply it. If you have that around you can try squeezing it as you need it, OR you can cut the applicator clean off and use the tube as a bucket to dip the product from. I recommend using a putty knife, flat-head screwdriver, kitchen knife, or really any flat surfaced tool of choice that is small enough to work in the dash area. Once you have the product accessible apply it to your tool. If you have a crack, try and separate the crack with your hands and "push" the caulking into the crack to fill the seam as much as possible. Once you work some product into the crack apply a layer on the crack surface then smooth it out flat with your tool. This really won't take that much. The product will be tack-free (not sticky) in one hour, but will take two to four weeks to fully cure and harden. Considering the dash is not normally touched the curing time shouldn't be a problem, just know that after applying and smoothing the product you should leave the area alone for up to two to four weeks. After that time get some 2500-3000 grit sand paper and lightly sand the area to create a nice flat surface.
After you're done with this process, I'd highly suggest taking it from me and investing in a quality dash cover to avoid exposure as much as possible. Here are some options to give you an idea.


#4
10-03-2016, 09:04 AM

I know this is an old thread, but I thought it would be worth mentioning that I gave this a shot. And for anyone else wanting to try it, don't! It doesn't match the color of the dash, and it may take multiple attempts to fill it in. I tried a small crack that isn't very visible. The caulk must have shrunk after 24 hrs because initially it looked filled in, but now it doesn't.
The following users liked this post:
Rob Wolford (02-26-2019)

Thread
Thread Starter
Forum
Replies
Last Post
Mad A
Not G35 Related
4
12-08-2015 01:45 PM