LED project part 3. GAUGES REVEALED (56k haha)
#1
 11-06-2004, 08:28 PM


LED project part 3. GAUGES REVEALED (56k haha)
ok as some of you know i've been working on my BLUE led project beginning with the VDC button and the heater seat buttons. Those were a sucess with no hot spots.. now i have the center console ALMOST complete with over 50 LEDS that had to be changed. I only ordered 50 so i have to order some more LOL.. the navigation panel is only 1/4 done right now but the a/c radio is complete except i have to fix a few dim spots..
and as for the gauges... as you all know it's made up of a ORANGE film.. read below for further details... =)
now on to the pictures!!
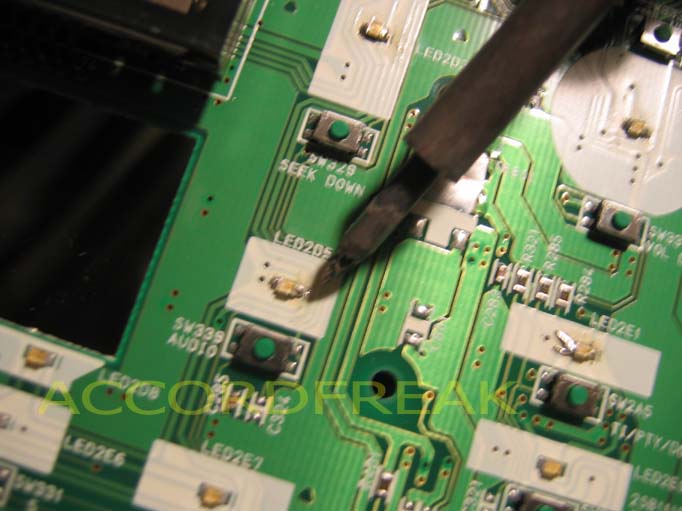
lets begin with the center console.. as you can see there are many LEDS.. here i am testing the blue LEDS i just soldered.. works great! oh yeah one more thing these are SURFACE MOUNT LEDS.. i couldn't find any at any store so you prboably have to order them online. 0805 http://www.lsdiodes.com/shop/index.p...9e72b763167cb6

after testing those.. i soldered the rest of the LEDS.. all freakin 35-40 of them!!!
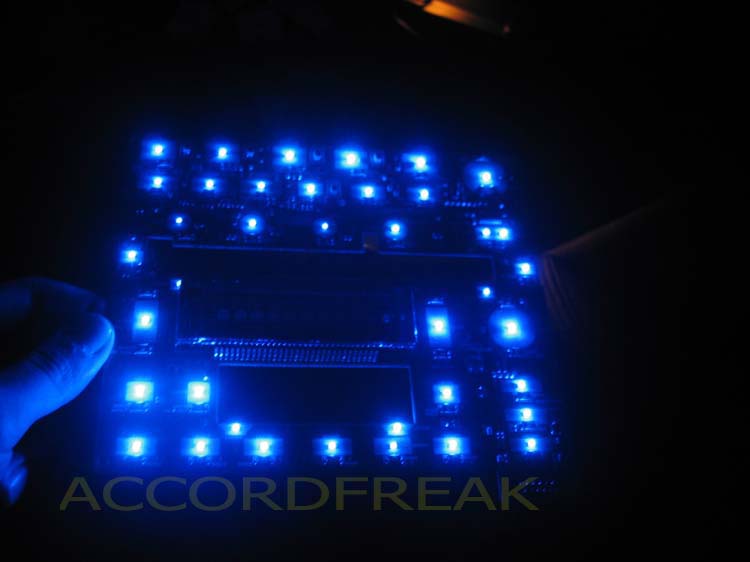
the result..... i have to fix "disc" ," mode" and "am/fm" somehow.. it's not that bright for some reason.

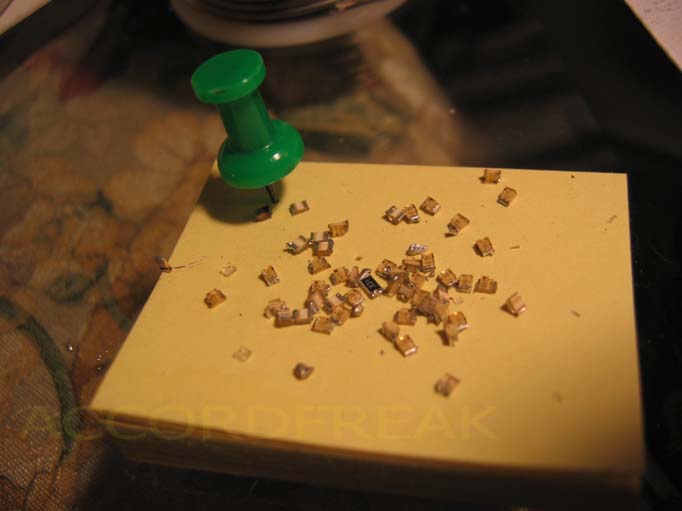
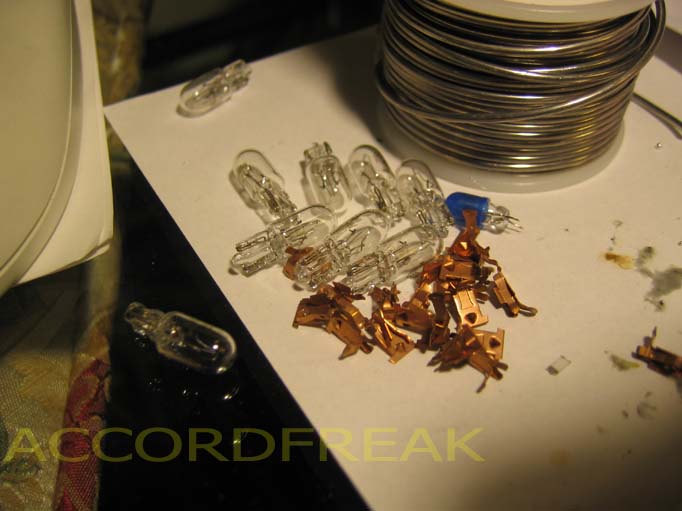
the pile of orange LEDS
OKAY now on to the gauges after many hours of soldering those tiny *** LEDS...
ok about that annoying orange film... ready??
whenever you shine a light through the gauges it's orange no matter what... now here's what you do....
you SAND IT OFF hahaha YUP you read corerectly.. SAND IT OFF.. the orange film is on the back and i had to sand it all off.. then i cleaned it up with alcohol. MAKE Sure you DON'T sand the turn signals or high beam indicator also.. just the gauges itself.. don't worry it won't sand off the numbers just the orange crap. look at the pictures below...
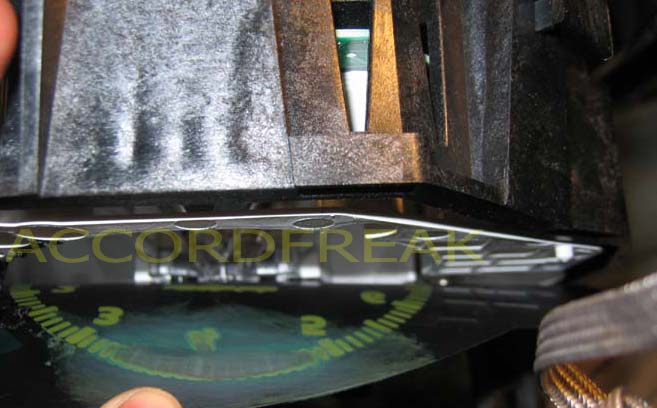
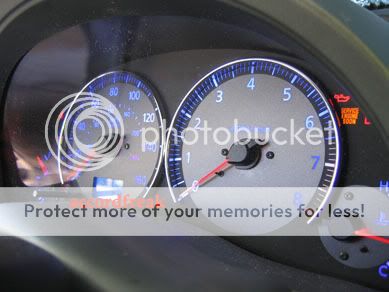
as you can see the orange film shines through with a clear light bulb in the back
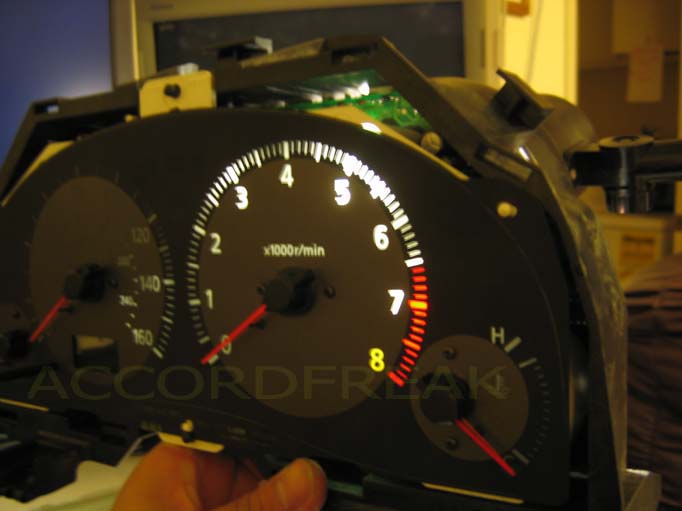
and here... i sanded off some of the film already..
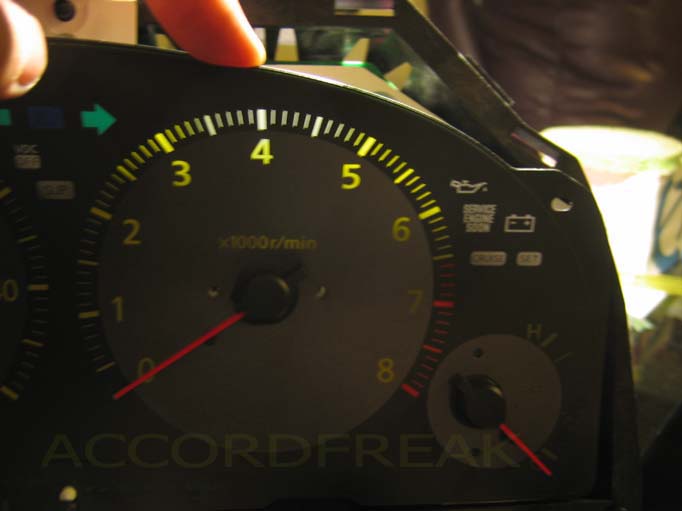
and so a WHITE LIGHT shines through!!! whoo hoo
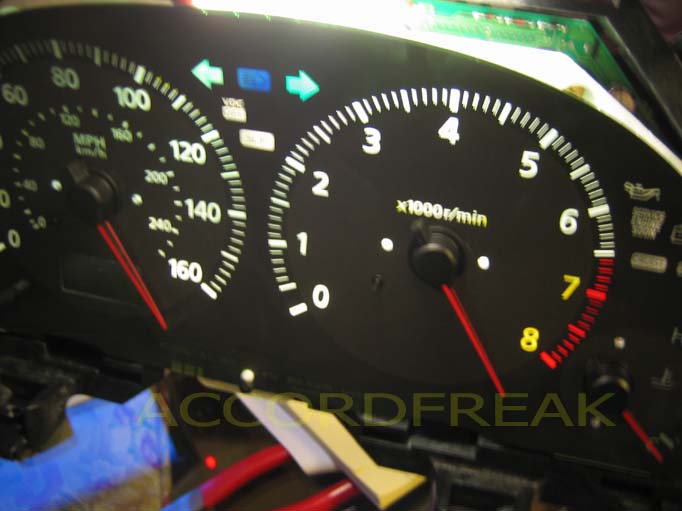
got most of it... as you can see the "x1000r/min" a little big of orange is showing through.. i sanded that off after i took the picture...
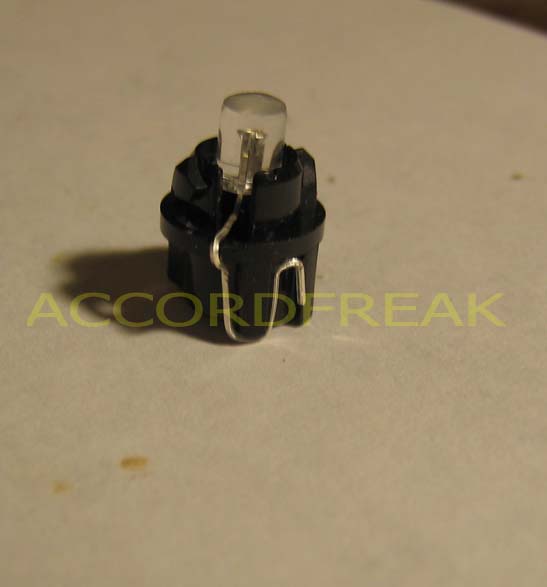
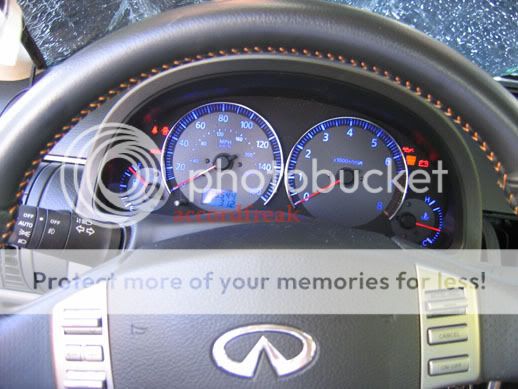
after sanding i had to test the blue 5mm LED...testing phase... testing where the hot spots are at and how well it lights up...that's just 1 bulb

after 4 hours of soldering and bending the LED wires....
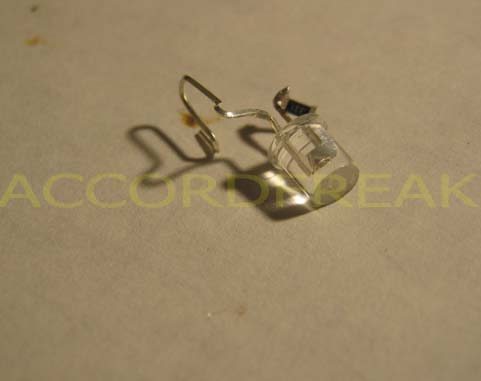
....i finally got most of it to work!!!

final note... if you're going to buy LEDS.. you have to buy the WIDEST angle which is like 3 bucks a piece.. Buy a piece of thin plastic sheet and cut out the shape of the cluster to diffusors to diffuse the light. (http://www.tapplastics.com/shop/product.php?pid=253&)
I recommend getting the 8-10mm LEDs.. or flux LEDs (search it on google, i'm not here to hold your hand ) LOL
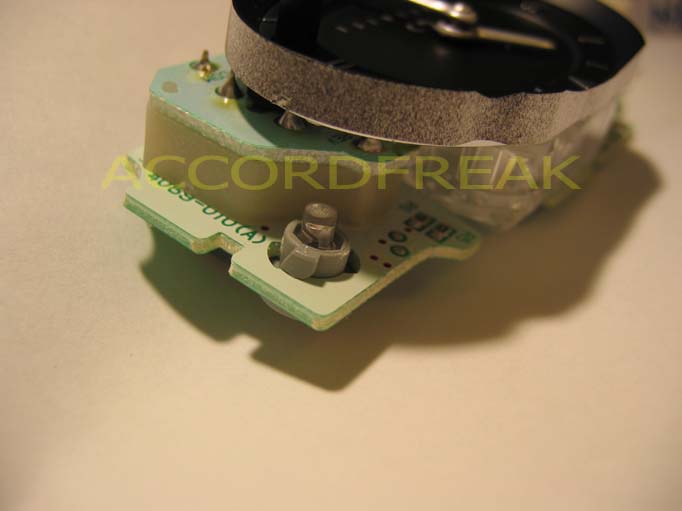
ok so towards the end.. i finally realized that silver i35 clock i installed wasn't too great because i couldn't see the needles at night.. so i put the black one back on and modfied it to match the rest...... hehehe
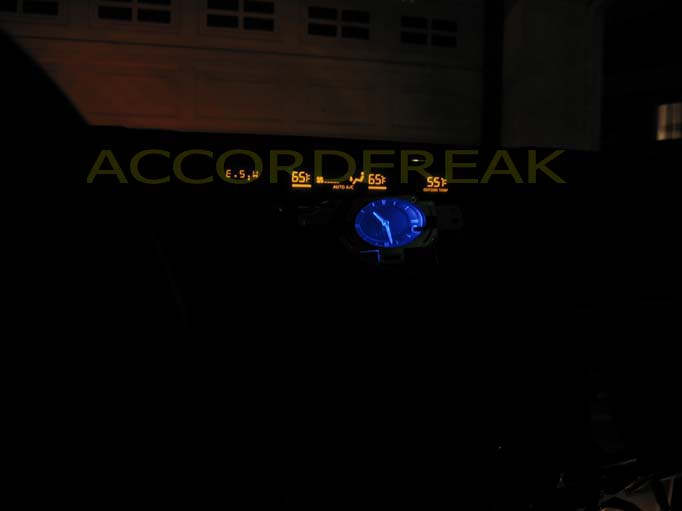
the blue lights matches my twilight blue car hehehe
the end.... =)
redid the lights a couple years back.. with more LEDs and diffuser (paper works too) to spread the light evenly
and as for the gauges... as you all know it's made up of a ORANGE film.. read below for further details... =)
now on to the pictures!!
lets begin with the center console.. as you can see there are many LEDS.. here i am testing the blue LEDS i just soldered.. works great! oh yeah one more thing these are SURFACE MOUNT LEDS.. i couldn't find any at any store so you prboably have to order them online. 0805 http://www.lsdiodes.com/shop/index.p...9e72b763167cb6
after testing those.. i soldered the rest of the LEDS.. all freakin 35-40 of them!!!
the result..... i have to fix "disc" ," mode" and "am/fm" somehow.. it's not that bright for some reason.
the pile of orange LEDS
OKAY now on to the gauges after many hours of soldering those tiny *** LEDS...
ok about that annoying orange film... ready??
whenever you shine a light through the gauges it's orange no matter what... now here's what you do....
you SAND IT OFF hahaha YUP you read corerectly.. SAND IT OFF.. the orange film is on the back and i had to sand it all off.. then i cleaned it up with alcohol. MAKE Sure you DON'T sand the turn signals or high beam indicator also.. just the gauges itself.. don't worry it won't sand off the numbers just the orange crap. look at the pictures below...
as you can see the orange film shines through with a clear light bulb in the back
and here... i sanded off some of the film already..
and so a WHITE LIGHT shines through!!! whoo hoo
got most of it... as you can see the "x1000r/min" a little big of orange is showing through.. i sanded that off after i took the picture...
after sanding i had to test the blue 5mm LED...testing phase... testing where the hot spots are at and how well it lights up...that's just 1 bulb
after 4 hours of soldering and bending the LED wires....
....i finally got most of it to work!!!
final note... if you're going to buy LEDS.. you have to buy the WIDEST angle which is like 3 bucks a piece.. Buy a piece of thin plastic sheet and cut out the shape of the cluster to diffusors to diffuse the light. (http://www.tapplastics.com/shop/product.php?pid=253&)
I recommend getting the 8-10mm LEDs.. or flux LEDs (search it on google, i'm not here to hold your hand ) LOL
ok so towards the end.. i finally realized that silver i35 clock i installed wasn't too great because i couldn't see the needles at night.. so i put the black one back on and modfied it to match the rest...... hehehe
the blue lights matches my twilight blue car hehehe
the end.... =)
redid the lights a couple years back.. with more LEDs and diffuser (paper works too) to spread the light evenly
Last edited by accordfreak; 09-16-2010 at 04:53 PM.
The following 5 users liked this post by accordfreak:
Blue Dream (07-11-2016),
chinabean (05-03-2016),
guido631 (11-10-2012),
ms4rs (02-28-2012),
Wrathernaut (12-12-2014)
#2
11-06-2004, 08:34 PM


#7
11-07-2004, 12:00 AM

Trending Topics
#8
11-07-2004, 02:13 AM

Registered User
Join Date: Apr 2004
Location: TX
Posts: 81
Likes: 0
Received 0 Likes
on
0 Posts
#9
11-07-2004, 07:02 AM

#10
11-07-2004, 08:18 AM

Re: LED project part 3... GAUGES REVIELED (56k haha)
Thats alot of work, but the end result is spectacular........
Is it the pics or the leds do not light the needles adequately?
Do you still have the option of increasing or decreasing the lights intensity?
If the dimmer switch worked along with the leds....it would be really nice.......
Either way, good job of tackling the interior lighting.....

04 cpe JDM clear corners/Piaa's/MTEC H4 Super White fog/highs
Is it the pics or the leds do not light the needles adequately?
Do you still have the option of increasing or decreasing the lights intensity?
If the dimmer switch worked along with the leds....it would be really nice.......
Either way, good job of tackling the interior lighting.....
04 cpe JDM clear corners/Piaa's/MTEC H4 Super White fog/highs
#11
11-07-2004, 09:44 AM

Re: LED project part 3... GAUGES REVIELED (56k haha)
Very nice. You are the poster child for dedication.
I wish we had the lights the new mustang has. You can change the gauges 100s of colors.
Russ
Black 6MT Coupe
Jax, FL
G35Driver.com Business Cards
I wish we had the lights the new mustang has. You can change the gauges 100s of colors.
Russ
Black 6MT Coupe
Jax, FL
G35Driver.com Business Cards


#14
11-07-2004, 03:19 PM

Re: LED project part 3... GAUGES REVIELED (56k haha)
freak...........those lights are out of control i wish i could do that  . Looks great i would do anything to have that set up.

03 coupe
19 inch RH Evolution GT5's black, Toyo T1's
Pro-1 Exhaust
clear corners
Escort X50 Blue
Momo shift ****
. Looks great i would do anything to have that set up. 03 coupe
19 inch RH Evolution GT5's black, Toyo T1's
Pro-1 Exhaust
clear corners
Escort X50 Blue
Momo shift ****
#15
11-07-2004, 04:15 PM

Join Date: Apr 2003
Location: Hamilton, NJ
Posts: 1,080
Likes: 0
Received 0 Likes
on
0 Posts
Re: LED project part 3... GAUGES REVIELED (56k haha)
My god that is amazing looking!!!
Can you provide some led and restior specs for what you used?
-----------------------------------------------------------------------
 http://www.G350Z.com/
Can you provide some led and restior specs for what you used?
-----------------------------------------------------------------------
http://www.G350Z.com/