DIY: OE Journey lip on sport bumper
#1
 08-17-2009, 02:44 PM


DIY: OE Journey lip on sport bumper
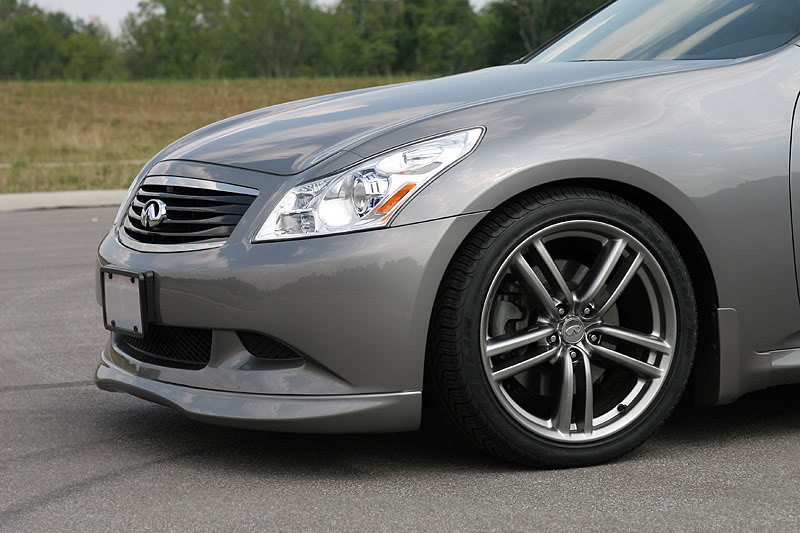
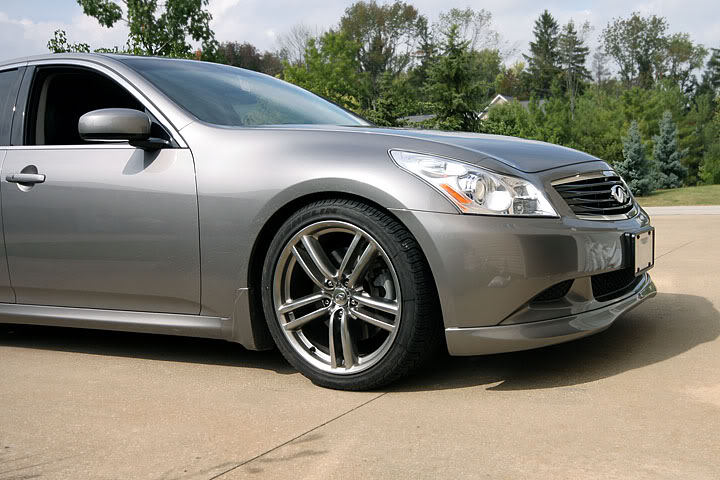
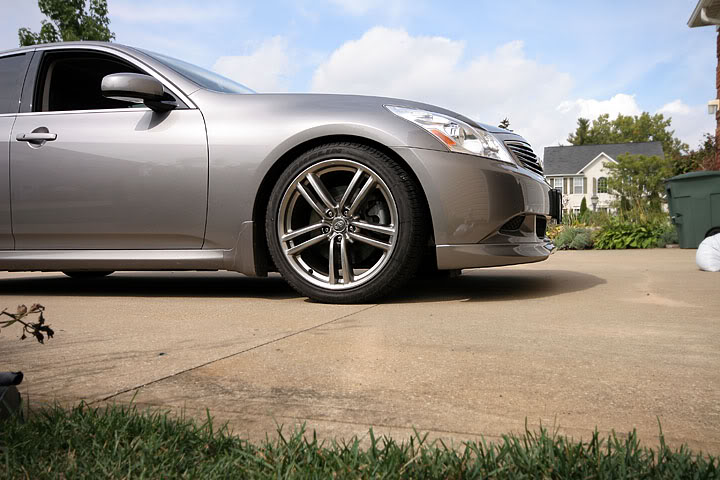
The following describes the installation of the journey lip on the sport bumper. Special thanks goes to Heyitsalex and Blueslate who first did this mod and described how to do it. Following their description, this writeup is how I did it but is in no way definitive. But if you follow the instructions, you will get great results. At the very least, I hope you get a feel for what is involved so you can decide if you want to do it. Some more pics of the lip installed here: https://g35driver.com/forums/media-s...urney-lip.html
I did this install by myself but an extra set of hands never hurt anyone! I jacked up the front end and placed jackstands, for easy access to the underside.
***Please note: this lip sits maybe an inch LOWER than the sport lip. For the most part, I never had any issues with clearance with the sport lip. That is not the case with this lip. Large speed bumps, many driveway lips are now problems. If you are lowered, you have to drive with extreme caution. I will probably be taking this lip off every winter.***
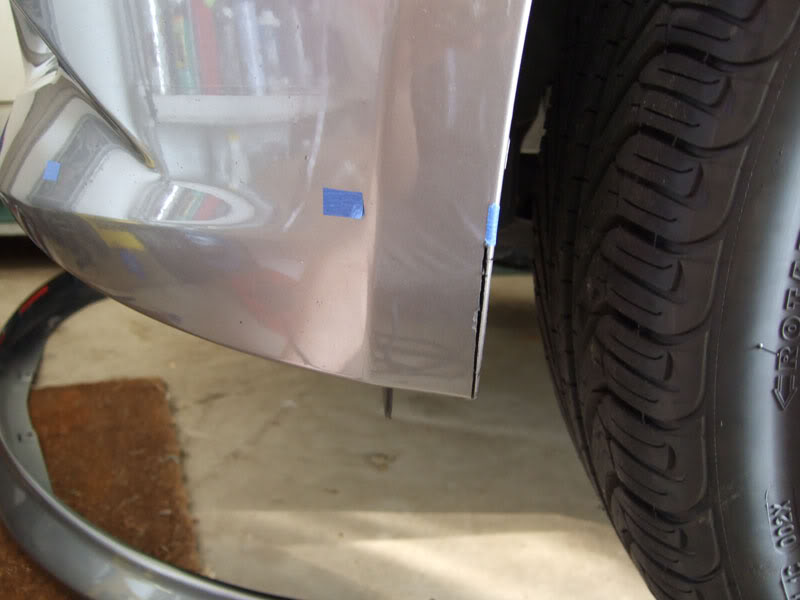
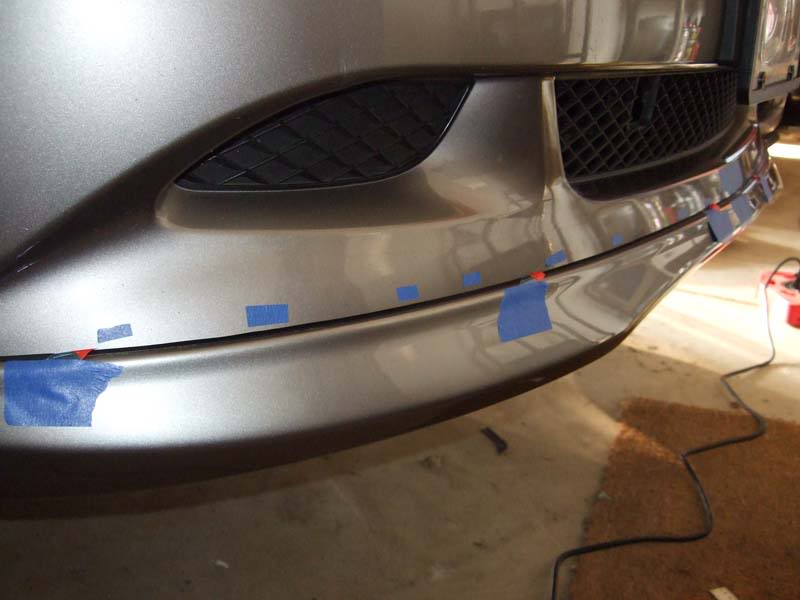
Step 1: use painters tape to mark out center line of bumper and lip. I used the lower crease of the sport bumper for reference and arbitrarily set and marked a 1/2" above this as the upper limit of where I wanted the bumper to sit. Too much below this and the mounting tape will not contact the bumper at all. Above this line, the lip will not look as good. Because the crease is not a pinpoint line, the more tape marks you use, the better you will be able to determine evenness from L to R.

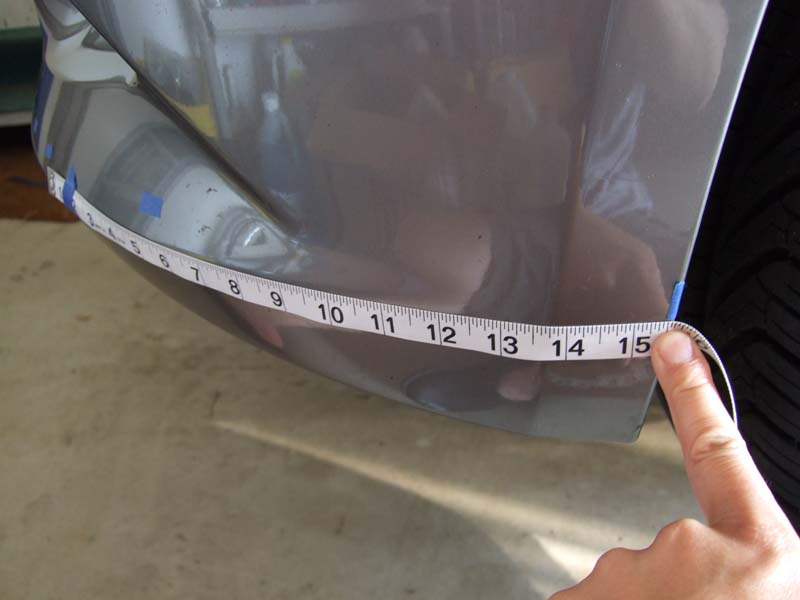
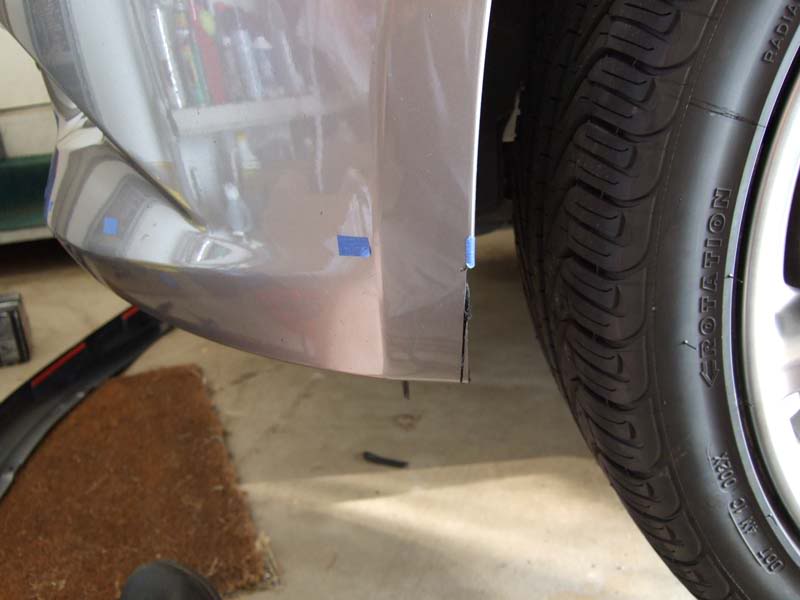
Step 2: use a tape measure and extend the bumper crease all the way to the wheel well and mark that location. As it turns out after test fitting, this spot was the perfect place to start trimming and then secure the ends of the lip.
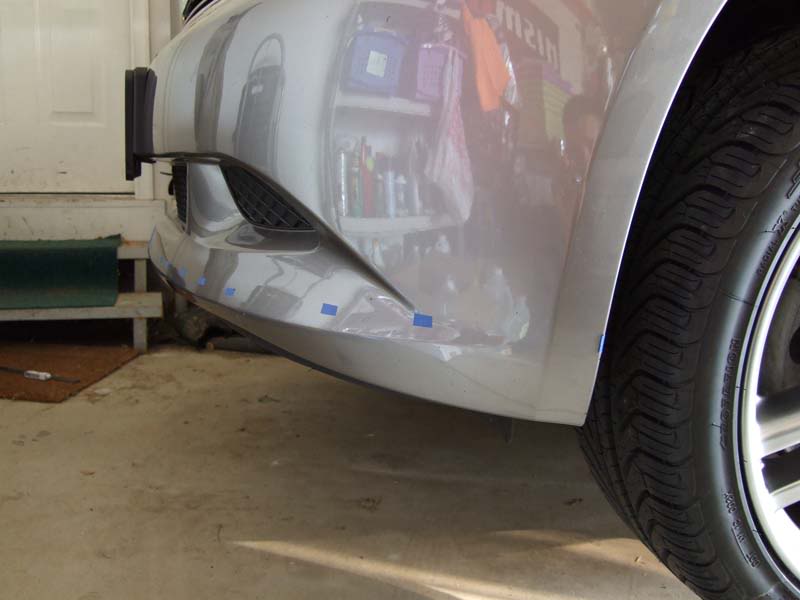
Step 3: preliminary test fit. match up the center of the bumper and lip, as well as putting the lip height near the 1/2" line above the crease that you marked. Extend the bumper all the way to the wheel well and insure that it makes a smooth curve out. For me, the end of the lip landed perfectly on the mark made when the crease was extended to the wheel well. This was exactly at 3" from the bottom tip of the bumper (measured from the wheel well). Also note that only a sliver of bumper would need to be removed from the bumper to accomodate the lip, based on this prelim test fit. I tried to make this lip fit without trimming--trust me, it won't fit well. Also, do not man-handle the lip during the prelim fitting--especially the top rubber trim. If the rubber trim starts to fall off, you may need some 3M weatherstrip adhesive to glue it back on.
Step 4: trim bumper at wheel well. Only a mm or so is needed to be removed. Do not remove too much or it will be noticeable and the lip may also not lay as flat on the bumper as it curves around (some tension is good). I used the the Rockwell Sonicrafter oscillating tool to do plunge cuts. Harbor freight also has a cheap $40 version that works well. Alternatively, a dremel with cutting wheel will work. Below is the sliver already cut (the black is from the plunge cuts, not a marker).
After test fitting again, there was excessive tension at the bottom of the bumper so I cut another wedge out.
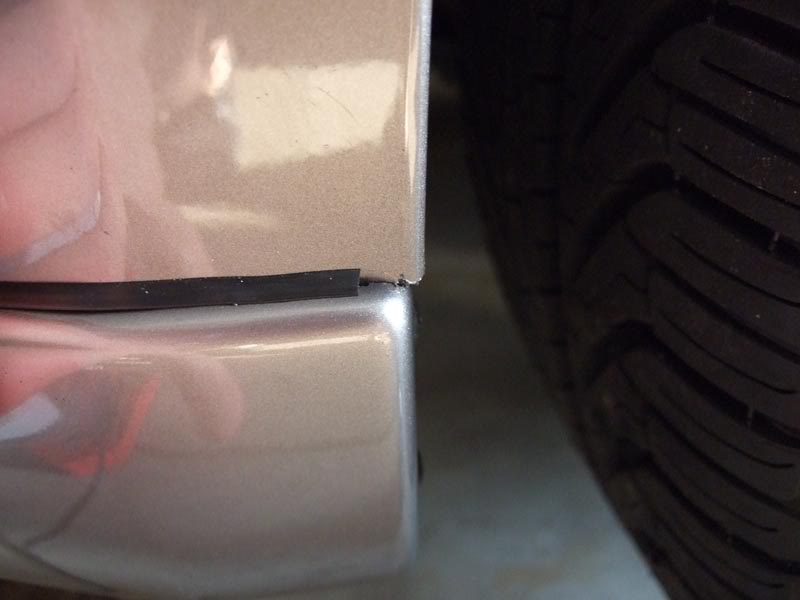
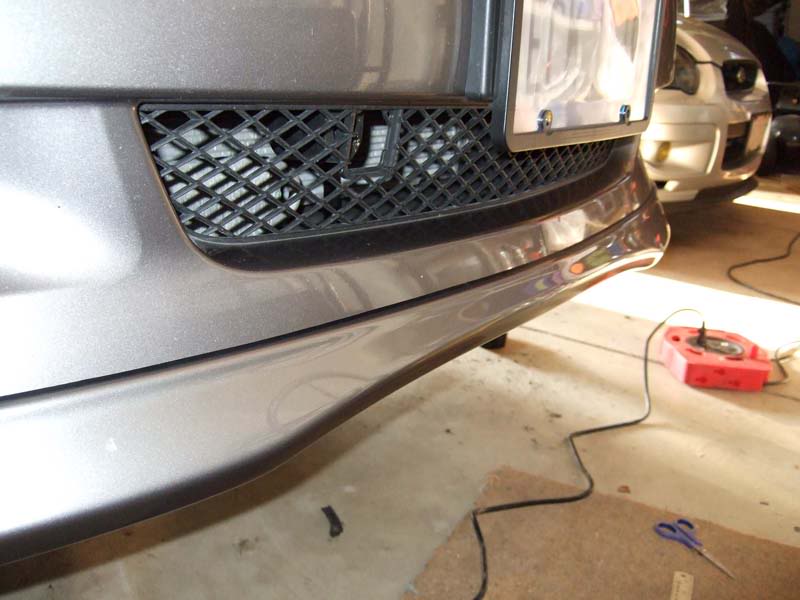
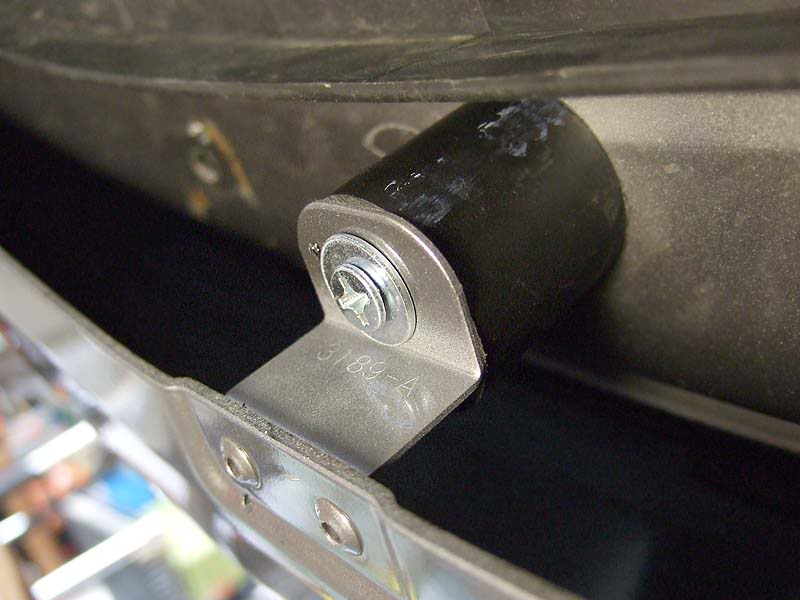
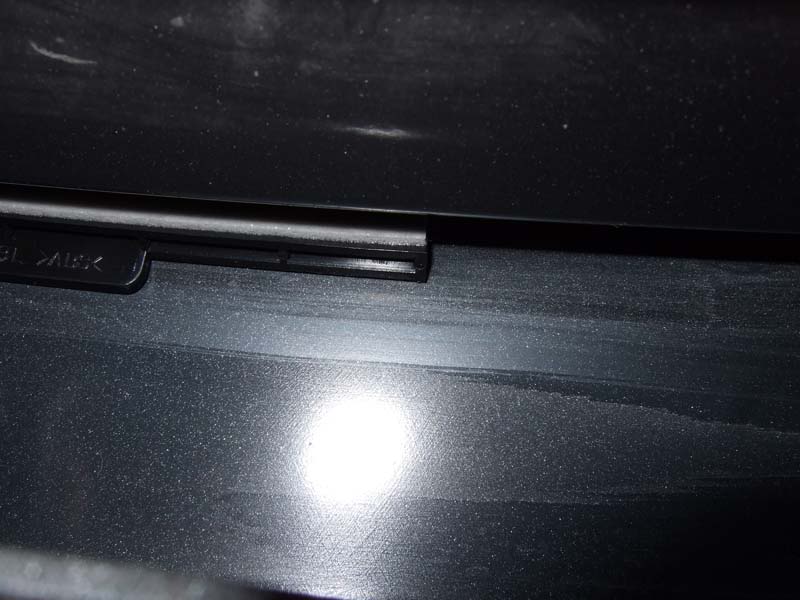
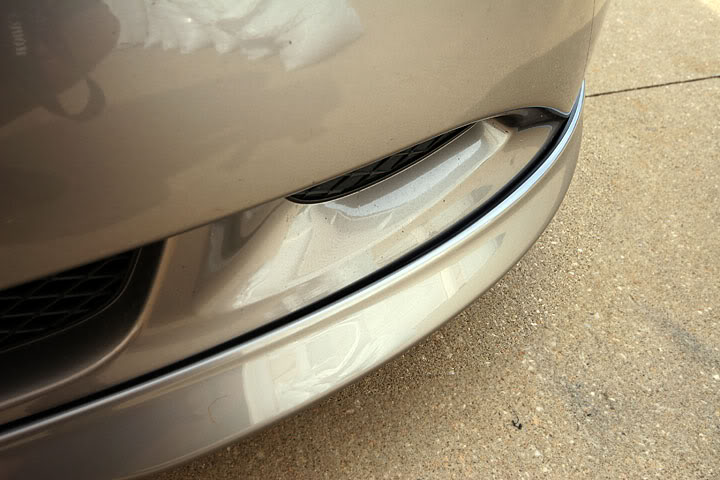
After both sides are trimmed. Place the lip on and secure the ends with a black screw into the top location and through the wheel well lining--turn the wheel for better access. I chose not to use the speednuts but don't see why you can't. Use touchup paint as needed. Save the bottom screw for after you have finalized the lip position. Here is how the lip end should fit when properly done:
Step 5: final test fitting. Adjust the height of the bumper, noting distance to the 1/2" marked line and also how flush the lip sits against the bumper. In my trials, I had the best results with the very front of the lip exactly at the 1/2" mark and dropping down a little from the mark as the lip wraps around (see pic below). Ensure that both sides are equal by comparing distance to the 1/2" marks. When satisfied, peel back the mounting tape backing and press firm on the lip to promote contact of the tape to the bumper. Now go back to the lip ends and screw the last lower black screw.
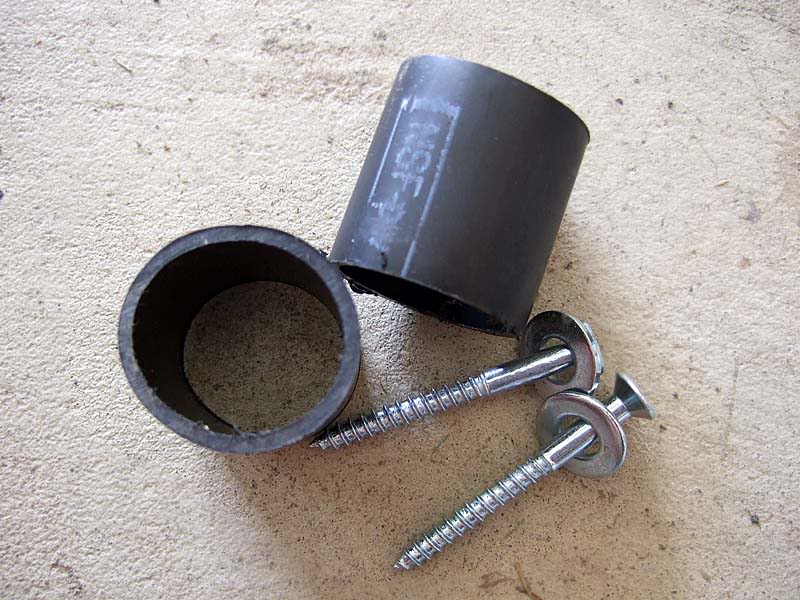
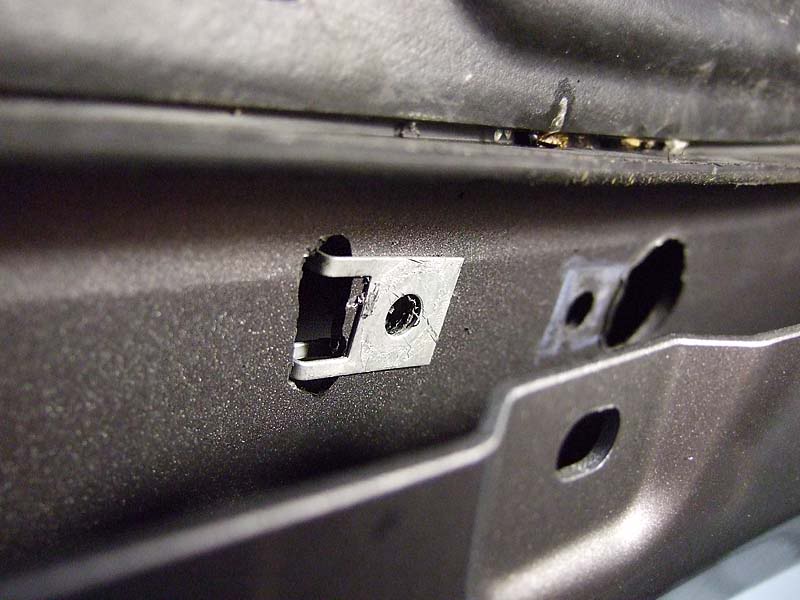
Step 6: lip bottom mounting points. There is a number of ways you could do this. I chose to drill new holes in the plastic undershield to match the 4 mounting locations on the underside of the lip (rather than try to use the mounting locations for the sport lip I removed). I believe Alex/Blue used "L" brackets. To bridge the gap of 1.25", I decided to cut 2" PVC I had on hand into 1.25" lengths and used #10 course 2" screws. The 2" diameter PVC is wide enough to provide a sturdy base. I first drilled holes through the plastic undershield directly over the lip mounting locations, then installed the large speednuts included with the lip by dremelling slots adjacent to the holes.
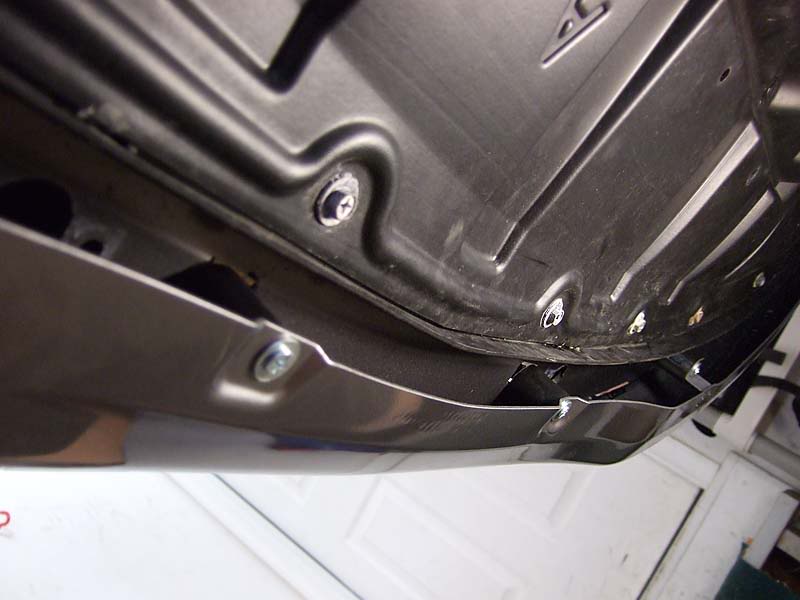
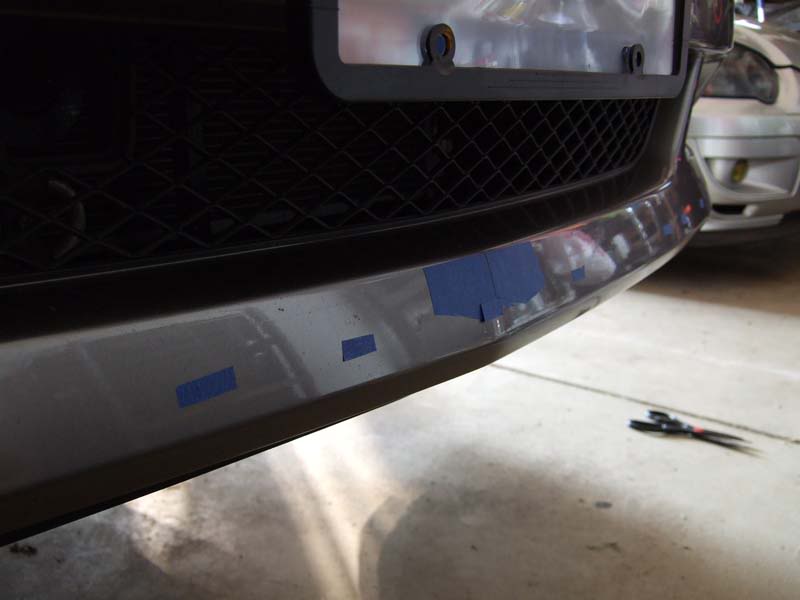
MISC: mounting tape issue. I noticed when looking from the underside, that some of the mounting tape (especially in front) did not appear to contact the bumper (see pic below). This is probably because the mounting tape itself sits down about a 1/2" from the top of the lip. In retrospect, it may have been better to buy some 1" or so 3M heavy duty mounting tape and apply this over top of the lip tape, but also closer to the edge. Since my lip was already on, I decided to fold up pieces of 1" mounting tape and wedge it in between the gap between the lip mounting tape and the bumper from underneath with a flat metal ruler.
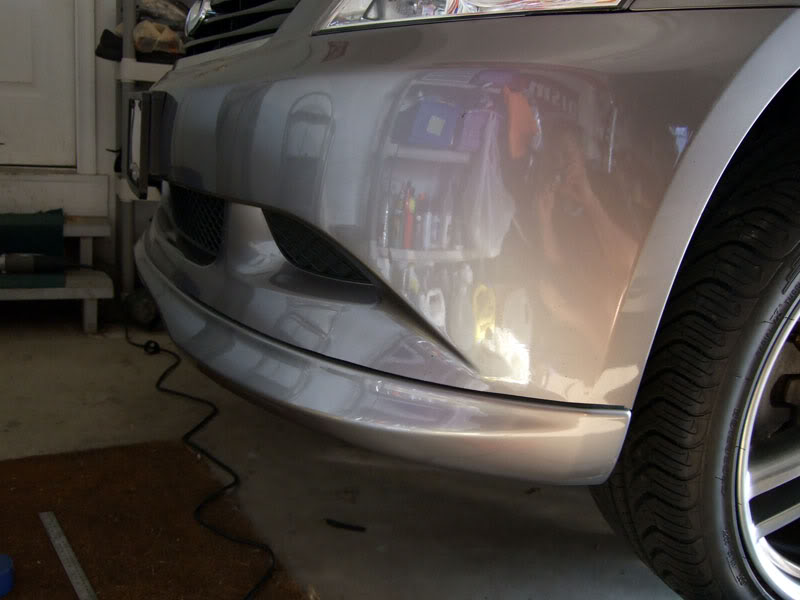
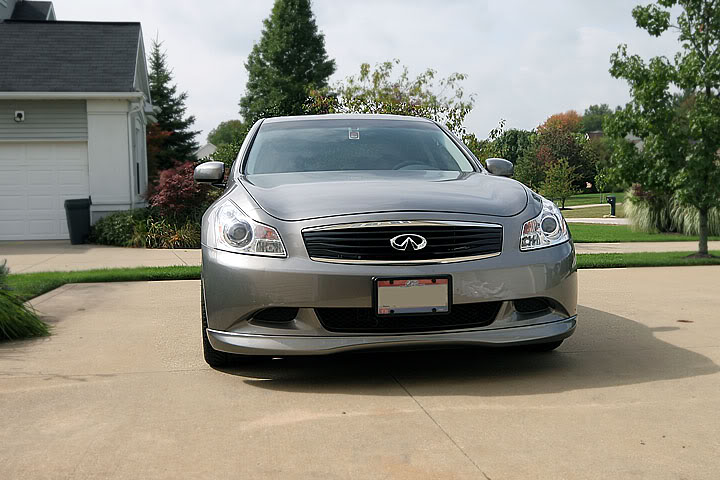
Final thoughts: install is not hard to do but takes some trial and error. I think the results are definitely worth it.
Last edited by mishmosh; 09-08-2009 at 04:21 PM.

#3
08-23-2009, 02:08 PM
No, the lip comes up short of the wheel well. You trim the stock bumper at the wheel well so that lip ends can insert there. You do not trim the wheel well lining, only the bumper. Some may not want this lip because of this fact. You cannot go back to stock and not see the bumper was trimmed.
#4
08-23-2009, 02:21 PM


#7
08-26-2009, 03:48 PM
Trending Topics
#8
08-26-2009, 03:59 PM
There should be no reason why you can't. I was surprised the curve of the lip matched to curve of the bumper so well after final placement of the lip where I did. Some other angles and the lip sticks out a bit from the bumper as it goes laterally. As you can see from the pics, the amount of material removed from the bumper is really, really small--just a little sliver. Aside from the bumper trimming, this lip fits extremely well.

#10
08-26-2009, 04:14 PM
The KEY thing is the height at which the lip sits. The crease is the KEY reference line! You want the lip a 1/2" above the crease directly in front, and if you extend the crease out, ending exactly at that crease level...3" from the bottom. also note where the crease coming down from the vents ends. It ends above where you want the lip to sit. The area where the lip sits is all smooth and if you get it in the right position, there are NO or minimal gap between the lip and the bumper.
Last edited by mishmosh; 08-26-2009 at 04:22 PM.
#11
08-26-2009, 04:15 PM


#13
08-28-2009, 03:16 PM
The following users liked this post:
breezethru (08-05-2014)
#14
09-23-2009, 03:50 PM
Update and alternative mounting
Just a 2 weeks after I installed the lip, I managed to crack it badly on the front of my parent's driveway. I totally wasn't thinking that the lip was that low, but conservatively, the lip probably sat 1" lower than my sport lip did and I am riding on Eibach springs. Here is another way to mount the lip for those who need maximal ground clearance.
The modification from my original description for optimal ground clearance:
-trim wheel well area 5/8" higher.
-position lip significantly higher in front with mounting tape only in front--I put two 2" strips of 3M 1" wide super heavy duty mounting tape over the top of the existing mounting tape in front. Despite only tape in front, the lip is very secure--more secure than my original mounting.
-use included speednuts (4) to secure bottom at the existing hole ***no spacers needed***
-use two screws to secure the ends at the existing holes.
Caveats:
-does not look as aggressive but still looks good!
-Small 2mm or so gap near fake fog light area...the price you pay for greater ground clearance. Nobody will notice this unless they are looking for it. Perfectionists need not apply!
Bottom line: The lip still looks good, is very close to the sport lip in height, but fitment and looks are are not optimal. It also will be very easy to take off and put on this lip as mounted (which I plan to do during the winters)
Last edited by mishmosh; 09-19-2010 at 07:08 PM.
#15
06-27-2010, 01:27 AM