DIY painted GTR tails (sedan)
#1
 07-29-2012, 11:07 AM


DIY painted GTR tails (sedan)
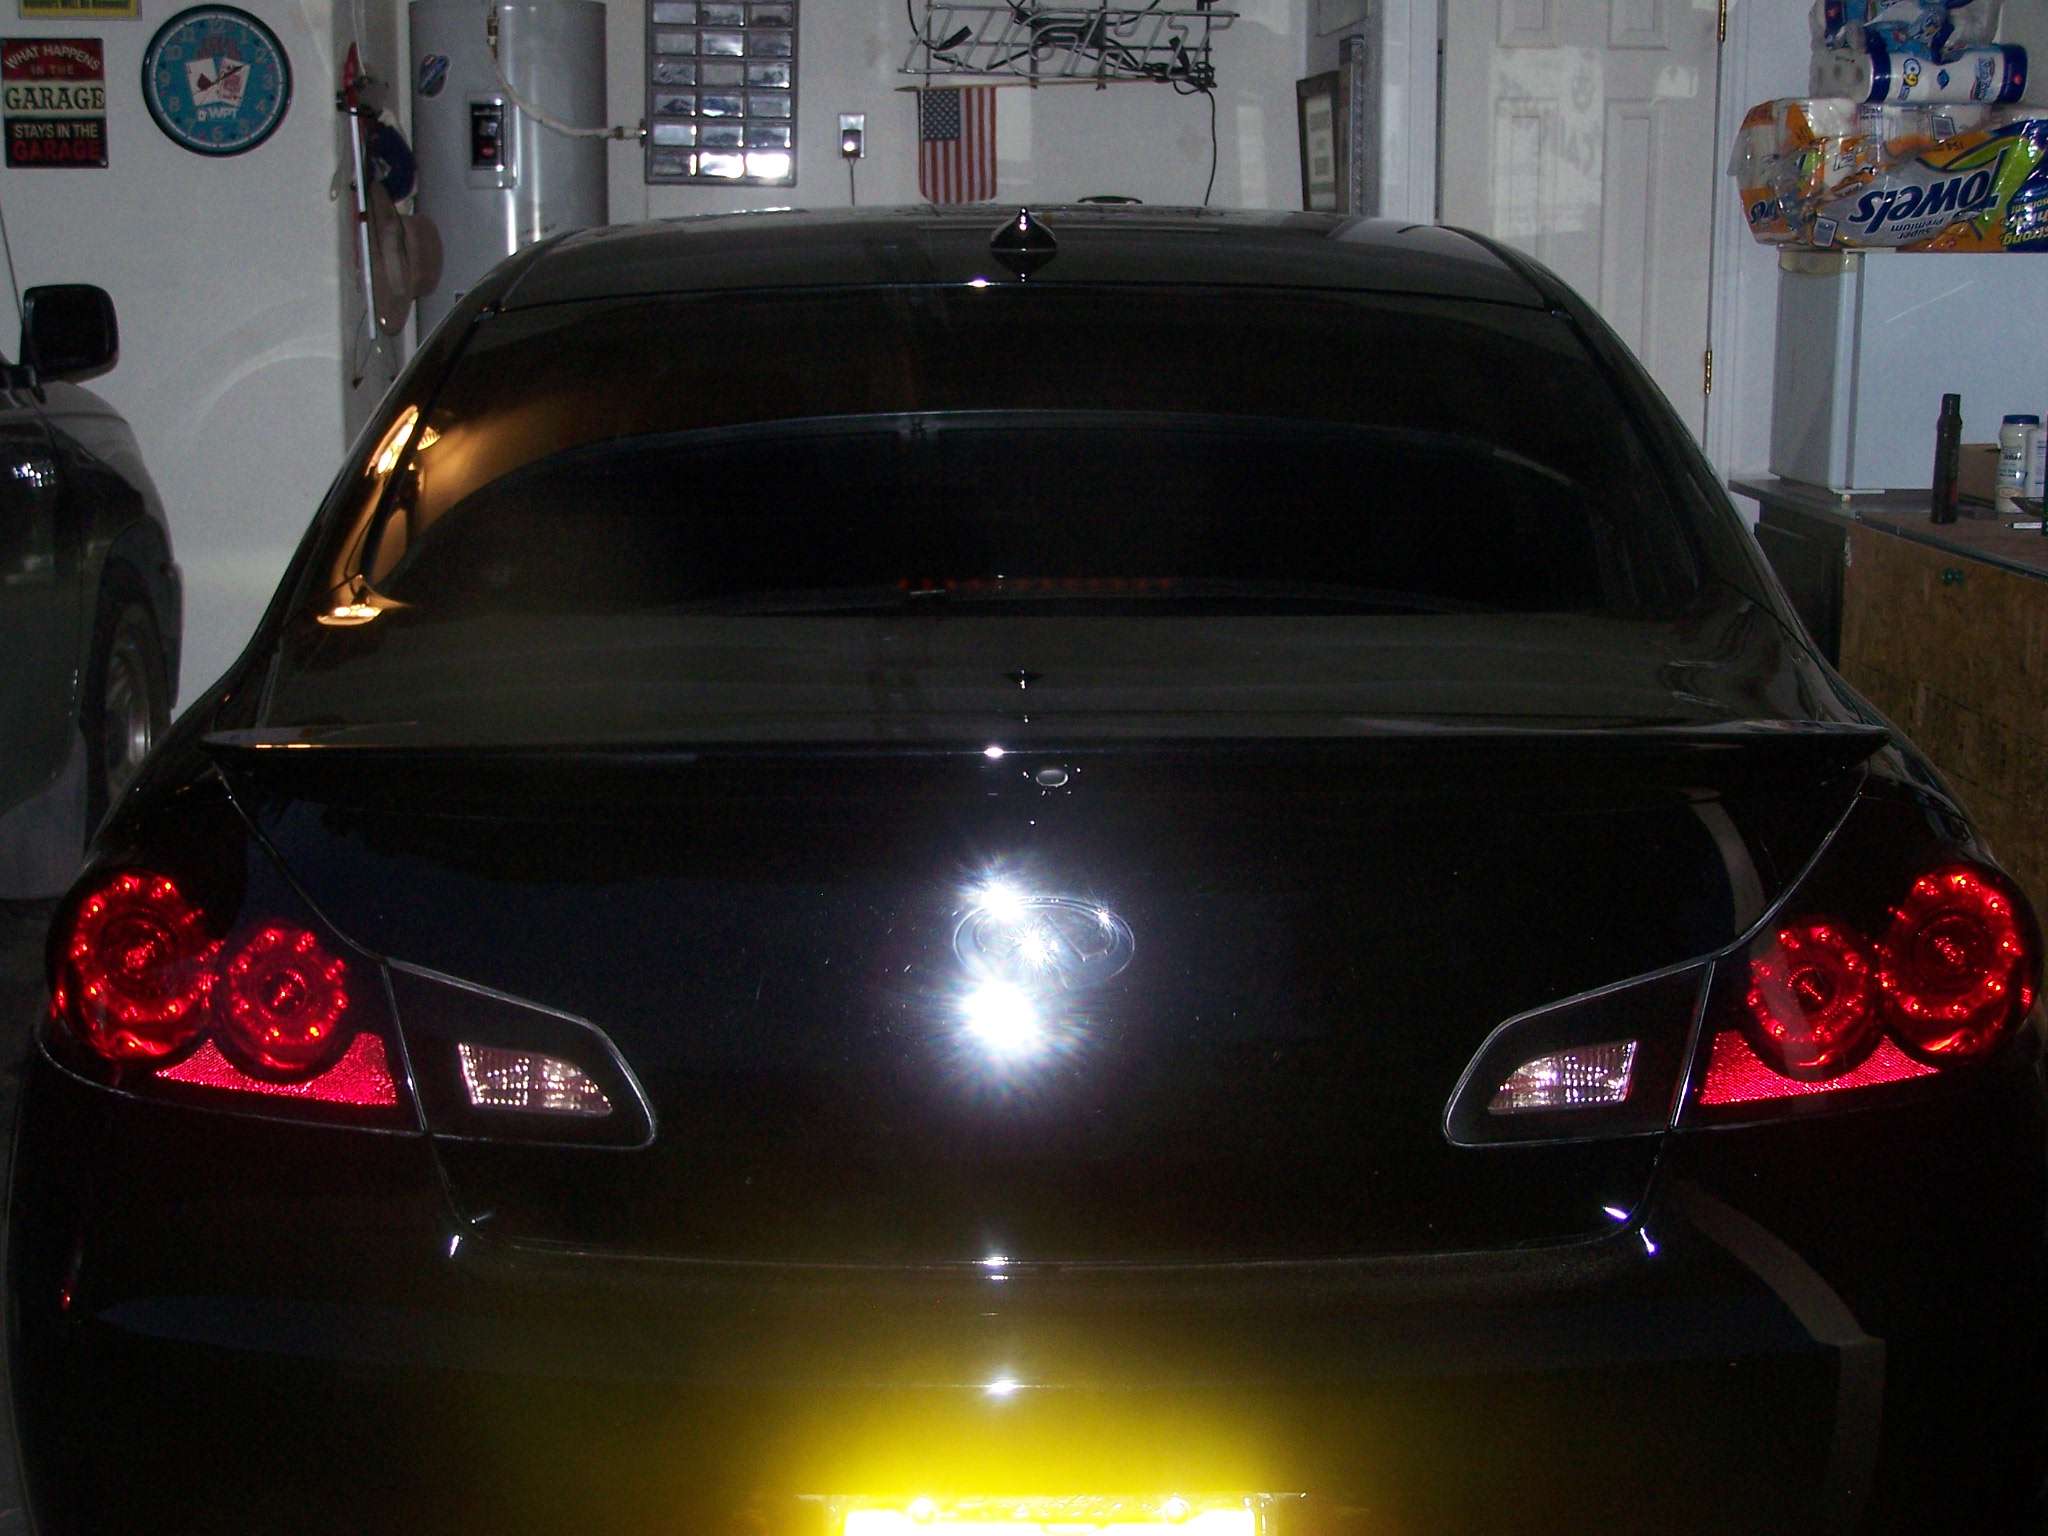
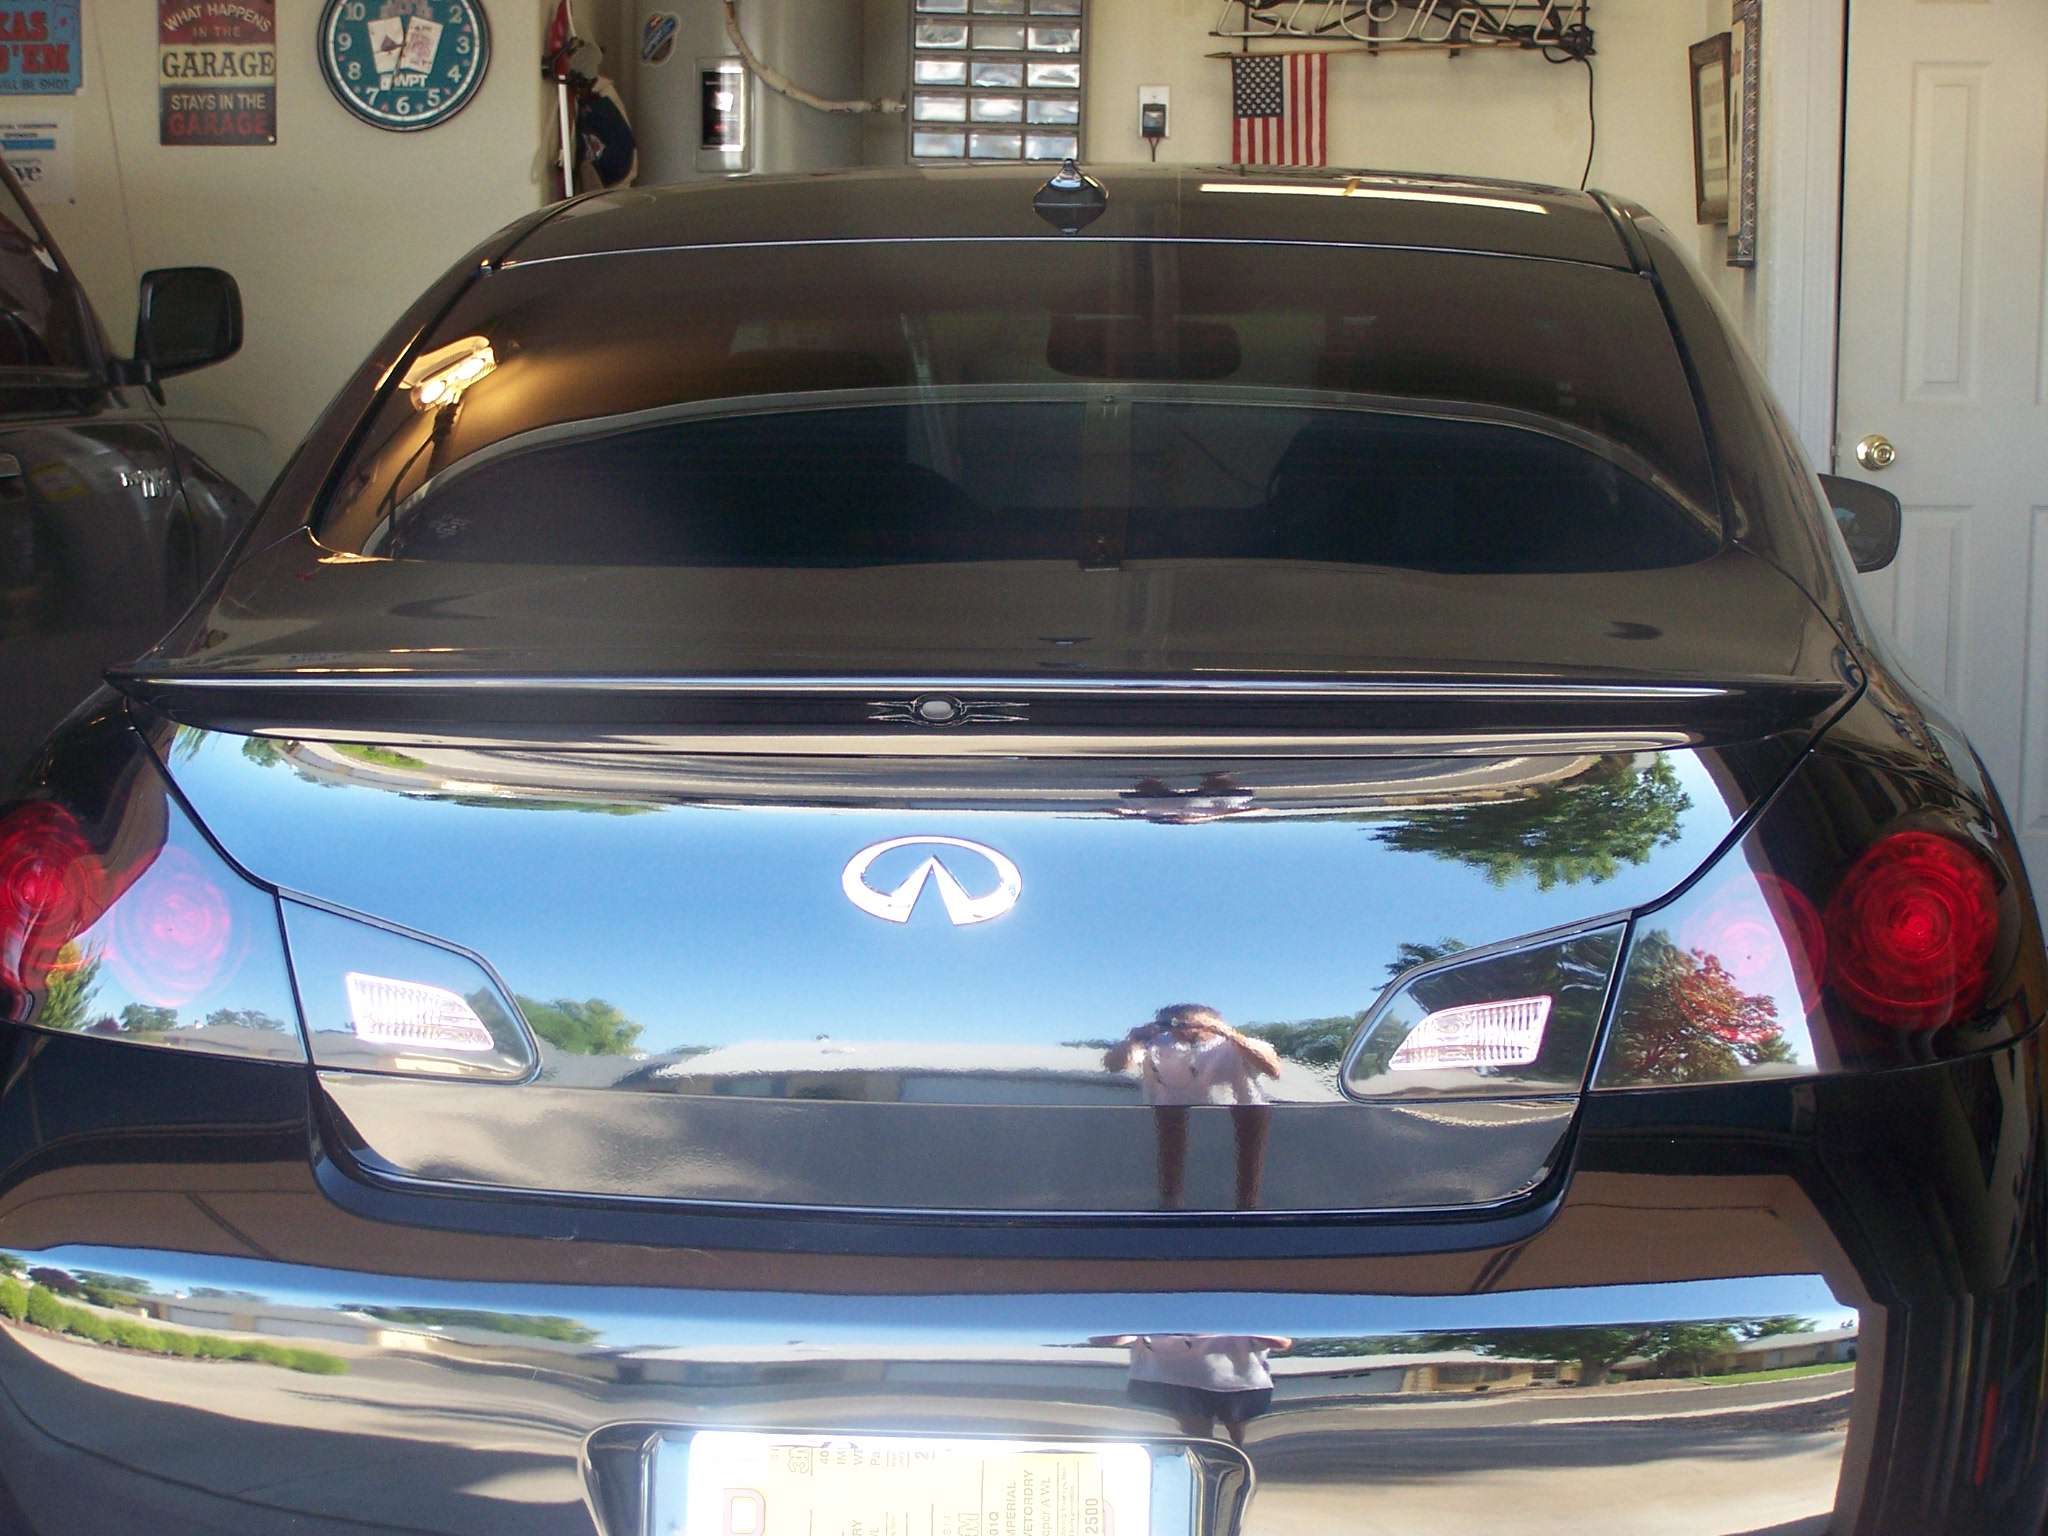
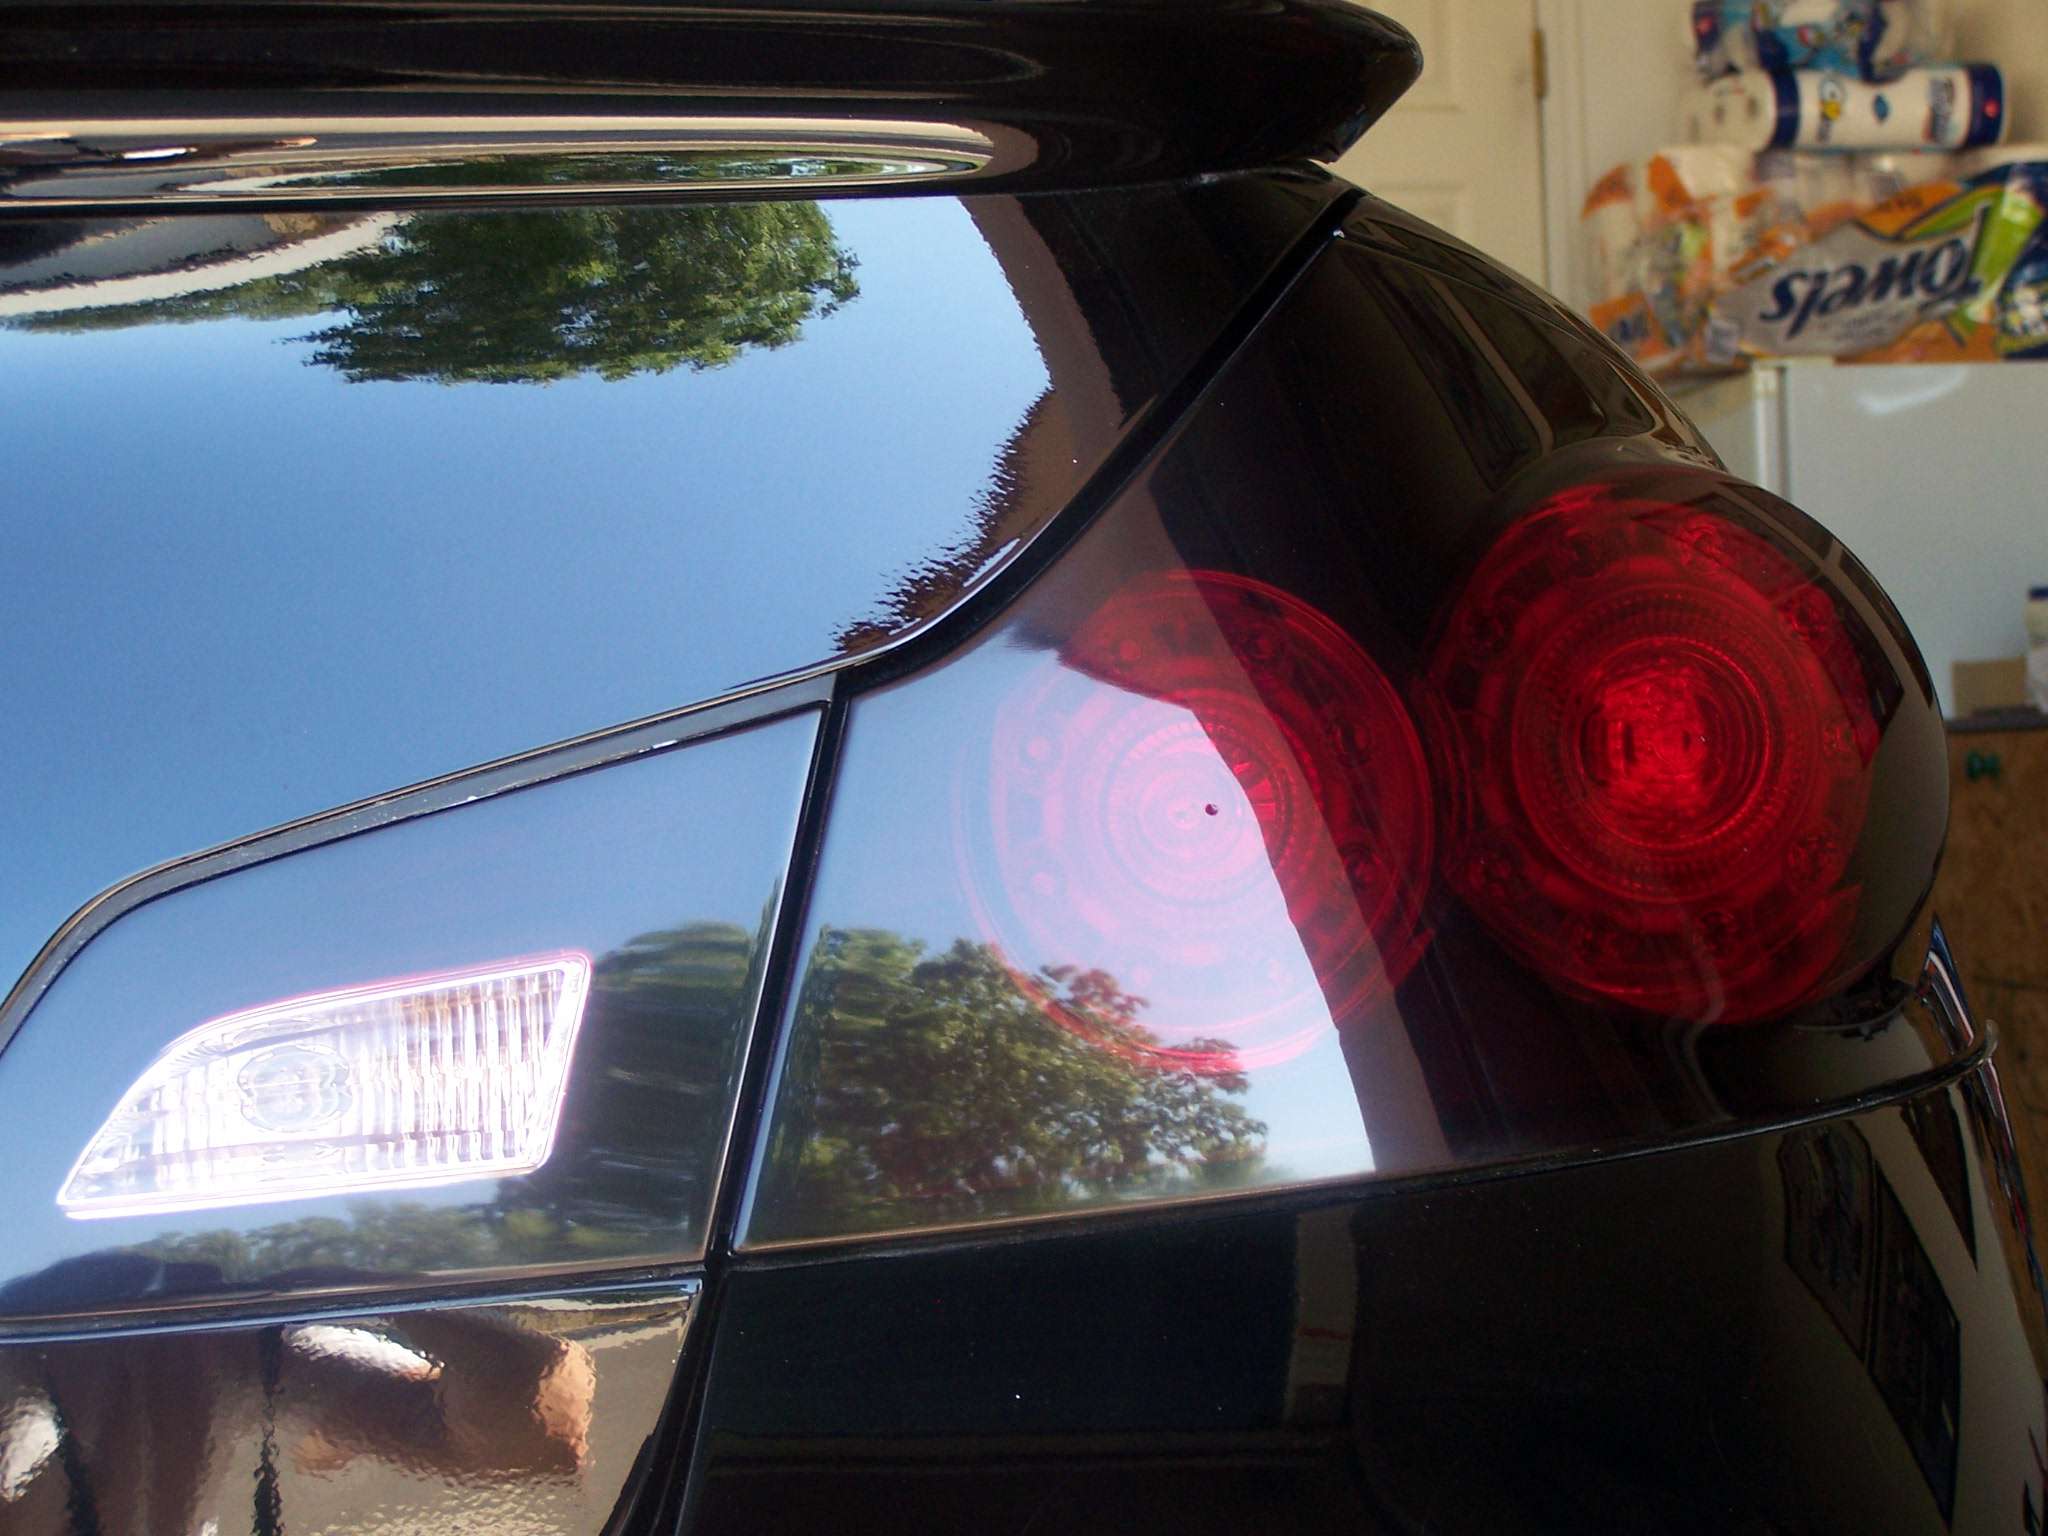
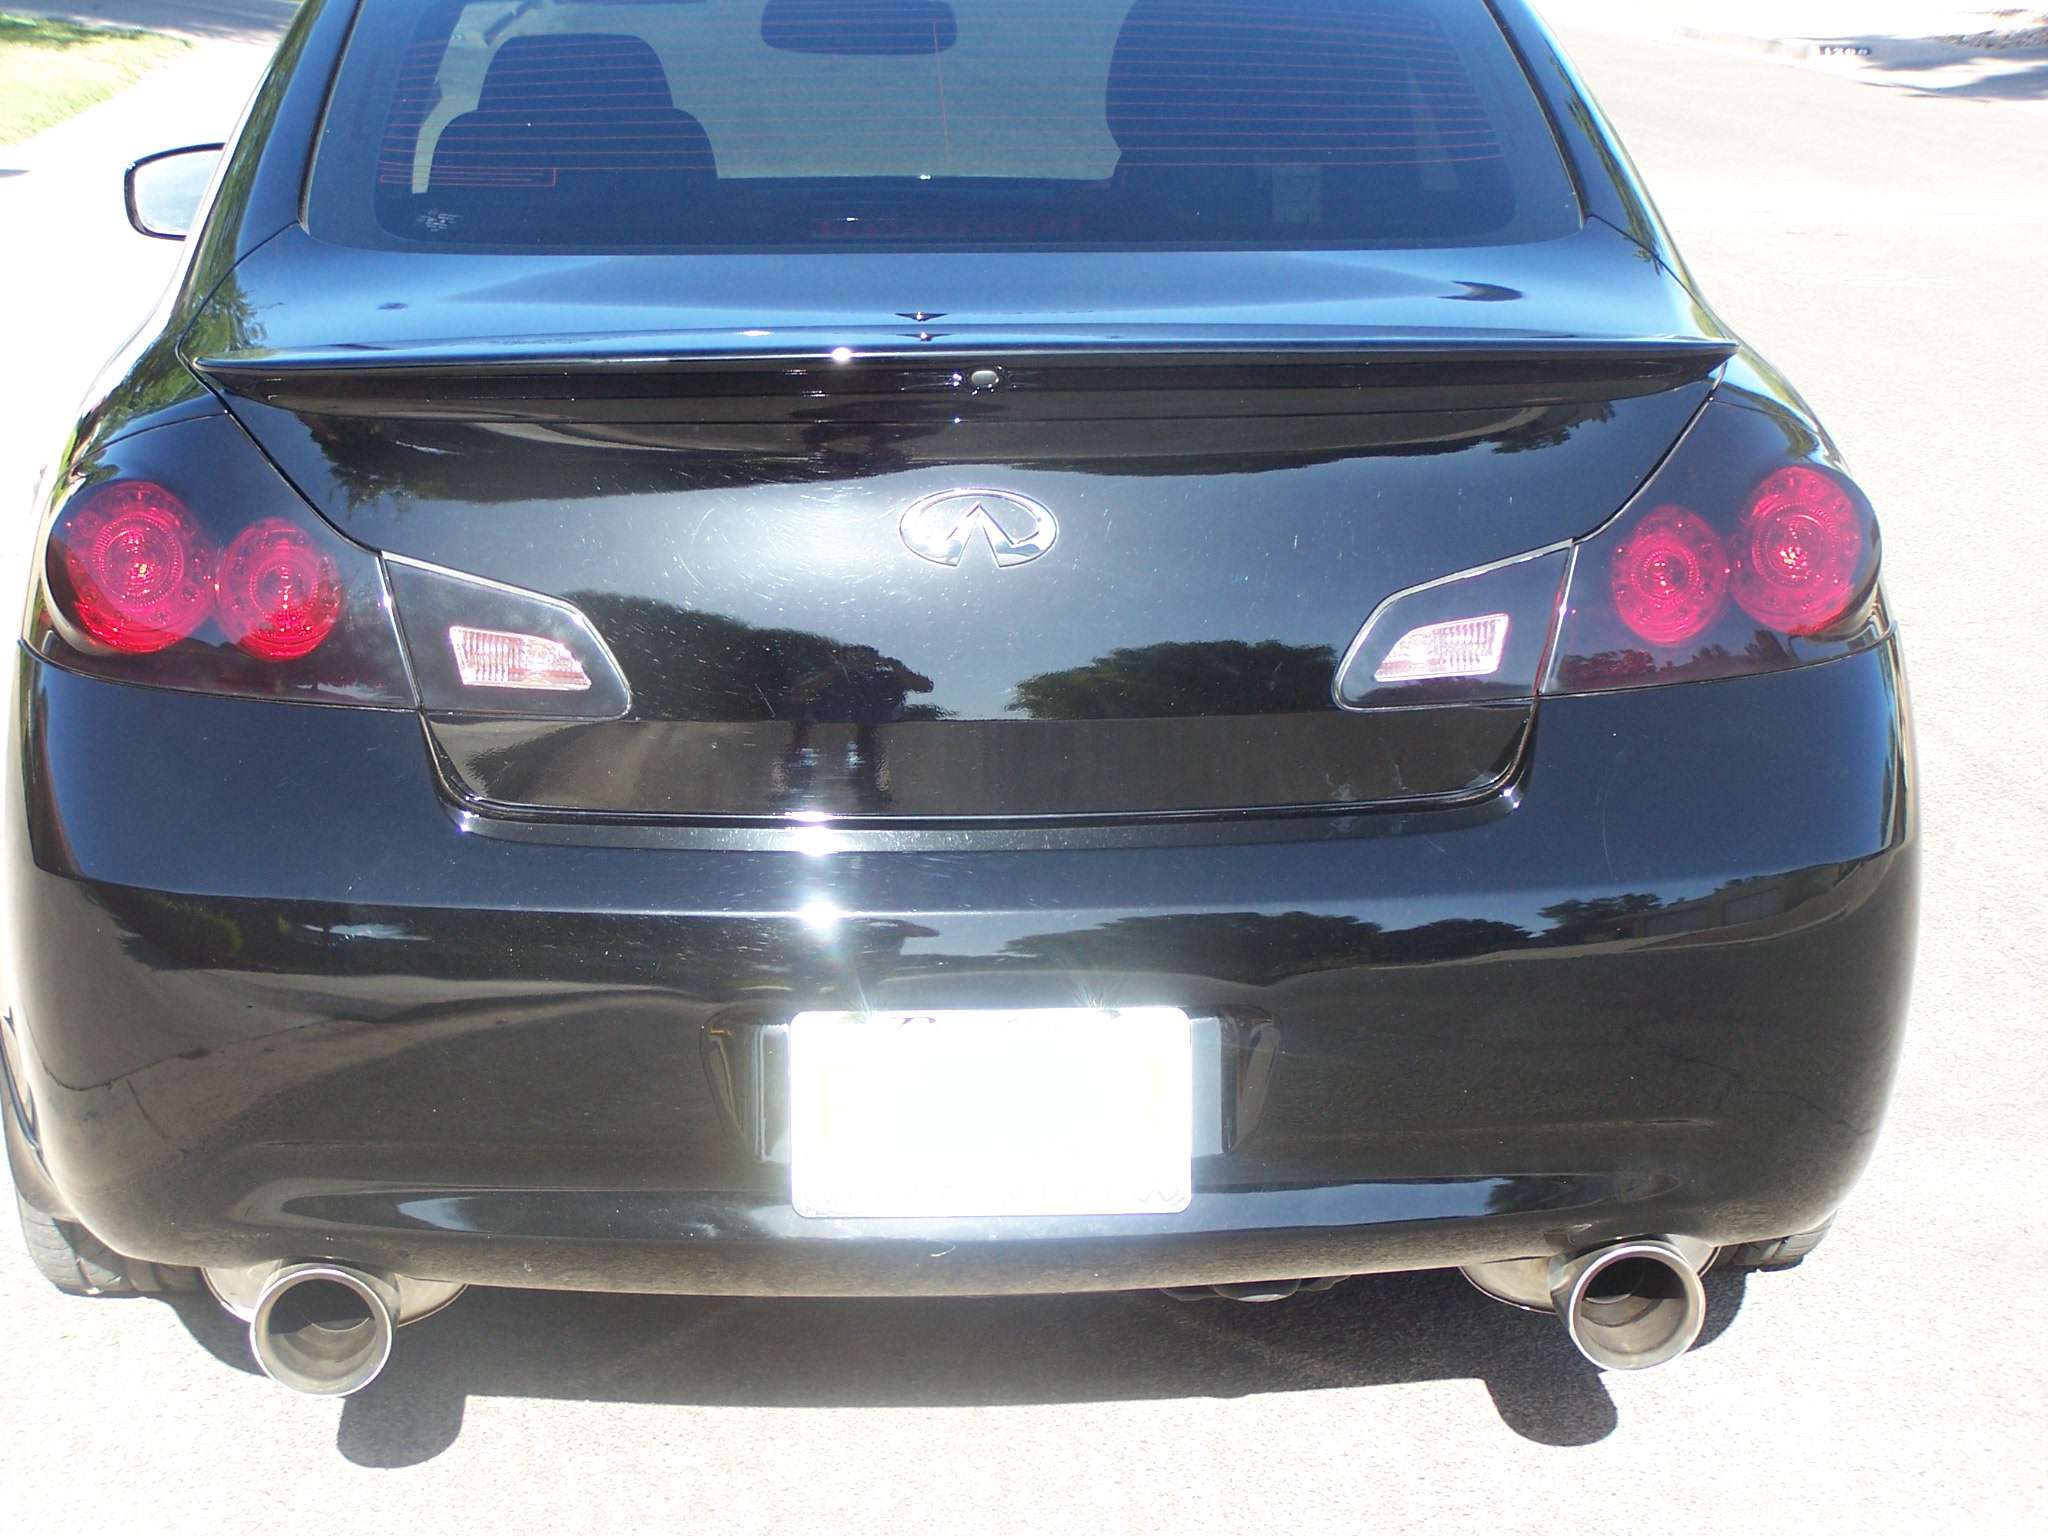
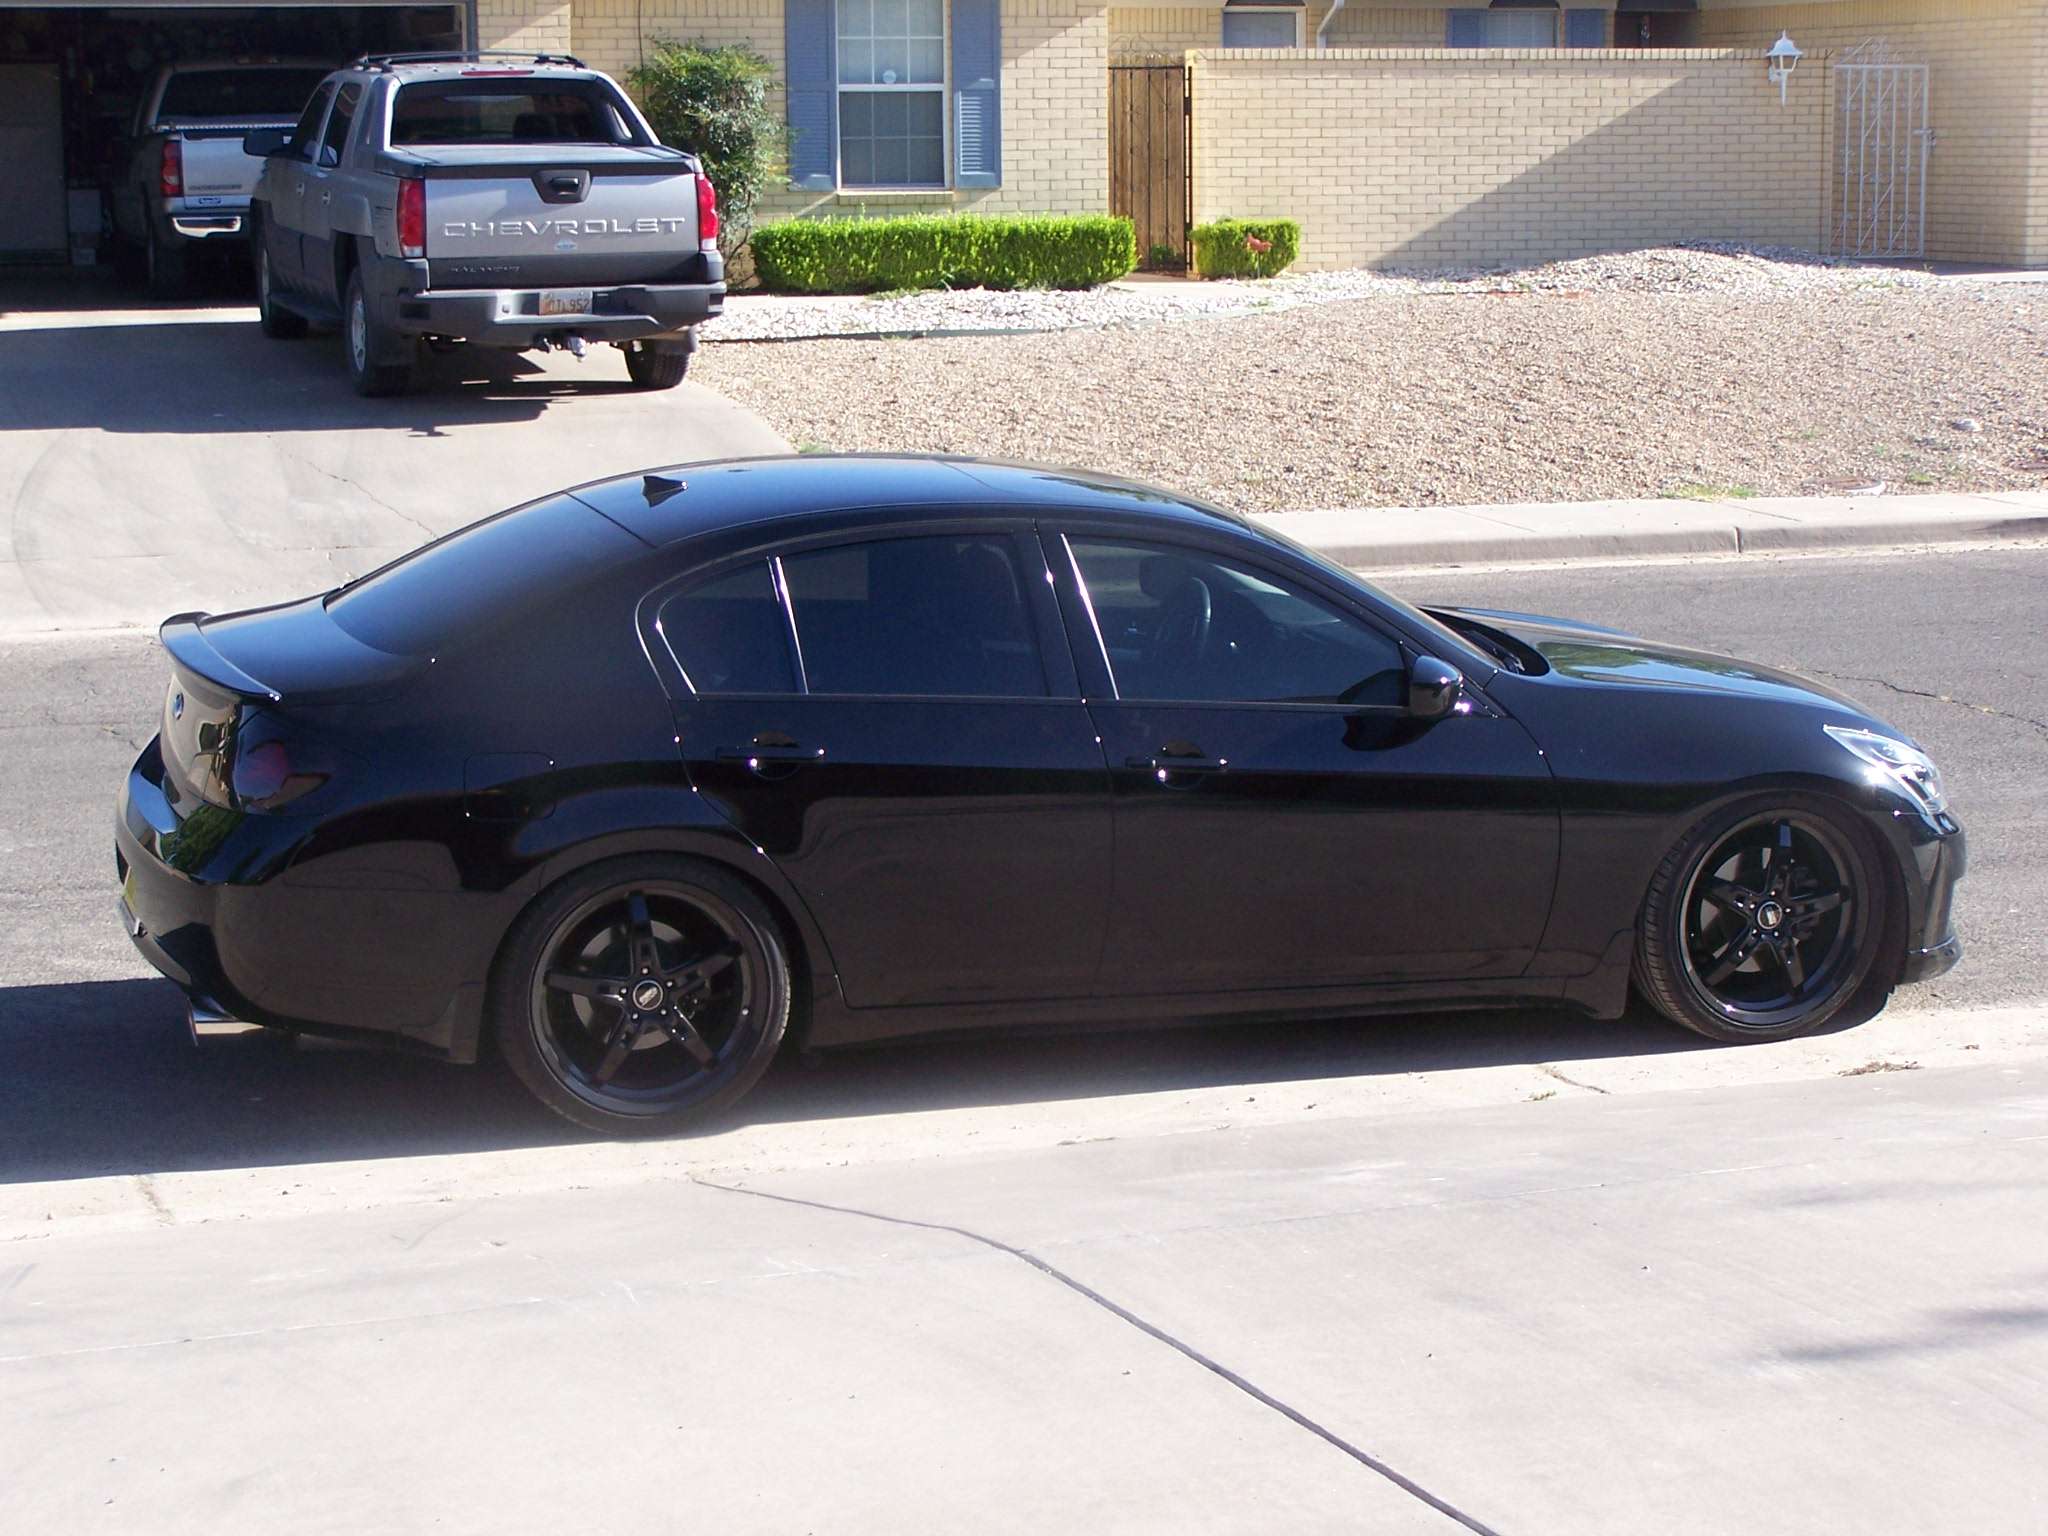
Here’s a few pics of my GTR style painted tails after an intial buffing, still have to do a final polish. And some DIY tips. Followed wakeboard & yogregb’s great DIY links
http://www.myg37.com/forums/d-i-y-in...se-cutout.html
http://www.myg37.com/forums/picture-...per-gloss.html
Those were both coupes so there’s a couple different things w/ the sedan. Removing the lights is simple, just remove the inner clips on the trunk lid to access the reverse lights, remove 3 nuts and then pull the lights from the trunk lid. When pulling the reverse lights you’ll separate the foam seal but it’s pretty pliable and just pushing the lights back onto the separated seal should still provide a good weather seal. The main taillights are even easier to remove since there’s no sticky seal tape to deal with, just 3 nuts and presto! I followed yogregbs DIY since I was going w/ the GTR look. I used extra vinyl that I had to make the cutouts for the ring lights and a small slot for the side marker LEDs and the reverse lights. I used VHT NiteShades, and Industry quality clearcoat (Dupont Acrylic Clear A-7480s). I started by wet sanding as per the above DIYs w/ 1000 grit, just enough to get rid of all the shine on the lens. You then tape up the hole over the reverse light and also around the rubber trim on the reverse light and the hard black plastic upper edge/flange on the main lights. I then wiped it down w/ Isopropyl Alcohol and applied the vinyl cutouts where needed. I then wiped the lenses down again w/ Alcohol to remove any finger oils/residue. I put all the parts to be painted at waist height so I’d be sure to get a good spray along all the edges, if you lay them on the ground to paint you’ll have a tough time getting good edge coverage. I sprayed them in my garage w/ a box fan venting outside (with all vehicles parked safely next door) to lessen the chance of dust & bugs landing on fresh paint. If possible it's best to paint one light and move it away from the spray area (so you won't get overspray mist back on your freshly painted light) and move on to the next light. I put down 2 medium to heavy coats of the NiteShades w/ about 15 minutes wait between coats. Spray around the edges first then spray across the lights. After the first coat decide how much darker you want them ( I wanted dark to blend w/ my black G) and spray accordingly. I waited another 15 minutes after the second coat then removed the vinyl from the main lights (it’s better to remove it when the paint’s still drying so you won’t have a chance to peel any paint away when removing the vinyl after the paint’s fully dry). If you happen to get your fingers on the lens under any vinyl be sure to dab out any prints or residue w/ more alcohol prior to spraying again. The final Niteshades coat covering the entire lens is a bit lighter coat than the previous two coats, you don’t want the actual lights any darker, you may even decide to avoid a coat over the entire lens if you want the brightest (stock) taillight output. DO NOT remove the vinyl on the reverse cutouts, just do a third Niteshades coat over the reverse light w/ the vinyl still applied to keep your reverse lights bright & useful (but be sure to remove the vinyl from the reverse lights 10-15 minutes after spraying the third coat). I then let the Niteshades set for 12 hours and then very lightly wetsanded w/ 2000 grit (barely ANY downward pressure applied) just to haze over the paint and get rid of any slight dust debris or anything else that may have landed in the paint, it also gives the clearcoat a better surface to bond to. I STRONGLY suggest investing in industry quality clearcoat, it’s 10-15 dollars more than the Rustoleums or Krylons but it’s a better paint that will last longer, goes on thicker, w/ a better spray as well. Evercoat Cut-in-Clear, Spraymax 2k cut-in-clear, or the Dupont clear I listed above are all excellent clearcoats, usually can only be found online or at auto-paint/body shop supply stores. If you can’t find the premium clearcoats Duplicolor RV, Truck & Van clearcoats get good reviews.
Again, wipe the entire lens w/ alcohol to get rid of the sanding debris and skin oils and then shoot a medium-heavy coat of clear, wait 15 minutes then apply a 2nd coat and so on until you get 3 heavy coats of clear on your tails. The premium clearcoats go on thicker than the cheap stuff so only 3 coats is plenty, otherwise about 5-6 coats of the cheaper clear is about right. If you can’t locate the better clearcoats I’d recommend shooting Niteshades on a scrap plastic piece, let it dry then shoot the clearcoat on the scrap just to be sure it sprays clear, some cheaper clearcoats go bad or just don’t mix right w/ the Niteshades and it’s much better to find this out on a scrap rather than having to do a complete redo.Let the clear dry overnight and then it’s safe to install the lights back in your G. I’d wait another 48 hours before finish buffing. I used 2000 grit to get rid of all the orangepeel, just sand till you see no imperfections on the surface, followed by 2500 grit for a final smooth over, then a final buffing w/ Macguires Ultimate Compound by hand (cheapest place for this is Target of all places, about 7 bucks a bottle) w/ micro fiber pads ( I don’t have a power buffer ). If you have a power random action buffer I’d follow wakeboards or yogregs buffing info. There really is no need to invest in a buffer if you don't have one, the lights are a small area and you can get mirror like results by hand, just takes a bit more sweat. If anyone out there wants to do this GTR tail style I can provide you w/ the precut vinyl pieces to save you time and insure an accurate fit. Just PM me & I’ll hook you up
Sorry for the horrible pics, I'll try to post some much better ones after the final polish session

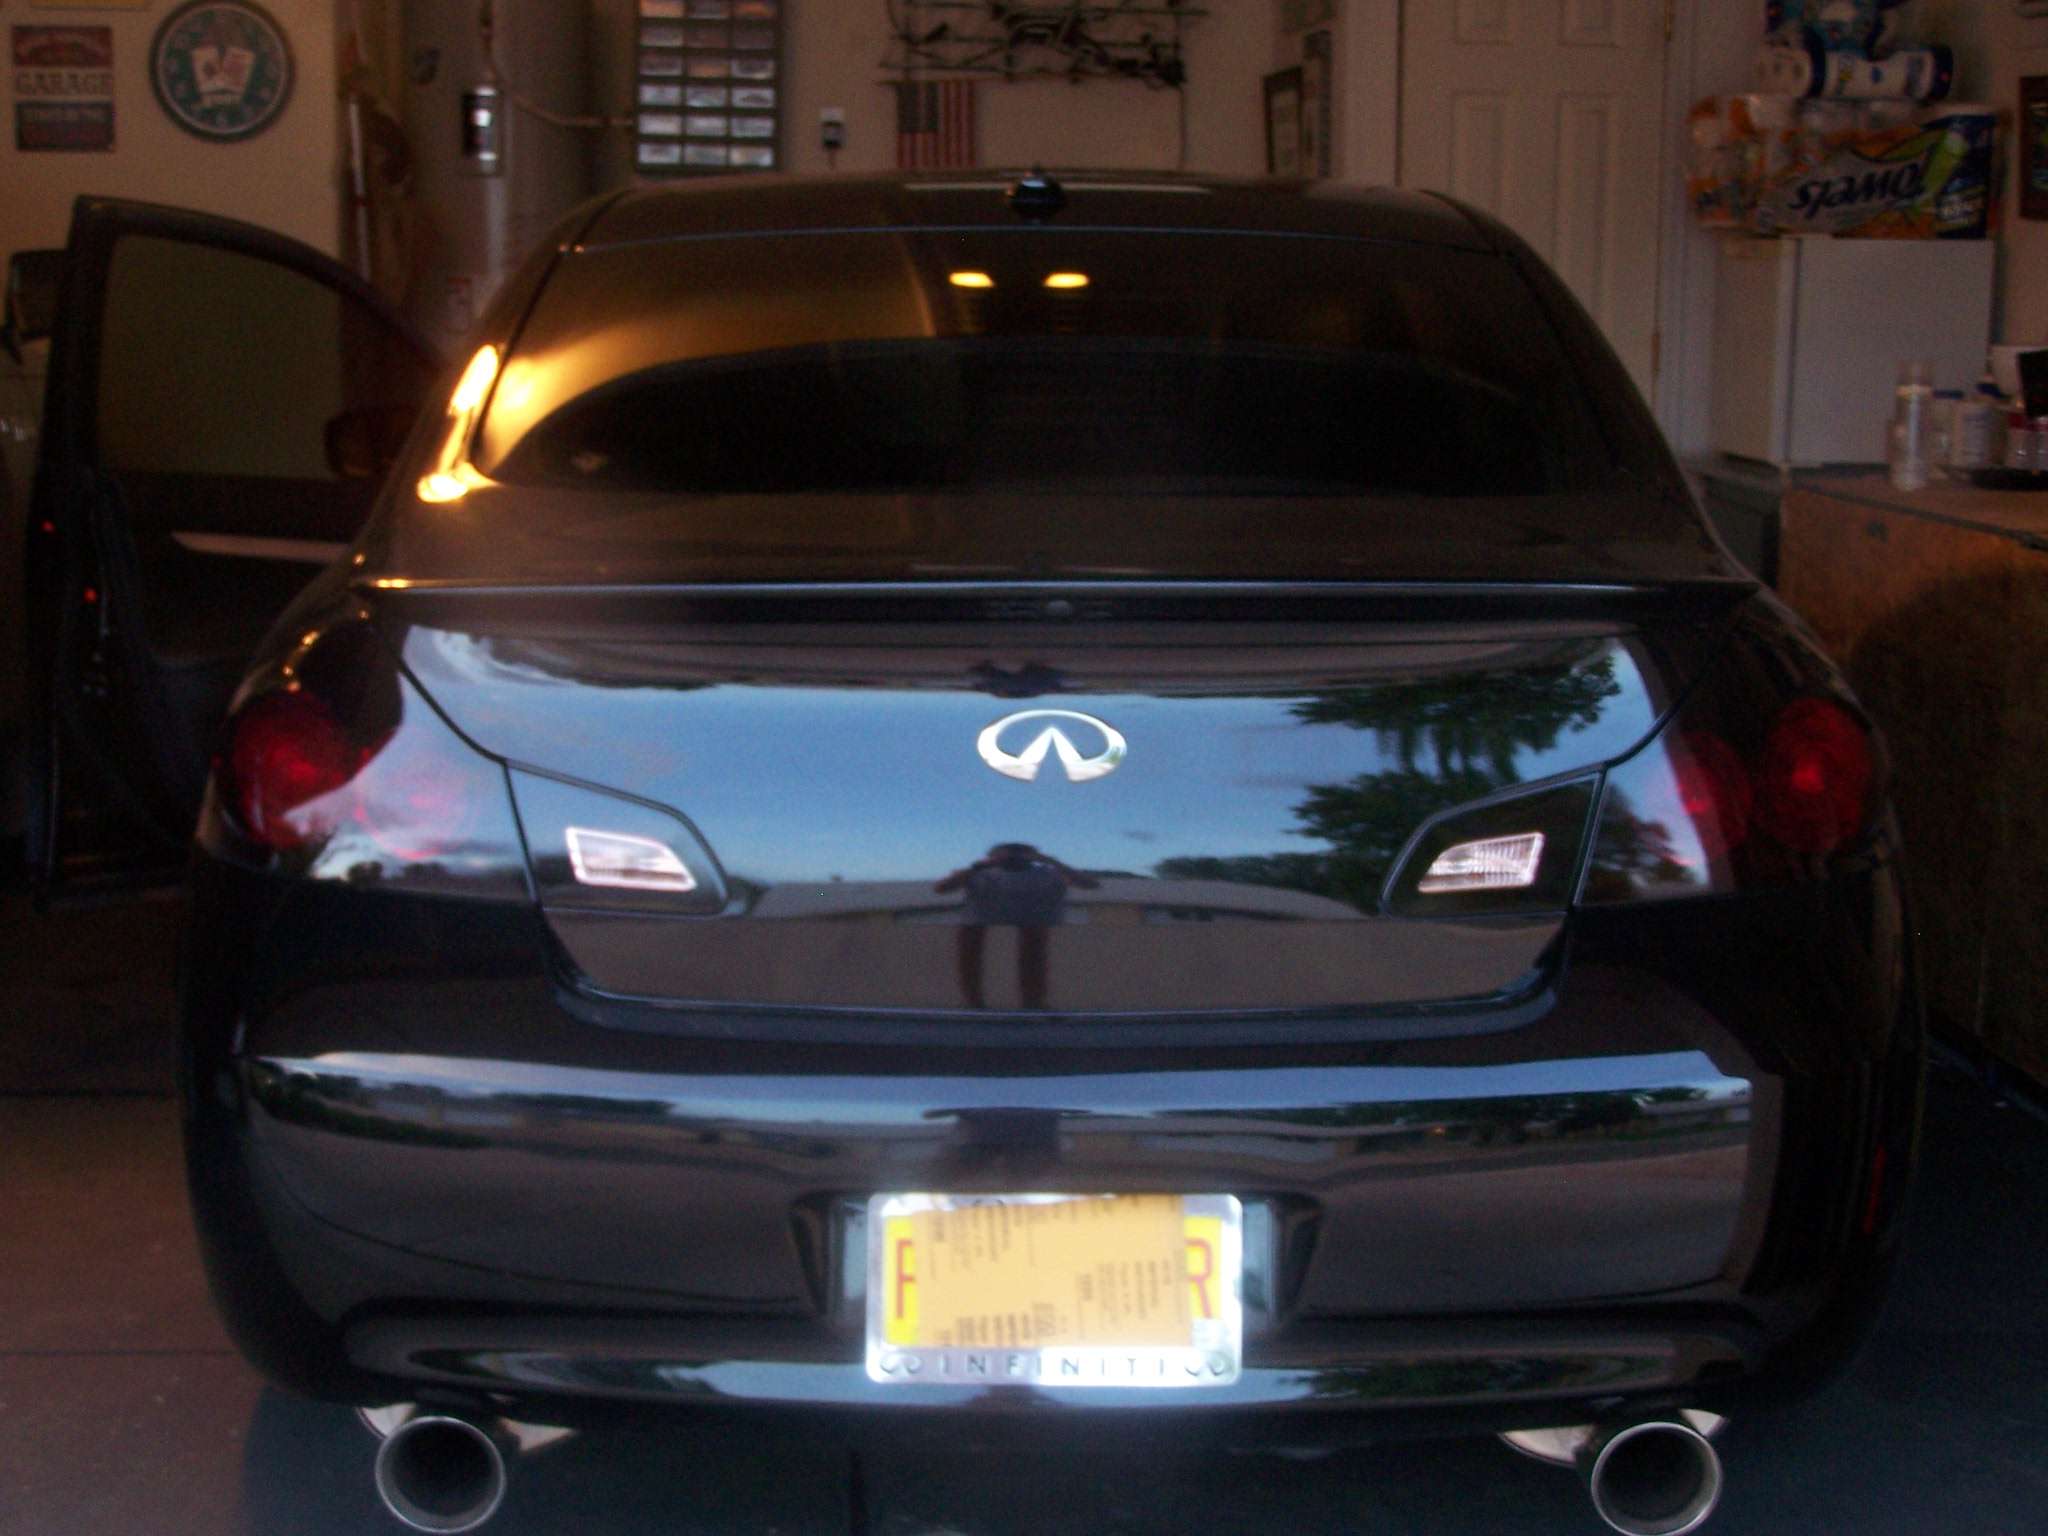
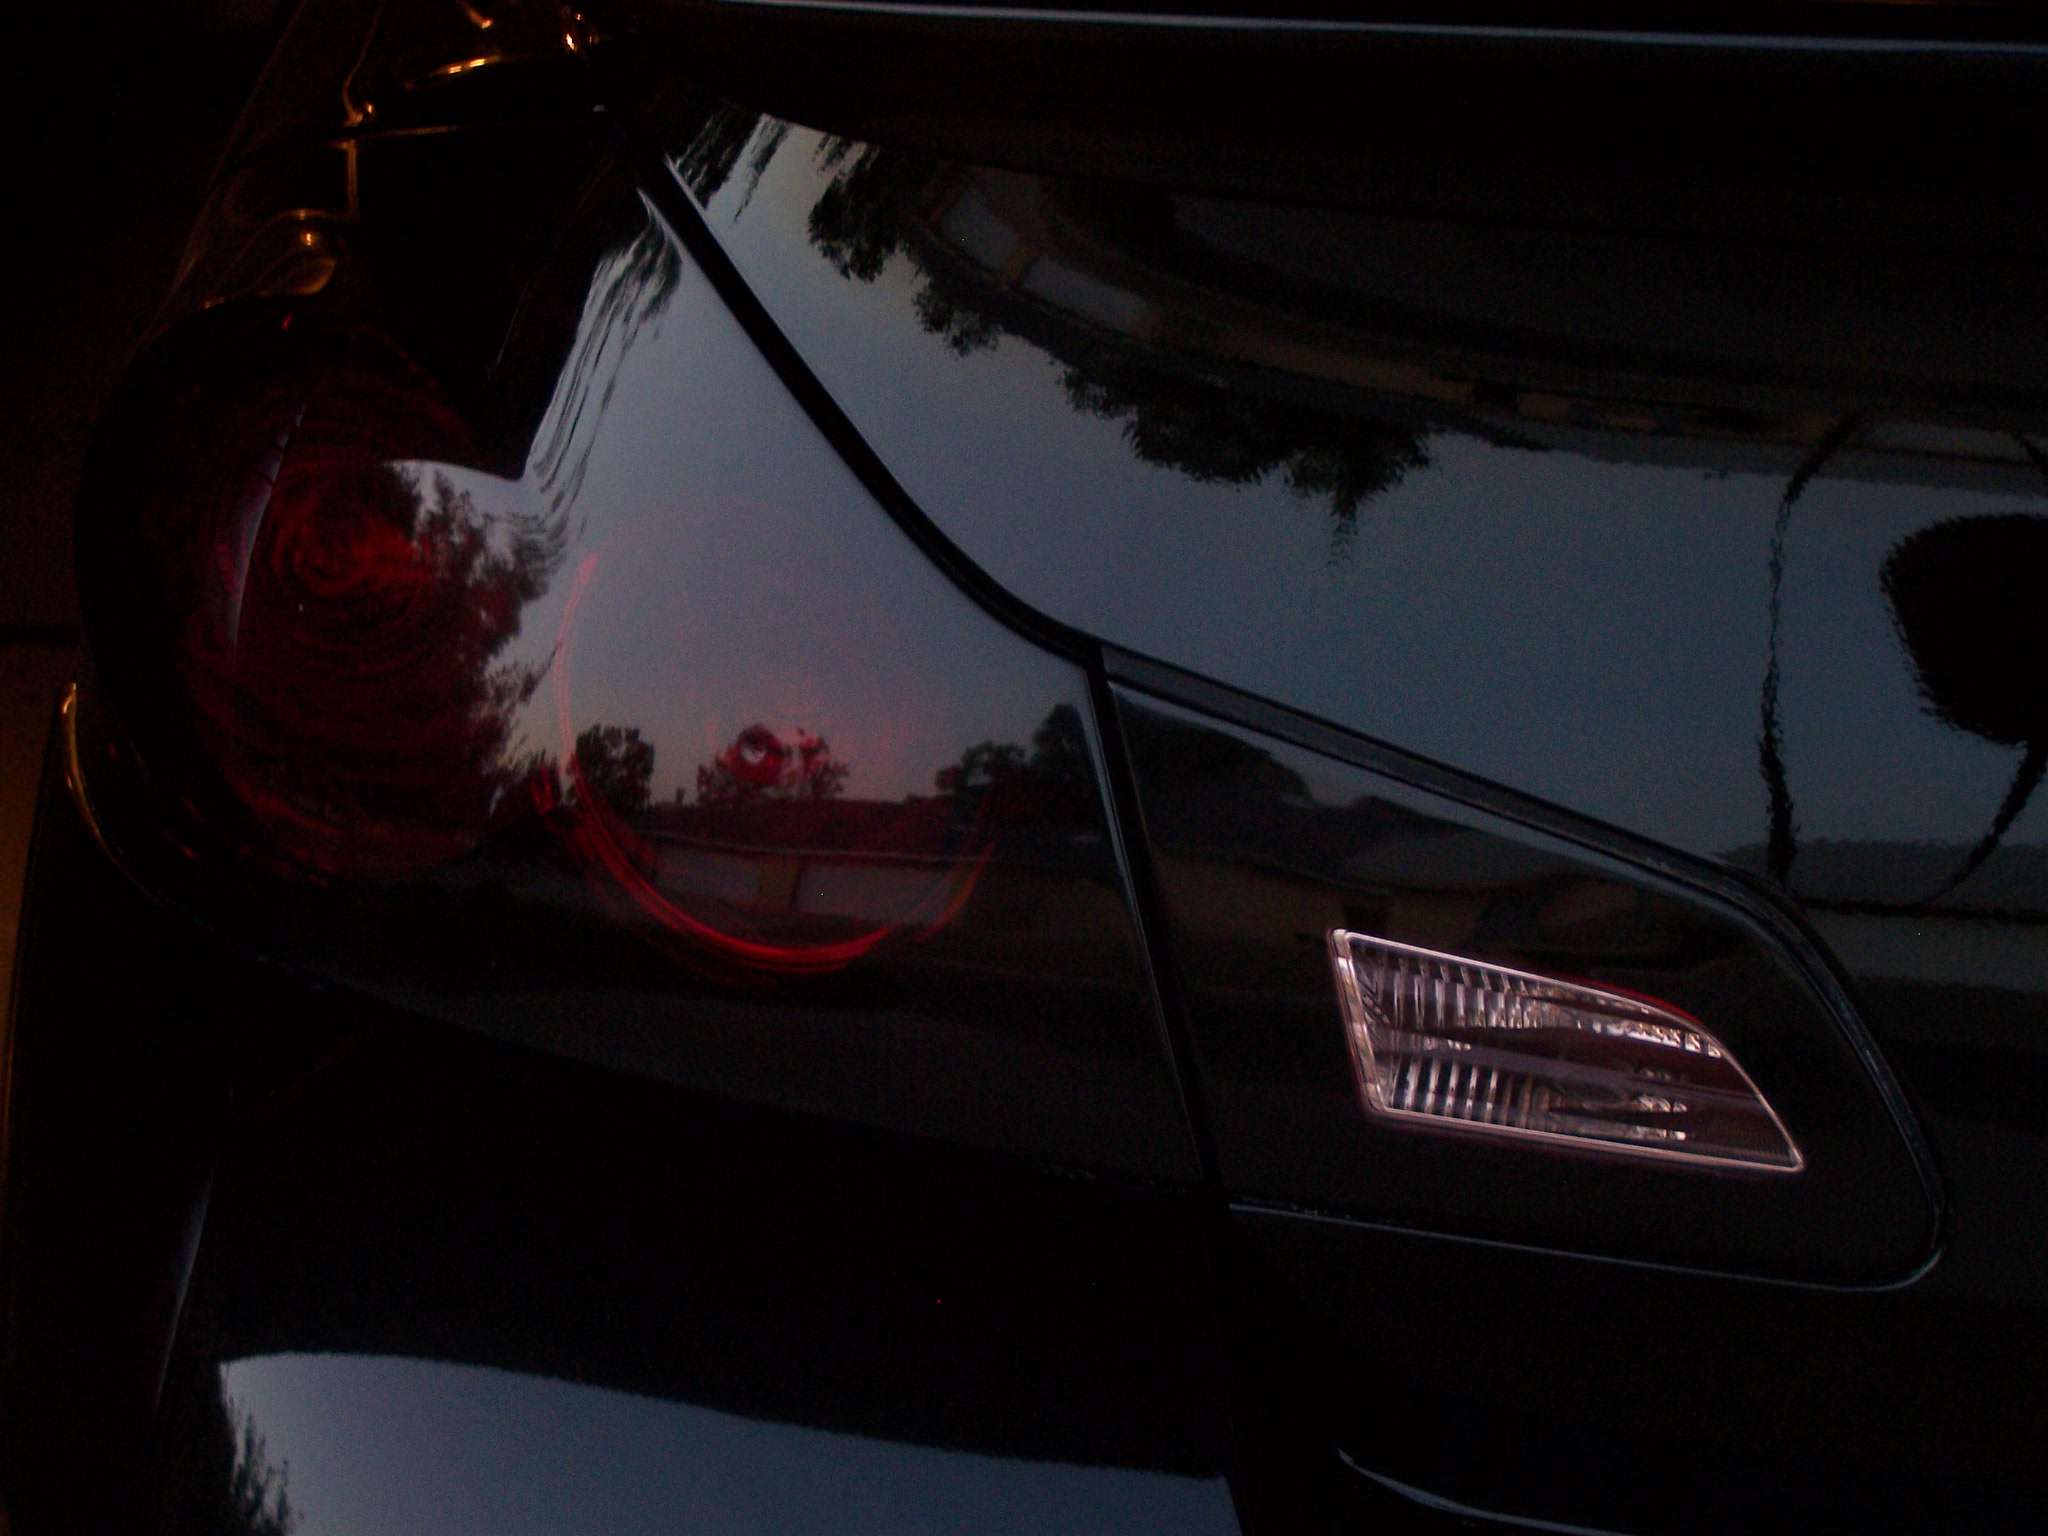
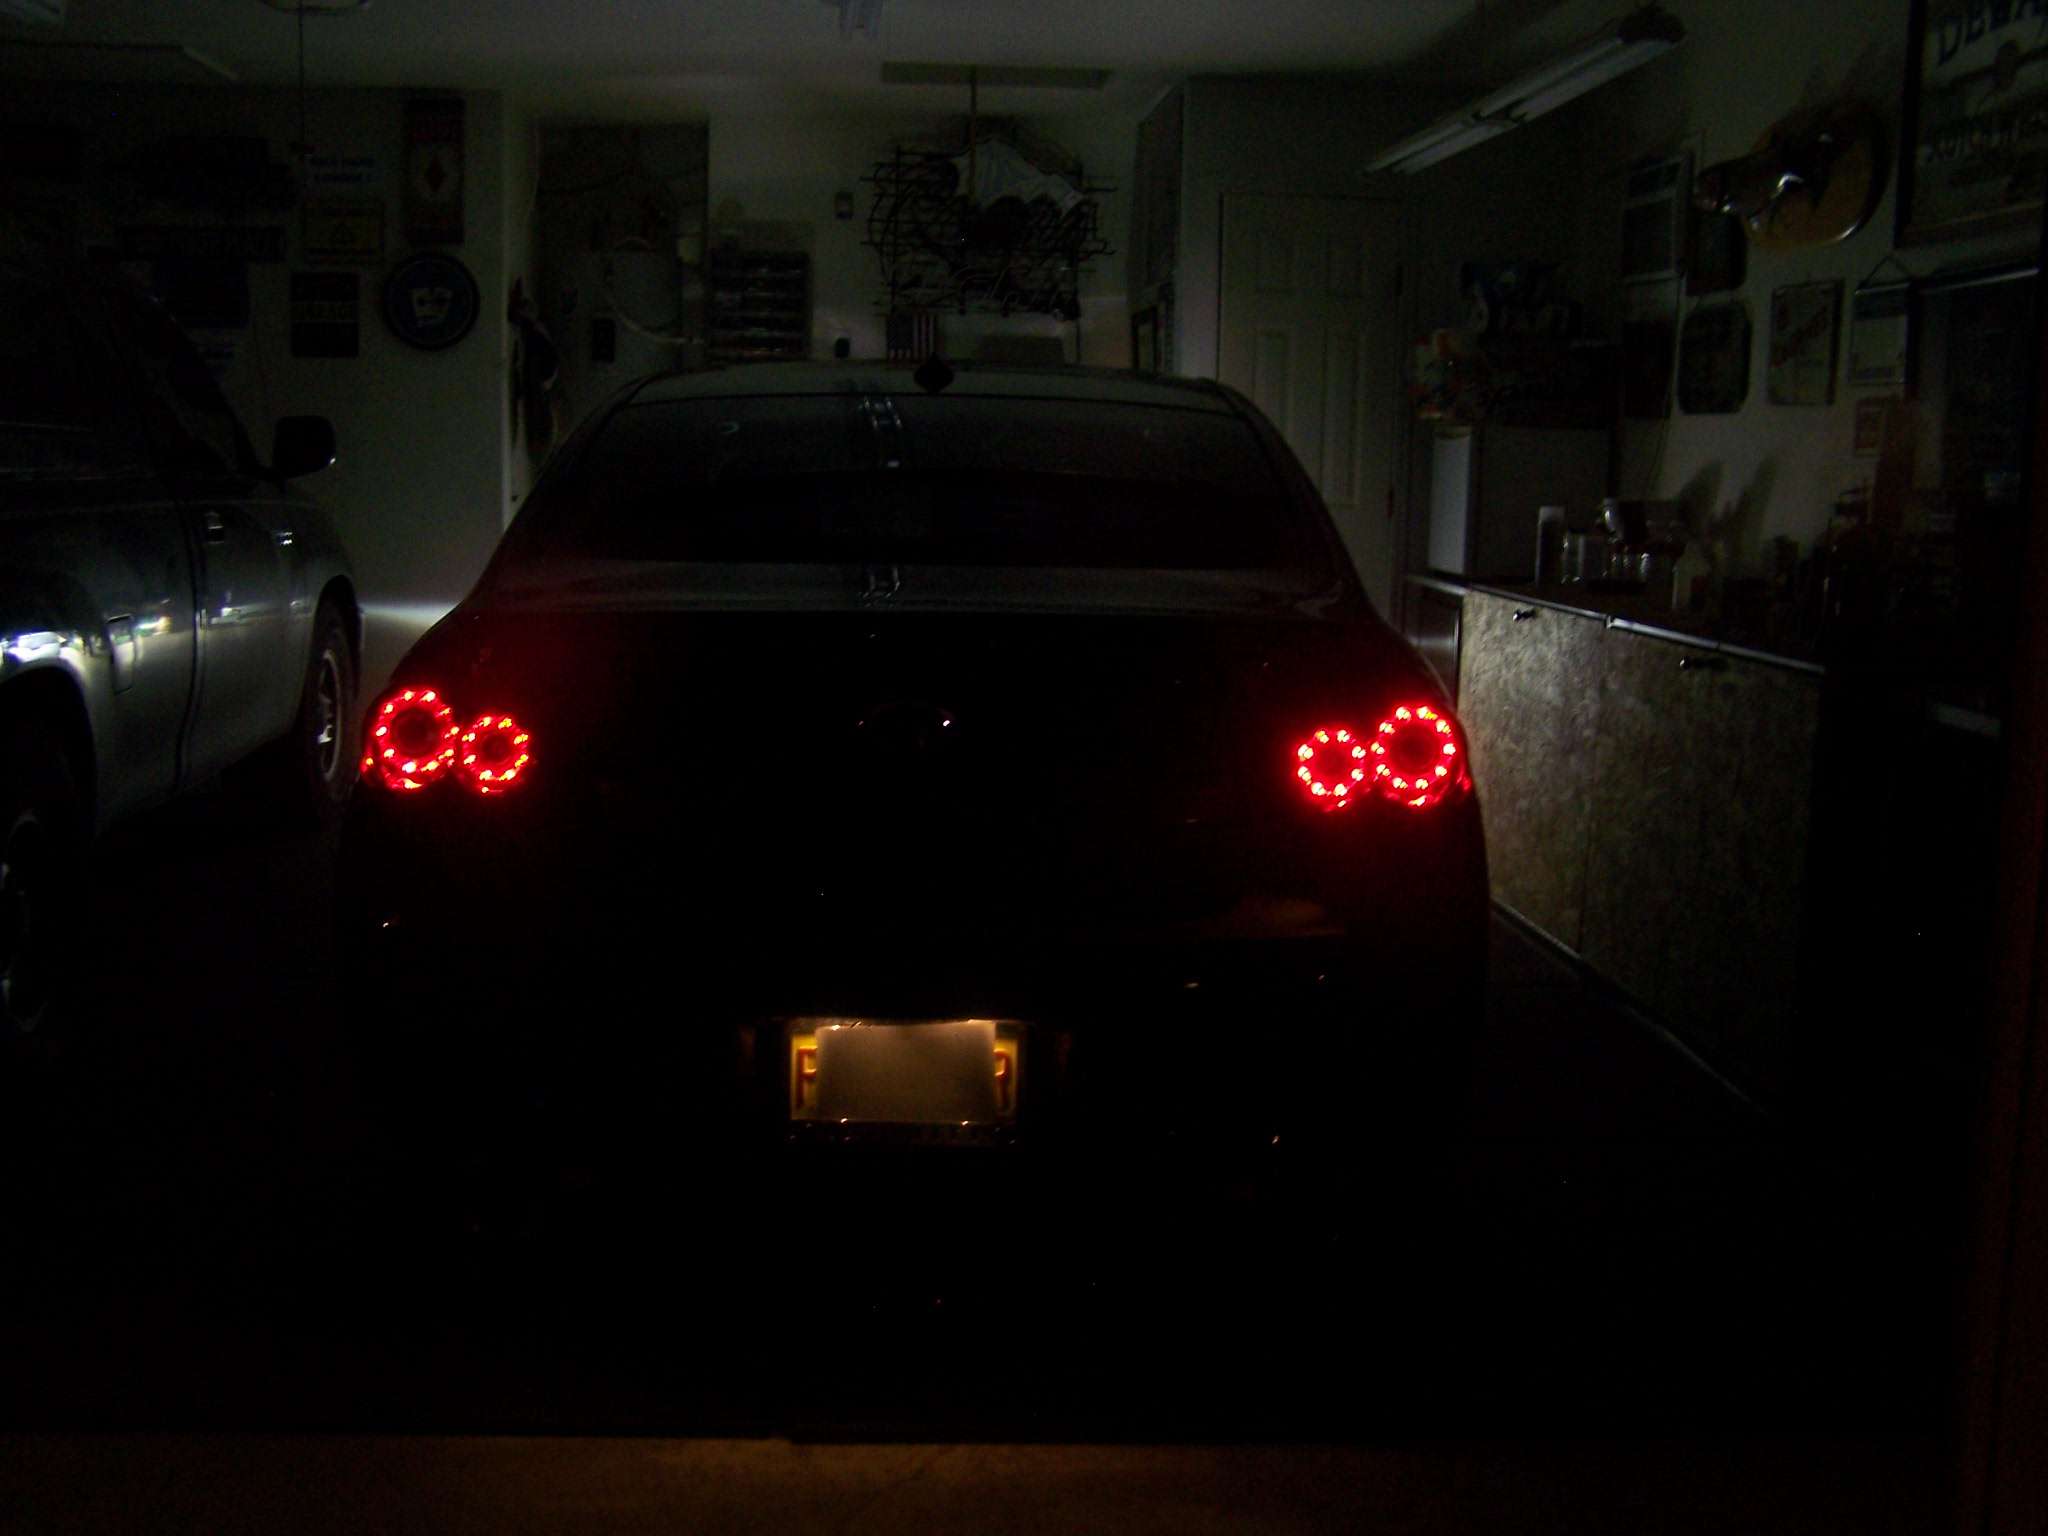
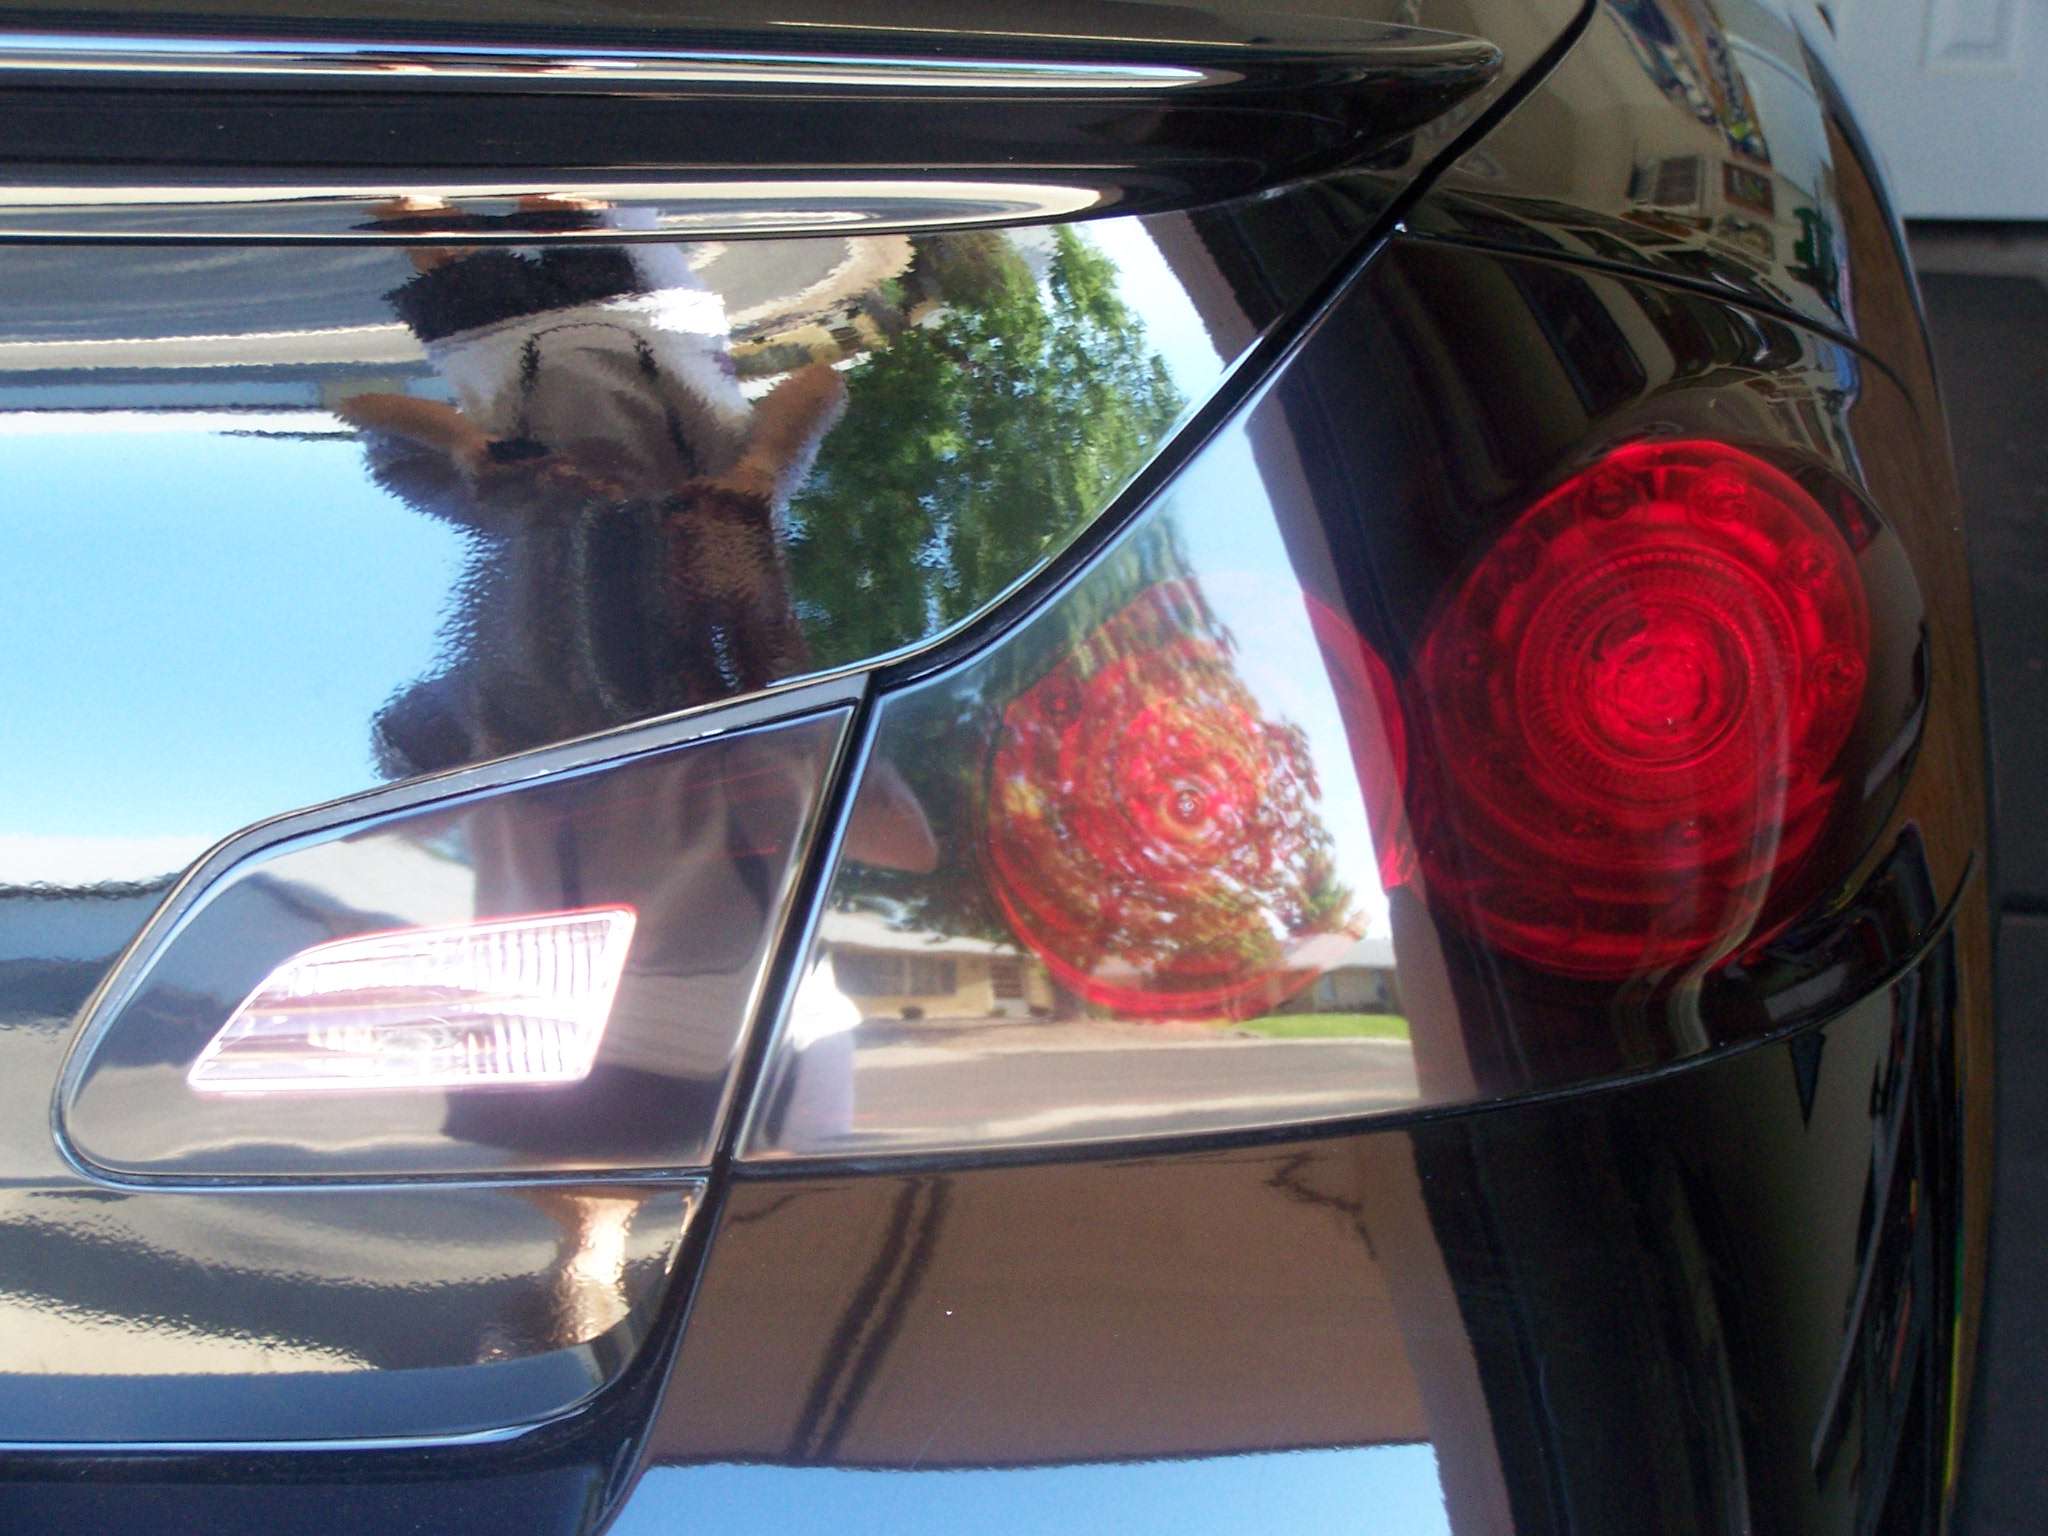
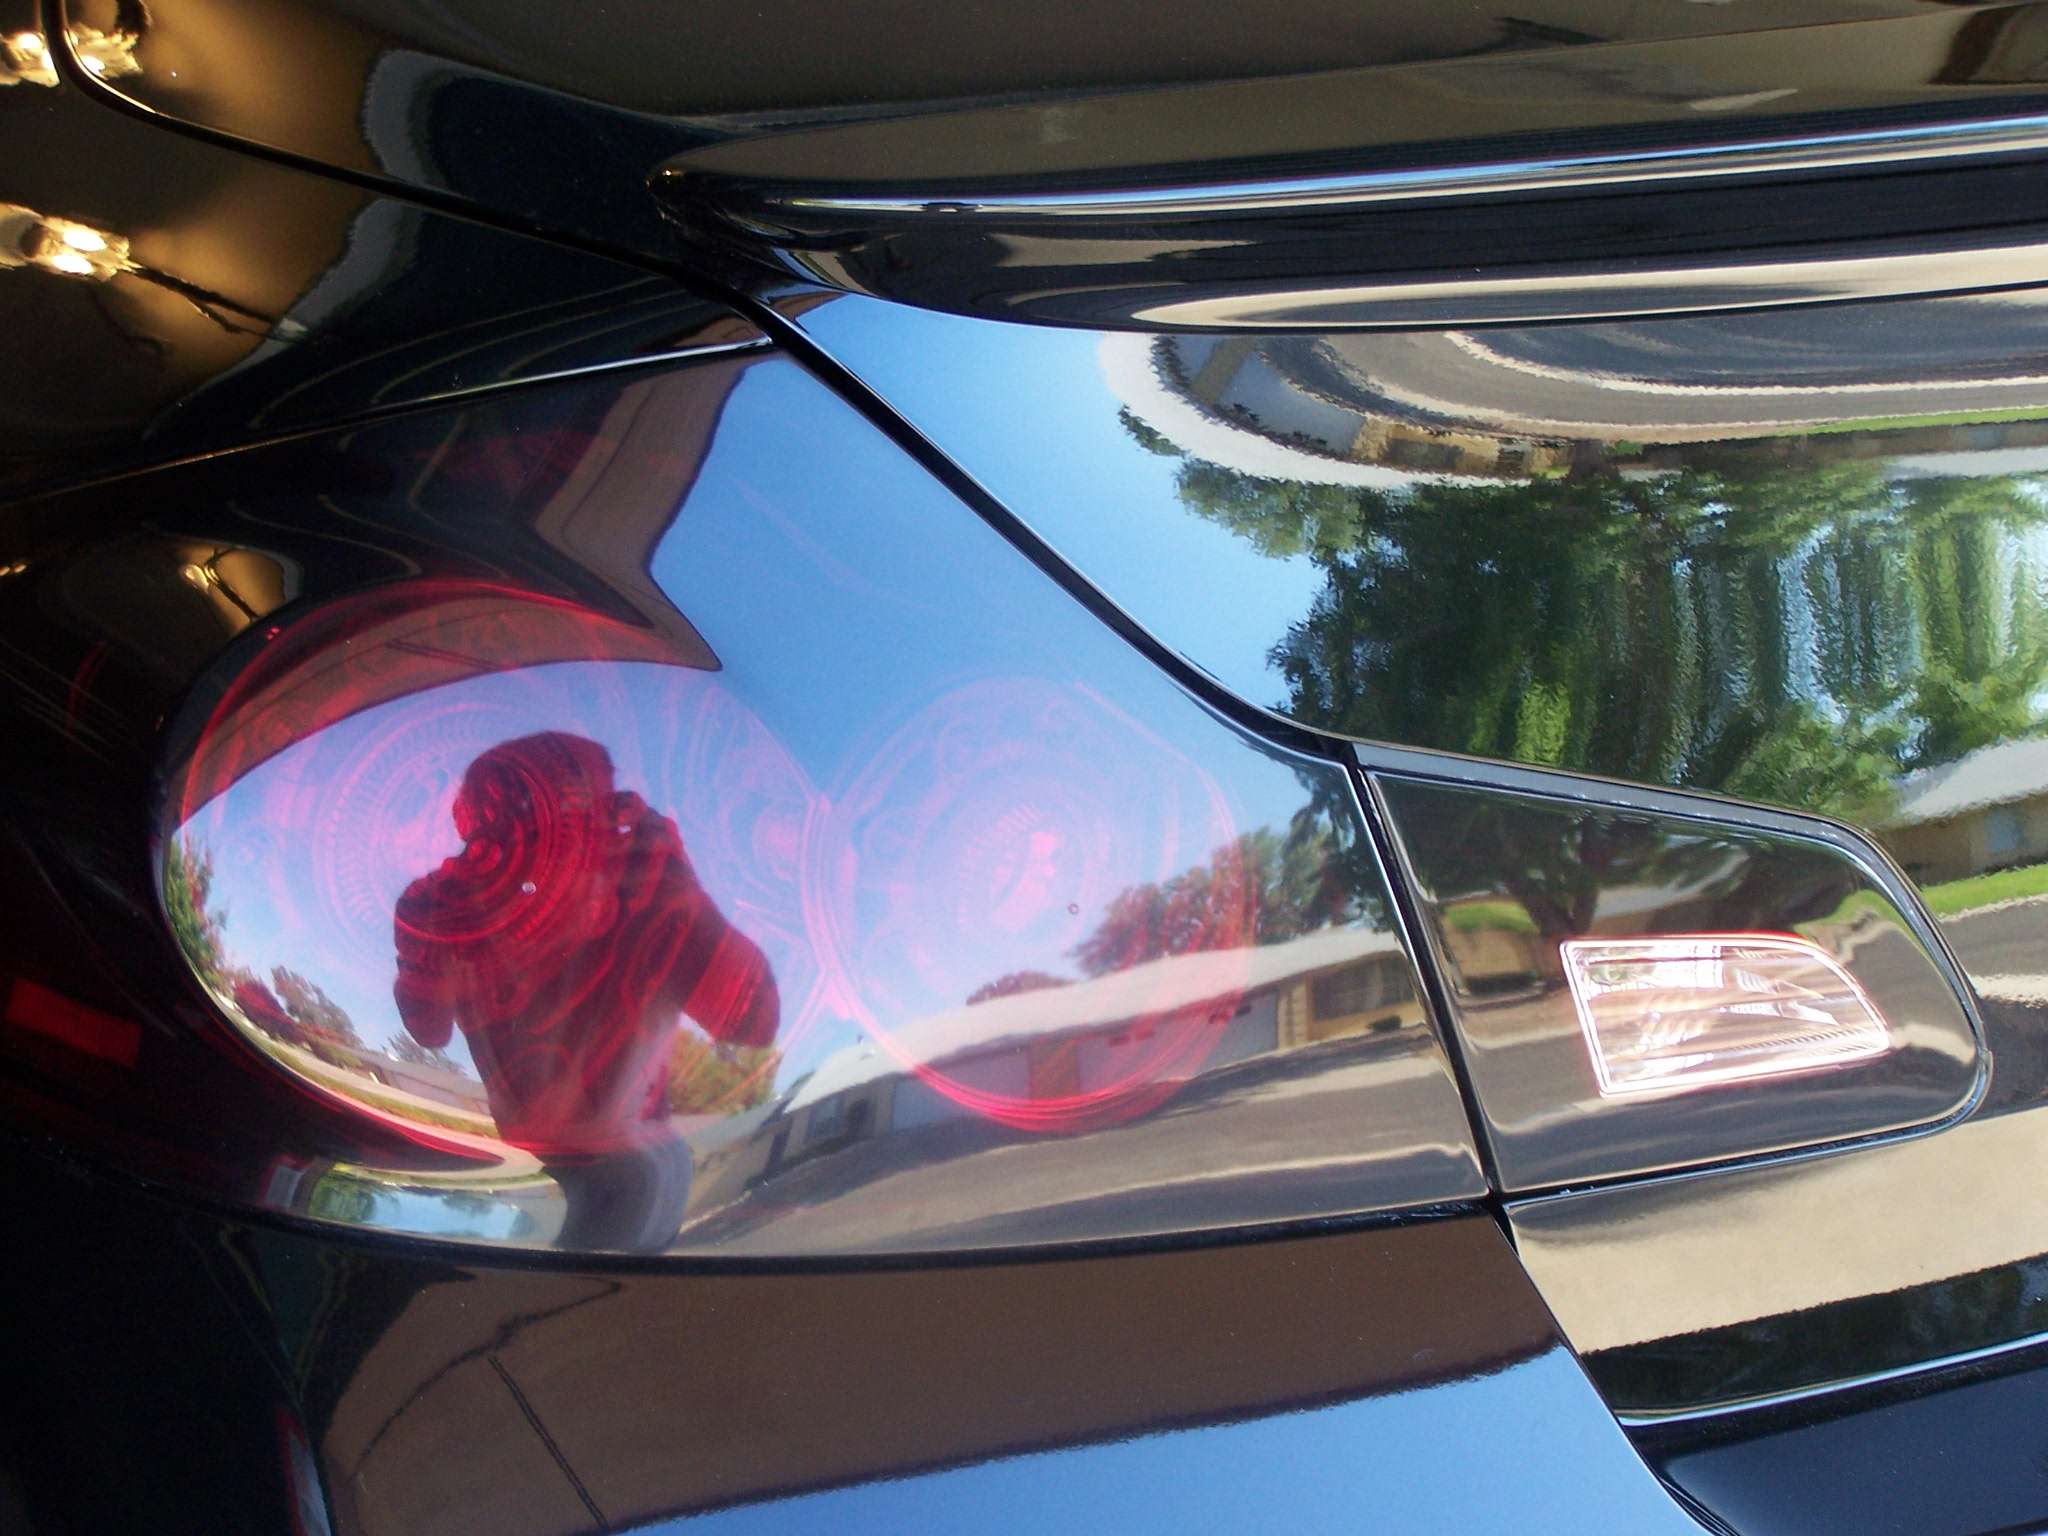
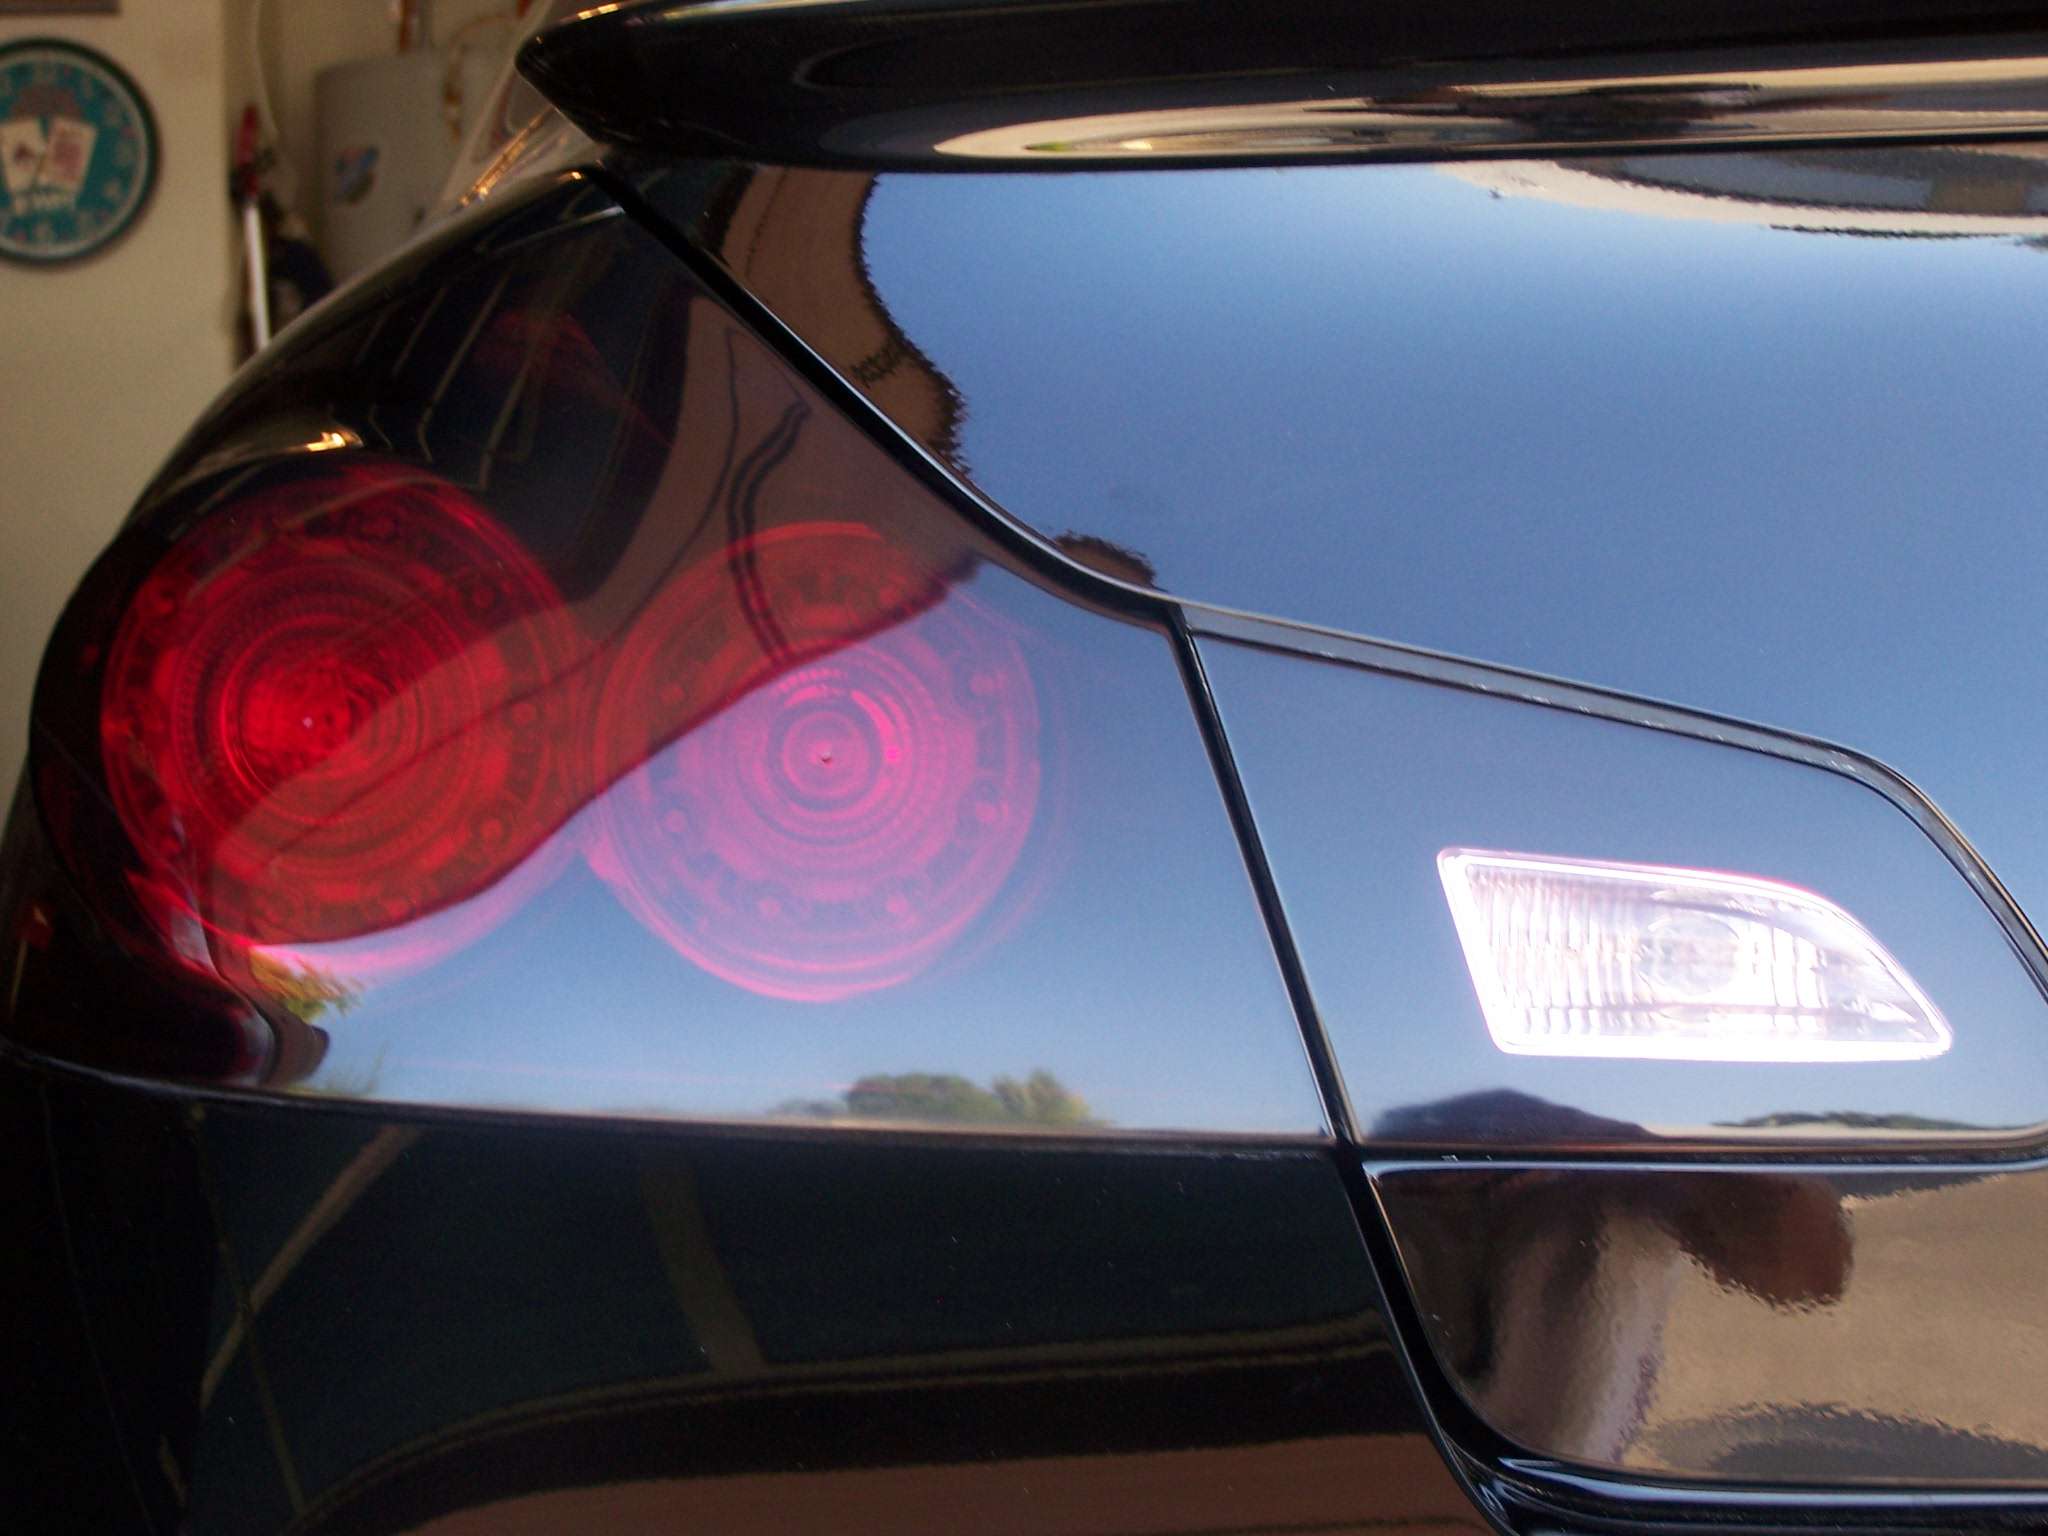
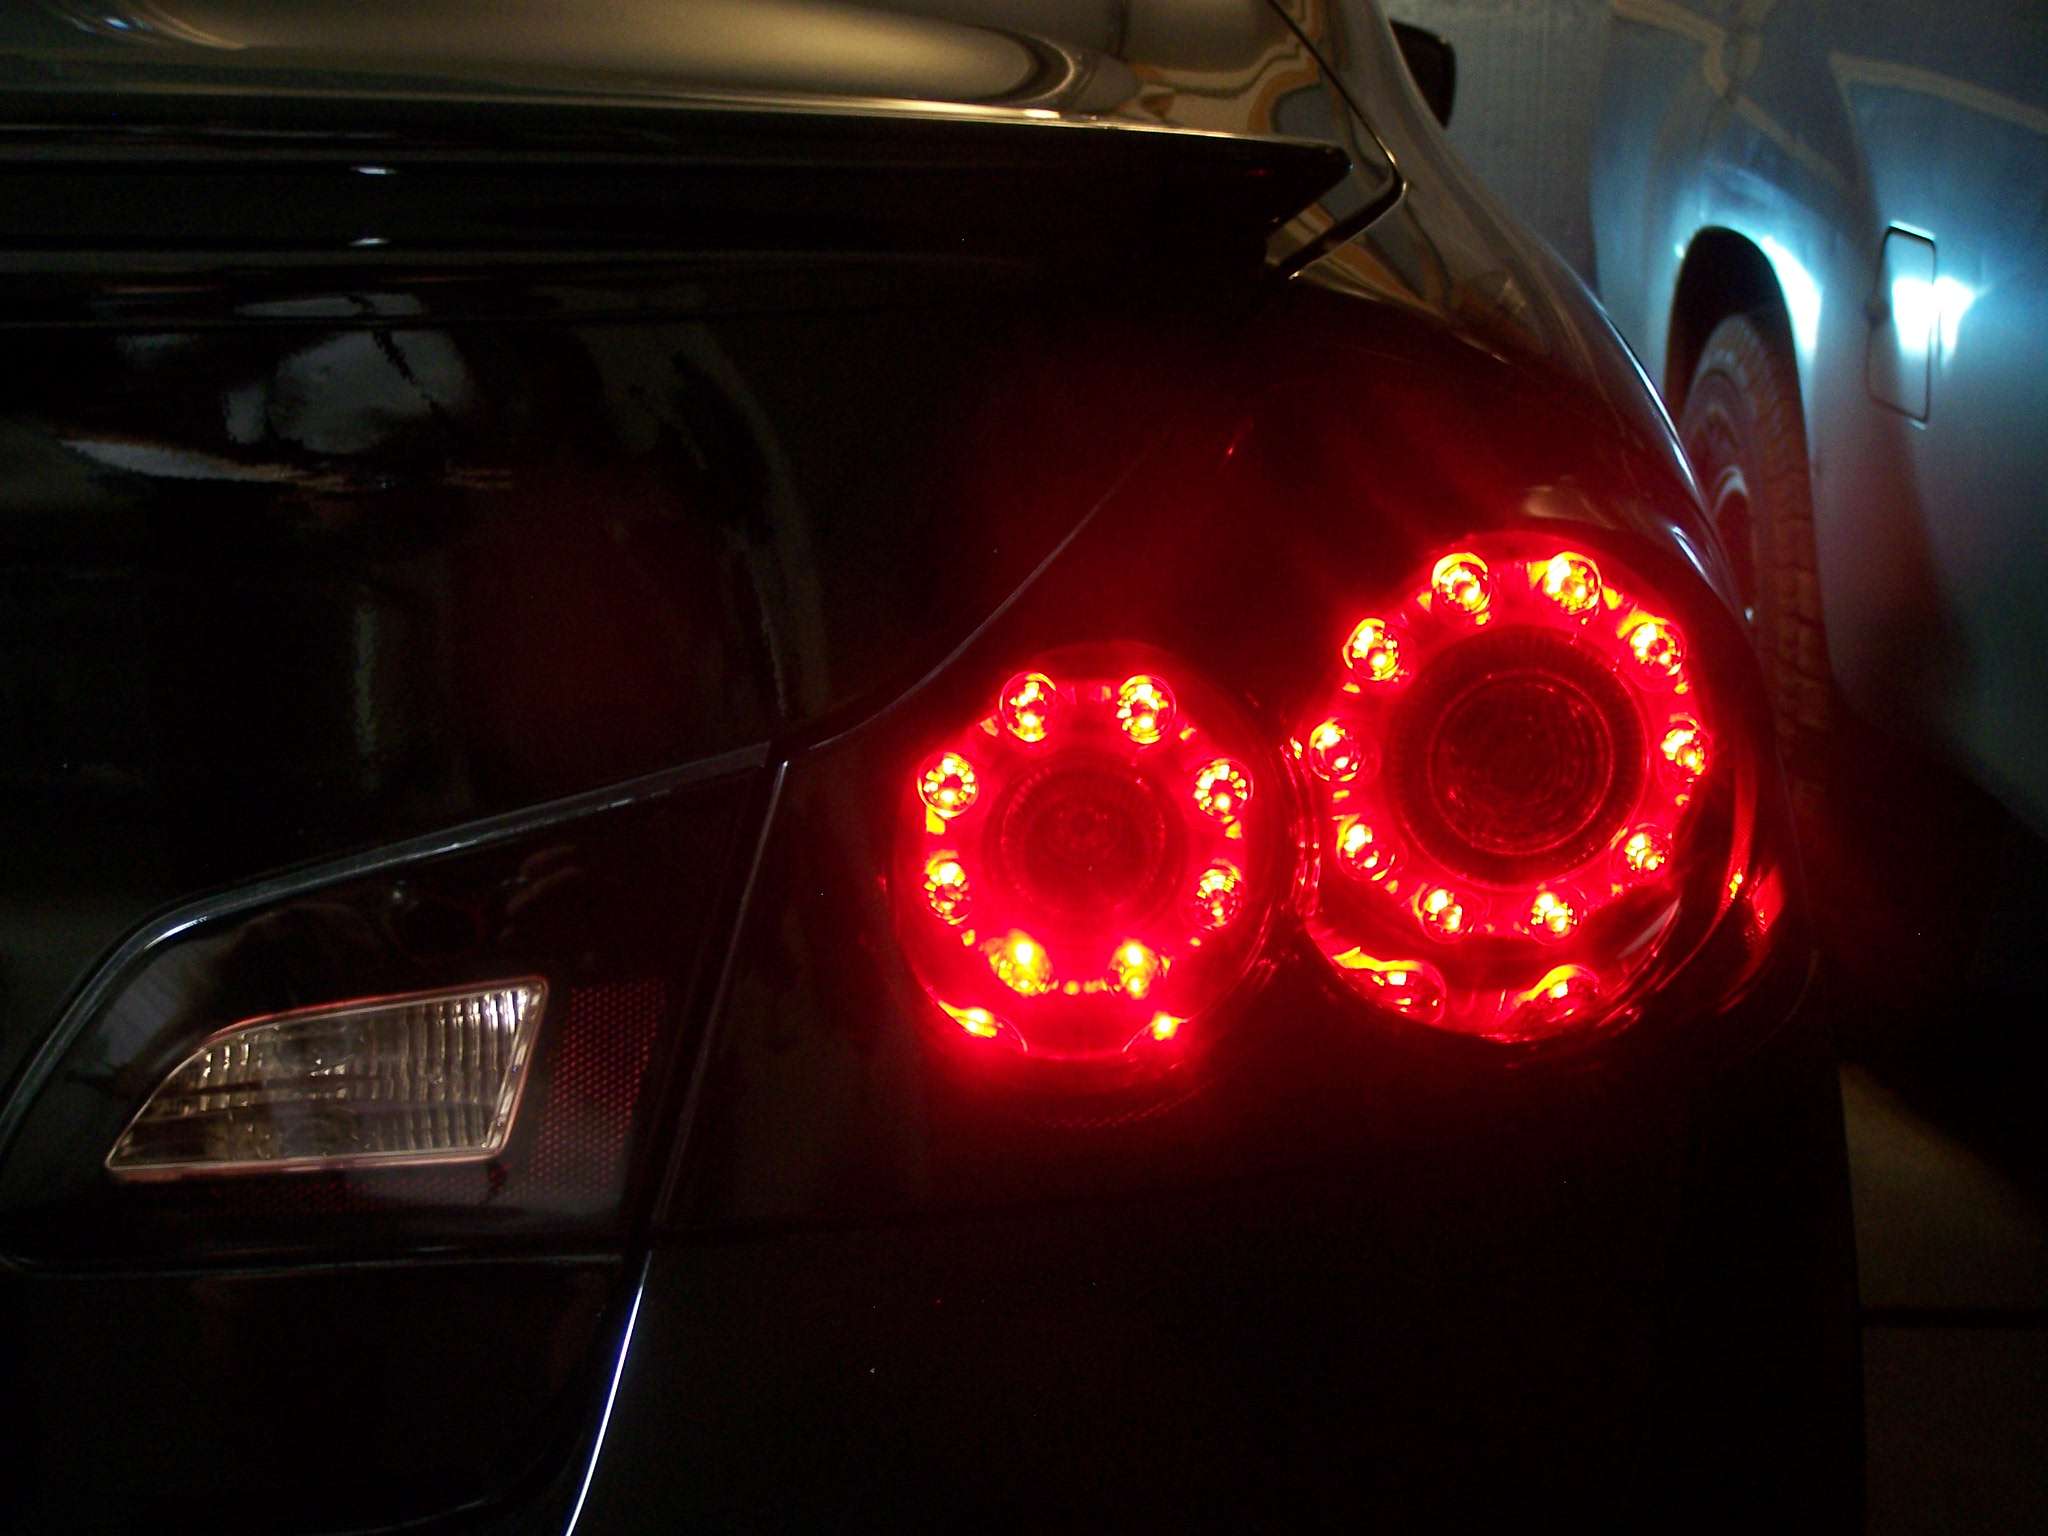
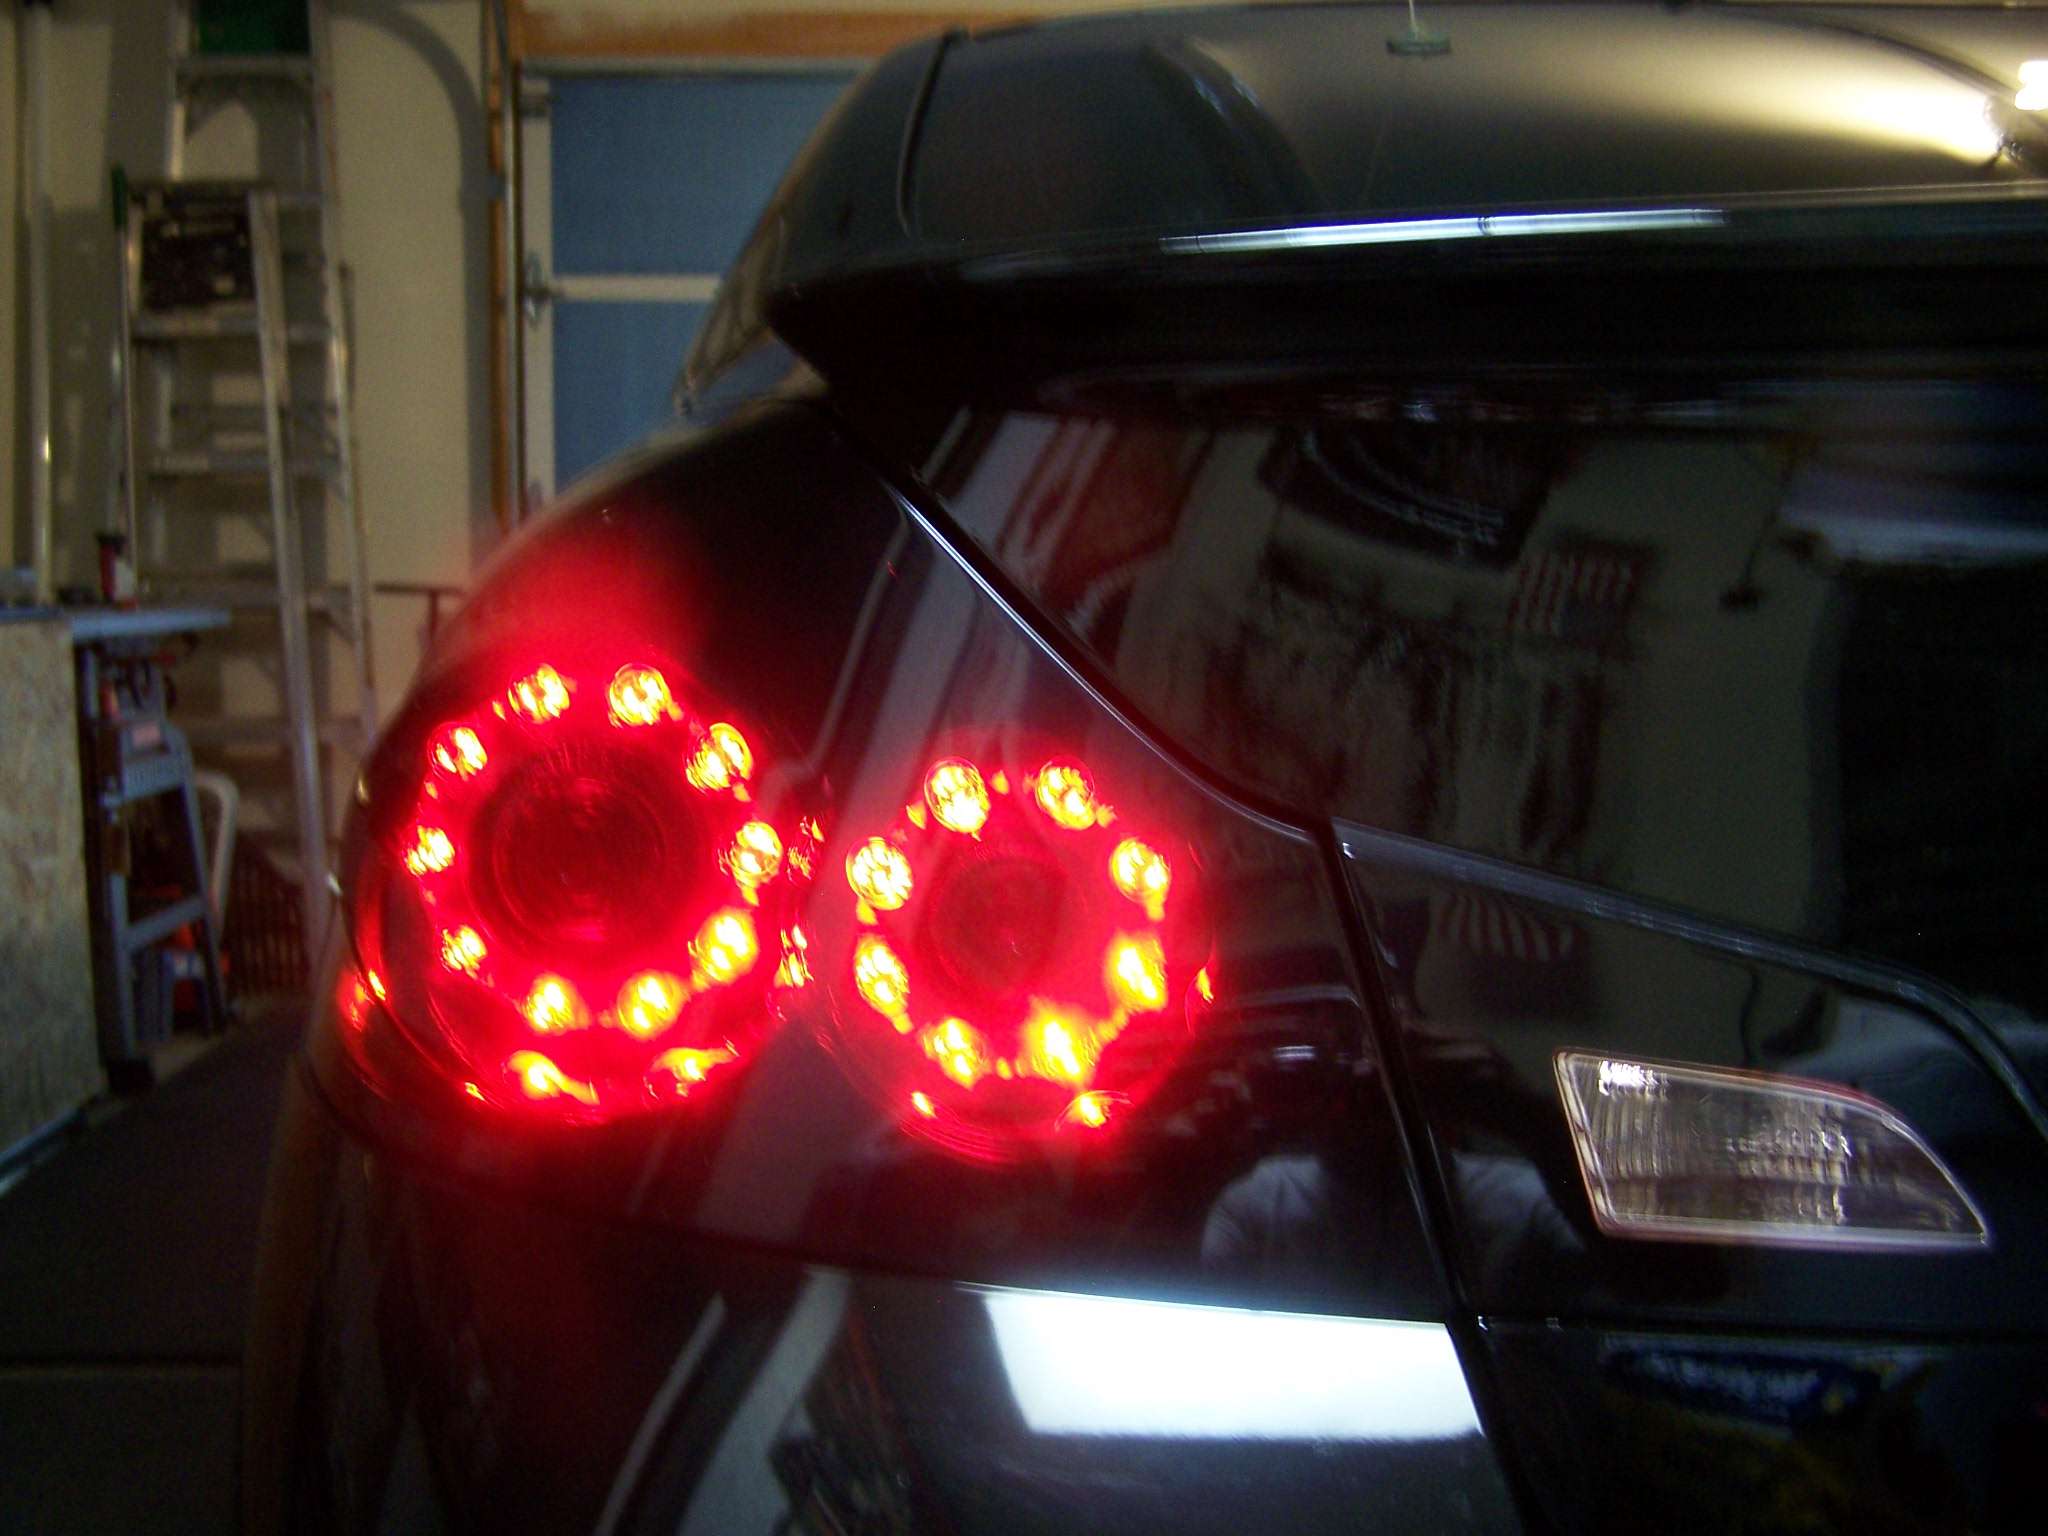
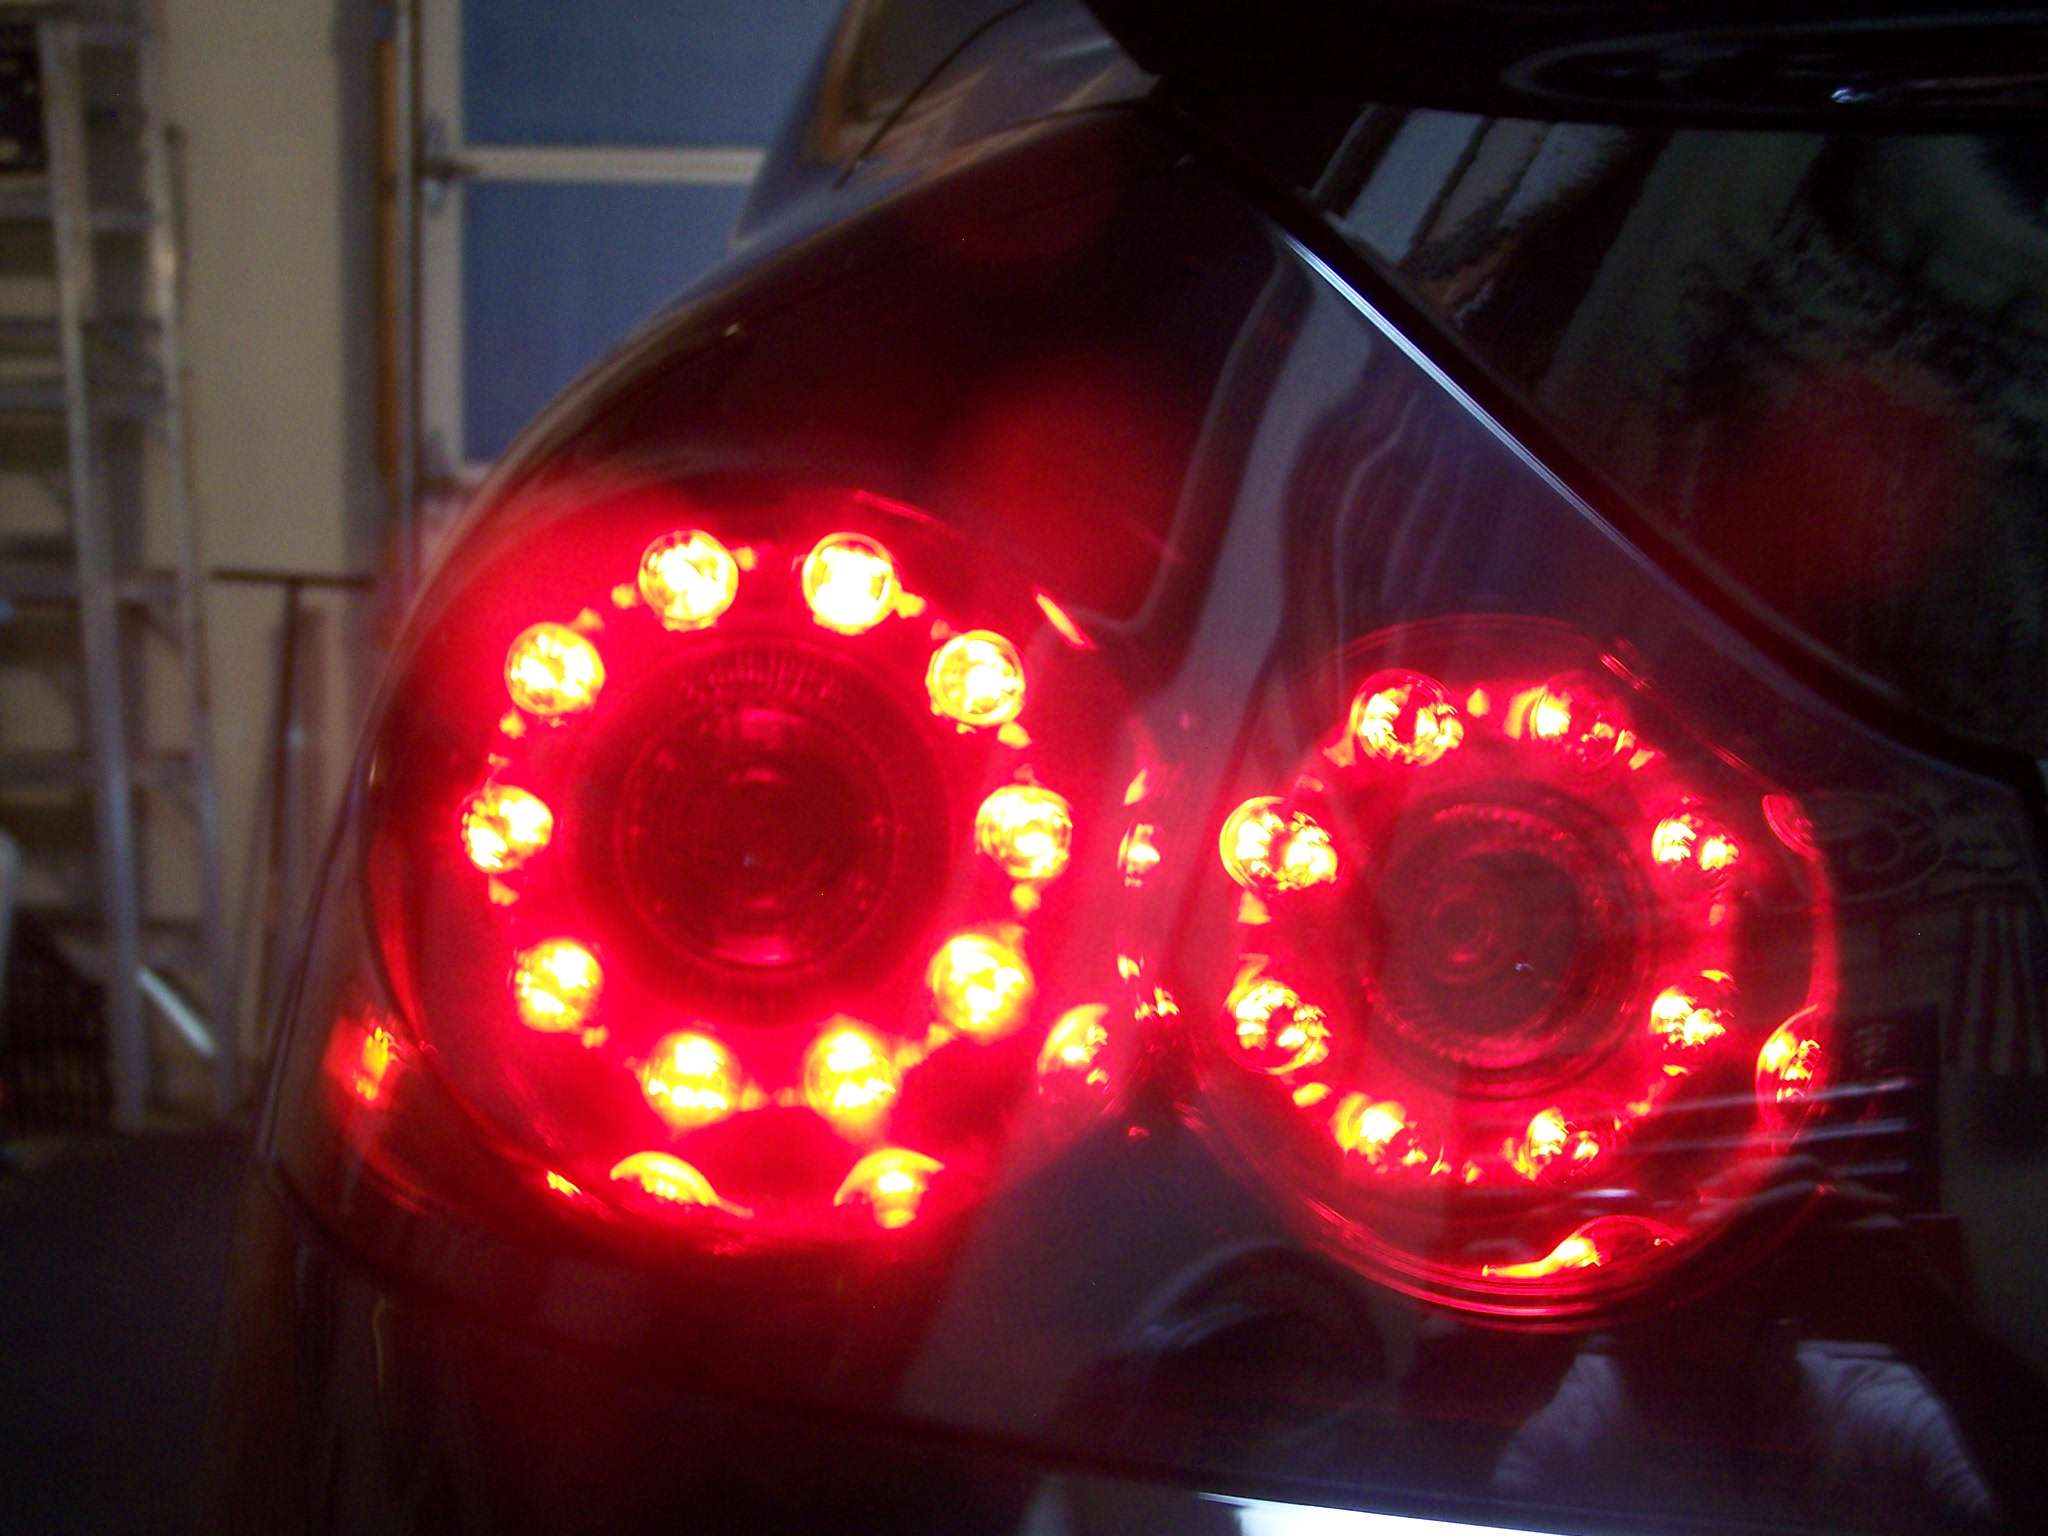
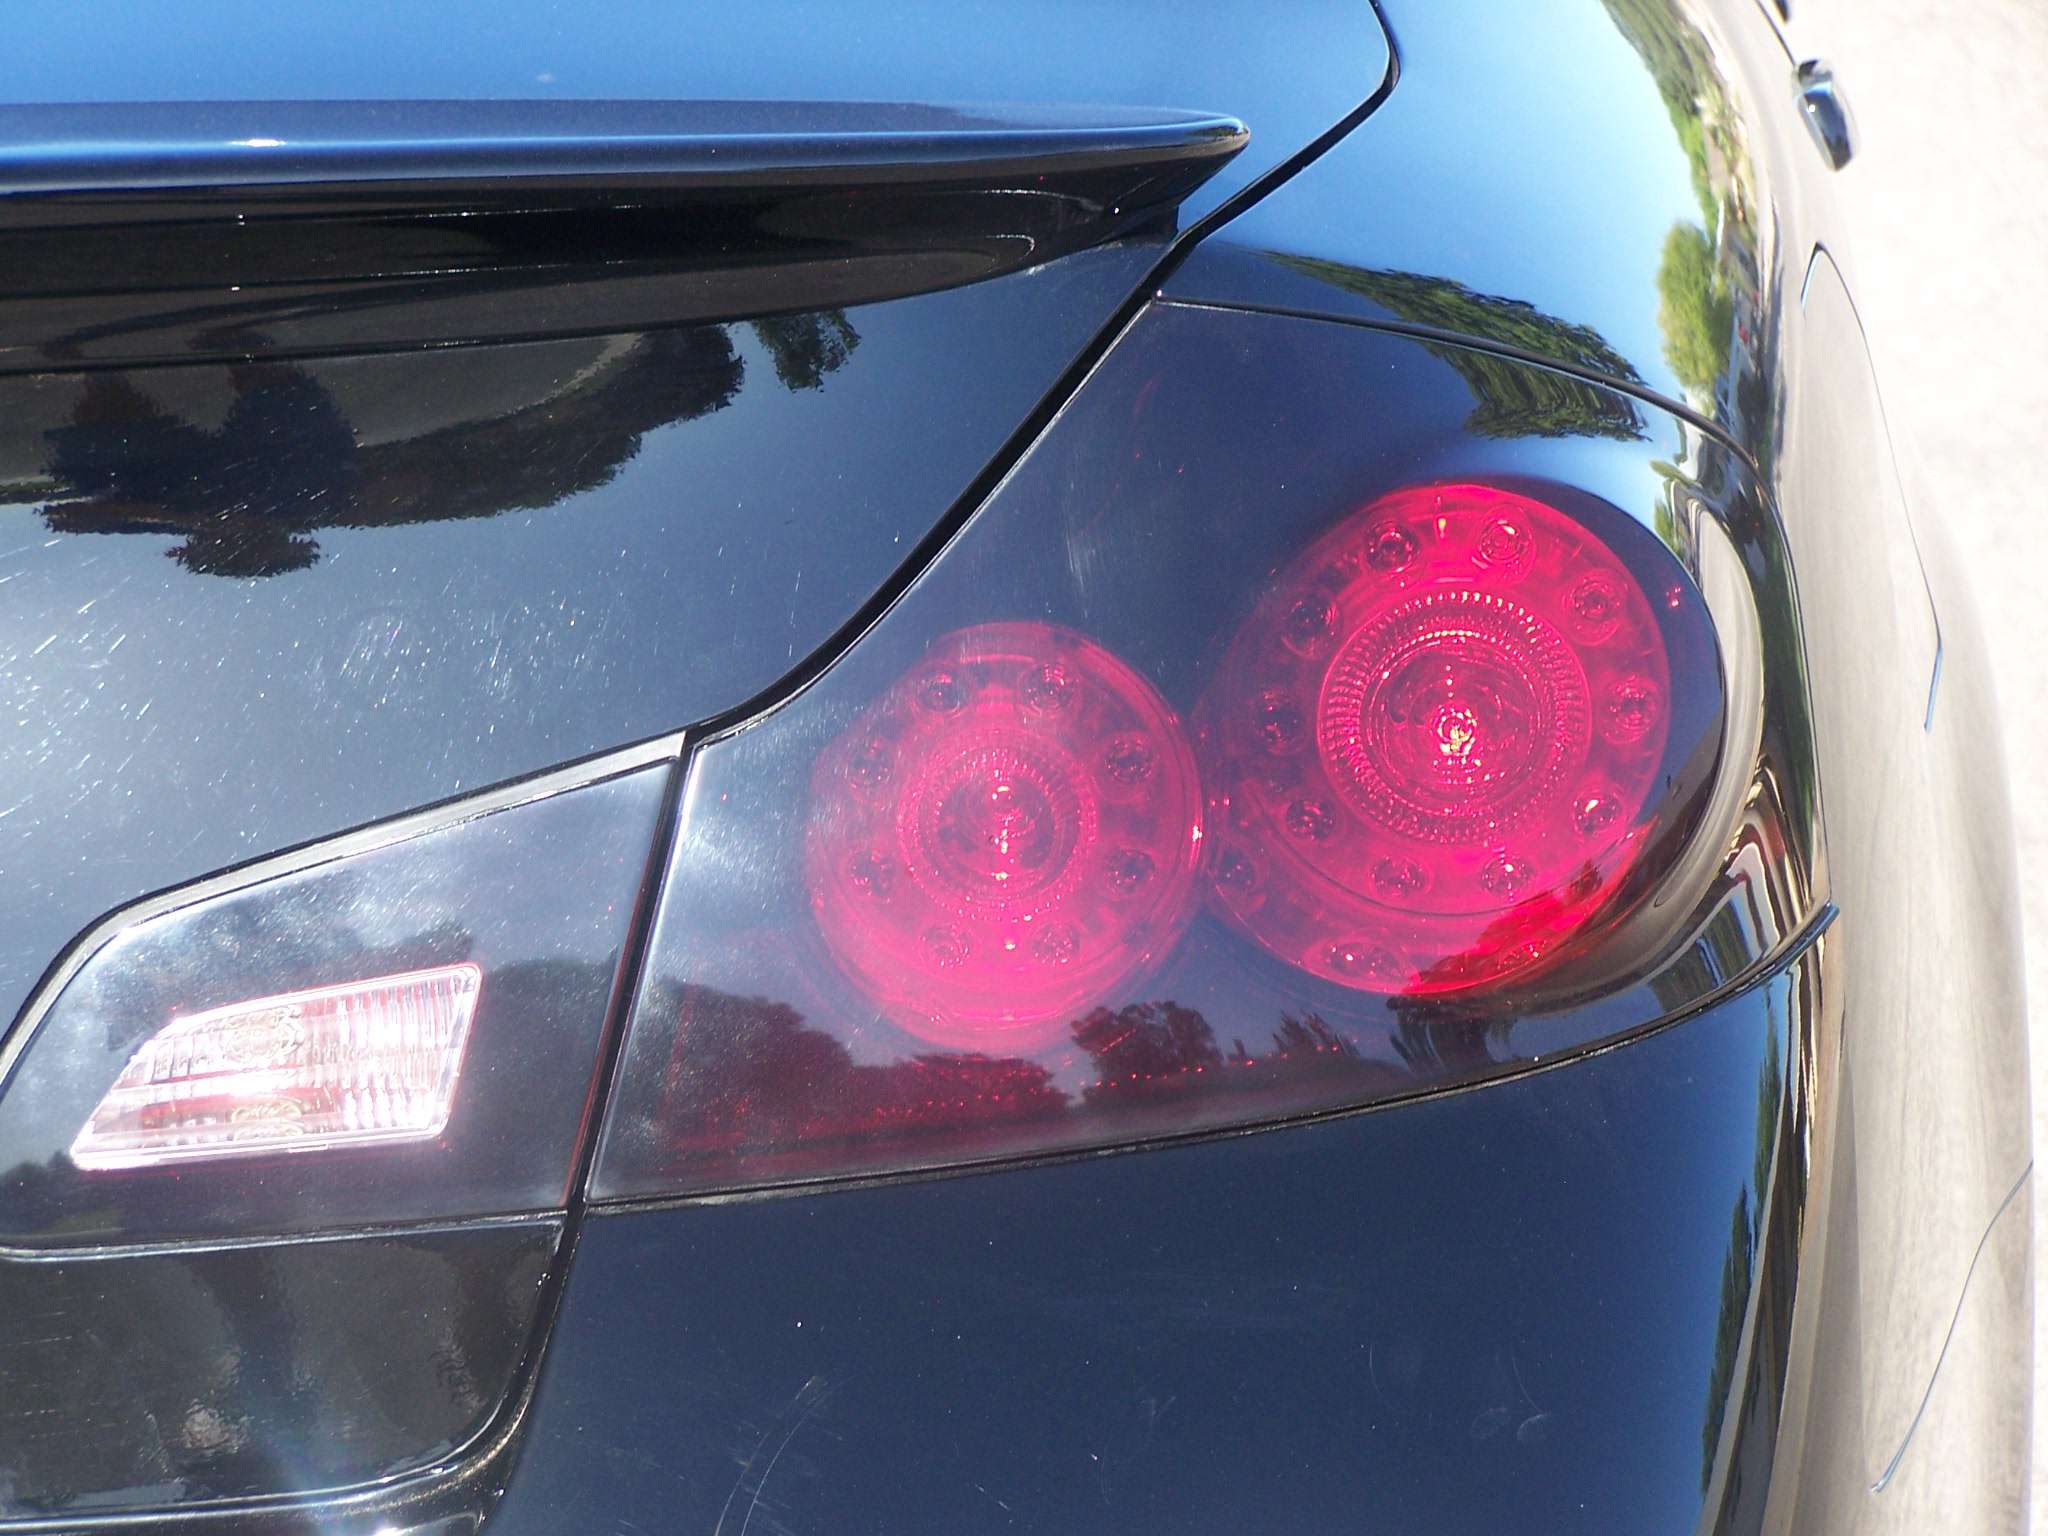
The following two pics shows the reflective strip under the main tail lights, this only appears under a camera flash (the translucent nature of Niteshades), the last pic shows what the lights actually look like at night.

http://www.myg37.com/forums/d-i-y-in...se-cutout.html
http://www.myg37.com/forums/picture-...per-gloss.html
Those were both coupes so there’s a couple different things w/ the sedan. Removing the lights is simple, just remove the inner clips on the trunk lid to access the reverse lights, remove 3 nuts and then pull the lights from the trunk lid. When pulling the reverse lights you’ll separate the foam seal but it’s pretty pliable and just pushing the lights back onto the separated seal should still provide a good weather seal. The main taillights are even easier to remove since there’s no sticky seal tape to deal with, just 3 nuts and presto! I followed yogregbs DIY since I was going w/ the GTR look. I used extra vinyl that I had to make the cutouts for the ring lights and a small slot for the side marker LEDs and the reverse lights. I used VHT NiteShades, and Industry quality clearcoat (Dupont Acrylic Clear A-7480s). I started by wet sanding as per the above DIYs w/ 1000 grit, just enough to get rid of all the shine on the lens. You then tape up the hole over the reverse light and also around the rubber trim on the reverse light and the hard black plastic upper edge/flange on the main lights. I then wiped it down w/ Isopropyl Alcohol and applied the vinyl cutouts where needed. I then wiped the lenses down again w/ Alcohol to remove any finger oils/residue. I put all the parts to be painted at waist height so I’d be sure to get a good spray along all the edges, if you lay them on the ground to paint you’ll have a tough time getting good edge coverage. I sprayed them in my garage w/ a box fan venting outside (with all vehicles parked safely next door) to lessen the chance of dust & bugs landing on fresh paint. If possible it's best to paint one light and move it away from the spray area (so you won't get overspray mist back on your freshly painted light) and move on to the next light. I put down 2 medium to heavy coats of the NiteShades w/ about 15 minutes wait between coats. Spray around the edges first then spray across the lights. After the first coat decide how much darker you want them ( I wanted dark to blend w/ my black G) and spray accordingly. I waited another 15 minutes after the second coat then removed the vinyl from the main lights (it’s better to remove it when the paint’s still drying so you won’t have a chance to peel any paint away when removing the vinyl after the paint’s fully dry). If you happen to get your fingers on the lens under any vinyl be sure to dab out any prints or residue w/ more alcohol prior to spraying again. The final Niteshades coat covering the entire lens is a bit lighter coat than the previous two coats, you don’t want the actual lights any darker, you may even decide to avoid a coat over the entire lens if you want the brightest (stock) taillight output. DO NOT remove the vinyl on the reverse cutouts, just do a third Niteshades coat over the reverse light w/ the vinyl still applied to keep your reverse lights bright & useful
Again, wipe the entire lens w/ alcohol to get rid of the sanding debris and skin oils and then shoot a medium-heavy coat of clear, wait 15 minutes then apply a 2nd coat and so on until you get 3 heavy coats of clear on your tails. The premium clearcoats go on thicker than the cheap stuff so only 3 coats is plenty, otherwise about 5-6 coats of the cheaper clear is about right. If you can’t locate the better clearcoats I’d recommend shooting Niteshades on a scrap plastic piece, let it dry then shoot the clearcoat on the scrap just to be sure it sprays clear, some cheaper clearcoats go bad or just don’t mix right w/ the Niteshades and it’s much better to find this out on a scrap rather than having to do a complete redo.Let the clear dry overnight and then it’s safe to install the lights back in your G. I’d wait another 48 hours before finish buffing. I used 2000 grit to get rid of all the orangepeel, just sand till you see no imperfections on the surface, followed by 2500 grit for a final smooth over, then a final buffing w/ Macguires Ultimate Compound by hand (cheapest place for this is Target of all places, about 7 bucks a bottle) w/ micro fiber pads ( I don’t have a power buffer
). If you have a power random action buffer I’d follow wakeboards or yogregs buffing info. There really is no need to invest in a buffer if you don't have one, the lights are a small area and you can get mirror like results by hand, just takes a bit more sweat. If anyone out there wants to do this GTR tail style I can provide you w/ the precut vinyl pieces to save you time and insure an accurate fit. Just PM me & I’ll hook you up Sorry for the horrible pics, I'll try to post some much better ones after the final polish session
The following two pics shows the reflective strip under the main tail lights, this only appears under a camera flash (the translucent nature of Niteshades), the last pic shows what the lights actually look like at night.
Last edited by blnewt; 07-30-2012 at 08:28 AM.
The following users liked this post:
ninjitsui1 (02-25-2013)
#2
07-29-2012, 11:12 AM


#5
07-29-2012, 10:34 PM
If you like the look I'd say go for it, much easier than the overlay install IMO, you did a great job on yours so this would be a walk in the park
Thanks a lot, you'd have no problem doing these yourself, like I mentioned I can provide the exact vinyl cutouts you'd need if you're interested. Just follow the DIYs I linked and the tips I detailed and you'll do fine!
The following users liked this post:
kool_yaar (07-29-2012)
#6
07-31-2012, 09:49 PM


Thread
Thread Starter
Forum
Replies
Last Post