DIY: Momentum header install

#1
 07-18-2012, 11:13 PM

DIY: Momentum header install
My install consisted of Momentum headers. I already had Berks HFC's before header install. NOTE: Different makes of headers and cat combo's may require a little different steps here and there. This is a basic header DIY install of Momentum headers. Most of the steps should be the same for the most part for different set ups. Feel free to add any info or steps for different set ups.
You will need:
-Metric socket sets, deep, and shallow; 3/8", and 1/2" (mostly 10, 12, 14, 15, and 16)
-Ratchets, 3/8" and 1/2' drives
-Breaker, 1/2" drive
-Extensions, 3/8", various lengths to 2' (1, 18in extension is highly recommended)
-Swivel, 3/8"
-Full metric box/open end wrench set (make sure you have thin walled box ends)
-Phillips and flat-head screwdrivers, various sizes
-Pliers, needle-nose and standard
-Anti-seize compound - use on all nuts used for exhaust components (be careful with O2 sensors - do not get anti-seize on the sensor head)
-2, 1 1/2" bolts and nuts to replace the two studs on the stock exhaust manifolds, 1 per each side (remember I already have HFC's so I only needed 2)
-22mm O2 socket or 22mm wrench will work too (as long as you take the O2 sensors off out of engine bay)
-Floor jack
-Jackstands (2)
-Coolant drain bucket
-Replacement coolant
-Whiteout to mark steering column alignments
-Extension/swivel, creativity and lots of patience
Optional items:
-New exhaust manifold nuts (12)
-New header gaskets
-New header to cat gaskets
-New coolant gasket - driver's side hardpipe to engine block fitting
-New O-ring where passenger's side coolant hardpipe connects at rear
-Heat shield material
-Zip ties, large (stainless steel if you can find them) for heat shield material
-One other person to help if you can
Procedure:
1. Disconnect battery cables (negative first)
2. Remove engine cover
3. Remove enough intake components to provide access to exhaust manifold
4. Jack front end up as high as you can get it and place jack stands
5. Remove front and rear lower engine fairings
6. Drain coolant - loosen the radiator cap and the vent plug at the top rear of the coolant pipes on the passenger side (near the firewall)
7. Remove all rubber coolant hoses from the hard pipe on the passenger and drivers side of the engine (you may also want to completely remove your top radiator hose and the coolant hose that runs from side to side at this time so its not in the way later on)
8. Remove the bolt from the front of the large hard pipe on the passenger side
9. Remove the 12mm bolt below the passenger side hardpipe at the rear - access from the front with the 18in extension
10. Slide the hardpipe out of the fitting with a little twisting and wiggling - save the O-ring if you plan on reusing it
11. Remove the 12mm bolt from the center hardpipe bracket on drivers side ( right above the ground cable and disconnect the ground strap from the body also.)
12. Remove the two 12mm bolts from the hardpipe fitting that goes into the engine block (place drain bucket directly under as coolant from the block will drain out once removed) - they're tough to access, so be creative with swivels and extensions if need be - save the gasket if you plan on reusing it
13. Remove the manifold heat shields on both sides - four 10mm bolts each - they will come out with some twisting and turning once cats are off (if I remember right one will come out from the top and one from the bottom)
14. Remove the passenger side and driver side O2 sensor connectors - they're green connectors clipped to the top rear corners of the engine, just follow wire from sensors - use a small flat head to disconnect (simply flip open the grey lock on the one side and pull apart)
15. Remove the brace that runs between the cats
16. Remove the two O2 connectors at the bottom center - green and blue - use a small flat head to disconnect
17. Remove O2 sensors carefully so as not to damage the tips once cats and manifolds are removed from car (found it easier to do than removing them while cats and manifolds are still connected)
18. Remove the two Y-pipe to cat flange nuts on each side
19. Remove the three cat to manifold nuts on each side - be careful, the cats will drop out and they're heavy if stock
20. Mark the steering column components with whiteout so you can get them put back together correctly (there may be a couple factory markings already there but still make your own)
21. Disconnect the steering column U-joint and set aside
22. Spray all manifold nuts with WD or something along those lines, makes it easier to remove nuts
23. Remove the manifold nuts - six each side - the front ones are the hardest to get to and you may have to get a little creative with a swivel
24. Remove the exhaust manifolds from the bottom - it's a bit of a puzzle because you'll have to twist and turn them a bit to work them out
25. Remove the manifold gaskets - carefully clean them up if you are reusing them, make sure you don't bend them
26. Check all the studs to make sure none of them got loosened - tighten as necessary
27. Replace the manifold gaskets in the correct orientation (pay attention to the way you took off the old ones to make sure the dot is facing the right direction if using OEM gaskets)
28. Reconnect the O2 sensors on the headers
29. Work the headers in from the bottom - again it's a puzzle, but it can be done
30. Get all the header nuts started on the studs
31. Torque all the nuts to 22 foot pounds; torque order for both sides is;
* Bottom center - top center - top front - bottom rear - bottom front - top rear (retorque the two centers after torquing all six nuts)
32. Reconnect the steering column using your alignment marks (make sure the steering wheel is centered and tires pointing straight) - make sure the top connector bolt has sufficient clearance on the header pipe when the steering wheel is turned
33. Wrap the fuel line and evap rubber hose on passenger side with heat shield material
34. Bolt up the cats on both ends (don't forget the gaskets on both ends)
35. Torque down all the bolts to 30-35 foot pounds
36. Replace the cat O2 sensors if removed - they're color coded for driver (green) and passenger (blue) sides
37. Replace the cat brace (with the Momentum headers and Berks HFC's I had to drill a new hole on the drivers side cat bracket to bolt cat brace back on. Well most likely be different with other makes of headers and cats)
38. Replace the coolant hard pipes on both sides - use new O-ring and gasket if you bought them; otherwise inspect and clean up the old ones
39. Replace the air intake components and anything else you disconnected for access to the exhaust manifolds - remember to hook up the MAF sensor connector
40. Replace the engine cover
41. Replace the under engine fairings
42. Replace coolant drain plugs and fill the radiator and overflow receptacle to cold full
43. Remove the jackstands and lower the car
44. Reconnect battery cables (positive first)
45. Run the engine at idle to circulate the coolant - add more coolant as needed - use the plug at the rear passenger side up next to the firewall to release any trapped air
Correct way to bleed cooling system as stated in the Haynes Repair Manual
1. Place the heater temperature control in the maxium heat position. Open the air relief plug located near the firewall on battery side.
2. Slowly fill the radiator with recommended mixture of coolant and water (50/50) untill coolant reaches the base of the filler neck. Then add coolant to the reservior untill it reaches the FULL COLD mark.When the coolant flows from the air relief hole, reinstall the air relief plug. Wait 5 mins and recheck coolant level in the radiator, adding if necessary
3. Leave the radiator cap off and run the engine in a well-ventilated area untill the thermostat opens (coolant will begin flowing through the radiator and the upper radiator hose will become hot)
4. Rev the engine to approximately 2500 rpm for ten seconds then let it idle; do this a few times
5. Turn the engine off and let it cool. Add more coolant mixture to bring the level back up to the base of the filler neck
6. Squeeze the upper radiator hose to expel air, then add more coolant mixture if necessary. Reinstall the radiator cap. Add coolant to the reservoir, if necessary
7. Start the engine, allow it to reach normal operating temperature and check for leaks
Side Notes
-Use heat shielding on lines you think might be affected by heat (better to be safe than sorry)
-The heat shielding material I used was DEI cool tape and DEI reflect-a-cool. I found them at Advanced auto but you can go to there website to make it easier http://www.designengineering.com/products.asp
-Its much easier to have another person to help but thats up to you
-After install; if your driving down the road and your steering wheel is not straight you well have to readjust the steering column. Just follow steps above but move 1 - 2 teeth which ever way your steering wheel is off.
-There are a few header nuts that you will not be able to get a ratchet or torque wrench on, just use your box wrench and tighten them down tight when doing the torque sequence
THE DATES ON THE PHOTOS ARE WRONG, I KNOW
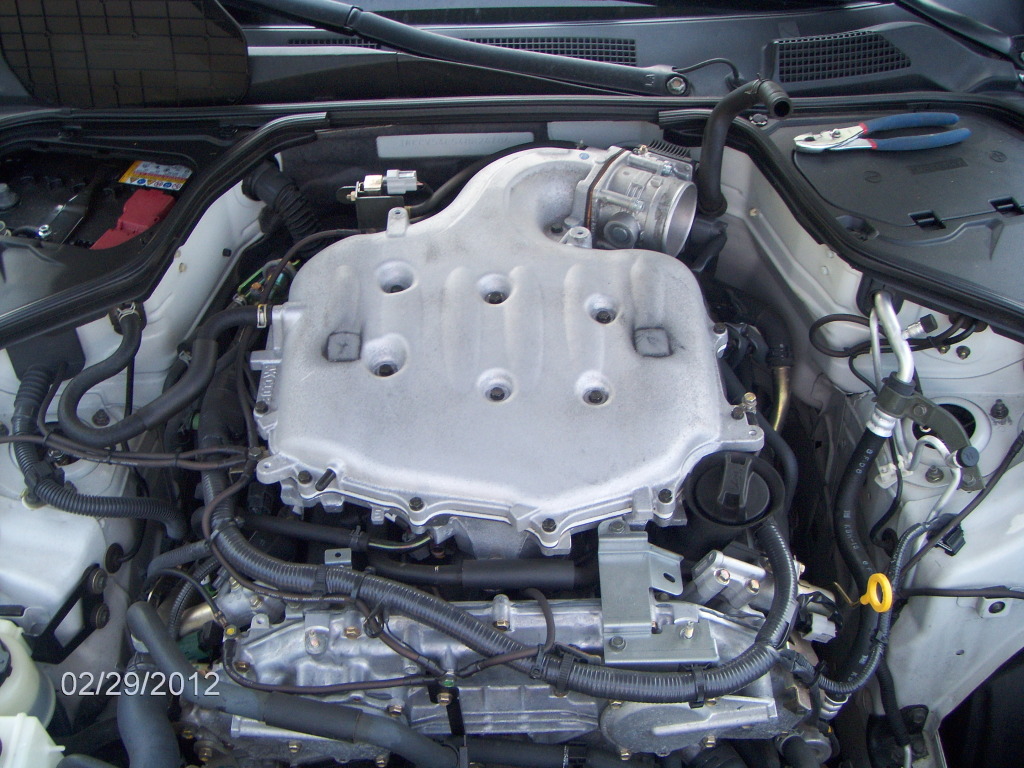
Engine after intake removed
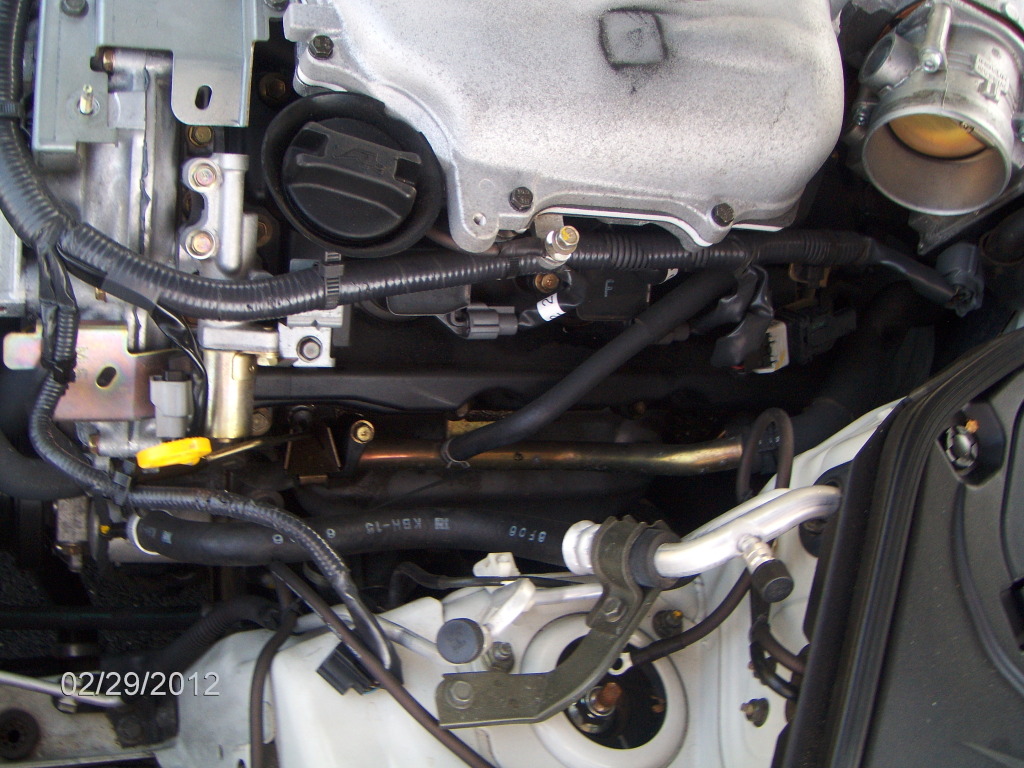
Drivers side before removing hard pipe
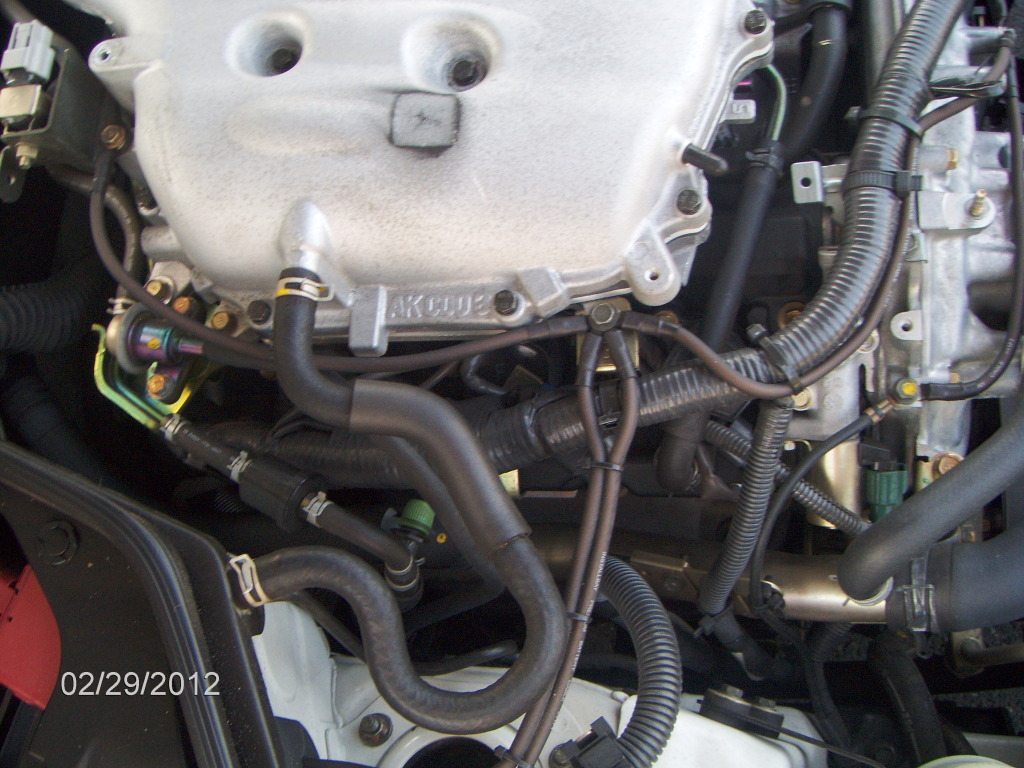
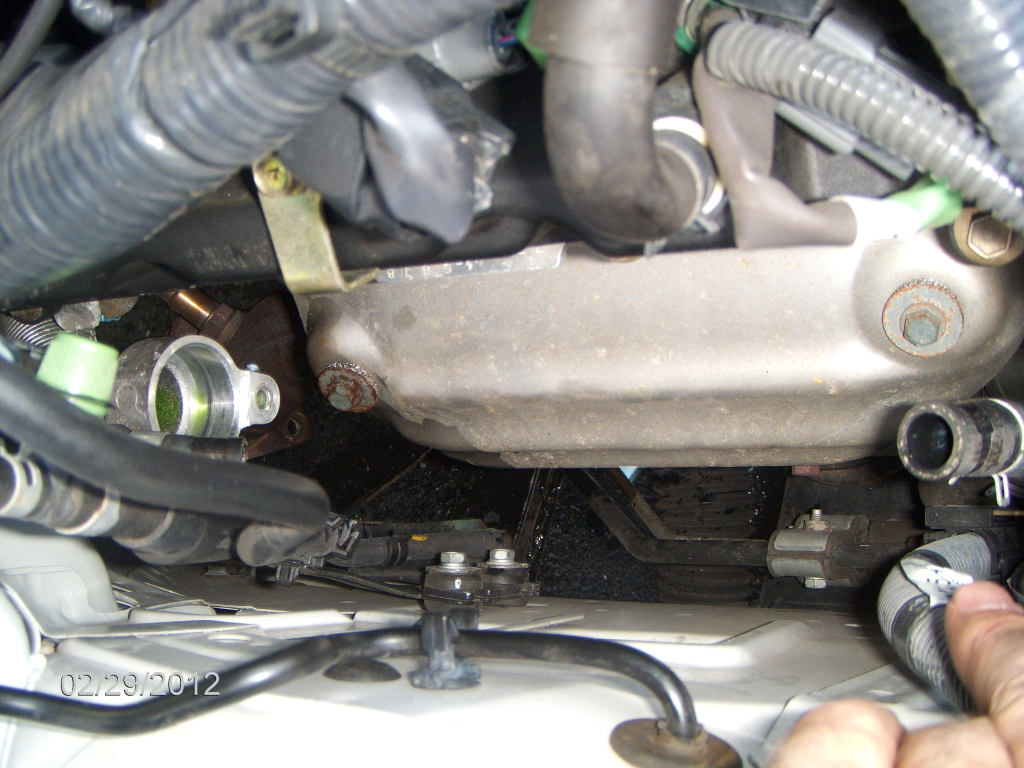
Passenger side before removing hard pipe
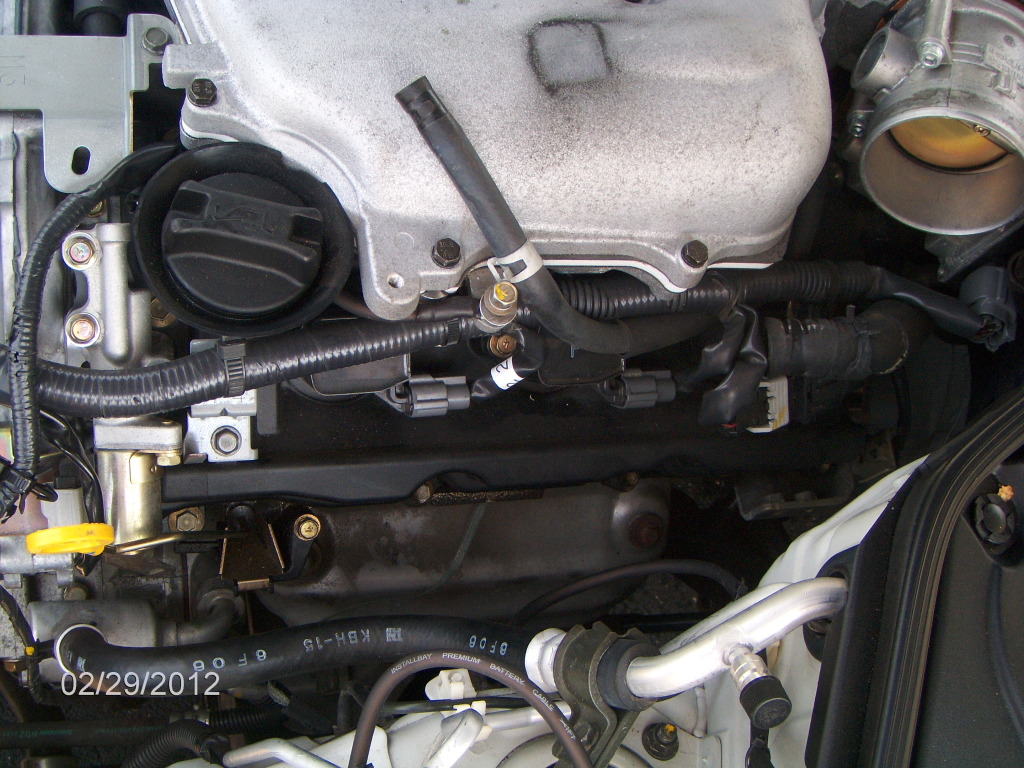
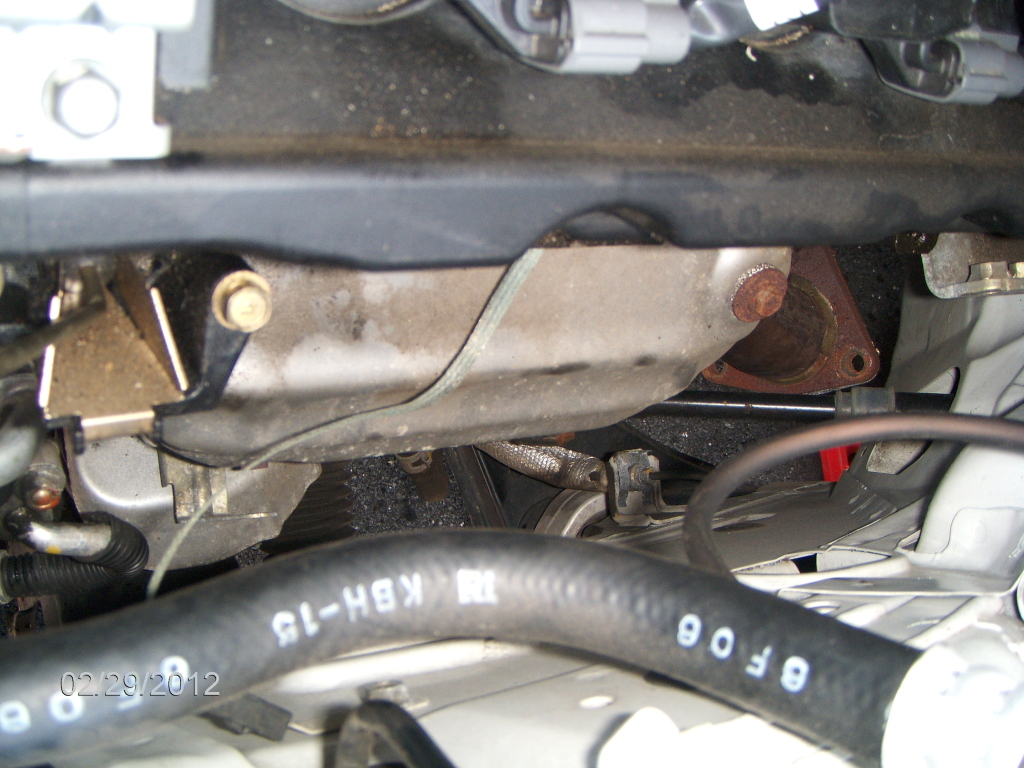
Drivers side after removing hard pipe, now you can see the heat shield better
You will need:
-Metric socket sets, deep, and shallow; 3/8", and 1/2" (mostly 10, 12, 14, 15, and 16)
-Ratchets, 3/8" and 1/2' drives
-Breaker, 1/2" drive
-Extensions, 3/8", various lengths to 2' (1, 18in extension is highly recommended)
-Swivel, 3/8"
-Full metric box/open end wrench set (make sure you have thin walled box ends)
-Phillips and flat-head screwdrivers, various sizes
-Pliers, needle-nose and standard
-Anti-seize compound - use on all nuts used for exhaust components (be careful with O2 sensors - do not get anti-seize on the sensor head)
-2, 1 1/2" bolts and nuts to replace the two studs on the stock exhaust manifolds, 1 per each side (remember I already have HFC's so I only needed 2)
-22mm O2 socket or 22mm wrench will work too (as long as you take the O2 sensors off out of engine bay)
-Floor jack
-Jackstands (2)
-Coolant drain bucket
-Replacement coolant
-Whiteout to mark steering column alignments
-Extension/swivel, creativity and lots of patience
Optional items:
-New exhaust manifold nuts (12)
-New header gaskets
-New header to cat gaskets
-New coolant gasket - driver's side hardpipe to engine block fitting
-New O-ring where passenger's side coolant hardpipe connects at rear
-Heat shield material
-Zip ties, large (stainless steel if you can find them) for heat shield material
-One other person to help if you can
Procedure:
1. Disconnect battery cables (negative first)
2. Remove engine cover
3. Remove enough intake components to provide access to exhaust manifold
4. Jack front end up as high as you can get it and place jack stands
5. Remove front and rear lower engine fairings
6. Drain coolant - loosen the radiator cap and the vent plug at the top rear of the coolant pipes on the passenger side (near the firewall)
7. Remove all rubber coolant hoses from the hard pipe on the passenger and drivers side of the engine (you may also want to completely remove your top radiator hose and the coolant hose that runs from side to side at this time so its not in the way later on)
8. Remove the bolt from the front of the large hard pipe on the passenger side
9. Remove the 12mm bolt below the passenger side hardpipe at the rear - access from the front with the 18in extension
10. Slide the hardpipe out of the fitting with a little twisting and wiggling - save the O-ring if you plan on reusing it
11. Remove the 12mm bolt from the center hardpipe bracket on drivers side ( right above the ground cable and disconnect the ground strap from the body also.)
12. Remove the two 12mm bolts from the hardpipe fitting that goes into the engine block (place drain bucket directly under as coolant from the block will drain out once removed) - they're tough to access, so be creative with swivels and extensions if need be - save the gasket if you plan on reusing it
13. Remove the manifold heat shields on both sides - four 10mm bolts each - they will come out with some twisting and turning once cats are off (if I remember right one will come out from the top and one from the bottom)
14. Remove the passenger side and driver side O2 sensor connectors - they're green connectors clipped to the top rear corners of the engine, just follow wire from sensors - use a small flat head to disconnect (simply flip open the grey lock on the one side and pull apart)
15. Remove the brace that runs between the cats
16. Remove the two O2 connectors at the bottom center - green and blue - use a small flat head to disconnect
17. Remove O2 sensors carefully so as not to damage the tips once cats and manifolds are removed from car (found it easier to do than removing them while cats and manifolds are still connected)
18. Remove the two Y-pipe to cat flange nuts on each side
19. Remove the three cat to manifold nuts on each side - be careful, the cats will drop out and they're heavy if stock
20. Mark the steering column components with whiteout so you can get them put back together correctly (there may be a couple factory markings already there but still make your own)
21. Disconnect the steering column U-joint and set aside
22. Spray all manifold nuts with WD or something along those lines, makes it easier to remove nuts
23. Remove the manifold nuts - six each side - the front ones are the hardest to get to and you may have to get a little creative with a swivel
24. Remove the exhaust manifolds from the bottom - it's a bit of a puzzle because you'll have to twist and turn them a bit to work them out
25. Remove the manifold gaskets - carefully clean them up if you are reusing them, make sure you don't bend them
26. Check all the studs to make sure none of them got loosened - tighten as necessary
27. Replace the manifold gaskets in the correct orientation (pay attention to the way you took off the old ones to make sure the dot is facing the right direction if using OEM gaskets)
28. Reconnect the O2 sensors on the headers
29. Work the headers in from the bottom - again it's a puzzle, but it can be done
30. Get all the header nuts started on the studs
31. Torque all the nuts to 22 foot pounds; torque order for both sides is;
* Bottom center - top center - top front - bottom rear - bottom front - top rear (retorque the two centers after torquing all six nuts)
32. Reconnect the steering column using your alignment marks (make sure the steering wheel is centered and tires pointing straight) - make sure the top connector bolt has sufficient clearance on the header pipe when the steering wheel is turned
33. Wrap the fuel line and evap rubber hose on passenger side with heat shield material
34. Bolt up the cats on both ends (don't forget the gaskets on both ends)
35. Torque down all the bolts to 30-35 foot pounds
36. Replace the cat O2 sensors if removed - they're color coded for driver (green) and passenger (blue) sides
37. Replace the cat brace (with the Momentum headers and Berks HFC's I had to drill a new hole on the drivers side cat bracket to bolt cat brace back on. Well most likely be different with other makes of headers and cats)
38. Replace the coolant hard pipes on both sides - use new O-ring and gasket if you bought them; otherwise inspect and clean up the old ones
39. Replace the air intake components and anything else you disconnected for access to the exhaust manifolds - remember to hook up the MAF sensor connector
40. Replace the engine cover
41. Replace the under engine fairings
42. Replace coolant drain plugs and fill the radiator and overflow receptacle to cold full
43. Remove the jackstands and lower the car
44. Reconnect battery cables (positive first)
45. Run the engine at idle to circulate the coolant - add more coolant as needed - use the plug at the rear passenger side up next to the firewall to release any trapped air
Correct way to bleed cooling system as stated in the Haynes Repair Manual
1. Place the heater temperature control in the maxium heat position. Open the air relief plug located near the firewall on battery side.
2. Slowly fill the radiator with recommended mixture of coolant and water (50/50) untill coolant reaches the base of the filler neck. Then add coolant to the reservior untill it reaches the FULL COLD mark.When the coolant flows from the air relief hole, reinstall the air relief plug. Wait 5 mins and recheck coolant level in the radiator, adding if necessary
3. Leave the radiator cap off and run the engine in a well-ventilated area untill the thermostat opens (coolant will begin flowing through the radiator and the upper radiator hose will become hot)
4. Rev the engine to approximately 2500 rpm for ten seconds then let it idle; do this a few times
5. Turn the engine off and let it cool. Add more coolant mixture to bring the level back up to the base of the filler neck
6. Squeeze the upper radiator hose to expel air, then add more coolant mixture if necessary. Reinstall the radiator cap. Add coolant to the reservoir, if necessary
7. Start the engine, allow it to reach normal operating temperature and check for leaks
Side Notes
-Use heat shielding on lines you think might be affected by heat (better to be safe than sorry)
-The heat shielding material I used was DEI cool tape and DEI reflect-a-cool. I found them at Advanced auto but you can go to there website to make it easier http://www.designengineering.com/products.asp
-Its much easier to have another person to help but thats up to you
-After install; if your driving down the road and your steering wheel is not straight you well have to readjust the steering column. Just follow steps above but move 1 - 2 teeth which ever way your steering wheel is off.
-There are a few header nuts that you will not be able to get a ratchet or torque wrench on, just use your box wrench and tighten them down tight when doing the torque sequence
THE DATES ON THE PHOTOS ARE WRONG, I KNOW
Engine after intake removed
Drivers side before removing hard pipe
Passenger side before removing hard pipe
Drivers side after removing hard pipe, now you can see the heat shield better
Last edited by 04WhiTe_G_Coupe; 07-22-2012 at 10:07 PM. Reason: Add info
The following 4 users liked this post by 04WhiTe_G_Coupe:
Footballmania32 (07-19-2012),
G35ChrisF (04-20-2020),
Herbbie Hablib (11-11-2012),
JaE35 (07-19-2012)
#3
07-19-2012, 12:01 PM
Took me 10 hours altogether. Started at 9am and finished at 8pm. I took a 1 hour break to eat and get out of the heat for a lil. I had my father help me. Its much easier having another set of hands here and there.


#6
07-19-2012, 12:33 PM
#7
07-19-2012, 12:34 PM

^Why did you get a tune without the headers? I saw that you posted you got a tune in the tuner section.
Trending Topics
#8
07-19-2012, 12:37 PM

#9
07-19-2012, 02:13 PM
Sorry for the split in pictures. Didnt get around to adding the pics till after comments were added.
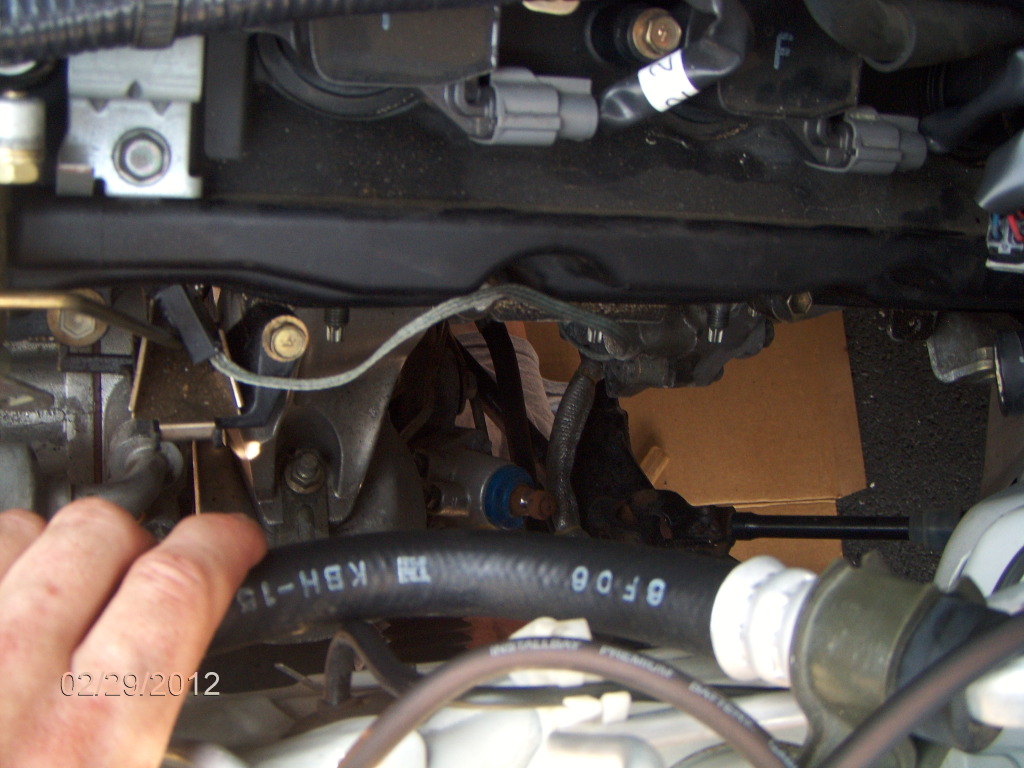
Passenger side after removing hard pipe, again you can see the heat shield and the fuel line, evap hose that needs wrapped with heat shield material
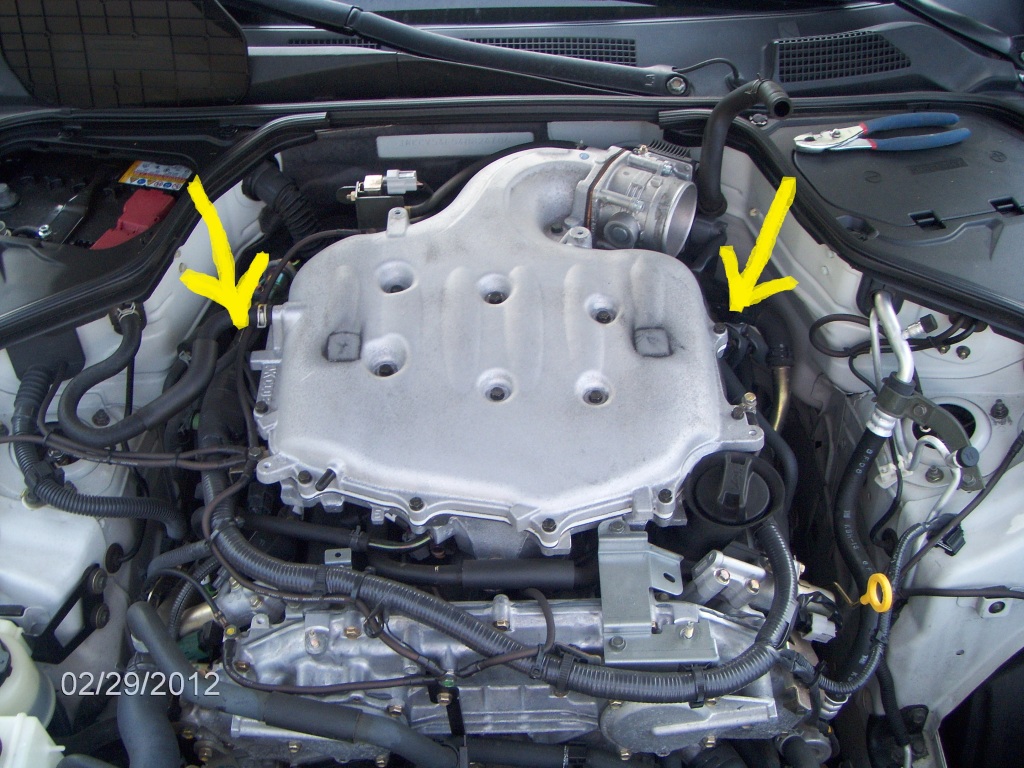
The connections for the exhaust manifold O2 sensors are in around these areas. If you cant pinpoint them simply follow the wires from the sensor
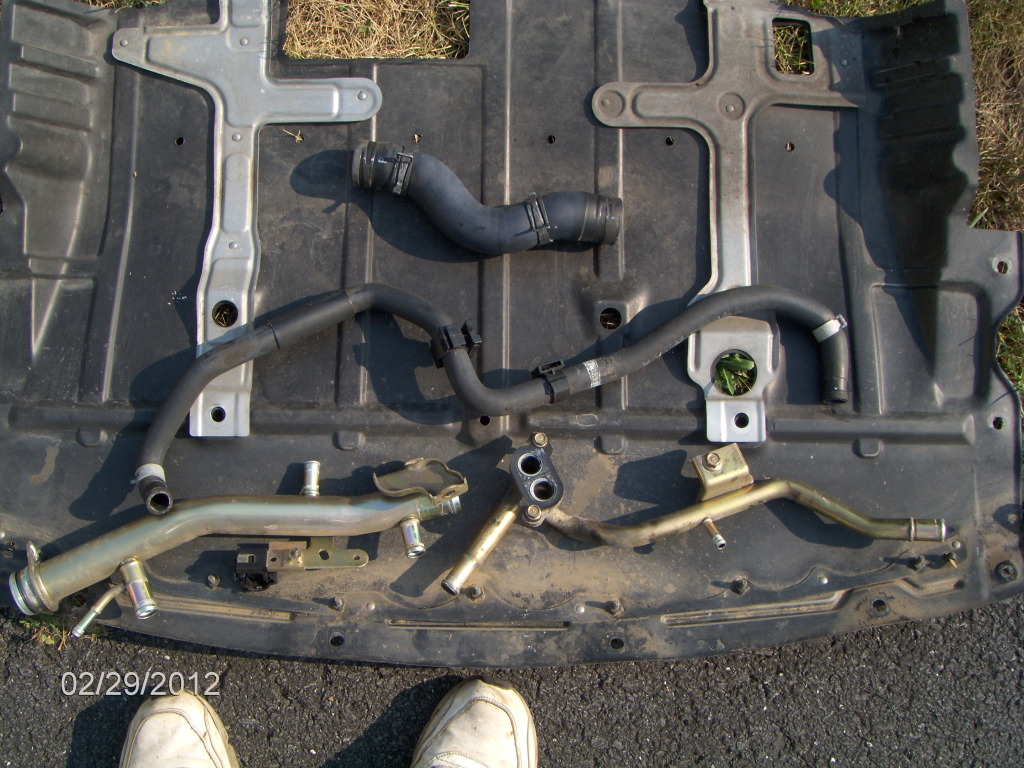
All the coolant pipes removed
Drivers side exhaust manifold removed. You can also see the steering column disconnected

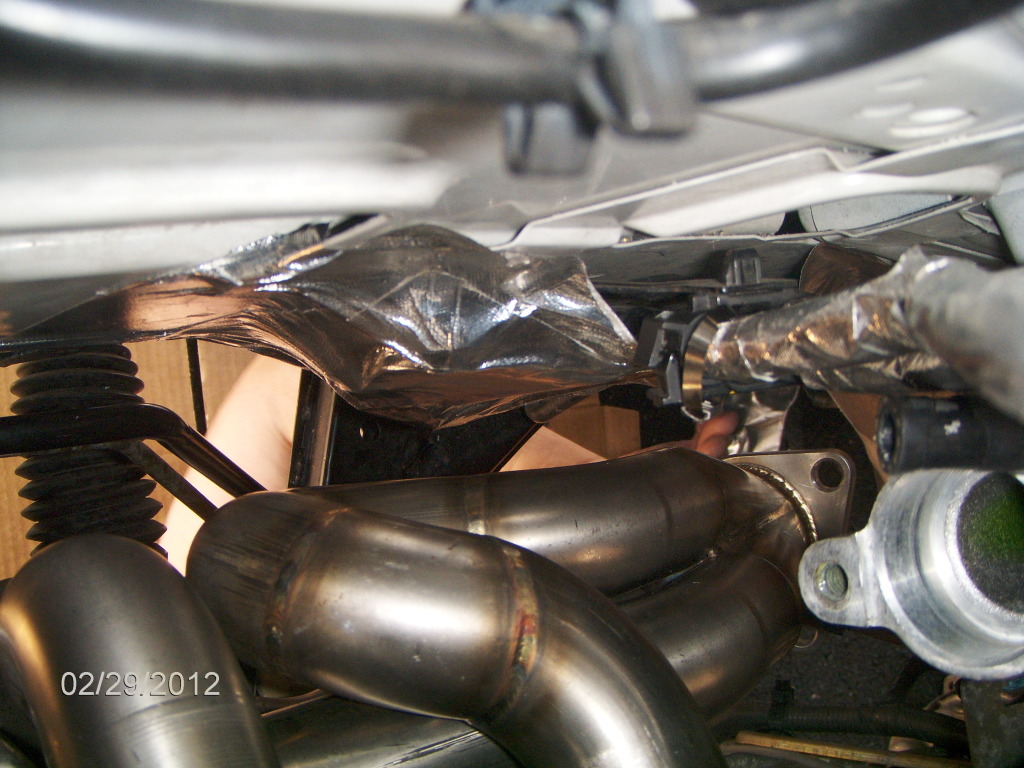
Here you can see what I did with the heat shield material I used.
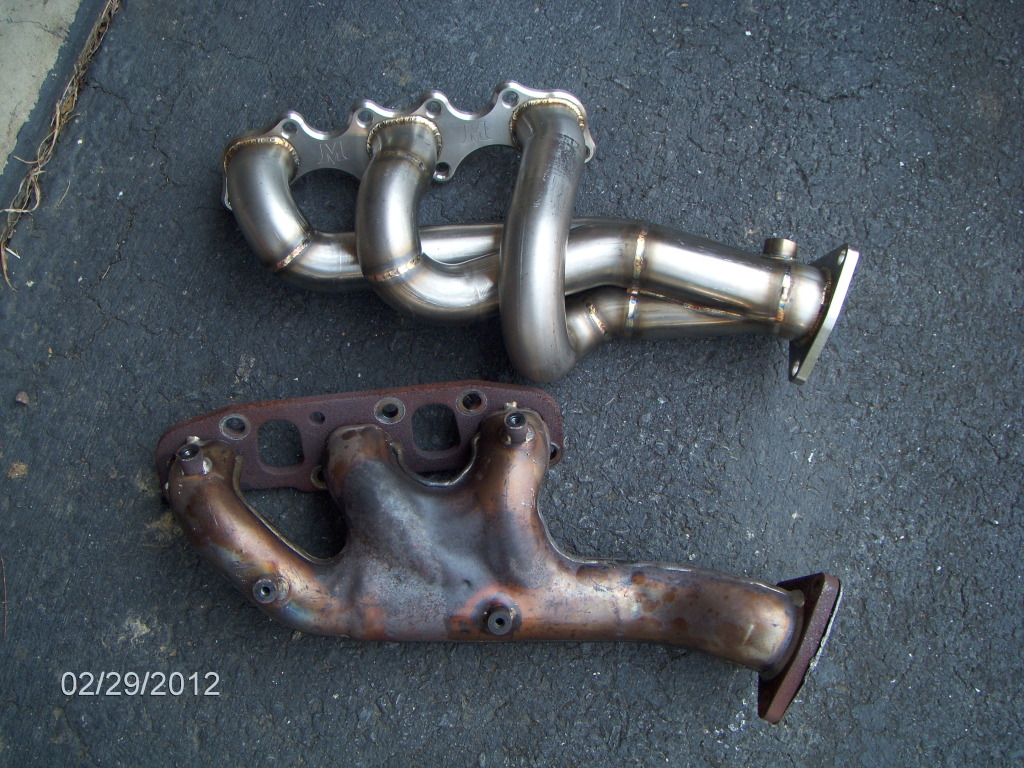
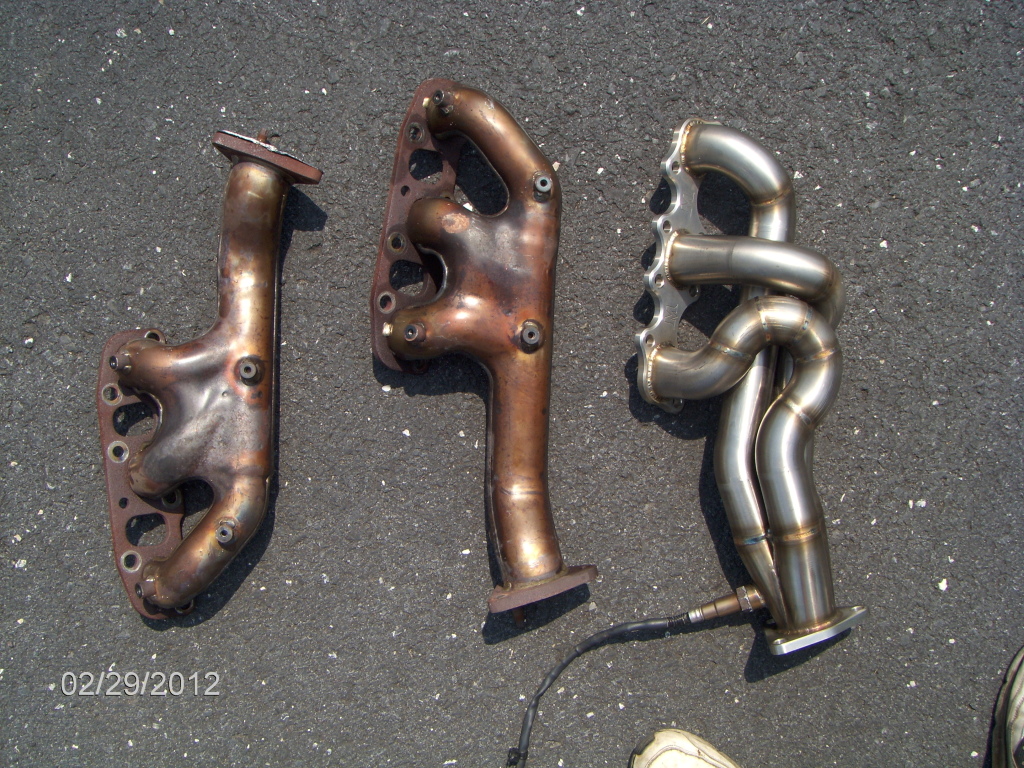
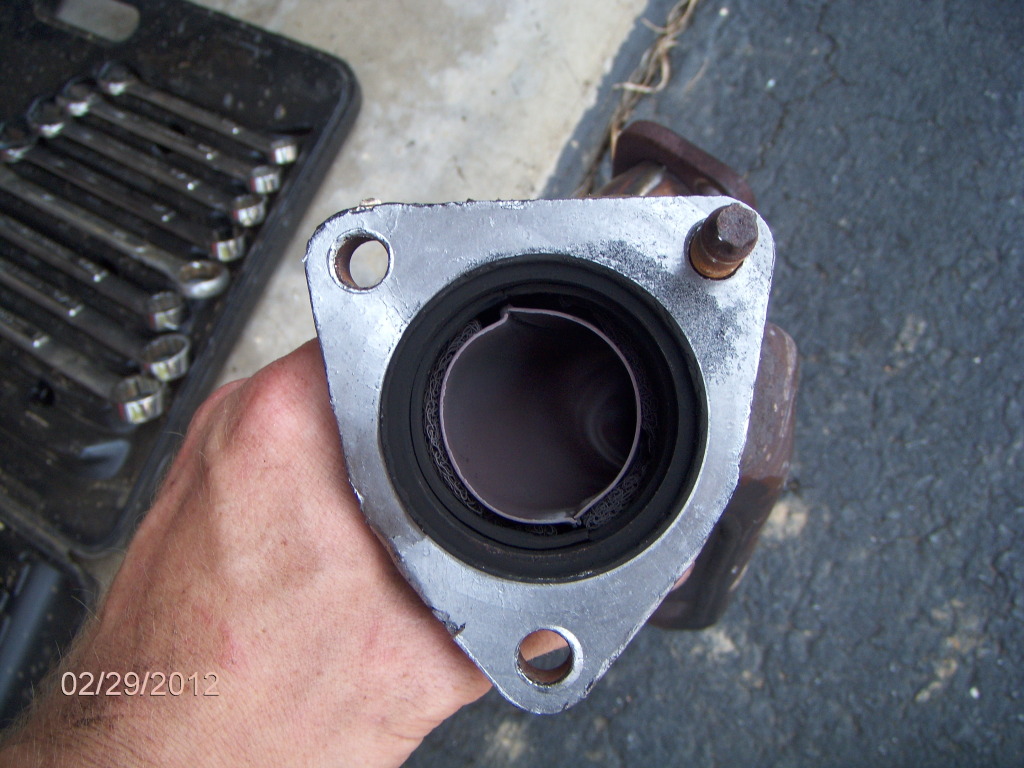
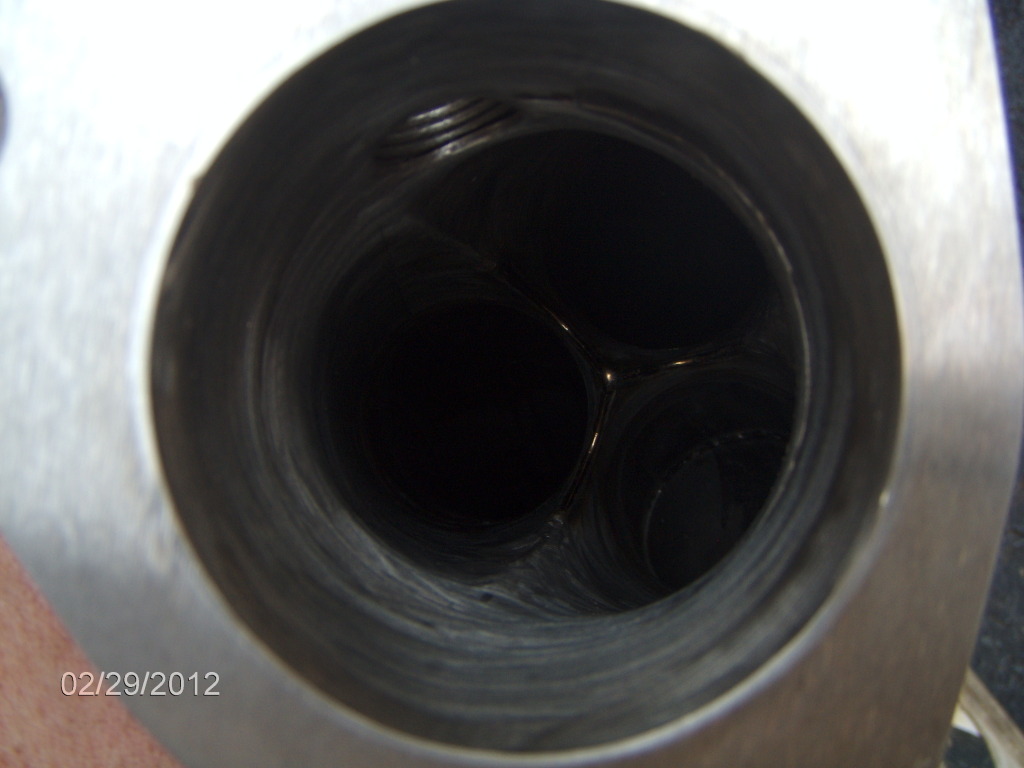
Just some comparisons of stock manifolds to Momentum headers
Passenger side after removing hard pipe, again you can see the heat shield and the fuel line, evap hose that needs wrapped with heat shield material
The connections for the exhaust manifold O2 sensors are in around these areas. If you cant pinpoint them simply follow the wires from the sensor
All the coolant pipes removed
Drivers side exhaust manifold removed. You can also see the steering column disconnected
Here you can see what I did with the heat shield material I used.
Just some comparisons of stock manifolds to Momentum headers
Last edited by 04WhiTe_G_Coupe; 07-19-2012 at 02:46 PM.
The following 4 users liked this post by 04WhiTe_G_Coupe:


Thread
Thread Starter
Forum
Replies
Last Post
Machine Head
G35 Sedan V35 2003-06
19
09-04-2015 07:22 PM
yosip1115
Engine - Exhaust
17
07-22-2015 01:47 PM