03 Infiniti G35 LS1/T56 Build Thread
#31
 10-20-2013, 10:40 PM


#33
10-20-2013, 11:55 PM


#35
10-22-2013, 02:25 AM
#37
10-28-2013, 12:28 AM
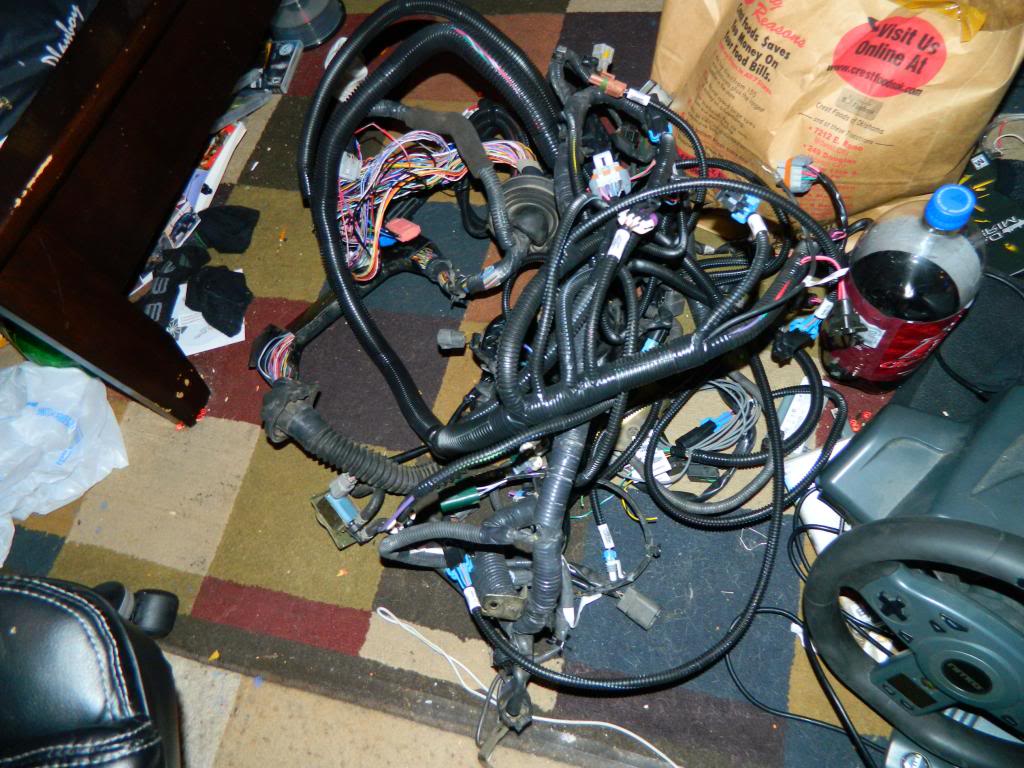
Well started this weekend and found out sikkys expensive oilpan pickup tube didnt work so we couldnt put the oilpan on due to it hitting the pan so that puts a hold till we get ahold of sikky =( as for the harness we found out were just junking the old harness and splicing into the stuff under the dash since current performance hasnt done a g35 they just make a harness for it not knowing what theyre doing i asked them which wires they said "idk you might need a wire schematic" so untill we hear from sikky its on hold =(
#38
10-29-2013, 12:20 PM

Registered User
#39
11-19-2013, 04:23 AM
sorry i havent updated this build in awhile been busy and lazy lol so the new update has arrived!
when we started to put oil pan on we were going to try any finish the car that weekend and ran into a problem which set us back about a week & a half.
sikky had sent us the wrong oil pickup tube we couldnt even put the pan on because it was bent completetly wrong so once we did that had to wait untill monday to even call sick and send the pan and tube back.
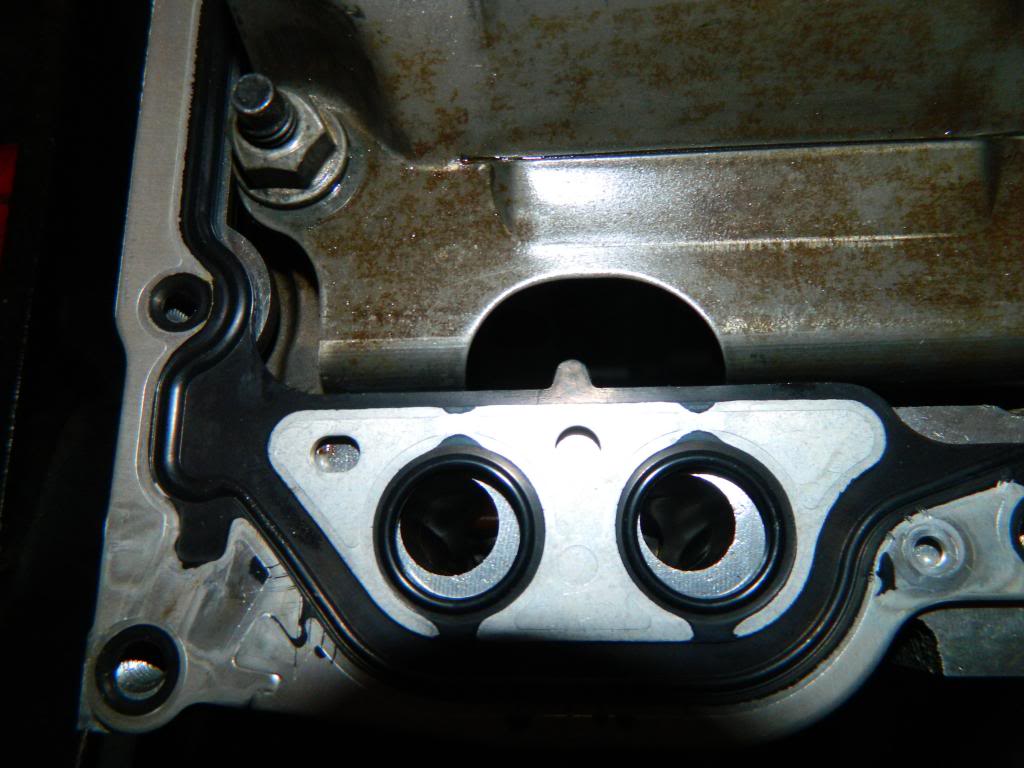
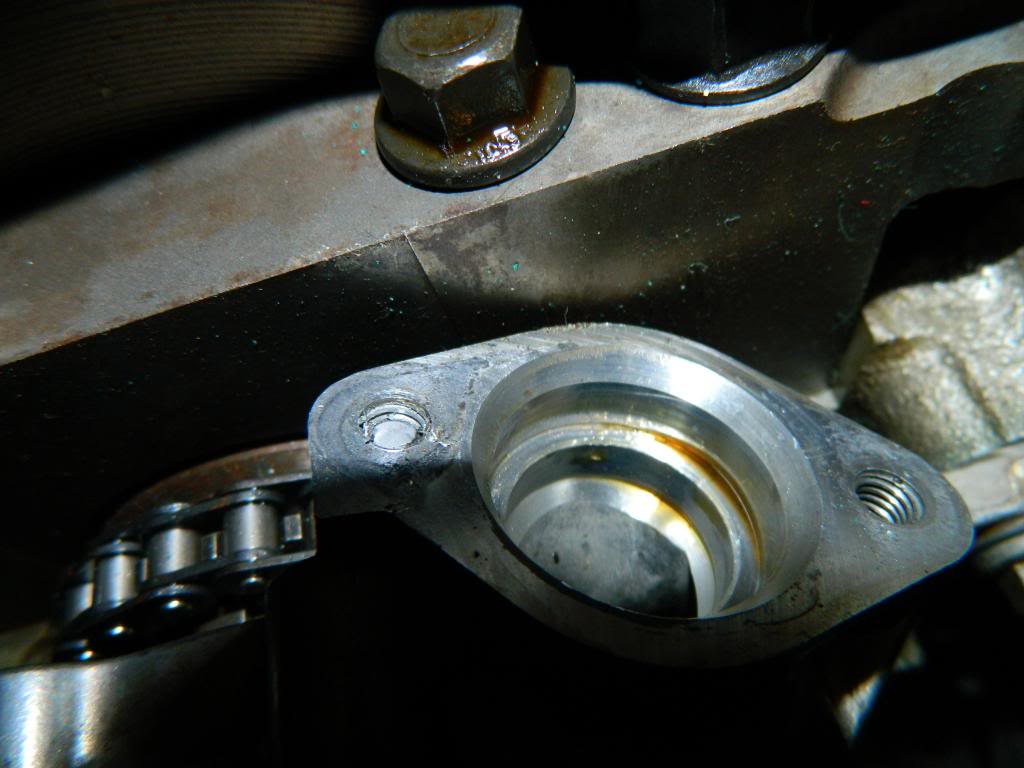
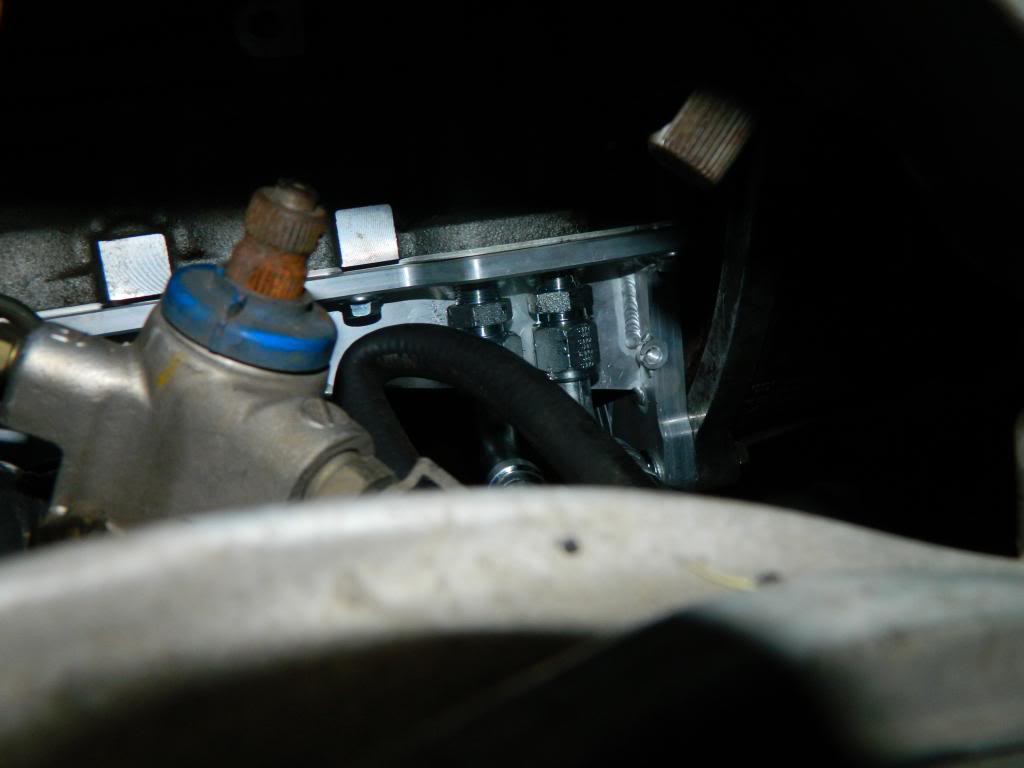
but finally after we received it we rested a few days and begun putting the new oilpan and pickup tube on. One thing i did find i didnt like is that the holes for oilfilter arent even aligned right and this is how the pan was made! wish they would of made it even and put the holes in the right spot and at least put a hole through the deep part of the pan like the batwing corvette pan so we can make sure that bolt is perfectly torqued but since we couldnt get a torque wrench or even a ratchet we had to kind of wing it and pray its close enough! we also tried putting the bigger bolts in front and it looked like it was crooked completely and since we had no instructions we didnt know that the allen head bolts go in the front lol
on top of our shitty weekend while torquing the oilpickup tube bolt we ended up breaking it smooth off the oil pump =( so there was another setback lol
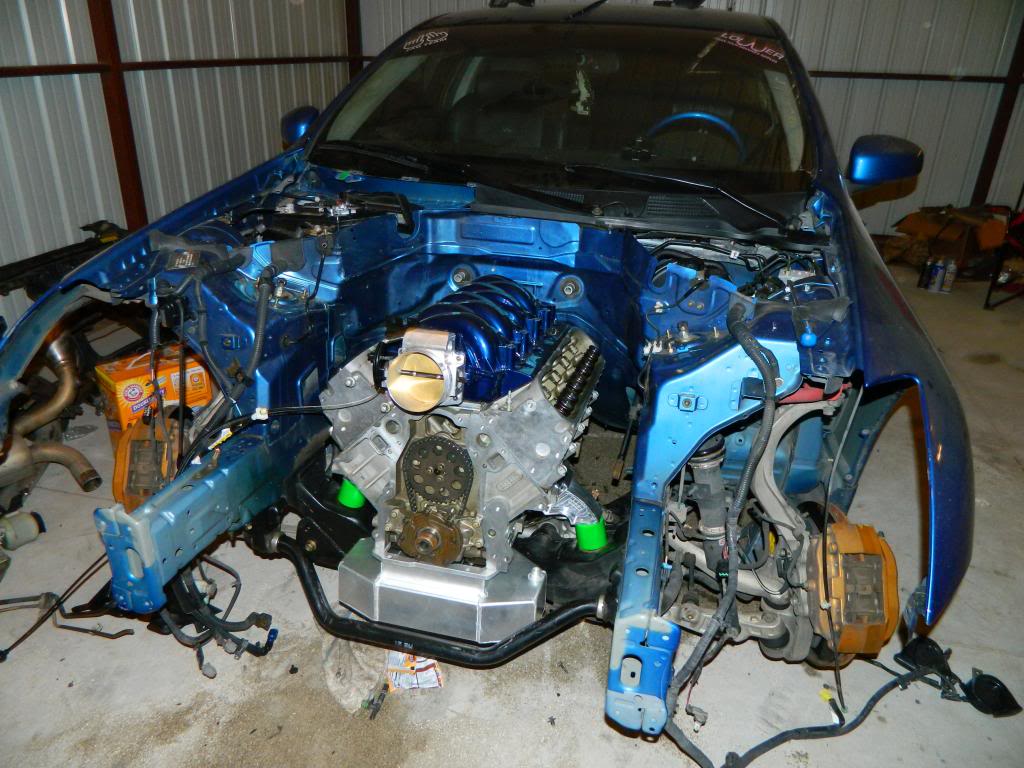
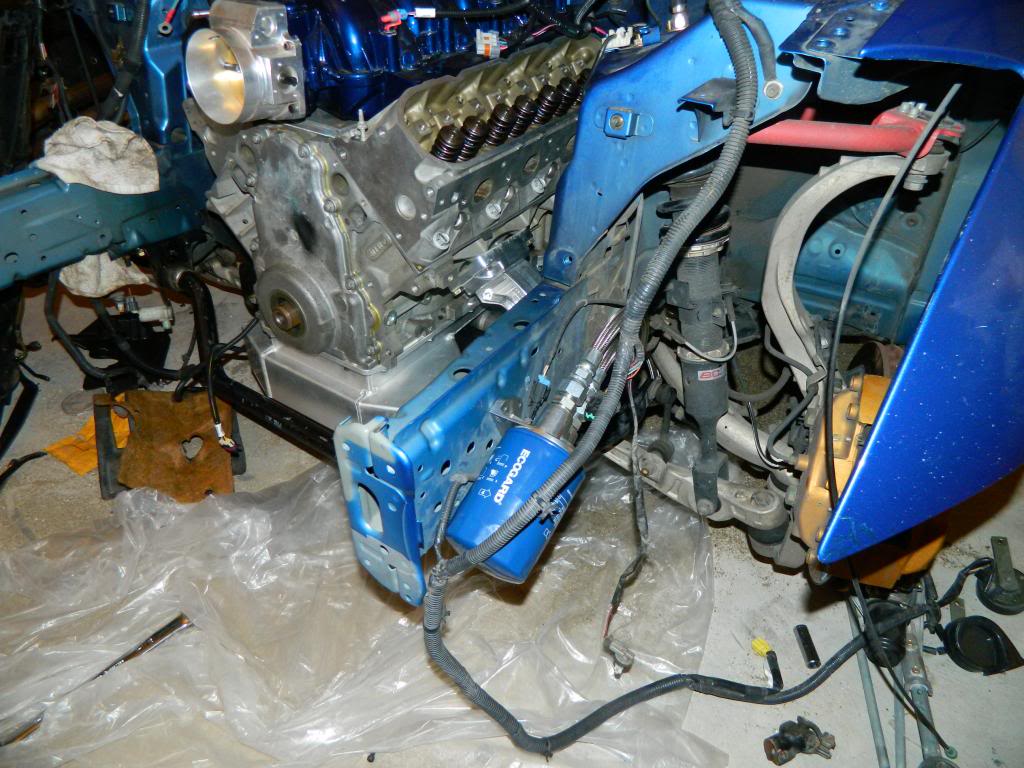
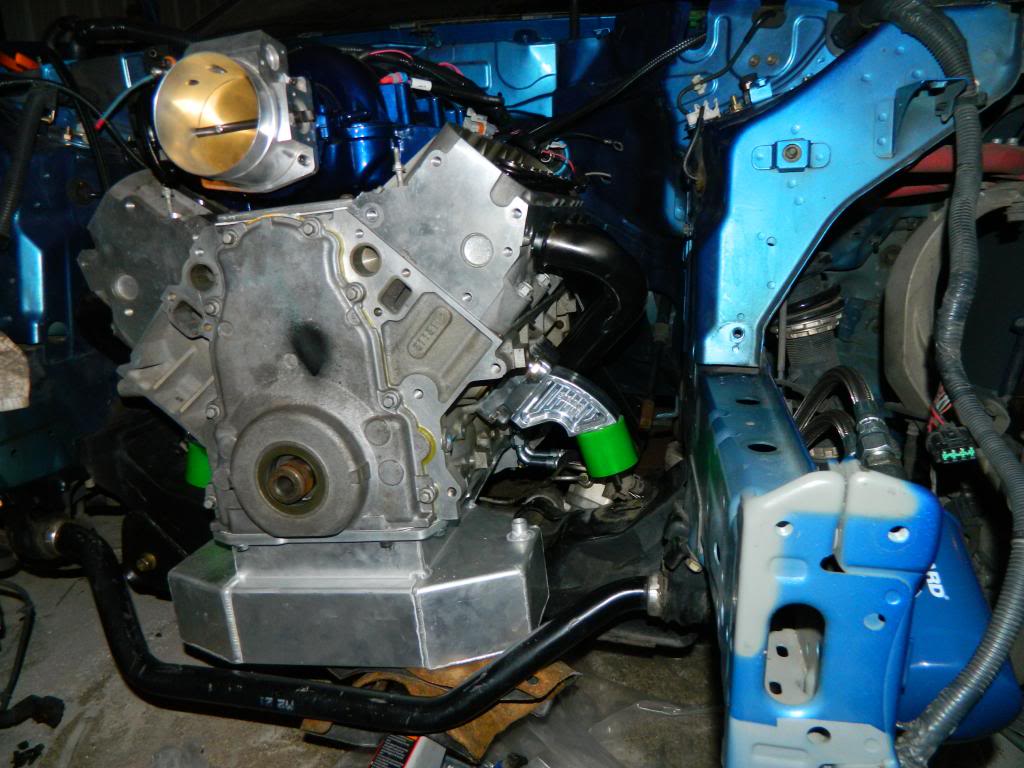
after all that mess was straightened out we put the motor into the car to see how it looked and test fit and figure out the pedal situation
after we drilled the hole and measured a bunch of times we finally got the cable ran to the interior of the car after using out "custom" pedal assembly from a 240 and g35 pedal so we can still have cable driven with stock pedal
and yes the valve covers are going to be repainted
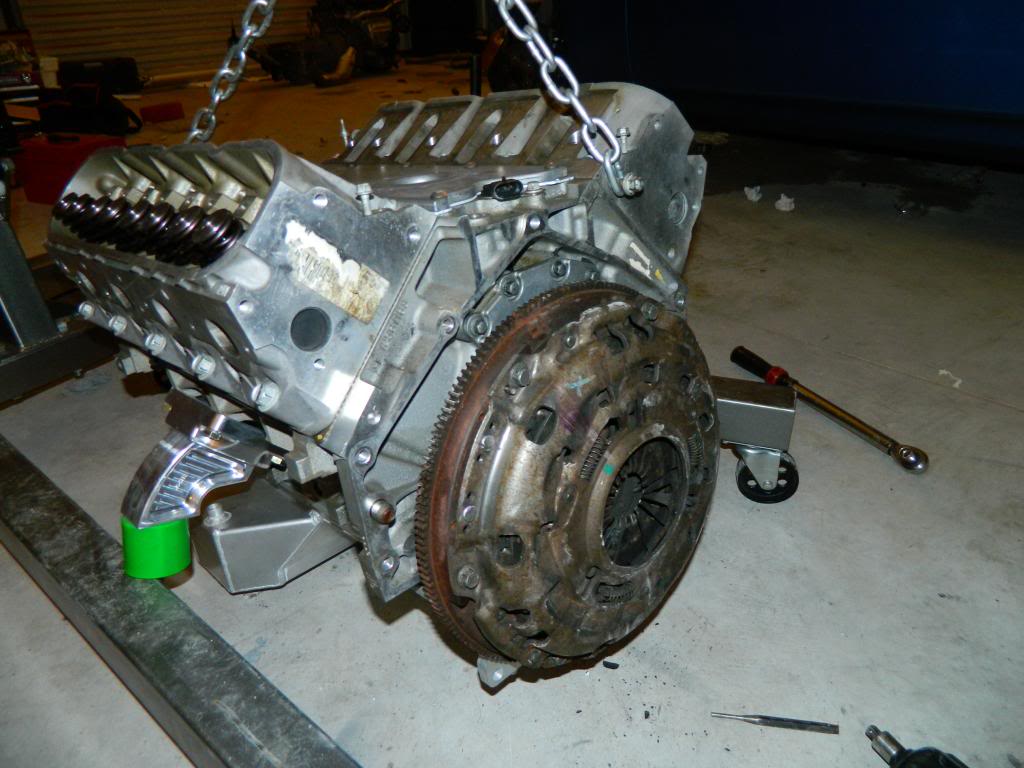
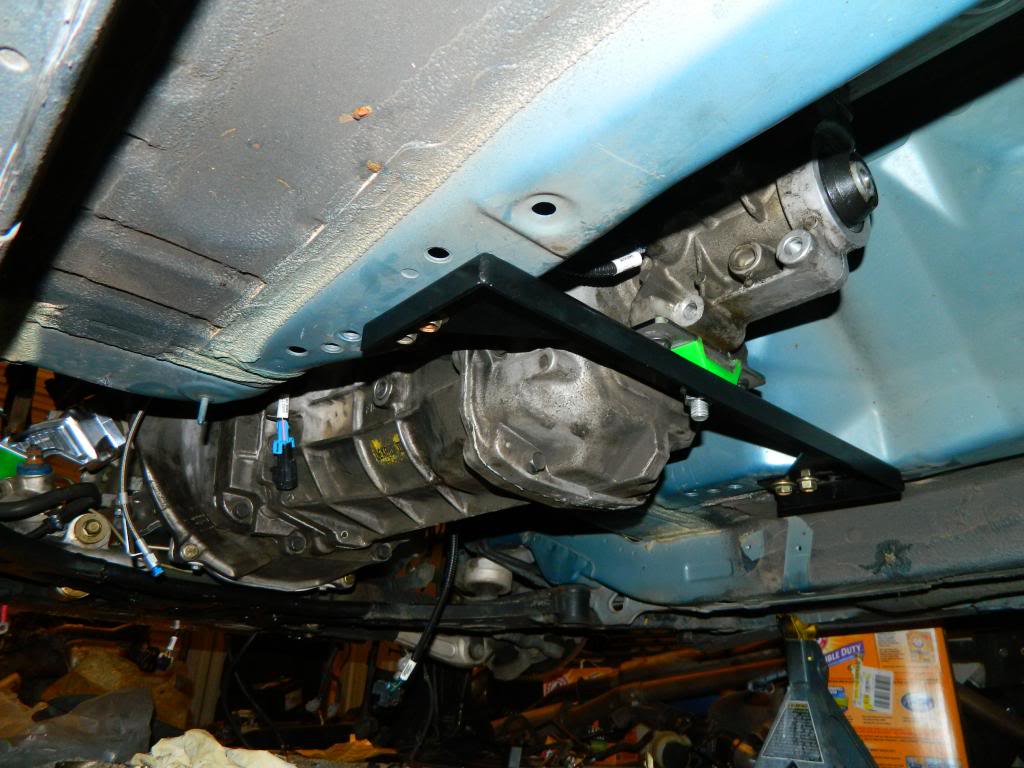
after we got the pedal and one of the hard things out of the way we pulled motor and set it on the ground so we could install flywheel and clutch for the t56. keep in mind this is my first t56 ive worked on so it was a learning experience for installing my first clutch and let me say its alot simpler then i figured it would be but putting trans onto the clutch is kind of a pain to get it on there perfect
lol here you can see how we ghetto rigged it to set up perfect so we can put the fluid in it. we got sidetracked and forgot lol
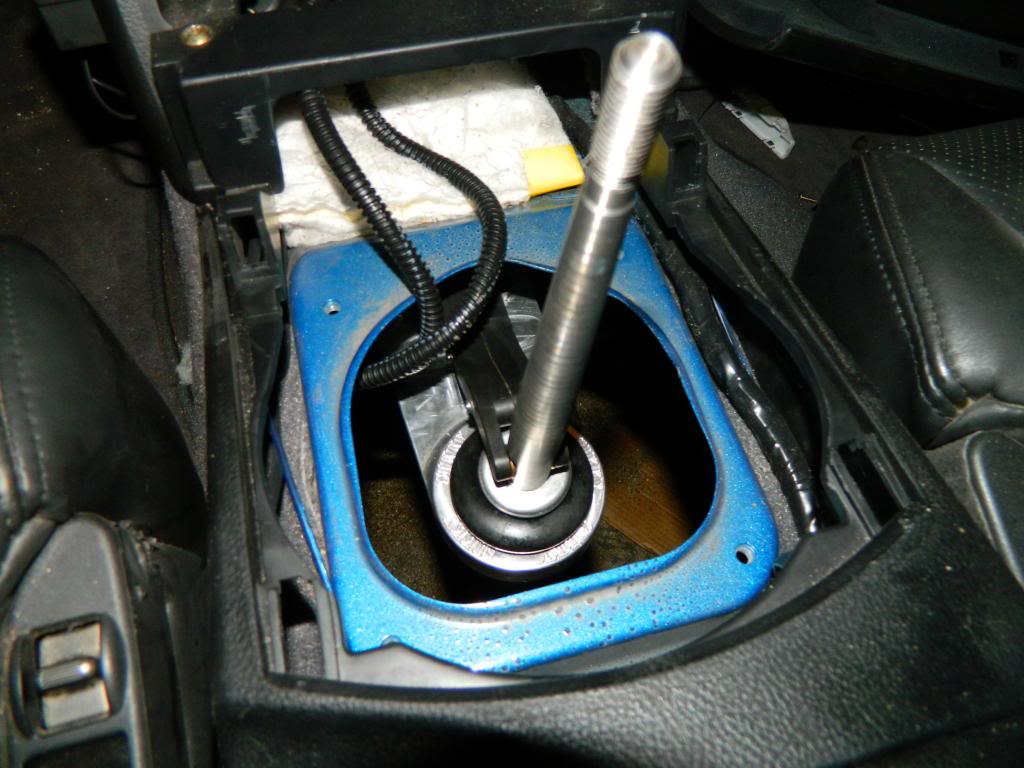
heres with the t65 on the motor and installed in the car. it wasnt that hard really we had to take the shifter off and install it from the top since it was in the way too much
after that we called it a night decided to take it easy for the next few days.
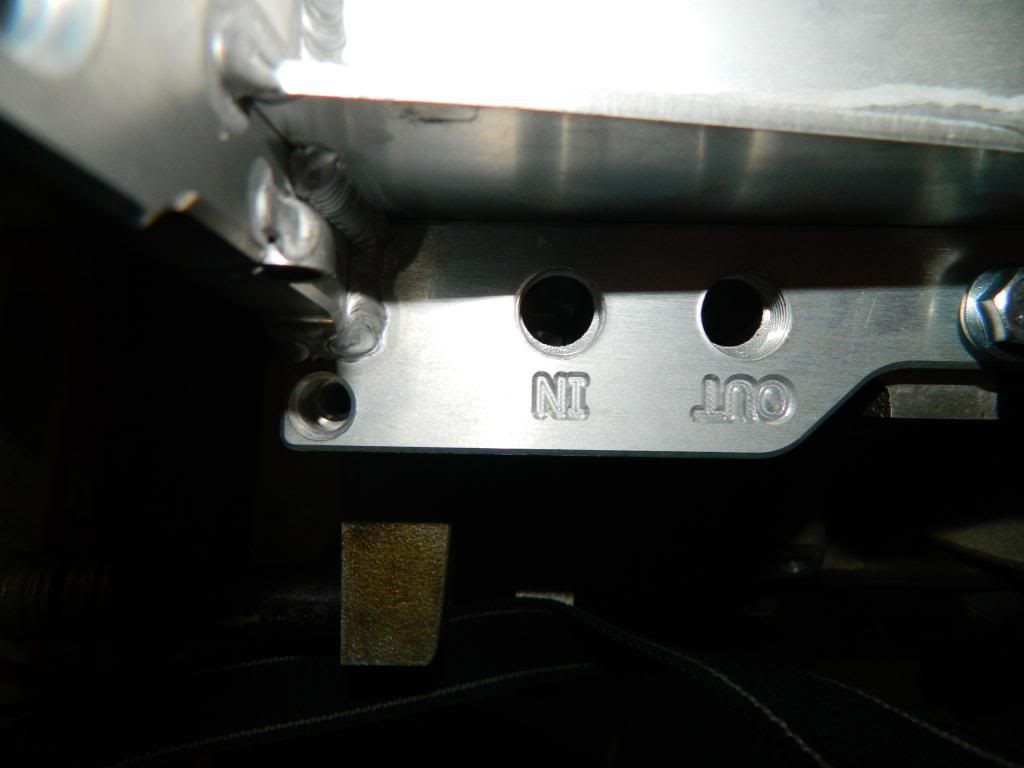
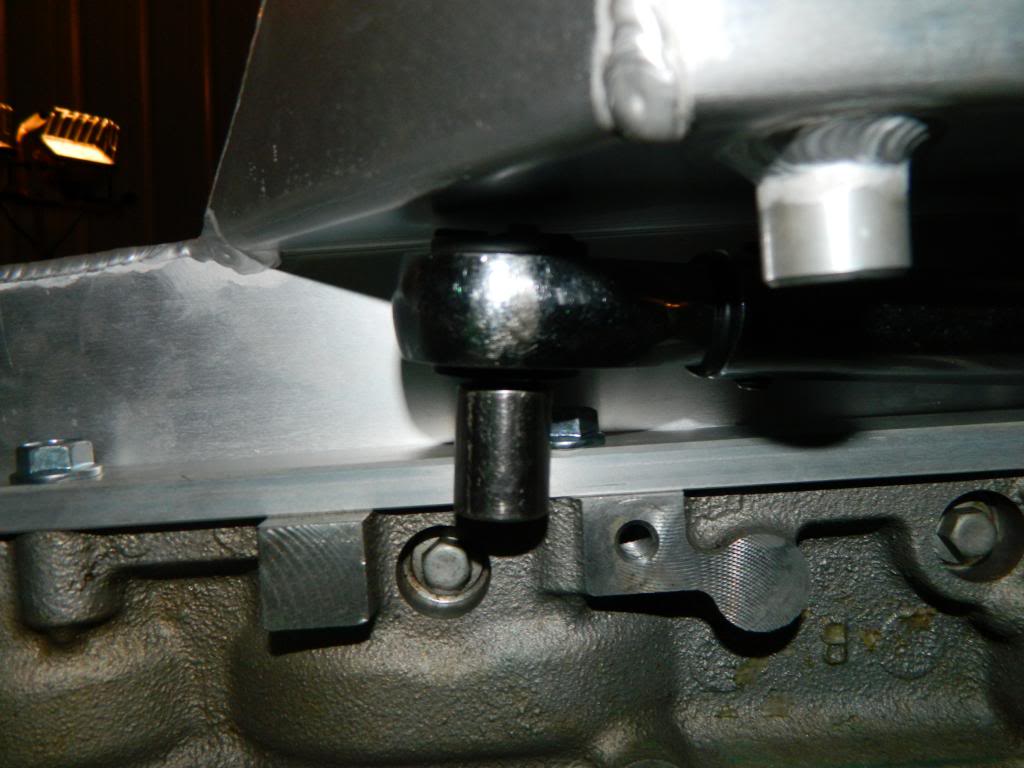
since i was bored tonight i figured id sneak over to the shop and get work done. we were having trouble finding where to mount the oil filter because those lines were HUGE we pinched one a little when lowering motor but we ended up taking them off and i got under the car and installed them tonight after i found where i wanted the filter to go.
after i knocked that out i heard that the headers are the worse part of this swap and said its going to take along time but apparently theyve never installed some on a camaro haha i ended up getting both headers in the car and bolted into place in under 5 minutes didnt take much effort at all since i just jacked up one side of the motor and slid em on in there turning every way i could while doing it.
after i saw the headers in i figured why not put the alternator and front assembly on now i dont need that extra room. i managed to forget to put dipstick into trans but since theres enough clearance it will be easy to come behind the alternator.
after that i decided to go ahead and install the 7.4 pushrods and torque all the rockers down to 22 ft lbs before installing the valve covers
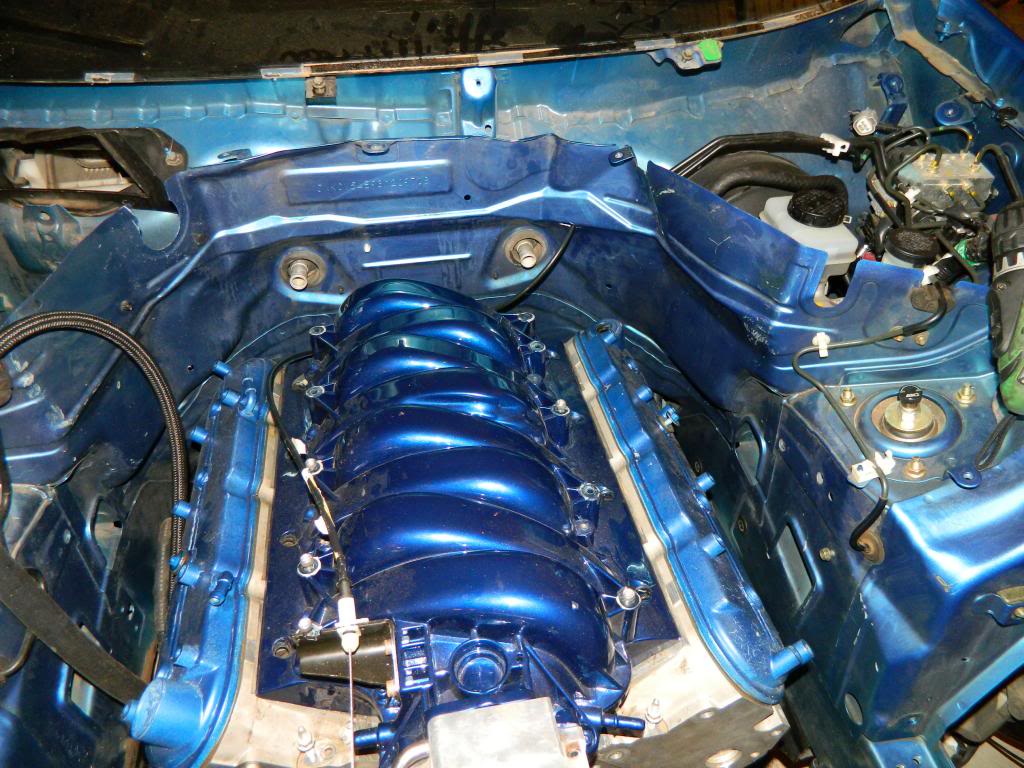
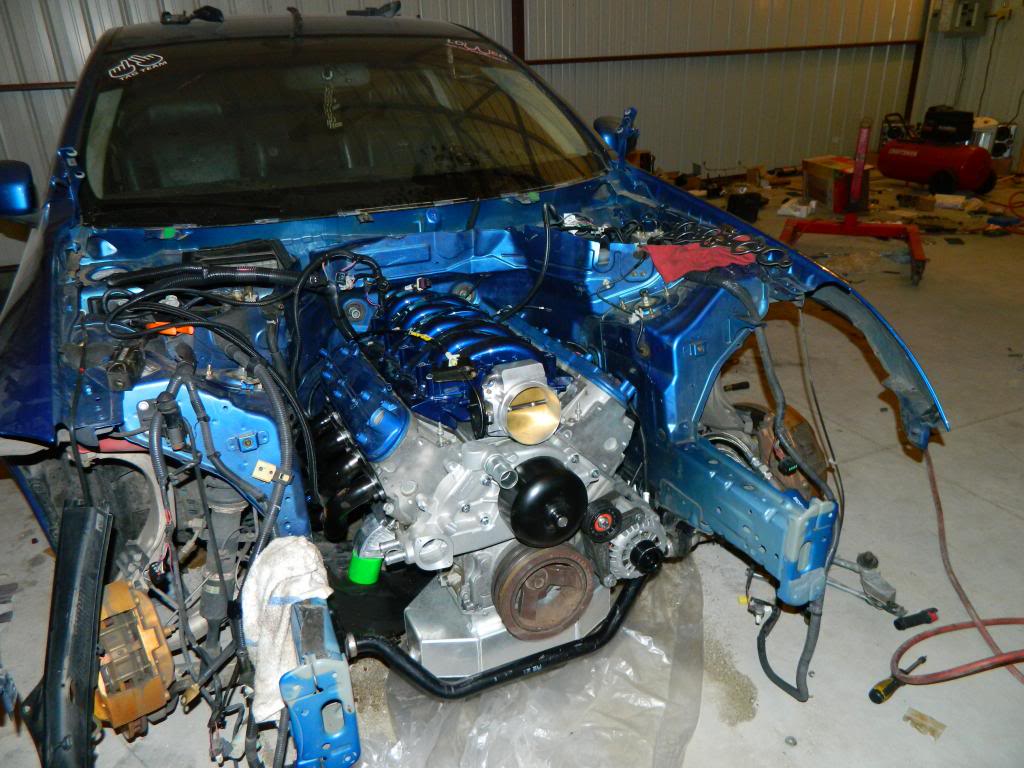
man she looks perdy! definitely looks like it belongs there! man we are so close for that first start up just gotta get the ecu tuned for a t56 and a base tune to where we can start it and figure out the bugs before we drive it to get dyno tuned !
all thats left now is install driveshaft plug up the harness and splice it all into the interior such as tach and we have to run the fuel pump wiring to the back of the car after we install the walboro 255 pump we have. So shouldnt be to much because after we do all of that we basically put the front bumper on with the radiator and the slim fans see how much clearance we have and find out how long of a hose we need from the heater core to the water pump so we can still have heat! then basic stuff like fluids and bleed clutch. thats all i can think of off the top of my head but stay tuned for the first startup and dyno numbers ! gonna be over 400 for sure!!! just need to figure out what rims and tire combo we are going to run then its time for axles because these are going to definitely snap once we show it some sticky tire.
when we started to put oil pan on we were going to try any finish the car that weekend and ran into a problem which set us back about a week & a half.
sikky had sent us the wrong oil pickup tube we couldnt even put the pan on because it was bent completetly wrong so once we did that had to wait untill monday to even call sick and send the pan and tube back.
but finally after we received it we rested a few days and begun putting the new oilpan and pickup tube on. One thing i did find i didnt like is that the holes for oilfilter arent even aligned right and this is how the pan was made! wish they would of made it even and put the holes in the right spot and at least put a hole through the deep part of the pan like the batwing corvette pan so we can make sure that bolt is perfectly torqued but since we couldnt get a torque wrench or even a ratchet we had to kind of wing it and pray its close enough! we also tried putting the bigger bolts in front and it looked like it was crooked completely and since we had no instructions we didnt know that the allen head bolts go in the front lol
on top of our shitty weekend while torquing the oilpickup tube bolt we ended up breaking it smooth off the oil pump =( so there was another setback lol
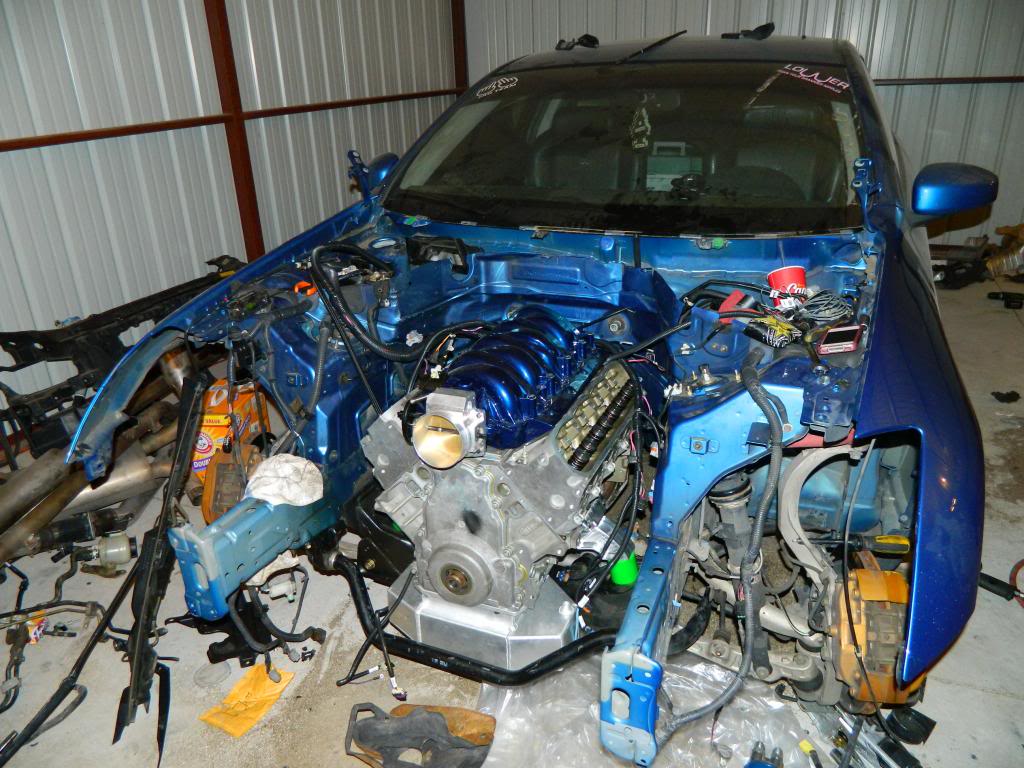
after all that mess was straightened out we put the motor into the car to see how it looked and test fit and figure out the pedal situation
after we drilled the hole and measured a bunch of times we finally got the cable ran to the interior of the car after using out "custom" pedal assembly from a 240 and g35 pedal so we can still have cable driven with stock pedal
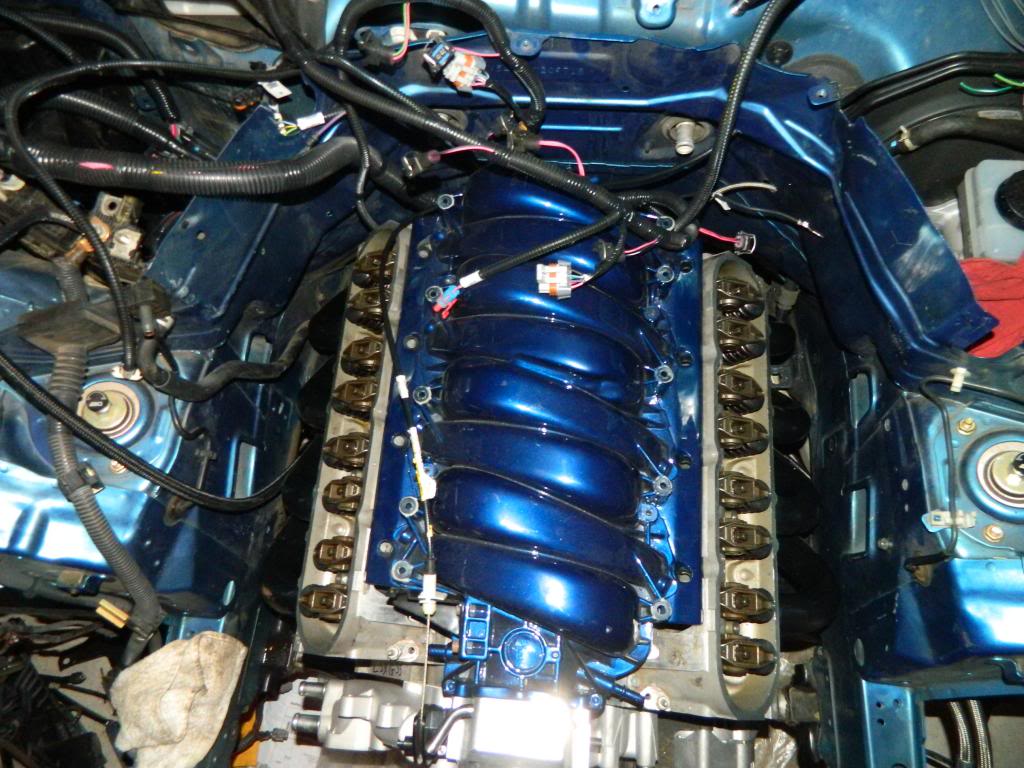
and yes the valve covers are going to be repainted
after we got the pedal and one of the hard things out of the way we pulled motor and set it on the ground so we could install flywheel and clutch for the t56. keep in mind this is my first t56 ive worked on so it was a learning experience for installing my first clutch and let me say its alot simpler then i figured it would be but putting trans onto the clutch is kind of a pain to get it on there perfect
lol here you can see how we ghetto rigged it to set up perfect so we can put the fluid in it. we got sidetracked and forgot lol
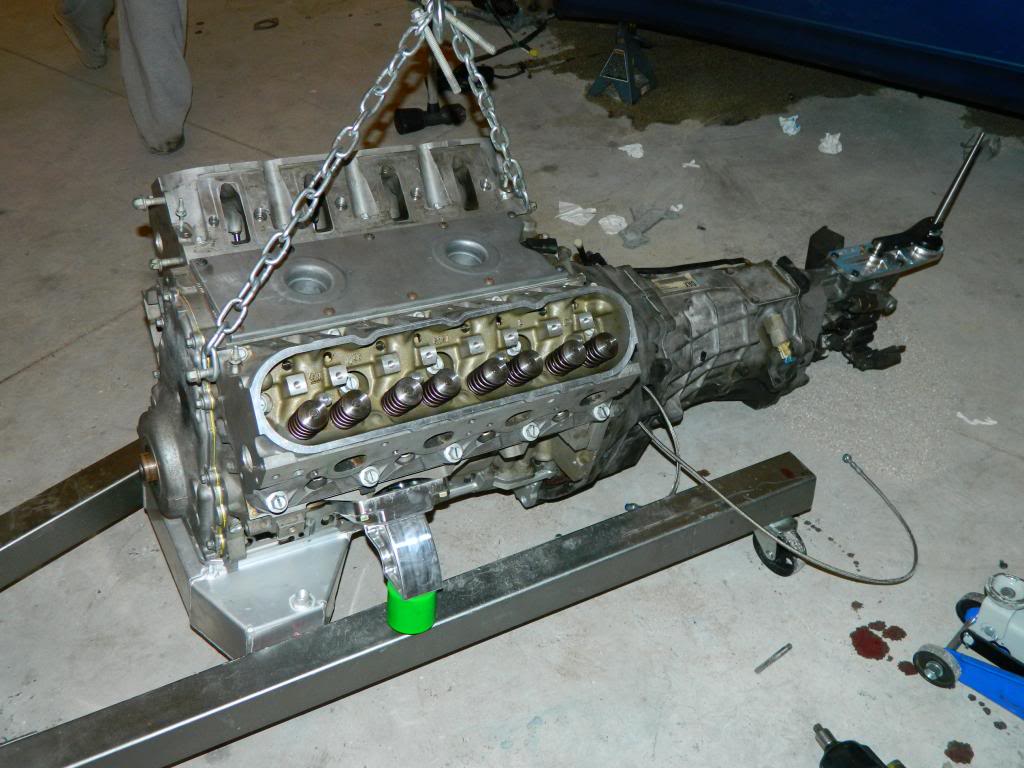
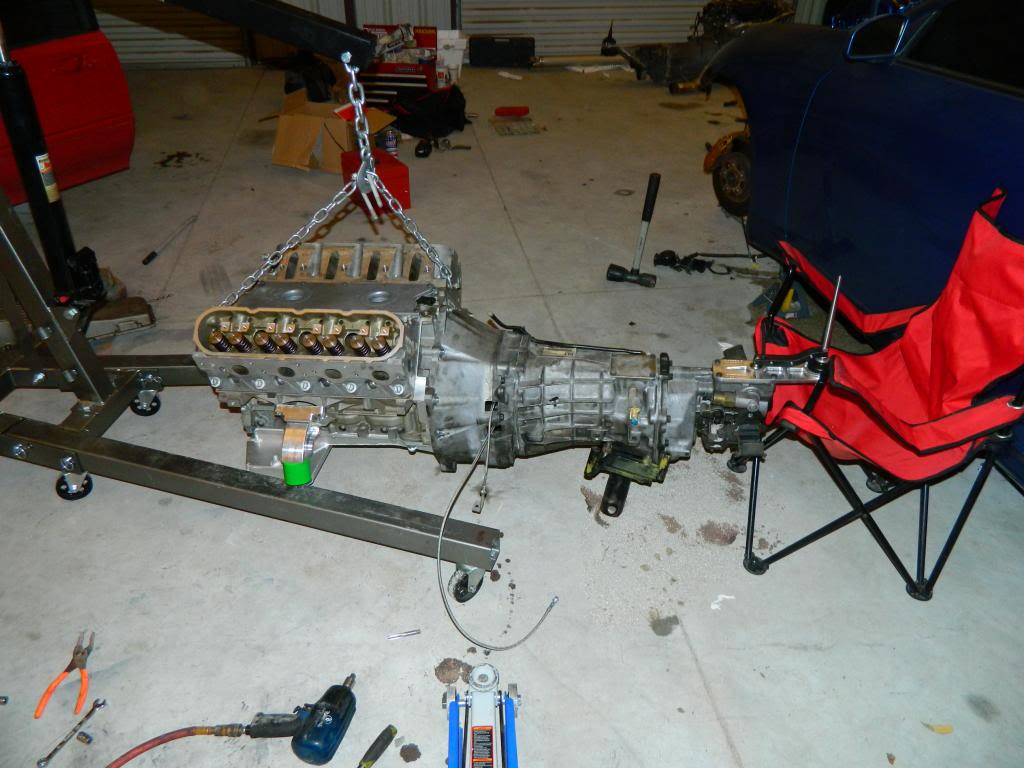
heres with the t65 on the motor and installed in the car. it wasnt that hard really we had to take the shifter off and install it from the top since it was in the way too much
after that we called it a night decided to take it easy for the next few days.
since i was bored tonight i figured id sneak over to the shop and get work done. we were having trouble finding where to mount the oil filter because those lines were HUGE we pinched one a little when lowering motor but we ended up taking them off and i got under the car and installed them tonight after i found where i wanted the filter to go.
after i knocked that out i heard that the headers are the worse part of this swap and said its going to take along time but apparently theyve never installed some on a camaro haha i ended up getting both headers in the car and bolted into place in under 5 minutes didnt take much effort at all since i just jacked up one side of the motor and slid em on in there turning every way i could while doing it.
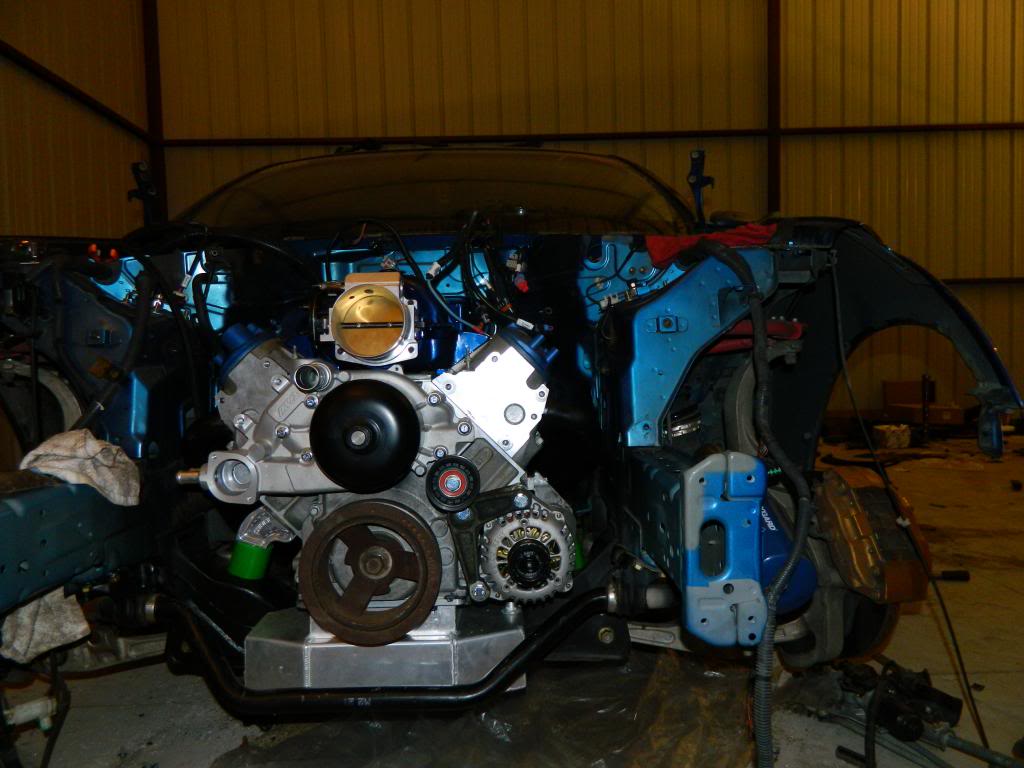
after i saw the headers in i figured why not put the alternator and front assembly on now i dont need that extra room. i managed to forget to put dipstick into trans but since theres enough clearance it will be easy to come behind the alternator.
after that i decided to go ahead and install the 7.4 pushrods and torque all the rockers down to 22 ft lbs before installing the valve covers
man she looks perdy! definitely looks like it belongs there! man we are so close for that first start up just gotta get the ecu tuned for a t56 and a base tune to where we can start it and figure out the bugs before we drive it to get dyno tuned !
all thats left now is install driveshaft plug up the harness and splice it all into the interior such as tach and we have to run the fuel pump wiring to the back of the car after we install the walboro 255 pump we have. So shouldnt be to much because after we do all of that we basically put the front bumper on with the radiator and the slim fans see how much clearance we have and find out how long of a hose we need from the heater core to the water pump so we can still have heat! then basic stuff like fluids and bleed clutch. thats all i can think of off the top of my head but stay tuned for the first startup and dyno numbers ! gonna be over 400 for sure!!! just need to figure out what rims and tire combo we are going to run then its time for axles because these are going to definitely snap once we show it some sticky tire.
#41
11-19-2013, 05:12 PM
Registered User
#43
11-19-2013, 07:22 PM

#44
11-20-2013, 10:35 PM
dont worry we will have plenty of videos lol the trans is hurt in my camaro so we wont be able to get a good race of the cars untill winter is over then we will get us both racing but till then hes getting skinnies with some drag radials for the back and axels since it will be more of a drag/street car

 biggthumpup: