
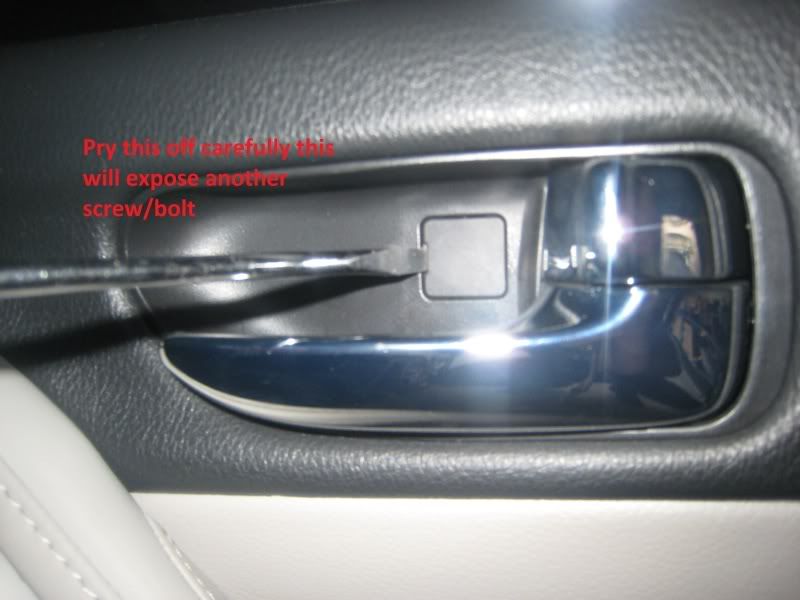
DIY: 03-05 Sedan Rear Door Rattle/Creak TSB Repair and Panel Removal


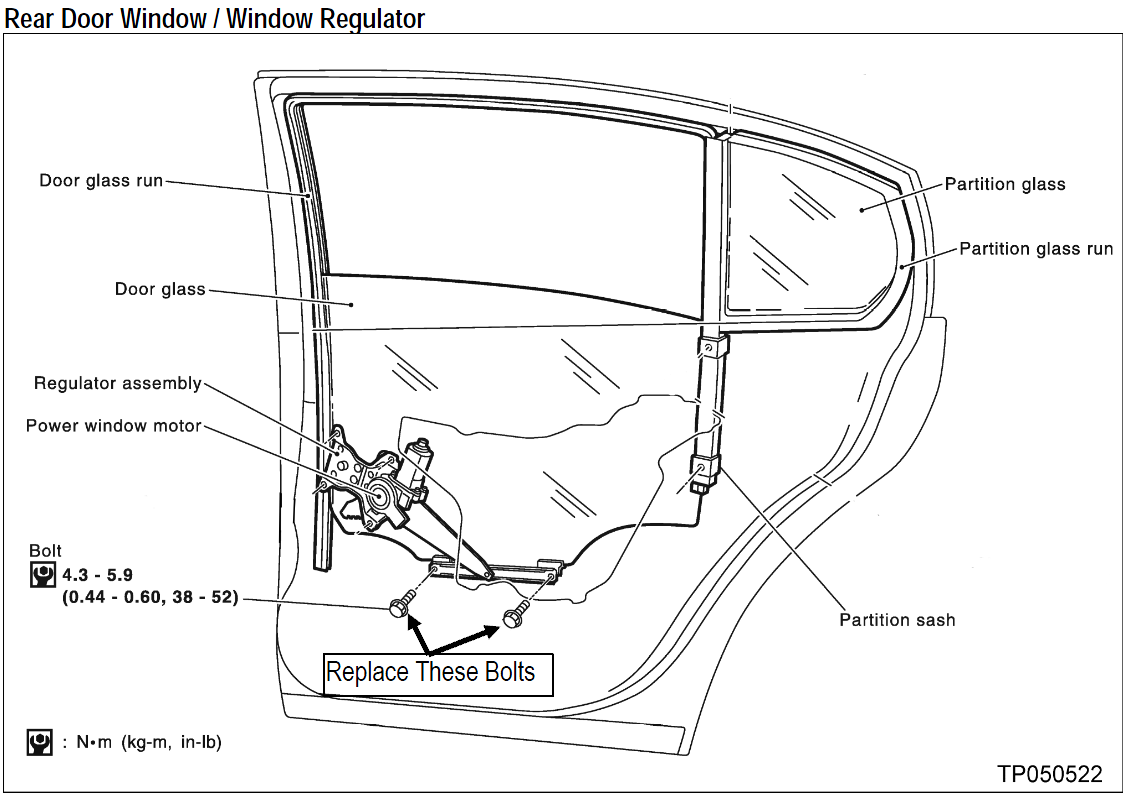
Well my dealer wanted me to accept a diagnostic fee($120) so I just bought the screws. $1.57 per screw at the dealer Part #01125-03241
I am not a professional at creating DIY videos and I do not have good editing software. As well as I was by my self when I did this.
If you have any questions please post below ill answer them as best I can.
My skill level so far is Changing my Oil, and installing a Z-Tube. So I think anyone that's just the little bit handy can do this no problem.
You will need
1 hours of time per door
Patience
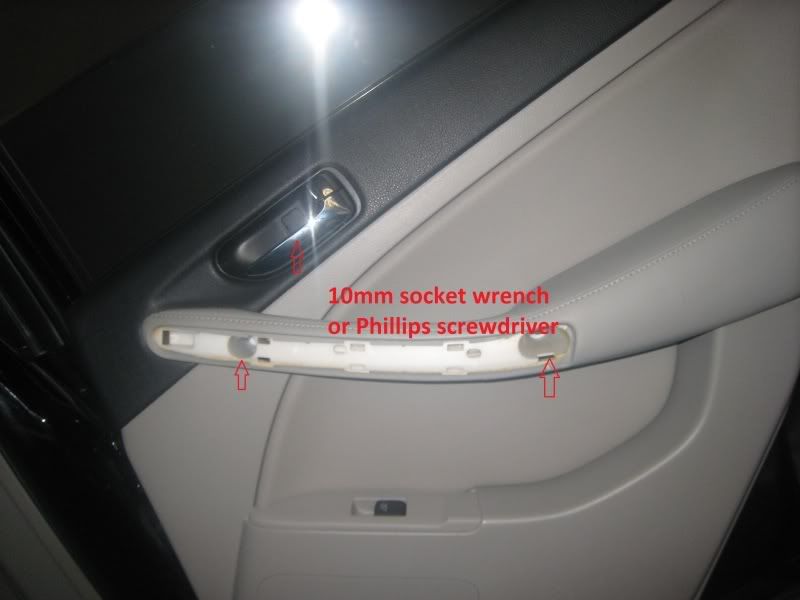
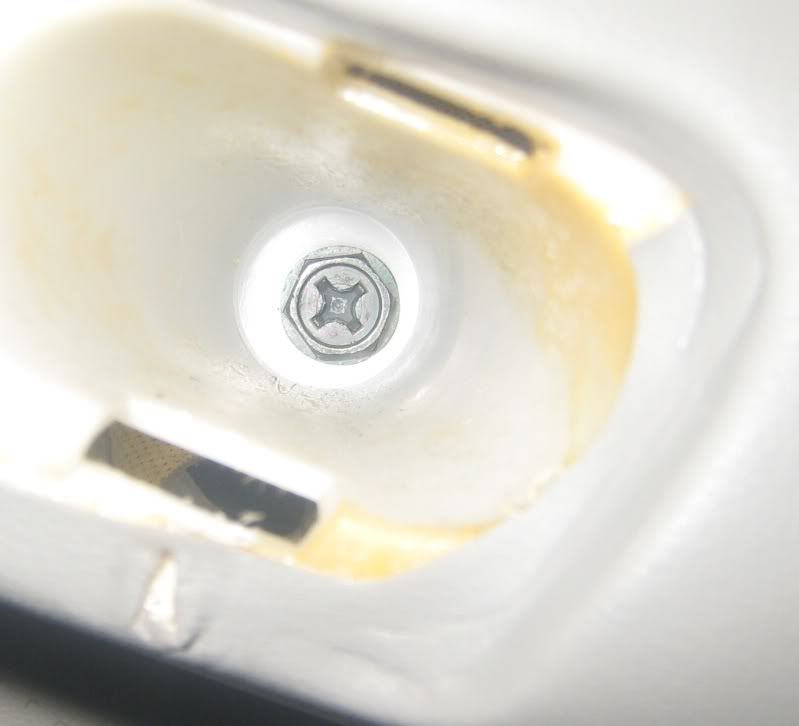
10mm socket wrench with extension
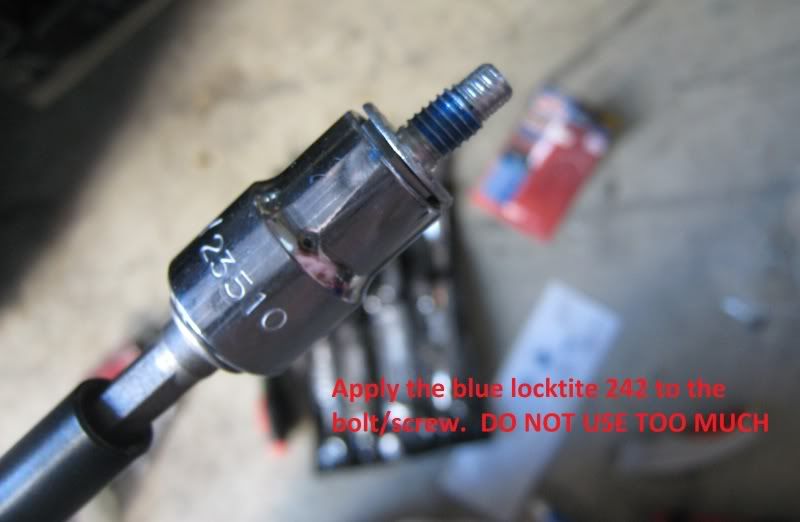
Blue 242 locktite ($5.99)
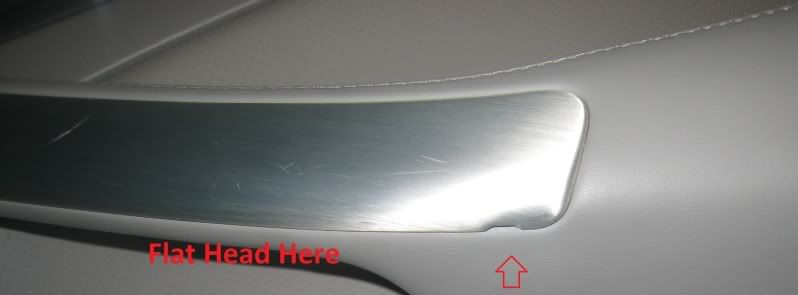
Small Flat Head Screw Driver
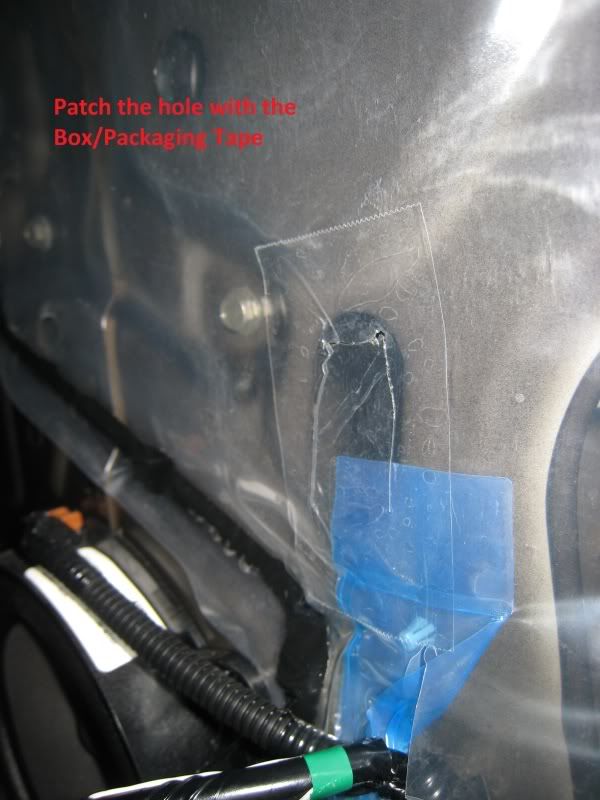
Box Cutter
Box/Packaging Tape
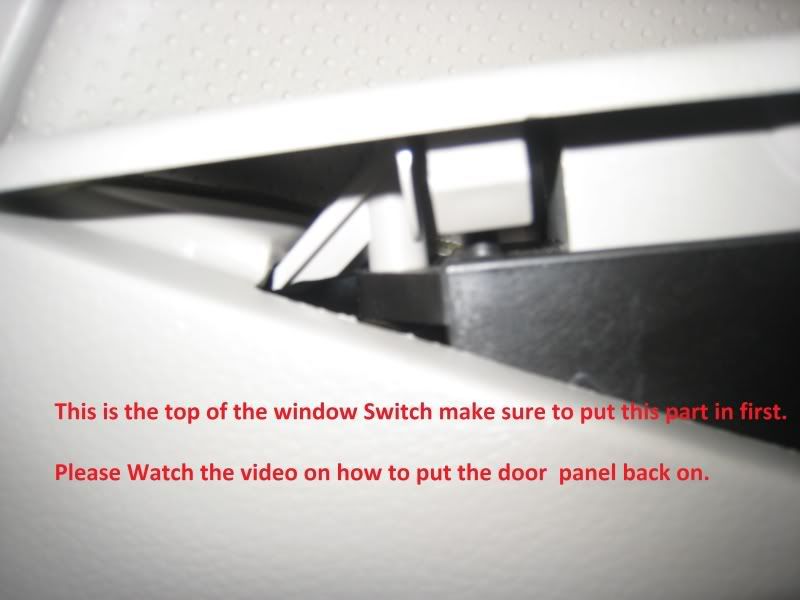
Video DIY
PART 1
PART 2
PICTURES

I want to thank bkd for the help Thanks again!
Hope you enjoyed my DIY!
I am not a professional at creating DIY videos and I do not have good editing software. As well as I was by my self when I did this.
If you have any questions please post below ill answer them as best I can.
My skill level so far is Changing my Oil, and installing a Z-Tube. So I think anyone that's just the little bit handy can do this no problem.
You will need
1 hours of time per door
Patience
10mm socket wrench with extension
Blue 242 locktite ($5.99)
Small Flat Head Screw Driver
Box Cutter
Box/Packaging Tape
Video DIY
PART 1
PART 2
PICTURES
I want to thank bkd for the help
Thanks again! Hope you enjoyed my DIY!
Last edited by thescreensavers; Oct 24, 2009 at 10:28 PM.


Registered User
Joined: Feb 2008
Posts: 9
Likes: 0
From: Atlanta, GA
Thanks!
I had taken my car to the dealer get the window noise fixed for free, due to the TSB. They only did one side, then I took it back to get the second side done. They claimed to have done the second side, but the noise was still there. I asked them to send me the parts and I used this write up to change the parts. Once I got into the door it was obvious that they either did not do the job, or they used the wrong bolts.
Great write up! A few suggestions to make it even easier:
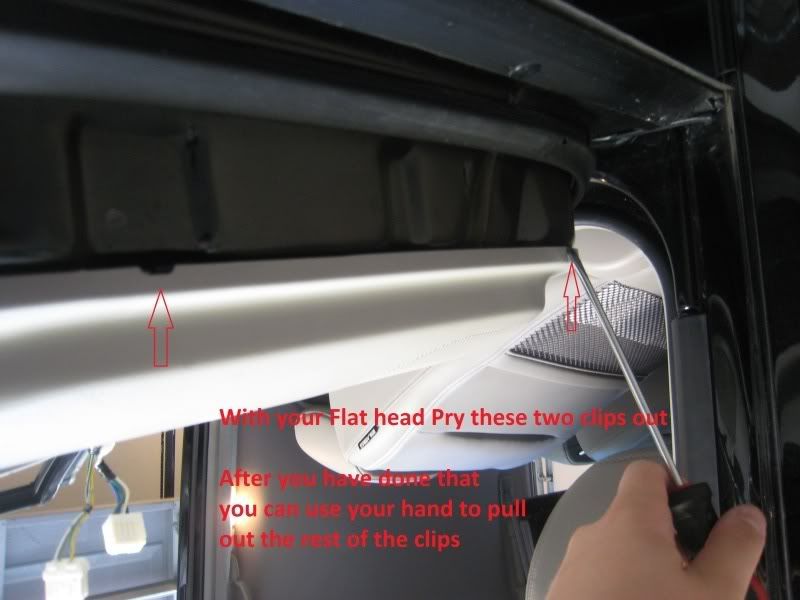
Use a plastic paint scraper to remove the silver door trim.
Use a drill to install/remove the screws.
Have this write up nearby when you do this.
Great write up! A few suggestions to make it even easier:
Use a plastic paint scraper to remove the silver door trim.
Use a drill to install/remove the screws.
Have this write up nearby when you do this.

Registered User
Joined: Jan 2010
Posts: 301
Likes: 19
From: Maryland
Finally performed this DIY after having the bolts for a year. So easy! Thanks to this write up it only took me half an hour from start to finish for the whole job. No more window creaking. Thank you sir!

I've been browsing the forums for a little over a month now since I purchased my G and had this issue. The dealership was quoting $250 to fix both doors. Thanks to your DIY you saved me $225. I figure that'd be worthy of a first post.
Thanks a lot, took me around 1 hour to complete both doors.
Thanks a lot, took me around 1 hour to complete both doors.

Registered User
Joined: Jul 2009
Posts: 22
Likes: 1
Had my door replaced as part of the rusty b - pillar extension about a year ago and once I got it back the creaking was horrible. Today I opened it up, removed the bolts, ground off the non threaded part of the existing bolts, and reassembled. The creaking is gone.
Thanks for the DIY instructions - they made the whole deal easy.
brian
Thanks for the DIY instructions - they made the whole deal easy.
brian
Trending Topics

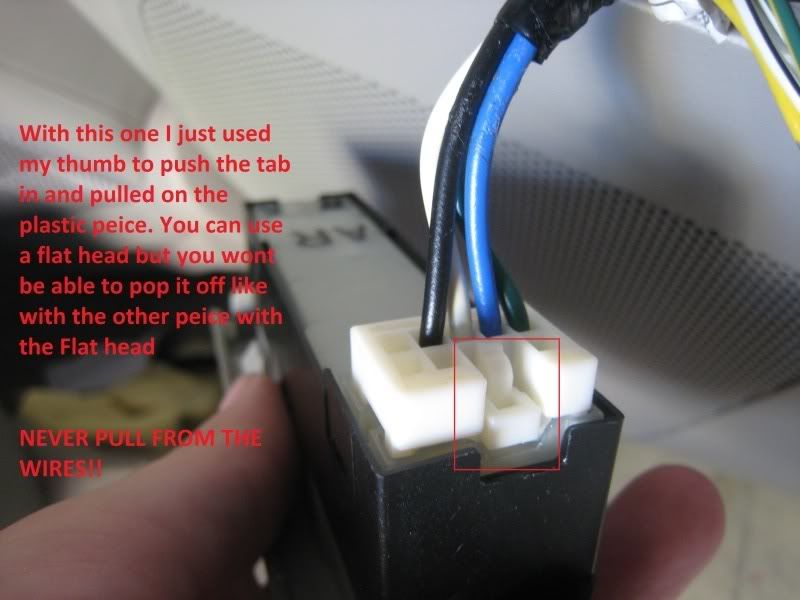
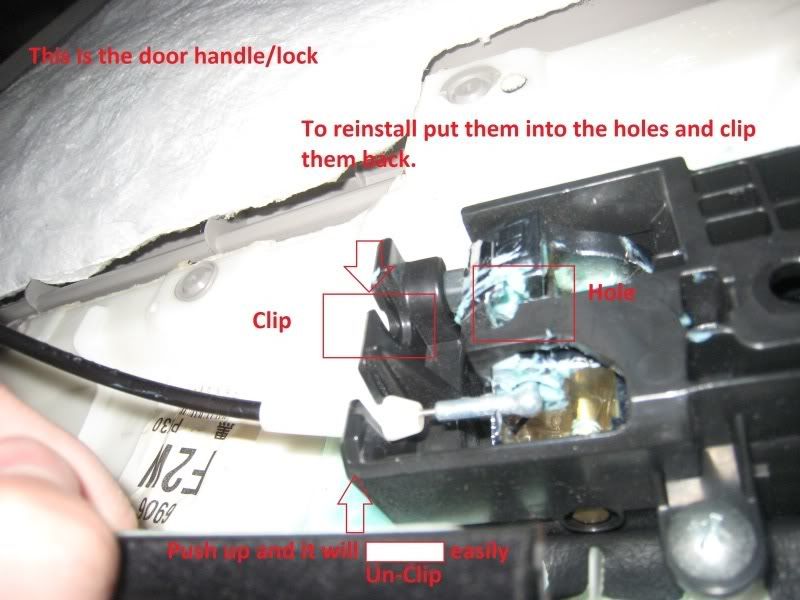
Power Switch Removal
After scratching my door finisher, I read the service manual. It says to pop the finisher loose and then to disconnect the electrical connectors from the back side. The torque specs for the new bolts are 38-52 inch lbs. Thanks for the write up. Scratching the finisher & insert sucked, but it was great getting rid of that annoying noise.
[IMG]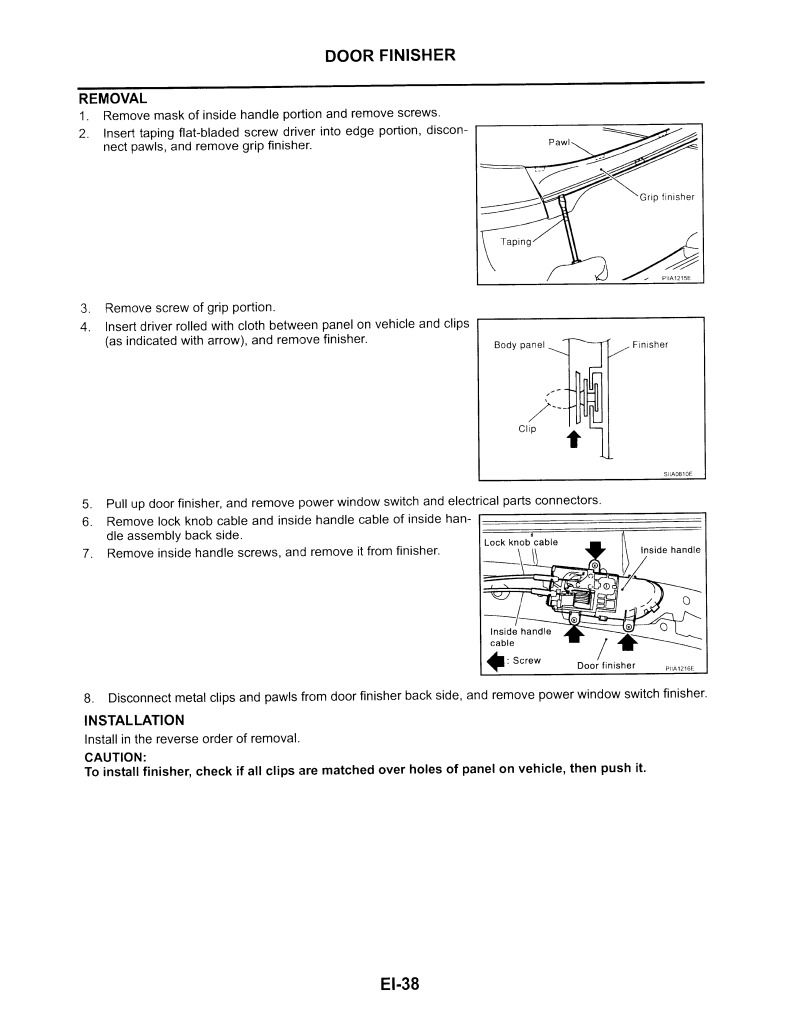
[/IMG][IMG]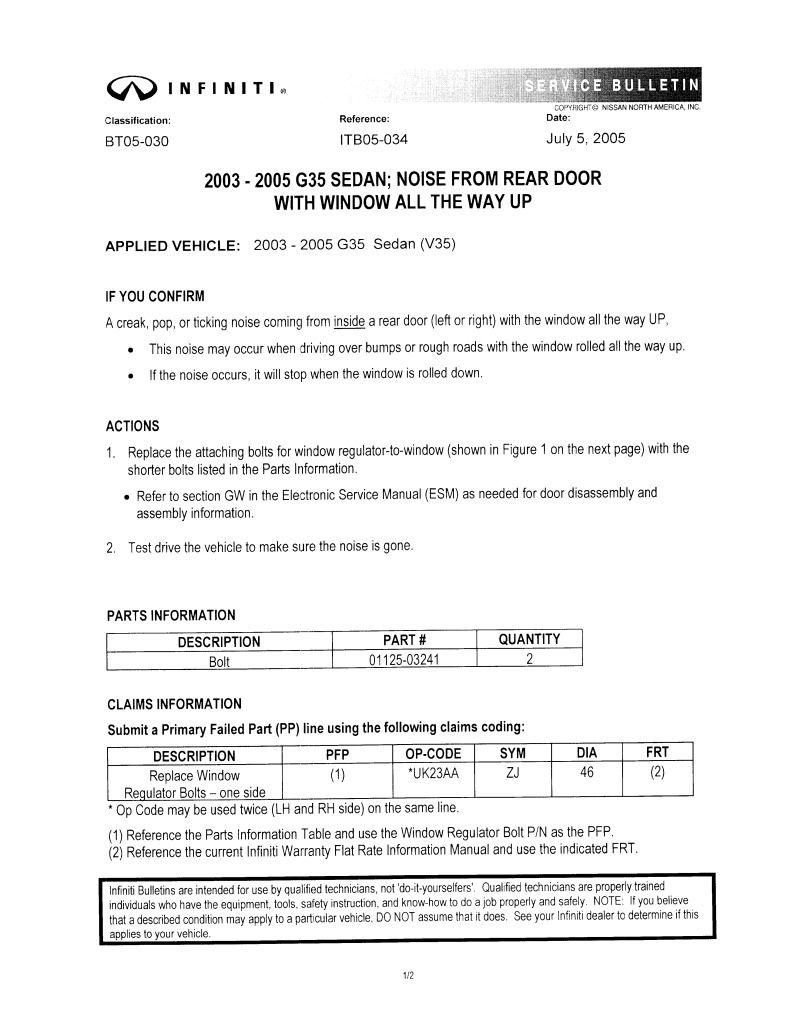 [/IMG][IMG]
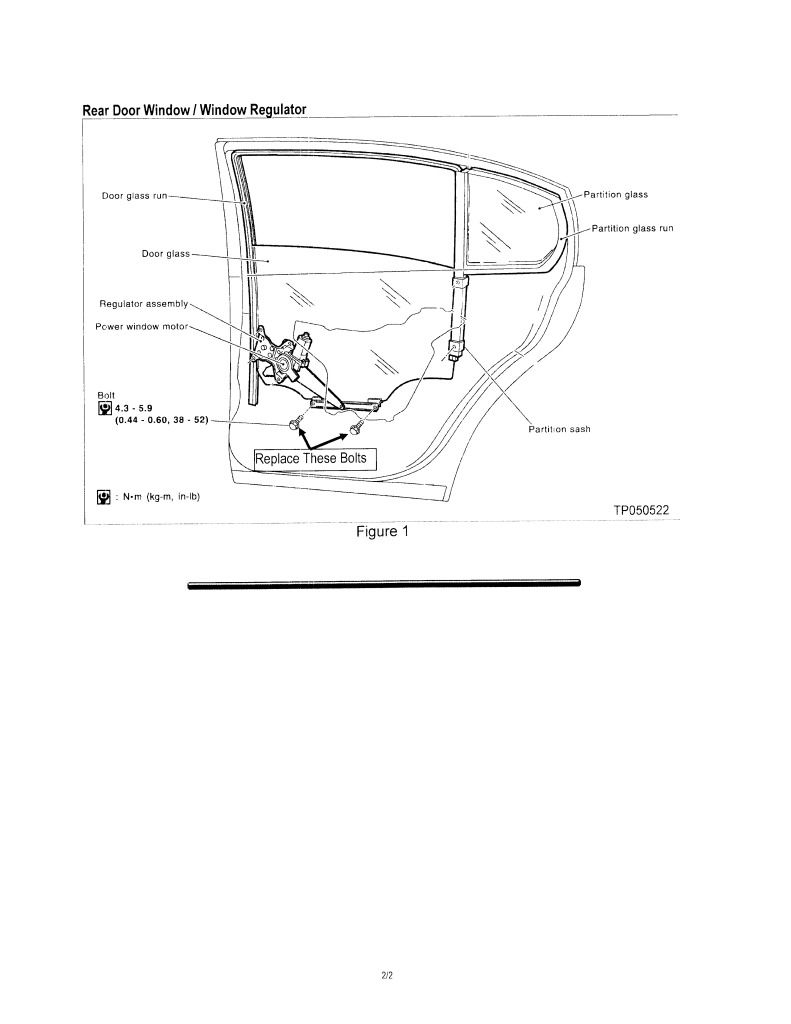 [/IMG]
[IMG]
[/IMG][IMG]
[/IMG][IMG][/IMG]

Thanks for the tutorial. Easy-peasy upgrade. If my dealer had stocked more than two of the bolts I'd have done both doors in under an hour. One more door to do once the dealer restocks.
Also, what kind of dealership only has two regulator bolts??
Also, what kind of dealership only has two regulator bolts??


Thread
Thread Starter
Forum
Replies
Last Post
yoyoyo8
Exterior - Body Parts
1
Aug 12, 2015 03:04 AM
will091195
General Tech Questions
1
Jul 27, 2015 09:19 PM