
long overdue fix for my DIY suspension how to


long overdue fix for my DIY suspension how to
The link below is a copy of the DIY suspension install I wrote awhile back. I've been meaning to offer up a rewrite on the process for the front for a long time. But either I didn't have the time or it was out of side out of mind. Using a spring compressor while the front shock/spring is still mounted on the car is out. I make mention of the 350Z at one point because I actually typed this up first for a post on my350z.com
www.g-owners.com/article_read.asp?id=25
As a courtesy I'll spell it all out.
Remove nut on sway bar end link on suspension control arm.

Use floor jack to compress suspension upwards to relieve pressure on the sway bar end link bolt, you goal it to push the bolt out of the suspension arm.
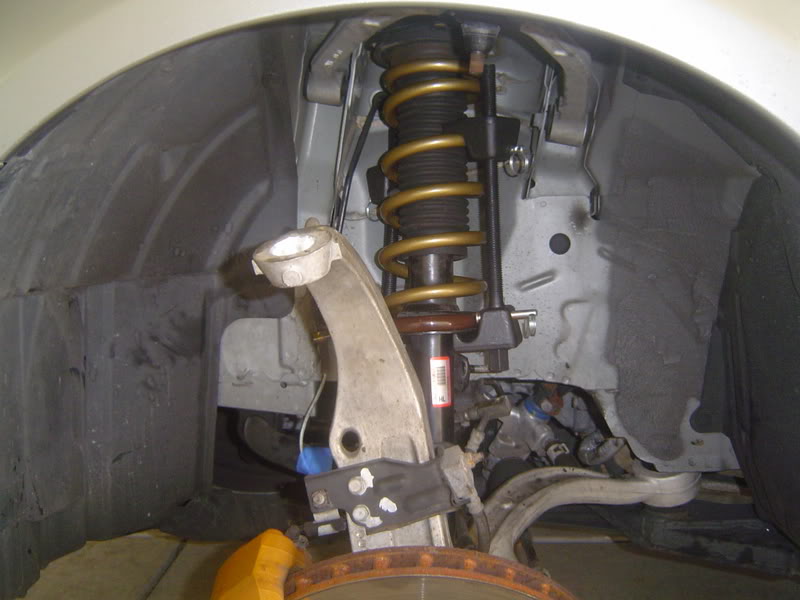
Remove lower bolt on shock/spring assembly, you may or may not need to use the floor jack to adjust pressure on the suspension in order to free the bolt.
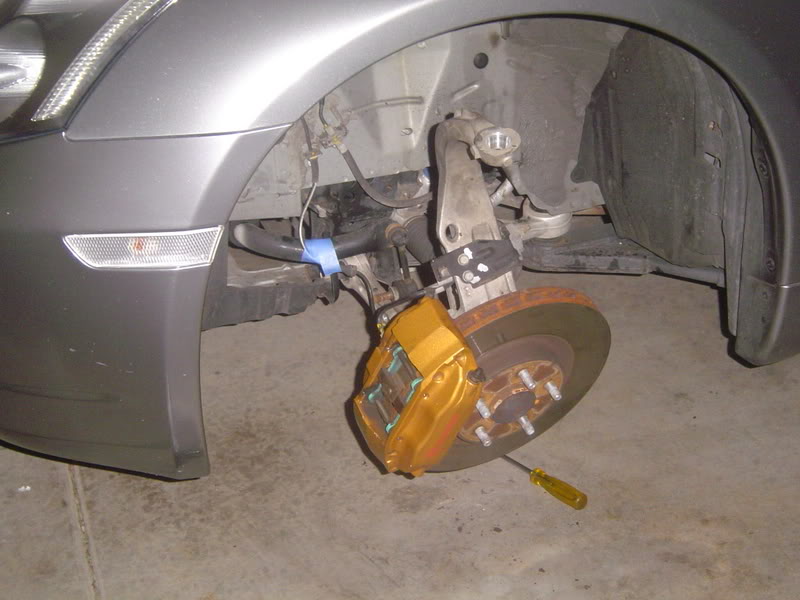
Unbolt the brake line from the shock, push off the speed sensor lines off the shock.
Look up at the bottom of the upper A arm that's closest to you. See the cotter pin in it. Remove that pin, your not going to be able to reuse it, replace it with a 3/32" by 1" pin on reasembly.

With the cotter pin out loosen the nut above it and turn it about 3 turn's. Since the A arm usually sticks in place on that bolt, you'll need to tap or whack the A arm with a rubber mallet to pop the bolt free. Once you get it free now take the nut off all the way. BUT be carefull once you do, the entire suspension will flop free and to the side, don't get hurt.

Now pop the hood of the car if you haven't already done so. Break free the 3 nuts that secure the top shock mount, removing only 2 nuts. On the 350Z IIRC you might have to remove the strut tower bar, though I could be wrong. Reach into the wheel well with one hand and grab the shock/spring assembly and push upwards while with the other free hand you undo the last upper shock mount bolt.
Guide the shock/spring assembly out of the car. Be very carefull at the fender lip, easy to scratch.
With the shock/spring assembly off the car it's time to deal with getting the spring off the shock. Some Z owner's may elect to not use a spring compressor, be carefull if you do.
When you get to the point of needing to break free the bolt the secures the shock to the shock mount here's how I figured out to break it free even if it's really on their hard.
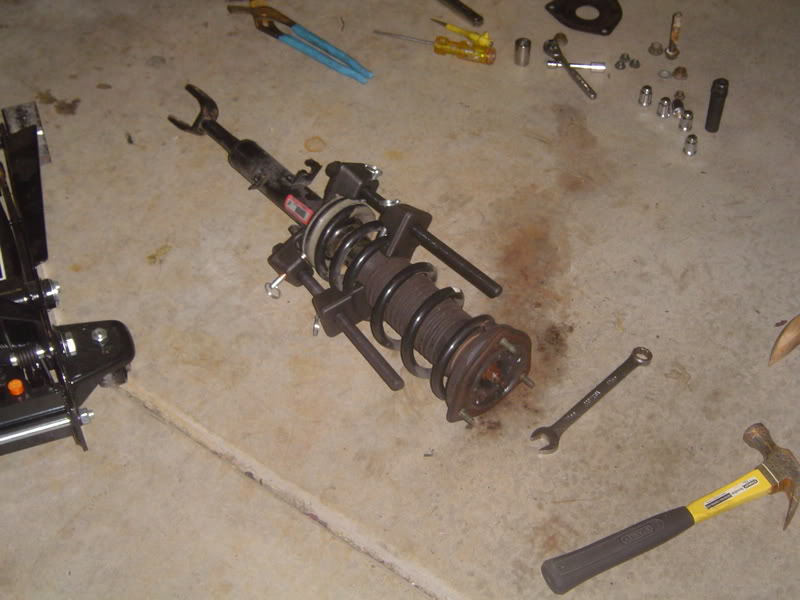
Use the wrench in the middle of the picture, got mine at Sears 17mm and 19mm.
Use that wrench and a cresent wrench in the following order.

Place the shock/spring assembly on the highest grip surface you can find. Grab the wrench, put your foot on the whole assembly and pull back with as much as it takes to get the nut free.

Hope that helps,
Repeat on the other side of the car of course.
www.g-owners.com/article_read.asp?id=25
As a courtesy I'll spell it all out.
Remove nut on sway bar end link on suspension control arm.
Use floor jack to compress suspension upwards to relieve pressure on the sway bar end link bolt, you goal it to push the bolt out of the suspension arm.
Remove lower bolt on shock/spring assembly, you may or may not need to use the floor jack to adjust pressure on the suspension in order to free the bolt.
Unbolt the brake line from the shock, push off the speed sensor lines off the shock.
Look up at the bottom of the upper A arm that's closest to you. See the cotter pin in it. Remove that pin, your not going to be able to reuse it, replace it with a 3/32" by 1" pin on reasembly.
With the cotter pin out loosen the nut above it and turn it about 3 turn's. Since the A arm usually sticks in place on that bolt, you'll need to tap or whack the A arm with a rubber mallet to pop the bolt free. Once you get it free now take the nut off all the way. BUT be carefull once you do, the entire suspension will flop free and to the side, don't get hurt.
Now pop the hood of the car if you haven't already done so. Break free the 3 nuts that secure the top shock mount, removing only 2 nuts. On the 350Z IIRC you might have to remove the strut tower bar, though I could be wrong. Reach into the wheel well with one hand and grab the shock/spring assembly and push upwards while with the other free hand you undo the last upper shock mount bolt.
Guide the shock/spring assembly out of the car. Be very carefull at the fender lip, easy to scratch.
With the shock/spring assembly off the car it's time to deal with getting the spring off the shock. Some Z owner's may elect to not use a spring compressor, be carefull if you do.
When you get to the point of needing to break free the bolt the secures the shock to the shock mount here's how I figured out to break it free even if it's really on their hard.
Use the wrench in the middle of the picture, got mine at Sears 17mm and 19mm.
Use that wrench and a cresent wrench in the following order.
Place the shock/spring assembly on the highest grip surface you can find. Grab the wrench, put your foot on the whole assembly and pull back with as much as it takes to get the nut free.
Hope that helps,
Repeat on the other side of the car of course.

Registered User
Joined: Aug 2004
Posts: 4,288
Likes: 3
i think using the spring compressor is actually easier unless everyone's
strong like you that can compress the strut with one arm while you
pull it out. so, i think either way is fine.
the nut on the piston shaft is easier to remove if you crack loose the
nut before removing the strut from the car.
regardless, nice write up. i don't think there was anything 'wrong' with
your first version.
strong like you that can compress the strut with one arm while you
pull it out.
so, i think either way is fine.the nut on the piston shaft is easier to remove if you crack loose the
nut before removing the strut from the car.
regardless, nice write up. i don't think there was anything 'wrong' with
your first version.

Jim, great write up as usual. Your first write up really helped me during my first OEM 350Z suspension install. This second version of undoing the A-arm is what I used during my D-Spec/'03 OEM 350Z spring install.


So I just finished my Z H-Tech spring intallation using this DIY and I can say that this is a great DIY, highly recommend reviewing it a few times prior to starting a spring/shock install.
Here are some additional points I would make based on my experience:
1. The rears are very easy, it took me about 20 minutes to do both rear springs. This is good, but also bad because it instills a false sense of confidence as you head to the front...
2. I struggled with EVERY nut and bolt. They were all difficult to remove. Even the little 12mm nut holding the brake line on the strut was a pain. I thought at one point I was going to break the bracket off the shock. This stuff was my best friend:
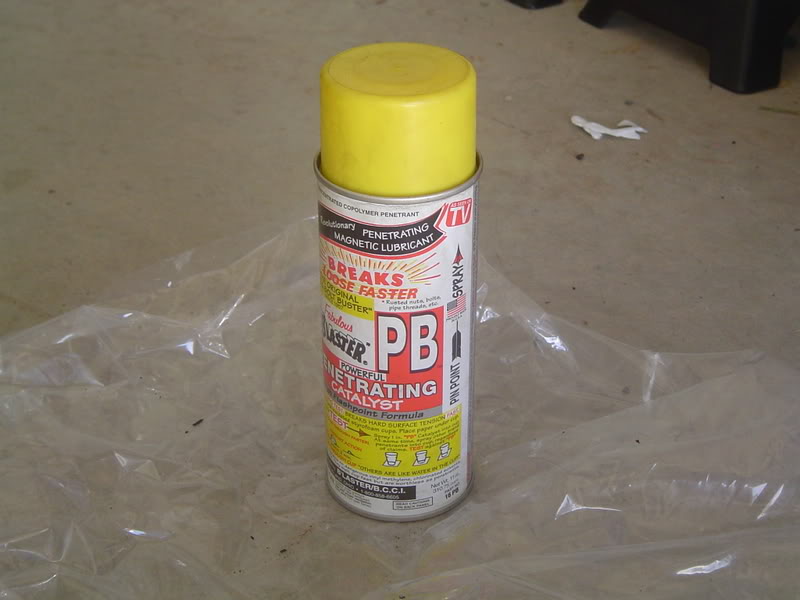
I used PB Blaster on all the nuts and bolts and it really helped. But you gotta be patient and use some muscle 'cause a lot of these nuts did not want to come out.
3. I realized after the first side, that if I jacked up the lower control arm (right underneath the bolt that holds on the shock/spring assembly), it made it easier to compress the spring with the spring compressor. When you jack it up you're already compressing the spring. Once you jack it up and put on the spring compressors, you let the jack down and it's much easier to get the lower spring/shock assembly bolt out. Play with the floor jack a bit and it's actually pretty easy to get the sway end bolt out.
4. Of the 4 hours I spent on the front, about 3 of those hours were spent trying to remove the nut that sits in the center on the top of the shock assembly (the one shown in the DIY where the OP uses the crescent wrench and 17mm box-end wrench and the foot on the assembly). That SUCKED!!! I knew that it was going to be a problem for me because that nut/bolt was really rusty looking. But here's the real problem: once you get the nut to the point where it's almost off, you can't use the crescent wrench to hold the "bolt" steady while turning the nut. The "bolt" is actually the shock piston shaft, so it spins as you're trying to remove the nut, and there's no other place to keep it from spinning. So I ended up using a ton of PB Blaster, turning the nut until the center bolt spun, then re-tightening the nut, then lossening, more spray, back and forth with loosening and tightening, for what felt like forever. Biggest pain of the whole job. I don't know if anyone else had this experience but I'd be interested to know if anyone figured out a "trick" for this. I could not and instead I just kept at it, wanting to kill someone or break something out of frustration.
Other than that the DIY sums the whole thing up really well. It's not "easy", but it's do-able if you are somewhat mechanically inclined and have some patience.

Here are some additional points I would make based on my experience:
1. The rears are very easy, it took me about 20 minutes to do both rear springs. This is good, but also bad because it instills a false sense of confidence as you head to the front...
2. I struggled with EVERY nut and bolt. They were all difficult to remove. Even the little 12mm nut holding the brake line on the strut was a pain. I thought at one point I was going to break the bracket off the shock. This stuff was my best friend:
I used PB Blaster on all the nuts and bolts and it really helped. But you gotta be patient and use some muscle 'cause a lot of these nuts did not want to come out.
3. I realized after the first side, that if I jacked up the lower control arm (right underneath the bolt that holds on the shock/spring assembly), it made it easier to compress the spring with the spring compressor. When you jack it up you're already compressing the spring. Once you jack it up and put on the spring compressors, you let the jack down and it's much easier to get the lower spring/shock assembly bolt out. Play with the floor jack a bit and it's actually pretty easy to get the sway end bolt out.
4. Of the 4 hours I spent on the front, about 3 of those hours were spent trying to remove the nut that sits in the center on the top of the shock assembly (the one shown in the DIY where the OP uses the crescent wrench and 17mm box-end wrench and the foot on the assembly). That SUCKED!!! I knew that it was going to be a problem for me because that nut/bolt was really rusty looking. But here's the real problem: once you get the nut to the point where it's almost off, you can't use the crescent wrench to hold the "bolt" steady while turning the nut. The "bolt" is actually the shock piston shaft, so it spins as you're trying to remove the nut, and there's no other place to keep it from spinning. So I ended up using a ton of PB Blaster, turning the nut until the center bolt spun, then re-tightening the nut, then lossening, more spray, back and forth with loosening and tightening, for what felt like forever. Biggest pain of the whole job. I don't know if anyone else had this experience but I'd be interested to know if anyone figured out a "trick" for this. I could not and instead I just kept at it, wanting to kill someone or break something out of frustration.
Other than that the DIY sums the whole thing up really well. It's not "easy", but it's do-able if you are somewhat mechanically inclined and have some patience.
Trending Topics


Tip for pinoy since he's doing it today....
The nut isn't easy to get off the strut assembly, as is mentioned earlier in the post. There's a way to get past this. THIS IS DANGEROUS. DO THIS AT YOUR OWN RISK. All the other disclaimers apply.
You can loosen or outright remove that nut while the strut is still bolted into the car. You've got to do some wrangling to get it out once you've done that, but that was what I did after wrestling with it out of the car for a while myself.
Make sure EVERYTHING is clear of the bottom of the strut assembly. Fingers, brake lines, everything. Unbolt the bottom and line it up somewhere no damage will occur.
I also found that with the shorter spring, the spring compressor was not required. Good thing, too, as the junky one I got from AutoZone was an inside-the-spring compressor...so it wouldn't work.
Anyway, take your time, be careful, and enjoy the results!
Originally Posted by bconrey
Tip for pinoy since he's doing it today....
The nut isn't easy to get off the strut assembly, as is mentioned earlier in the post. There's a way to get past this. THIS IS DANGEROUS. DO THIS AT YOUR OWN RISK. All the other disclaimers apply.
You can loosen or outright remove that nut while the strut is still bolted into the car. You've got to do some wrangling to get it out once you've done that, but that was what I did after wrestling with it out of the car for a while myself.
Make sure EVERYTHING is clear of the bottom of the strut assembly. Fingers, brake lines, everything. Unbolt the bottom and line it up somewhere no damage will occur.
I also found that with the shorter spring, the spring compressor was not required. Good thing, too, as the junky one I got from AutoZone was an inside-the-spring compressor...so it wouldn't work.
Anyway, take your time, be careful, and enjoy the results!
The nut isn't easy to get off the strut assembly, as is mentioned earlier in the post. There's a way to get past this. THIS IS DANGEROUS. DO THIS AT YOUR OWN RISK. All the other disclaimers apply.
You can loosen or outright remove that nut while the strut is still bolted into the car. You've got to do some wrangling to get it out once you've done that, but that was what I did after wrestling with it out of the car for a while myself.
Make sure EVERYTHING is clear of the bottom of the strut assembly. Fingers, brake lines, everything. Unbolt the bottom and line it up somewhere no damage will occur.
I also found that with the shorter spring, the spring compressor was not required. Good thing, too, as the junky one I got from AutoZone was an inside-the-spring compressor...so it wouldn't work.
Anyway, take your time, be careful, and enjoy the results!

I also found this write up very useful. I had basically no difficulties doing the job at all. I think the spring release method mentioned above involves unnecessary risk. Letting loose a compressed spring can cause serious injury. I bought a fine set set of spring compressors from Autozone for $37, just like the black ones in the pic. You can buy them on line for about $25. Renting them for a day would have cost $15 plus tax plus gas and time to drive to the rental shop twice. Buying them was a no brainer. (BTW, a cheaper looking set was offered at NAPA for $80, with lots of separate hooks and stuff to lose.) Imagine losing a finger or just getting a gash, or damaging a brake sensor line or paintwork in order to save $40. Not worth it.
I broke loose the top nut on the strut before doing anything. I was able to remove it without trouble after removing the assembly.
I broke loose the top nut on the strut before doing anything. I was able to remove it without trouble after removing the assembly.


I thought the specs were in the how-to (I can't remember specifically where I found them when I did this), but I can check the service manual when I get home and post the torque specs for you.
Brian
Brian