
detailed the hood today. here are the results....

detailed the hood today. here are the results....
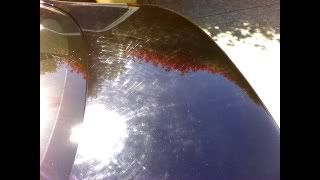
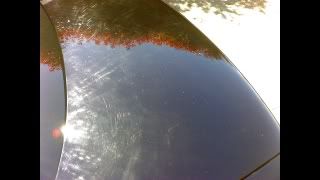
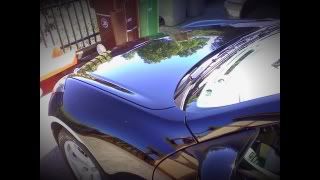
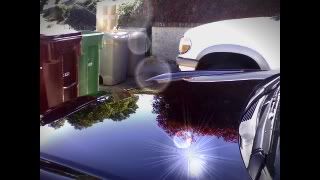
SO... my hood had tons of hairline circular scratches and swirl marks on it and I couldn't stand it any more. Especially now that the sun is out and the weather is warming up. in the daylight with the direct sun on the car you can clearly see how bad it was.
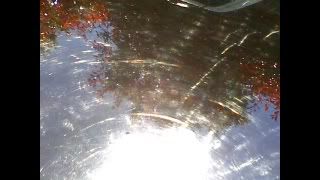
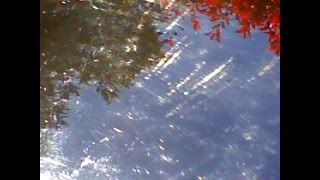
here are some pictures of my trunk which is the same condition that my hood was in due to a poor detail job previouslly. the sun makes all the scratches easily visible. im sure all you OB owners share my pain.
I'm going to do the Trunk tomorrow but this was the exact same condition that my hood was in. I chose to do the hood today because it was bothering me more and I couldn't stand looking at it. I dont have a porter cable or anything so I did all the polishing / compounding by hand and here are the results:
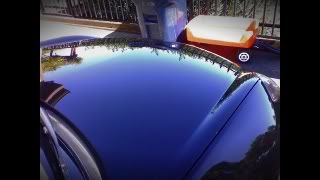

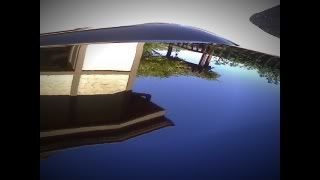
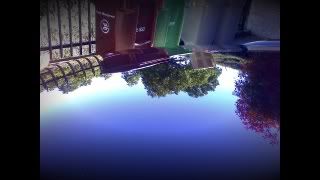
and finally my favorite: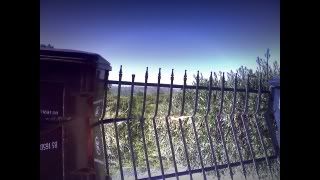 you can really see how mirror-like the hood is against the reflection of the gate
I'm only 20 years old and In college so I don't have a TON of money to spend on getting my car professionally detailed every couple of months, nor do I own a Porter cable or rotary buffer, so this was kind of a pain in the A$$ to do by hand.... but I enjoy it and since about 99.999999% of my monthly paycheck goes towards financing my G, I put as much effort possible into keeping it looking clean.
The products I used and steps were:
1.) wash the car with Meguiars Gold Class Car Wash
2.) Clay bar the hood with Meguiars Smooth Surface Clay Kit
3.) Polish the hood With Meguiars Deep crystal finishing Polish (foam applicator pad)
4.) compound with Meguiars Swirl remover and light cut compound (foam Applicator Pad)
5.) compound with meguiars Medium cut Compound (foam applicator pad)
6.) isolate a few remaining problem spots with Scatch X
7.) applied touch up paint to a chip in the hood
8.) work backwards now from most aggresive compound (medium cut) back down to least aggressive (light cut) then Finishing polish
9.) then sprayed the hood down with 70% water 30% rubbing alcohol solution to get an remaining polish off the hood.
10.) then finally applied Meguiars Cleaner Wax to seal and protect (microfiber applicator pad)
The results were worth the time spent (approx 2.5 hours by hand) and i probablly got a better workout than I would have if I spend an hour at the gym lifting weights
here are some pictures of my trunk which is the same condition that my hood was in due to a poor detail job previouslly. the sun makes all the scratches easily visible. im sure all you OB owners share my pain.
I'm going to do the Trunk tomorrow but this was the exact same condition that my hood was in. I chose to do the hood today because it was bothering me more
and I couldn't stand looking at it. I dont have a porter cable or anything so I did all the polishing / compounding by hand and here are the results:and finally my favorite:
you can really see how mirror-like the hood is against the reflection of the gateI'm only 20 years old and In college so I don't have a TON of money to spend on getting my car professionally detailed every couple of months, nor do I own a Porter cable or rotary buffer, so this was kind of a pain in the A$$ to do by hand.... but I enjoy it and since about 99.999999% of my monthly paycheck goes towards financing my G, I put as much effort possible into keeping it looking clean.
The products I used and steps were:
1.) wash the car with Meguiars Gold Class Car Wash
2.) Clay bar the hood with Meguiars Smooth Surface Clay Kit
3.) Polish the hood With Meguiars Deep crystal finishing Polish (foam applicator pad)
4.) compound with Meguiars Swirl remover and light cut compound (foam Applicator Pad)
5.) compound with meguiars Medium cut Compound (foam applicator pad)
6.) isolate a few remaining problem spots with Scatch X
7.) applied touch up paint to a chip in the hood
8.) work backwards now from most aggresive compound (medium cut) back down to least aggressive (light cut) then Finishing polish
9.) then sprayed the hood down with 70% water 30% rubbing alcohol solution to get an remaining polish off the hood.
10.) then finally applied Meguiars Cleaner Wax to seal and protect (microfiber applicator pad)
The results were worth the time spent (approx 2.5 hours by hand) and i probablly got a better workout than I would have if I spend an hour at the gym lifting weights


Yeah holy crap that's a lot of work... I thought it was taking forever when I just washed and buffed some Zymol all over my car haha. That crap took forever by hand and damn my arms were tired. Looked really good though haha. Your's looks pretty nice! Need bigger pictures though!

Could you explain your process a little better. I'm going to do the same on mine. My car is IP and it a PIA to see the imperfections.
Trending Topics


yeah they did lol. but a case of stella artois helps with that 
thanks for all the love guys. It really isnt that bad to do by hand. just do a small section at a time, like the hood, trunk, fender, door, roof. and space it out over a week. I'm working on the trunk today or tomorrow, I'll post pics of that once I'm done.
If you keep the car clean, it seriously just takes like 5 minutes to wipe it down with a sponge and dry. if you do it every other day it really cuts down on the prep time.
80% of making your car look good is just keeping it clean.