
How to: Major Headlight Restoration!!!


How to: Major Headlight Restoration!!!
NOTE: I am not responsible for any work you may do that could ruin your headlights in any way/shape of any sort. Do it your own risk. If you are doing this with your headlights still on your car, make sure you tape up the perimeter to ensure you do not sand the paint in any way. ENJOY!
This is work that I have been doing for a while and is pretty risky in some cases if not done right. It has astonished people countless of times on how well headlights can turn out with a little bit of elbow grease!
Tools that I used for this job:
As many of you may know him, g35man04, contacted me and told me he had projectors that he needed to have cleaned up badly. He explained how bad the headlights were and what kind of condition they were in. As a detailer, I took on the challenge and tackle these headlights as best as I could. You will soon see how well these came out from start to finish.
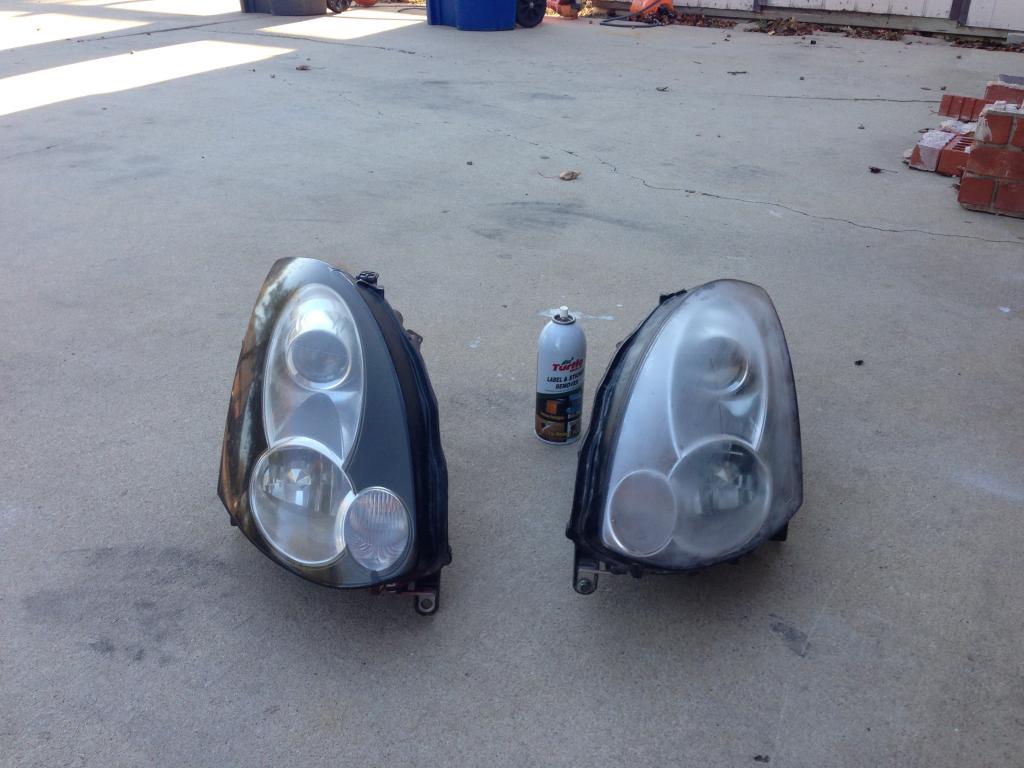
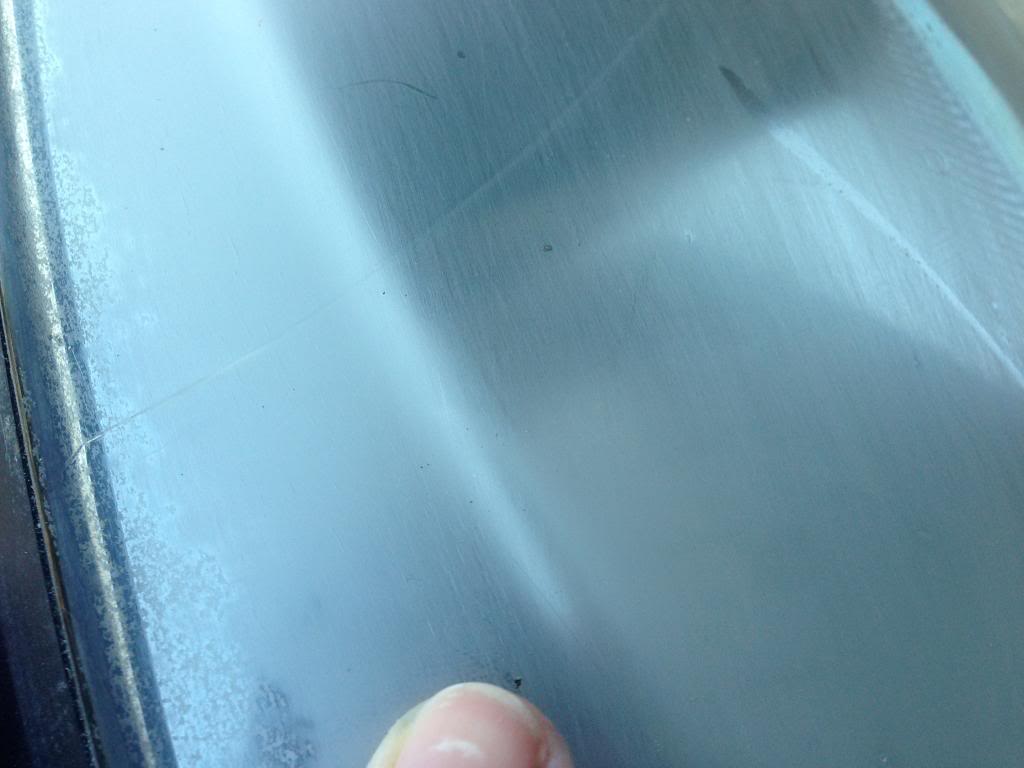
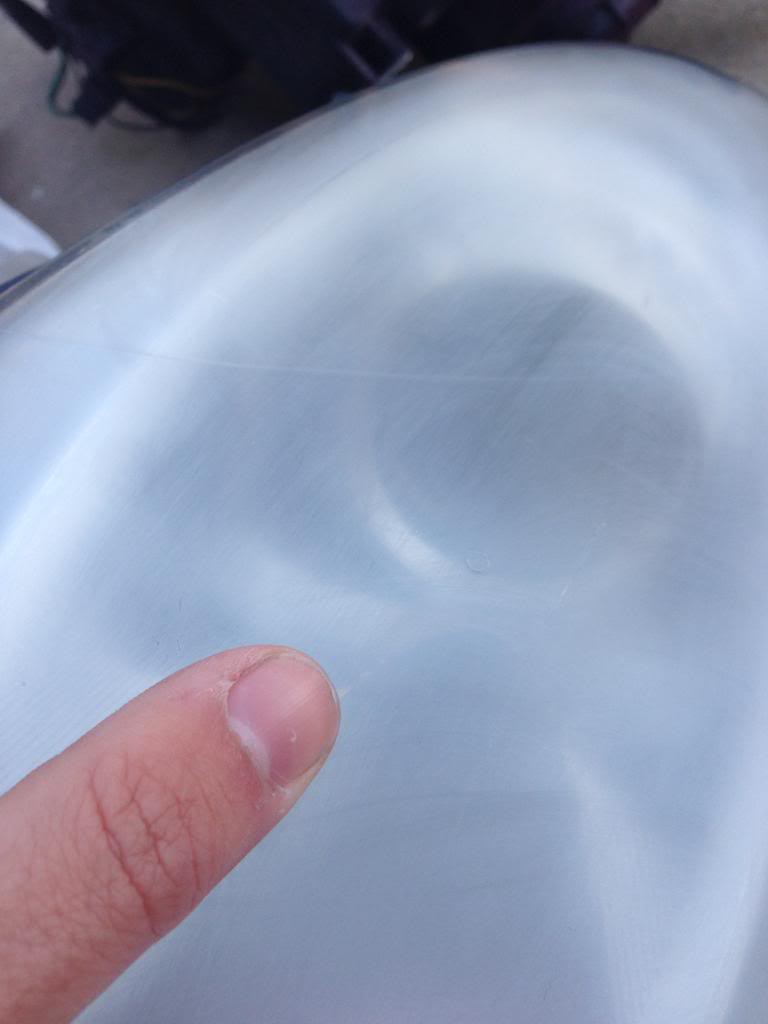
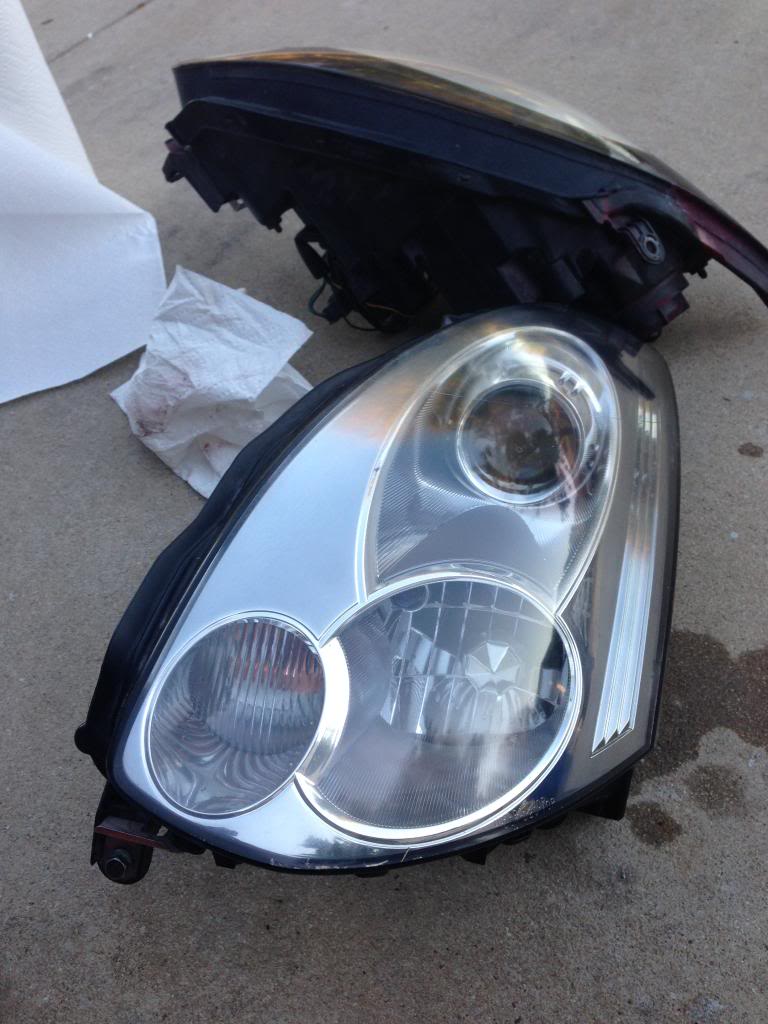
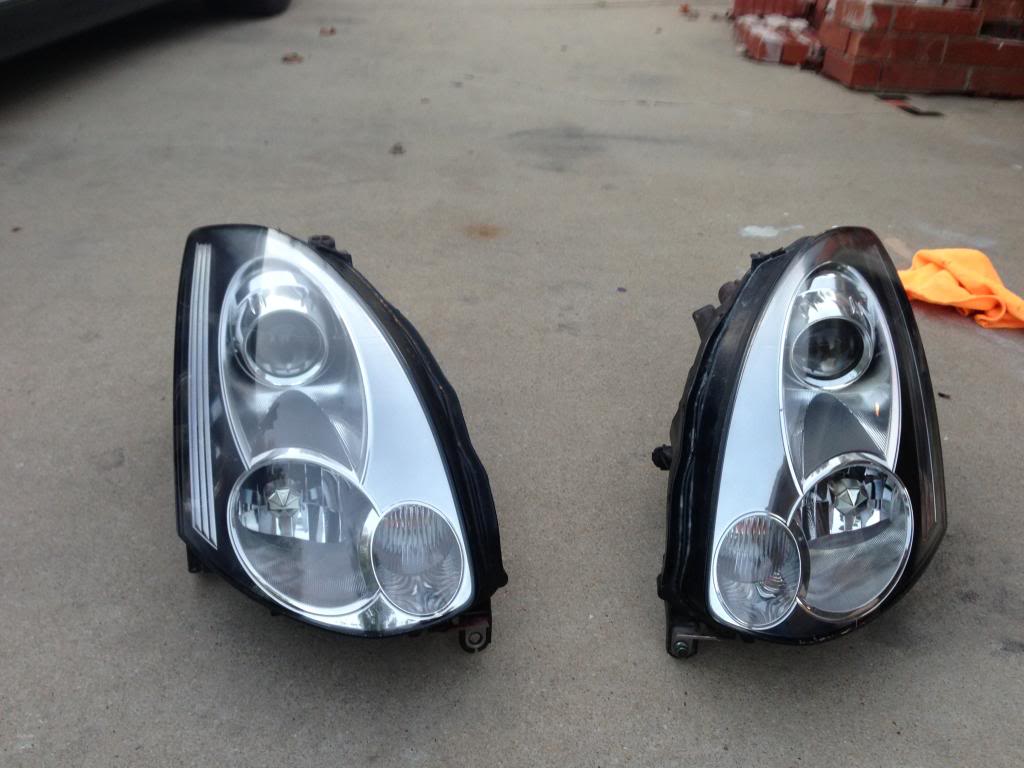
When he first handed me these headlights, he wasn't kidding, they were in very bad condition. Scratches, adhesive everywhere, and overlays still on one of them. I'll let the pictures speak for themselves here.
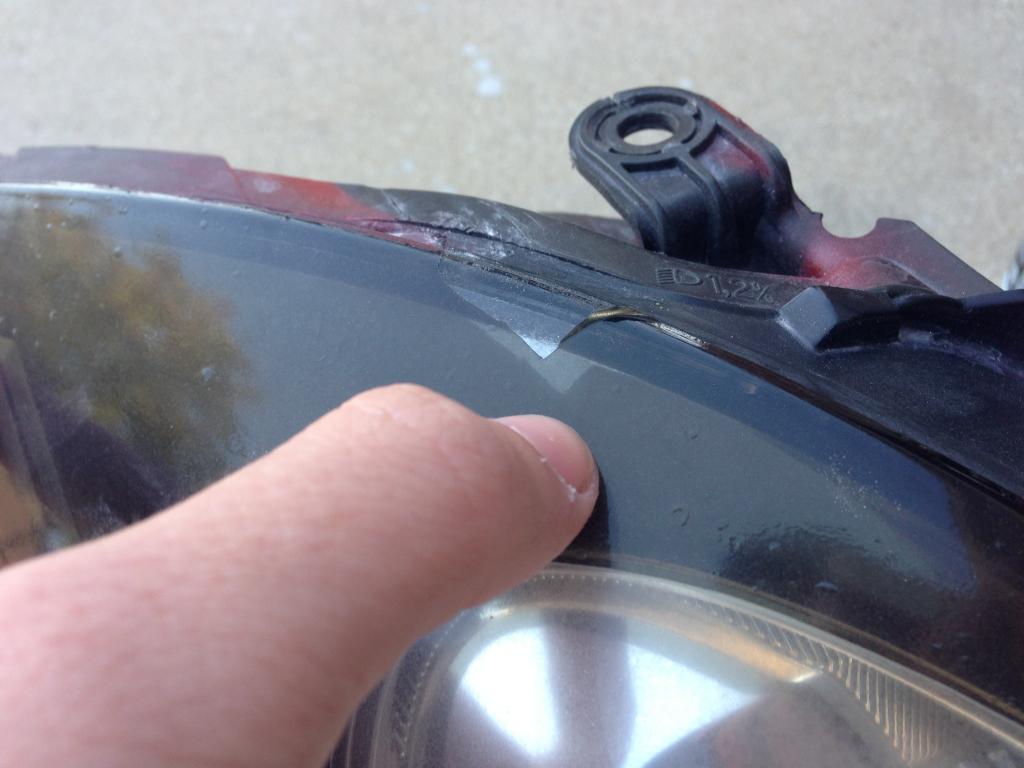
The overlays were coming off already in some spots on the passenger side headlight
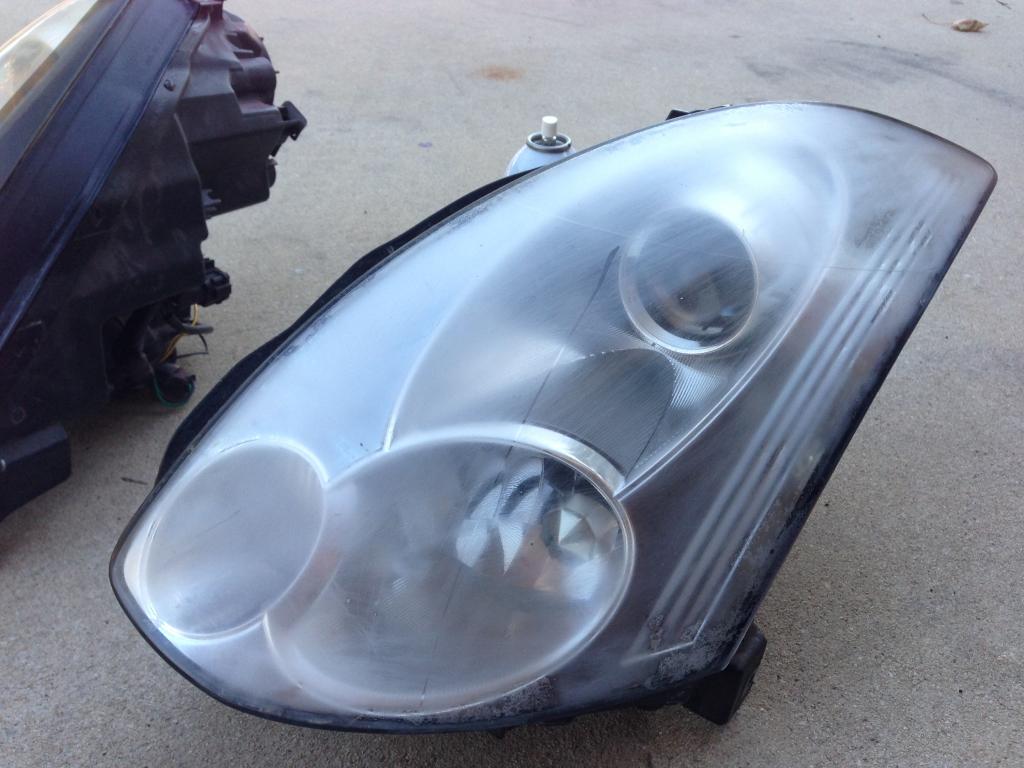
And someone already tried sanding them down on the driver side headlight
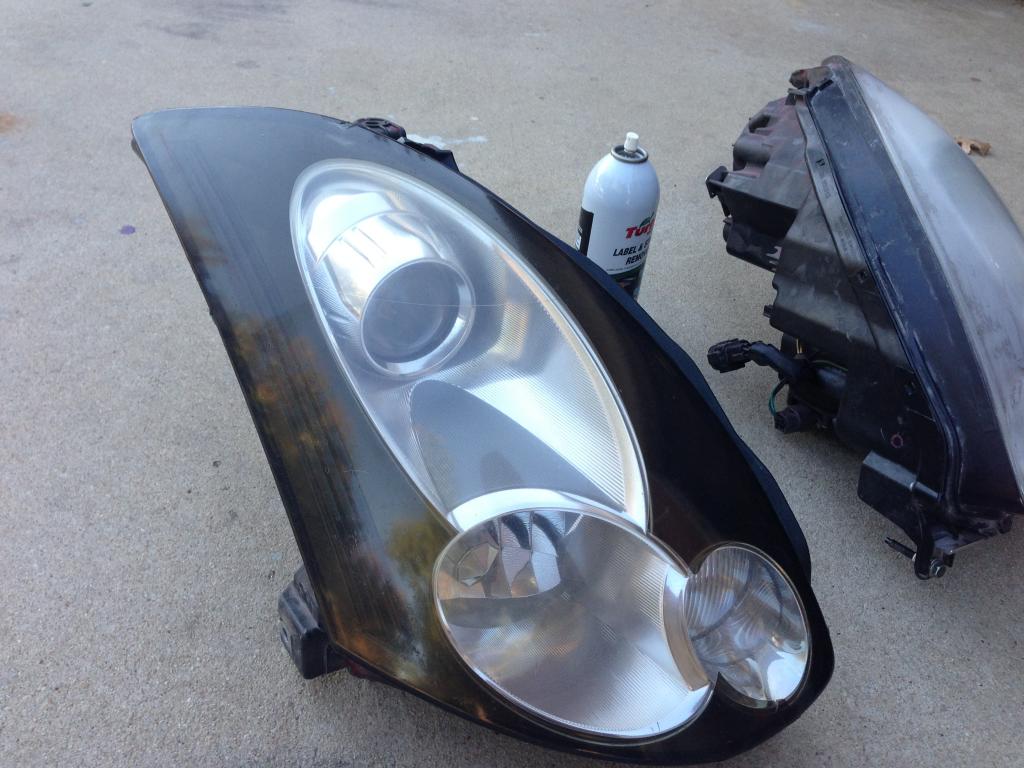
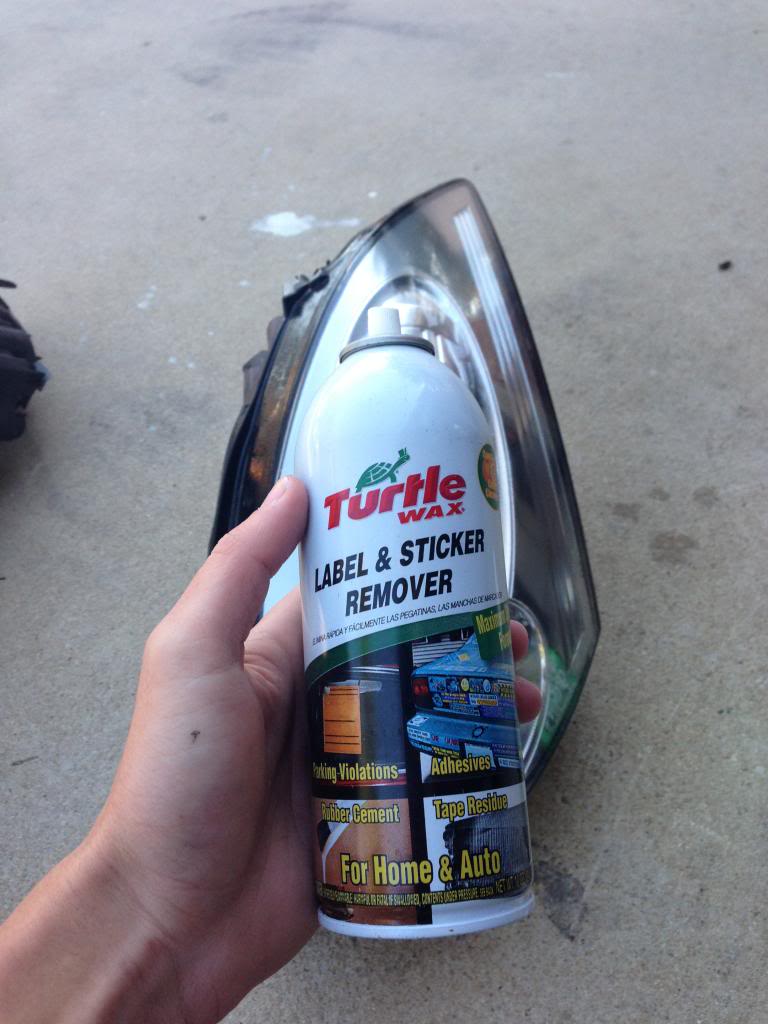
Now here is where the turtle wax adhesive remover comes into play. Sprayed it all over the headlight to get off some of the adhesive on the driver side headlight. Took off 99% of it, the rest was removed later on.

(The red is overspray onto the headlights in some spots.. weird)
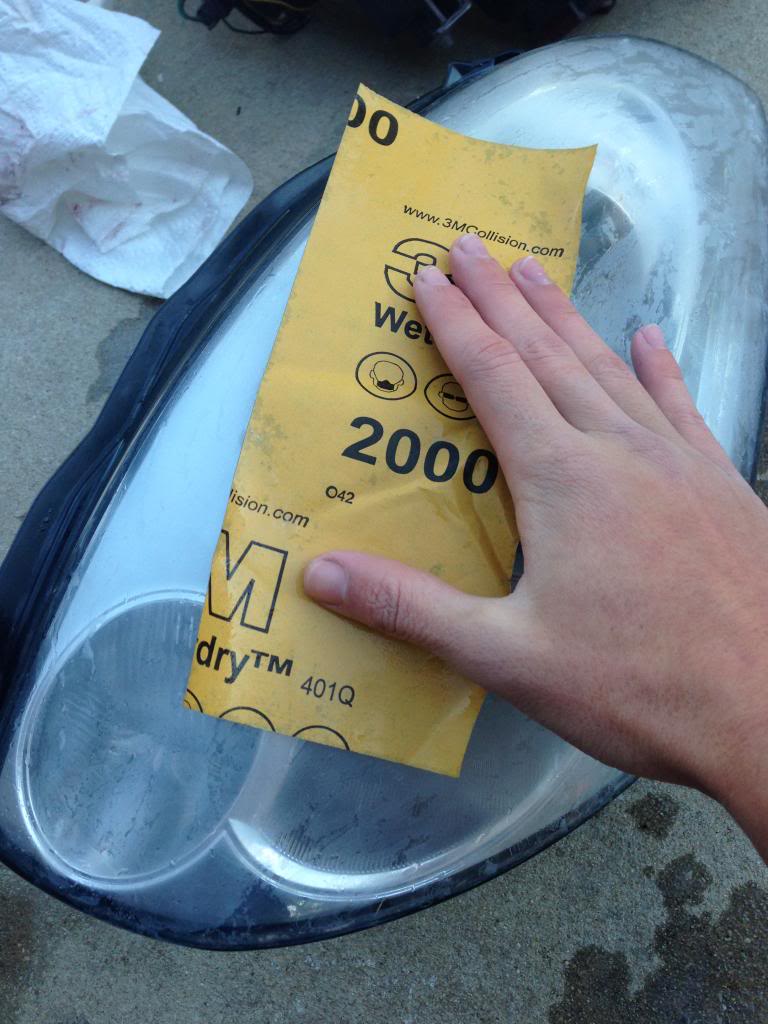
Next task was to now sand these bad boys down to minimize the scratches and smooth out the surface to as best as possible. I know what you're thinking.... sandpaper?! on my headlights?!?! You have to be crazy!!! Yes and no on that last comment. If you keep reading this actually works for the best in the end. I start with the 1000 grit wet sandpaper and move my way up the grit scale to 2000 grit.
Make sure you keep the wet sand paper, at all times, drenched in water!
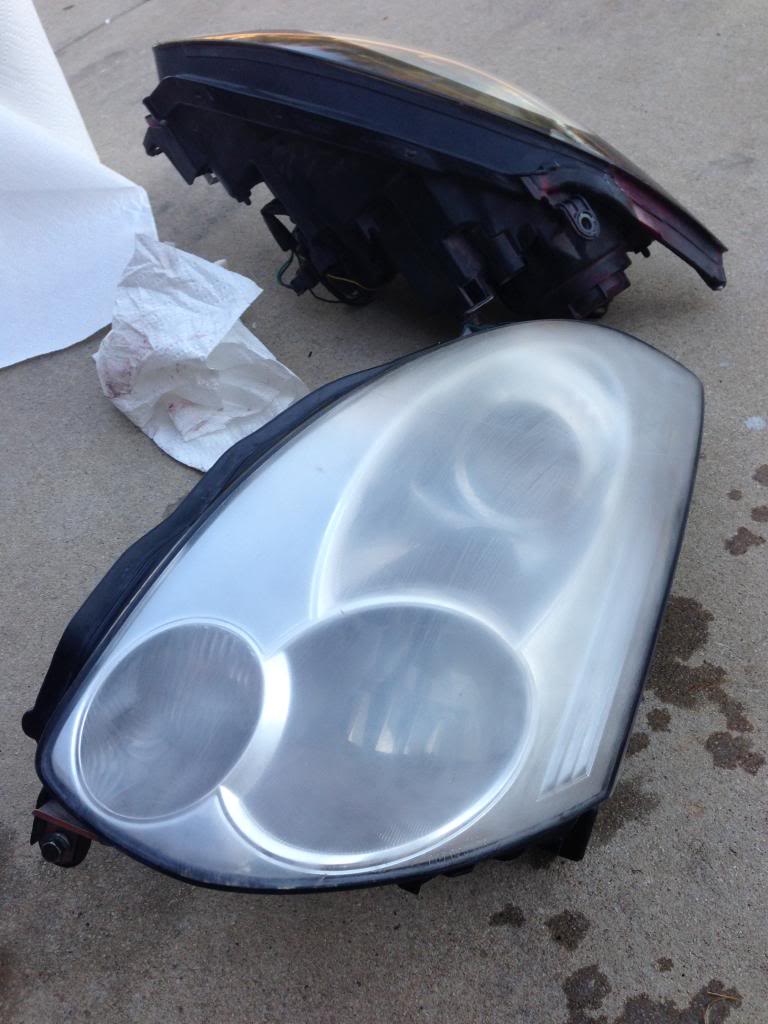
Your headlights should look something like this once done. All effed up and terrible looking, if so, good job you are on the right track! Continue reading, promise they will shine soon.
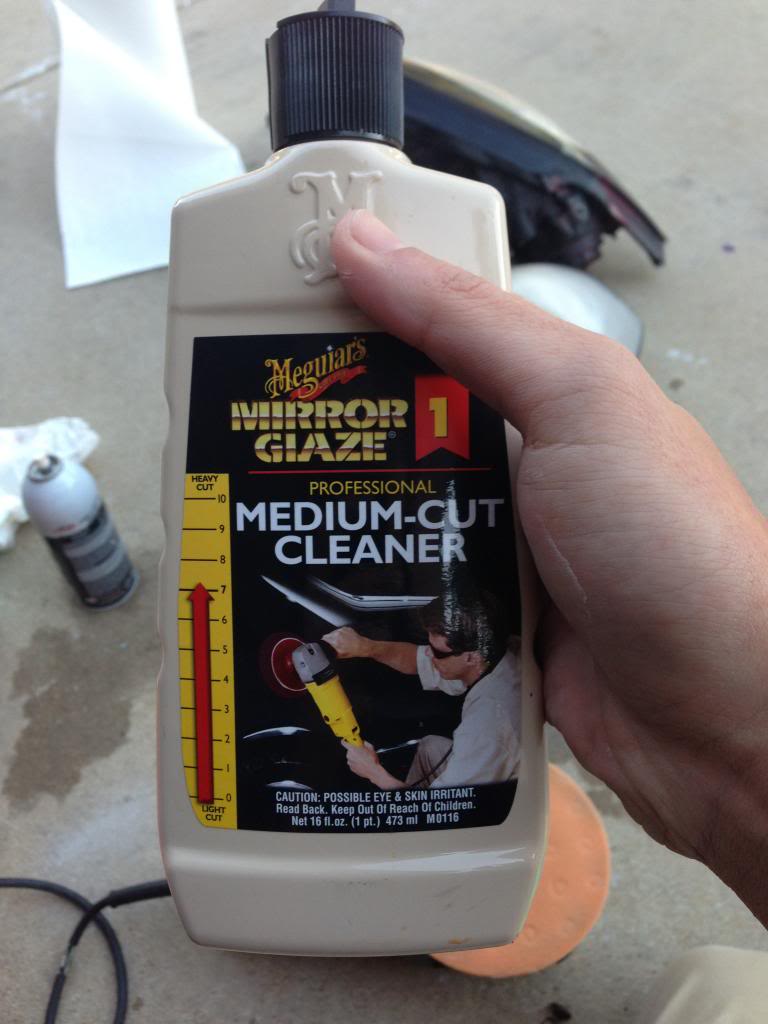
Ok, now it's time to remove the scratches you have now added to these expensive headlights. Pull out the buffer and throw on a strong pad. My Combination of choice is my Porter Cable 7424 xp with an orange LC Pad. Then apply the Meguiar's medium-cut compound (or whatever compound you choose to use) to the pad lightly.
Now when using a buffer, always remember to place it on the surface you are working with and then spread it out on the surface BEFORE turning on the buffer. Or else you will have a very nice mess all over your garage, car, and clothes that you will have to clean up
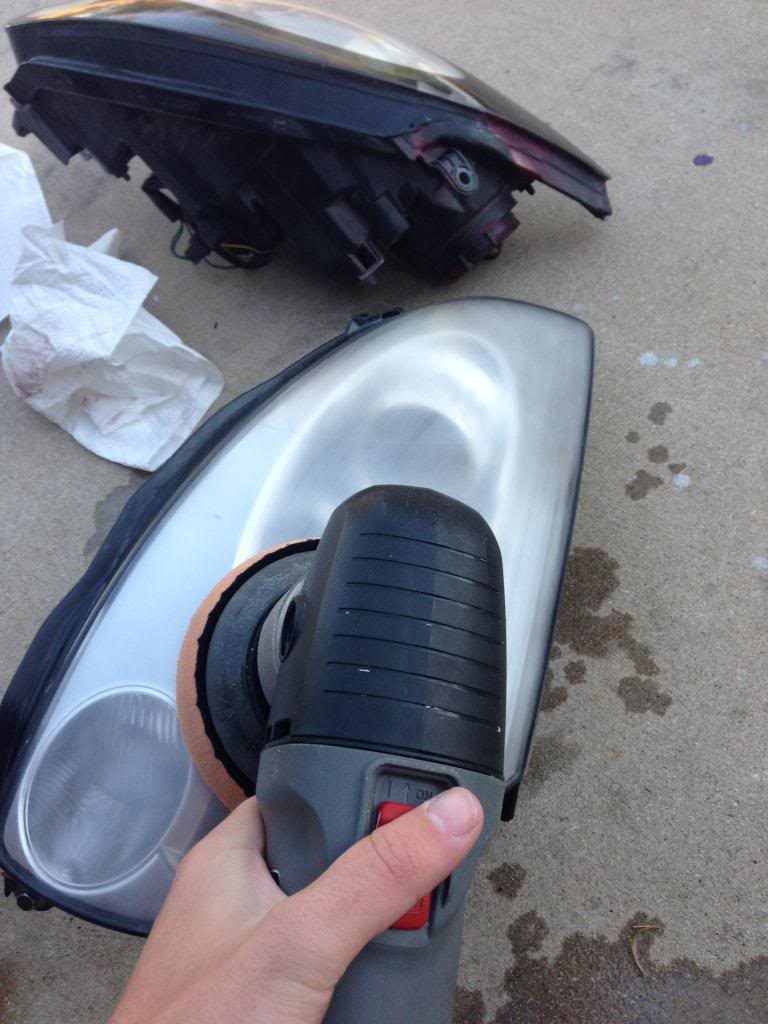
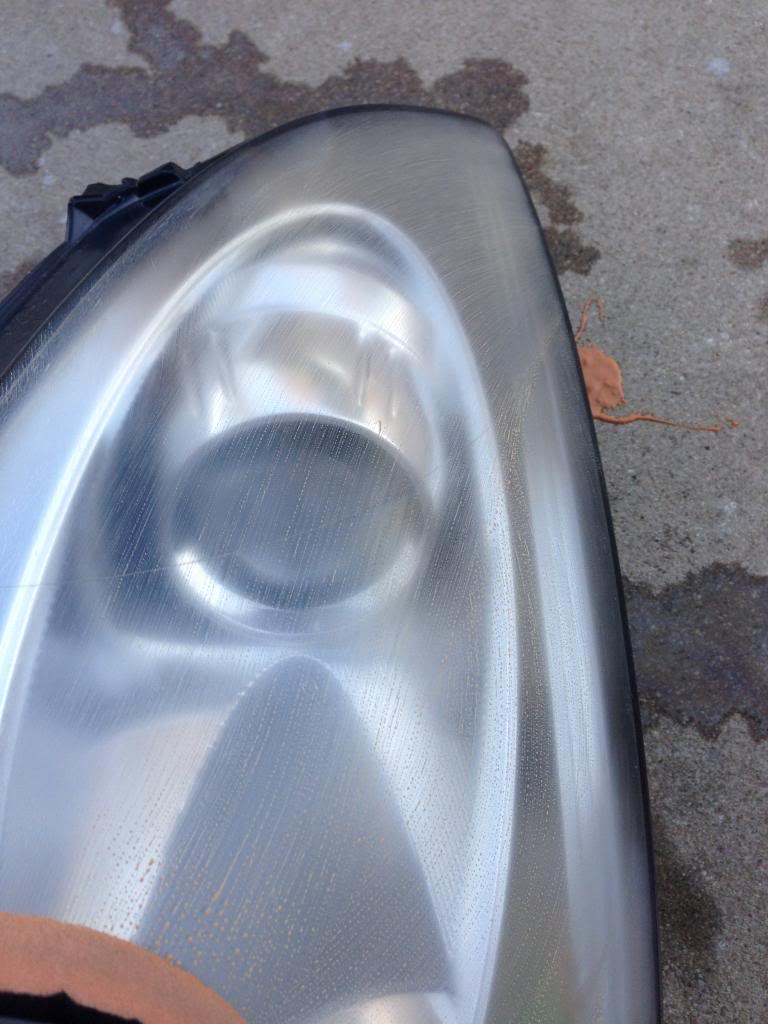
Start up the buffer you use at the lowest speed and spread the compound out even more so. Then start kicking it up slowly in speed till its at full throttle or 6000rpm. Move in a side to side motion then up in down atleast 3-4 times each way just to ensure best quality. After all said and done, wipe off the compound with a microfiber towel! DO not use the paper towels at all. I just used autozone microfiber towels that I got for about $5 for a pack of 3. Then BOOM! The headlights should be cleaned up quite nicely so far.
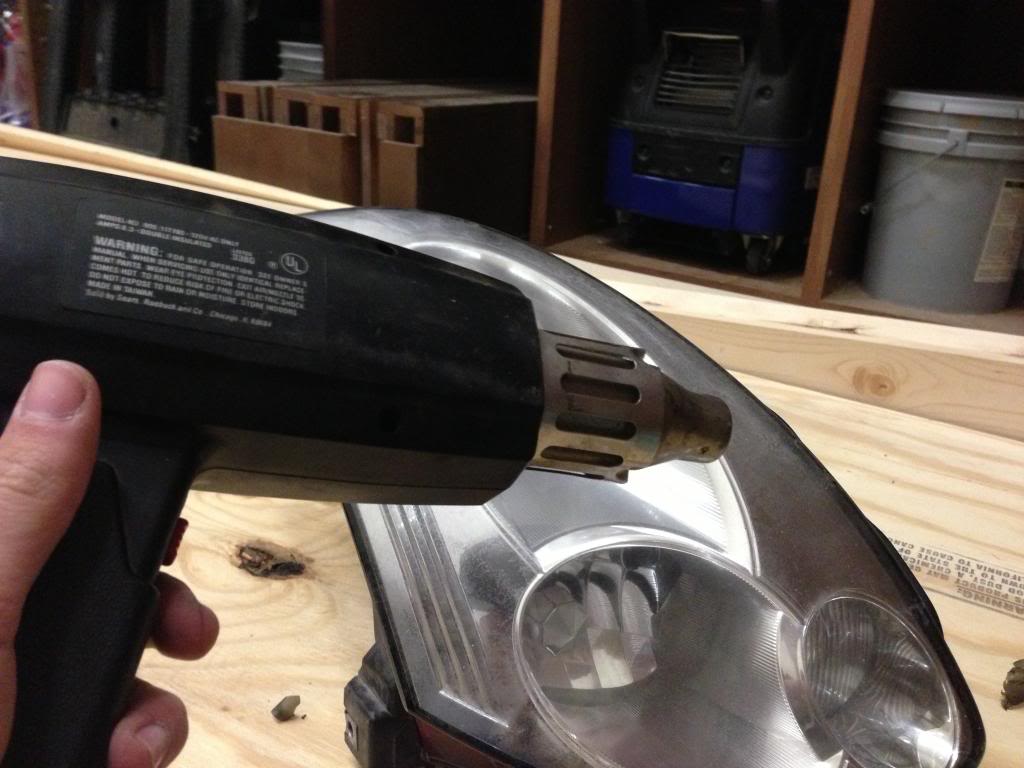
After all of that, I moved over to the other headlight to get this dang overlay off and all of the nasty adhesive off. Just pulled out the heat gun and put it on low power as I ripped off the overlays.
Next I just did the same thing as I did up there ^^^ and took off the adhesive the same way. (no picture necessary for this one)
Now I began Sanding the headlights down pretty well to get off all of the corrosion and bringing them to their true form.

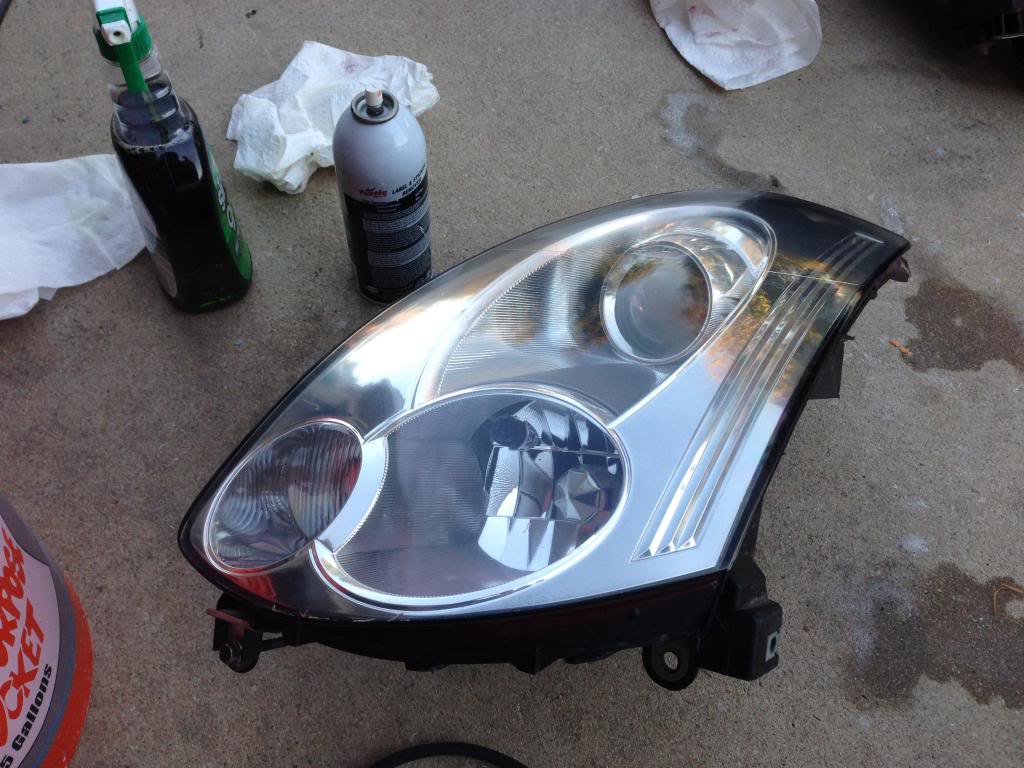
So here is where I began to get picture lazy. But to apply the Polish and Sealant, I did it the same way I did the compound. Back and forth 3-4 times, and up and down 3-4 times. After I applied the sealant though, I let it sit for about 15-20min to let it dry onto the headlight so that it can act as a new clear coat and protect them.
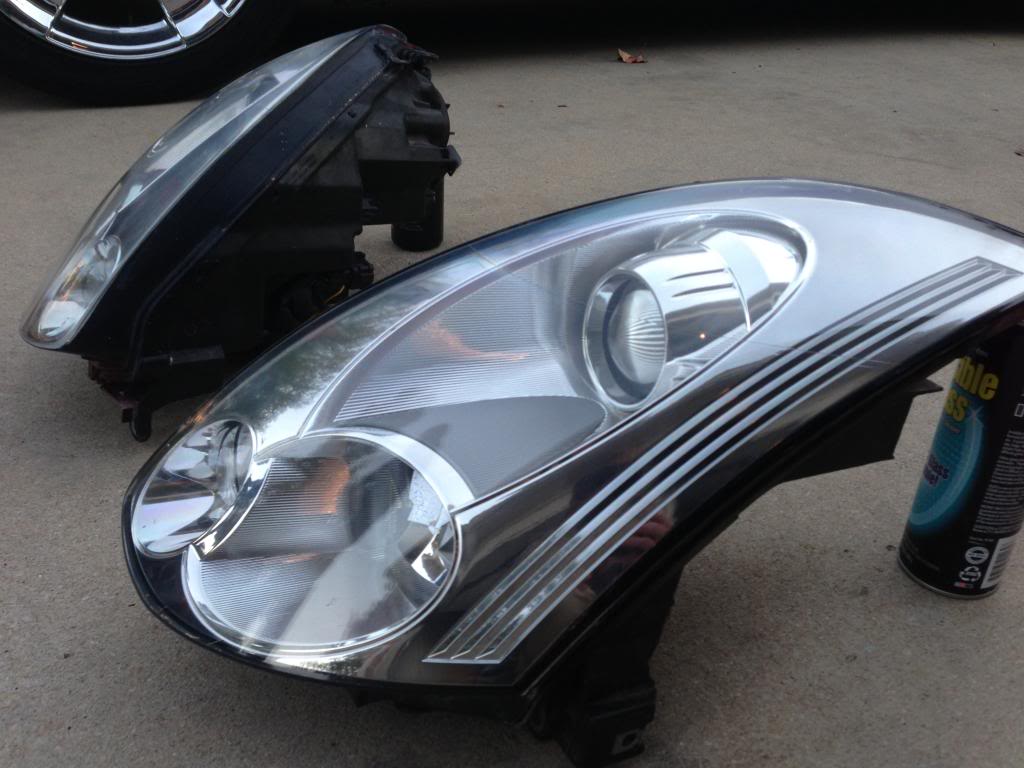
Now this is the final product you will have in front of you! Two brand new looking headlights that make your car POP big time!

BEFORE
AFTER
Thanks guys for reading! I hope you can get your headlights looking the best they can get! If you have any questions/comments/concerns I will get back to you as soon as I can! Goodluck guys!
This is work that I have been doing for a while and is pretty risky in some cases if not done right. It has astonished people countless of times on how well headlights can turn out with a little bit of elbow grease!
Tools that I used for this job:
- Porter Cable 7424xp
- Heat Gun
- Orange, White, Blue and Red LC Pads
- Meguiar's High Cut
- Wolfgang Glaze
- Wolfgang Paint Sealant
- Turtle Wax Adhesive Remover
- 1000, 1500, 2000 Grit Wet Sand Paper
As many of you may know him, g35man04, contacted me and told me he had projectors that he needed to have cleaned up badly. He explained how bad the headlights were and what kind of condition they were in. As a detailer, I took on the challenge and tackle these headlights as best as I could. You will soon see how well these came out from start to finish.
When he first handed me these headlights, he wasn't kidding, they were in very bad condition. Scratches, adhesive everywhere, and overlays still on one of them. I'll let the pictures speak for themselves here.
The overlays were coming off already in some spots on the passenger side headlight
And someone already tried sanding them down on the driver side headlight
Now here is where the turtle wax adhesive remover comes into play. Sprayed it all over the headlight to get off some of the adhesive on the driver side headlight. Took off 99% of it, the rest was removed later on.
(The red is overspray onto the headlights in some spots.. weird)
Next task was to now sand these bad boys down to minimize the scratches and smooth out the surface to as best as possible. I know what you're thinking.... sandpaper?! on my headlights?!?! You have to be crazy!!! Yes and no on that last comment. If you keep reading this actually works for the best in the end. I start with the 1000 grit wet sandpaper and move my way up the grit scale to 2000 grit.
Make sure you keep the wet sand paper, at all times, drenched in water!
Your headlights should look something like this once done. All effed up and terrible looking, if so, good job you are on the right track! Continue reading, promise they will shine soon.
Ok, now it's time to remove the scratches you have now added to these expensive headlights. Pull out the buffer and throw on a strong pad. My Combination of choice is my Porter Cable 7424 xp with an orange LC Pad. Then apply the Meguiar's medium-cut compound (or whatever compound you choose to use) to the pad lightly.
Now when using a buffer, always remember to place it on the surface you are working with and then spread it out on the surface BEFORE turning on the buffer. Or else you will have a very nice mess all over your garage, car, and clothes that you will have to clean up
Start up the buffer you use at the lowest speed and spread the compound out even more so. Then start kicking it up slowly in speed till its at full throttle or 6000rpm. Move in a side to side motion then up in down atleast 3-4 times each way just to ensure best quality. After all said and done, wipe off the compound with a microfiber towel! DO not use the paper towels at all. I just used autozone microfiber towels that I got for about $5 for a pack of 3. Then BOOM! The headlights should be cleaned up quite nicely so far.
After all of that, I moved over to the other headlight to get this dang overlay off and all of the nasty adhesive off. Just pulled out the heat gun and put it on low power as I ripped off the overlays.
Next I just did the same thing as I did up there ^^^ and took off the adhesive the same way. (no picture necessary for this one)
Now I began Sanding the headlights down pretty well to get off all of the corrosion and bringing them to their true form.
So here is where I began to get picture lazy. But to apply the Polish and Sealant, I did it the same way I did the compound. Back and forth 3-4 times, and up and down 3-4 times. After I applied the sealant though, I let it sit for about 15-20min to let it dry onto the headlight so that it can act as a new clear coat and protect them.
Now this is the final product you will have in front of you! Two brand new looking headlights that make your car POP big time!
BEFORE
AFTER
Thanks guys for reading! I hope you can get your headlights looking the best they can get! If you have any questions/comments/concerns I will get back to you as soon as I can! Goodluck guys!

Thanks bud! And will do!
Trending Topics


Yeah I know right? Before with all of the crap that was on them, I wasn't sure if I had 06 projectors or 03-05 headlights lol... But now they look brand new!


