

Another Wiretuck Project


Joined: Dec 2008
Posts: 859
Likes: 114
From: Ewa Beach
Another Wiretuck Project
hey wassup guys i've been on these forums for a while and have read and done quite a few of the DIY. I've read up on so many wiretucks but have never really found the pics needed in detail to show what had to be moved where and so on.
I've learned so many things from alot of peeps on this forum and i appreciate all of it. so heres my contribution back to hopefully help others that have questions on things they've wanted to do on the wiretuck.
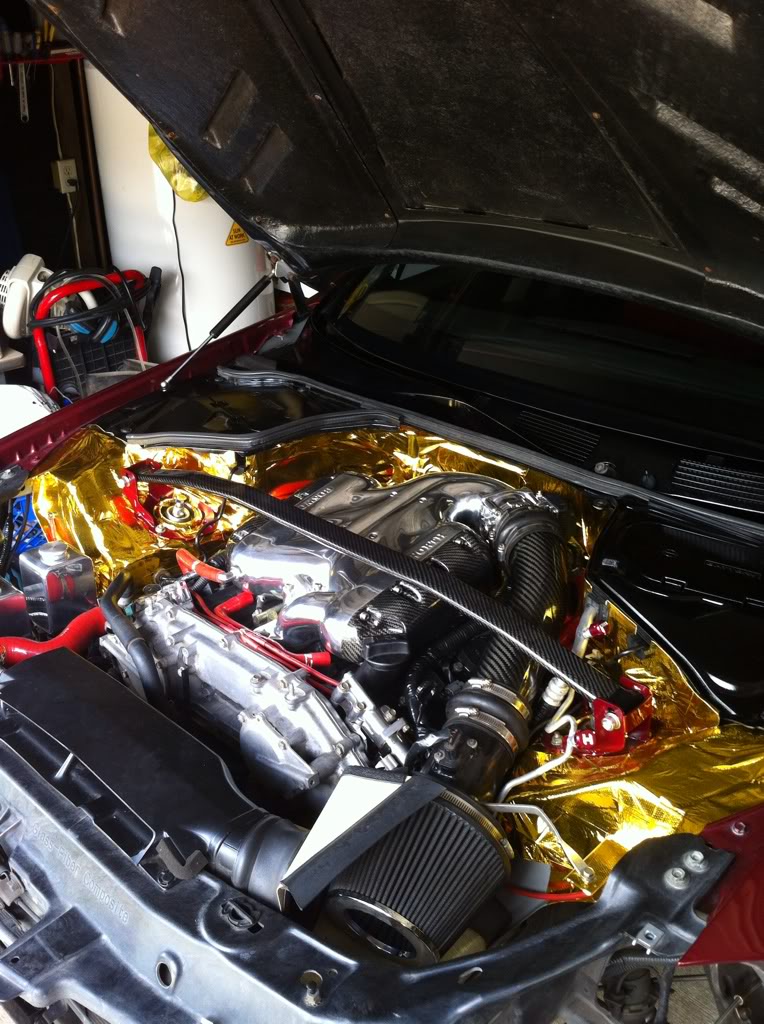
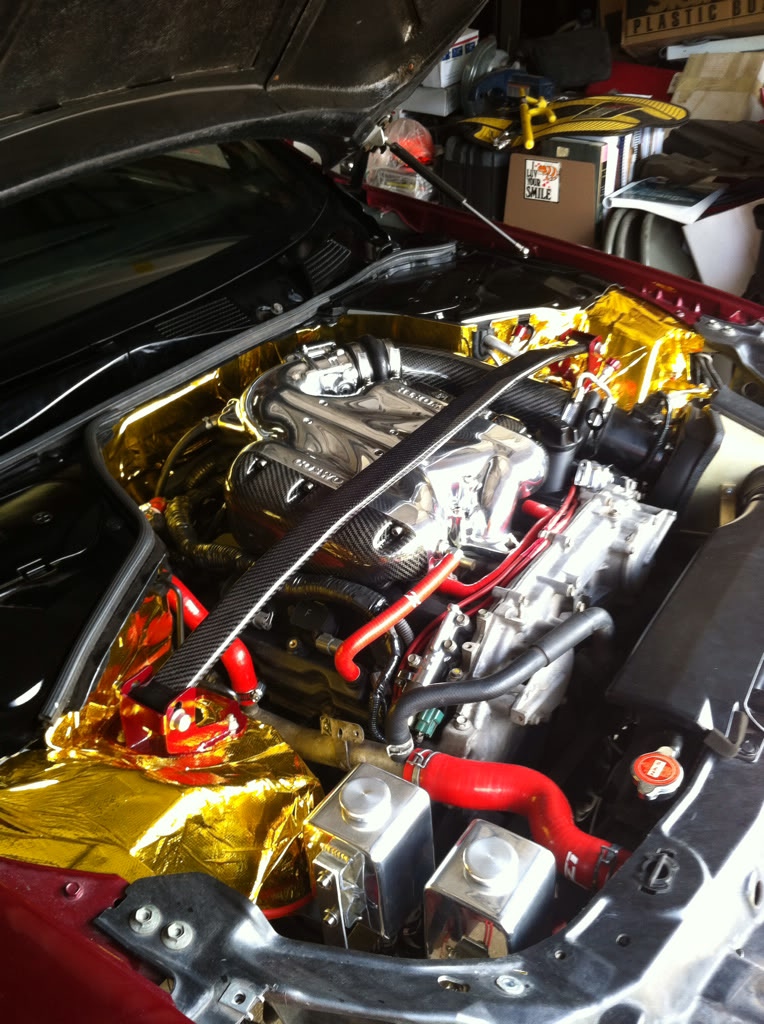
also my pride and joy. all my hard earned money goes into this car, u can never get enough of the modbug.
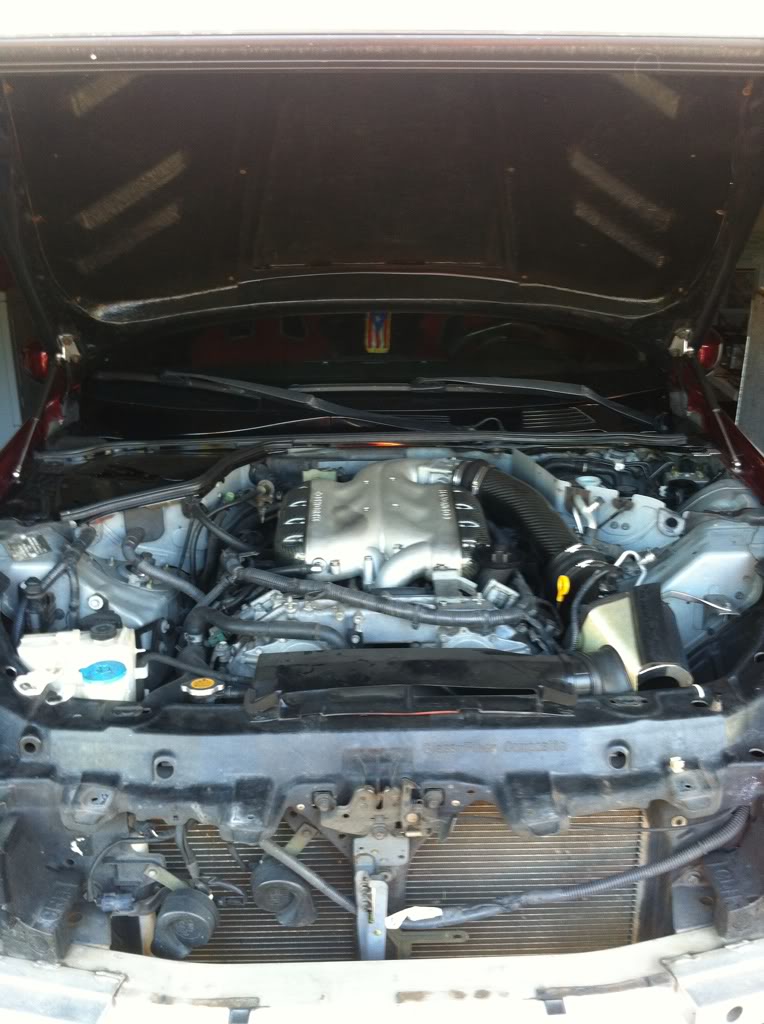
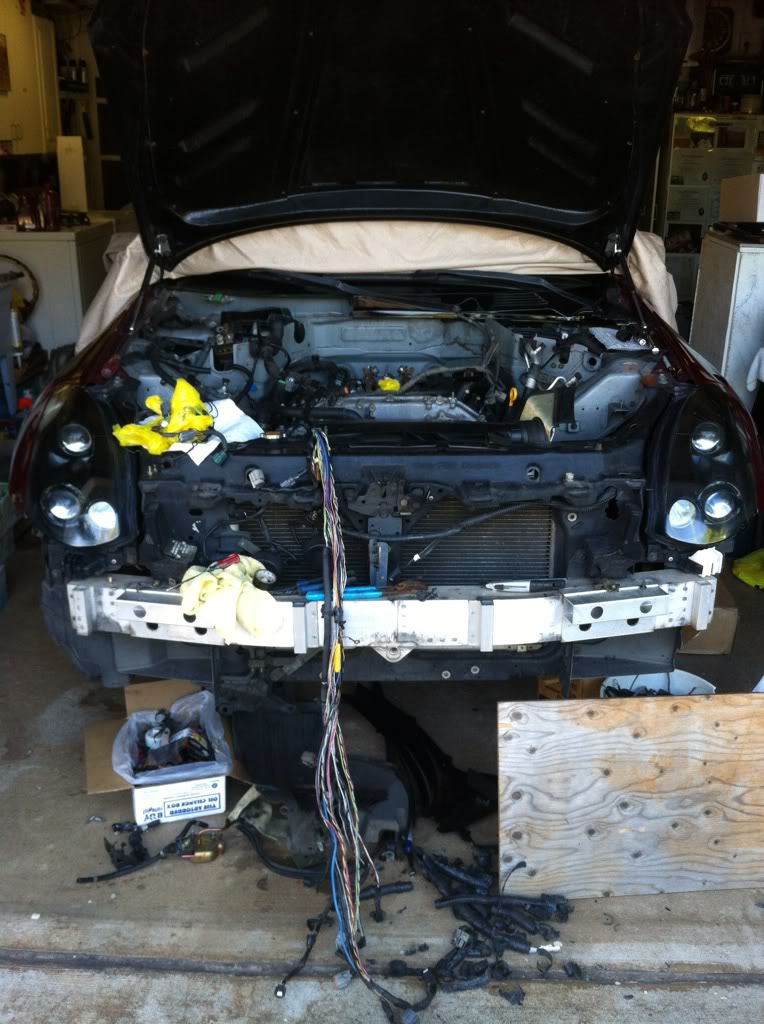
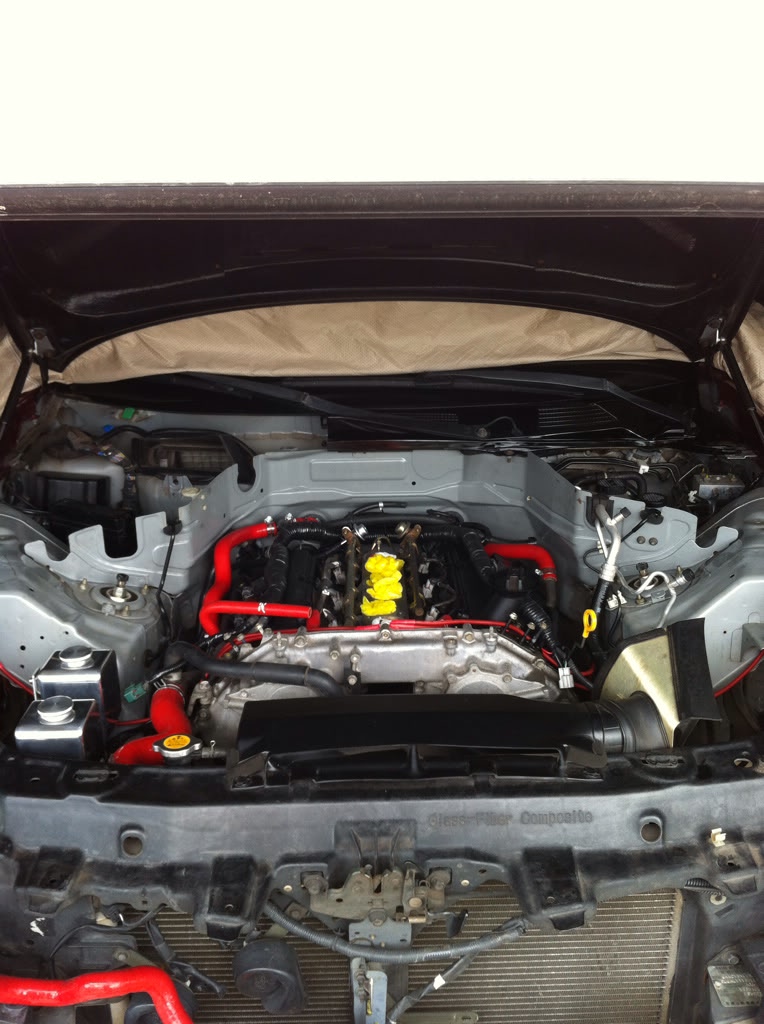
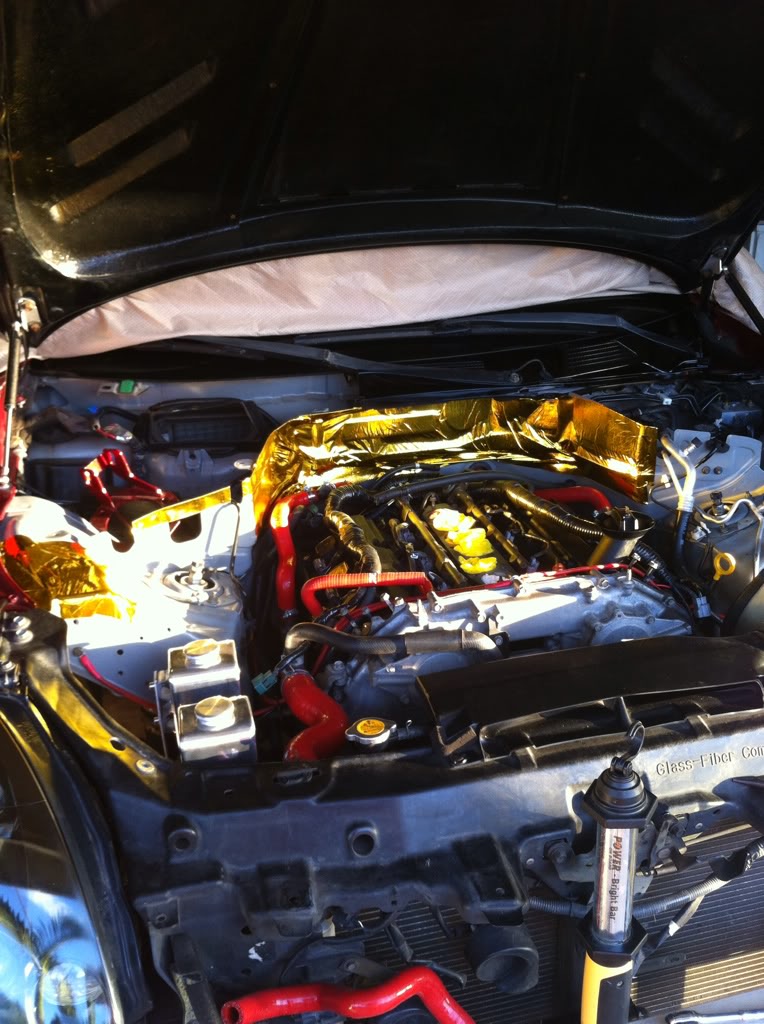
here she is ready to be taken on. keep in mind i won't be covering the tuck for the harnesses on the driver and passenger sides, there are enough wiretuck DIY that cover this thoroughly and i think would be the easiest place to start off when you decide too.
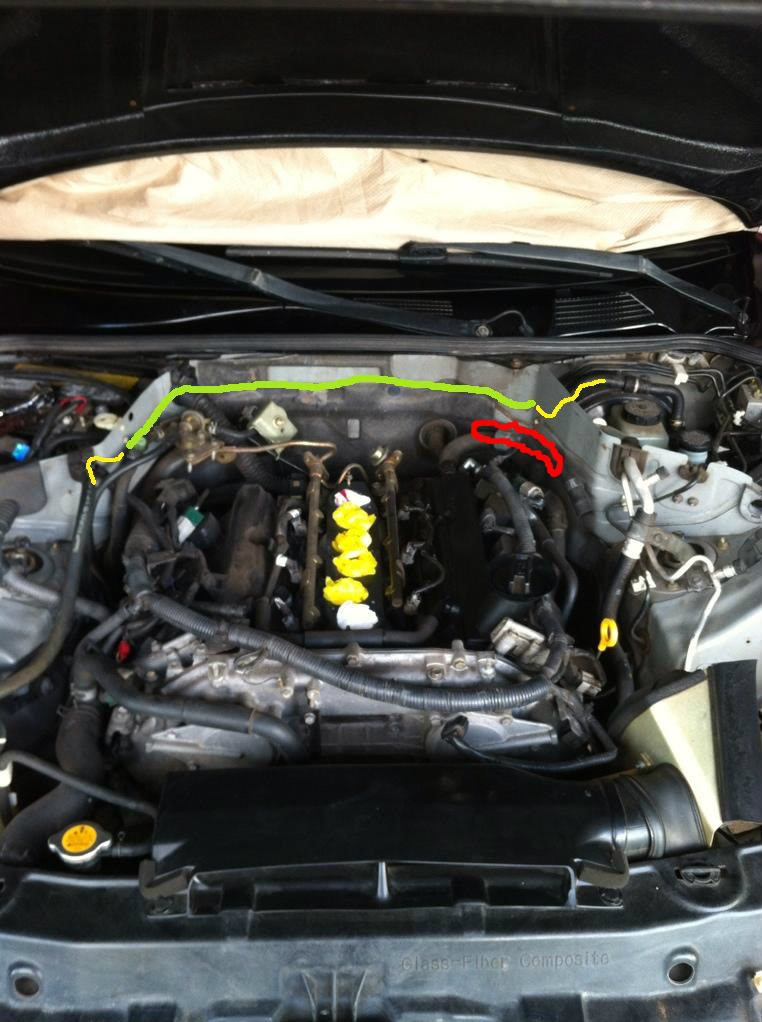
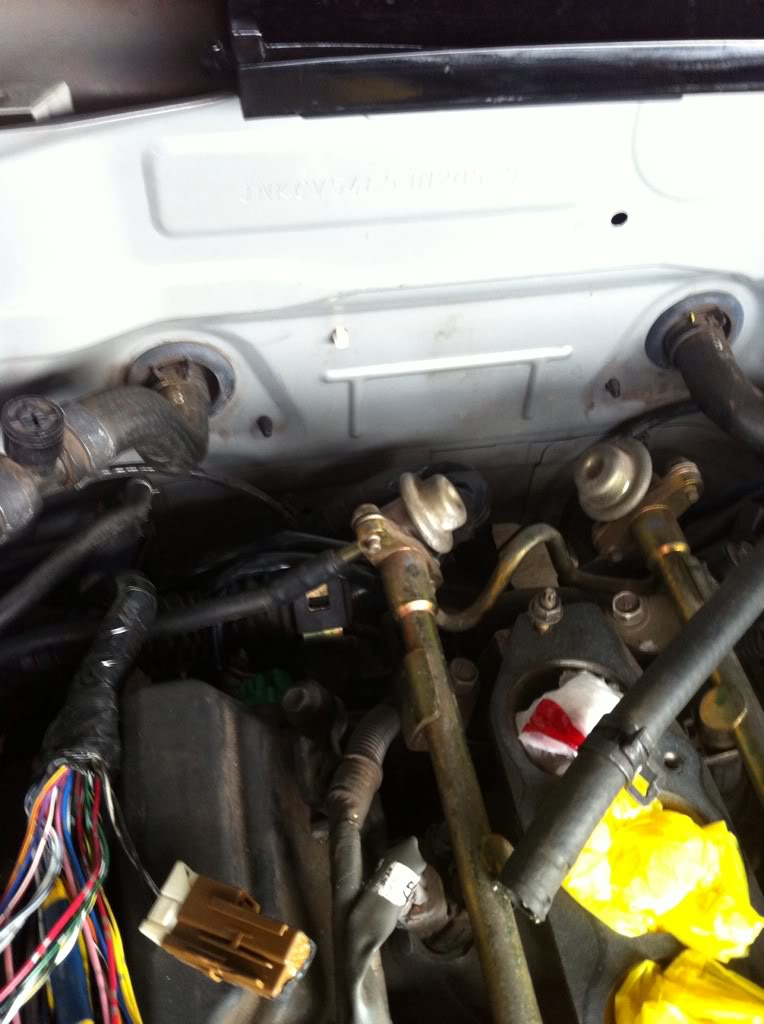
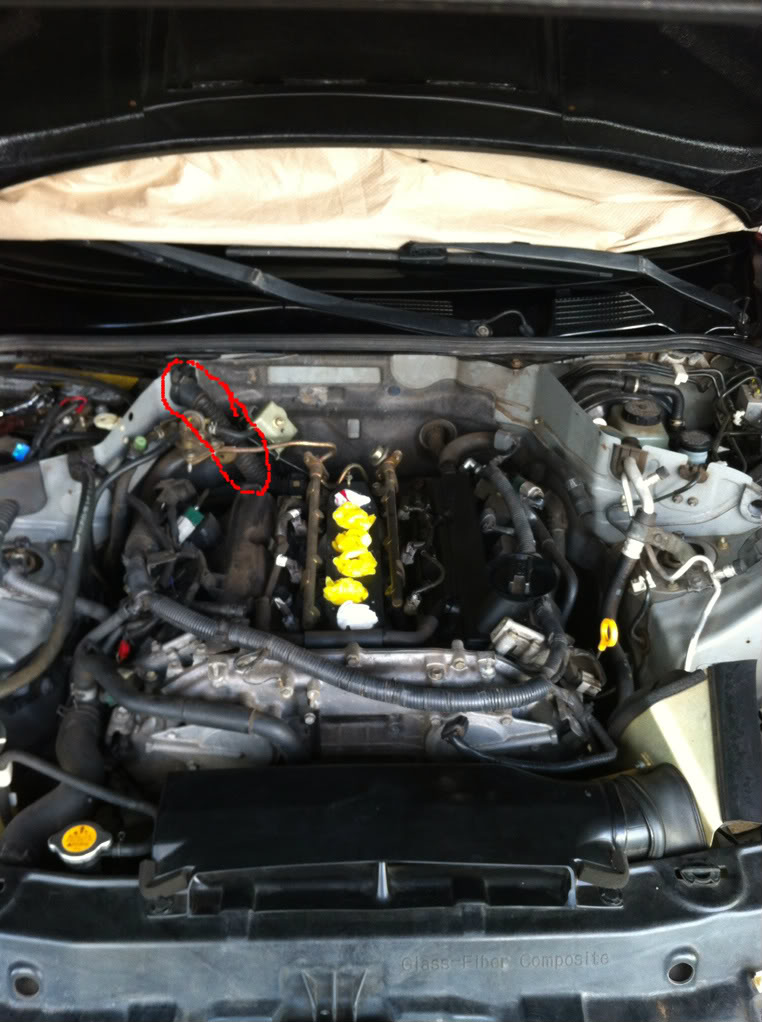
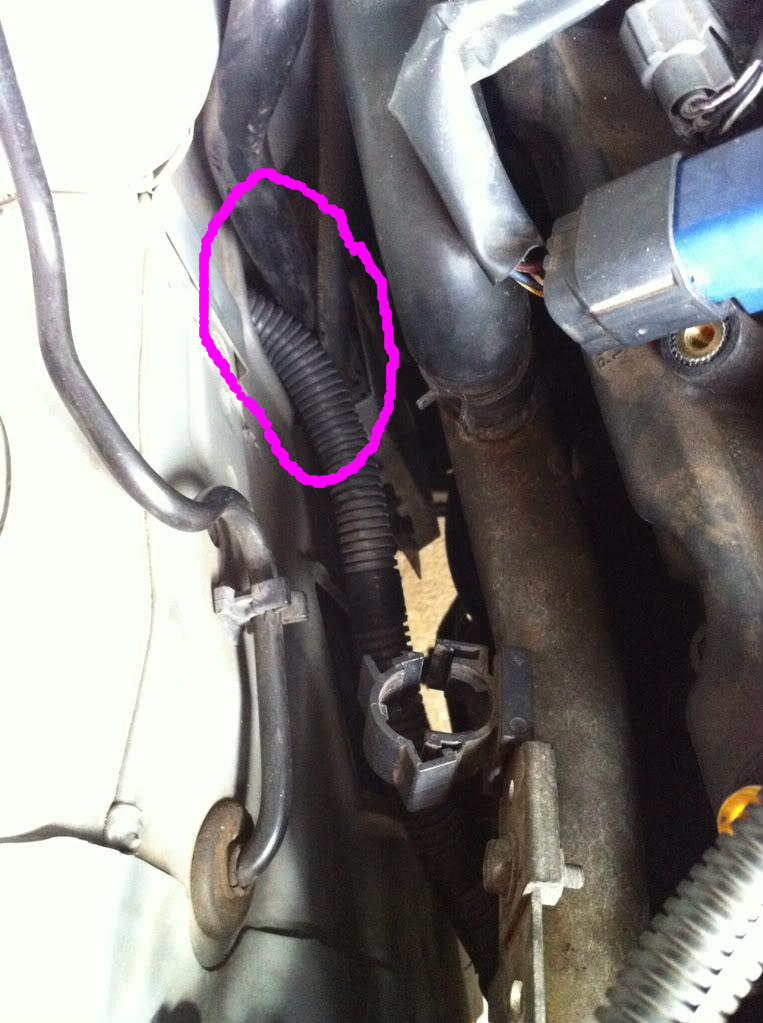
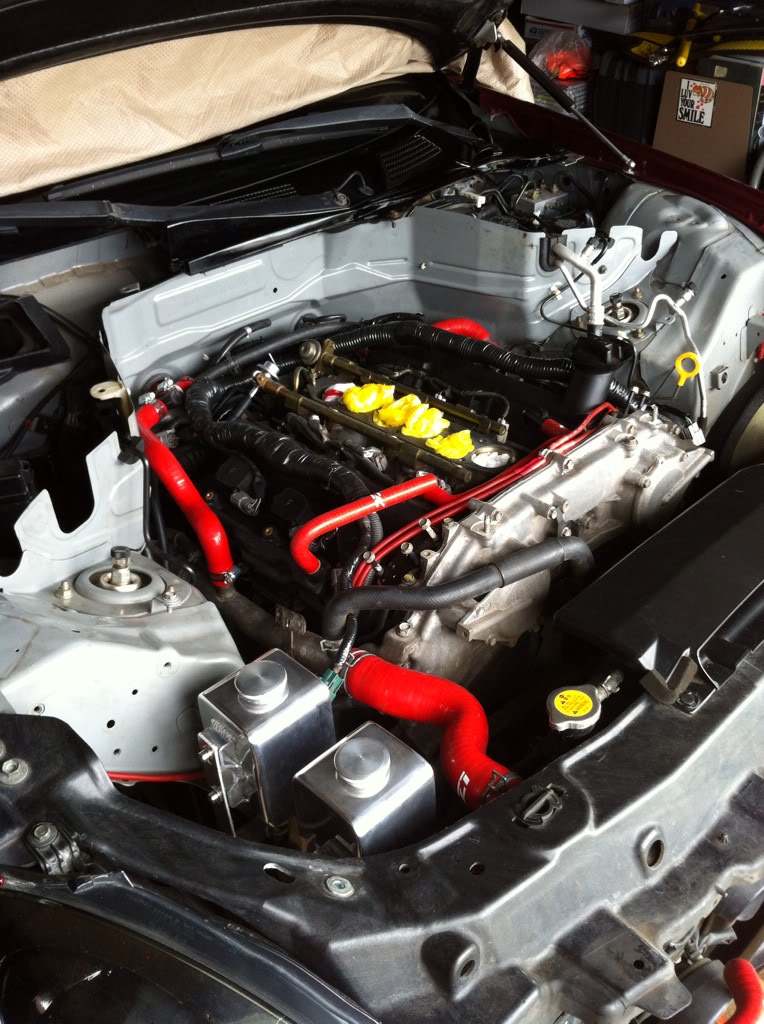
the highlighted part below in green is the brake booster line that runs behind the engine wall under the wiper covers. the yellow is where it transitions to soft lines in rubber. the left side you follow it all the way to your manifold whether it be the stock one or the cosworth. disconnect both sides and save that hose you will need it later. on the right side disconnect that soft line also and basically you will drill a hole anywhere in the area of the red circle making sure on the other side its clear. run that long hose you disconnected earlier through the hole and connect it back on the right side. connect other side back to manifold and youre done. i left the hardline in the back to much of a hassle to pull out.
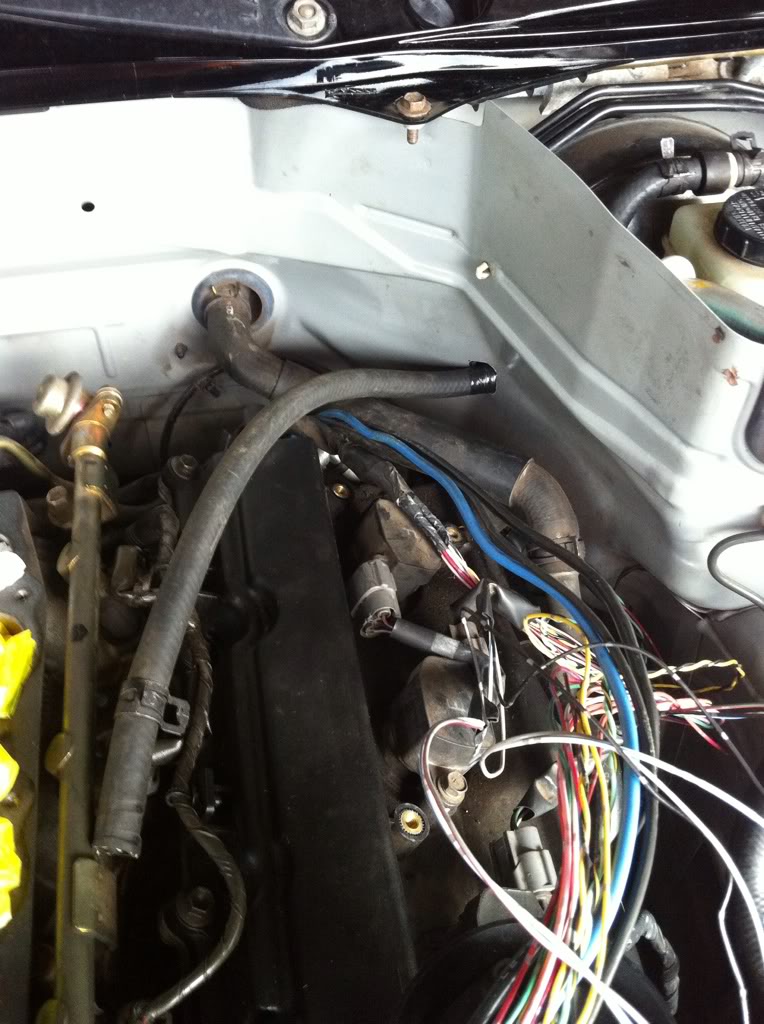
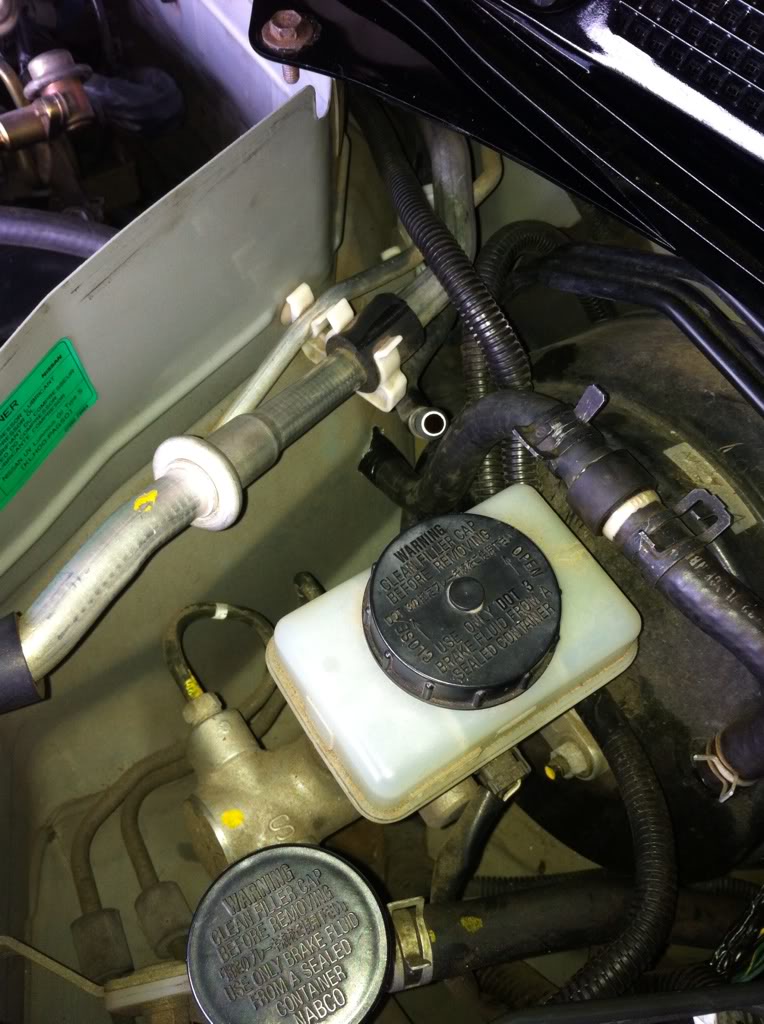
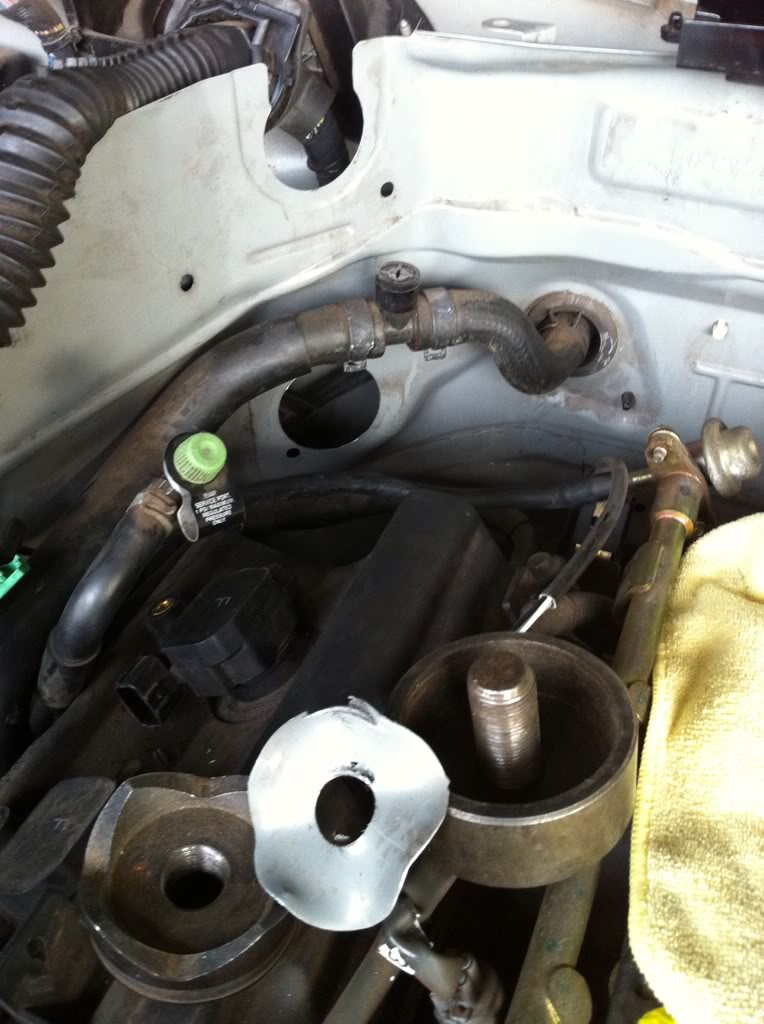
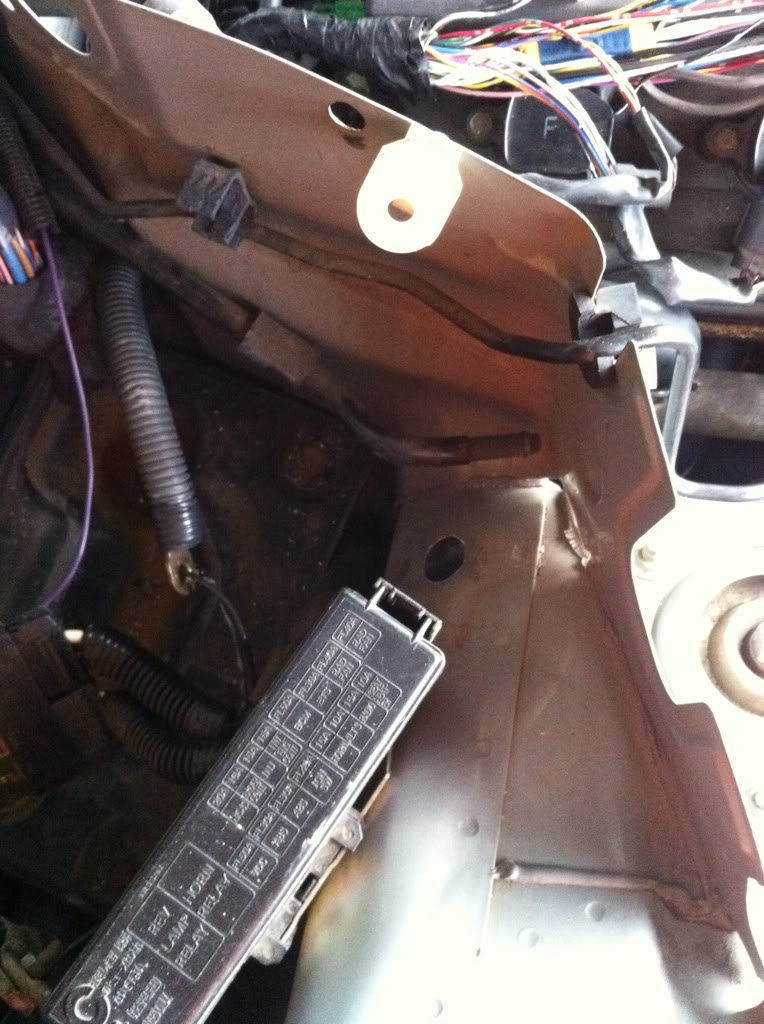
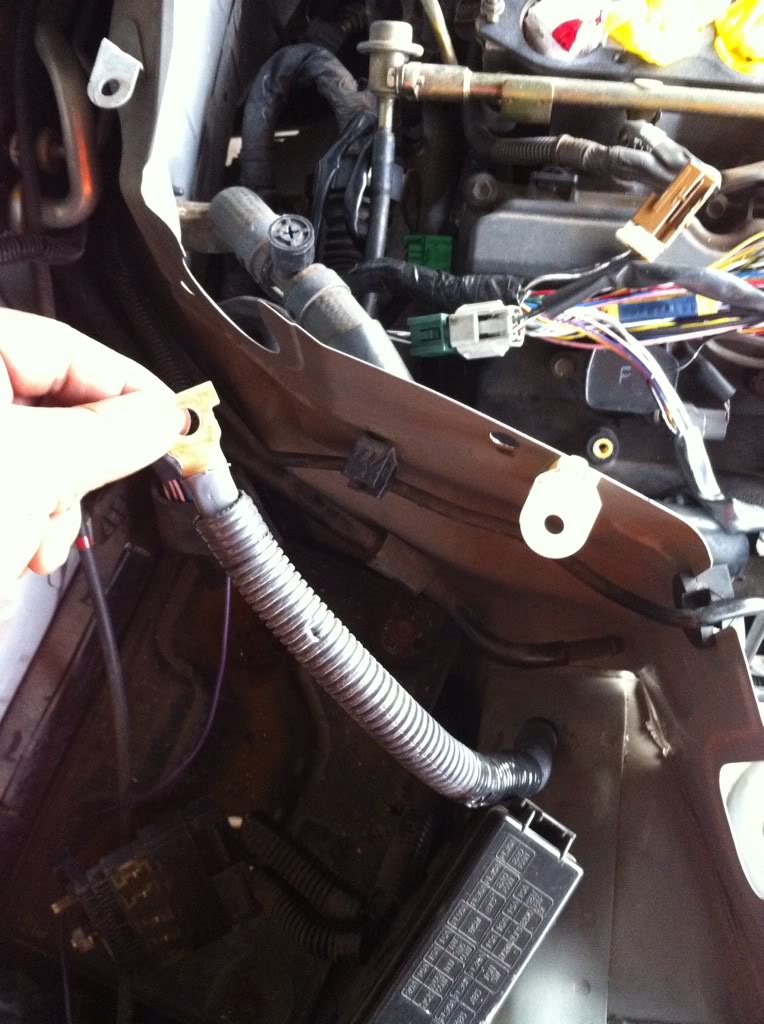
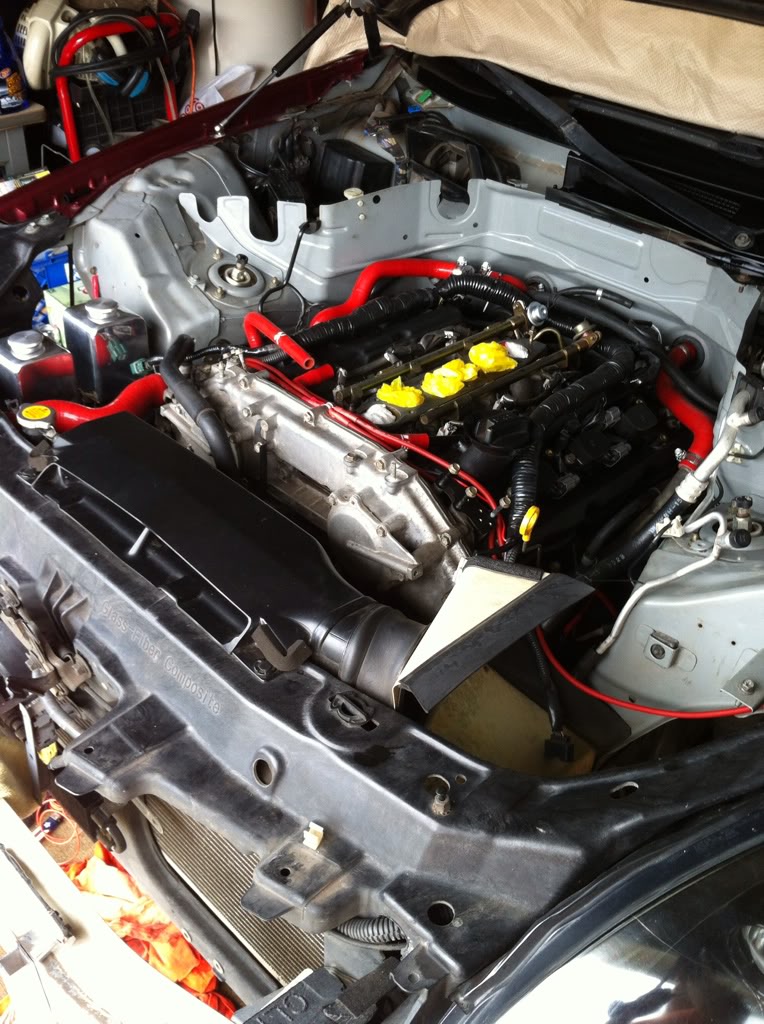
next is the fuel service line. first off theirs a line running through the fuel service highlighted in yellow. you need to disconnect those two hoses. then the fuel lines in red you unbolt both and remove that whole bracket dont need it anymore. bolt on the fuel line and it should look like the following picture below this one.

now you have that out of the way, start disconnecting everything. if you don't trust yourself to remember where everything goes mark the connectors however it suits you best so you know where to connect them back. I had always wondered why everyone had always left the big harness when doing the wiretuck. supposedly only a few have tackled this far into the wiretuck and would disconnect from inside the car and pull the wires out through the battery area and then run the wires under the car somewhere back into the battery bay.
i believe i found a much easier way by disconnecting the harness going down the engine bay in the back center under the car to the transmission and the other o2 sensors and this is the result. easier than i thought and don't know why no one has figured it out or at least posted their discovery
here is where i decided to make my hole to rerun the wire harness through. if any of you are electricians you know what those things are right there. basically you drill or holesaw a 7/8 to 1" inch hole then you put this knockout set to cut a perfect hole out. if you don't have one its costly to purchase so i would recommend a holesaw of whatever size you desire to rerun the harness. i think anywhere from 1 3/4 to 2 inch is sufficient. im not **** about the hole being sealed perfectly so there will be play with the harness in the new hole
now on to the + battery wire relocation. theres a hole in that pink outline which the battery wire will run through.
below is a picture of the inside of the battery bay. that is the hole you will need to drill which the battery wire will come up through.
here it is pulled through and you're done
these bad boys are off to sean(SxExCx) to get polished and also thanks to sean for helping me out with any questions i had during my wire tuck
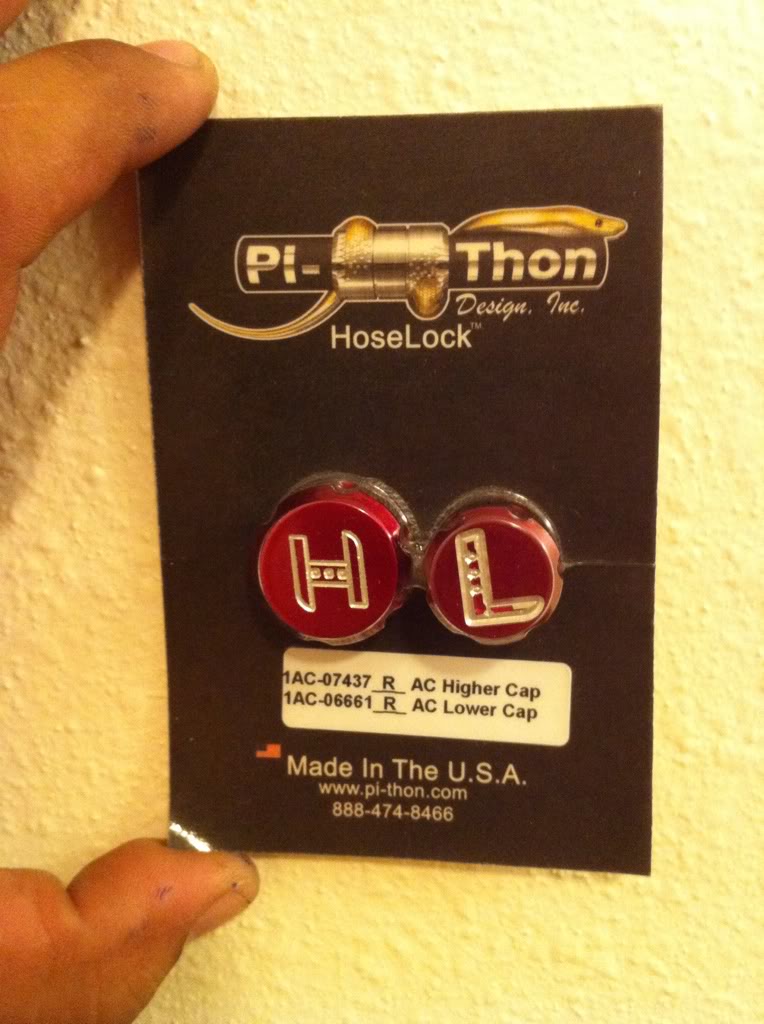
was lucky enough to pick this set up from redpearl99. thanks for these hard to find ac line covers
MORE TO COME WITH UPDATED PICTURES. PLZ BARE WITH ME AS I WORK JUS LIKE YOU GUYS DO
I've learned so many things from alot of peeps on this forum and i appreciate all of it. so heres my contribution back to hopefully help others that have questions on things they've wanted to do on the wiretuck.
also my pride and joy. all my hard earned money goes into this car, u can never get enough of the modbug.
here she is ready to be taken on. keep in mind i won't be covering the tuck for the harnesses on the driver and passenger sides, there are enough wiretuck DIY that cover this thoroughly and i think would be the easiest place to start off when you decide too.
the highlighted part below in green is the brake booster line that runs behind the engine wall under the wiper covers. the yellow is where it transitions to soft lines in rubber. the left side you follow it all the way to your manifold whether it be the stock one or the cosworth. disconnect both sides and save that hose you will need it later. on the right side disconnect that soft line also and basically you will drill a hole anywhere in the area of the red circle making sure on the other side its clear. run that long hose you disconnected earlier through the hole and connect it back on the right side. connect other side back to manifold and youre done. i left the hardline in the back to much of a hassle to pull out.
next is the fuel service line. first off theirs a line running through the fuel service highlighted in yellow. you need to disconnect those two hoses. then the fuel lines in red you unbolt both and remove that whole bracket dont need it anymore. bolt on the fuel line and it should look like the following picture below this one.
now you have that out of the way, start disconnecting everything. if you don't trust yourself to remember where everything goes mark the connectors however it suits you best so you know where to connect them back. I had always wondered why everyone had always left the big harness when doing the wiretuck. supposedly only a few have tackled this far into the wiretuck and would disconnect from inside the car and pull the wires out through the battery area and then run the wires under the car somewhere back into the battery bay.
i believe i found a much easier way by disconnecting the harness going down the engine bay in the back center under the car to the transmission and the other o2 sensors and this is the result. easier than i thought and don't know why no one has figured it out or at least posted their discovery
here is where i decided to make my hole to rerun the wire harness through. if any of you are electricians you know what those things are right there. basically you drill or holesaw a 7/8 to 1" inch hole then you put this knockout set to cut a perfect hole out. if you don't have one its costly to purchase so i would recommend a holesaw of whatever size you desire to rerun the harness. i think anywhere from 1 3/4 to 2 inch is sufficient. im not **** about the hole being sealed perfectly so there will be play with the harness in the new hole
now on to the + battery wire relocation. theres a hole in that pink outline which the battery wire will run through.
below is a picture of the inside of the battery bay. that is the hole you will need to drill which the battery wire will come up through.
here it is pulled through and you're done
these bad boys are off to sean(SxExCx) to get polished and also thanks to sean for helping me out with any questions i had during my wire tuck
was lucky enough to pick this set up from redpearl99. thanks for these hard to find ac line covers
MORE TO COME WITH UPDATED PICTURES. PLZ BARE WITH ME AS I WORK JUS LIKE YOU GUYS DO
Last edited by PR-G35Driver; Mar 3, 2012 at 01:44 AM. Reason: picture update


These are VERY useful pics and I sure you will get many thanks to all the people outside of Socal who haven't had the knowledge or resources to do it.
Props to you!
My only advice you be to get some snap-in grommets for the hose holes. You can pick them up at Home Depot for about $1 and they will prevent the sheet metal from cutting through the hoses after a long period of time.
Props to you!
My only advice you be to get some snap-in grommets for the hose holes. You can pick them up at Home Depot for about $1 and they will prevent the sheet metal from cutting through the hoses after a long period of time.
Trending Topics
Joined: Dec 2008
Posts: 859
Likes: 114
From: Ewa Beach
^^ lol same thing my pops told me when he looked at my engine bay. i did file down all the holes i made though so its not rough.
but yeah i will get those grommets.
feel free to post teaser pics on here of my manifold lol. im itching to put them on already
but yeah i will get those grommets.
feel free to post teaser pics on here of my manifold lol. im itching to put them on already


Joined: Dec 2008
Posts: 859
Likes: 114
From: Ewa Beach
thanks guys. hopefully these pictures will clear up a lot of questions people have had.
if u guys want pictures of anything else lmk and I'll add it in my write up
if u guys want pictures of anything else lmk and I'll add it in my write up
