
DIY Rain Guards for TS Hood!


Please understand that i am not liable for any damages or injuries because of this write up. This is simply a guideline and im sure there are many other ways to fab these.
Please be prepared for lots of work.
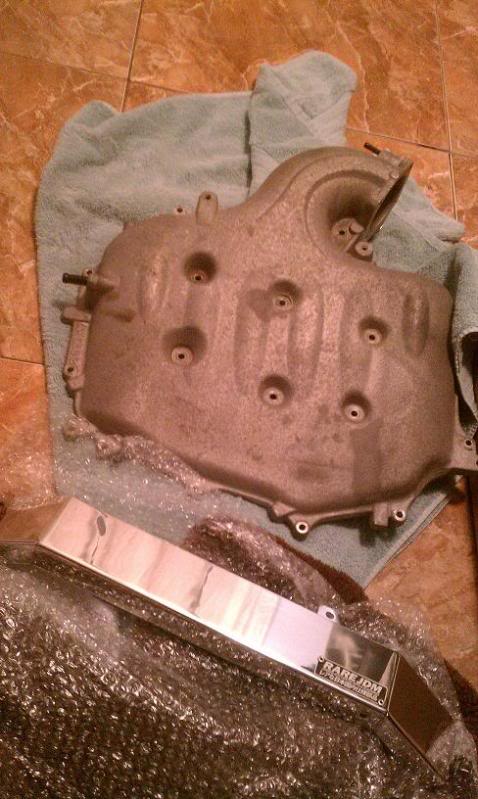
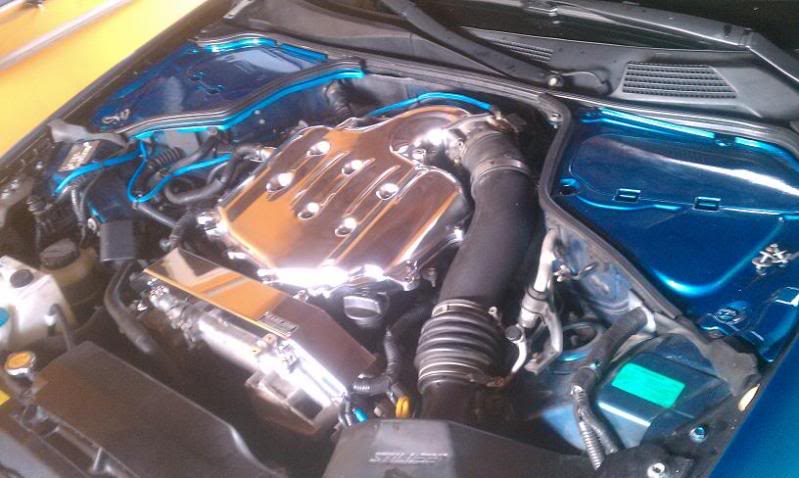
So I found a used upper plenum on craigslist and decided it would be a good project to polish it and switch it out with mine when I'm done. This equals no down time with the car so it was perfect. I slowly and painfully began the polishing process and realized that if I was going to keep the engine bay looking nice I would have to fabricate some sort or rain guard for my Siebon TS Hood.
To remove the hood you will need some help. Find a friend and remove the two bolts on both the drivers side and passenger side hinges.
Make sure you have some place SAFE to work on. I used a couple tables covered with old towels.

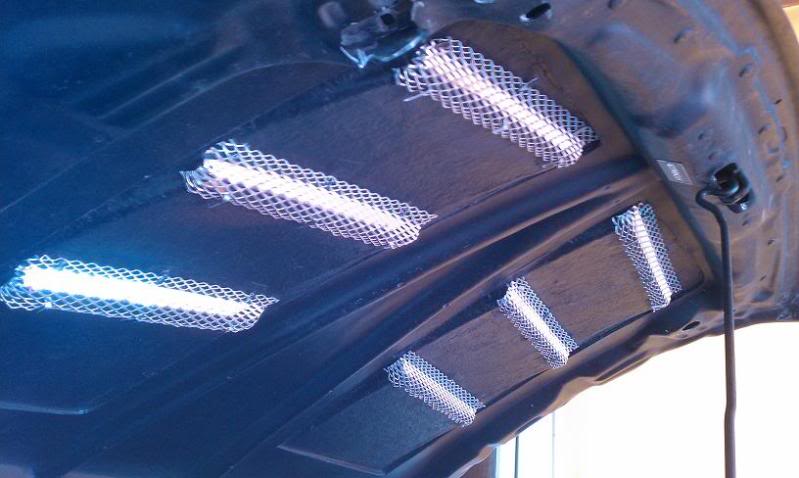
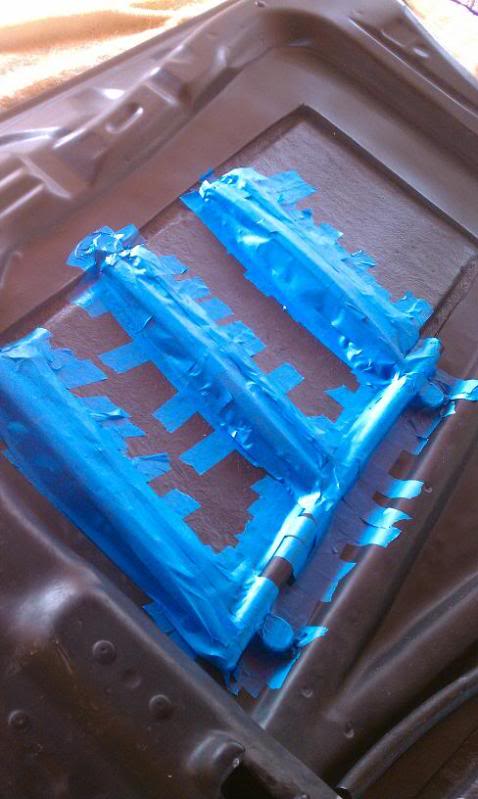
Once I had the hood off I scavenged up some old piping to use as a skeleton for my mold. Normally would have made this skeleton of wood but that would involve a lot of curved edges and routing.

Next I taped down the tubing. It would be great to hot glue them down but I couldn't find the hot glue gun.
Notice that I taped down some bottle caps to create a mold around. These will give me the depth to be able to drill them on.

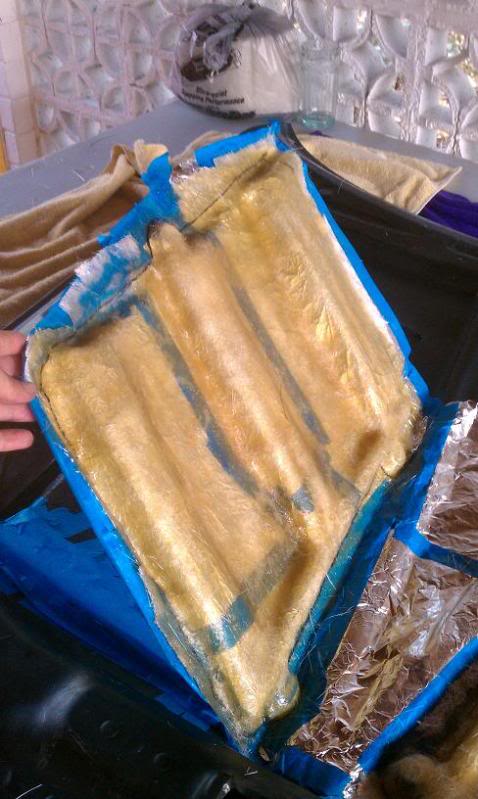
Next I laid aluminum foil over the vents and tubing making sure that I taped the edges of the aluminum foil. This is important so that the resin doesn't get through.
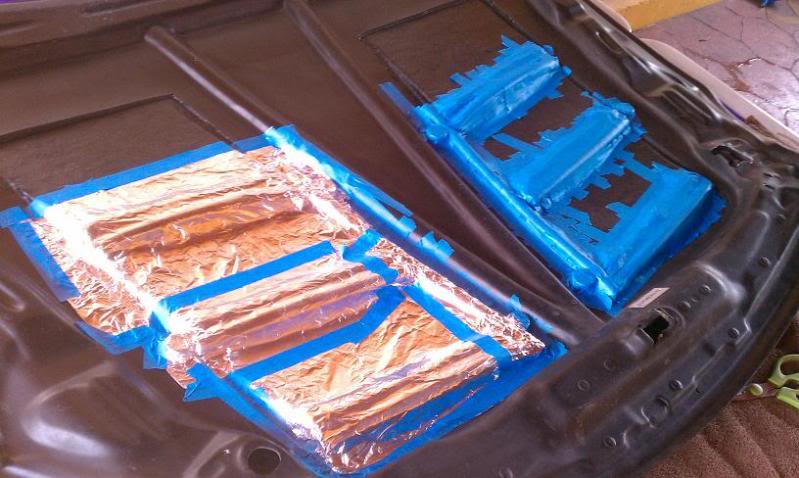
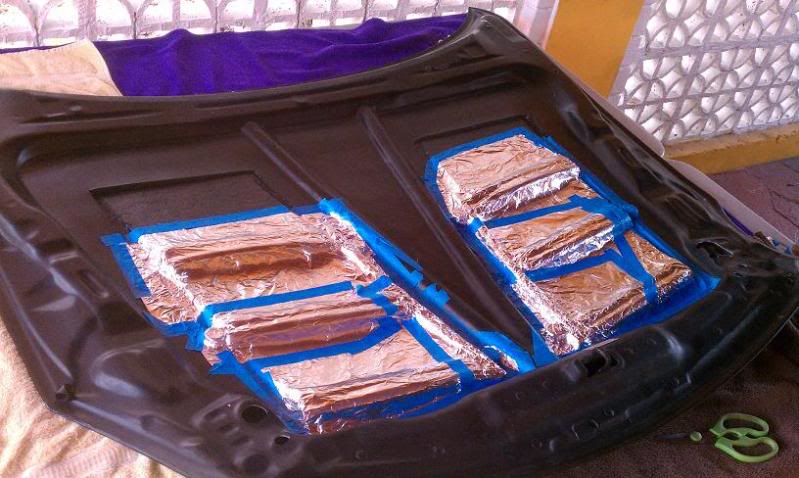
When all the foil is laid and taped up you can begin mixing your fiberglass resin and hardener. (use the ratio recommended of resin and hardener) I cut out squares of fiberglass cloth and laid them overlapping each other. Use a cheap brush and dab the mixed resin Do Not use Painting movements. dab Dab until the cloth takes the shape of the underside of the hood.
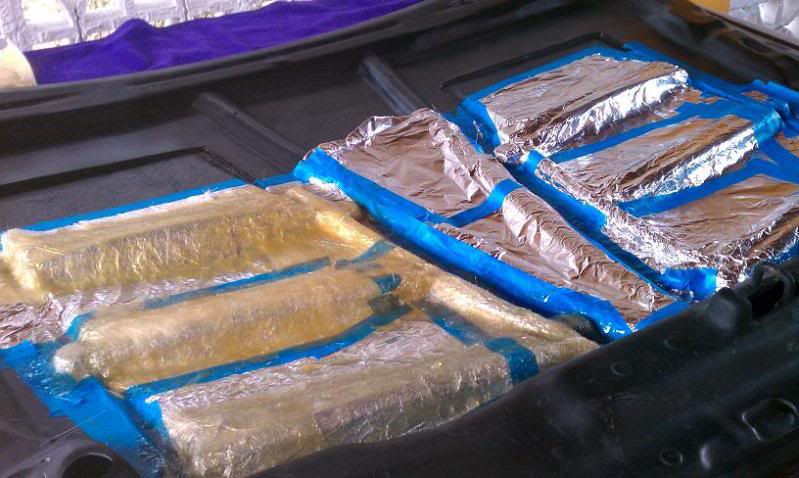
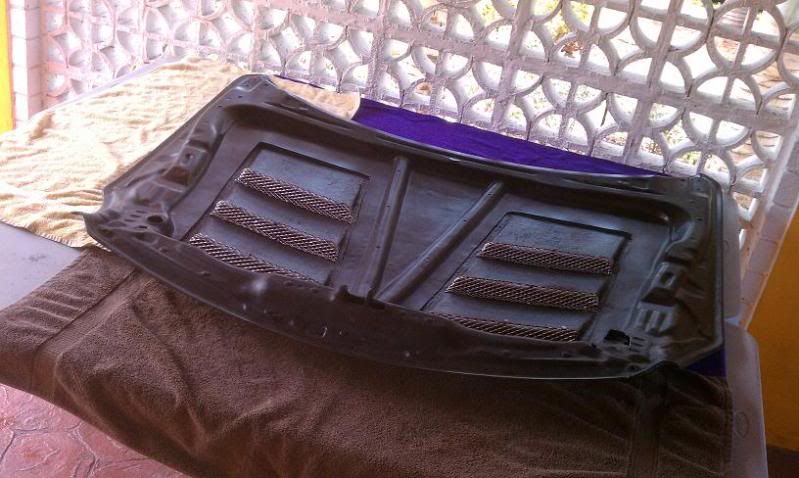
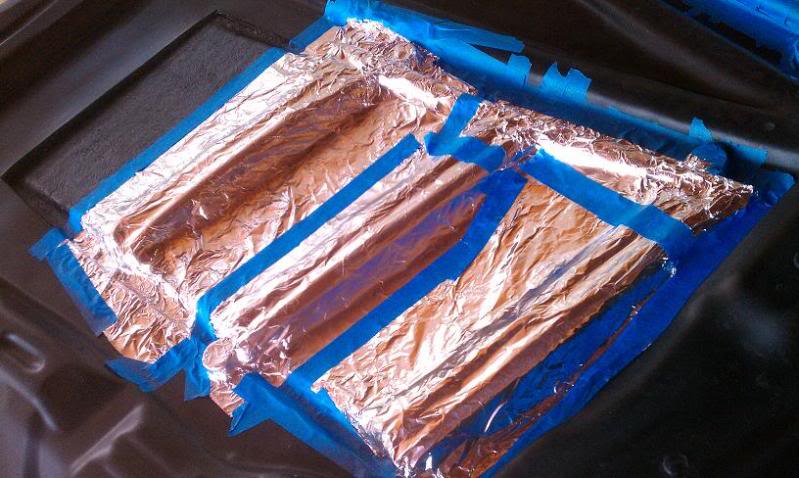
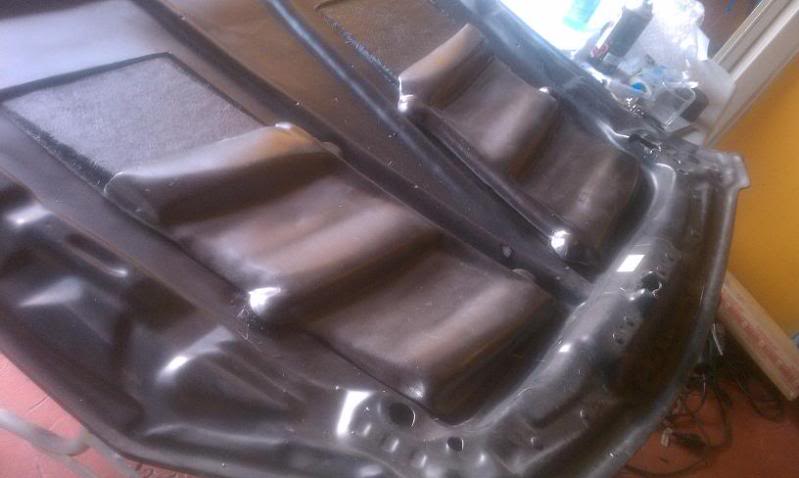
Here's how it should look after two coats of fiberglass cloth...
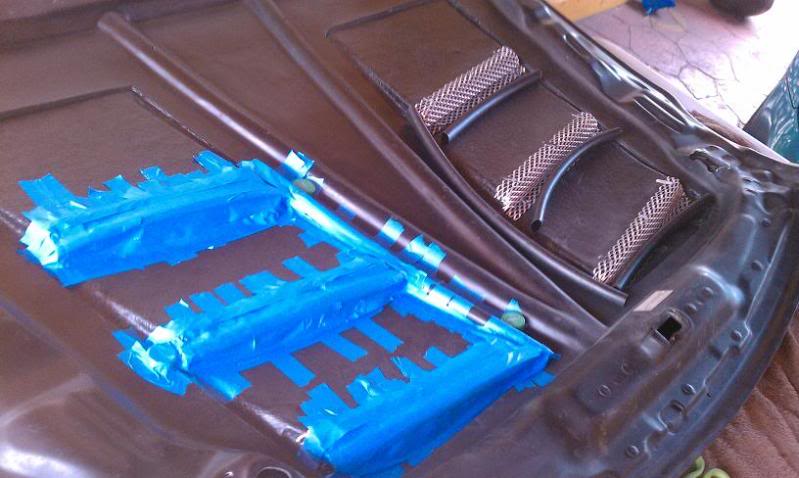
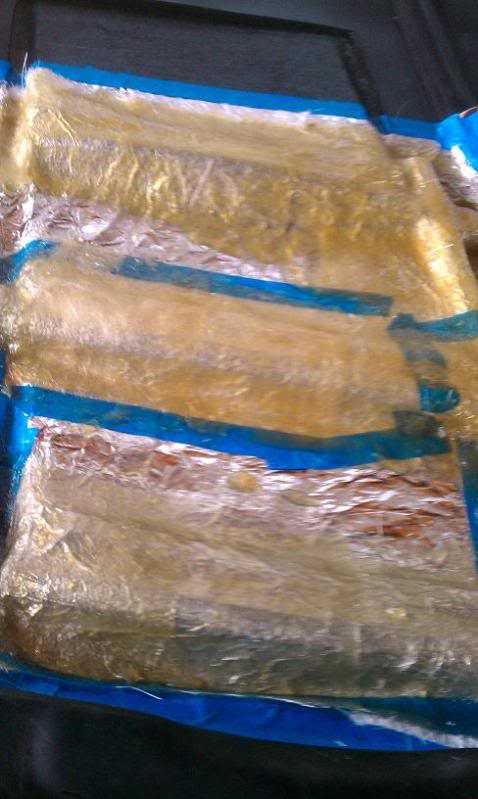
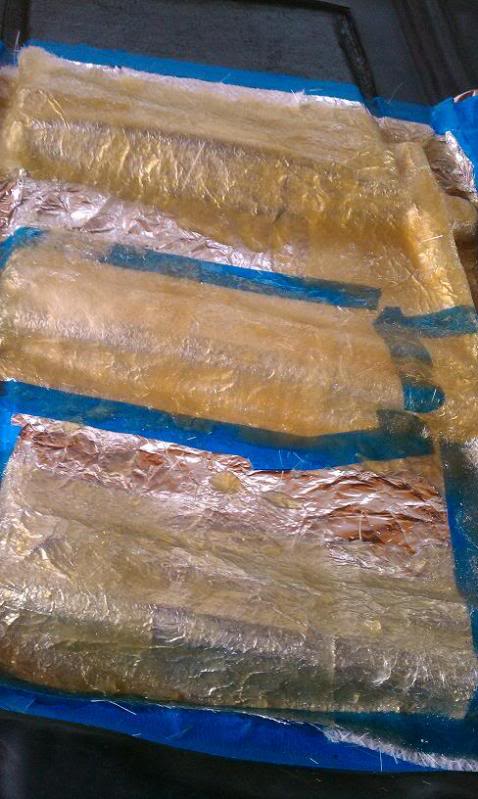
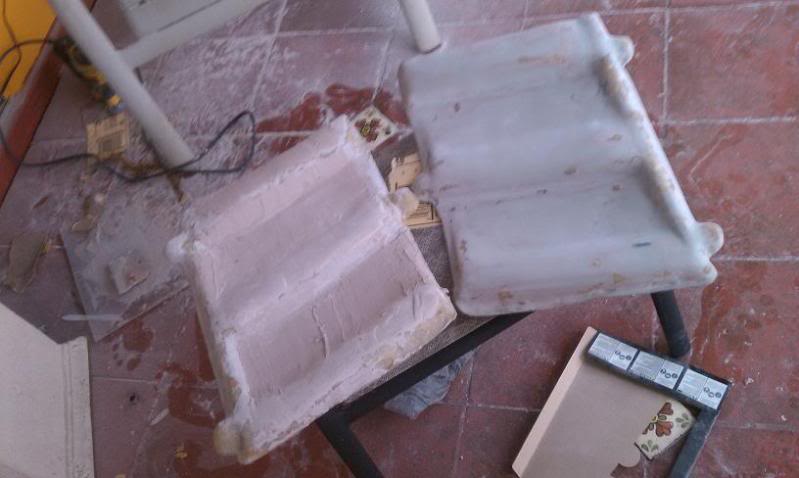
After it fully dries you should be able to remove the mold and discard the aluminum foil tape and tubing.
These are both molds after I peeled off all the trash.
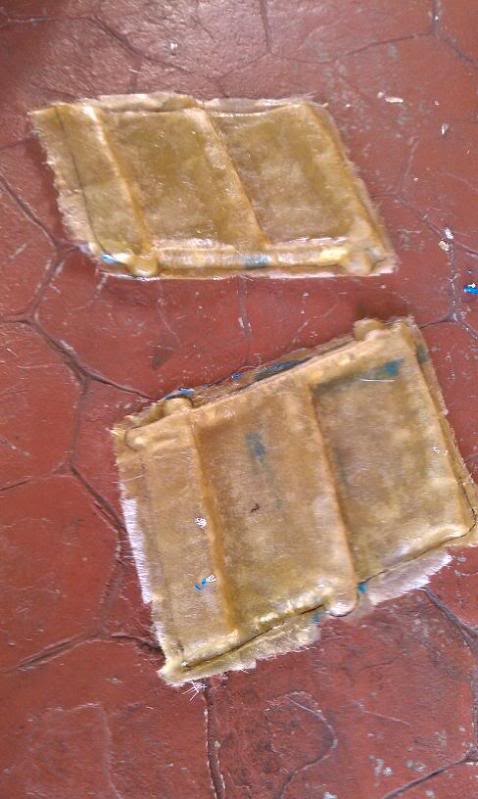
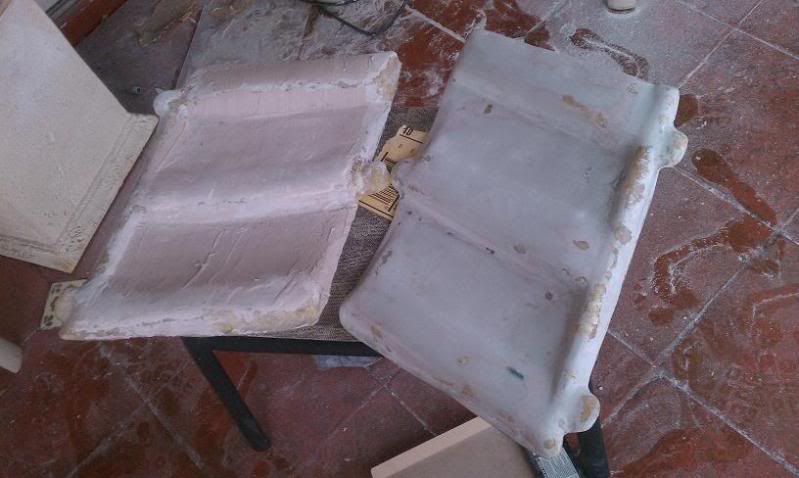
Use a dremel with a cutting wheel and trim all the excess fiberglass cloth.

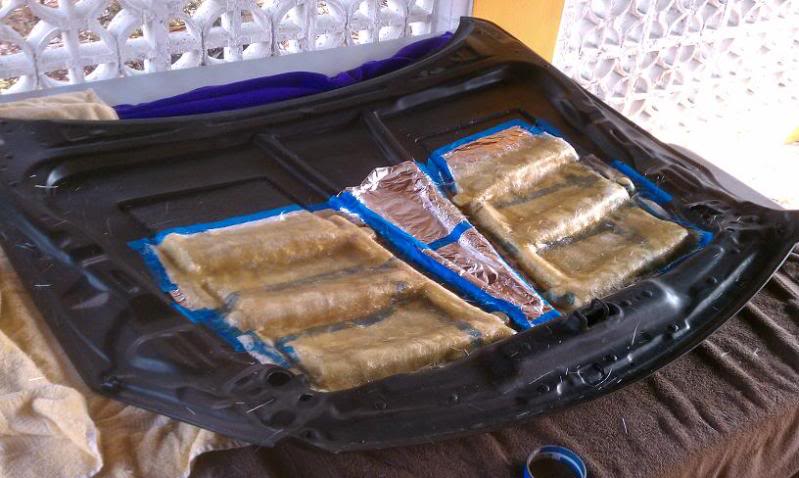
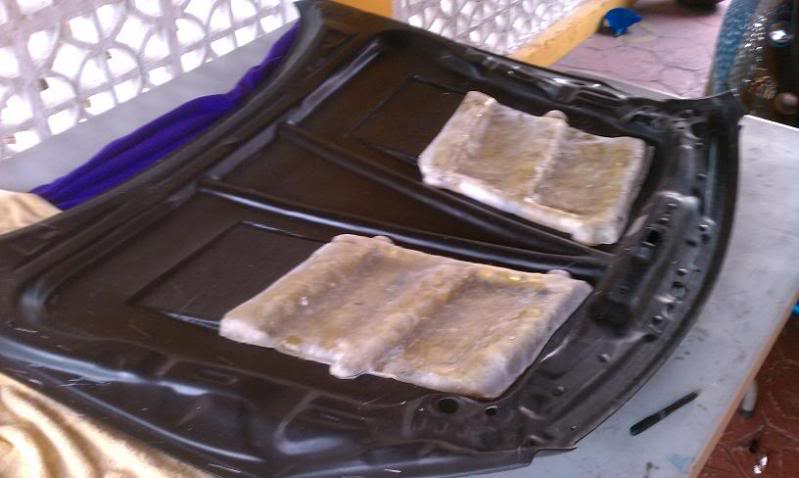
TEST FIT
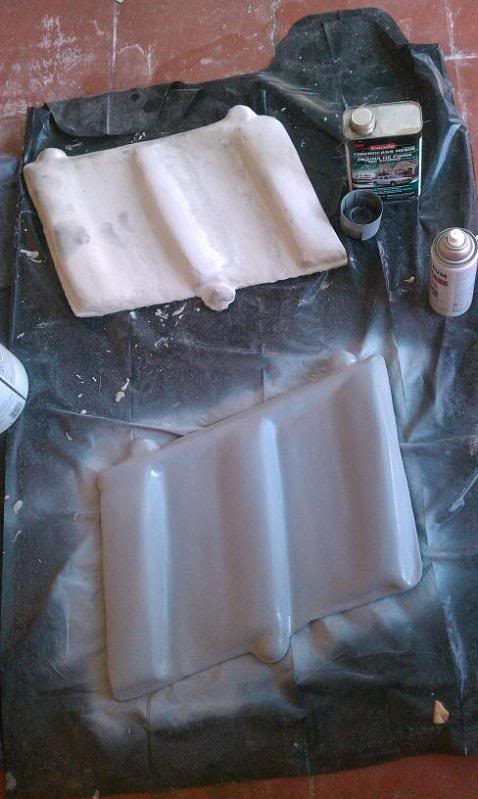
Sand down the molds to remove thick spots using 40 grit sandpaper.
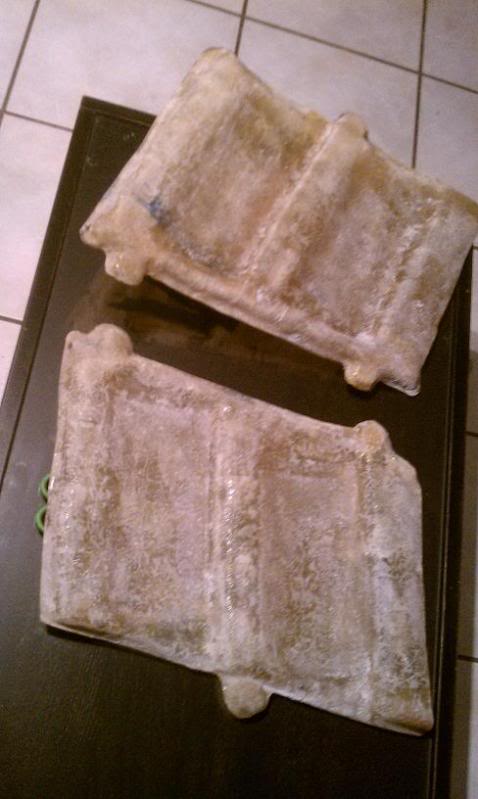
Now your ready for bondo. Spread the bondo over the entire mold making sure to cover it completely. (use the bondo hardener ratio on the label).
Here is a pic of one mold before sanding and another already sanded to 100 grit.
Once they are both sanded smooth you can begin priming..
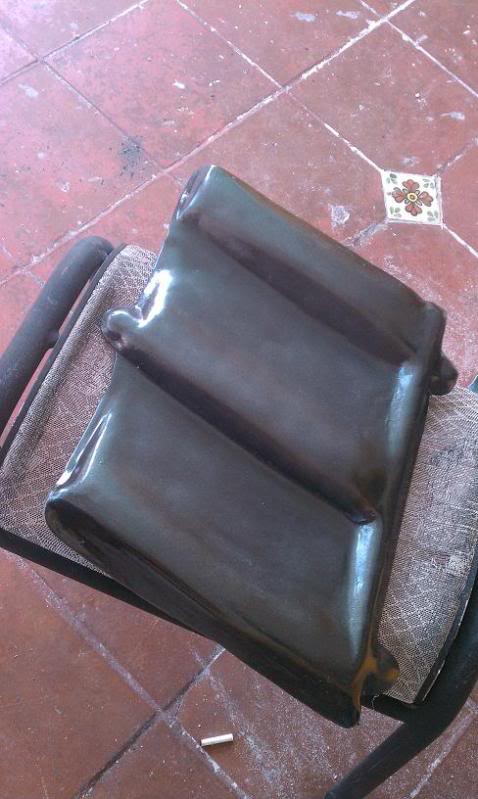
And painting...
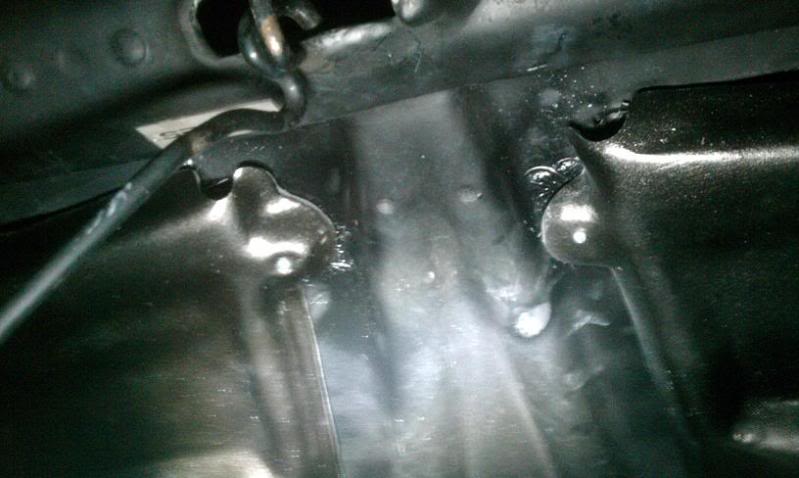
Next I filled the bottle caps with a fiberglass resin hardener mix. Once it dried i removed the caps leaving only the inside mold. Then i fiberglassed them under the hood in their corresponding locations to have a support to drill into. Sorry but no pics of this!
UPDATE: FORGOT TO ADD!!
Using a Dremel sanding tool cut out the "Water Drain Holes" toward the Lower/Center part of the rain guards.
This will let the water drain over the hood latch!!
Note The " Drain Holes"
Next just drill on your new rain guards and undrill to remove.
Ohhh.. And I polished the plenum .
Please be prepared for lots of work.
So I found a used upper plenum on craigslist and decided it would be a good project to polish it and switch it out with mine when I'm done. This equals no down time with the car so it was perfect. I slowly and painfully began the polishing process and realized that if I was going to keep the engine bay looking nice I would have to fabricate some sort or rain guard for my Siebon TS Hood.
To remove the hood you will need some help. Find a friend and remove the two bolts on both the drivers side and passenger side hinges.
Make sure you have some place SAFE to work on. I used a couple tables covered with old towels.
Once I had the hood off I scavenged up some old piping to use as a skeleton for my mold. Normally would have made this skeleton of wood but that would involve a lot of curved edges and routing.
Next I taped down the tubing. It would be great to hot glue them down but I couldn't find the hot glue gun.
Notice that I taped down some bottle caps to create a mold around. These will give me the depth to be able to drill them on.
Next I laid aluminum foil over the vents and tubing making sure that I taped the edges of the aluminum foil. This is important so that the resin doesn't get through.
When all the foil is laid and taped up you can begin mixing your fiberglass resin and hardener. (use the ratio recommended of resin and hardener) I cut out squares of fiberglass cloth and laid them overlapping each other. Use a cheap brush and dab the mixed resin Do Not use Painting movements. dab Dab until the cloth takes the shape of the underside of the hood.
Here's how it should look after two coats of fiberglass cloth...
After it fully dries you should be able to remove the mold and discard the aluminum foil tape and tubing.
These are both molds after I peeled off all the trash.
Use a dremel with a cutting wheel and trim all the excess fiberglass cloth.
TEST FIT
Sand down the molds to remove thick spots using 40 grit sandpaper.
Now your ready for bondo. Spread the bondo over the entire mold making sure to cover it completely. (use the bondo hardener ratio on the label).
Here is a pic of one mold before sanding and another already sanded to 100 grit.
Once they are both sanded smooth you can begin priming..
And painting...
Next I filled the bottle caps with a fiberglass resin hardener mix. Once it dried i removed the caps leaving only the inside mold. Then i fiberglassed them under the hood in their corresponding locations to have a support to drill into. Sorry but no pics of this!
UPDATE: FORGOT TO ADD!!
Using a Dremel sanding tool cut out the "Water Drain Holes" toward the Lower/Center part of the rain guards.
This will let the water drain over the hood latch!!
Note The " Drain Holes"
Next just drill on your new rain guards and undrill to remove.
Ohhh.. And I polished the plenum .
Last edited by amart014; Jun 20, 2011 at 10:36 PM.

Joined: Mar 2009
Posts: 18,299
Likes: 1,488
From: By the sea, Tx
G35 sedan w/ too much money in mods

Wow that's a lot of work but well laid out so even someone with no previous fiberglass experience could do this.
Good looking out!!
Good looking out!!


Registered User
Joined: May 2010
Posts: 918
Likes: 17
From: Orlando
Im surprised no ones done this before.. also surprised that aftermarket hoods let water into the engine bay, i would think of that as a big no no.. but i guess its form>function. even though its still functionable for keeping engin bay cool..
Trending Topics
Exellent work they look good, I am just wondering how you drain all of the water that will sit in the vent holes?


I just realized that i left that out. The water flows through the hood vents into the void left by the tubing it then flows through this sort of cannel until it reach the bottom of the rain guard. There I used a Dremel to carve out a hole so the water drains over the hood latch. Pics of the hole coming soon.
Last edited by amart014; Jun 20, 2011 at 10:37 PM.