
Installed the garmin GVN 53--pics!!


Thread Starter
|
Registered User
Joined: Jun 2008
Posts: 148
Likes: 1
Installed the garmin GVN 53--pics!!
First off--let me give a big thanks to forum member Mikaly for all his help in the install and a smooth transaction in purchasing the GPS from him. I am a poor installer of most mods on cars due to a lack of patience and knowledge, but his tips helped it all go much more smoothly.
I was interested in the GVN since my other G (the wife's G35) has nav and a backup camera stock and I had tech envy! I already had the backup camera installed so this was the missing piece of the puzzle.....
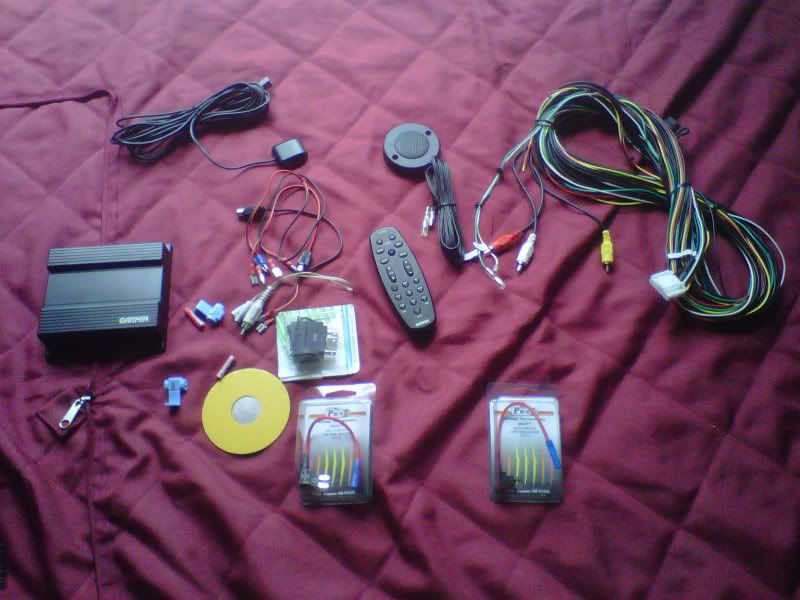
Here are the items after taking them out of the box..(sorry for the low quality cell phone pics....)
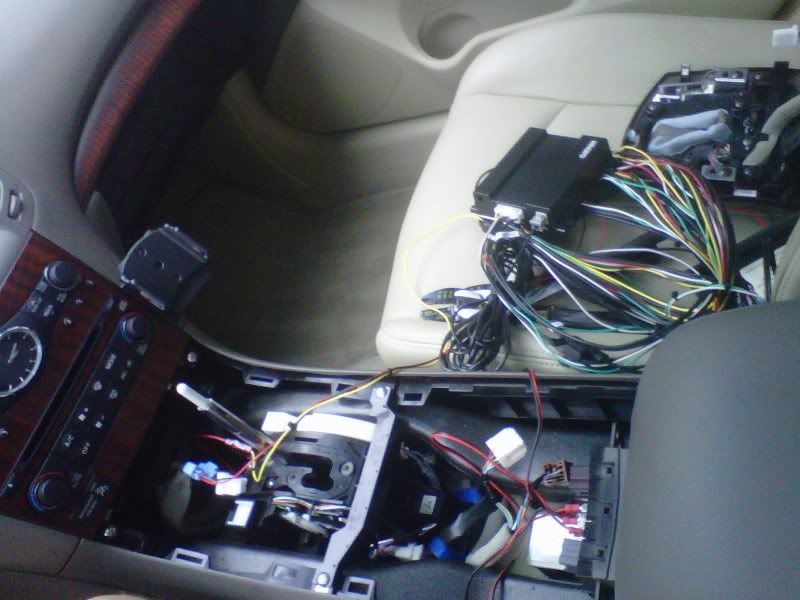
At this point of the install, I was pretty much in full panic mode I ended up changing the connection to the center console cigarette lighter by the way....:
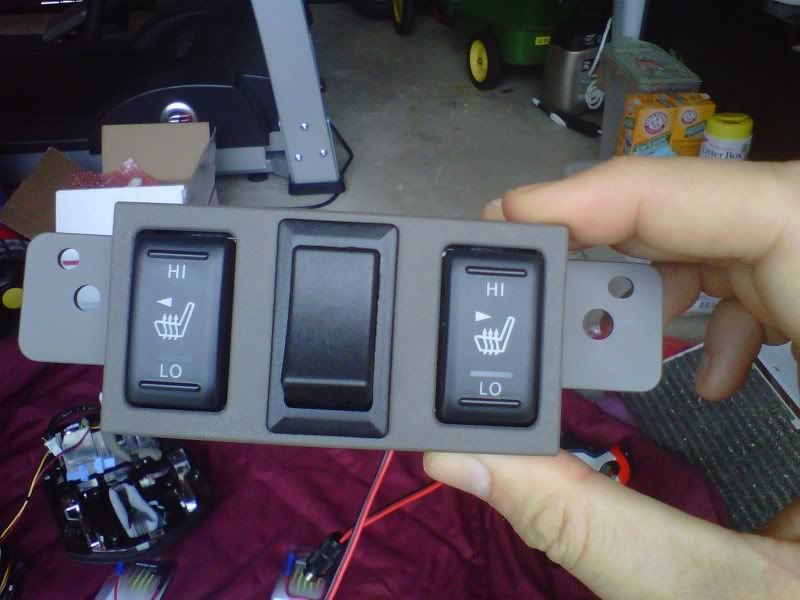
This is the switch for the nav/backup camera. I toggle it fwd (in aux mode) for the GPS, back for the backup camera. Works great!
Here is the mount under the glovebox area (velcro):
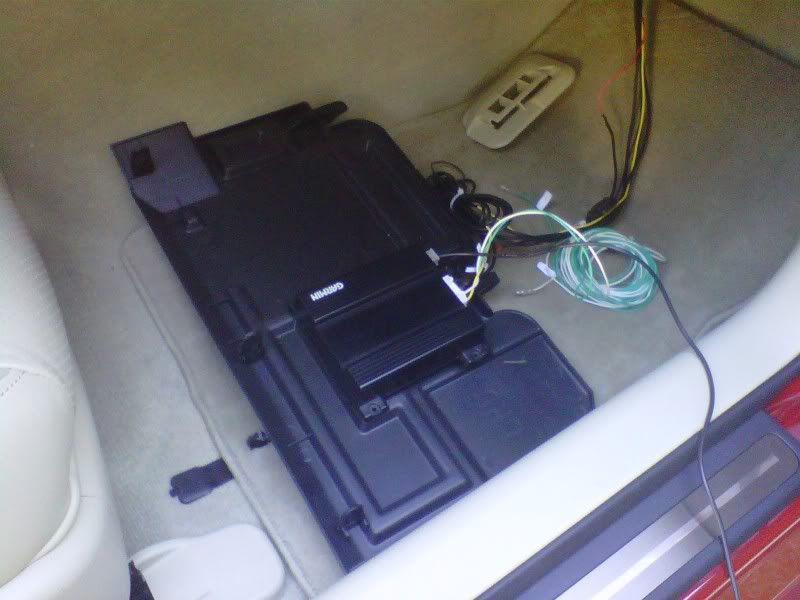
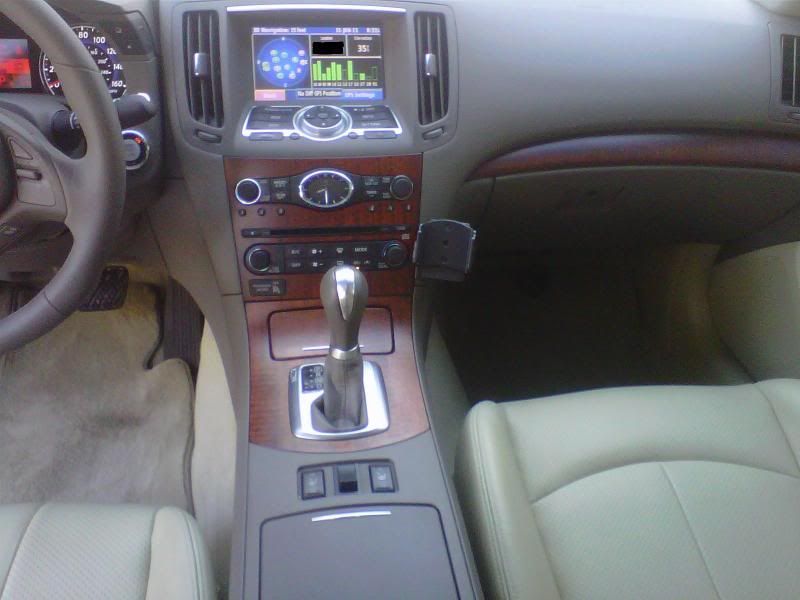
Here is a pic of the final install:
A brief review of the unit:
I like the fact that it is totally hidden from view and required no real permanent modification to the car. Everything can be easily undone prior to selling the vehicle. The remote works good, but I do miss having a touchscreen. I don't find it to be an issue driving around in aux most of the time since I connect my phone to the audio inputs and listen to pandora or mp3's via the phone. I also like having an SD card for easy map updates.
Here are the install procedures I used. If you use them for your car, it is at your own risk!:
All you are really doing is choosing a discrete location for the GVN-53, and essentially finding sources for power (constant, ignition, and ground).
1. Choose where you will mount the GVN-53 unit: trunk or under glovebox.
2. If glovebox, skip to step 5.
3. Take out side trim along passenger side door sills (the same way you routed your camera?)
4. Remove rear seat (there are two "clips" you pull out centered at each passenger's seat).
5. Route Garmin Wiring to GVN-53. Also route and consider where you will put the antenna (mine just sat on the rear deck behind a headrest).
6. Remove underside panel of glovebox (not the glovebox itself).
7. Remove shiftknob panel.
8. Remove center console (the one with the heated switches).
9. Remove center heated switch panel (two phillips screws)
10. Remove central switch cover.
11. Install DPDT switch (check below for wiring instructions).
12. Use wiretap to cigarette lighter POSITIVE (or accessory port) and connect to GARMIN-RED wire (this will be ignition 12v).
13. Use wiretap to cigarette lighter NEGATIVE (or accessory port) and connect to GARMIN-BLACK wire (this will be ground).
14. In the driver's side footwell, look for fuse panel. Use fusetap to tap into "ignition" (10A). This will be your constant power source.
15. From fusetap, route wire towards glovebox and attach to GARMIN-YELLOW wire.
16. Look for a place you want to place your Garmin Speaker. I velcro-ed it onto the glovebox panel. Connect GARMIN-GREEN and GARMIN-WHITE to Garmin Speaker.
VIDEO SWITCH:
Install the switch into the panel. It doesn't matter which direction faces forward. It has six pins. Let's refer to them like so:
FRONT OF CAR
1 2
3 4
5 6
REAR OF CAR
You can think of the switch as a Y-splitter.
3&4 are the "shared" video
1&2 toggles video input when the switch is toggled towards the rear of car
5&6 toggles video input when the switch is toggled towards the front of car
Let's keep 1, 3, 5 POSitive (red) and 2,4,6 GND (black)
You should have two female RCA plugs and one male RCA plug (with an additional extension I recommend you use).
1. Connect [FEMALE-RCA#1 RED] wire into SWITCH_1
2. Connect [FEMALE-RCA#1 BLACK] wire into SWITCH_2
3. Connect REAR-CAMERA RCA into [FEMALE-RCA#1]
4. Connect [FEMALE-RCA#2 RED] wire into SWITCH_5
5. Connect [FEMALE-RCA#2 BLACK] wire into SWITCH_6
6. Connect GVN-53 RCA (Yellow) into [FEMALE-RCA#2]
7. Connect [MALE-RCA#1 RED] wire into SWITCH_3
8. Connect [MALE-RCA#1 BLACK] wire into SWITCH_4
9. Connect [MALE-RCA#1] into center console's AUX video input (through the hole you drilled in your camera install).
I was interested in the GVN since my other G (the wife's G35) has nav and a backup camera stock and I had tech envy! I already had the backup camera installed so this was the missing piece of the puzzle.....
Here are the items after taking them out of the box..(sorry for the low quality cell phone pics....)
At this point of the install, I was pretty much in full panic mode
I ended up changing the connection to the center console cigarette lighter by the way....:This is the switch for the nav/backup camera. I toggle it fwd (in aux mode) for the GPS, back for the backup camera. Works great!
Here is the mount under the glovebox area (velcro):
Here is a pic of the final install:
A brief review of the unit:
I like the fact that it is totally hidden from view and required no real permanent modification to the car. Everything can be easily undone prior to selling the vehicle. The remote works good, but I do miss having a touchscreen. I don't find it to be an issue driving around in aux most of the time since I connect my phone to the audio inputs and listen to pandora or mp3's via the phone. I also like having an SD card for easy map updates.
Here are the install procedures I used. If you use them for your car, it is at your own risk!:
All you are really doing is choosing a discrete location for the GVN-53, and essentially finding sources for power (constant, ignition, and ground).
1. Choose where you will mount the GVN-53 unit: trunk or under glovebox.
2. If glovebox, skip to step 5.
3. Take out side trim along passenger side door sills (the same way you routed your camera?)
4. Remove rear seat (there are two "clips" you pull out centered at each passenger's seat).
5. Route Garmin Wiring to GVN-53. Also route and consider where you will put the antenna (mine just sat on the rear deck behind a headrest).
6. Remove underside panel of glovebox (not the glovebox itself).
7. Remove shiftknob panel.
8. Remove center console (the one with the heated switches).
9. Remove center heated switch panel (two phillips screws)
10. Remove central switch cover.
11. Install DPDT switch (check below for wiring instructions).
12. Use wiretap to cigarette lighter POSITIVE (or accessory port) and connect to GARMIN-RED wire (this will be ignition 12v).
13. Use wiretap to cigarette lighter NEGATIVE (or accessory port) and connect to GARMIN-BLACK wire (this will be ground).
14. In the driver's side footwell, look for fuse panel. Use fusetap to tap into "ignition" (10A). This will be your constant power source.
15. From fusetap, route wire towards glovebox and attach to GARMIN-YELLOW wire.
16. Look for a place you want to place your Garmin Speaker. I velcro-ed it onto the glovebox panel. Connect GARMIN-GREEN and GARMIN-WHITE to Garmin Speaker.
VIDEO SWITCH:
Install the switch into the panel. It doesn't matter which direction faces forward. It has six pins. Let's refer to them like so:
FRONT OF CAR
1 2
3 4
5 6
REAR OF CAR
You can think of the switch as a Y-splitter.
3&4 are the "shared" video
1&2 toggles video input when the switch is toggled towards the rear of car
5&6 toggles video input when the switch is toggled towards the front of car
Let's keep 1, 3, 5 POSitive (red) and 2,4,6 GND (black)
You should have two female RCA plugs and one male RCA plug (with an additional extension I recommend you use).
1. Connect [FEMALE-RCA#1 RED] wire into SWITCH_1
2. Connect [FEMALE-RCA#1 BLACK] wire into SWITCH_2
3. Connect REAR-CAMERA RCA into [FEMALE-RCA#1]
4. Connect [FEMALE-RCA#2 RED] wire into SWITCH_5
5. Connect [FEMALE-RCA#2 BLACK] wire into SWITCH_6
6. Connect GVN-53 RCA (Yellow) into [FEMALE-RCA#2]
7. Connect [MALE-RCA#1 RED] wire into SWITCH_3
8. Connect [MALE-RCA#1 BLACK] wire into SWITCH_4
9. Connect [MALE-RCA#1] into center console's AUX video input (through the hole you drilled in your camera install).

Registered User
Joined: Mar 2010
Posts: 4
Likes: 0
From: San Diego, California
I was wondering how did you remove the shiftknob panel? Would you mind showing how this was done? I would like to quiet the creaking noise behind the center console trim and shiftknob panel by seeing where I can place foam, but I do not know how to remove the trims/panels.
Thanks!
Thanks!

Registered User
Joined: Jan 2007
Posts: 842
Likes: 50
From: Dutchess County, NY
Specialized - there is a DIY for that in the DIY section. you'll find alot of other great info there too.
red00lght - excellent work!! i still think garmin has the best product out there. i'm eagerly waiting for their next program to come out this year!
and also, props for mounting it in the panel below the glovebox. i had wanted to put my carputer there but it was too thick. the odd thing is that i think it's thinner than the GVN so maybe i looked at it wrong. ill definitely be looking again this weekend!
- Bob


Registered User
Joined: Dec 2012
Posts: 1
Likes: 0
Wonderfull !!
I have two questions .. 1st please give me a quick hint how to update the map and if you have links for the newest map plzzz post them . The 2nd Q is can i install IGO maps instead of garmin on this device ?
Am about to buy a g35 2008 gcc spec but without builtin gps , it has gvn 53
Thanks
I have two questions .. 1st please give me a quick hint how to update the map and if you have links for the newest map plzzz post them . The 2nd Q is can i install IGO maps instead of garmin on this device ?
Am about to buy a g35 2008 gcc spec but without builtin gps , it has gvn 53
Thanks

Thread
Thread Starter
Forum
Replies
Last Post