07 g35x, solved gas smell in interior at idle problem
#16
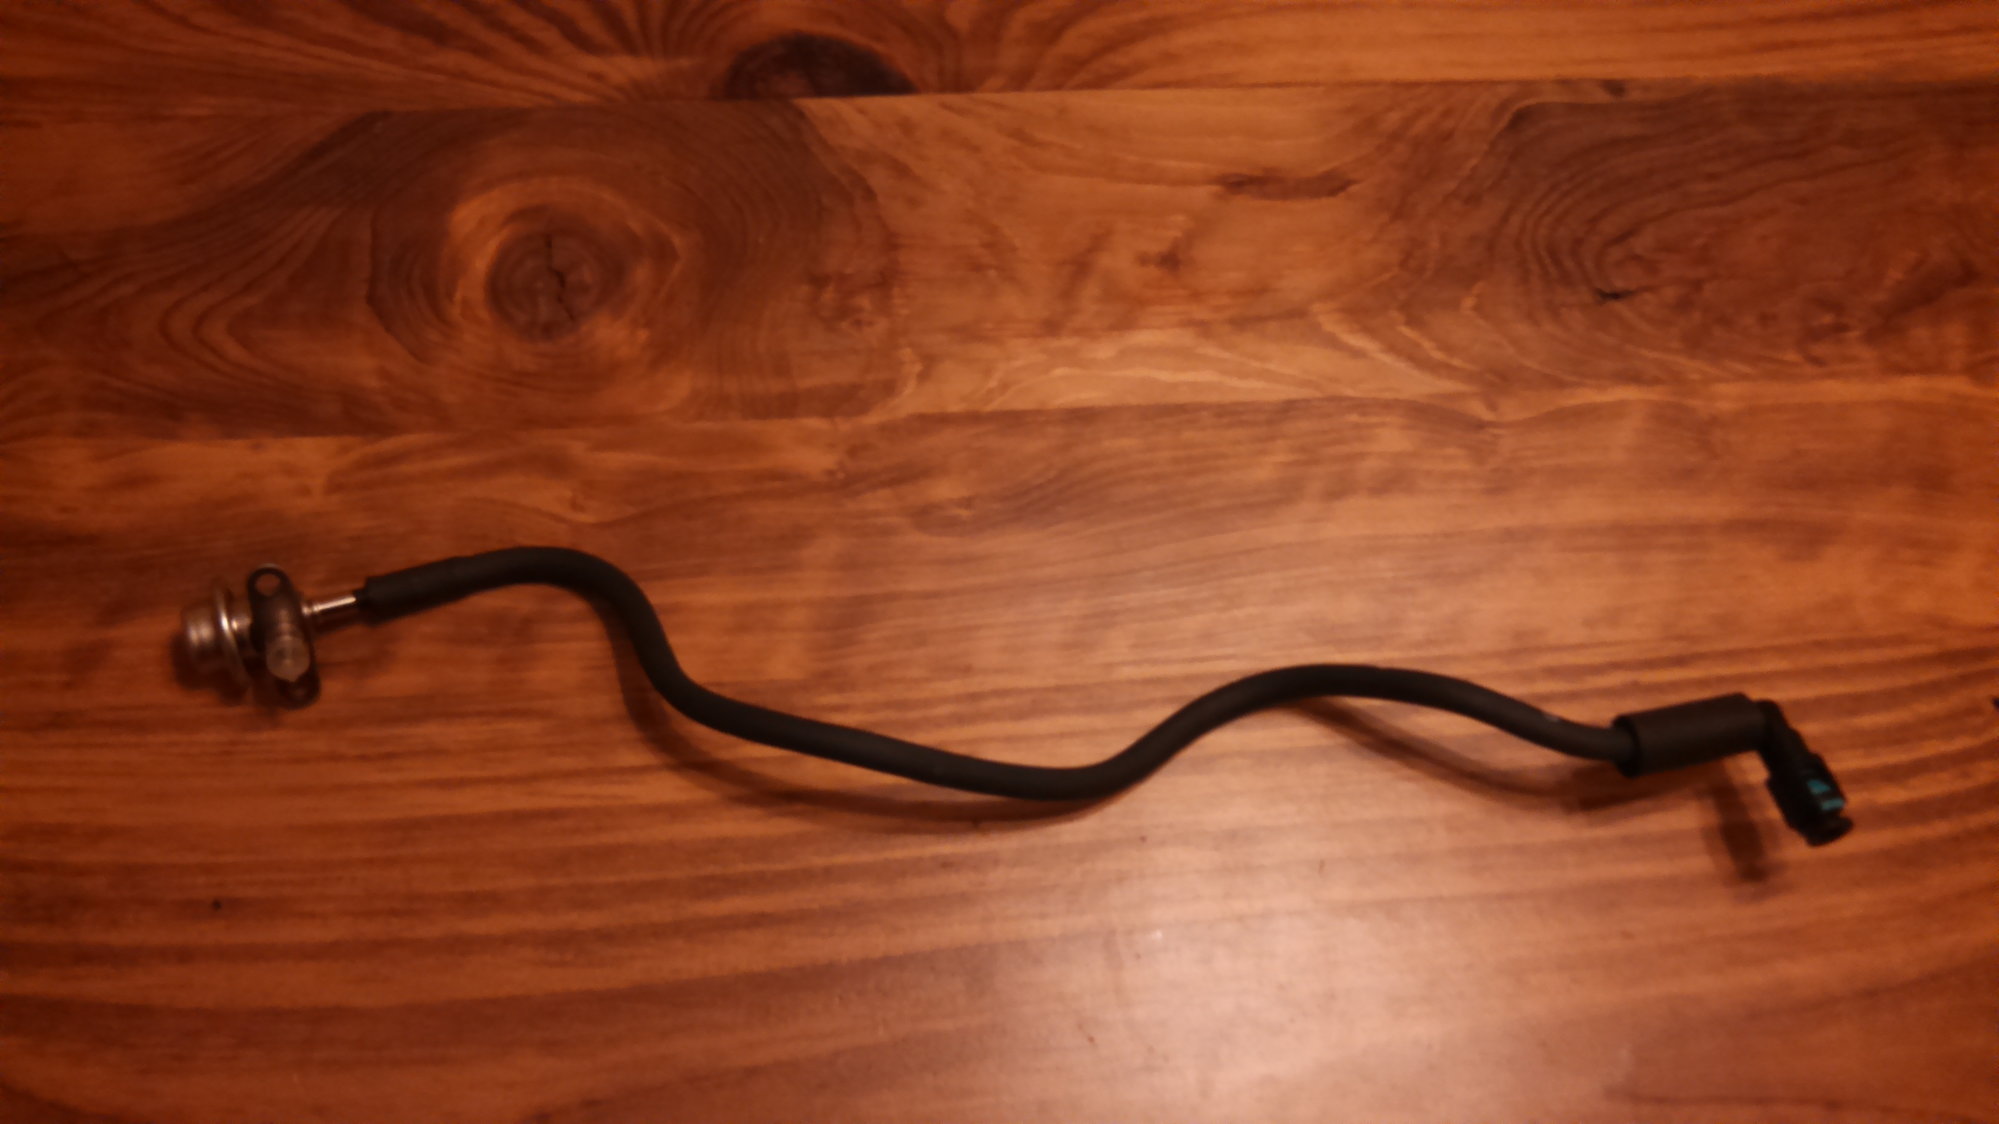
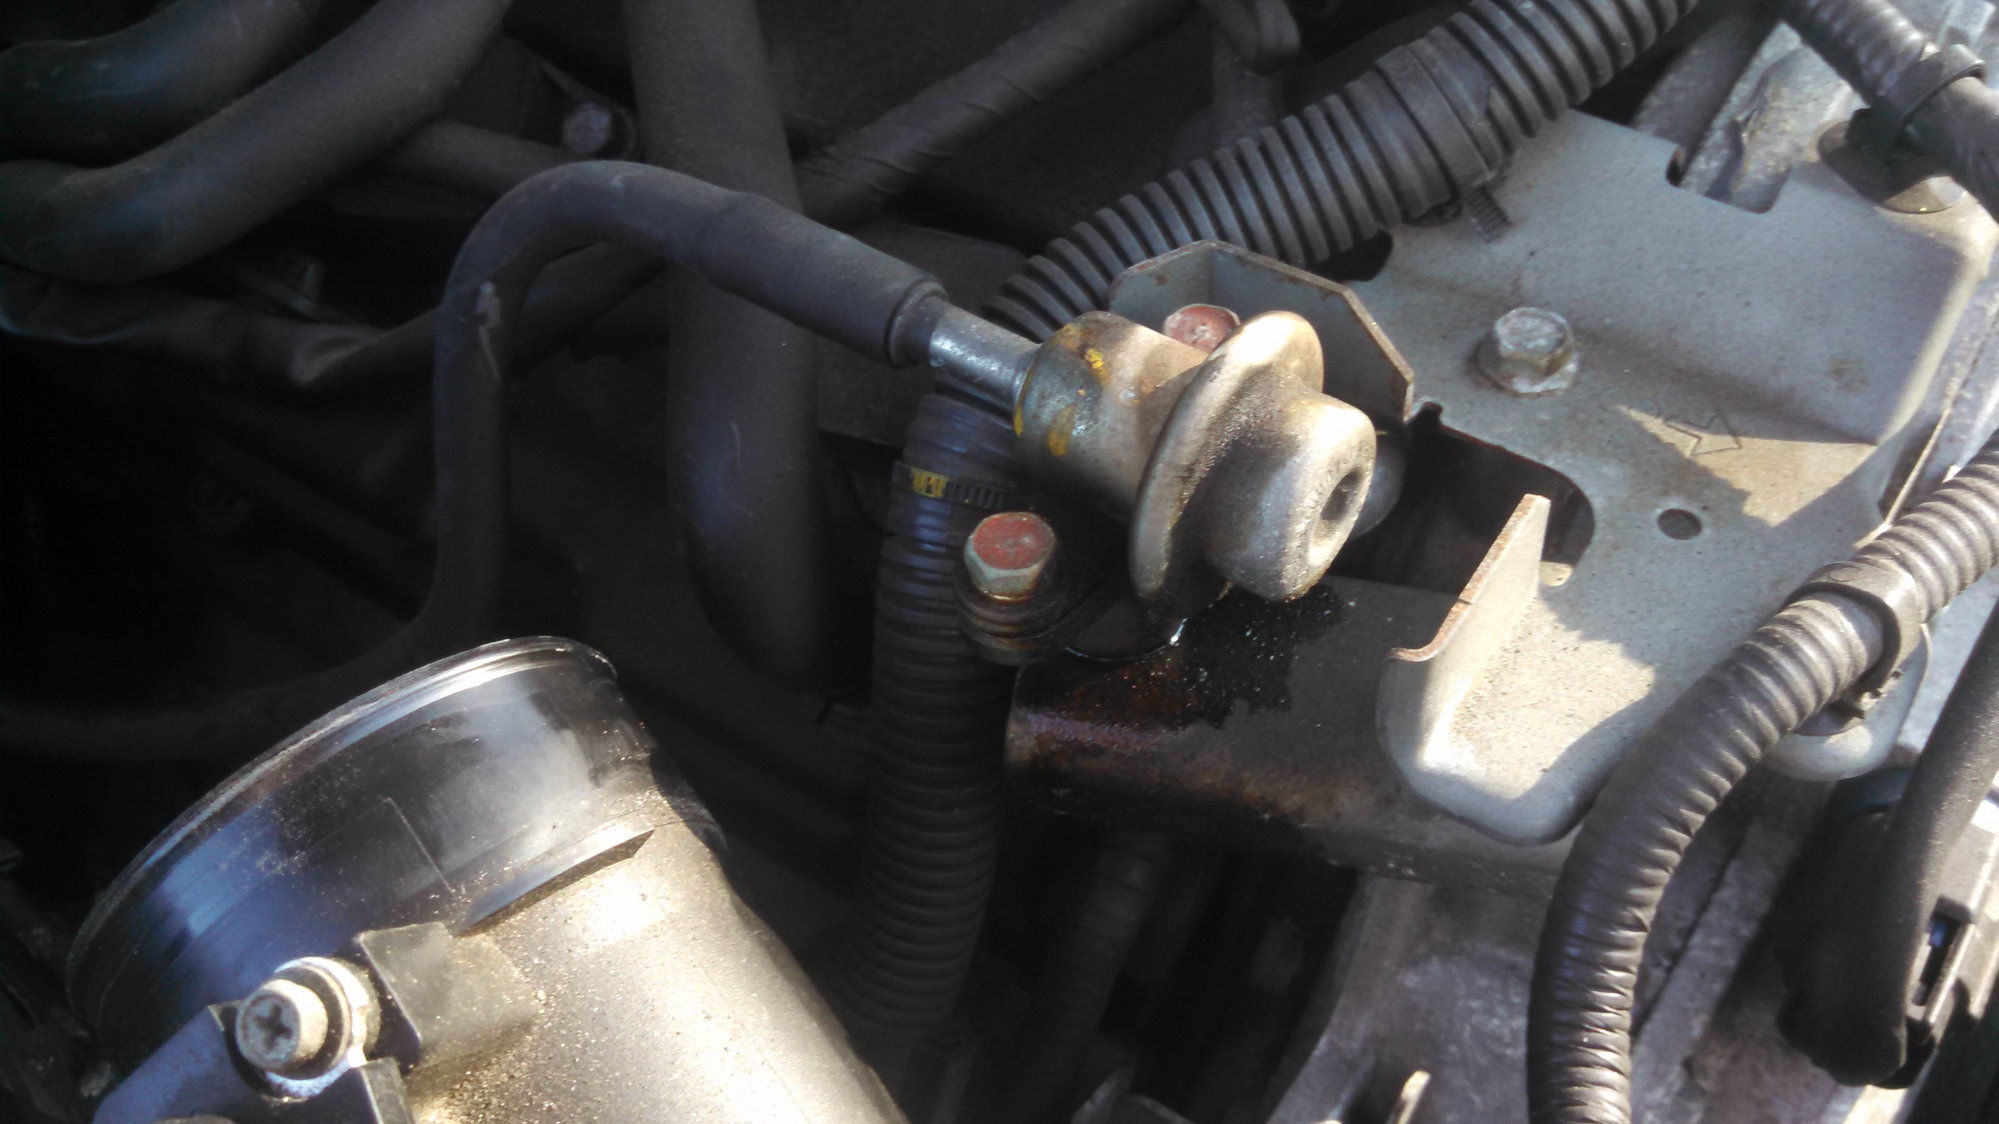
Welp, I finally got under the hood to replace my fuel damper assembly last night and it turns out I got the wrong part. The stiff hose is too long and the connector at the end has a 90 degree elbow on it whereas the one on there now is a straight connector. Also, Frankenstein, I didn't see the things you mentioned (which, btw, I very much appreciated!). I wonder if we're talking about the same damper. Mine is on the front, passenger side and runs down from the "hat"-looking part at about a 45 degree angle. I couldn't quite get my hand down in there to release the clip, which was not green nor cylindrical, nor 2" long.
Also, my G is a 2007 assembled in August of 2007.
Thanks!
Also, my G is a 2007 assembled in August of 2007.
Thanks!
edit: also, how can you tell if it is the fuel damper itself and not just the O-Ring? Part number 1661810V10, Reference number 16618P from the Sewell part diagram. I wouldn't want to spend $70 to fix a $1 problem.
Also, according to orderinfinitiparts.com P/N 22675JK20A is an old P/N and has been superceded by 22675JK20B.
Last edited by Fred_in_CT; 02-20-2014 at 05:18 PM.
#17
I did, indeed, order 22675JK20B.
One strange thing I noticed is that after I took off the damper, played around with the O-ring, and reassembled it, the gas smell is gone! My guess is that I do just have to replace the O-ring. I think with the ridiculously cold winter we had that the darn thing just shrank out of spec but after messing with it the other day and now that temps have moderated a bit, it may be ok now. But, it probably won't hurt to replace it anyway!
One strange thing I noticed is that after I took off the damper, played around with the O-ring, and reassembled it, the gas smell is gone! My guess is that I do just have to replace the O-ring. I think with the ridiculously cold winter we had that the darn thing just shrank out of spec but after messing with it the other day and now that temps have moderated a bit, it may be ok now. But, it probably won't hurt to replace it anyway!
#18
I was able to do the swap without getting under the car at all. Here are a few things I learned along the way.
1. I took out the passenger side air box. this was super easy and gave me a ton of extra room to work.
2. between you and the end of the damper assy is a metal bracket that obstructs your view. I removed this, but in hindsight I don't think it was necessary but I had no idea how the assy was secured to the fuel line back there.
3. There is a green clip securing the assy to the fuel line. It is cylindrical and maybe 2" long, and open on one side. I spent quite a bit of time trying to poke around for some sort of release or something, but the whole thing just comes off if you pull away from the open side. If you look at the clip from the end, it kind of looks like a C <- open side.
#19
I am in the same situation. After noticing a fuel leak and tracking it down to the fuel damper discussed above, I tinkered around to see if I would be able to replace it myself. Looking from under the car, there is almost no way to reach the green clip. From above, I can't seem to find a good way to reach the bottom of the new assembly with enough visibility left over to see what I am doing. A little more in depth tutorial would be greatly appreciated.
#20
I am in the same situation. After noticing a fuel leak and tracking it down to the fuel damper discussed above, I tinkered around to see if I would be able to replace it myself. Looking from under the car, there is almost no way to reach the green clip. From above, I can't seem to find a good way to reach the bottom of the new assembly with enough visibility left over to see what I am doing. A little more in depth tutorial would be greatly appreciated.
and used like this:
http://www.autozone.com/repairguides...96b43f803815e6
I suspect there are less expensive knock off brand tools out there. Harbor freight probably sells one.
The following users liked this post:
LogicSays (01-11-2015)
#21
I think the service manual refers to using a quick release fuel line disconnect tool like: # J-45488
and used like this:
http://www.autozone.com/repairguides...96b43f803815e6
I suspect there are less expensive knock off brand tools out there. Harbor freight probably sells one.
and used like this:
http://www.autozone.com/repairguides...96b43f803815e6
I suspect there are less expensive knock off brand tools out there. Harbor freight probably sells one.
#22
#23
I did, indeed, order 22675JK20B.
One strange thing I noticed is that after I took off the damper, played around with the O-ring, and reassembled it, the gas smell is gone! My guess is that I do just have to replace the O-ring. I think with the ridiculously cold winter we had that the darn thing just shrank out of spec but after messing with it the other day and now that temps have moderated a bit, it may be ok now. But, it probably won't hurt to replace it anyway!
One strange thing I noticed is that after I took off the damper, played around with the O-ring, and reassembled it, the gas smell is gone! My guess is that I do just have to replace the O-ring. I think with the ridiculously cold winter we had that the darn thing just shrank out of spec but after messing with it the other day and now that temps have moderated a bit, it may be ok now. But, it probably won't hurt to replace it anyway!
#24

O-Ring is item 16618P, part# 1661810V10

Part connects via green quick connect on one side, and two hex bolts on the other side. O-ring is on the left hand side of this picture, underneath a little plastic protector.

Picture of the leak in action. I replaced the whole assembly, not just the O-Ring. I couldn't manage to disconnect the green quick disconnect, so I paid somebody to replace the fuel damper for me. Gas smell issue has been fixed for me.
#25

O-Ring is item 16618P, part# 1661810V10

Part connects via green quick connect on one side, and two hex bolts on the other side. O-ring is on the left hand side of this picture, underneath a little plastic protector.

Picture of the leak in action. I replaced the whole assembly, not just the O-Ring. I couldn't manage to disconnect the green quick disconnect, so I paid somebody to replace the fuel damper for me. Gas smell issue has been fixed for me.
#26
The O-Ring is not the same as the diaphragm internal to the damper itself. I do not think you will be able to take apart the actual damper without damaging it. If the source of the leak is coming from inside the fuel damper itself, due to a damaged diaphragm, I think your only option is to replace the whole assembly.
#28
I am not a qualified mechanic, so at this point I am a little wary about giving any suggestions. But, if you disconnect the fuse for the fuel pump and run the engine it should run all the fuel out of the lines.
#29
Depressurization procedure is covered here: http://www.nicoclub.com/FSM/G35/Sedan/2008/EC.pdf (refer to page EC-550)
The entire service manual is here:
for '07: http://www.nicoclub.com/FSM/G35/Sedan/2007_G35_Sedan/
for '08: http://www.nicoclub.com/FSM/G35/Sedan/2008/
They are basically identical between the two years though.
The following users liked this post:
Fred_in_CT (01-03-2016)


