
RHD Battery Cover


Joined: Apr 2005
Posts: 11,717
Likes: 3
From: S.F. Bay Area
RHD Battery Cover
First and foremost . . . Props to Chad at chad@infinitispecialists for offering such an excellent price on the RHD Battery Covers. His service is second to none. This was my 2nd time dealing with Chad and it will not be the last.
For those that have asked for a DIY on this RHD Battery Cover, I could not post it in the DIY section. So, here it is.
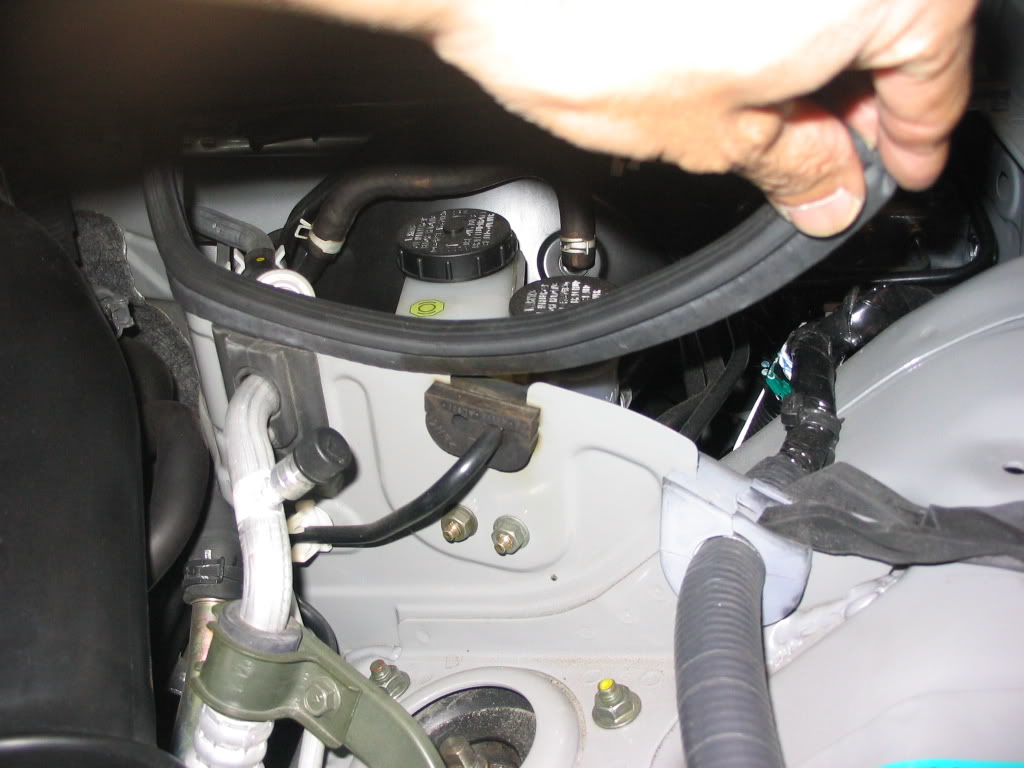
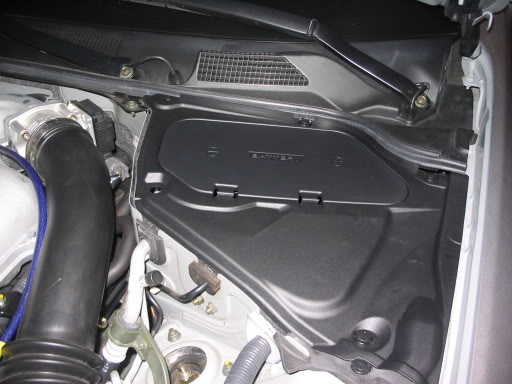
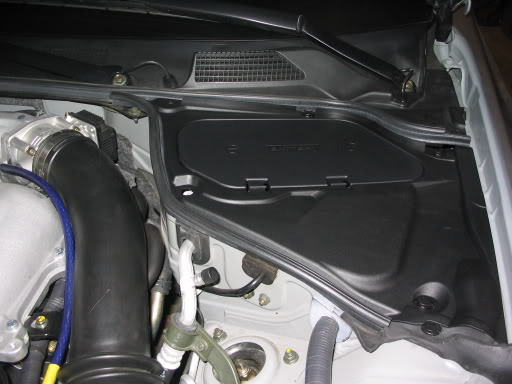
Remove the existing piece of molding, which is mounted onto the brake fluid compartment section of the firewall wall.
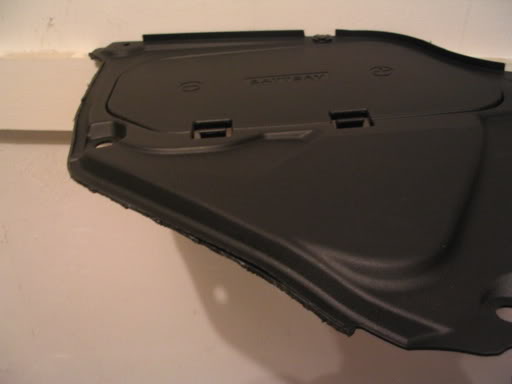
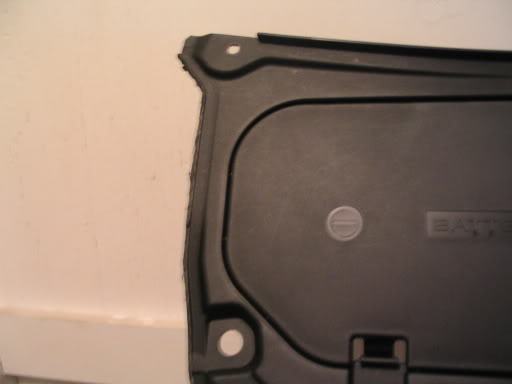
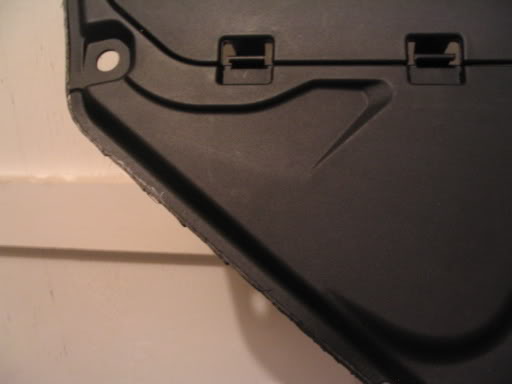
Trim the 1/4" rib on the left completely off, as per the above 3 pics. I trimmed the said right at the inside edge. More trimming might be required, but this worked for me. Sorry, I didn't plan on posting a DIY . . . So, I have no before trimming the cover pics. However, if you have the battery cover in hand, the pics should make plenty of sense.
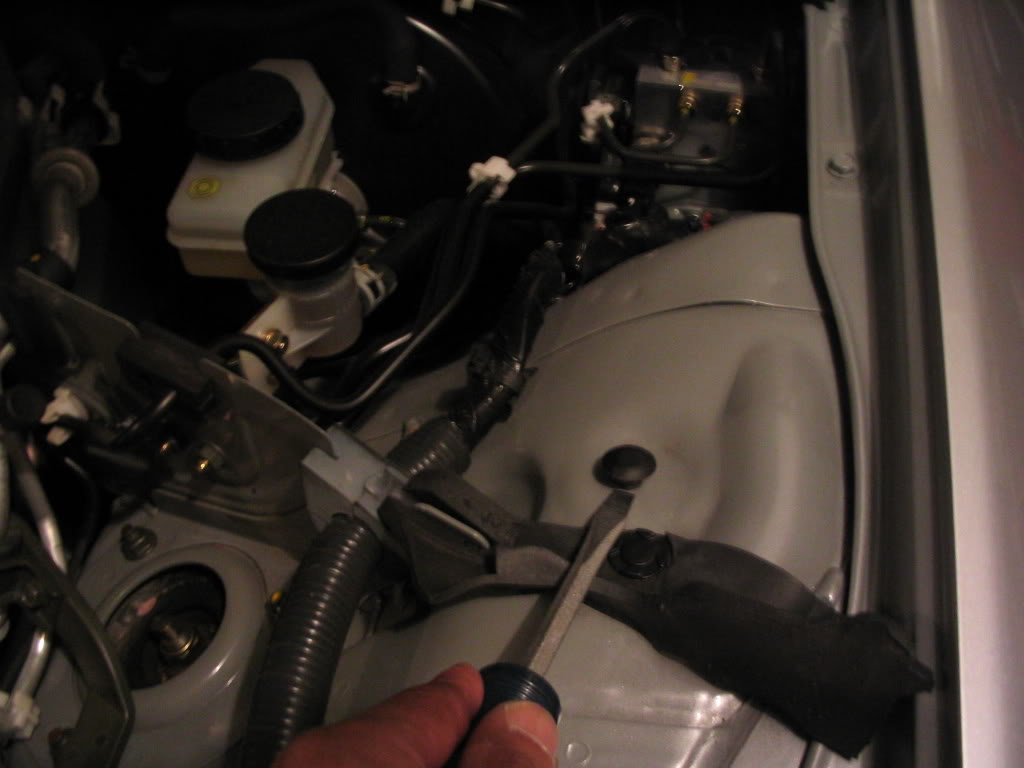
Remove the plastic plug. I used a flathead screwdriver with a small piece of electrical tape wrapped to the tip.
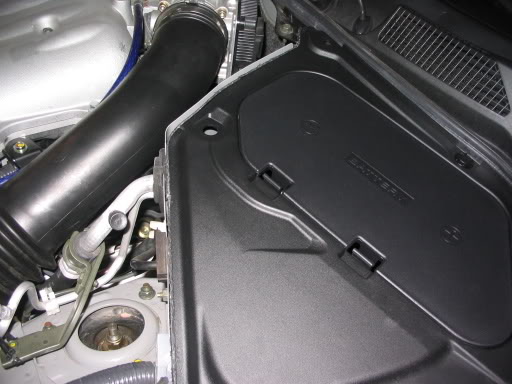
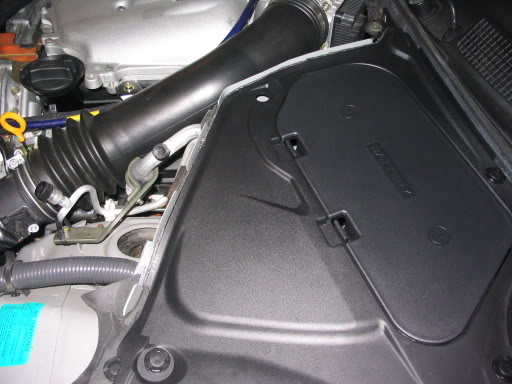
The above 3 pics are the trimmed battery cover fitted in the brake fluid compartment. The cover required no additional trimming. Notice that the left side of the cover sits on top of the 2 bushings, making for a very secure placement. I installed 1 of the provided plastics plugs into the lower right to secure the cover. I installed 2 additional plastic plugs at the upper right and top center. The last 2 plugs are merely for looks, as they have no receiving hole beneath them. I may drill a hole at the upper left corner and add a bracket to the middle left for added support. However, as you will see, this is not neccessary . . . The cover is quite sturdy and secure.
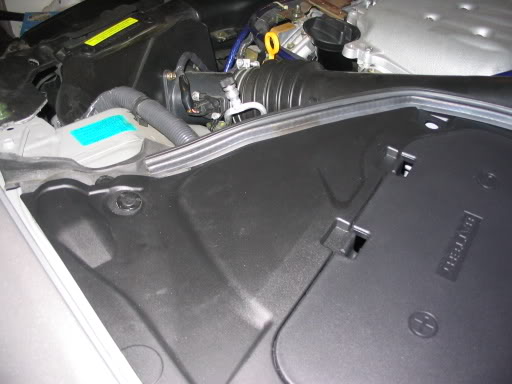
Replace the piece of rubber molding and you are done.

For those that have asked for a DIY on this RHD Battery Cover, I could not post it in the DIY section. So, here it is.
Remove the existing piece of molding, which is mounted onto the brake fluid compartment section of the firewall wall.
Trim the 1/4" rib on the left completely off, as per the above 3 pics. I trimmed the said right at the inside edge. More trimming might be required, but this worked for me. Sorry, I didn't plan on posting a DIY . . . So, I have no before trimming the cover pics. However, if you have the battery cover in hand, the pics should make plenty of sense.
Remove the plastic plug. I used a flathead screwdriver with a small piece of electrical tape wrapped to the tip.
The above 3 pics are the trimmed battery cover fitted in the brake fluid compartment. The cover required no additional trimming. Notice that the left side of the cover sits on top of the 2 bushings, making for a very secure placement. I installed 1 of the provided plastics plugs into the lower right to secure the cover. I installed 2 additional plastic plugs at the upper right and top center. The last 2 plugs are merely for looks, as they have no receiving hole beneath them. I may drill a hole at the upper left corner and add a bracket to the middle left for added support. However, as you will see, this is not neccessary . . . The cover is quite sturdy and secure.
Replace the piece of rubber molding and you are done.


Originally Posted by DaVeeD
NICE DIY... BTW its the left hand battery cover
 it's JDM RHD battery cover
 and this will help me with the installation of mine... im going to hit up Chad
thanks for the DIY 
Joined: Apr 2005
Posts: 11,717
Likes: 3
From: S.F. Bay Area
Giri,
I used a pair aviator snips. These are normally used for cutting sheetmetal. Depending on the direction, which you are cutting from, you can either use a pair of reds or greens. Wiss makes the best ones.
Everyone is quite welcome . . . And David (Fini) . . . Thank you for the heads up on the RHD Battery Cover.
ok thanks andy. i'll have to run over to lowe's and pick up a set of those snips. hopefully everything will be waiting for me after i finish this conf in SF and head back home thursday
Trending Topics
Originally Posted by andy2434
Giri,
I used a pair aviator snips. These are normally used for cutting sheetmetal. Depending on the direction, which you are cutting from, you can either use a pair of reds or greens. Wiss makes the best ones.
Everyone is quite welcome . . . And David (Fini) . . . Thank you for the heads up on the RHD Battery Cover.
I used a pair aviator snips. These are normally used for cutting sheetmetal. Depending on the direction, which you are cutting from, you can either use a pair of reds or greens. Wiss makes the best ones.
Everyone is quite welcome . . . And David (Fini) . . . Thank you for the heads up on the RHD Battery Cover.
Anyone san jose have a pair of aviator snips?

And here is mine:
https://g35driver.com/forums/showthr...=1#post1164523
I wish I could have figured out how to seperate the pictures with the instructions like you did.
https://g35driver.com/forums/showthr...=1#post1164523
I wish I could have figured out how to seperate the pictures with the instructions like you did.
Originally Posted by absolutg
what did you use to trim the cover?
Joined: Apr 2005
Posts: 11,717
Likes: 3
From: S.F. Bay Area
Originally Posted by Texasscout
I used a razor knife and traced the line several times and it just fell off. It left a clean edge. I cut it leaving the upright lip that follows the compartment. I then pushed them together and pushed the weather stripping down over both of them. It holds pretty well.


Originally Posted by DaVeeD
NICE DIY... BTW its the left hand battery cover
BTW - for those interested, I came up with a very stealth OEM look bracket for the firewall side of the cover - the cover piece itself has no connector to the firewall area.
It's simply the white bracket that the pin-clip snaps into - same one found on the curb side battery cover - its the clamp on the inside of the OEM cover that has two nipple clips through the inside of your engine compartment. Just look at your existing battery cover and locate the pin clip on the inside towards the engine. That�s the clamp you want to get from your local dealer service department (about $2 I think). Simply clip off the two nipples on the side (you can keep them but you don�t need them) - then use a dremmel (sp?), or a small rat tail file, or even a drill bit to etch a small curved opening at the bottom of the clamp (to create a notch slightly larger than the brake lines running along the firewall - this is where you are going to place the bracket. The original length is perfect fit to rest on the lines - then simply install your cover as indicating in Andy�s DIY and insert the pin clip. There is no tension or pressure on the lines, it will not cause any harm.
Now you have an OEM look/fit that is functional. The cover is perfectly secure in all areas around the edges. Hope this made sense to everyone... Pics are attached.
Last edited by OCG35; May 22, 2006 at 12:00 AM.
