

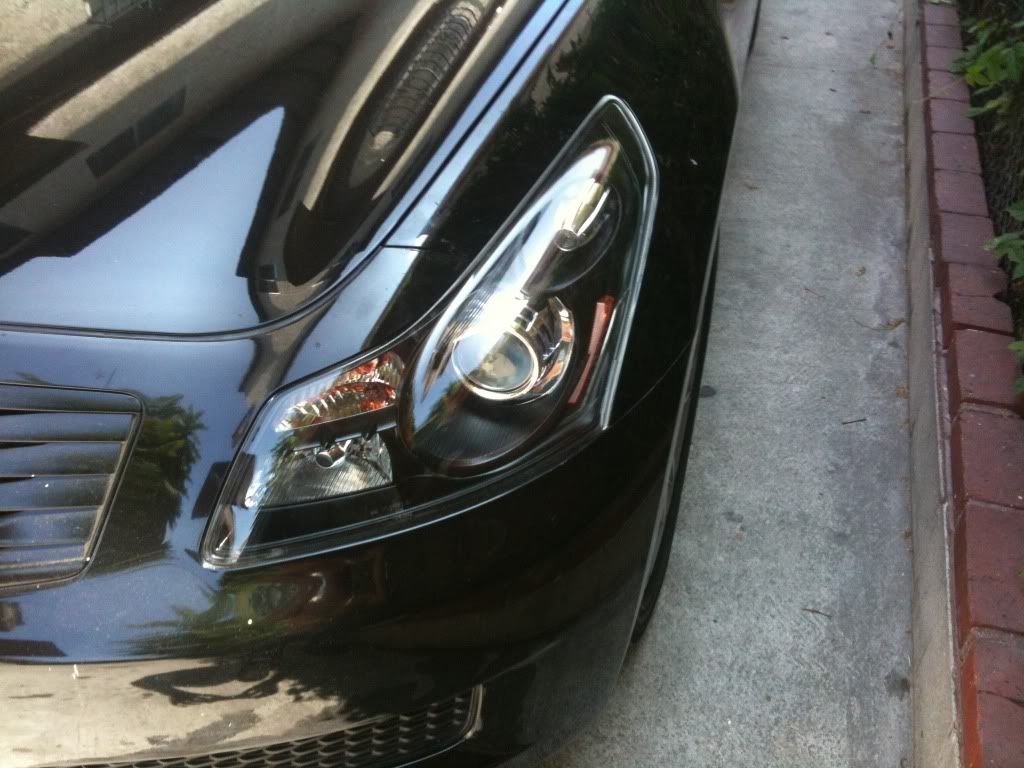
First take out the front bumper, follow by the headlights.


Gutted Head Light. Not all wires come out, but get all the bulbs out. In the Oven at 240 around 11min

Get the bezels and follow the painting procedure.(sanding, primer, paint, clear)

Tomorrow I post the final results. I am just waiting for the paint to cure to put them back in the oven. (Who wants their done in SoCal)
Gutted Head Light. Not all wires come out, but get all the bulbs out. In the Oven at 240 around 11min
Get the bezels and follow the painting procedure.(sanding, primer, paint, clear)
Tomorrow I post the final results. I am just waiting for the paint to cure to put them back in the oven. (Who wants their done in SoCal)


Registered User
so you took all the bulbs out only, the wires remained in the light right?
So how did you put them together again? How did you melt the silicone???
So how did you put them together again? How did you melt the silicone???


Quote:
So how did you put them together again? How did you melt the silicone???
The wires holding the fog light bulb and signal bulb come out, but there some wires that don't, you will know once you are unscrewing everything. To melt the silicone just put it in the oven at 240 degrees for about 10min. Just keep checking on the light to unsure you don't burn anything. To put it back together I am putting back in the oven about the same temperature and time. Just keep checking the light.Originally Posted by Shurik355
so you took all the bulbs out only, the wires remained in the light right?So how did you put them together again? How did you melt the silicone???


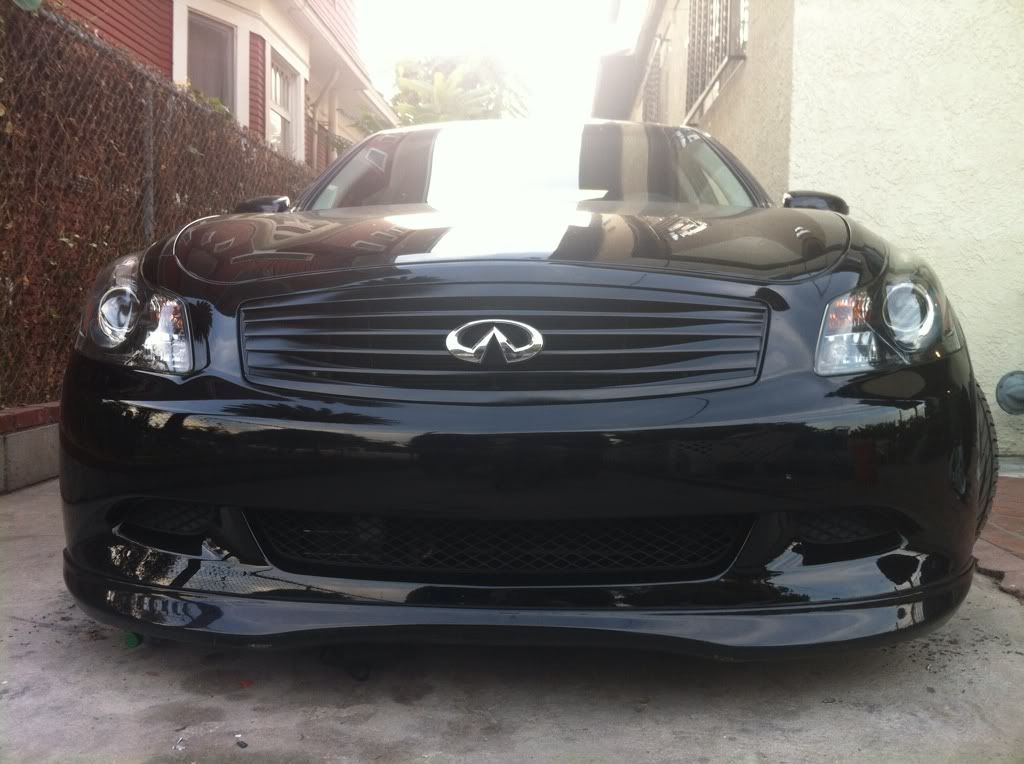
Upgraded with sports bumper and journey lip!


if you send them to me. You gotta pay shipping.

Registered User
Do you mind posting up a tutorial??
I really want to do this, but I don't want to **** it up.
I really want to do this, but I don't want to **** it up.
The process is simple but time consuming.
1. Take Front bumper out. Take your time, there are a lot hidden screws.
2. Take Head Lights out. Again take your time, make sure all screws are out. Don't break anything.
3. Once the Head lights are out. Take all the wiring, bulbs, ballasts. You don't want any of these getting ruin when you are baking. Not all wires come out. You will know once you are doing it.
4. I baked the first light at 240 degrees for about 12min. Keep checking to make sure nothing is burning. Check in between to see if the glue is melting already. If not, then put it back in. The second light was a little less time because the oven was preheated already. Maybe 8min. Again, check constantly.
5. Once the head light is open, unscrew the bezel, and paint whatever you desire. Just follow the painting procedure.(sand, primer, paint, clear).
6. Then after you are done painting, clean the headlights before putting back together. Mine have dust inside.
7. Back in the oven at the same temperature and around the same time. Make sure everything clicks back the way it was.
8. After that put the bulbs back in and wiring.
9. You are set, Put them in your car.
I recommend taking pictures to make sure you put everything back the right way. Be organize and take your time.

Registered User
I've done this on several Subarus, few tips:
use high temp spray paint, I believe Rustoleum makes a grill paint.
I've never done the sand, prime, clear coat process. all optional I'm sure. The clear coat would give a higher sheen when done as opposed to a matte finish.
always a good idea to go back with extra silicone when putting them back together. you DON'T want condensation getting in there...
Mike
Registered User
Salvador take some farther away shots. I want to see pictures from the distance.
You know what I just can't make up my mind. sometimes the blacked out lights look better and sometimes they don't. They sure do look better on light color cars but on darker I just can't make up my mind. Not sure what looks better lol
Well post some distance pics bro! I want to see how it looks from the distance.
I love it, it's kinda late right now but tomorrow I take some really good ones. It's goes really good with my black grille and black head lights. I just need the lip!!! To complete my front look.
Quote:
use high temp spray paint, I believe Rustoleum makes a grill paint.
I've never done the sand, prime, clear coat process. all optional I'm sure. The clear coat would give a higher sheen when done as opposed to a matte finish.
always a good idea to go back with extra silicone when putting them back together. you DON'T want condensation getting in there...
Mike
Nice input, I use duplicolor. Those fricking G35 lights have so much glue. I am serious, I don't think you need more glue. I actually used gloss black. I love it.Originally Posted by Mr. Michael123
I've done this on several Subarus, few tips: use high temp spray paint, I believe Rustoleum makes a grill paint.
I've never done the sand, prime, clear coat process. all optional I'm sure. The clear coat would give a higher sheen when done as opposed to a matte finish.
always a good idea to go back with extra silicone when putting them back together. you DON'T want condensation getting in there...
Mike