
DIY: Grille Removal


Joined: Dec 2007
Posts: 3,577
Likes: 12
From: South Florida
DIY: Grille Removal
Tools needed:
8mm socket
10mm socket
Socket wrench
Flathead screwdriver
Guide:
Red - Flathead screwdriver
Blue - 10mm socket
Yellow - 8mm socket
Green - pinch and push out
White - push out
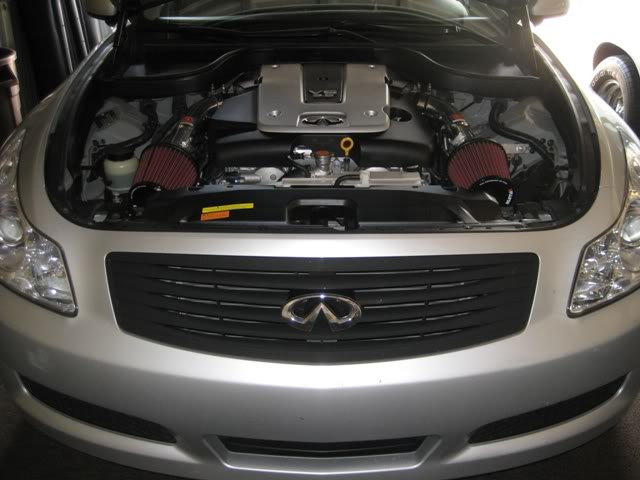
Front end
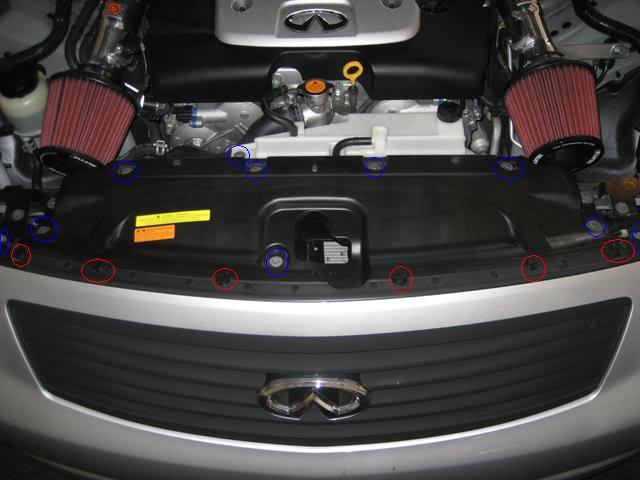
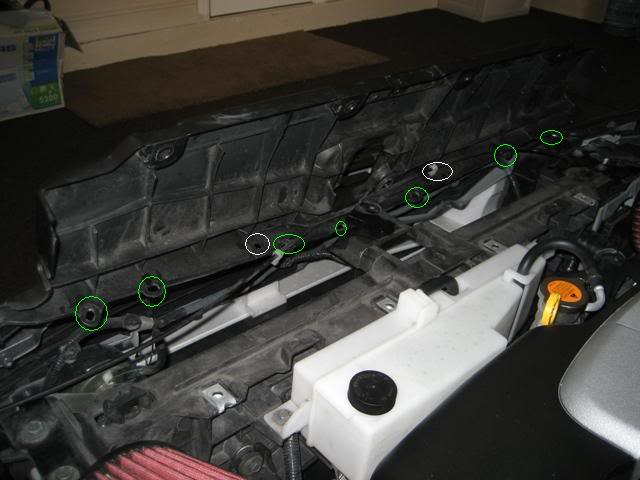
First remove all clips circled in red with flathead (6 total), also remove all 10mm bolts circled in blue (10 total).
clips circled in red upclose
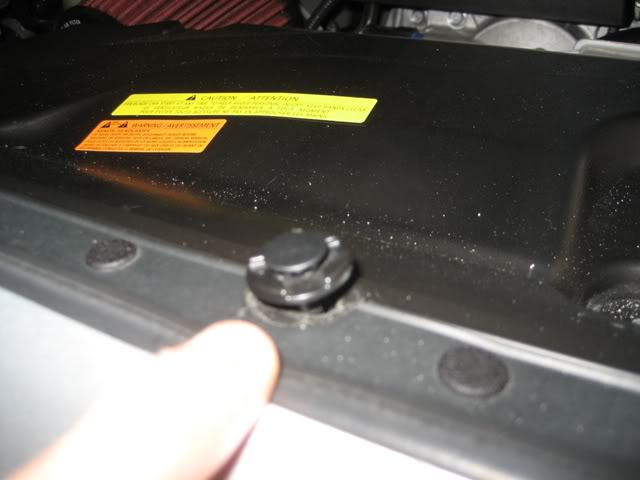
FYI: There are two 10mm bolts that are covered by rubber, pull back rubber and remove bolts
Left side (looking head on)
Right side (looking head on)
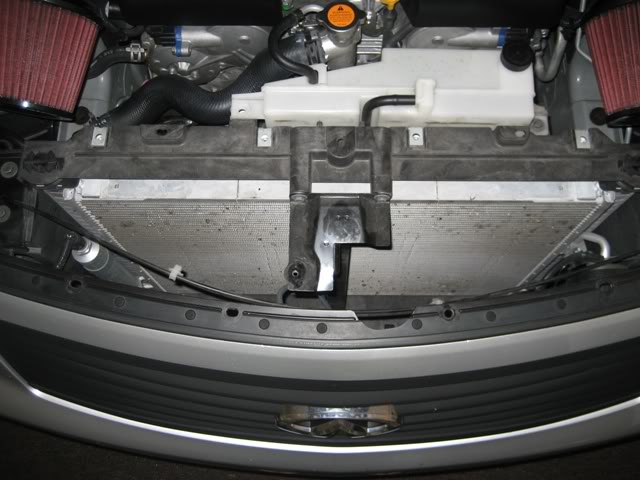
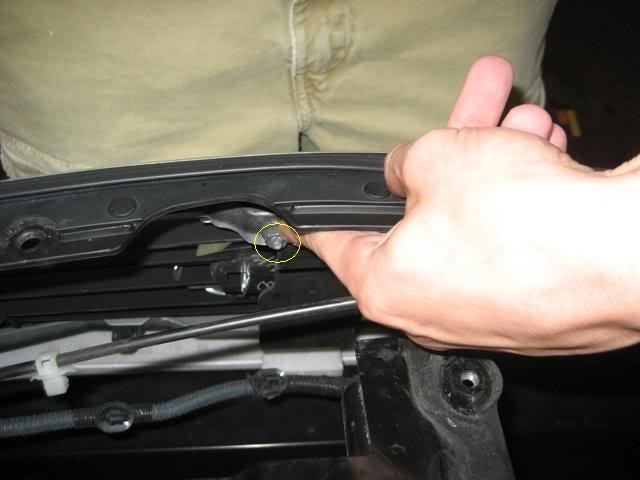
At this point you should be able to lift the cover up like this... dont lift it too much as it is still attached by 7 pinch and push clips (circled in green) and 2 push clips (circled in white)
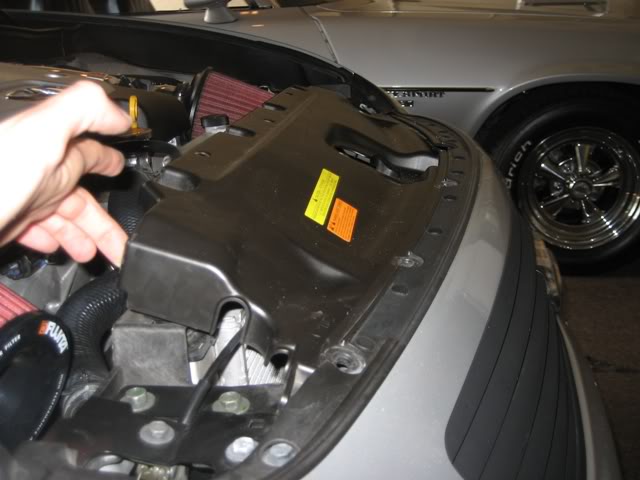
Lift enough to reach in and undo the 7 pinch and push clips (circled in green) and the 2 push clips (circled in white)
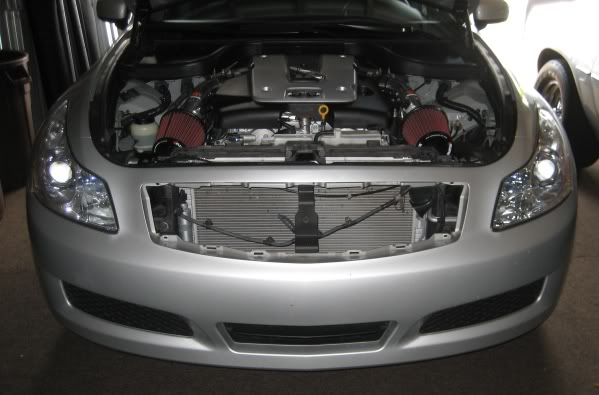
Once all clips are removed it should lift up like this...
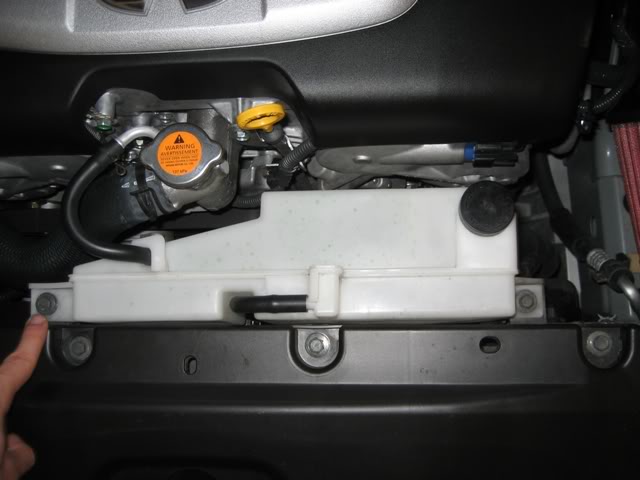
Removing this 10mm bolt and turning the reservoir away makes its easier to remove the plastic piece
wiggle this plastic piece out as it is now free... looks like this..
Top view
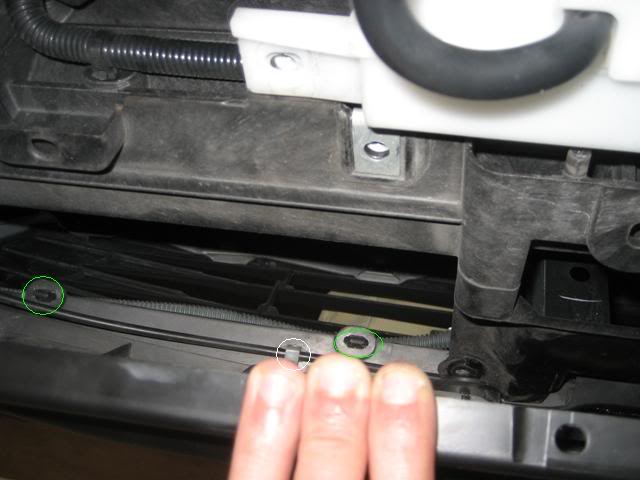
Now reach in and loosen the 5 8mm bolts (circled in yellow)
Next pinch and push 4 clips from the inside of the grille, top and bottom X2 (circled in green)
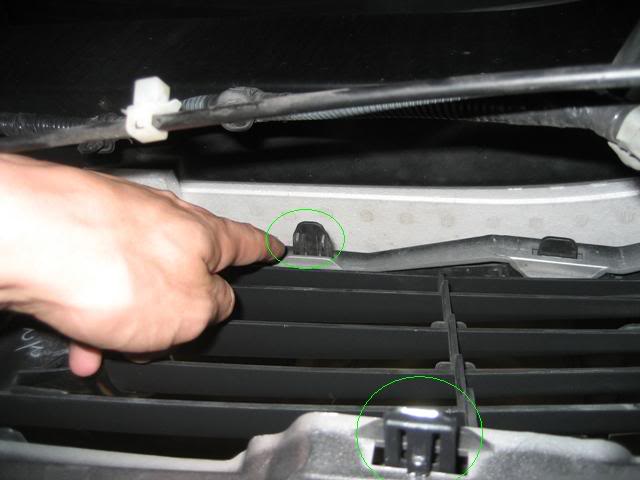
once completed it should look like this...
In total when removed you should have:
6 clips (circled in red)
10 10mm bolts (circled in blue)
5 8mm nuts (circled in yellow)
To put everything back together do the whole process in reverse...
Good luck!
8mm socket
10mm socket
Socket wrench
Flathead screwdriver
Guide:
Red - Flathead screwdriver
Blue - 10mm socket
Yellow - 8mm socket
Green - pinch and push out
White - push out
Front end
First remove all clips circled in red with flathead (6 total), also remove all 10mm bolts circled in blue (10 total).
clips circled in red upclose
FYI: There are two 10mm bolts that are covered by rubber, pull back rubber and remove bolts
Left side (looking head on)
Right side (looking head on)
At this point you should be able to lift the cover up like this... dont lift it too much as it is still attached by 7 pinch and push clips (circled in green) and 2 push clips (circled in white)
Lift enough to reach in and undo the 7 pinch and push clips (circled in green) and the 2 push clips (circled in white)
Once all clips are removed it should lift up like this...
Removing this 10mm bolt and turning the reservoir away makes its easier to remove the plastic piece
wiggle this plastic piece out as it is now free... looks like this..
Top view
Now reach in and loosen the 5 8mm bolts (circled in yellow)
Next pinch and push 4 clips from the inside of the grille, top and bottom X2 (circled in green)
once completed it should look like this...
In total when removed you should have:
6 clips (circled in red)
10 10mm bolts (circled in blue)
5 8mm nuts (circled in yellow)
To put everything back together do the whole process in reverse...
Good luck!
Joined: Dec 2007
Posts: 3,577
Likes: 12
From: South Florida
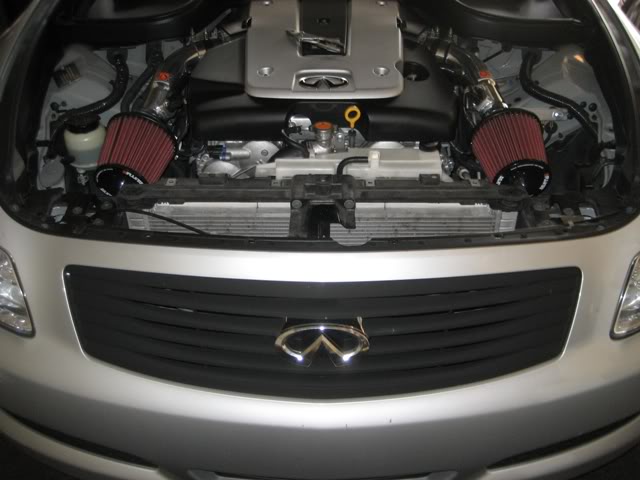
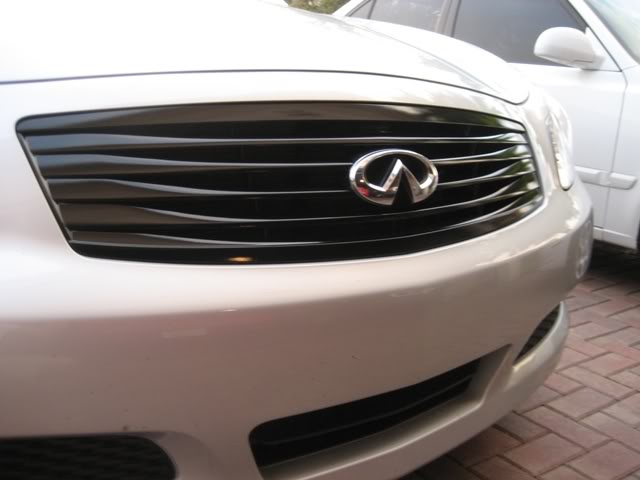
repainted my grille gloss black instead of ultra flat black in picture #1.
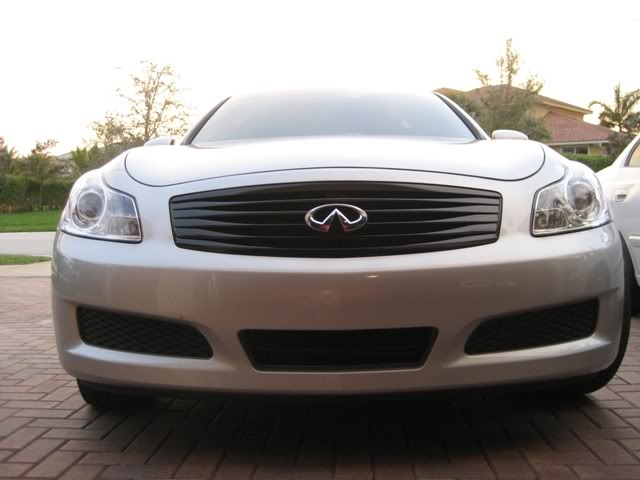
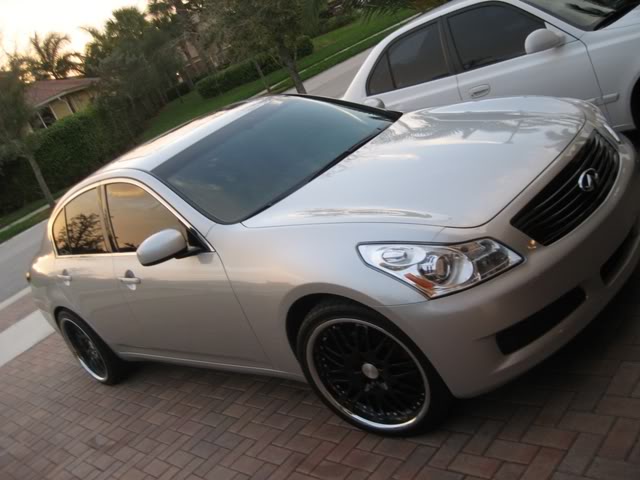
and the last one just because i love looking at my car!
and the last one just because i love looking at my car!
Last edited by MikeYo; Feb 22, 2008 at 06:33 PM.


Registered User
Joined: Feb 2007
Posts: 364
Likes: 0
You are the man, Awesome write up!!!!
Could you elaborate on the process related to sanding, priming and painting?
What brand / color paint did you use?
Also just need to find time and better weather before I do this mod.
Could you elaborate on the process related to sanding, priming and painting?
What brand / color paint did you use?
Also just need to find time and better weather before I do this mod.
Last edited by 07 G35S Sedan; Feb 22, 2008 at 06:52 PM.


Joined: Dec 2007
Posts: 3,577
Likes: 12
From: South Florida
I used Dupli color ultra gloss black and dupli color color match clear coat. 4 layers of black and 8 coats of clear.
Trending Topics

Registered User
Joined: Nov 2007
Posts: 35
Likes: 0
From: Canada
07SilverG,
Very nice DIY.
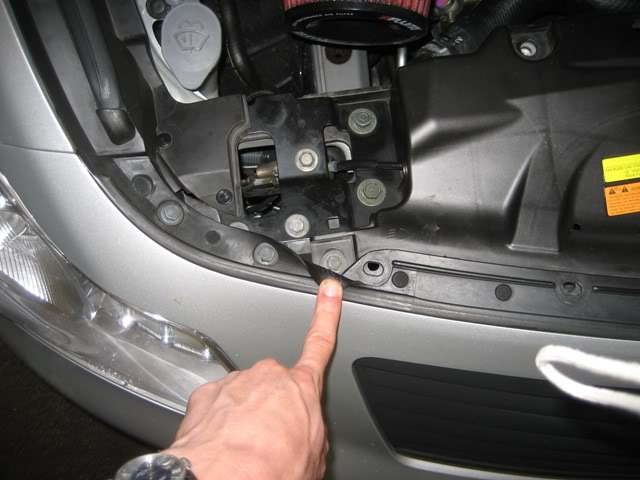
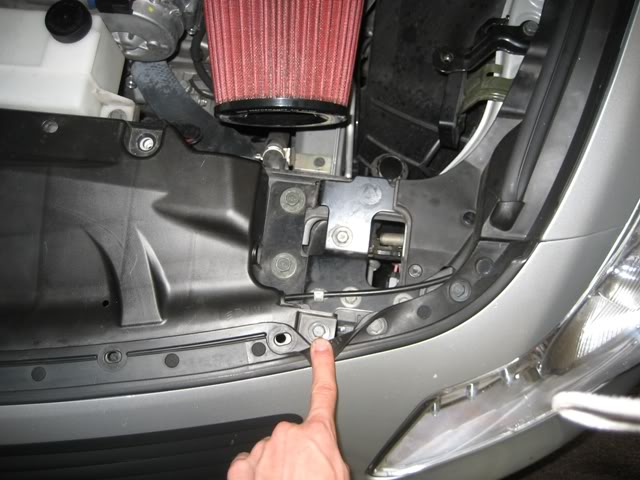
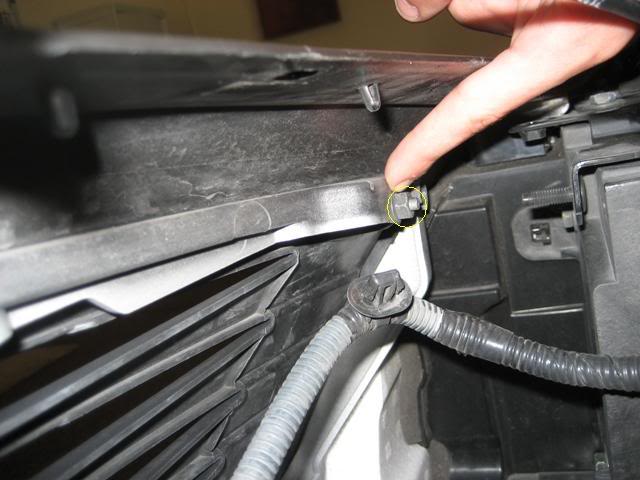
When I attempted to do this before, there were 2 screws that blocked me from lifting the piece (pic #6). I even removed the white reservoir (pic #9). I've attached a pic of which screws I'm talking about.
I cracked my cover, so I gave up. How did you past these? Just by wiggling the cover?
Very nice DIY.
When I attempted to do this before, there were 2 screws that blocked me from lifting the piece (pic #6). I even removed the white reservoir (pic #9). I've attached a pic of which screws I'm talking about.
I cracked my cover, so I gave up. How did you past these? Just by wiggling the cover?
Joined: Dec 2007
Posts: 3,577
Likes: 12
From: South Florida
Originally Posted by georgesa
07SilverG,
Very nice DIY.
When I attempted to do this before, there were 2 screws that blocked me from lifting the piece (pic #6). I even removed the white reservoir (pic #9). I've attached a pic of which screws I'm talking about.
I cracked my cover, so I gave up. How did you past these? Just by wiggling the cover?

Registered User
Joined: Feb 2007
Posts: 364
Likes: 0
Originally Posted by 07SilverG
I used Dupli color ultra gloss black and dupli color color match clear coat. 4 layers of black and 8 coats of clear.
Joined: Dec 2007
Posts: 3,577
Likes: 12
From: South Florida
i only used 400 grit sandpaper to sand it down until all the chrome was off and it became white, if you start to get to deep it starts to turn black. stop sanding that area of that occurs. it takes a little effort because of the angles you have to get into towards the sides. i sanded it by hand and couldnt see how it could have been done nicely with a power tool. i sprayed one coat of dupli color primer, layed down 4 layers of glass black and 8 layers of clear, let it dry for 2 hours and reinstalled.
