
front bumper removal for Stillen Gen 3


Thread Starter
|
Registered User
Joined: Dec 2009
Posts: 12
Likes: 0
front bumper removal for Stillen Gen 3
I'm installing the Stillen Gen 3 and I'm having a very hard time taking off the front bumper for the G sedan. I need your help with it. Is it the same as the coupe or is there extra bolts i need to take off? I took off the radiator cover and all the plastic tabs along the liner, and i took off two 10mm screws on the side where it connects to the bumper. I pulled really hard on it and it's not coming out. Please advise. Thanks.

You can install the gen 3 w/o removing the front bumper. Just take off your grill and you can work through it.. i's a bit tougher to work w/ due to limited space than having your bumper removed, but it will save you much trouble not having to take off the whole front fascia.
GL!
GL!

There are a total of 16 bolts and 6 plastic clips holding the bumper.
You don't need to remove or loosen the radiator cover.
All you need is a 10mm wrench, a flat head screw driver and a socket extension.
8 bolts on the bottom (Marked A)
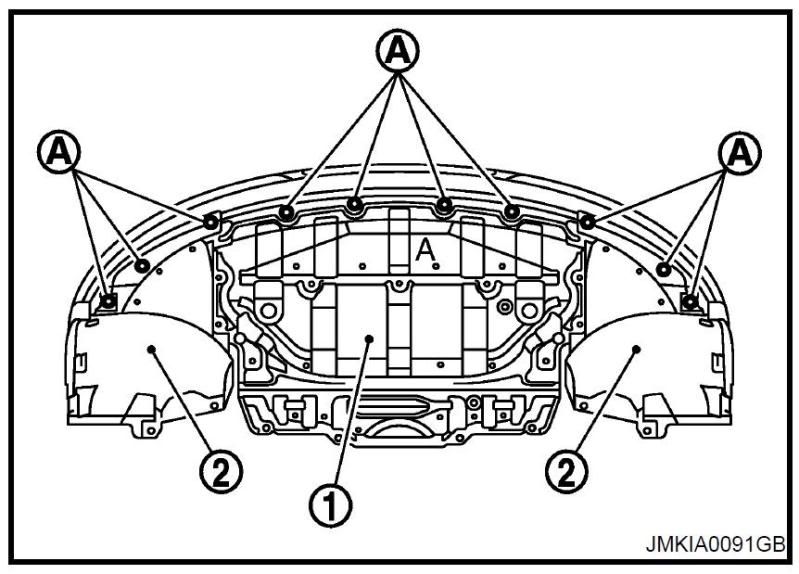
Then there are 6 clips holding the bumper to the radiator cover. remove those with a flat head screwdriver. You do not need the remove the bolts in either side of the clips (Marked A)
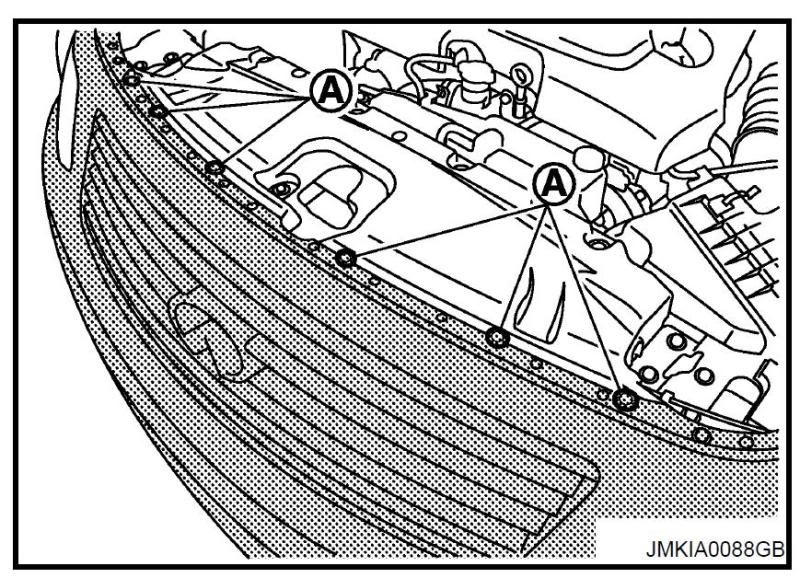
Turn the steering wheel to either side and remove 1 plastic clip on the wheel well lining to access the bolts inside. Once you pull back the lining you will need to use a long extension to remove two 10mm bolts. Do the same for both sides (Marked A)
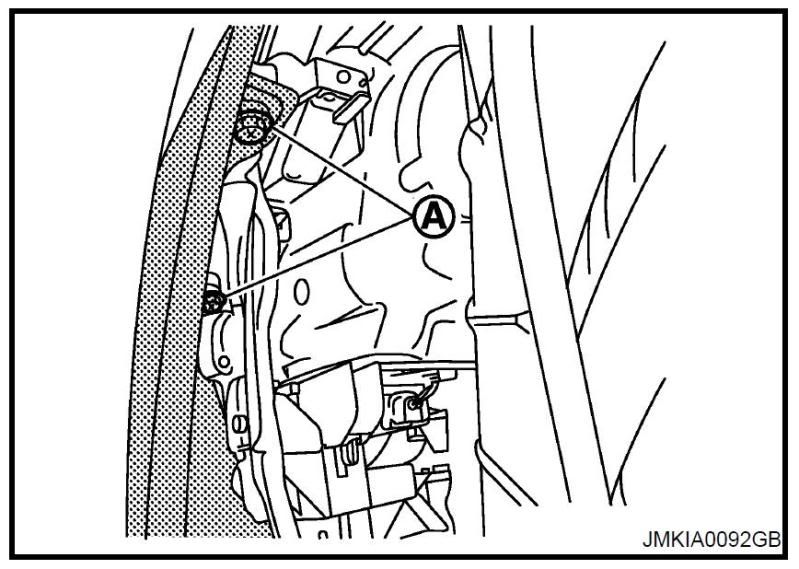
Once that is done, there are 2 more bolts holding the bumper, 1 on each side.
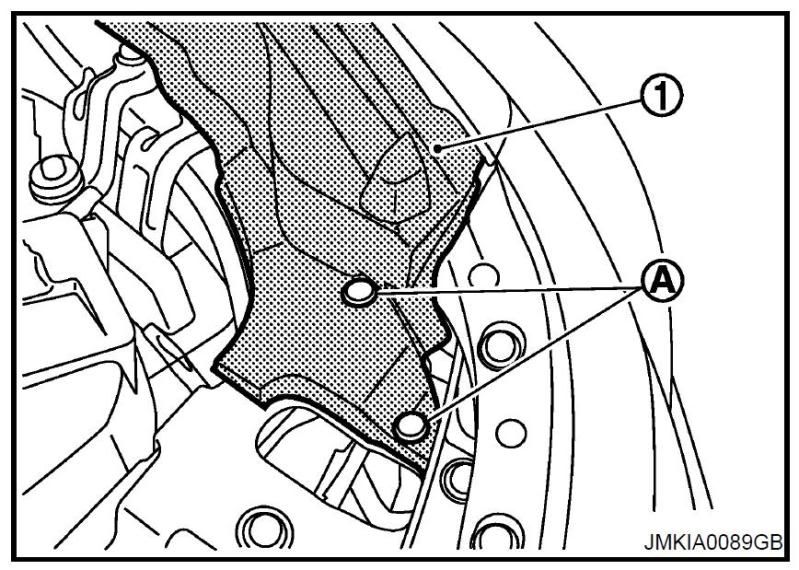
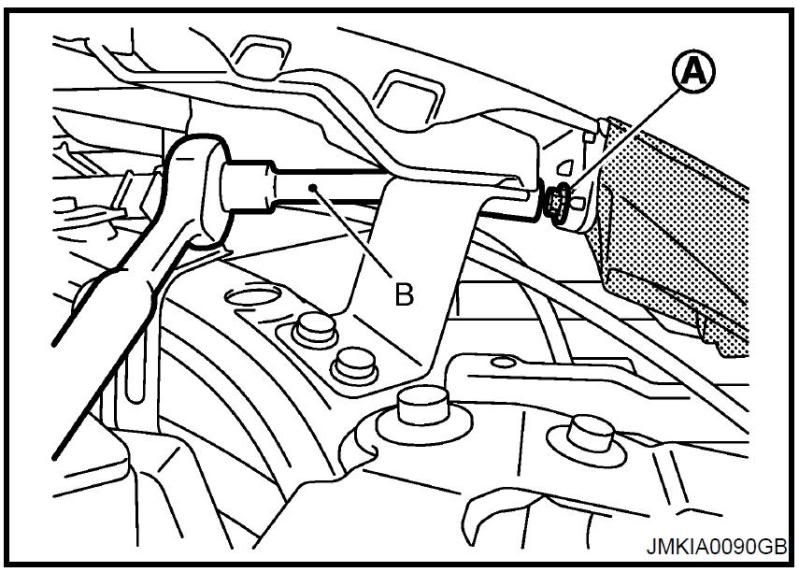
you will need to pull up the rubber seal on the side of the engine bay to access a 10mm bolt as shown below. You will need to use an extension here too. the first pic shows the location of the bolt behind the rubber seal. you don't need to remove the seal, just pull it back until you can stick your wrench in there. (Marked 1)
You don't need to remove or loosen the radiator cover.
All you need is a 10mm wrench, a flat head screw driver and a socket extension.
8 bolts on the bottom (Marked A)
Then there are 6 clips holding the bumper to the radiator cover. remove those with a flat head screwdriver. You do not need the remove the bolts in either side of the clips (Marked A)
Turn the steering wheel to either side and remove 1 plastic clip on the wheel well lining to access the bolts inside. Once you pull back the lining you will need to use a long extension to remove two 10mm bolts. Do the same for both sides (Marked A)
Once that is done, there are 2 more bolts holding the bumper, 1 on each side.
you will need to pull up the rubber seal on the side of the engine bay to access a 10mm bolt as shown below. You will need to use an extension here too. the first pic shows the location of the bolt behind the rubber seal. you don't need to remove the seal, just pull it back until you can stick your wrench in there. (Marked 1)


Thread
Thread Starter
Forum
Replies
Last Post
Nick_M
Interior & Exterior
1
Aug 3, 2015 11:08 PM
Nick_M
Interior & Exterior
0
Aug 3, 2015 05:33 PM