When you click on links to various merchants on this site and make a purchase, this can result in this site earning a commission. Affiliate programs and affiliations include, but are not limited to, the eBay Partner Network.
ok, I know this is getting old, but my blose radio/cd player finally failed on my 04 G. The CD portion of these radios are terrible, and the radio was not that much better.
Anyway, after the CD would no longer load, and it in turn kept draining my Battery since it was constantly supplied with power, I ordered a OEM double din conversion, but the ends did not match my willow interior. It was a dull black.
I knew it was a problem, since I researched this thread when my radio died.
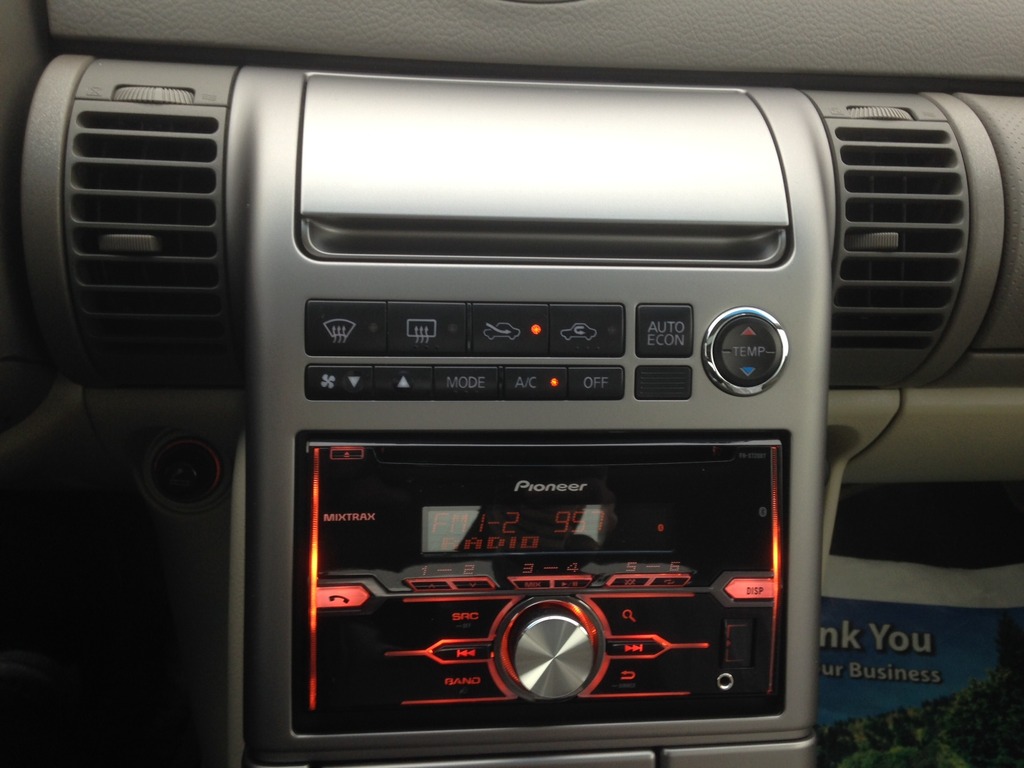
So i orderd a couple different interior paints from COLOR BOND. I managed to get the color pretty close. I guess with a little more patience and paints, I could have got it spot on.
This is my install.....Pioneer 720BT....did not need the DVD option or Nav since this is now my second car.
Thanks for everyone who posted on this thread. It made it very easy to understand what I need for this install. I had the radio installed professionally.
Thanks for looking
ok, I know this is getting old, but my blose radio/cd player finally failed on my 04 G. The CD portion of these radios are terrible, and the radio was not that much better.
Anyway, after the CD would no longer load, and it in turn kept draining my Battery since it was constantly supplied with power, I ordered a OEM double din conversion, but the ends did not match my willow interior. It was a dull black.
I knew it was a problem, since I researched this thread when my radio died.
So i orderd a couple different interior paints from COLOR BOND. I managed to get the color pretty close. I guess with a little more patience and paints, I could have got it spot on.
This is my install.....Pioneer 720BT....did not need the DVD option or Nav since this is now my second car.
Thanks for everyone who posted on this thread. It made it very easy to understand what I need for this install. I had the radio installed professionally.
Thanks for looking
Match on the paint looks good. I wouldn't question it at all.
Here's mine. Pioneer AVH-4100NEX w/Carplay. PAC-ROEM-NIS2, ASWC-1 Steering Wheel controls.
Also installed SiriusXM and a rear-view license plate camera.
Poured over Wrathernut's thread for over a month, bought all the materials, and then spent a good week and a half doing all the soldering and prep work. I found a cheap donor finisher panel on eBay to steal the climate control button and switch from so I wouldn't have to spend time transferring it from my original unit during the install, and everything came together smoothly with all the wiring working on the first try. It took me about 3.5 hours to do the install today.
I got very lucky with the DIN cage fitting perfectly flush without the need to drill any new holes. Used a combo of foam black tape and one section of the trim ring along the bottom to fill the gap, and it looks pretty good. The face ejects smoothly with no issues. Unfortunately the microphone that I had been using with my Parrot BT unit did not work with the Pioneer, so I had to run a new mic through the headline and A-pillar, but it wasn't a big deal. I just have to play around with the mic location a bit more so it looks a bit more hidden.
Really liking the AVH-4100...lots of cool features. Looking forward to using this unit.
Thanks again to Wrathernut and others for an amazing thread and for all your help. That sticky made this install so smooth and straightforward.
Last edited by G35fromPA; 04-25-2015 at 02:12 PM.
Reason: Added more description.
I got very luck with the DIN cage fitting perfectly flush without the need to drill any new holes. Used a combo of foam black tape and one section of the trim ring along the bottom to fill the gap, and it looks pretty good. The face ejects smoothly with no issues.
LOL. I was so dreading the marking, drilling, etc. My jaw just dropped as I was test fitting on the bench and it slid right into position. I may have even done a little happy dance too.


 03-29-2015, 02:35 PM