Custom installed Radar (Pics)
#1
Custom installed Radar (Pics)
Hello all.... first real post here, long time reader. Long story short my G was broken into and some things stolen, dash messed up. & in the process of adding an aftermarket security system and replacing things I decided to go with a custom installed radar.
Luckily the thieves did not steal my sound system/headunit... All they got was my escort 8500 and iPod with iPod cable
Things installed in G:
Viper 5902 Alarm/Remote Start
Pioneer Avic-Z110bt
Infinity Kappa Five amp
Infinity Kappa Perfect 6.1 Components
Infinity Kappa 63.9 3-way 6.5" speakers
Infinity Kappa 100.3 Subwoofer
I went with the Escort QI45 installed radar.... The installation only took a couple hours. If anyone's interested I could write a DIY later
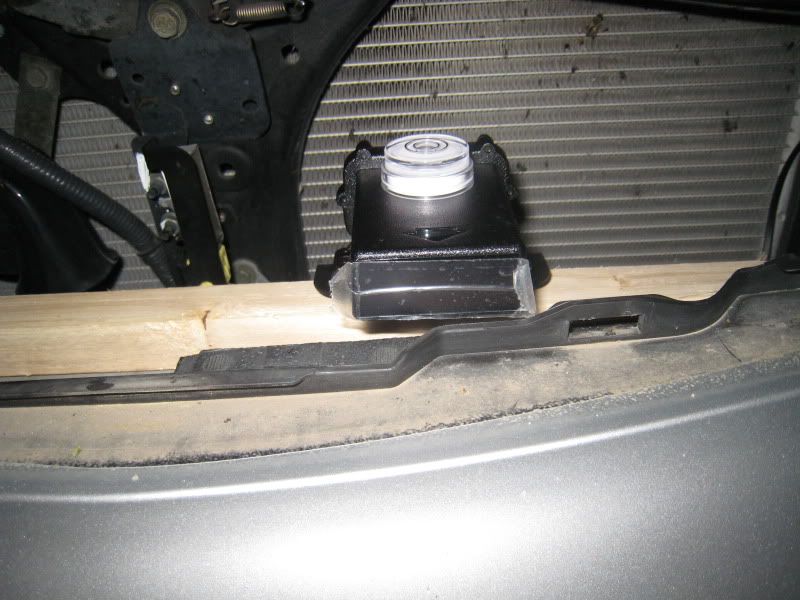
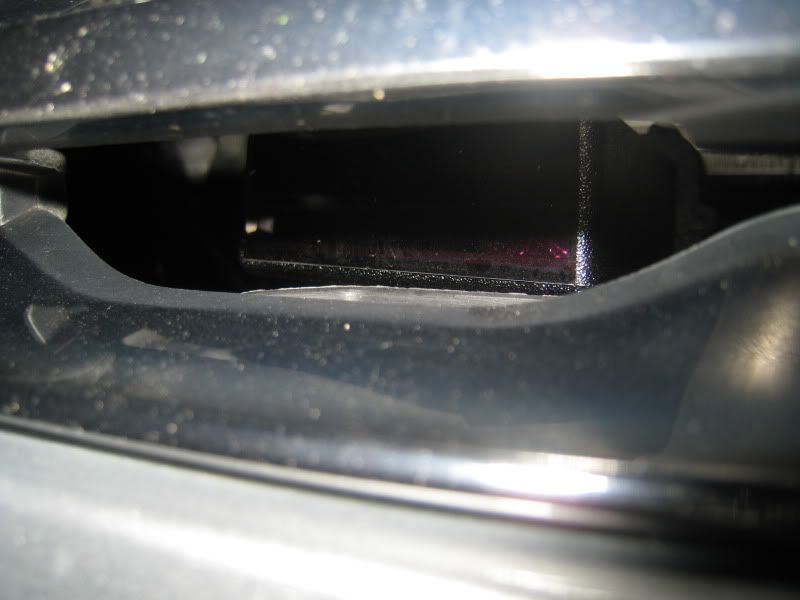
Here is the Radar/Laser Sensor

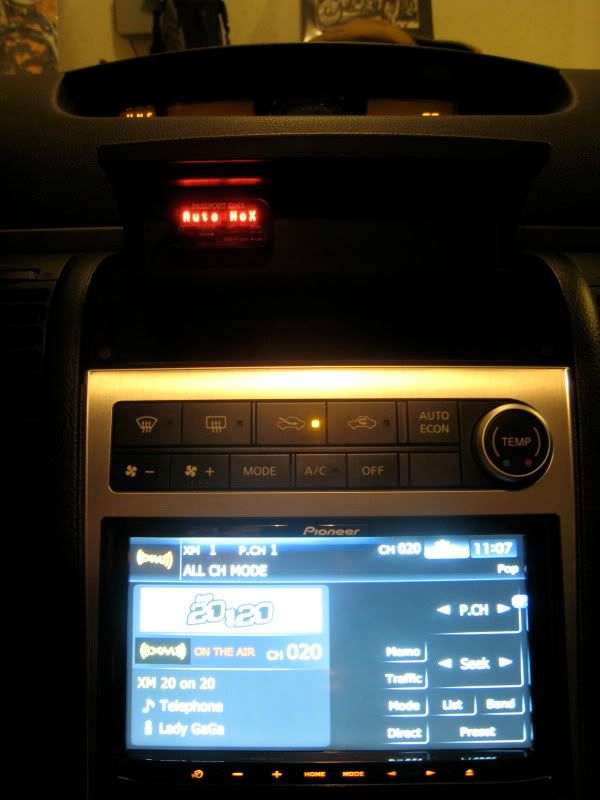
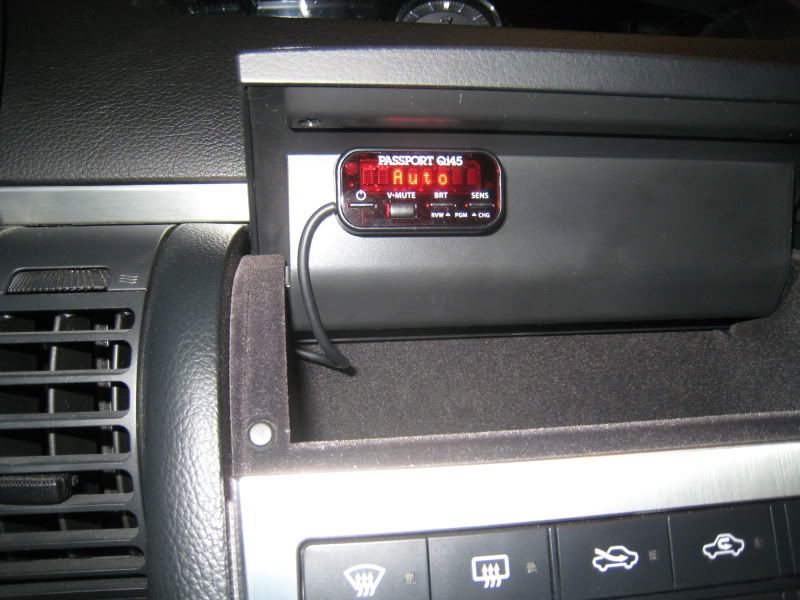
Control Module placed in upper cubby
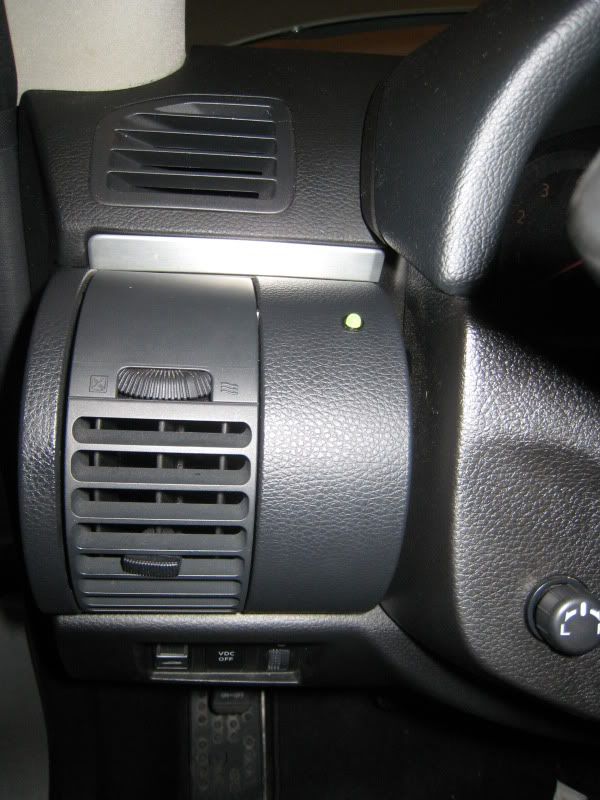
Replaced Security LED with Radar Status LED
There is the capability to add Laser shifters which I will do when I have more money available....
Luckily the thieves did not steal my sound system/headunit... All they got was my escort 8500 and iPod with iPod cable
Things installed in G:
Viper 5902 Alarm/Remote Start
Pioneer Avic-Z110bt
Infinity Kappa Five amp
Infinity Kappa Perfect 6.1 Components
Infinity Kappa 63.9 3-way 6.5" speakers
Infinity Kappa 100.3 Subwoofer
I went with the Escort QI45 installed radar.... The installation only took a couple hours. If anyone's interested I could write a DIY later

Here is the Radar/Laser Sensor

Control Module placed in upper cubby

Replaced Security LED with Radar Status LED
There is the capability to add Laser shifters which I will do when I have more money available....
#7
Trending Topics
#11
Thanks for the positive responses... I'll be sure to write up a DIY with more pics etc when I've got more time...
No, it does not have sensors for the rear.... I have read that the radar can still be sensed from the rear as the signals will bounce off of things in front of you. There are no laser sensors for the rear, but I think that the rear facing laser sensor on my dash mounted escort 8500 did not do much good anyway, as I've got window tint on the back window and had the radar mounted in the center low right above the clock. The only time I think rear sensors would come in handy would be if a police officer was coming up behind from you; I've rarely been hit from behind without first passing the officer.
yea, unfortunately I don't... I was hit at work in broad daylight... Hopefully the 2-way alarm will help... & good thing it's a PITA to put the indash in/take it out... I've seen G's that had their entire dash tore up though... sucks
Thanks.... Nice Nice
No, it does not have sensors for the rear.... I have read that the radar can still be sensed from the rear as the signals will bounce off of things in front of you. There are no laser sensors for the rear, but I think that the rear facing laser sensor on my dash mounted escort 8500 did not do much good anyway, as I've got window tint on the back window and had the radar mounted in the center low right above the clock. The only time I think rear sensors would come in handy would be if a police officer was coming up behind from you; I've rarely been hit from behind without first passing the officer.
Thanks.... Nice Nice
#13
Custom Radar Install (Escort QI45) DIY
This information is meant to guide you, please use common sense. I am not responsible for any damage/injury that may occur to your car/you... Use at your own risk. That being said, hope this can help someone.
Tools and supplies needed - Flathead Screwdriver, Phillips Screwdriver, Bubble Level, 1/4" drillbit, JB Weld, 1" square wooden clamping dowel, Sand Paper, Zip Ties, Electrical Tape, Add-A-Fuse.
First you should test your unit and make sure it is functional... It would be a major PITA to get it all installed only to find out you have a defective unit.
Step 1
remove the Front Grill... Do this by releasing the two clips located in the top right and left of the grill with a flathead screwdriver, A quarter turn to align the square head will allow you to pull it back... and then you can release the lower clips with your hand from behind the grill
Top left and right clips
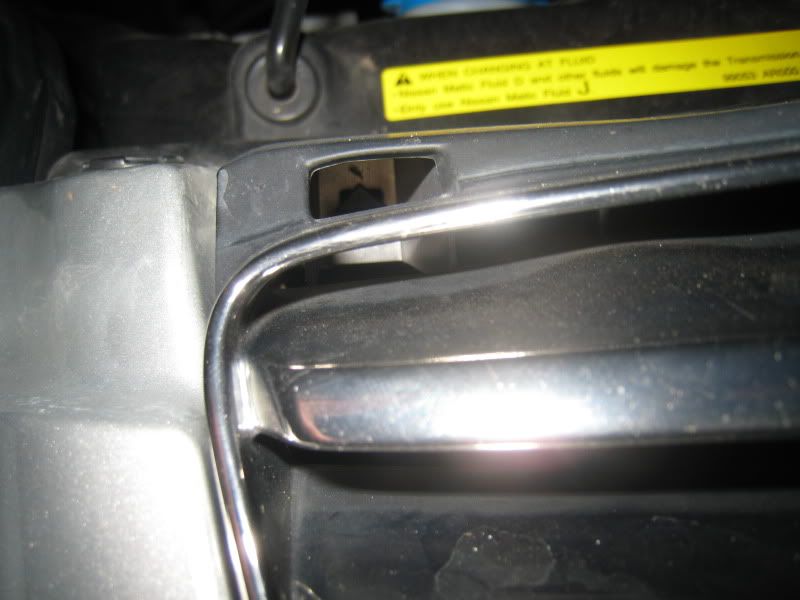
Bottom Clips
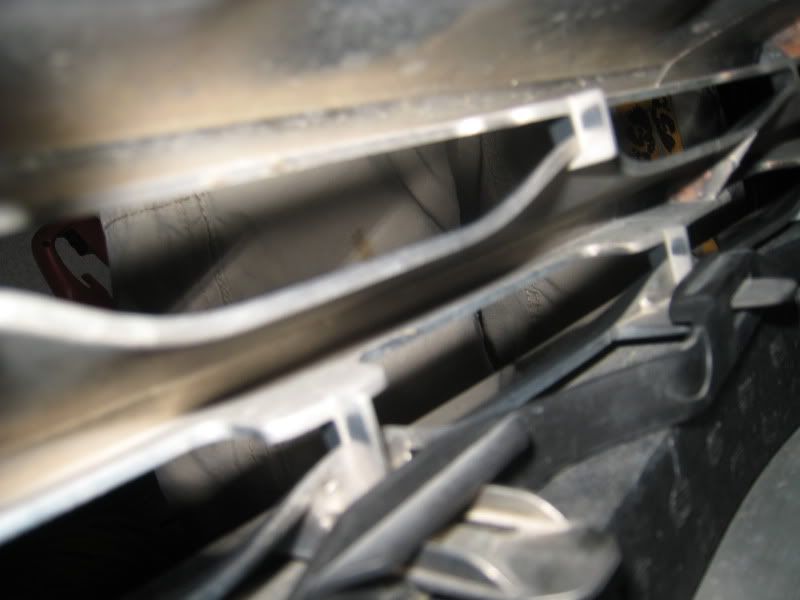
Step 2 Placing/Mounting the sensor
The Radar sensor comes with an L shaped Bracket... Ideally you would remove the bumper and actually screw this into the aluminum bumper... I attached this to the Aluminum Bumper using JB weld... First find the position to where it would have full visibility Using a sharpie, mark this location... Also mark the height needed... Temporarily replacing the grill may be needed to find the position...
The sensor needs to be plumb (level in all directions), Do this using a bubble level, Bending the bracket may be needed.
The aluminum bumper needs to be cleaned, I just used water and later sanded it with medium grit sandpaper. The black paint on the L bracket needs to be removed with sandpaper. Next Mix the JB Weld and apply it to the L bracket... I found a 1 inch square clamping dowel made for the perfect height for supporting the sensor. Line it up with the marks previously made. Apply pressure for a few minutes until it stays, This needs to set overnight.
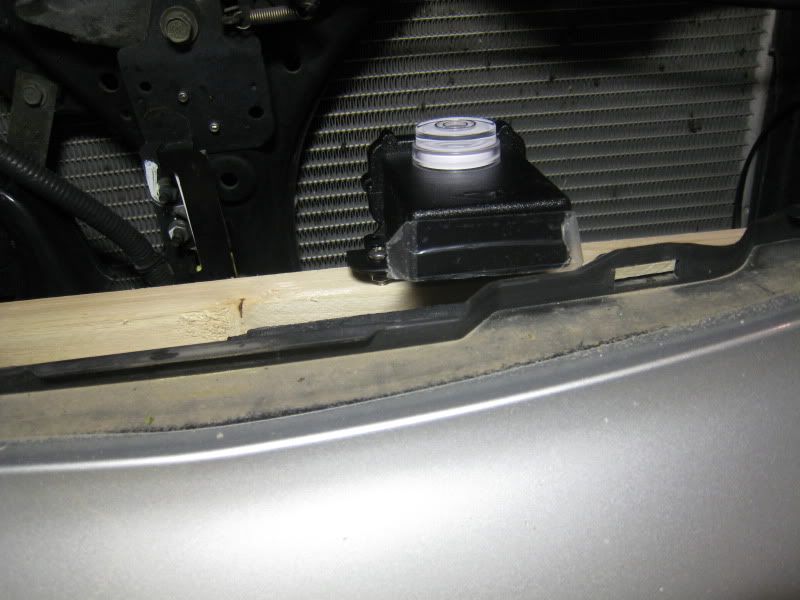
Step 3 Running the wire from the Radar Sensor into the cabin
I did this by following the hood release cable and then a wire harness that goes through a grommet on the driver side. I got through the grommet by making a small slice with an exacto knife... I then used the straight part of a coat hanger taped to the end of the cable to fish it through... I used zip-ties to secure this cable.
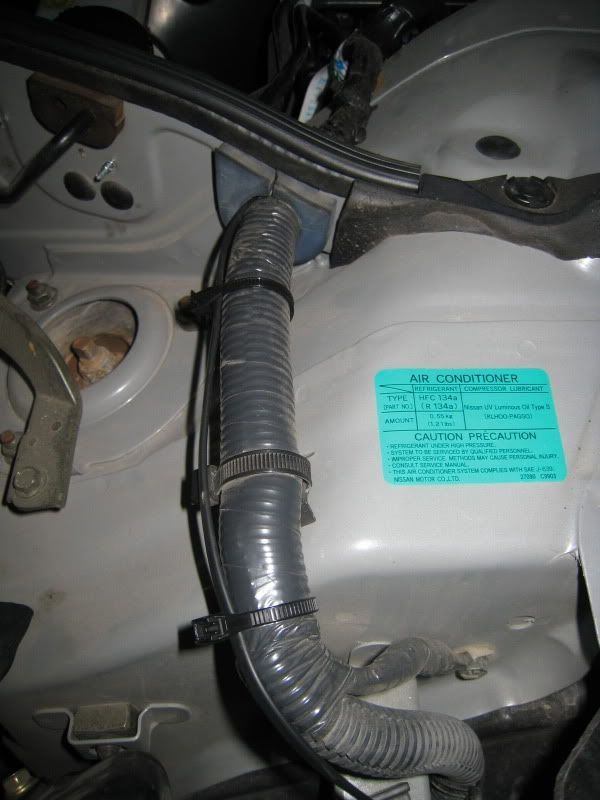

Step 4 Mounting Control Module
First take apart the center console, using the same directions to install a Double Din unit. There is double stick tape on the back already, next fish the wire out of the cubby and down in the opening that you will see.... down to the foot well.
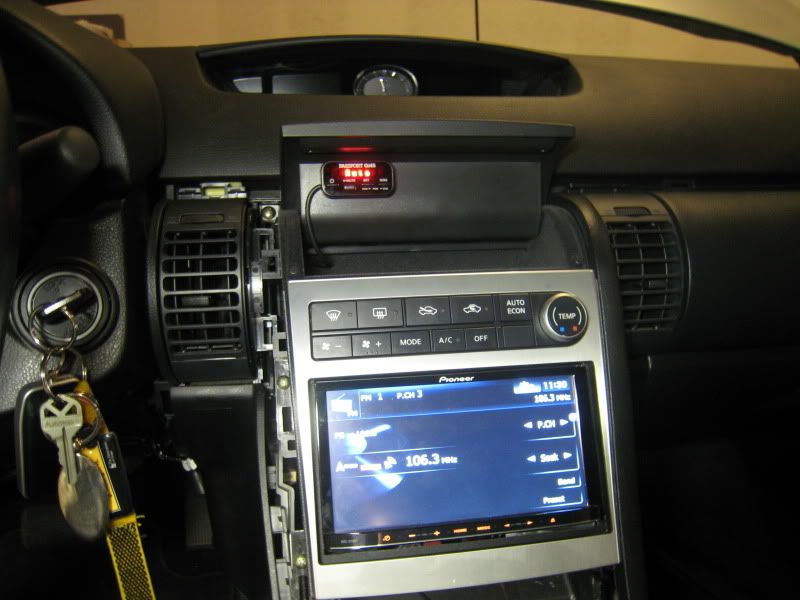
Step 5 Mounting LED
I mounted this where the standard security LED was as I have an aftermarket Alarm. You can mount this wherever you want or not at all, It is optional.
I did this by removing the left A/C duct and removing the security LED... With the Lower steering column panel removed (contains trunk release button, VDC, and hood release) you can reach under and release a clip from the back... You pull straight back towards you and it will come out. Once you get the vent removed you can remove the security LED by unscrewing 2 screws... This hole needs to be enlarged to a 1/4" size I did this in steps using a couple smaller drill bits. The radar comes with an LED holder that goes into this hole, the LED then slides into place. Tape the Security LED to a metal bracket underneath the dash.
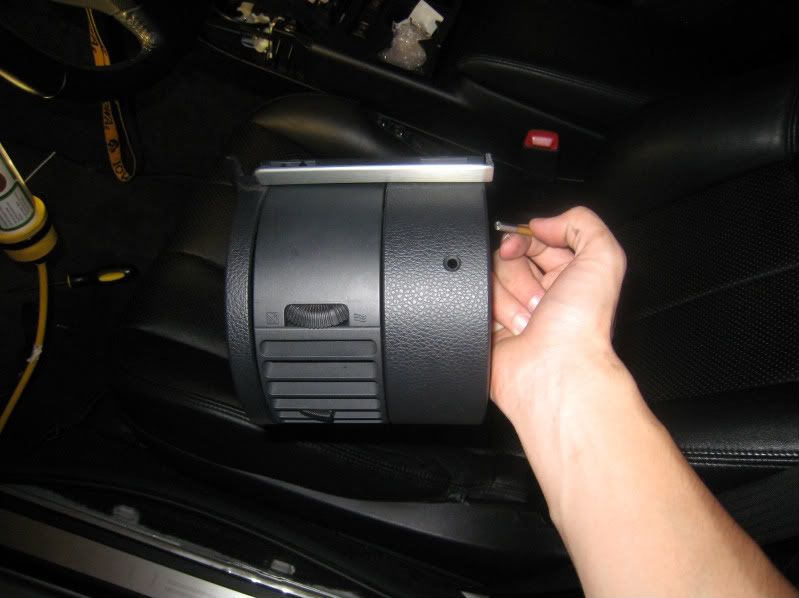
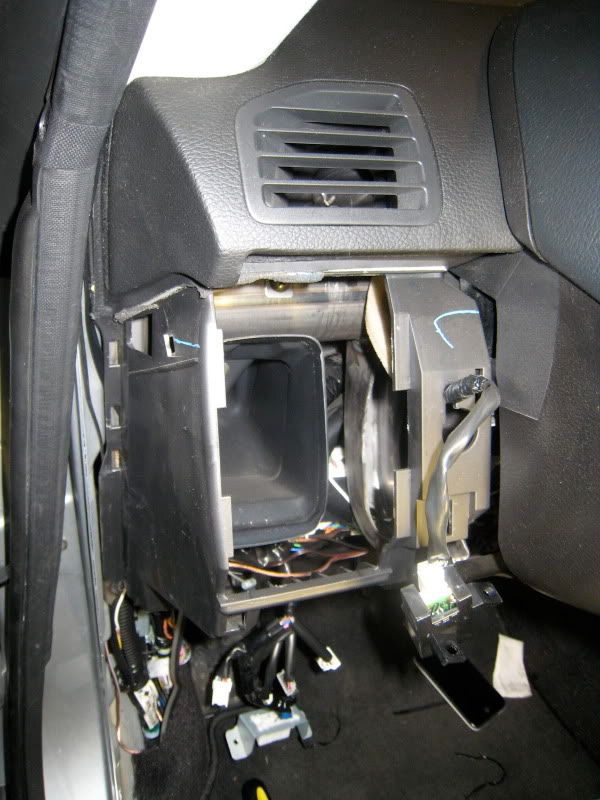
Step 6 Mounting the Brain and connecting Power
Sorry I didn't take pictures of the Brain... It is a Plastic box a little bit bigger than a deck of cards, this is where the speaker is and where everything plugs into.
There is a metal bracket underneath... To the right of the steering column I used zip ties to secure this with the input jacks facing down and the speaker facing to the left.

I connected power to the unit by purchasing an add-a-fuse and connected the positive lead of the brain to this... The other end simply goes to chassis ground. I used the cigarette lighter fuse so it would automatically turn the radar on/off

Plug everything into the respective jacks and tidy up/ tuck away all of the wiring and reassemble the dash.
AFTER
Radar Sensor

INTERIOR


Let me know if there's anything I can do to help... I'm glad I took the time to install this, it prob took around 2-4 hours with me taking my time... Now I've got the benefits of a discrete radar system, less likely to get stolen & police less likely to notice... I've heard that a police officer is more likely to write you a ticket if he sees you have a radar. Range on this thing is great, it is based of of the Escort x50 8500, I think that it's a little better than that.
Tools and supplies needed - Flathead Screwdriver, Phillips Screwdriver, Bubble Level, 1/4" drillbit, JB Weld, 1" square wooden clamping dowel, Sand Paper, Zip Ties, Electrical Tape, Add-A-Fuse.
First you should test your unit and make sure it is functional... It would be a major PITA to get it all installed only to find out you have a defective unit.
Step 1
remove the Front Grill... Do this by releasing the two clips located in the top right and left of the grill with a flathead screwdriver, A quarter turn to align the square head will allow you to pull it back... and then you can release the lower clips with your hand from behind the grill
Top left and right clips

Bottom Clips

Step 2 Placing/Mounting the sensor
The Radar sensor comes with an L shaped Bracket... Ideally you would remove the bumper and actually screw this into the aluminum bumper... I attached this to the Aluminum Bumper using JB weld... First find the position to where it would have full visibility Using a sharpie, mark this location... Also mark the height needed... Temporarily replacing the grill may be needed to find the position...
The sensor needs to be plumb (level in all directions), Do this using a bubble level, Bending the bracket may be needed.
The aluminum bumper needs to be cleaned, I just used water and later sanded it with medium grit sandpaper. The black paint on the L bracket needs to be removed with sandpaper. Next Mix the JB Weld and apply it to the L bracket... I found a 1 inch square clamping dowel made for the perfect height for supporting the sensor. Line it up with the marks previously made. Apply pressure for a few minutes until it stays, This needs to set overnight.

Step 3 Running the wire from the Radar Sensor into the cabin
I did this by following the hood release cable and then a wire harness that goes through a grommet on the driver side. I got through the grommet by making a small slice with an exacto knife... I then used the straight part of a coat hanger taped to the end of the cable to fish it through... I used zip-ties to secure this cable.


Step 4 Mounting Control Module
First take apart the center console, using the same directions to install a Double Din unit. There is double stick tape on the back already, next fish the wire out of the cubby and down in the opening that you will see.... down to the foot well.

Step 5 Mounting LED
I mounted this where the standard security LED was as I have an aftermarket Alarm. You can mount this wherever you want or not at all, It is optional.
I did this by removing the left A/C duct and removing the security LED... With the Lower steering column panel removed (contains trunk release button, VDC, and hood release) you can reach under and release a clip from the back... You pull straight back towards you and it will come out. Once you get the vent removed you can remove the security LED by unscrewing 2 screws... This hole needs to be enlarged to a 1/4" size I did this in steps using a couple smaller drill bits. The radar comes with an LED holder that goes into this hole, the LED then slides into place. Tape the Security LED to a metal bracket underneath the dash.


Step 6 Mounting the Brain and connecting Power
Sorry I didn't take pictures of the Brain... It is a Plastic box a little bit bigger than a deck of cards, this is where the speaker is and where everything plugs into.
There is a metal bracket underneath... To the right of the steering column I used zip ties to secure this with the input jacks facing down and the speaker facing to the left.

I connected power to the unit by purchasing an add-a-fuse and connected the positive lead of the brain to this... The other end simply goes to chassis ground. I used the cigarette lighter fuse so it would automatically turn the radar on/off

Plug everything into the respective jacks and tidy up/ tuck away all of the wiring and reassemble the dash.
AFTER
Radar Sensor


INTERIOR


Let me know if there's anything I can do to help... I'm glad I took the time to install this, it prob took around 2-4 hours with me taking my time... Now I've got the benefits of a discrete radar system, less likely to get stolen & police less likely to notice... I've heard that a police officer is more likely to write you a ticket if he sees you have a radar. Range on this thing is great, it is based of of the Escort x50 8500, I think that it's a little better than that.


