
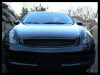
DIY: Ionic Grill Installation


Here you go: https://g35driver.com/forums/exterior-vendor/126572-gialla-replica-grill-special-introductory-pricing.html
You can buy then painted for $170 shipped or painted for $260 shipped.
Thanks!
You can buy then painted for $170 shipped or painted for $260 shipped.
Thanks!

Registered User
iTrader: (1)
Originally Posted by aHero4Eternity
^^^I would not use double sided tape at all.
why wouldn't you use the double sided tape - it seems the grille would have too much play without it since only the fasteners are holding it together - also has anybody used bolts instead of the fasteners for a more secure fit??

mine just uses the pins no tape.. it fits alright, i might add some tape later.. it's not going to come loose with just the fasteners but it will be more secure with tape

Registered User
Joined: May 2007
Posts: 345
Likes: 0
Originally Posted by jimmyshaker
Once you use the double-sided tape on the grille, this essentially becomes a "permanent" installation right?
I will need to take the bumper off a later time to replace the headlights and factory mesh.
Does having the double-sided tape make a huge difference in the way it looks? And will the grille rattle without it??
I will need to take the bumper off a later time to replace the headlights and factory mesh.
Does having the double-sided tape make a huge difference in the way it looks? And will the grille rattle without it??


Registered User
Joined: Sep 2008
Posts: 71
Likes: 0
From: Vancouver, BC
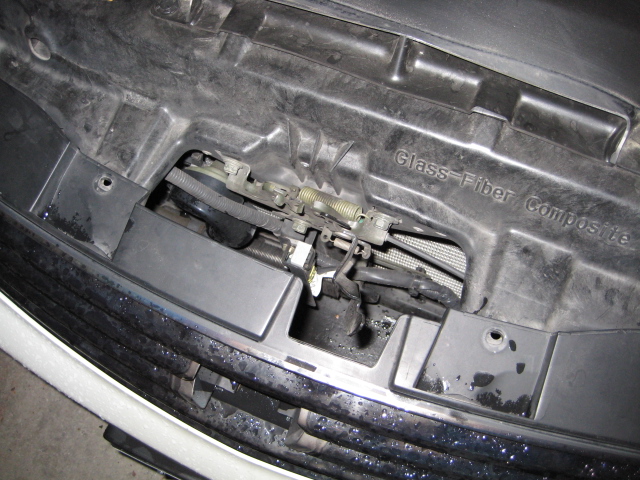
I need help! So I bought this Ionic Gialla replica grill over three weeks ago and didn't get around too installing it until today. I've been looking at this DIY guide over and over and thought to myself, "This should be a piece of cake." I was wrong, oh was I ever so wrong...I don't know what in the hell did I ever do to deserve so much punishment but I was so frustrated today I came pretty close to getting a sledge hammer and taking a good crack at my oem grill. In the end I decided not to do that because there was a very high likelyhood I'd damage the front bumper as well.
Anyways, to make a long story short I couldn't manage to take off the F*CKING OEM GRILL!! GRRRR!! I spent almost a good 1.5 hours trying and I finally gave up. I took some pics to show you guys what happened and maybe some of you can tell me what in the hell I did wrong...(oh and btw, I found this DIY guide helpful in a sense that it gave me a very very very general description of what to do but it lacked some major details -- this could be because my car is from Canada and the parts are installed differently?)
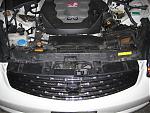
1.) The four pop-up rivets I managed to remove (along with the Infinit emblem). Btw, here's already the first thing I found difficult apparently you pop up the rivets from the center and not from the outter ring of the plastic. It took me a good 15-20 mins to finally figure this out
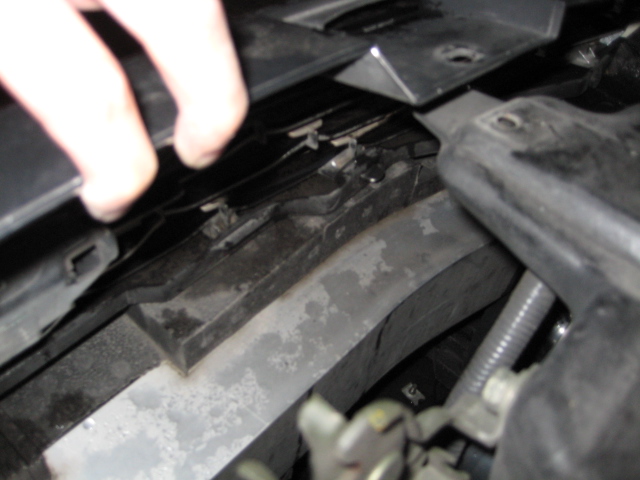
2.) After I removed the four pop-up rivets as instructed on this DIY guide, I found that there are two latches (one on each end of the grill) attaching the grill to the front bumper. I have no f-ing clue how to unlatch these things. This is another thing I found that this DIY did not describe about, I'm not sure if this was because my car is a Canadian one or if it's just supposed to be a "given" that people should already know about? But I sure didn't know.
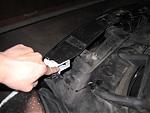
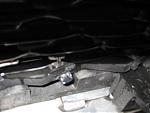
3.) Here's a closer picture of what the latch looks like from the bumper attached to the grill. I know this pic is sort of blurry but my camera is pretty sh*tty, sorry.

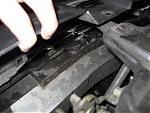
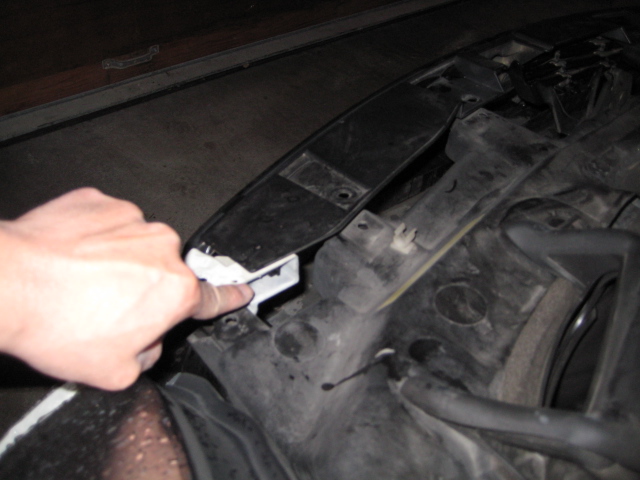
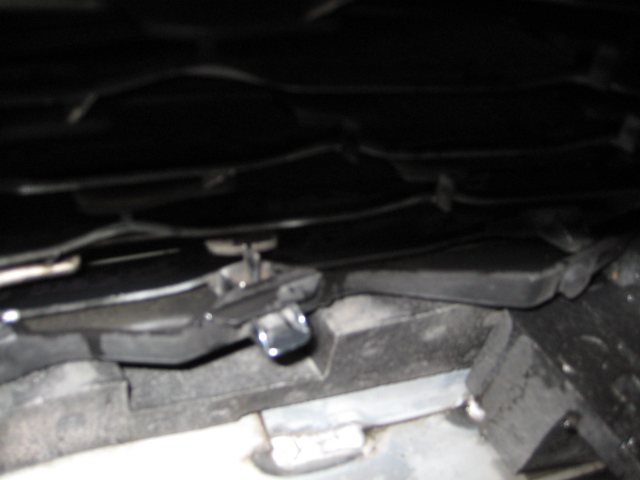
4.) So apparently I have some sort of mental retardation with taking off latches, either that or these latches/tabs are retardly hard to remove. I decided to just ignore everything in 3.) and move on to the tabs as described in the DIY since the DIY guide did not mention anything at all about what I said in 3.) After I tried to push down the tabs with a little bit of force, the grill would not "slide out" at all. And with a little bit more force, the tabs freaking broke off. At first, I felt an "unlatch" sort of feeling and thought oh, that means the tabs have been unlatched. I proceeded with the second one on the side only to see that the second tab snapped and fell off altogether. That was when I realized something was wrong...really wrong...here's a pic of the tabs already gone. The other tab was already snapped but I didn't realize it was actually plastic so I tried to bend it back straight, but obviously that was a wrong decision because when plastic is snapped/bent and just hanging by that little bit remaining...trying to straighten the plastic again only snaps it off altogether.
5.) Here are the remaining outter tabs (the two inner tabs broke off already) and I found these tabs were even harder to push. Hell, I even tried to use force and break them since the other two were broken off already but no luck at all. How the F*CK do you remove these tabs?!?!? I tried looking from all sorts of angles and the more I look at it, the more it seems to be one piece all attached to the grill.
Anyways, to make a long story short I couldn't manage to take off the F*CKING OEM GRILL!! GRRRR!!
I spent almost a good 1.5 hours trying and I finally gave up. I took some pics to show you guys what happened and maybe some of you can tell me what in the hell I did wrong...(oh and btw, I found this DIY guide helpful in a sense that it gave me a very very very general description of what to do but it lacked some major details -- this could be because my car is from Canada and the parts are installed differently?)1.) The four pop-up rivets I managed to remove (along with the Infinit emblem). Btw, here's already the first thing I found difficult
apparently you pop up the rivets from the center and not from the outter ring of the plastic. It took me a good 15-20 mins to finally figure this out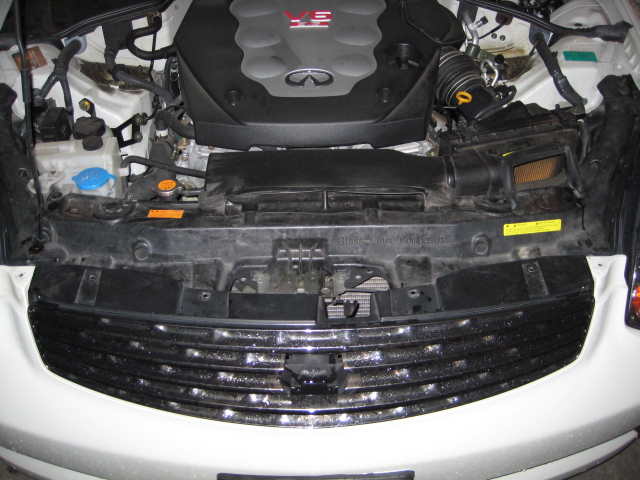
2.) After I removed the four pop-up rivets as instructed on this DIY guide, I found that there are two latches (one on each end of the grill) attaching the grill to the front bumper. I have no f-ing clue how to unlatch these things. This is another thing I found that this DIY did not describe about, I'm not sure if this was because my car is a Canadian one or if it's just supposed to be a "given" that people should already know about? But I sure didn't know.
3.) Here's a closer picture of what the latch looks like from the bumper attached to the grill. I know this pic is sort of blurry but my camera is pretty sh*tty, sorry.
4.) So apparently I have some sort of mental retardation with taking off latches, either that or these latches/tabs are retardly hard to remove. I decided to just ignore everything in 3.) and move on to the tabs as described in the DIY since the DIY guide did not mention anything at all about what I said in 3.) After I tried to push down the tabs with a little bit of force, the grill would not "slide out" at all. And with a little bit more force, the tabs freaking broke off. At first, I felt an "unlatch" sort of feeling and thought oh, that means the tabs have been unlatched. I proceeded with the second one on the side only to see that the second tab snapped and fell off altogether. That was when I realized something was wrong...really wrong...here's a pic of the tabs already gone. The other tab was already snapped but I didn't realize it was actually plastic so I tried to bend it back straight, but obviously that was a wrong decision because when plastic is snapped/bent and just hanging by that little bit remaining...trying to straighten the plastic again only snaps it off altogether.
5.) Here are the remaining outter tabs (the two inner tabs broke off already) and I found these tabs were even harder to push. Hell, I even tried to use force and break them since the other two were broken off already but no luck at all. How the F*CK do you remove these tabs?!?!? I tried looking from all sorts of angles and the more I look at it, the more it seems to be one piece all attached to the grill.
Registered User
Joined: Sep 2008
Posts: 71
Likes: 0
From: Vancouver, BC
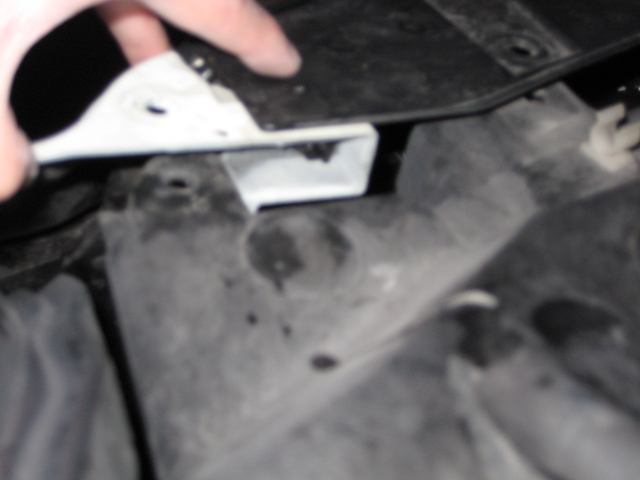
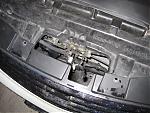
6.) This is a pic to show you where the tabs fell off afterwards. This picture is used to help you refernce where the tabs fell in the second picture. Please next note/point
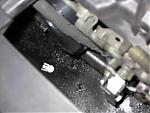
7.) And this is where the tab/latch fell
Somebody please help me!! I was gonna pull my hair out today especially after I found out those tabs were broken...
7.) And this is where the tab/latch fell

Somebody please help me!! I was gonna pull my hair out today especially after I found out those tabs were broken...