
DIY: Rear Sidemarkers as Turn Signals ('06-'07)

Joined: Apr 2008
Posts: 370
Likes: 1
From: Hamilton, Canada
DIY: Rear Sidemarkers as Turn Signals ('06-'07)
So after wiring the front sidemarkers to be turn signals, thanks to the DIY that was posted on here, I wanted to do the rears. I couldn't find anything on here about doing it so I figured I'd try to figure it out. Same concept as the front sidemarkers are applied here and it works perfect.
Function
Turn signal off: sidemarker lit (OEM)
Turn signal on: sidemarker and turn signal alternate (same as the front sidemarkers)

**Disclaimer: I do not take any responsibility for any damage or injuries occurred while following this DIY**
Difficulty
1.5/5. This took me about 30 minutes and I'd think anyone would be able to do this.
Materials
-Wire (I used 18 gauge)
-2 Wire taps (Optional, you can solder the connection as well)
-Quick Disconnects (Optional. I used these to make switching back to OEM easier)
Steps (Passenger Side)
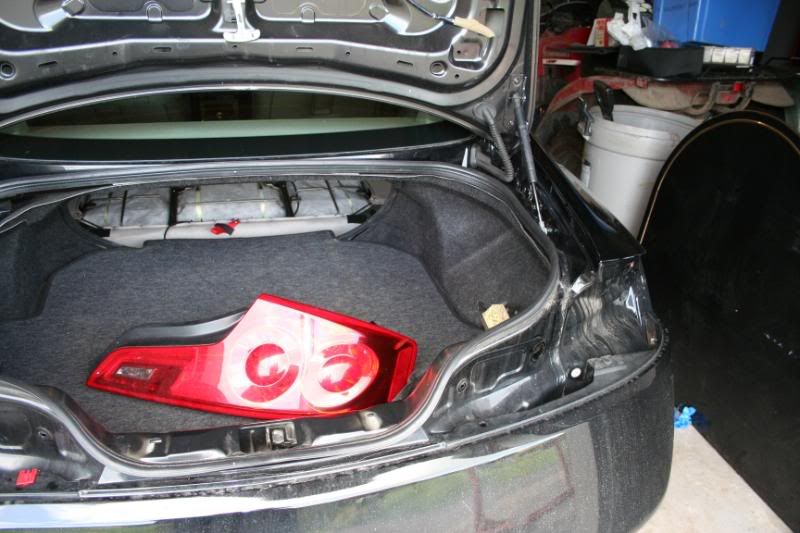
1) Open trunk and remove the interior trim piece that runs across the middle of the back of the trunk. This can be done by pulling it off.
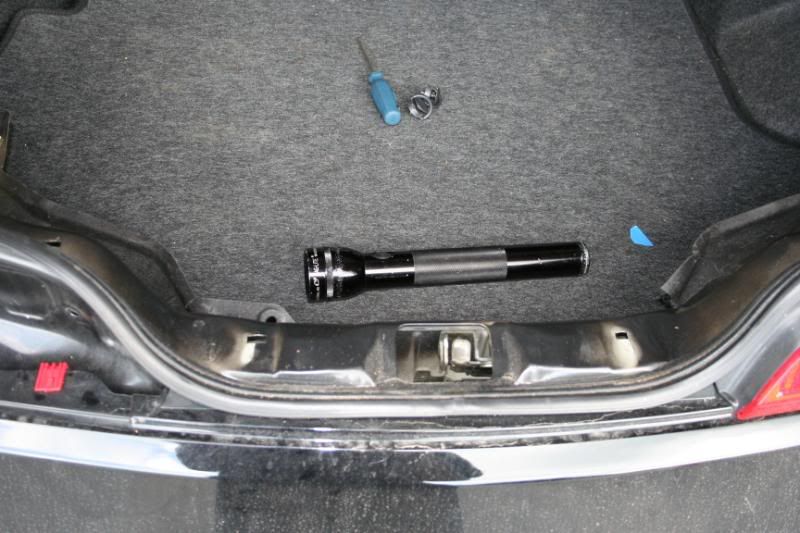
2) Remove the plastic screws holding in the trunk liner. Pull back on the liner to expose the 3 screws holding the tails in.
3) Remove the 2 screws on outside of the taillight (8mm).
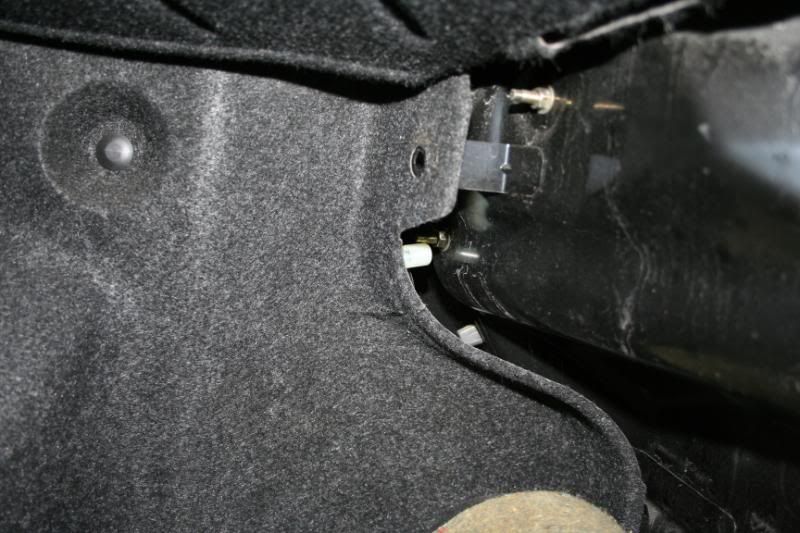
4) Remove the 3rd screw that is above the harness connector. It is behind a hole in the metal, so be careful you don't drop the screw.
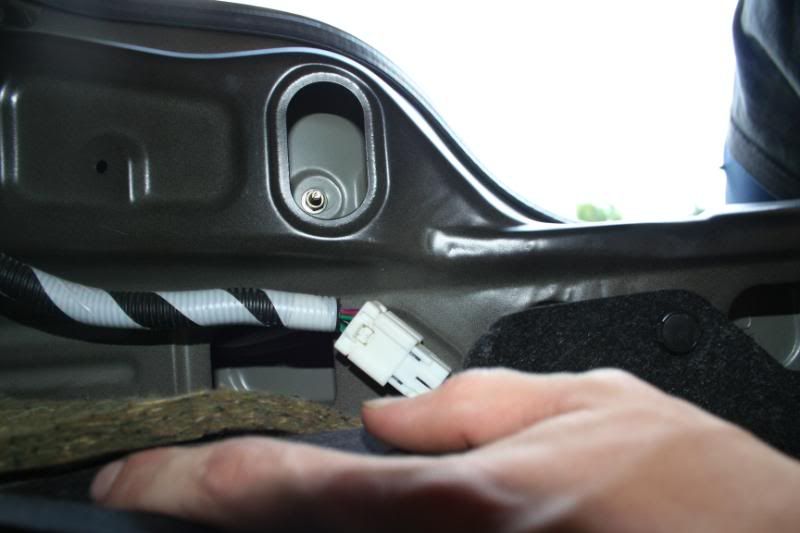
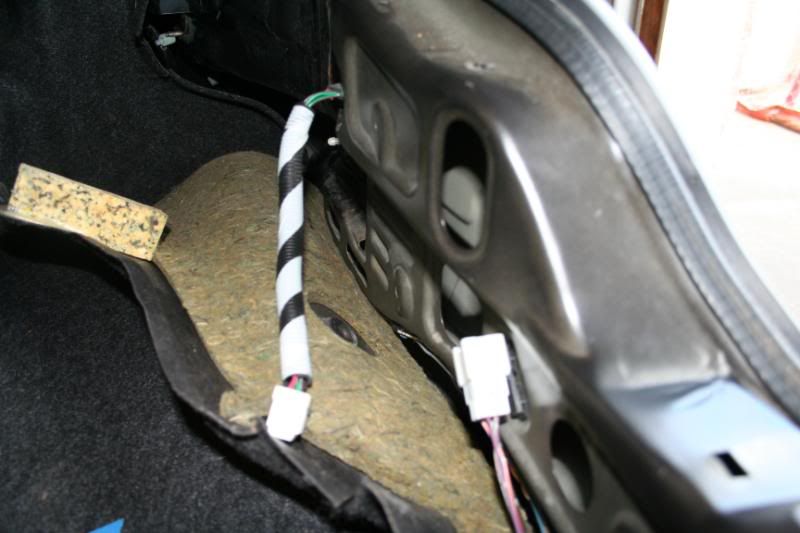
5) Disconnect the connector by pushing the tab and pulling out.
6) Pull the taillight off of the car.
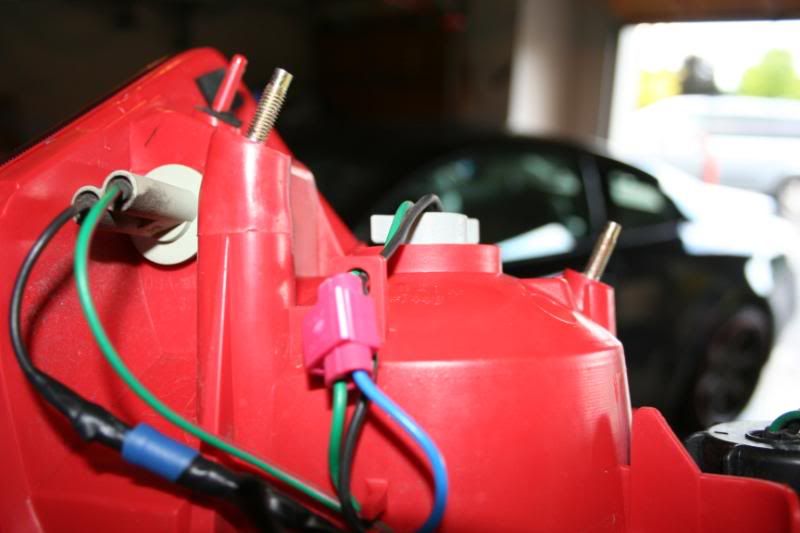
7) Get about 3" of wire. Strip 1/4" off of one end and crimp/solder your quick disconnect.
8) You will be making 2 connections for this. For the first connection you will be cutting the black wire coming from the side marker. On the BULB SIDE of the cut wire, attach a quick disconnect. Plug in the 3" wire you had in step 7.
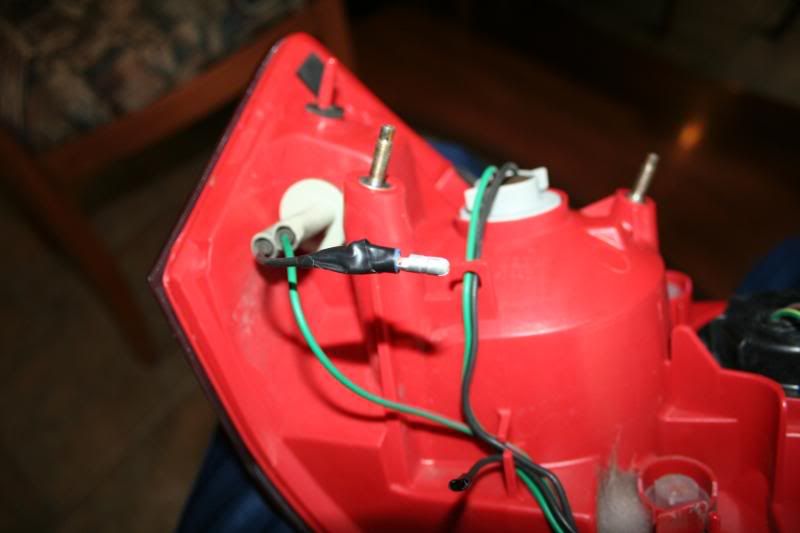
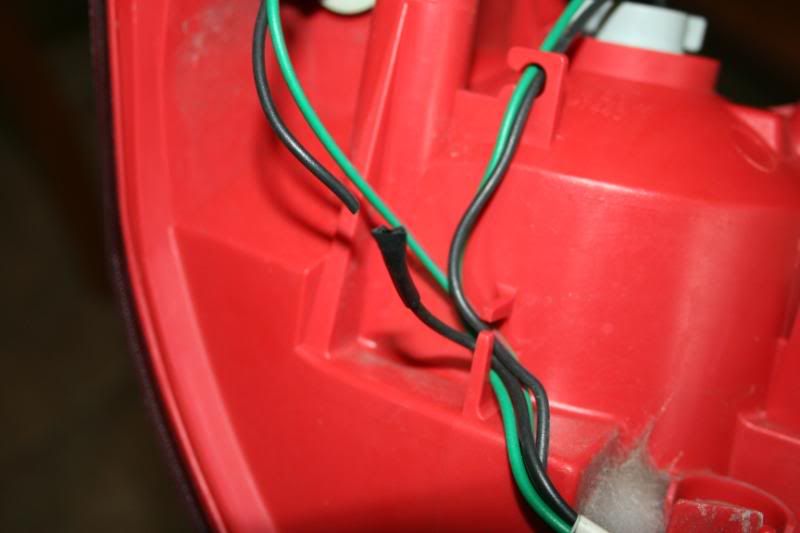
9) Using a wire tap (you can also solder the connection), tap the other end of the 3" wire into the green wire coming from the turn signal bulb.
10) Tape up the lose end of the black wire you cut from step 8.
11) Put everything back together by following the steps in reverse.
12) Enjoy your new turn signals
*The driver's side is the same process*
Function
Turn signal off: sidemarker lit (OEM)
Turn signal on: sidemarker and turn signal alternate (same as the front sidemarkers)
**Disclaimer: I do not take any responsibility for any damage or injuries occurred while following this DIY**
Difficulty
1.5/5. This took me about 30 minutes and I'd think anyone would be able to do this.
Materials
-Wire (I used 18 gauge)
-2 Wire taps (Optional, you can solder the connection as well)
-Quick Disconnects (Optional. I used these to make switching back to OEM easier)
Steps (Passenger Side)
1) Open trunk and remove the interior trim piece that runs across the middle of the back of the trunk. This can be done by pulling it off.
2) Remove the plastic screws holding in the trunk liner. Pull back on the liner to expose the 3 screws holding the tails in.
3) Remove the 2 screws on outside of the taillight (8mm).
4) Remove the 3rd screw that is above the harness connector. It is behind a hole in the metal, so be careful you don't drop the screw.
5) Disconnect the connector by pushing the tab and pulling out.
6) Pull the taillight off of the car.
7) Get about 3" of wire. Strip 1/4" off of one end and crimp/solder your quick disconnect.
8) You will be making 2 connections for this. For the first connection you will be cutting the black wire coming from the side marker. On the BULB SIDE of the cut wire, attach a quick disconnect. Plug in the 3" wire you had in step 7.
9) Using a wire tap (you can also solder the connection), tap the other end of the 3" wire into the green wire coming from the turn signal bulb.
10) Tape up the lose end of the black wire you cut from step 8.
11) Put everything back together by following the steps in reverse.
12) Enjoy your new turn signals
*The driver's side is the same process*
Last edited by cc_brandon; Jul 28, 2009 at 12:38 AM.

Thanks Brandon, looks a lot easier than the fronts. Well, at least access is a heck of a lot easier. I won't have time this week to do it, probably Sunday or next week, but I'll post up any differences I encounter when doing it on a Sedan.
I tell ya, after spending a decent amount of money on mods, I'm really enjoying these inexpensive but labor intensive mods I've been doing lately. Painted grille, painted headlights, front blinker mod, and soon the rear blinker mod and spring swapout. A couple of cans of paint, some sandpaper, and some scrap wire I've got laying around, and I'm having a blast!
I tell ya, after spending a decent amount of money on mods, I'm really enjoying these inexpensive but labor intensive mods I've been doing lately. Painted grille, painted headlights, front blinker mod, and soon the rear blinker mod and spring swapout. A couple of cans of paint, some sandpaper, and some scrap wire I've got laying around, and I'm having a blast!
Joined: Apr 2008
Posts: 370
Likes: 1
From: Hamilton, Canada
Thanks Brandon, looks a lot easier than the fronts. Well, at least access is a heck of a lot easier. I won't have time this week to do it, probably Sunday or next week, but I'll post up any differences I encounter when doing it on a Sedan.
I tell ya, after spending a decent amount of money on mods, I'm really enjoying these inexpensive but labor intensive mods I've been doing lately. Painted grille, painted headlights, front blinker mod, and soon the rear blinker mod and spring swapout. A couple of cans of paint, some sandpaper, and some scrap wire I've got laying around, and I'm having a blast!
I tell ya, after spending a decent amount of money on mods, I'm really enjoying these inexpensive but labor intensive mods I've been doing lately. Painted grille, painted headlights, front blinker mod, and soon the rear blinker mod and spring swapout. A couple of cans of paint, some sandpaper, and some scrap wire I've got laying around, and I'm having a blast!
The sedan should be basically the same. The wires are really easy to find, I just followed the wires from the respective bulb openings.Definitely agree with the cheap mods. It's nice to be able to do some cheap mods to the car and not have to put a lot of cash into it.
I'm having some trouble uploading the video from my camcorder. It's a Sony camcorder and I'm using a Macbook so if anyone has any ideas, that'd be great. In the mean time, I'll try to find another way to get a video up.


Joined: Apr 2008
Posts: 370
Likes: 1
From: Hamilton, Canada

Trending Topics
Just finished the rear mod on a 2005 Sedan. The taillight assembly is very different than your Coupe, and ultimately I can't get the mod to work when the lights are off. I don't have access to the side marker bulb, it's sealed deep inside the light assembly, so I can't test why it won't work. I tried hooking it up directly to the rear turn signal, but it still only works when the headlights are on. I have no idea how you can change the rear side bulbs without either replacing the entire rear light assembly or completely dissabembling it, including breaking the waterproof seal. Oh well, it works with the lights on.
I'll post up a few pics later.
I'll post up a few pics later.
Yes, and the mod works with the lights on. I just checked my Service Manual, and the rear side light is an LED (another error on Sylvania's chart) and can only be replaced by replacing the entire rear lamp assembly.
I tried hooking the sidemarker up directly to the rear signal wiring, only in reverse (green to black, black to green) thinking that would make it always blink the opposite, but I got nothing from the sides at all. I may not have had a solid connection, but I doubt it, and it could be that it reversed the polarity on the side bulb making it stay off. I'm going to open it back up this weekend and see what I can do. There's not a lot of wire in there to work with, so I'm going to get some quick disconnects installed first.
I tried hooking the sidemarker up directly to the rear signal wiring, only in reverse (green to black, black to green) thinking that would make it always blink the opposite, but I got nothing from the sides at all. I may not have had a solid connection, but I doubt it, and it could be that it reversed the polarity on the side bulb making it stay off. I'm going to open it back up this weekend and see what I can do. There's not a lot of wire in there to work with, so I'm going to get some quick disconnects installed first.


Thread
Thread Starter
Forum
Replies
Last Post