
My Kinetex G35 / 350z Front Upper Control Arm Install - Pics Inside


My Kinetex G35 / 350z Front Upper Control Arm Install - Pics Inside
DISCLAIMER: I Am Not Responsible For Any Damages Or Injury That May Occur To You, Others, Pets/Animals or property from Improper Installation. Professional Installation is always suggested on any automotive item.
This will be my first post on this forum. I decided I would try and contribute to the community as it has for me.
This post will cover my Kinetix G35/350z front upper control arm finalized installation. This will not be a step by step
guide but will show what I did during my installation. I hope this helps some people out when making a control arm decision.
Kinetex has always picked up the phone and answered my questions with no hassle so far. I know in the early design they got some bad reviews but I think all those problems have been sorted out. I have put about 2,000 miles on these so far and they have not failed. Adjusting these things isn't so hard it just takes more time to dial them in, each thread turn is supposed to give .2 degrees of camber either + or - depending if you turn in or outward. You should contact them for the proper number. Your alignment shop will figure it out if you dont need to..but at the added hourly expense. Once these things are set thy aren't going anywhere, that's why I got them.
Kinetex Front Upper Control Arms Pros & Cons:
Pros: Low price, lightweight, new tubular design with built in urethane bushings and grease fittings for easy maintenance.
Cons: No instructions, alignment shop needs to do a bit more work to dial it in, exposed ball joints on top.
Completed Install Picture:
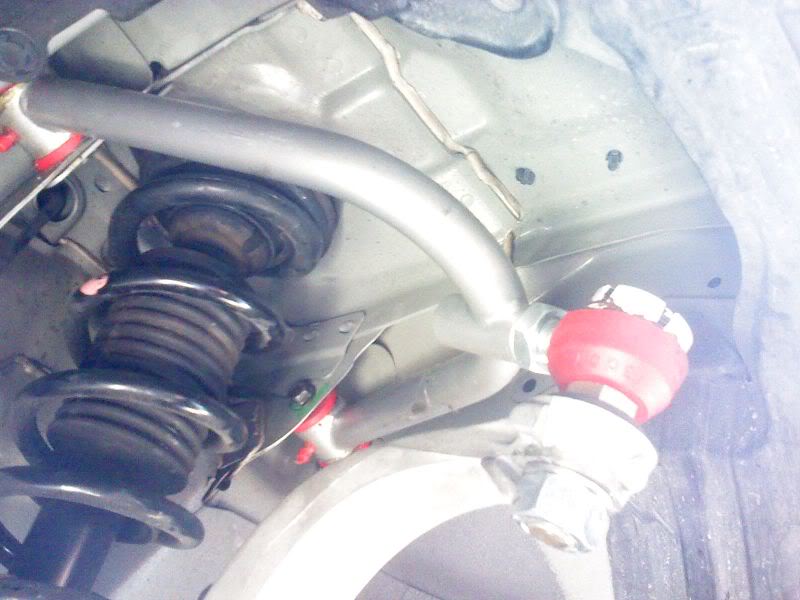
The above photo Shows the Kinetex control arm installed. You will notice the lower castle nut and cotter pin have been replaced by a massive Stop Nut that Kinetex provides with their kit. The grease nipples should be facing the bottom aka pointed down.
Custom Dust Cap:
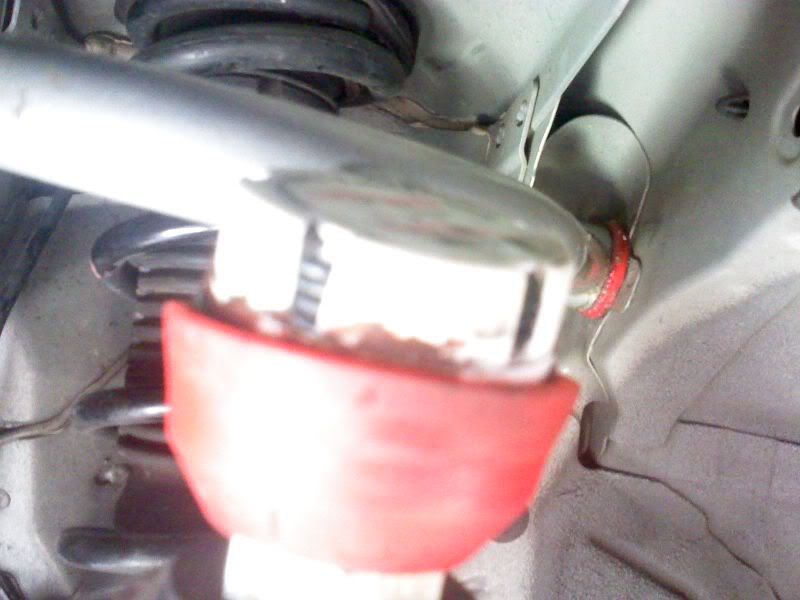
The Kinetex Control Arms only come with a urethane dust boot that covers the lower half of the ball joint. I have read of some people making dust covers out of condoms and other various materials but I feel my method is best, but I wish the caps were metal instead of plastic.
How I made the dust caps:
I used a CVS medicine bottle cap on each side and modified them. Makes me think my control arms are on "steroids" if you think about it..
1) I had to dremel and file the tabs in the inner of the caps so they sit flush on the ball joints.
2) The caps have holes in them so if you look in the gaps you see that i fitted O rings inside.
3) I put grease inside the cap so that the ball joint doesn't get dry or bind from heat.
4) Once I had it all in place I sealed it with gasket maker RTV (brown type) around the cap and ball joint and let it set. I let them set for about a day before driving around with them.
2,000 Miles so far and they are still on the car.
I hope you all enjoyed this. I have some other low budget and great mods that I will be sharing as soon as I have time to get some pictures up.
MAZ350
05 G35 Coupe 6MT/ 05 G35 Sedan AT & 03 350z Touring 6MT
This will be my first post on this forum. I decided I would try and contribute to the community as it has for me.
This post will cover my Kinetix G35/350z front upper control arm finalized installation. This will not be a step by step
guide but will show what I did during my installation. I hope this helps some people out when making a control arm decision.
Kinetex has always picked up the phone and answered my questions with no hassle so far. I know in the early design they got some bad reviews but I think all those problems have been sorted out. I have put about 2,000 miles on these so far and they have not failed. Adjusting these things isn't so hard it just takes more time to dial them in, each thread turn is supposed to give .2 degrees of camber either + or - depending if you turn in or outward. You should contact them for the proper number. Your alignment shop will figure it out if you dont need to..but at the added hourly expense. Once these things are set thy aren't going anywhere, that's why I got them.
Kinetex Front Upper Control Arms Pros & Cons:
Pros: Low price, lightweight, new tubular design with built in urethane bushings and grease fittings for easy maintenance.
Cons: No instructions, alignment shop needs to do a bit more work to dial it in, exposed ball joints on top.
Completed Install Picture:
The above photo Shows the Kinetex control arm installed. You will notice the lower castle nut and cotter pin have been replaced by a massive Stop Nut that Kinetex provides with their kit. The grease nipples should be facing the bottom aka pointed down.
Custom Dust Cap:
The Kinetex Control Arms only come with a urethane dust boot that covers the lower half of the ball joint. I have read of some people making dust covers out of condoms and other various materials but I feel my method is best, but I wish the caps were metal instead of plastic.
How I made the dust caps:
I used a CVS medicine bottle cap on each side and modified them. Makes me think my control arms are on "steroids" if you think about it..
1) I had to dremel and file the tabs in the inner of the caps so they sit flush on the ball joints.
2) The caps have holes in them so if you look in the gaps you see that i fitted O rings inside.
3) I put grease inside the cap so that the ball joint doesn't get dry or bind from heat.
4) Once I had it all in place I sealed it with gasket maker RTV (brown type) around the cap and ball joint and let it set. I let them set for about a day before driving around with them.
2,000 Miles so far and they are still on the car.
I hope you all enjoyed this. I have some other low budget and great mods that I will be sharing as soon as I have time to get some pictures up.
MAZ350
05 G35 Coupe 6MT/ 05 G35 Sedan AT & 03 350z Touring 6MT
Last edited by Maz350; Aug 3, 2010 at 09:20 PM.

Registered User
Joined: Jul 2009
Posts: 87
Likes: 0
hey there
hey i have the black version idk if its the old model or not but was wondering is your car lowered? mine is and im havving issues with the end tward the fender the ball joint actualy rubbing or touching the fender when i try and bring the camber back to 0, did you have to do any fender mods?
Getting Camber to Zero (0)
My car is not lowered, dunked or even leaning and the stupid suspnsion was eating up the tires like a fat girl at the buffet..
These arms only do + or - 1.5 degrees so you might not be able to get you camber to Zero (0) depending on the drop. I would suggest you don't chop your fender up and force it because that would mean your ball joint adjusment would be at the end of it's threads where it fits in the control arm shaft. You really dont want to do that on the old design arms either. I would call Kinetex and ask them to upgrade you to the tube version. Maybe at a small upgrade price?
Kinetex had the right idea early in the game but the old design looks really questionable. I know it's steel but I personally don't like those welds.
Most of the other brands stick to the factory design layout. The Kinetex design is obviously far from it but it does give adjustment where the factory gives none...Nissan + Infiniti Arms = Fail
Most dealers selling the Kinetex stuff always show the v1 metal plate arms but are actually selling the v2 tubular arms. Those dealers should get their act together.

Thread
Thread Starter
Forum
Replies
Last Post