
DIY - Headlight Restoration


DIY - Headlight Restoration
So... I decided to restore my headlights today! Along the way, I took pictures, so I'm made this handy-dandy DIY to contribute to the forum (I didn't see one with pics, at least).
Without further ado:
Materials you will need to do a proper restoration:
REQUIRED:
A power drill you can use as a buffer (1000+ RPM is good) (borrow one from a friend if you need to)
- Don't forget an extension cord if you need one! I needed TWO!
Meguiar's Headlight Restoration Kit ($24.99)
2" Blue painter's tape ($10.99)
2000 Grit Wet Or Dry Sandpaper ($4.99)
A bucket of clean water
An hour of time
Optional:
A big sponge (makes it easier to wetsand, keeps the sandpaper from getting defunked, & saves your fingers some ache and pain)
An iPod or other entertainment (to pass the time while you degrime :J )
All materials
(Excuse the pecan tree tassels, I live in TX, these things are all over the place right now)
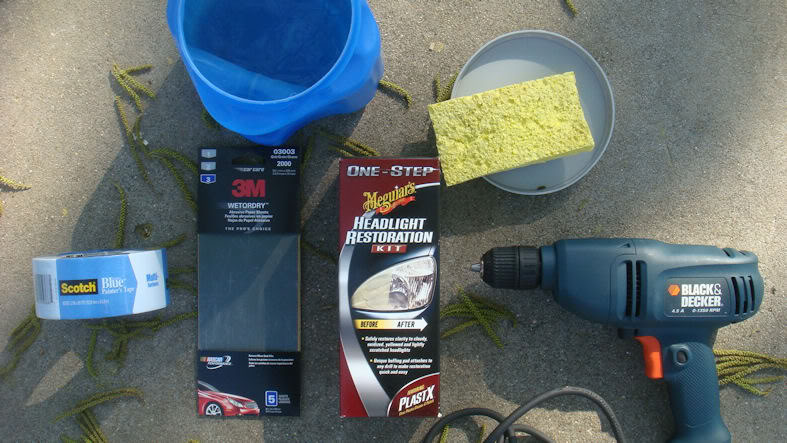
1000+ RPM Drill (Mine has a cord, yours may not)

Meguiar's Headlight Restoration Kit
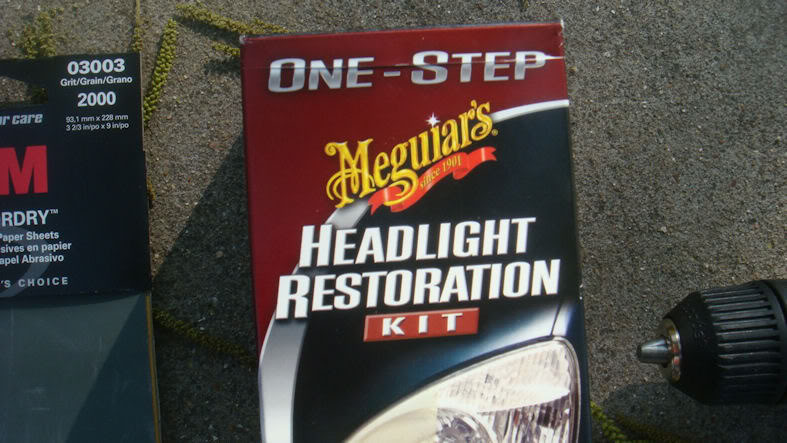
3M 2000 grit WETORDRY Sandpaper

The rest is common sense, so refer to the first pic above, I just wanted everyone to see specifics.
So first we have our car:
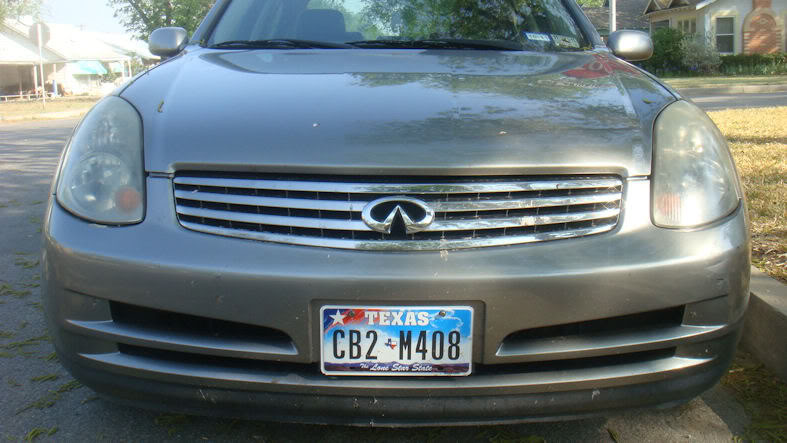
Notice the yellowing?

Up close it's IN YOUR FACE!

Disgusting

So now we begin fixing it...
First, mask off the area around the headlight so you can go hogwild with your sanding and not worry about removing your paint's clear
Like so:

(This was my devirginizing experience with painter's tape, and I got tape happy... In retrospect, this much really isn't necessary)
**TIP: If you just lay the tape down on the areas around the lens, it'll come up when you're wetsanding.
To help prevent this, lay the tape sticky-side-up on the headlight, then slide it about a quarter inch under the painted area, then fold over.
Wet your sponge and wipe your headlight free of any dirt, droppings, and other debris. Once it's "clean", proceed!
Next, you'll want to take a sheet of the wetsand paper and wrap it longways across your sponge.

Keeping the two together, dip them in your bucket of water:

Now, applying gentle, constant pressure, give your headlight a good wetsanding.

**NOTE: Gentle pressure is all that's needed. Think of it like rubbing your friend's back when they're face-first in the toilet after a night of heavy drinking.
**NOTE: Also, you can wetsand in any direction you want. I did long-ways down the lens (vertically) and then did a waxing motion. The result will be the same.
You'll notice that the water dripping down is really cloudy:

This is good. It's a sign that the headlight is still dirty, and you're making progress!
When there's no more water coming out of the sponge, it's time to get more water!
**NOTE: It's important you keep this a WET sanding process. It helps the paper glide, and eventually you'll feel like there's no more "rough" feeling to the sanding process, which is when you can stop and proceed to the next step.
After a while, you'll feel the "roughness" of the headlight disappear, and when you run your wet sponge over the headlight, it looks really clear:

Good! We're almost done! Here's a comparison for where we stand so far:

"WTF! My headlight's getting foggy!"

"DUDE WTF! IT'S EVEN WORSE NOW!!"

Sorry, friends. I led you here to LOL in your face.
THE END!
No actually, this is where we use the good stuff... Meguair's Headlight Restoration Kit:

**EASTER EGG: 03/04 Sedan owners will find a familiar image on the back of the box ;J
Inside your MHRK, you will find the following:
A buffer pad for your drill.
A washable Microfiber towel
and Meguair's PlastX (this is how the magic happens)
**WARNING: Before continuing, I have to stress to you it's VERY important that you not contaminate your buffer pad or your microfiber towel with any debris at this point, or you're gonna pineapple the blueberry out of your headlight.
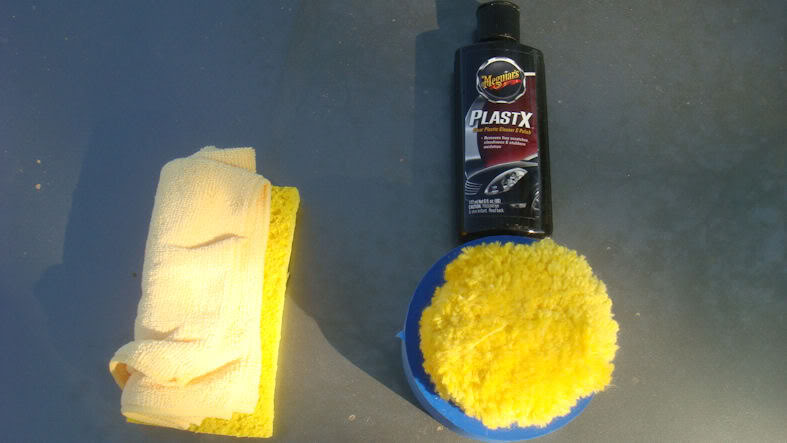
**NOTE: Sponge not included, that's MY SPONGE! GET YOUR OWN!
Load and secure the buffer pad into your drill:

Apply a nickel to quarter sized amount of PlastX directly onto the buffer pad:

**NOTE: DO NOT BUFF WITH A NICKEL ATTACHED, READ ABOVE WARNING! Nickel was just for reference.
Prior to turning it on, apply the buffer to the headlight... Unless you like creamy white stuff all over your face.

Make like Schwarzenegger and buff up! Use a sweeping motion across your headlight. If you run out of PlastX on the buffer, apply more PlastX and continue.

**TIP #1: You want to buff at a slight angle, so you don't lose control of your drill.
**WARNING: Don't use the EDGE of the buffer or you'll pineapple the blueberry out of the headlight!
**TIP #2: You don't need, or even want, to apply more than light pressure. Get the PlastX on there, and use the buffer to apply it across the headlight.
**TIP #3: The faster your drill spins, the better the buff.
If this is the first time you're restoring a headlight, take some time to pick your jaw off the floor.


BUT WAIT! THERE'S MORE! Don't forget about this little guy:

He needs loving, too.
BUT WATCH OUT!:

Now give it some good ol' fashioned elbow grease, applying a moderate pressure to your hand buffing.

Now you need to repeat these processes to the other headlight, remove the tape, and admire:

Damn tassels! Lastly, wash your car because even if you don't have tassels like I do, it still looks like your car was crying like a little bitch.
Here's some before and after side-by-side's for your viewing pleasure. Please note, these don't do the headlights justice... They look brand new. So new, in fact, that from some angles, it looks like I completely removed the plastic part I just got finished cleaning.


Hope this helps you all out! - Mark
Without further ado:
Materials you will need to do a proper restoration:
REQUIRED:
A power drill you can use as a buffer (1000+ RPM is good) (borrow one from a friend if you need to)
- Don't forget an extension cord if you need one! I needed TWO!
Meguiar's Headlight Restoration Kit ($24.99)
2" Blue painter's tape ($10.99)
2000 Grit Wet Or Dry Sandpaper ($4.99)
A bucket of clean water
An hour of time
Optional:
A big sponge (makes it easier to wetsand, keeps the sandpaper from getting defunked, & saves your fingers some ache and pain)
An iPod or other entertainment (to pass the time while you degrime :J )
All materials
(Excuse the pecan tree tassels, I live in TX, these things are all over the place right now)
1000+ RPM Drill (Mine has a cord, yours may not)
Meguiar's Headlight Restoration Kit
3M 2000 grit WETORDRY Sandpaper
The rest is common sense, so refer to the first pic above, I just wanted everyone to see specifics.
So first we have our car:
Notice the yellowing?
Up close it's IN YOUR FACE!
Disgusting
So now we begin fixing it...
First, mask off the area around the headlight so you can go hogwild with your sanding and not worry about removing your paint's clear
Like so:
(This was my devirginizing experience with painter's tape, and I got tape happy... In retrospect, this much really isn't necessary)
**TIP: If you just lay the tape down on the areas around the lens, it'll come up when you're wetsanding.
To help prevent this, lay the tape sticky-side-up on the headlight, then slide it about a quarter inch under the painted area, then fold over.
Wet your sponge and wipe your headlight free of any dirt, droppings, and other debris. Once it's "clean", proceed!
Next, you'll want to take a sheet of the wetsand paper and wrap it longways across your sponge.
Keeping the two together, dip them in your bucket of water:
Now, applying gentle, constant pressure, give your headlight a good wetsanding.
**NOTE: Gentle pressure is all that's needed. Think of it like rubbing your friend's back when they're face-first in the toilet after a night of heavy drinking.
**NOTE: Also, you can wetsand in any direction you want. I did long-ways down the lens (vertically) and then did a waxing motion. The result will be the same.
You'll notice that the water dripping down is really cloudy:
This is good. It's a sign that the headlight is still dirty, and you're making progress!
When there's no more water coming out of the sponge, it's time to get more water!
**NOTE: It's important you keep this a WET sanding process. It helps the paper glide, and eventually you'll feel like there's no more "rough" feeling to the sanding process, which is when you can stop and proceed to the next step.
After a while, you'll feel the "roughness" of the headlight disappear, and when you run your wet sponge over the headlight, it looks really clear:
Good! We're almost done! Here's a comparison for where we stand so far:
"WTF! My headlight's getting foggy!"
"DUDE WTF! IT'S EVEN WORSE NOW!!"
Sorry, friends. I led you here to LOL in your face.
THE END!
No actually, this is where we use the good stuff... Meguair's Headlight Restoration Kit:
**EASTER EGG: 03/04 Sedan owners will find a familiar image on the back of the box ;J
Inside your MHRK, you will find the following:
A buffer pad for your drill.
A washable Microfiber towel
and Meguair's PlastX (this is how the magic happens)
**WARNING: Before continuing, I have to stress to you it's VERY important that you not contaminate your buffer pad or your microfiber towel with any debris at this point, or you're gonna pineapple the blueberry out of your headlight.
**NOTE: Sponge not included, that's MY SPONGE! GET YOUR OWN!
Load and secure the buffer pad into your drill:
Apply a nickel to quarter sized amount of PlastX directly onto the buffer pad:
**NOTE: DO NOT BUFF WITH A NICKEL ATTACHED, READ ABOVE WARNING! Nickel was just for reference.
Prior to turning it on, apply the buffer to the headlight... Unless you like creamy white stuff all over your face.
Make like Schwarzenegger and buff up! Use a sweeping motion across your headlight. If you run out of PlastX on the buffer, apply more PlastX and continue.
**TIP #1: You want to buff at a slight angle, so you don't lose control of your drill.
**WARNING: Don't use the EDGE of the buffer or you'll pineapple the blueberry out of the headlight!
**TIP #2: You don't need, or even want, to apply more than light pressure. Get the PlastX on there, and use the buffer to apply it across the headlight.
**TIP #3: The faster your drill spins, the better the buff.
If this is the first time you're restoring a headlight, take some time to pick your jaw off the floor.
BUT WAIT! THERE'S MORE! Don't forget about this little guy:
He needs loving, too.
BUT WATCH OUT!:
Now give it some good ol' fashioned elbow grease, applying a moderate pressure to your hand buffing.
Now you need to repeat these processes to the other headlight, remove the tape, and admire:
Damn tassels! Lastly, wash your car because even if you don't have tassels like I do, it still looks like your car was crying like a little bitch.
Here's some before and after side-by-side's for your viewing pleasure. Please note, these don't do the headlights justice... They look brand new. So new, in fact, that from some angles, it looks like I completely removed the plastic part I just got finished cleaning.
Hope this helps you all out! - Mark
Last edited by RADRaze2KX; Aug 5, 2012 at 04:42 PM.
Why thank you. It was my first proper restoration, did it today. I would've taken more/better headlight pics but the sun was going down. I started at about 7PM and finished around 8PM.
My previous experience with PlastX was so-so, I used it on my friend's 98' Ford Contour and we just buffed it in by hand, with just a bit of wet sending prior to. They came out more clear, but not "brand new" clear.
After today's experiment, I'm a believer
My previous experience with PlastX was so-so, I used it on my friend's 98' Ford Contour and we just buffed it in by hand, with just a bit of wet sending prior to. They came out more clear, but not "brand new" clear.
After today's experiment, I'm a believer
Thanks DrewLe  I wasn't sure how well they'd turn out, but I certainly didn't expect them to look as good as they do now. I'll post up better after pics tomorrow when the sun's back out.
I wasn't sure how well they'd turn out, but I certainly didn't expect them to look as good as they do now. I'll post up better after pics tomorrow when the sun's back out.


LOL Glad someone liked my sense of humor. Or maybe everyone just glances at the pics and goes "yup.. yup.. k.. k... yup.. k.. done" 
Trending Topics
I forgot to mention, the materials cost about $45 after tax. You have PLENTY of supplies left over after you've done your car to do someone else's. I'm going to do some of my buddies' cars this week and charge them as I go. I should make back well more than I spent on materials

Thank you. I had done a half-assed restoration before with 1500 wet sanding and no power tools, used PlastX and it left enough of an impression on me to try it again. I heard a lot of good stuff about it when it's used right, and I figured "hey, I used it wrong before, and it still came out alright". I was also considering the Turtle restoration kit, but decided to stick with Meguiar's because I absolutely love their detailing products.


I still have some "Spiderweb" effect going on I guess due to the age of the headlights and sun weathering. The effect is only seen from certain angles, but I think I may try to do a complete restoration with 220/440/600/800/1500/2000/2500 wet sanding. If I do that, THEN I'll clear bra it (had to google "clear bra" to figure out what you were talking about haha) Another time though, these are beautiful for now. Thank you MichaelHuynh13 and TheScreenSavers.


