
Review: Meguiar's 2-Step Headlight Restoration Kit Sanding and Polishing System


Review: Meguiar's 2-Step Headlight Restoration Kit Sanding and Polishing System
I feel like an idiot, as I totally forgot to take a before picture. But my headlights basically had yellow splotches intermittently spread about them and had a generally hazy look. I'm sure a lot of you guys know what I'm talking about.
I did a little research, and I was about to buy some sandpaper and polish, then I came across this kit that had everything put together for me. The kit comes with a polishing drill attachment, a microfiber cloth, 1000 and 3000 grit sandpaper, a hand pad for the sandpaper, polishing compound, and a headlight protection liquid. At only $25, it's actually a pretty decent deal considering all of the things that are given. The procedure was very straight forward, and it only took me about 20 minutes from start to finish (for more info on the procedure, just YouTube it. There are plenty of videos that spell out the process from start to finish). All in all, I am extremely happy with my purchase, and I would recommend this product to anyone with headlights that could use some sprucing up.
After: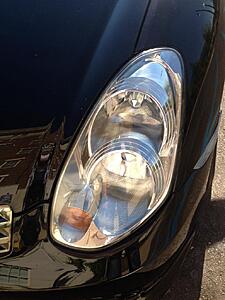


Joined: Mar 2009
Posts: 18,299
Likes: 1,488
From: By the sea, Tx
G35 sedan w/ too much money in mods

Looks great. IMO the only way to really get badly hazed headlights looking like new is to wetsand them at some point in the cleaning process like you did. The secret is keeping them clean and new looking without a lot of other maintenance. I've seen a lot of people use different methods with differing results. Clear bra material and automotive grade clear coat seem to be the most popular 2 solutions.

Registered User
Joined: Mar 2009
Posts: 55
Likes: 0
Were do you find 1000 and 3000 grit sandpaper? I tried Lowes and Home Depot but they only go as high as 600.
I have the Meguiar's kit but it's the one with the drill attachment and polish, no sandpaper. So I figured I'd just buy the sandpaper but can't find it.
I have the Meguiar's kit but it's the one with the drill attachment and polish, no sandpaper. So I figured I'd just buy the sandpaper but can't find it.

The kit the guy has is the "Heavy" one.. it comes with the sand paper. I just did mine this weekend. You might try a hardware store like "Ace Hardware" i think that what it is still called.
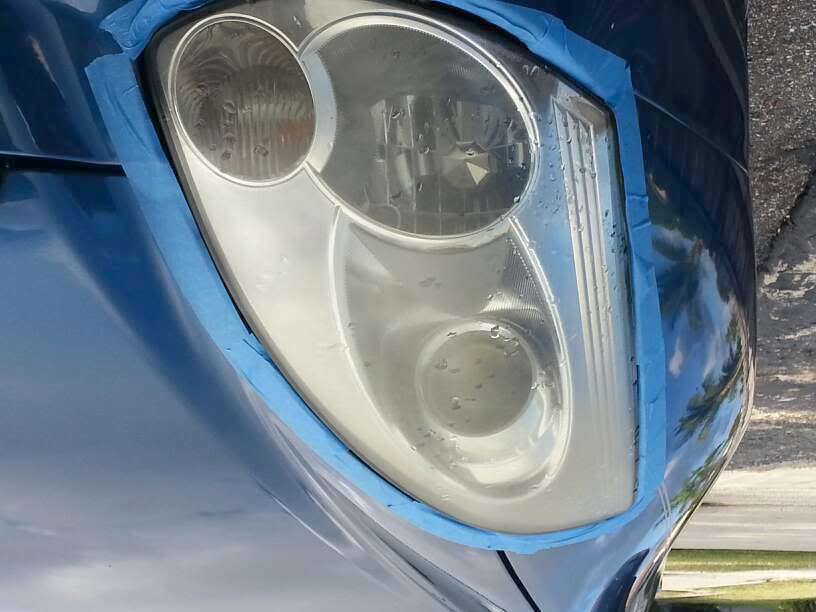
Before
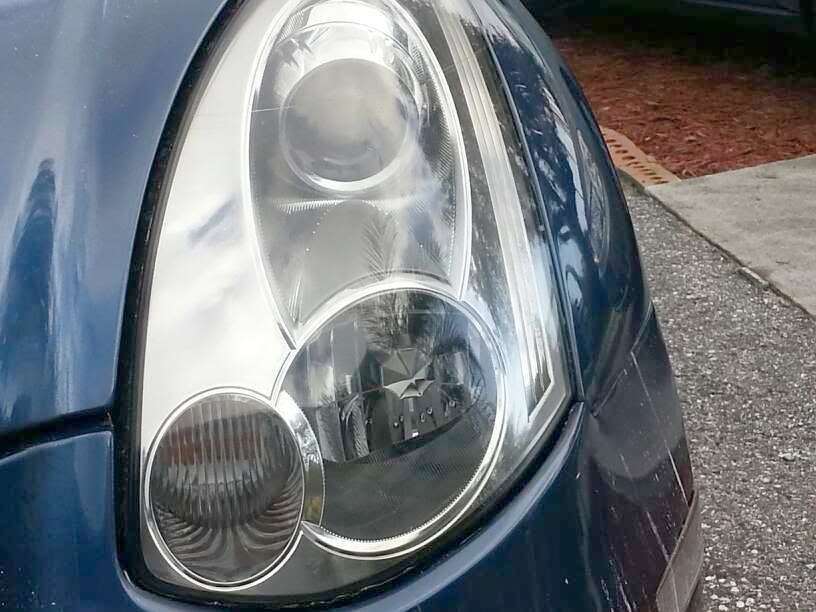
After
Before
After


Did this to my cars as well. Very happy with the kit, although to be truly "complete" it should come with masking tape so you're not sanding the paint around the headlights.
Trending Topics

Registered User
Joined: Dec 2013
Posts: 17
Likes: 0
looks good!
I have been restoring lights for years. Here is my process that lasts
1. wash the lights very very good (sometimes I will clay bar them If i have the materials)
2. once the lights are cleaned wetsand with 1500 then 2000 grit.
3. Whip out the rotary buffer and hit it with a wool pad and some semi aggressive compound.
4. follow up with a polish and a foam polishing pad. I will usually use a DA with this but you can use a rotary buffer since its a small area.
5. Put a sealer on it then wax..... the wax will not last long but the sealer under it will. Just re wax 1 every 6 weeks.
I always have minty lights. Anyone reading this BEWARE of the headlight kits that make you spread on some bull*** glaze stuff. you will ruin your headlights.
I have been restoring lights for years. Here is my process that lasts
1. wash the lights very very good (sometimes I will clay bar them If i have the materials)
2. once the lights are cleaned wetsand with 1500 then 2000 grit.
3. Whip out the rotary buffer and hit it with a wool pad and some semi aggressive compound.
4. follow up with a polish and a foam polishing pad. I will usually use a DA with this but you can use a rotary buffer since its a small area.
5. Put a sealer on it then wax..... the wax will not last long but the sealer under it will. Just re wax 1 every 6 weeks.
I always have minty lights.
Anyone reading this BEWARE of the headlight kits that make you spread on some bull*** glaze stuff. you will ruin your headlights.

Thread
Thread Starter
Forum
Replies
Last Post
FS[Canada]: G35 Front Upper Strut Tower Bar
netcbc
Steering & Suspension CDN
1
Jul 24, 2015 11:23 PM