
b&m line lock installation w part #'s

b&m line lock installation w part #'s
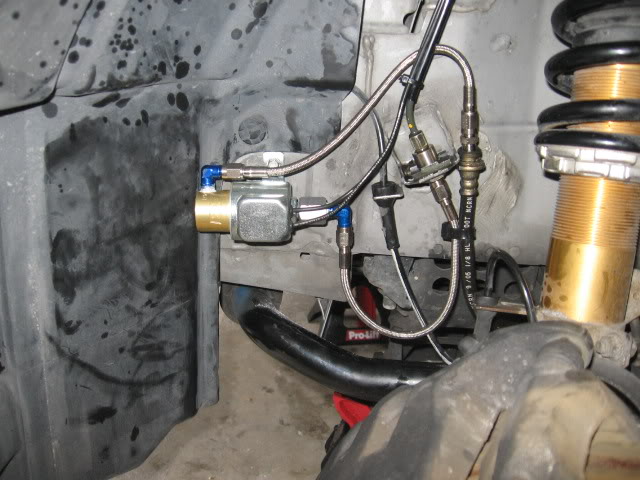
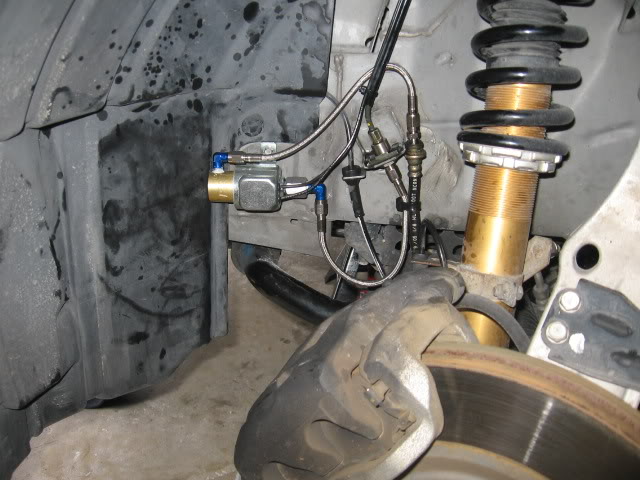
Welp peeps the line locks are in and the set up is simple. I will probably catch some $hit for the placement but I installed them in the wheel wells. It took about 3 hrs to install and 2 hrs to wire. I have pictures of the install and a breakdown of parts. I will post them up later. ps price of everything total was around 170$ Talk to you soon
Here are some pics of the install
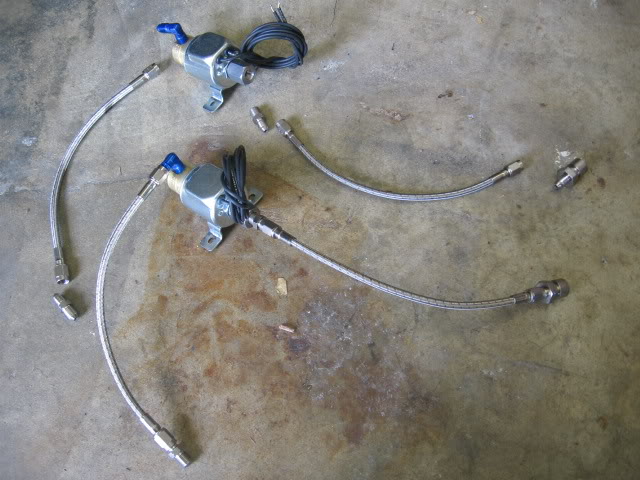
here are the part numbers do some shopping around and you should be able to find it under $175
xrp fittings
(4) 982203 elbow 90 #3flare-1/8 npt
(1) 410103 3 male to m10x1.0mm female (pair)
(1) 420003 3 male to m10x1.0mm male (pair)
(4) 630009 strait 3 to straight 9" hose
B&M
(2) 46075 launch solenoids
Good luck and happy burn outs!!!!!!!

I went straight to the battery for the solenoids and ran the switch below my vdc switch That may not be the best place if you get frustated easy. There are steps to using it but once you get the hang of it, it fkn rocks!!!! The switch and inline fuse/wire I picked up at the local autoparts store.
steps for running
enter water box
make sure the rear tires get wet
engage brakes hard
activate switch
disengage breaks (fronts will maintain pressure)
lite em up
deactivate switch and power out of burn out
stage and make a good pass!!!!
Good luck!!!
steps for running
enter water box
make sure the rear tires get wet
engage brakes hard
activate switch
disengage breaks (fronts will maintain pressure)
lite em up
deactivate switch and power out of burn out
stage and make a good pass!!!!
Good luck!!!

that is the first thing you do after you start your car. unless you have the kp tech mod. The vdc is one reason I for sure wouldnt put the solenoid switch near the vdc switch. Later mike
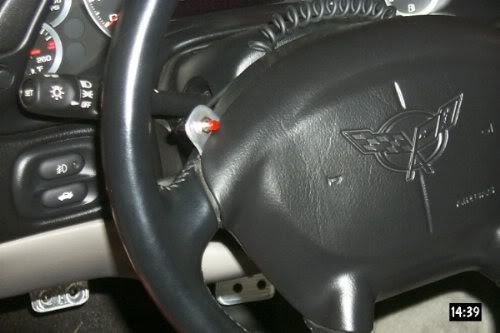
I would put a momentary switch so you can hold it down when burning out and then release to get out of the box.
What voltage did the solenoids say it needed?
What voltage did the solenoids say it needed?
Trending Topics
12v with an inline 4amp fuse per solenoid I actually ran a 10amp. I'm against momentary switch. You could find one for the steering wheel or shifter but while doing a side ways burnout in the water box I prefer one on the shifter and one on the wheel.

so the m10 pieces come in packs of 2 for those XRP part #'s?
(1) 410103 3 male to m10x1.0mm female (pair)
(1) 420003 3 male to m10x1.0mm male (pair)
the jegs solenoids are a lil cheaper and are the same, so i'll prolly try those.
Great DIY!!! thanks!
(1) 410103 3 male to m10x1.0mm female (pair)
(1) 420003 3 male to m10x1.0mm male (pair)
the jegs solenoids are a lil cheaper and are the same, so i'll prolly try those.
Great DIY!!! thanks!
Last edited by str8dum1; Jul 8, 2009 at 09:53 PM.

can you post a few pics of how you have your switch.
Also one of your replies is a little confusing. YOu say you are against a momentary switch.
And then say its best to have a switch on the steering wheel and on the shifter. Can you clarify what you did?
I'd like to do a momentary switch on the shifter but dont see any clean way to do so. A simple on/off switch might be the only option (that appears how you have yours done also).
Not really against a momentary switch. But the location of as momentary switch is the problem. You will need to have a finger on the switch the full time both during the burnout or during the launch. They do sell several really trick momentary switches. But the problem with that is the switch wiring needs to move with the steering wheel. You can however mount it to the shifter there are also several line lock switches or nos switches you can use. I guess it just depends on your shift ****. All in all remember during the burn out you should have either both hands on the wheel or one on the wheel and one on the shifter. That was my true reason for a on/off switch. Found this pic online and this would be the way to go on a wheel mount
Last edited by rpm06g35; Jul 13, 2009 at 10:51 PM. Reason: new

Thanks jb! Went out for a shakedown pass on the drag radials (since installing the rear pumpkin cover bushing) No wheel hop and the tire heating procedure makes for a good show. Let me know jb later
Last edited by rpm06g35; Sep 19, 2009 at 10:05 AM. Reason: spell check

Thread
Thread Starter
Forum
Replies
Last Post
RAVSPEC
Wheels & Tires-Vendor
0
Aug 5, 2015 03:53 PM