
DIY: Pumpkin Swap


DIY: Pumpkin Swap
I recently did another 3.5fd w/vLSD Pumpkin Swap, and i thought id share with you guys how I went about it.
CAUTION: Install at your own risk. This is only a tutorial, and I will not resume responsibilty if anything goes wrong with your install.
First: Raise car and place on jack stands
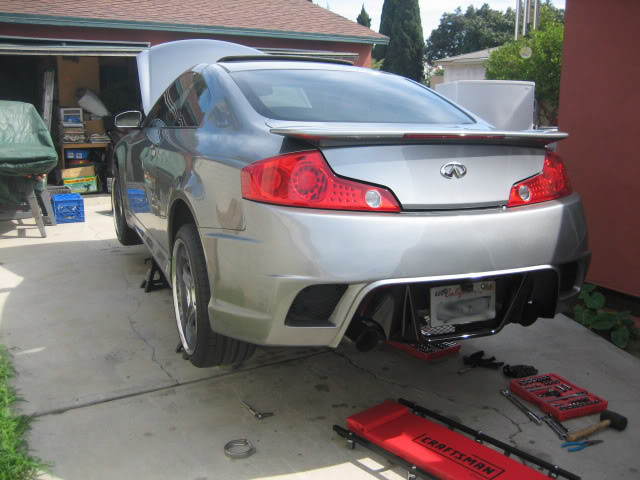
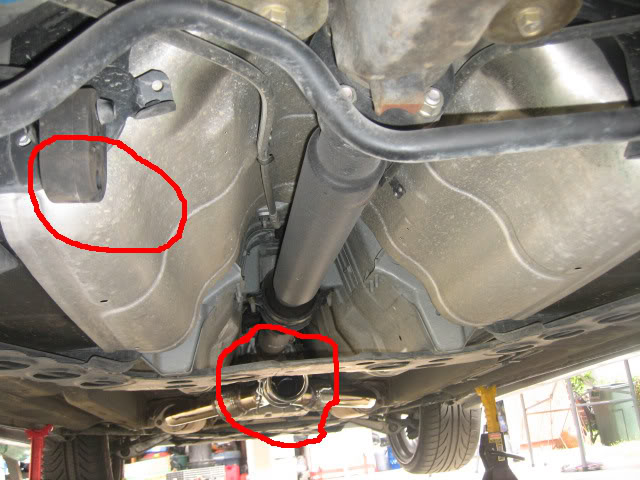
Remove exhaust mid pipe
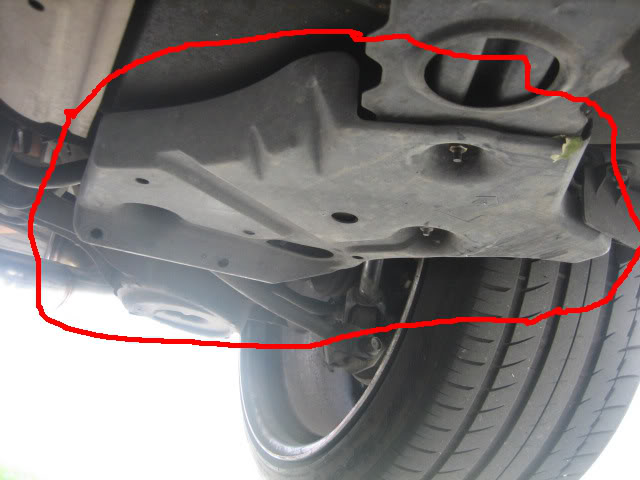
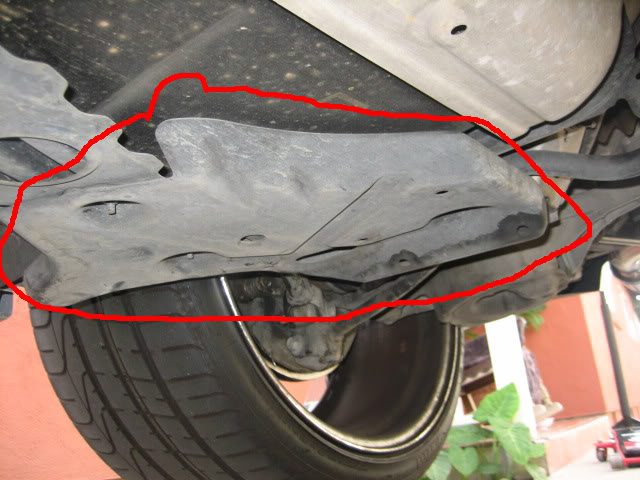
Remove bottom rear plastic trim pieces
Remove rear swaybar


CAUTION: Install at your own risk. This is only a tutorial, and I will not resume responsibilty if anything goes wrong with your install.
First: Raise car and place on jack stands
Remove exhaust mid pipe
Remove bottom rear plastic trim pieces
Remove rear swaybar
Last edited by bikinilust; Sep 16, 2009 at 06:42 PM.
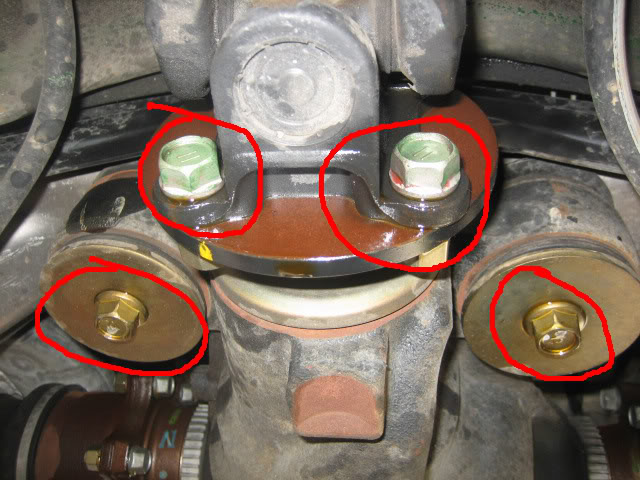
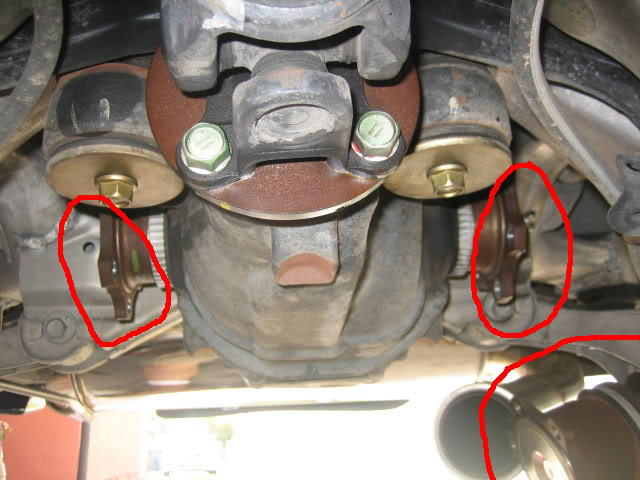
Lube drive shaft flange bolts and bushing bolts
I used PB Blaster
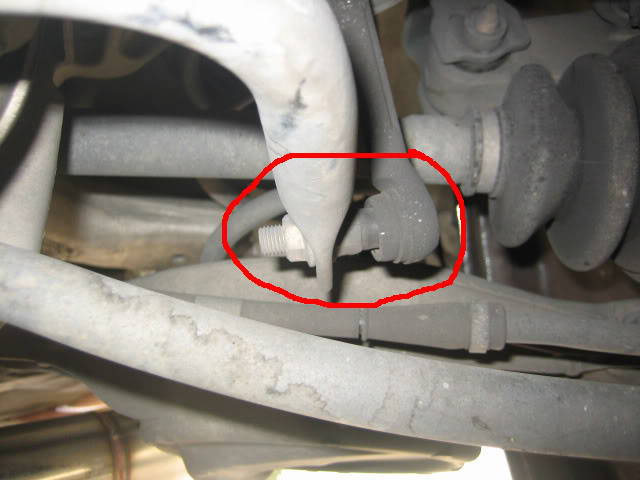
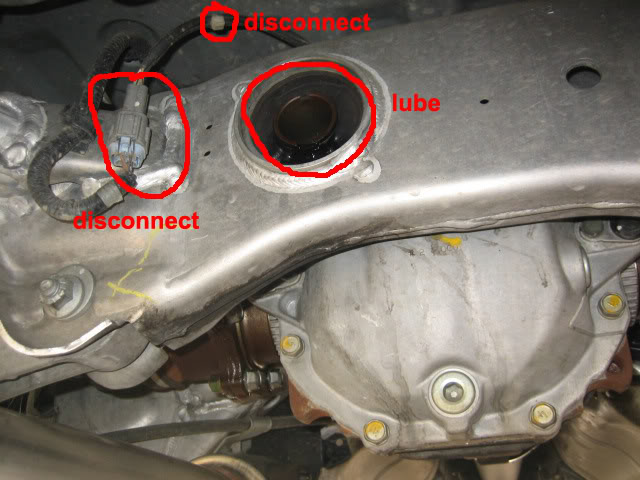
Lube rear bolt and disconnect wheel sensor harness
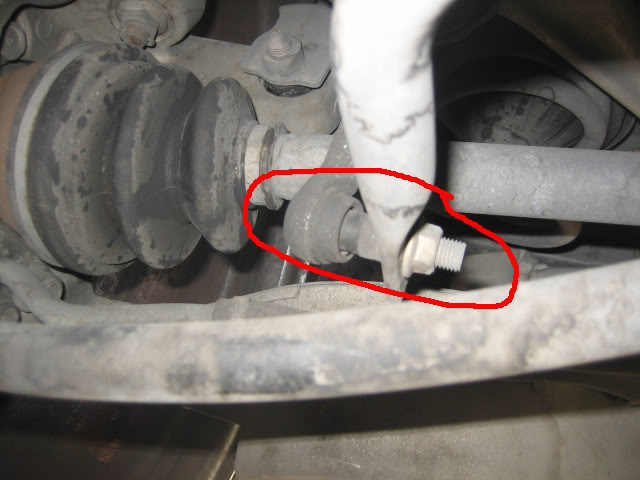
Lube axle stub bolts, then remove those bolts
Hang axles with wire or zip ties so they are not just dangling free
I used PB Blaster
Lube rear bolt and disconnect wheel sensor harness
Lube axle stub bolts, then remove those bolts
Hang axles with wire or zip ties so they are not just dangling free
Last edited by bikinilust; Sep 16, 2009 at 06:43 PM.
Remove drive shaft flange bolts
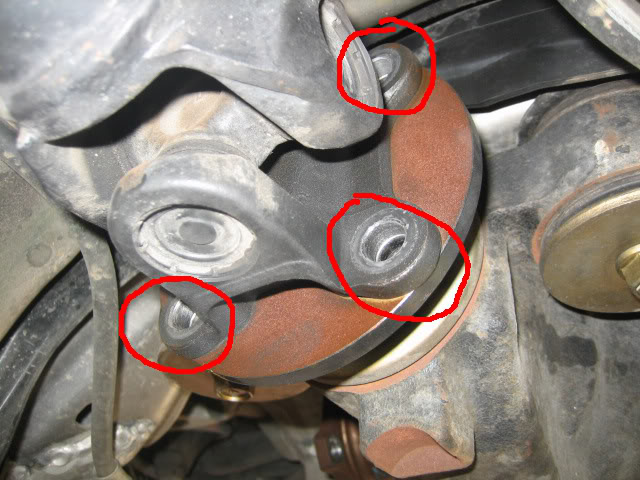
Place jack under pumpkin and remove pumpkin bushing bolts.
Im using a transmission jack adapter to make it a little easier.
I picked up this adapter @ Harbor Freight for about $40.

Place jack under pumpkin and remove pumpkin bushing bolts.
Im using a transmission jack adapter to make it a little easier.
I picked up this adapter @ Harbor Freight for about $40.
Last edited by bikinilust; Sep 16, 2009 at 06:45 PM.
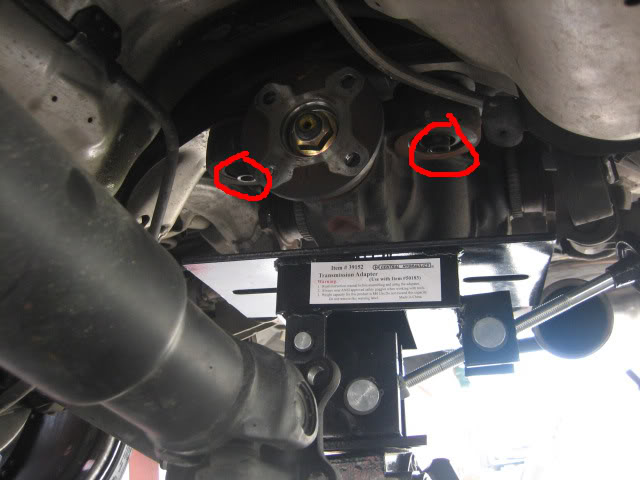
Remove rear bolt
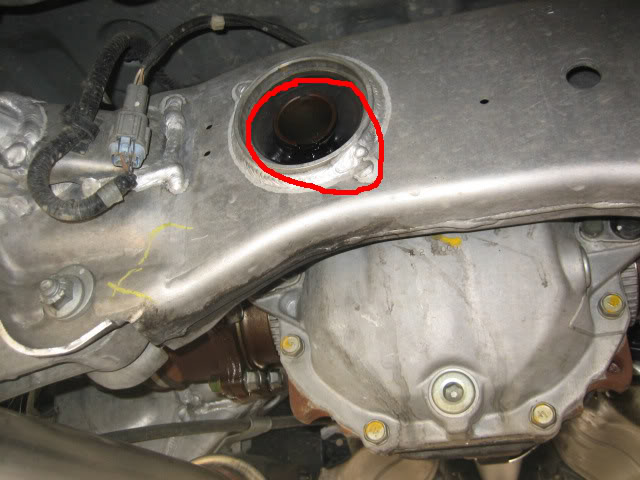
now lower jack by about 2", then push jack forward just enough for the rear stud to slide out. Now reach around top and you will see a rubber hose clamped onto the differential cover. Disconnect that hose [sorry forgot to take picture of this step]. Then you can completely lower the jack and remove the pumpkin.
Install is the Reverse.
TIP for Install: raise pumpkin in place with rear stud in its hole, then install bushing bolts and install till hand tight. Then hand tight the rear bolt. Then torque the bushing bolts. Then torque the rear bolt. Going little by little like this ensures a smooth install because alignment wont give you any hassle.
Last edited by bikinilust; Sep 17, 2009 at 04:28 PM.
Torque Specs:
Pumpkin
Drive Shaft Bolts - 54 ft/lbs
Bushing Bolts - 74 ft/lbs
Axle Bolts - 52 ft/lbs
Rear Nut - 81 ft/lbs
Sway Bar
Bushing Nuts - 25 ft/lbs
Endlink Nuts - 41 ft/lbs
Pumpkin
Drive Shaft Bolts - 54 ft/lbs
Bushing Bolts - 74 ft/lbs
Axle Bolts - 52 ft/lbs
Rear Nut - 81 ft/lbs
Sway Bar
Bushing Nuts - 25 ft/lbs
Endlink Nuts - 41 ft/lbs

Nice and detailed, excuse my ignorance, but what is a pumpkin swap? what does it do, and what excattly do the toque specs mean, you get those increased toque power to the wheels with different bolts and nuts you use? thanks.
OEM AT has a 3.3FD gear ratio
OEM MT has a 3.5FD gear ratio
alot of guys that have the AT want to swap their entire differential [pumpkin] with the MT's differential so they can have a higher gear ratio for a relatively cheap price [cheaper compared to getting the aftermarket 3.9 or 4.083 gears installed into the pumpkin itself]. The higher final drive gear ratio shifts the power band over, and gives you torque earlier on in the each gear.
Torque specs = the amount of torque each individual nut or bolt have. In other words, how tight the bolt or nut should be. The amount of torque turned on a nut or bolt can be determined by using a Torque Wrench.
FYI: Torque Specs are determined by the NISSAN engineers
Trending Topics
ok, thank you. When you say cheap, that means all you have to pay for is the part, a Mt's diff.? How much are they and where do you get them. I have never heard of this, and i'm glad you did a DIY because I just might when I get some time. Thanks.
**EDIT**
How long did it take you also?
**EDIT**
How long did it take you also?

What can I say? I may go out of my way and spend an extra 10 min to get somethings out of my way to make life easier and prevent scratches on customer's exhaust pipes and sway bars. Unlike some people, I like to work smart, not hard. And i always torque nuts and bolts to specs. Some people drive like a grandpa and never put any real stress on their cars, thus getting away with not having to torquing to specs. But i deal with all types of drivers and i like to do things right the first time. But hey, what do i know? Ive only installed a dozen of these without any customer complaints.
Install time is based on your mechanical skills, your tools, If you have a helpful friend or neighbor, and how easy it is to raise your car. Some cars are really low which require a little more time to raise onto jacks.


What can I say? I may go out of my way and spend an extra 10 min to get somethings out of my way to make life easier and prevent scratches on customer's exhaust pipes and sway bars. Unlike some people, I like to work smart, not hard. And i always torque nuts and bolts to specs. Some people drive like a grandpa and never put any real stress on their cars, thus getting away with not having to torquing to specs. But i deal with all types of drivers and i like to do things right the first time. But hey, what do i know? Ive only installed a dozen of these without any customer complaints.
