
DIY - Transgo Valve Body Upgrade


Thread Starter
|
Registered User
Joined: Oct 2009
Posts: 23
Likes: 9
From: McDonough, GA
DIY - Transgo Valve Body Upgrade
I'm going to start off with saying this "kit" is not for someone who has never worked on cars ..
I AM NOT responsible if you mess up your car, tranny, fingers, etc
this is just a tool to help someone decide if they want to do this mod themselves or pay someone
and if you do decide to do it yourself, this should help make the install go smoothly :thumbup:
.................................................. ................................................
Tools -
10mm, 14mm, 19mm sockets / 14mm wrench
drain pan
torque wrenches (ft lb for drain plug .. inch lb for everything else) - I had to buy inch lb torque wrench .. $40 @ napa
funnel
5mm allen head socket
stiff wire (use to help get shims out valve body)
dikes / pliers
flat screwdriver
punch or 1/4" drive extension (drive in tapered orfice)
light hammer
Supplies -
8 quarts NISSAN S-MATIC ATF (do not use anything else) $8.12 / quart with discount (work at dodge dealer) .. they wanted $18
two rolls of paper towel or shop towels
Transgo Valve Body Upgrade Kit $295 (really fast free shipping from forged performance .. also avail. @ GTM)
Vaseline or suitable assembly lube / grease (hold ***** in place)
Instructions -
Download both VB Removal and Transgo Install pdf files off GTM website
Start One Day Trial with transgo website and download three more files
(Study all and become familiar with the parts, bolts, etc before starting)
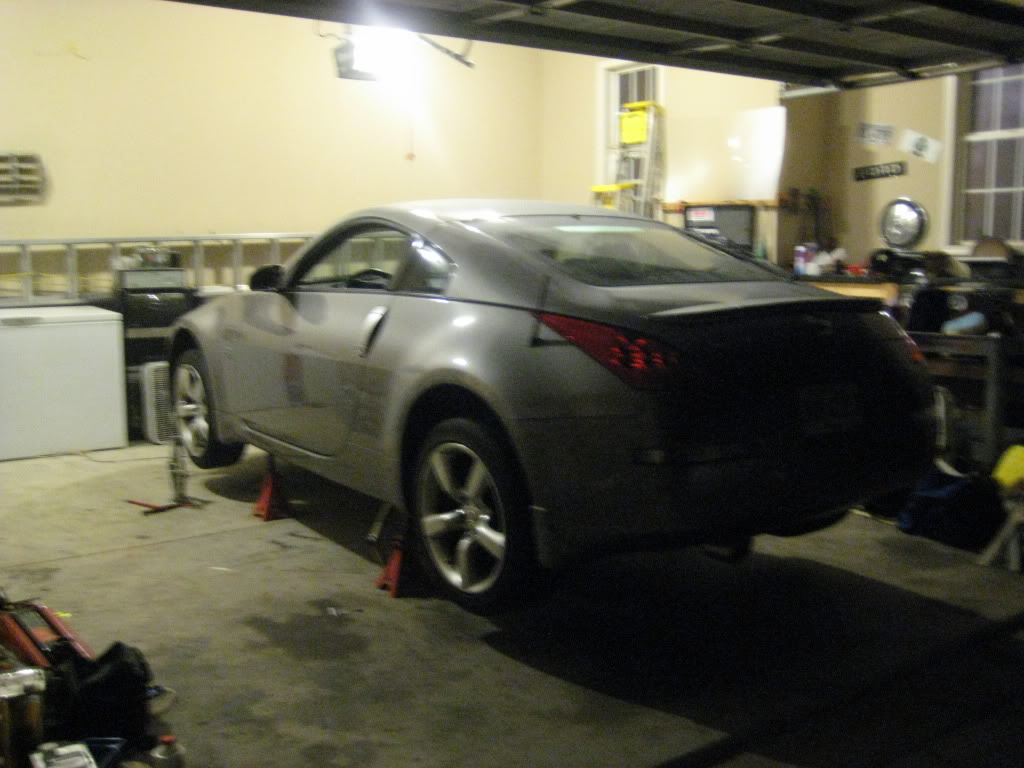
1) Jack car up and set on jack stands, then drain tranny fluid (4 quarts), re-install drain plug at 35 ft lb
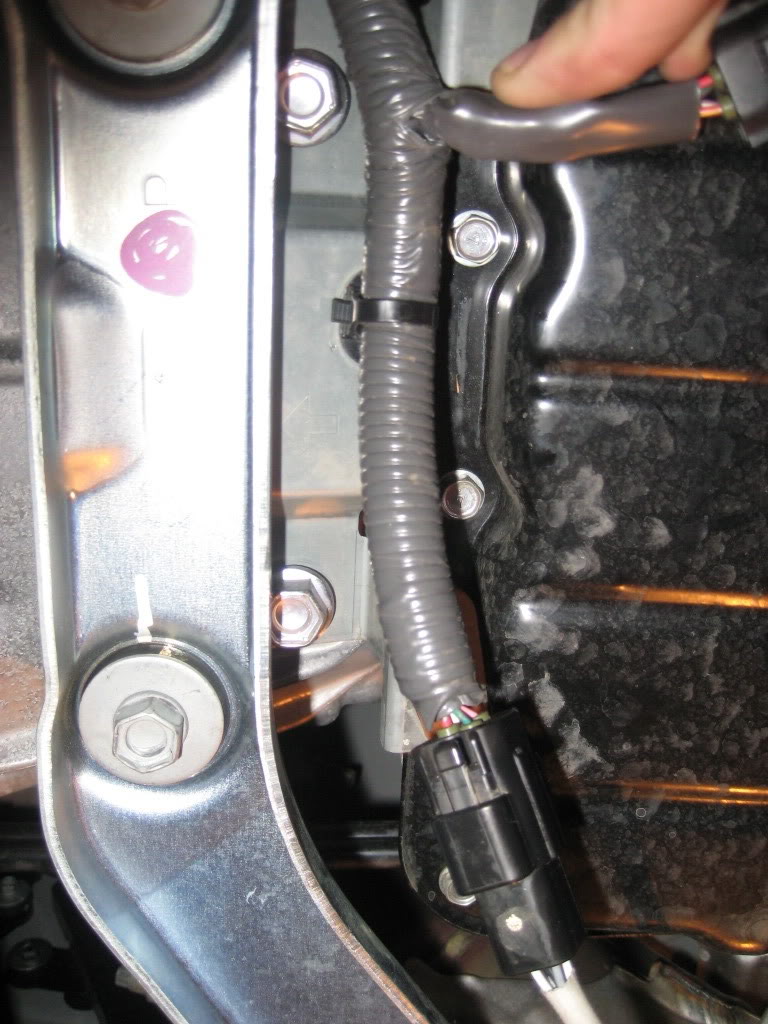
2) Remove two bolts holding the bracket that 02 sensor wires mount to .. one on passenger side with 14mm wrench .. drivers side with socket .. then remove wire clip from bracket for easy install
unclip o2 sensor wires and push everything out of the way
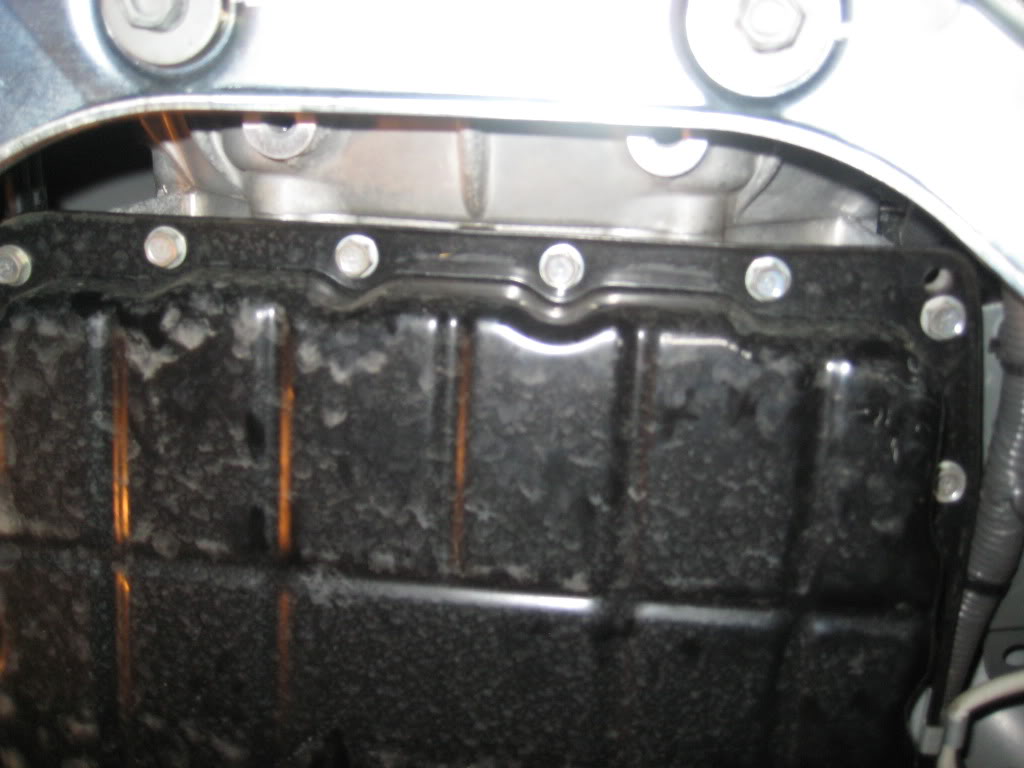
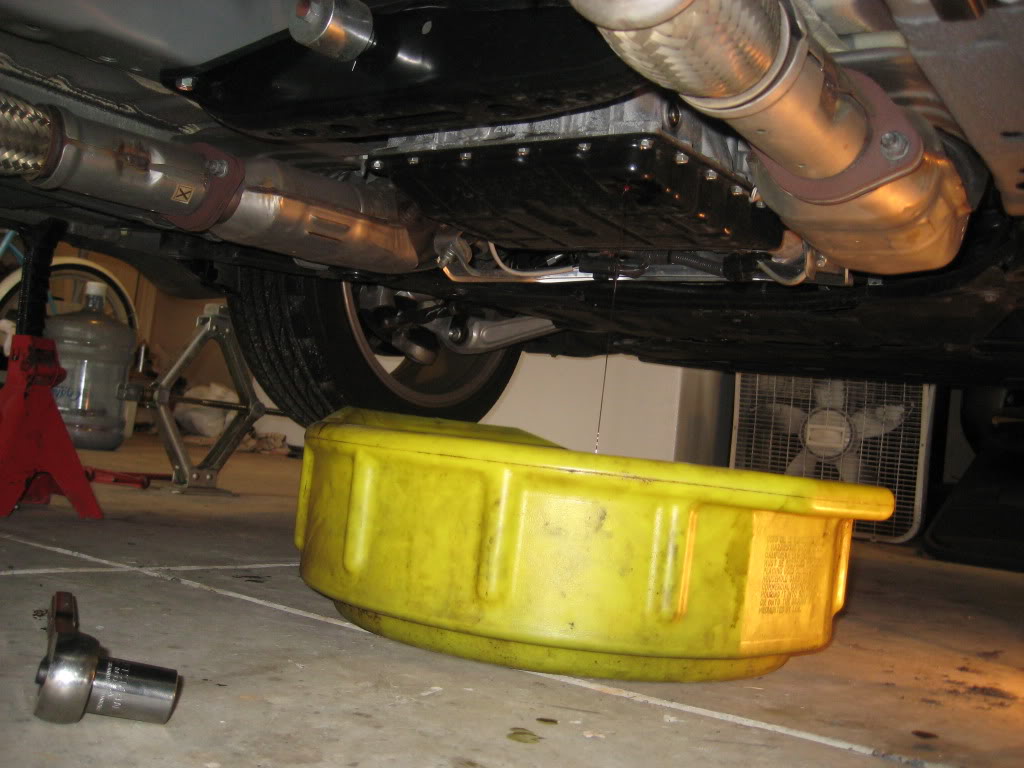
3) Take 10mm bolts out of tranny pan and drop, drain, and put to the side (wont need it for a while)
there will be another quart or so in the pan
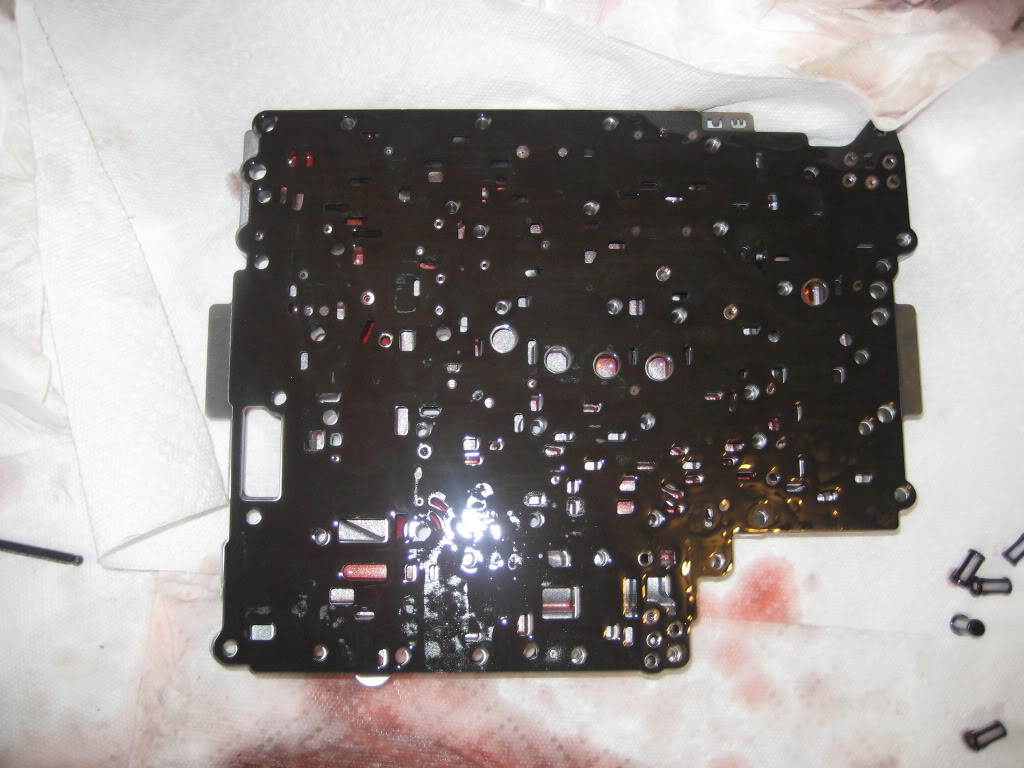
then you see this
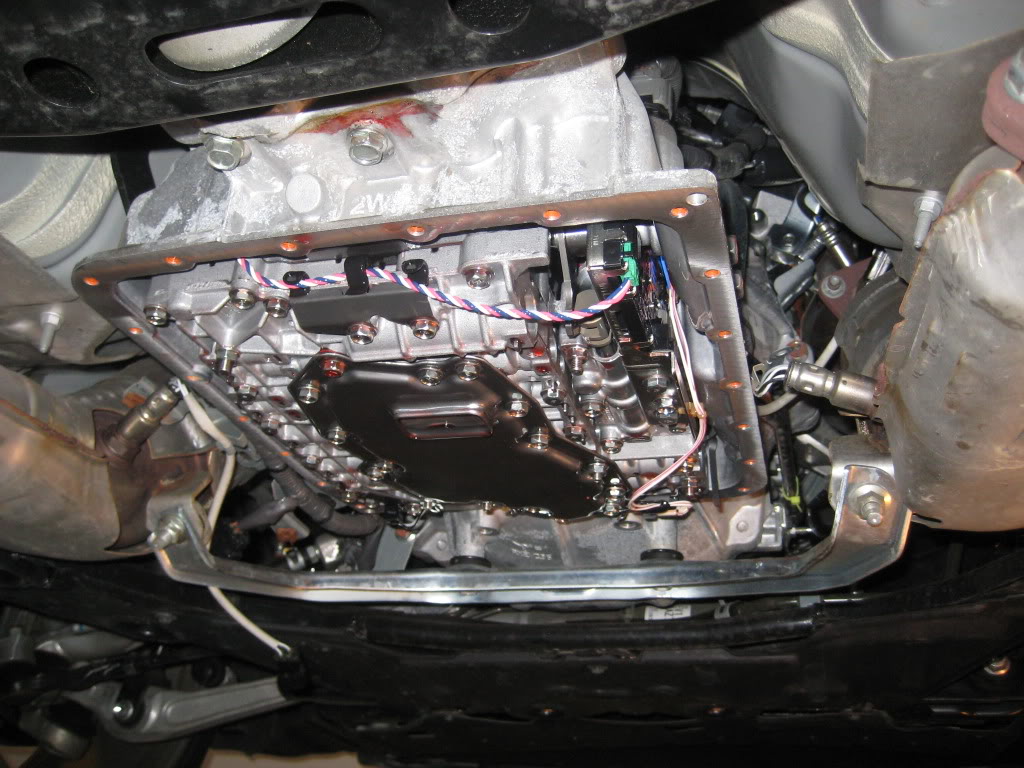
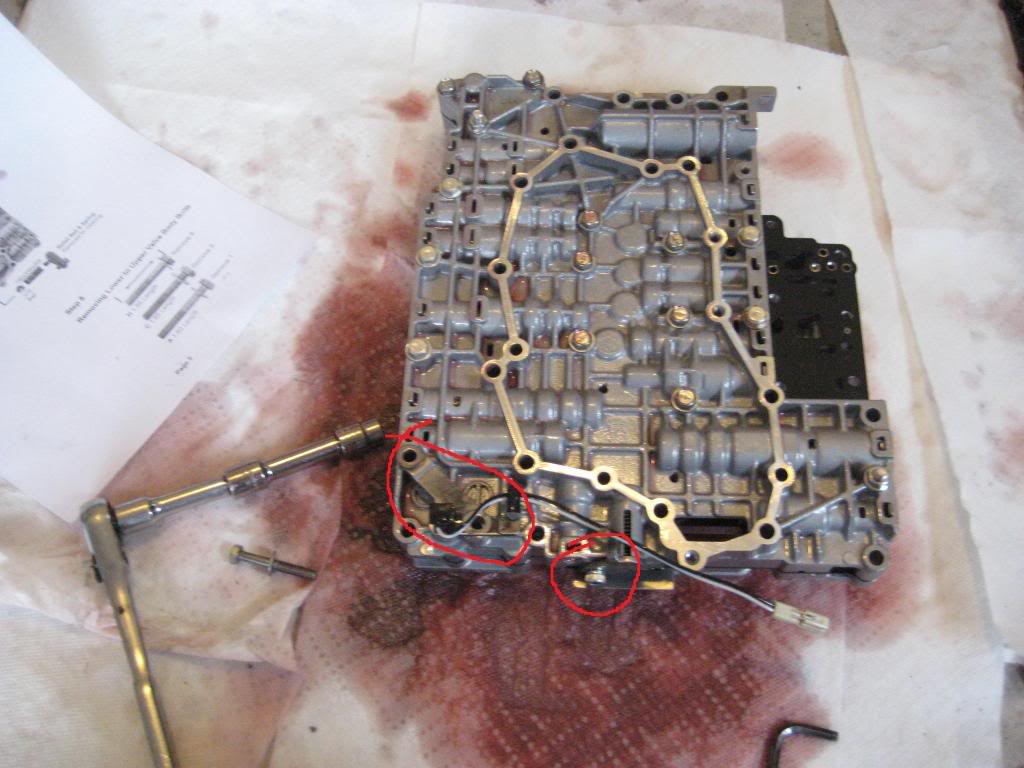
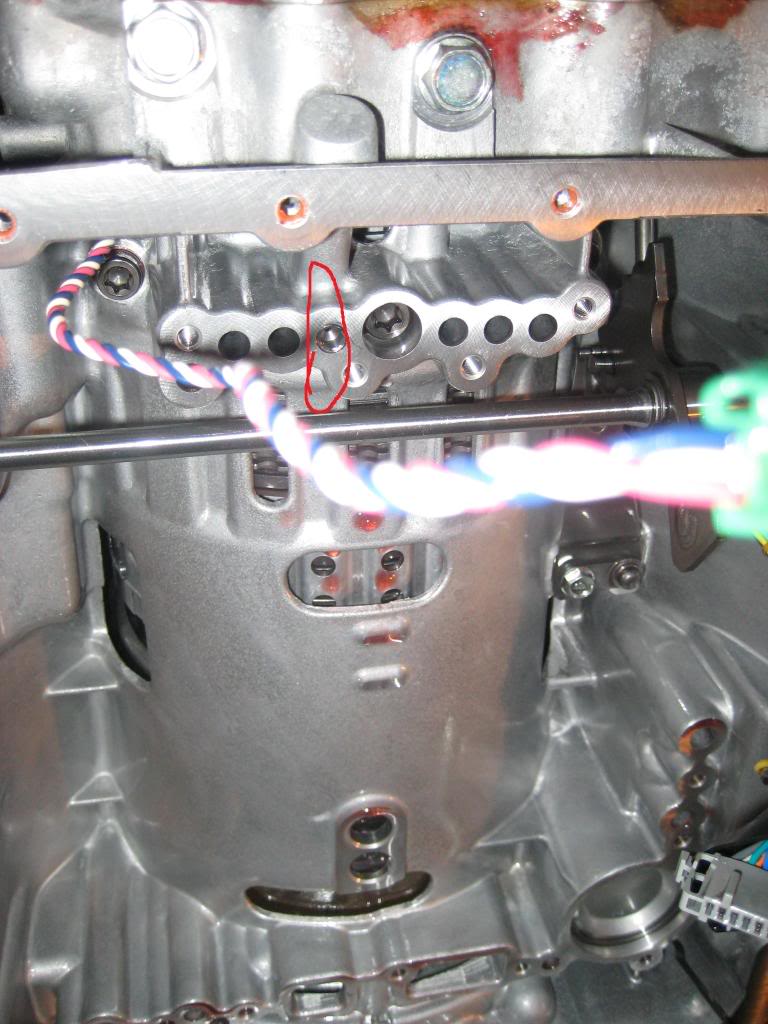
4) Get out the instructions .. unhook the wires on the bottom .. then take out and label bolts according to the diagram (A, B, C, ETC) ... I used paper with letters on them to organize the bolts (or you could use bags)
get organized b/c there are ALOT of pieces to keep up with
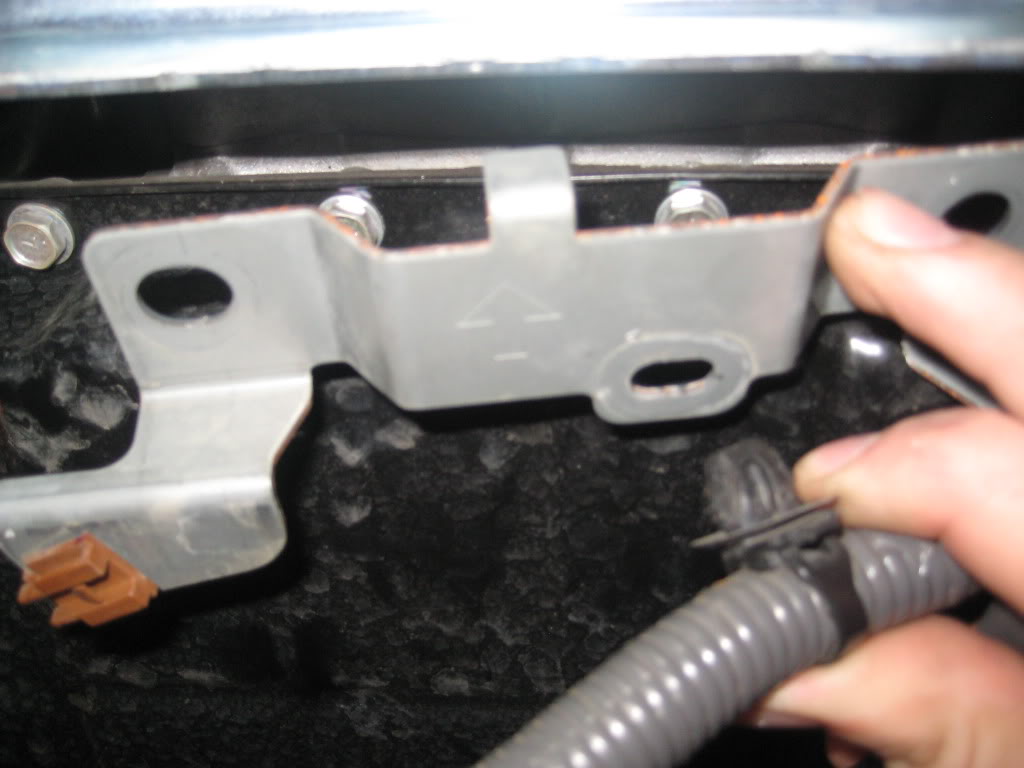
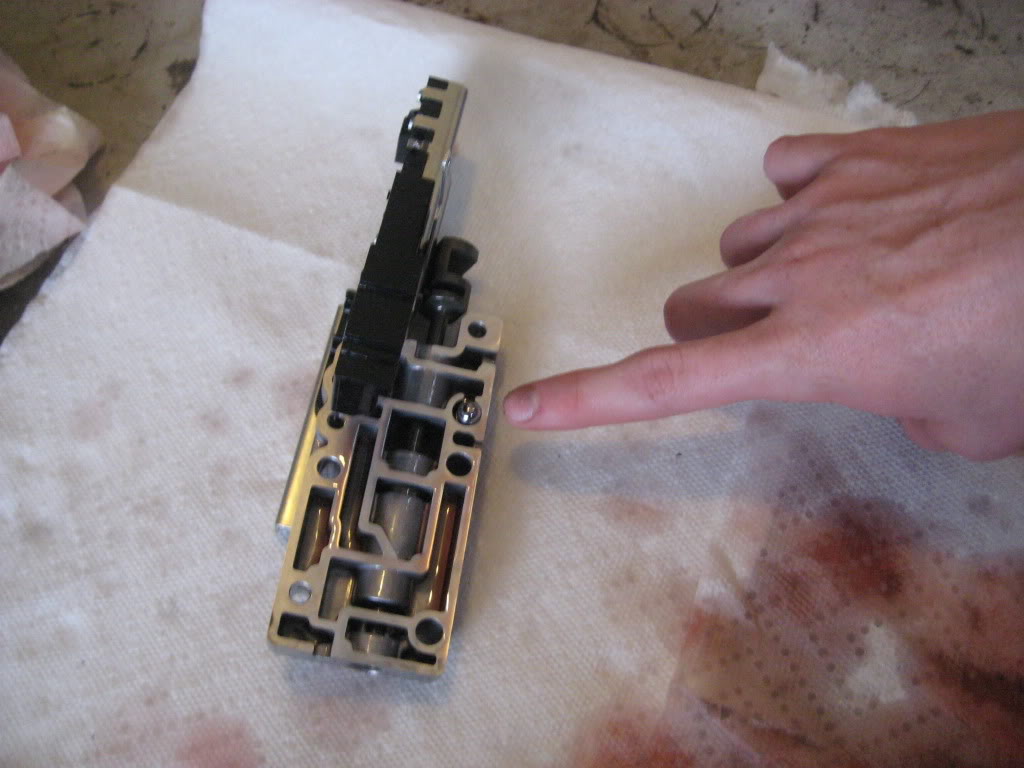
NOTE - Unclip the two things circled in red before unbolting .. clip on side of the VB sucks when your holding the vb up .. haha
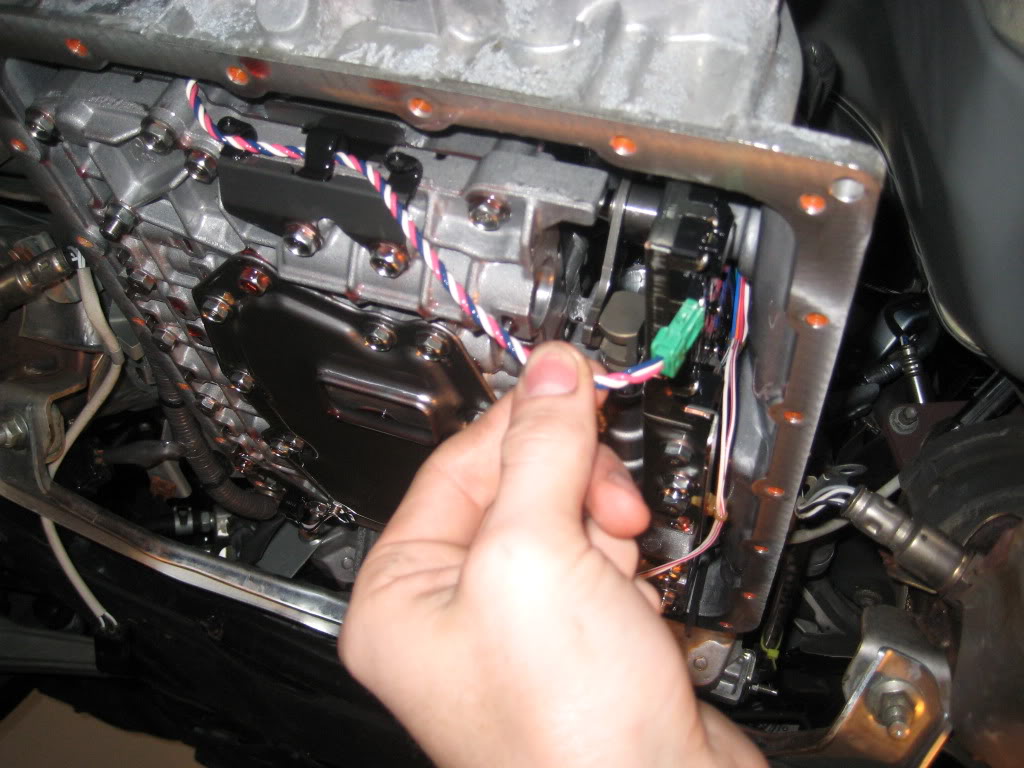
5) BE CAREFUL dropping the valve body .. there are wires you have to disconnect on top (around 6" of slack in them)
put a glove on or paper towel between your hand and the valve body .. this is where I cut my finger .. the pickup is razor sharp
after that little struggle .. you get this
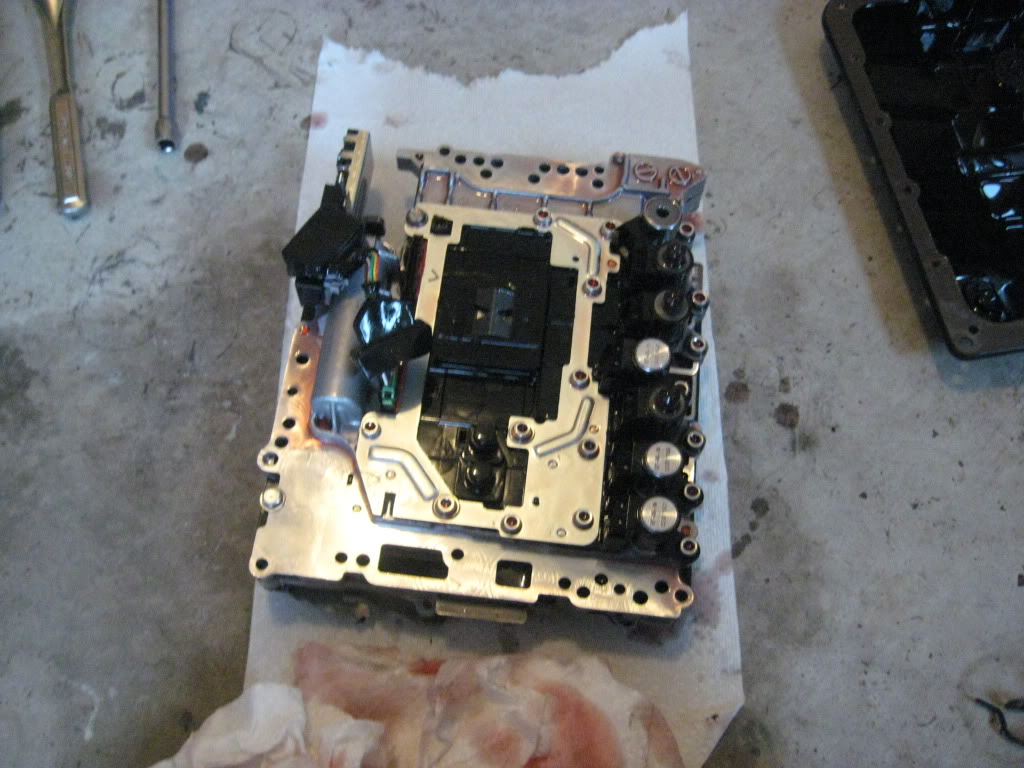
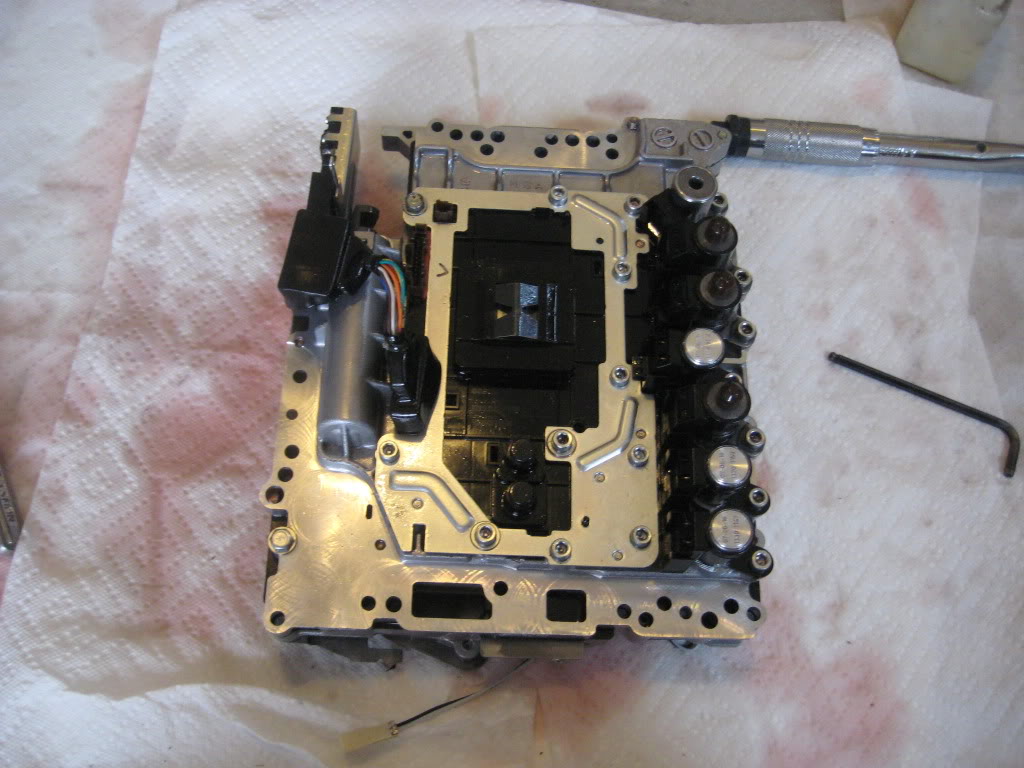
go ahead and take a break b/c that was the "easy part" ..the harder part is next
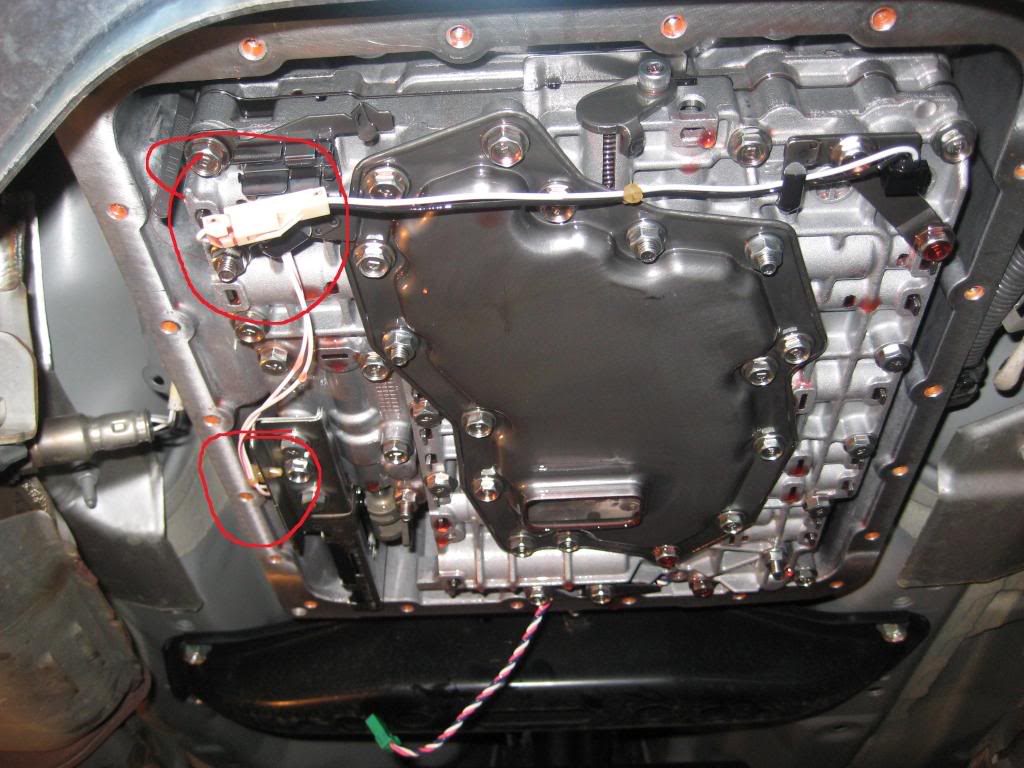
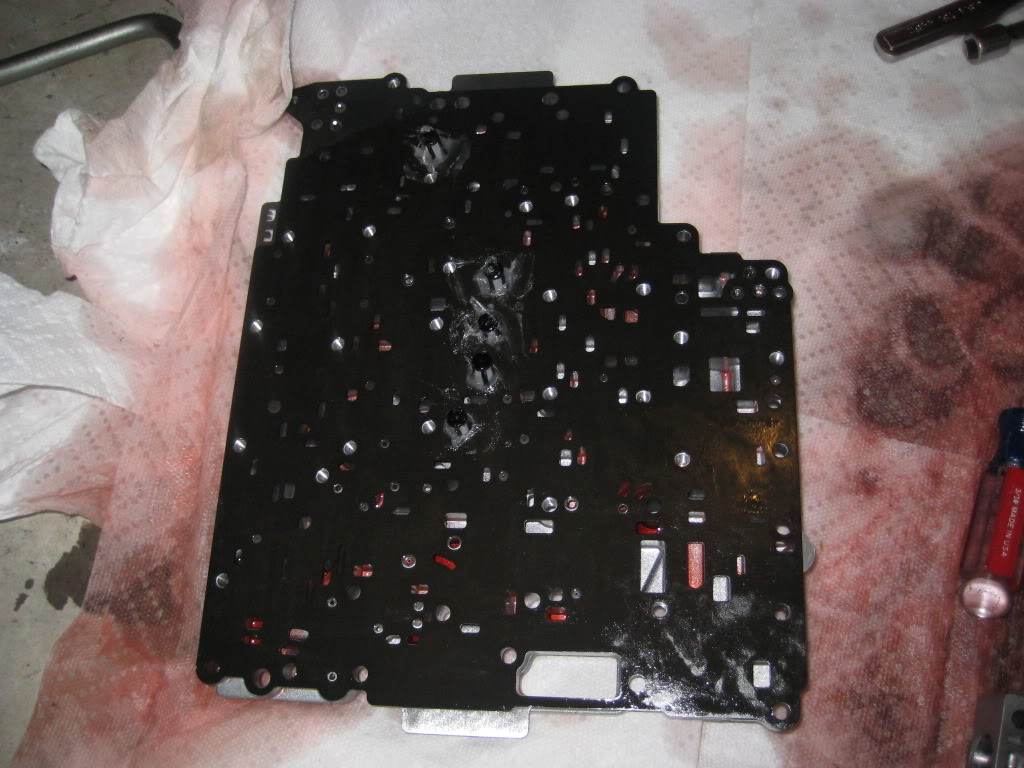
6) Following the instructions for removing electronics / solenoids .. remove / label bolts and keep solenoids in order
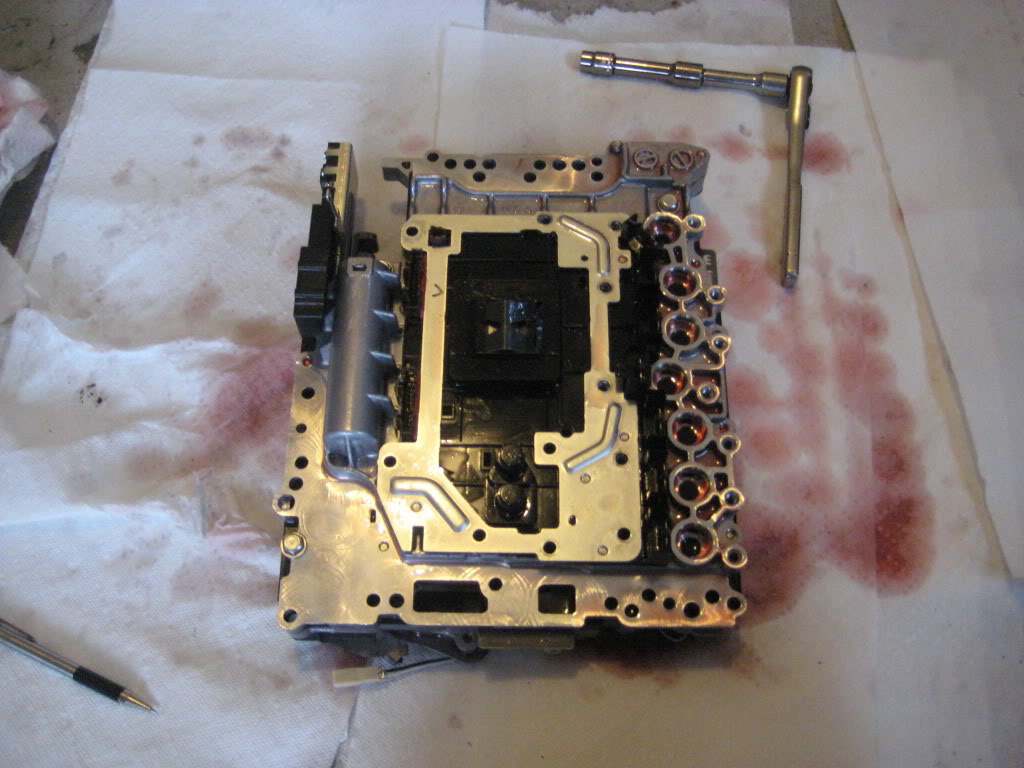
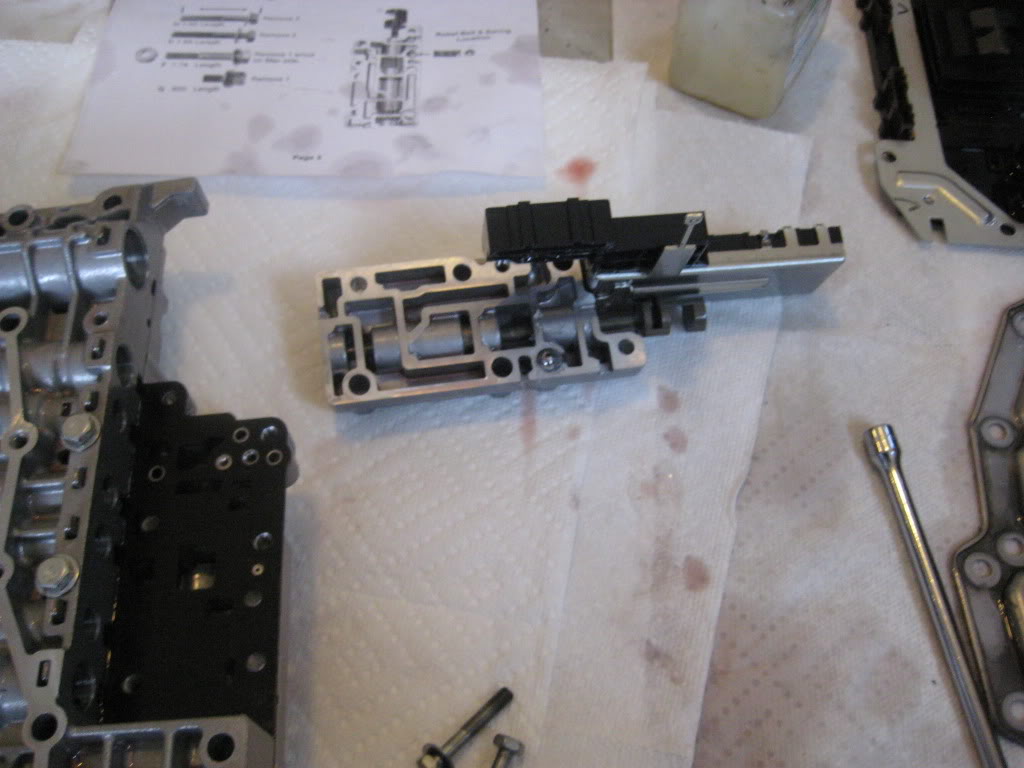
7) Remove / Label filter bolts .. then remove the manual valve body and watch for the spring and ball inside
8) Remove Temp Sensor and Relief Ball & Spring
Around now you should have something that looks like this
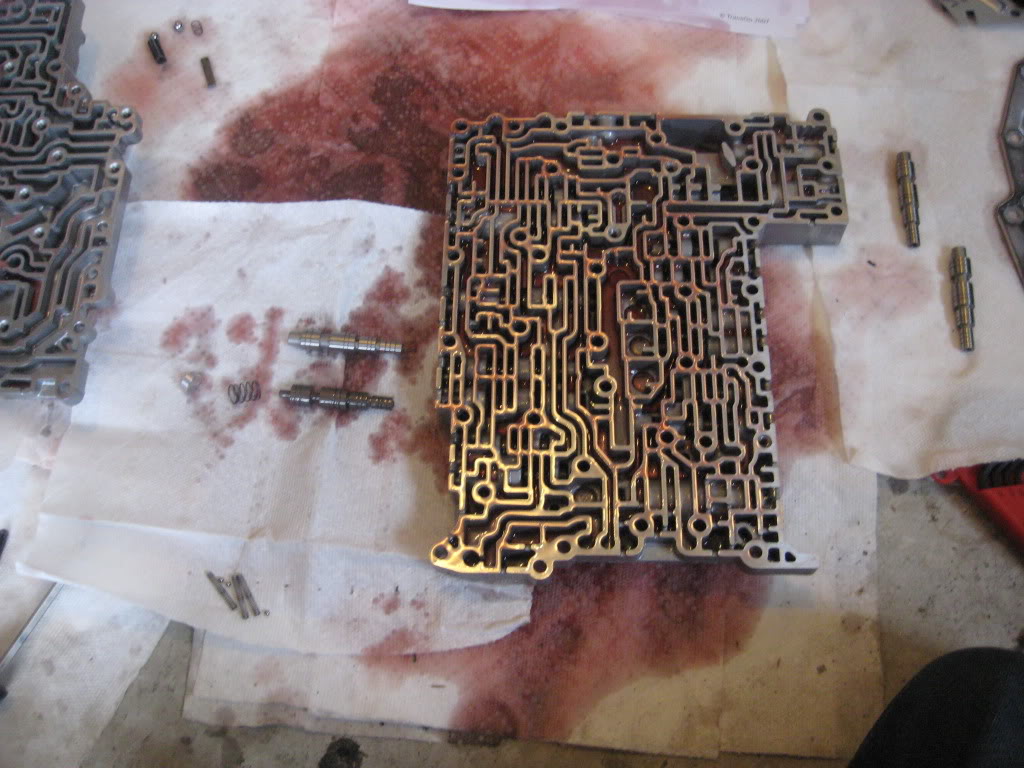
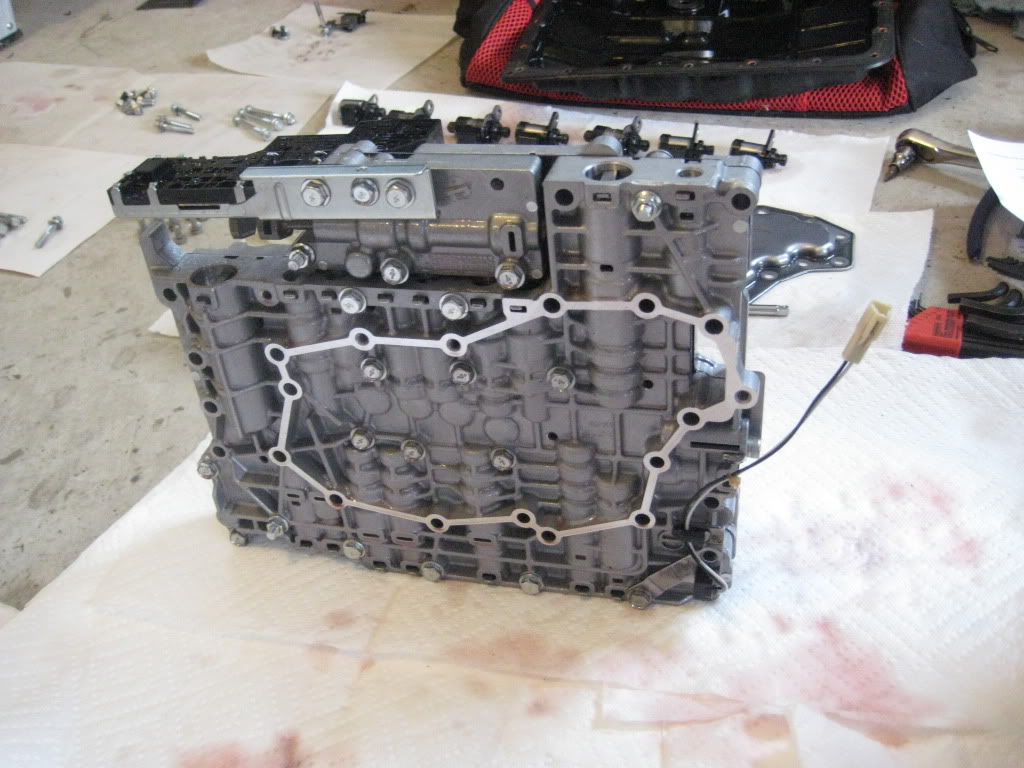
9) Again follow the instructions to remove the upper to lower vb bolts .. and lower to upper
then lift the upper vb off WITH the separator plate so the ***** don't fall out of the upper .. flip over as an assembly and set down (no mods to upper)
only lower vb and separator plate get worked on
also .. take note where the ***** are in the lower vb section (yours may differ by VB)
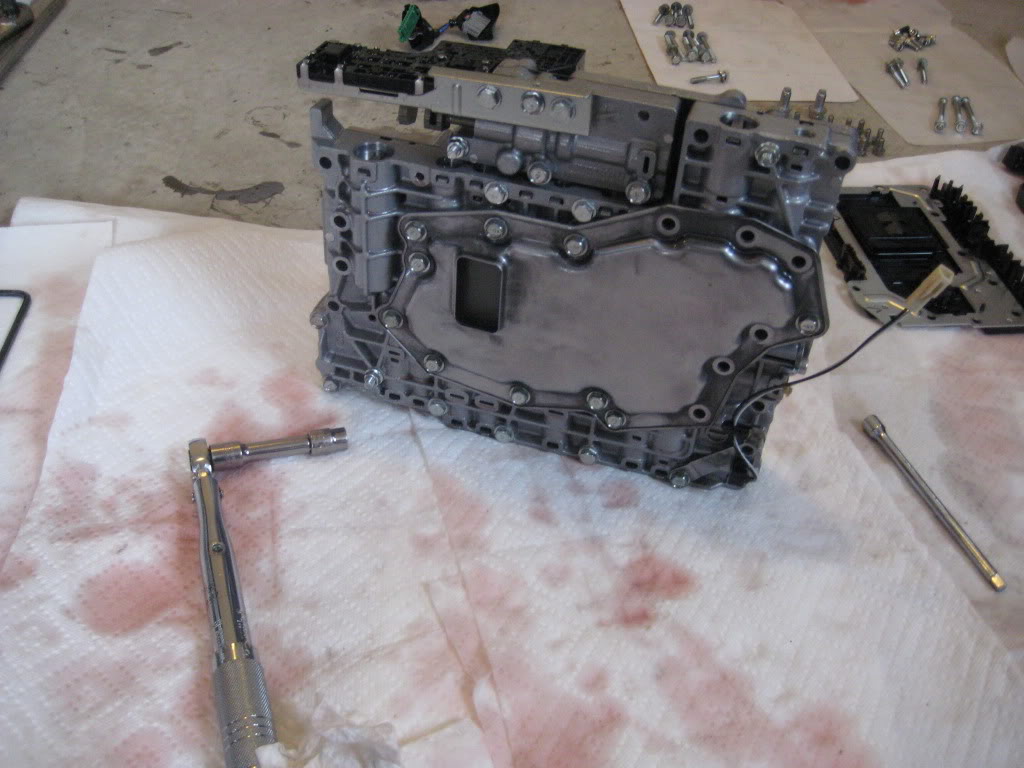
10) The fun part begins .. installing the kit .. take out the transgo vb install instructions and follow them for location and color of springs
DO ONE AT A TIME and double check everything
I used a piece of thick wire with a hook on the end to help push out the shims .. installing springs on left side is easy, right side are stiffer / harder
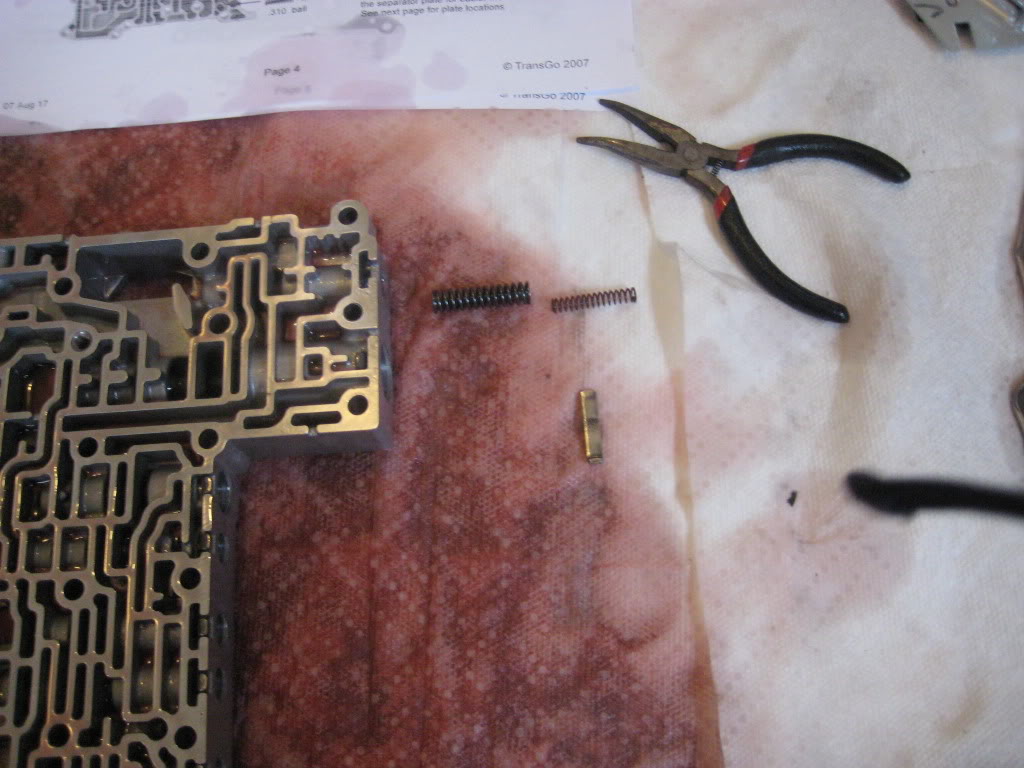
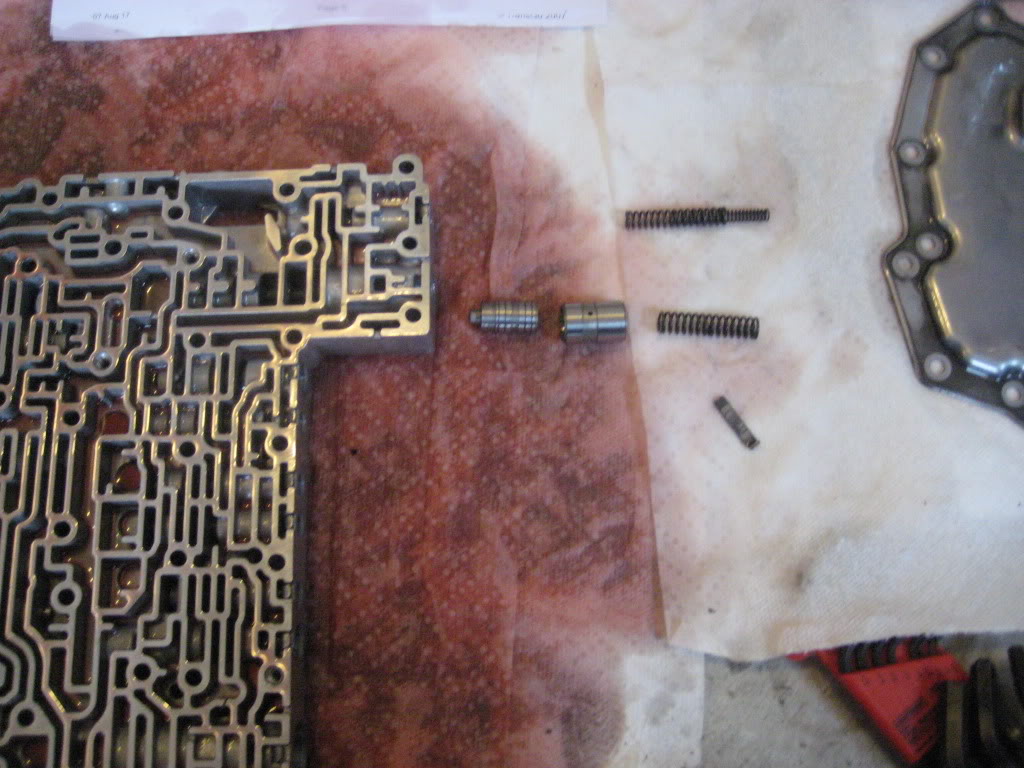
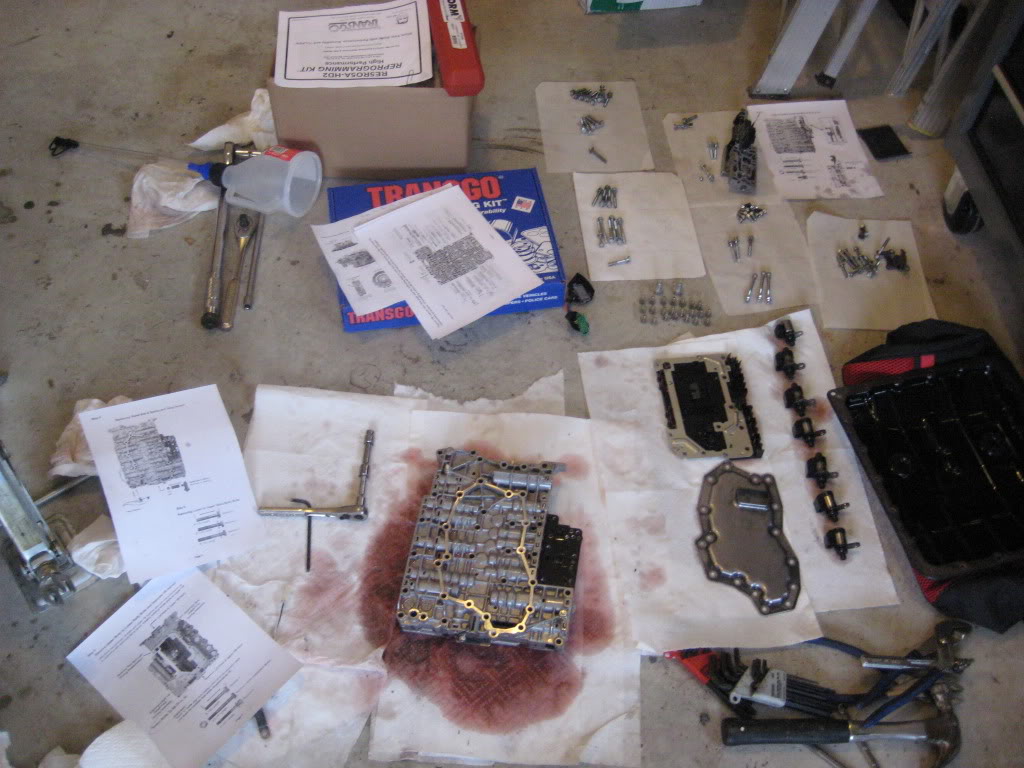
and your organized mess of parts should look like this now
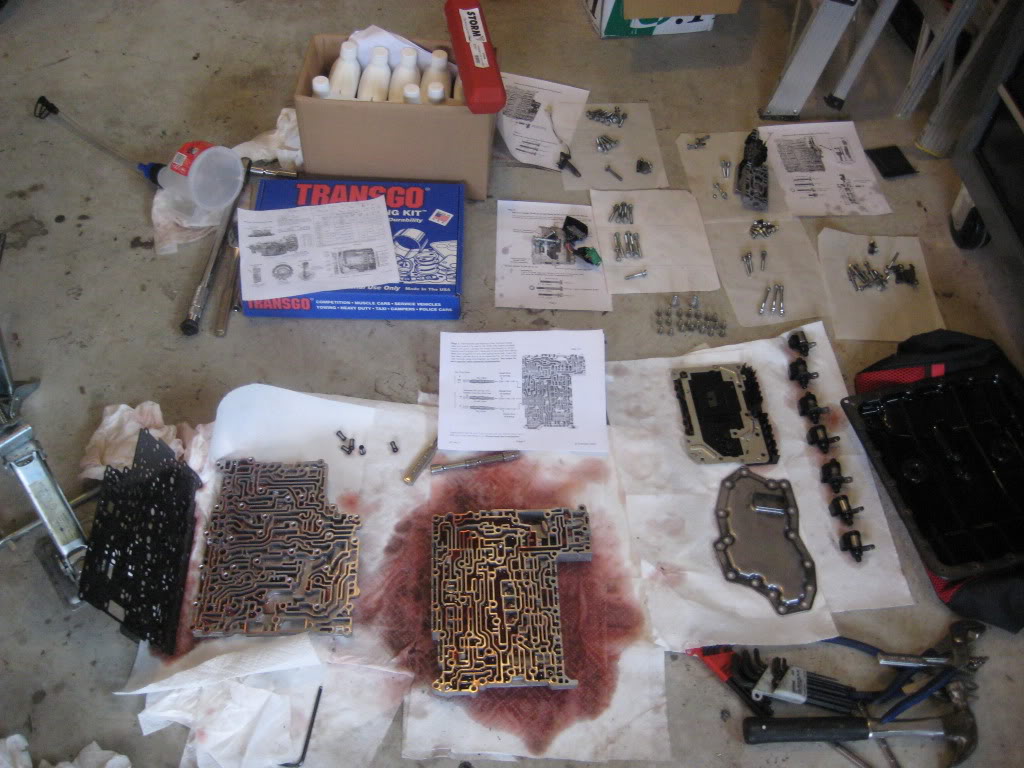
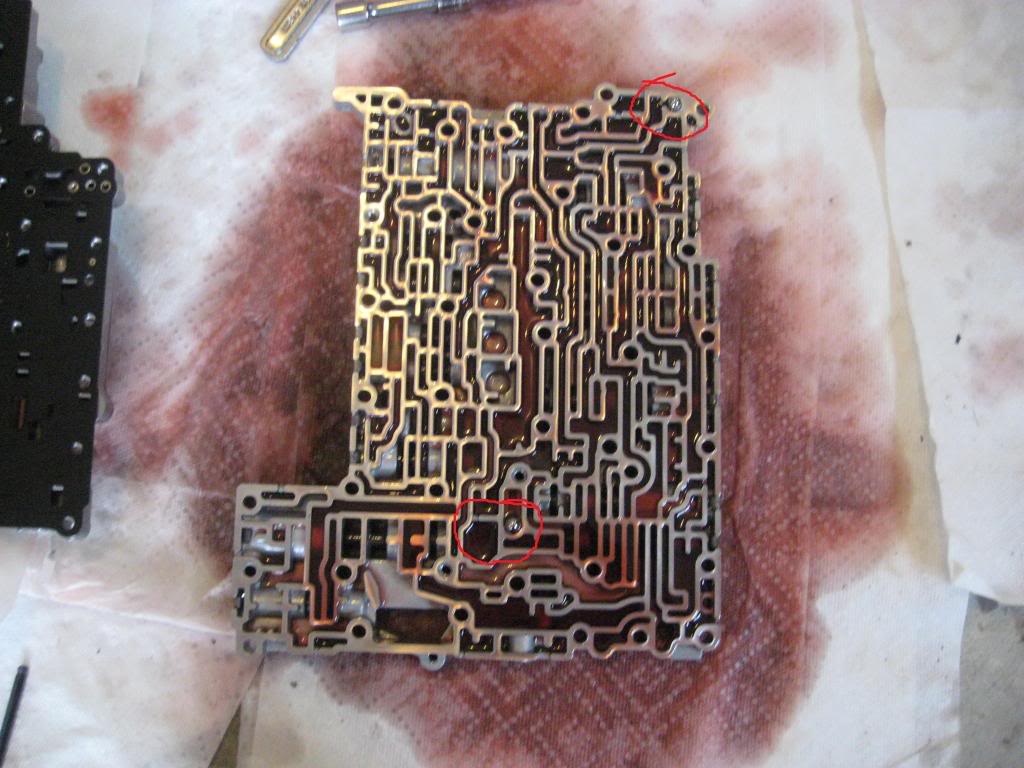
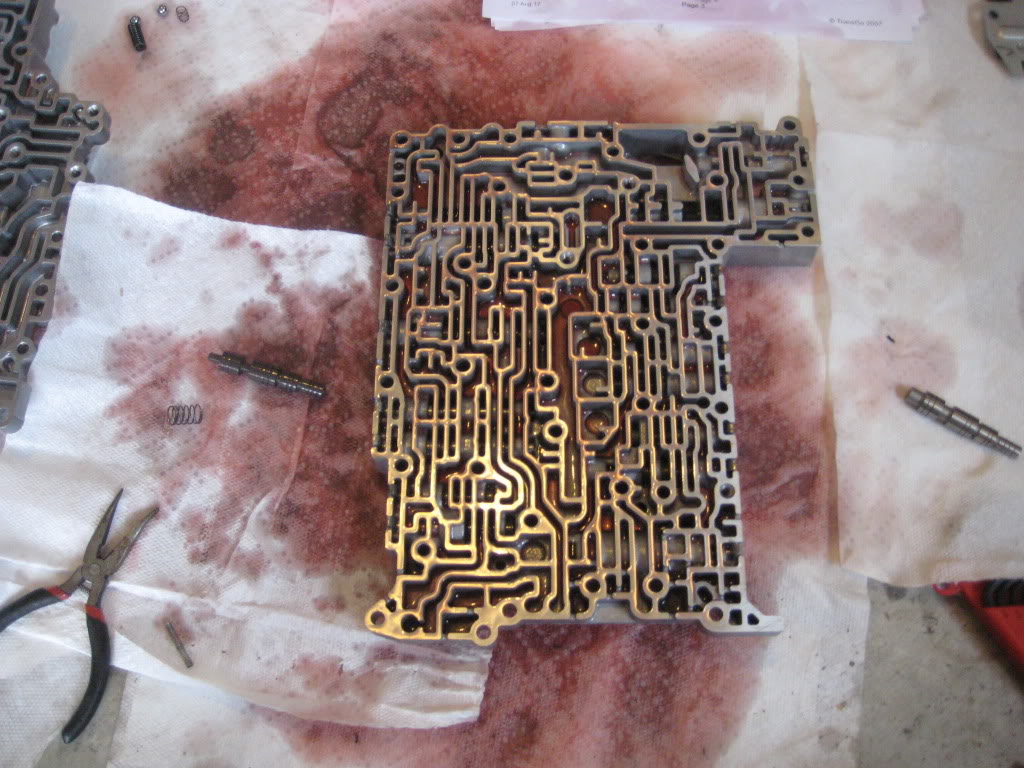
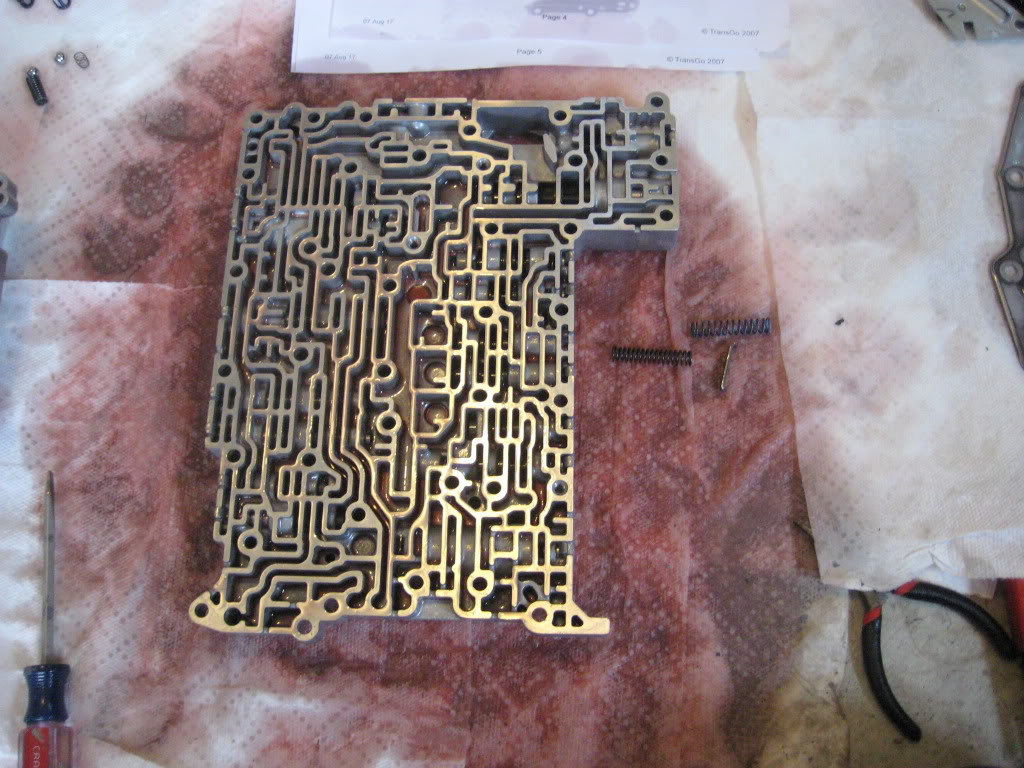
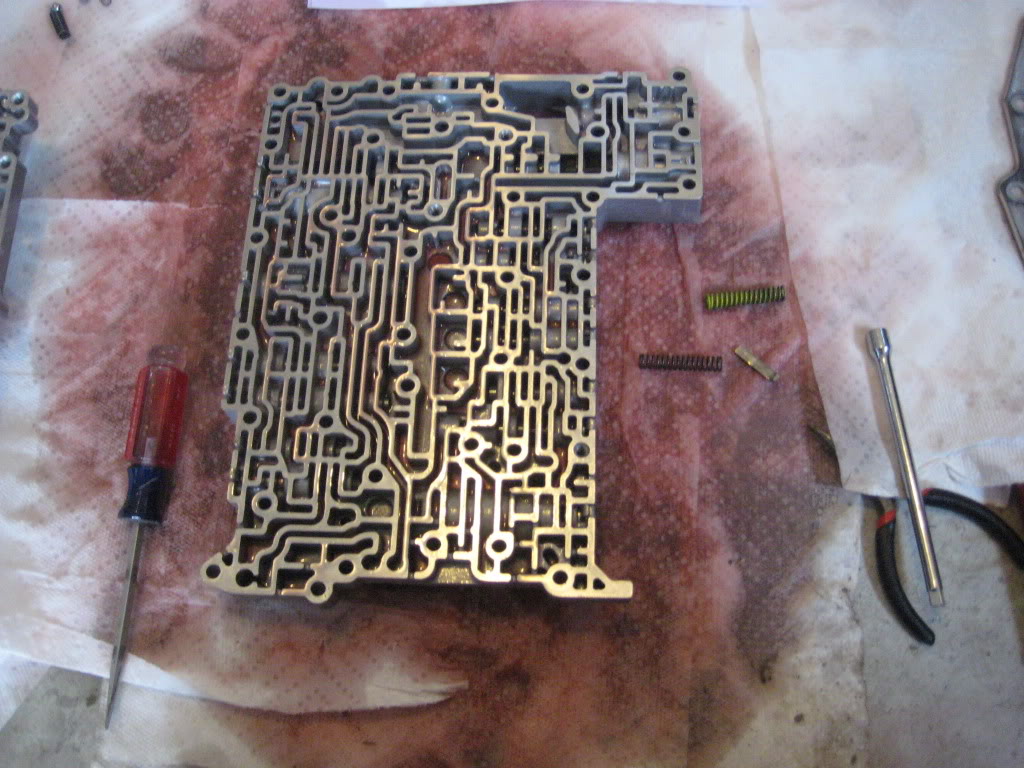
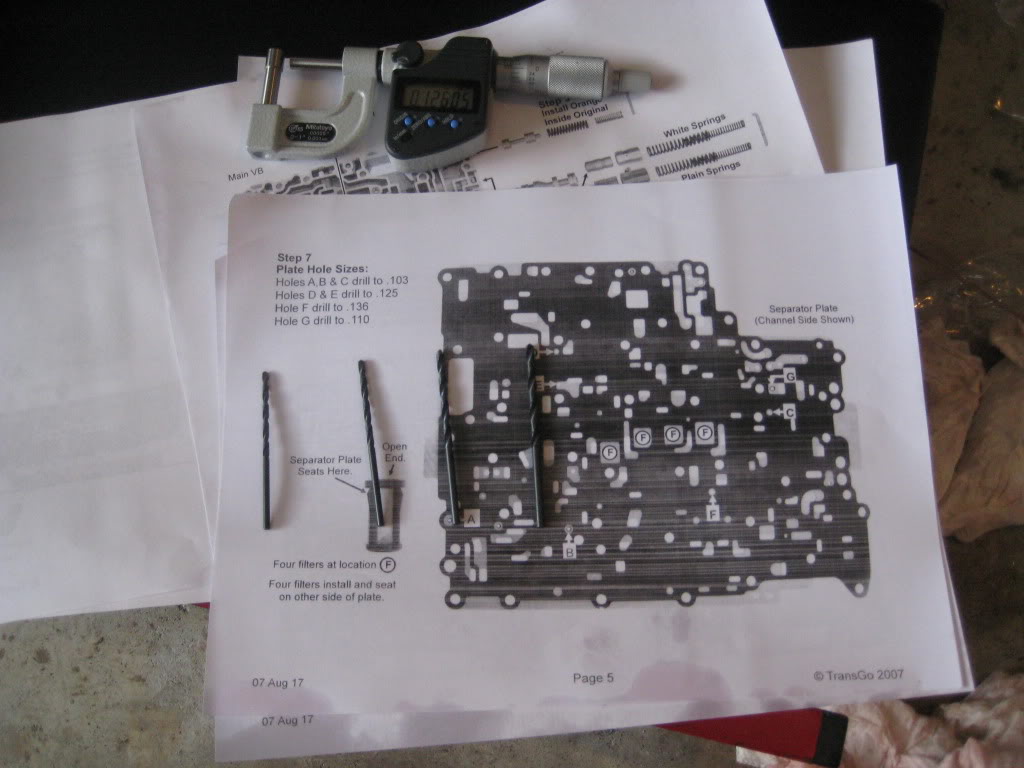
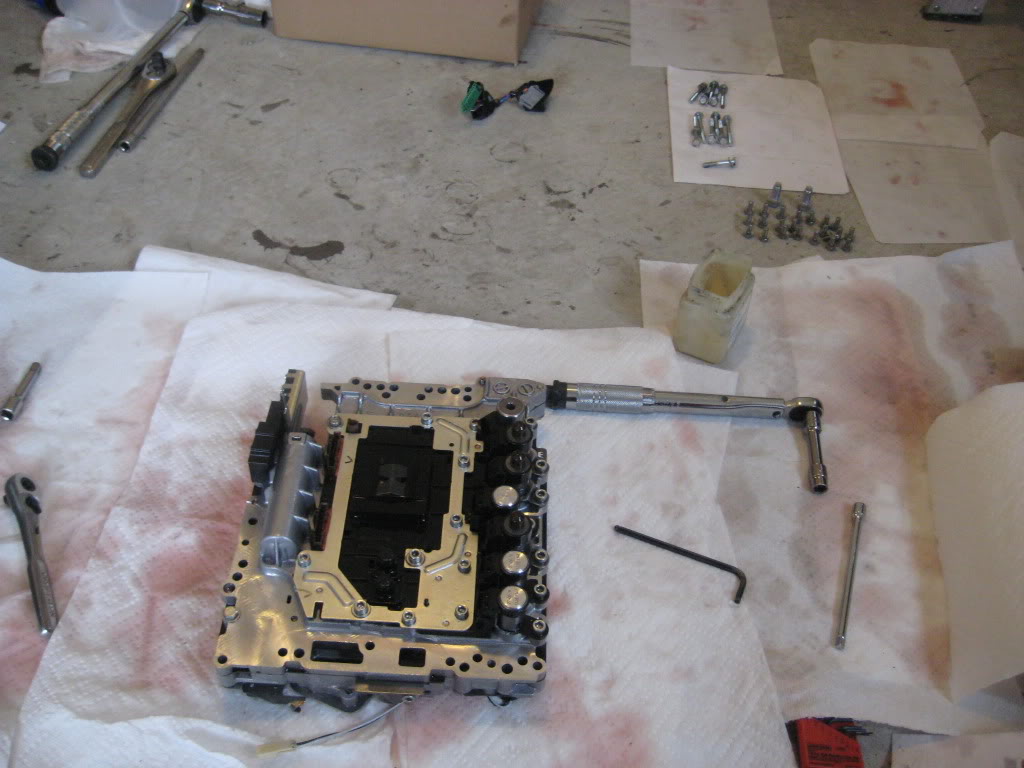
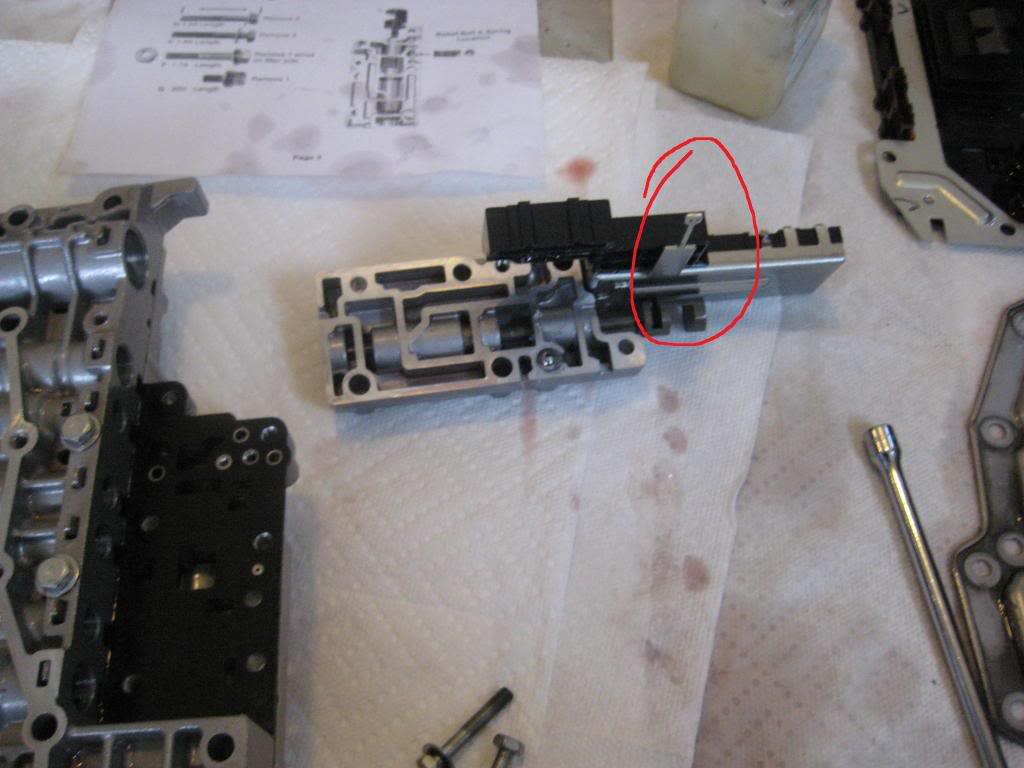
11) Measure each drill bit in the kit and / or order them from small to large .. then carefully drill out the seperator plate holes according to the instructions
BE VERY CAREFUL AND DOUBLE CHECK THE LOCATIONS BEFORE DRILLING
I noticed the holes are shiny that need to be drilled out .. if you locate a hole and it isnt shiny .. dont drill it out and check it again
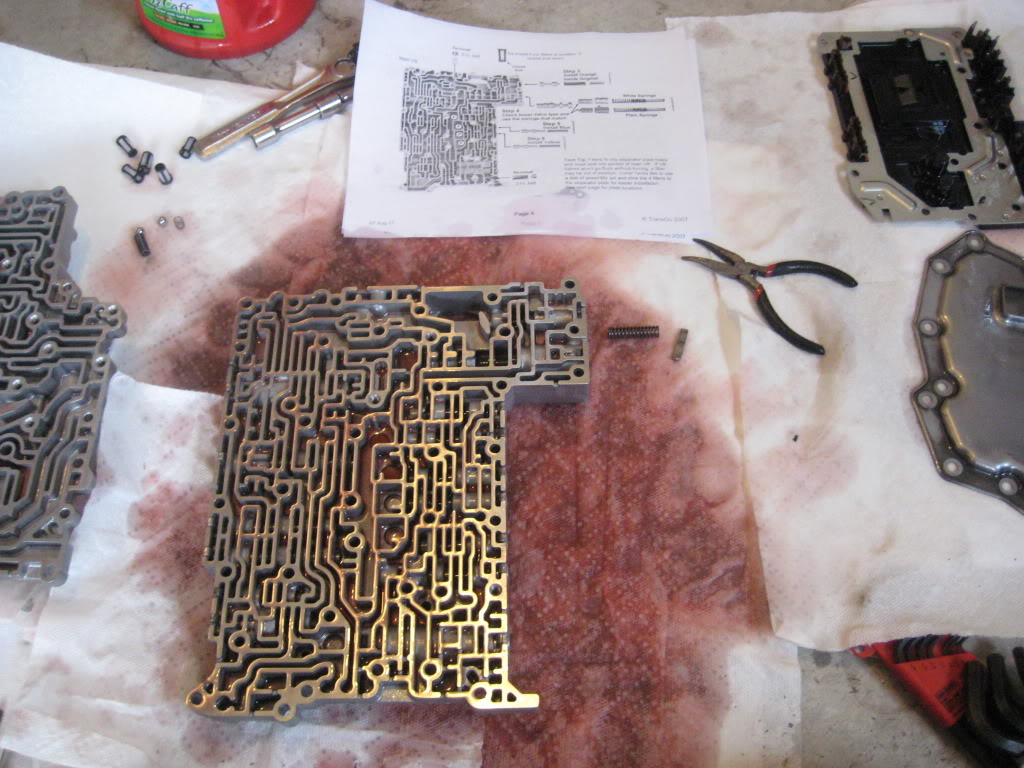
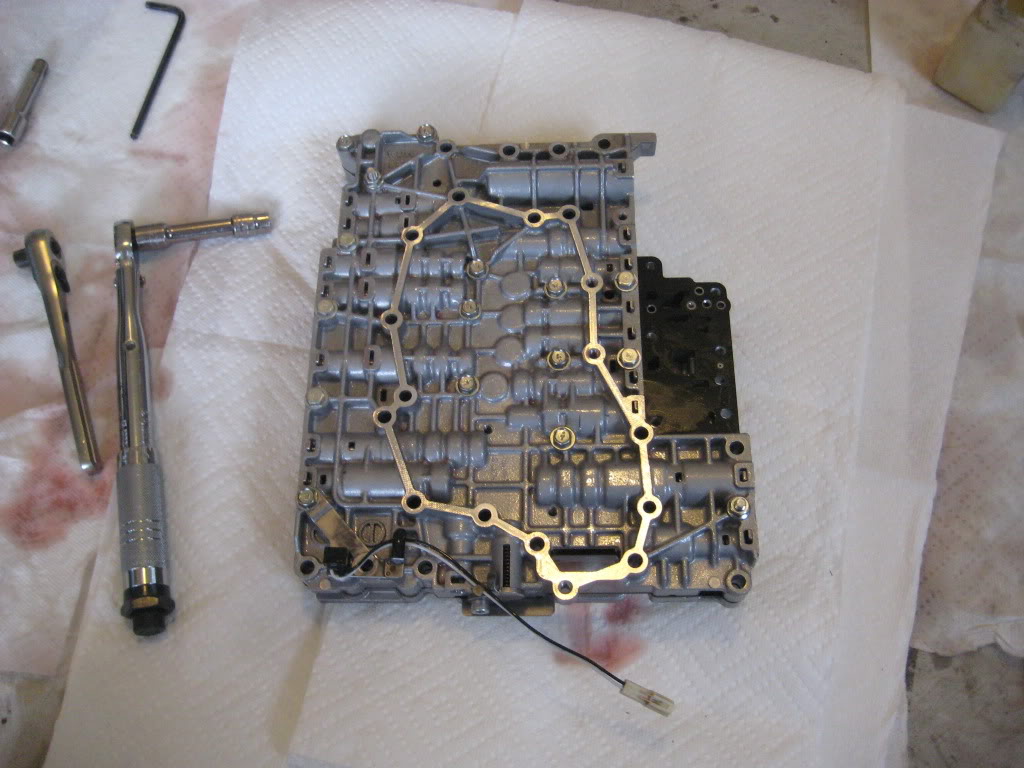
12) Make sure the separator plate is clean of metal shavings, check all of the ***** in upper and lower VB (I put Vaseline on them to be safe and hold them) .. then Vaseline the filters onto the separator plate
carefully flip upper vb / separator plate over onto lower and make sure the filters stay in place and aligned
Torque to - 65 to 70 inch pounds
then start assembling reversal of the instructions .. make sure to put the bolts in the correct holes
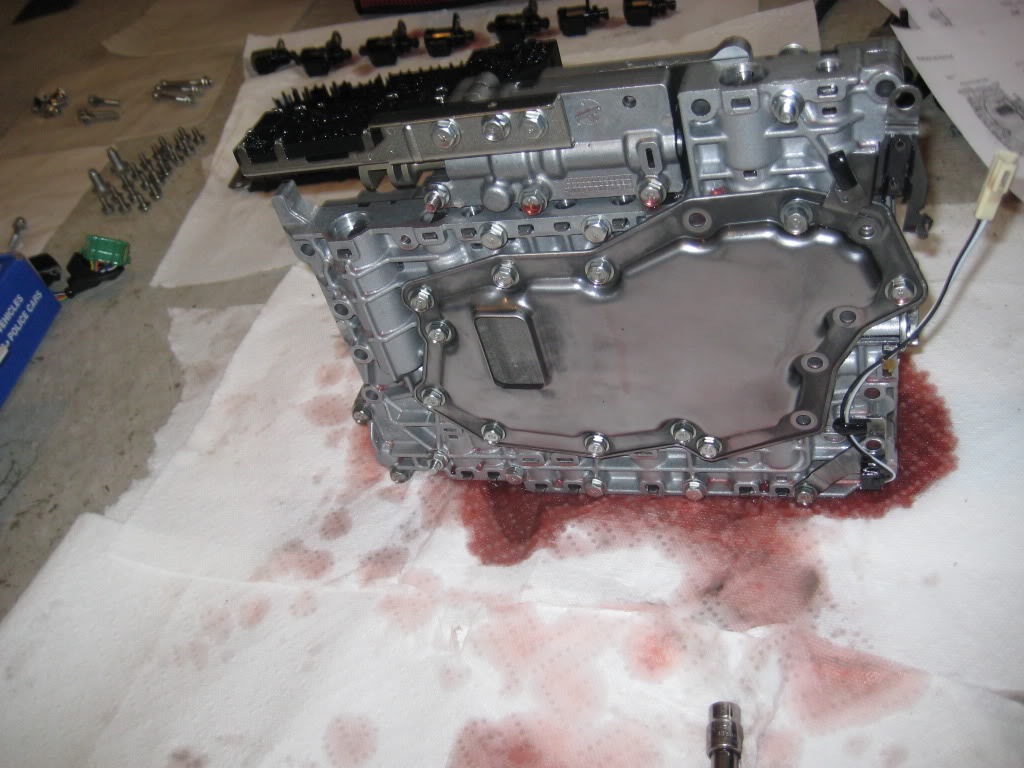
13) Re-Install manual valve body, vb filter, temp sensor and relief ball / spring
NOTE - Everything torques to 65 to 70 INCH lb
Vaseline the ball to help keep it in place
14) Re-Install Electronics board, Soleniods (in order), and wiring

15) Tap the "tapered orfice" into the hole in the transmission before putting the valve body back in .. make sure it is below the surface
I used a 1/4" drive extension .. book says punch .. but either works
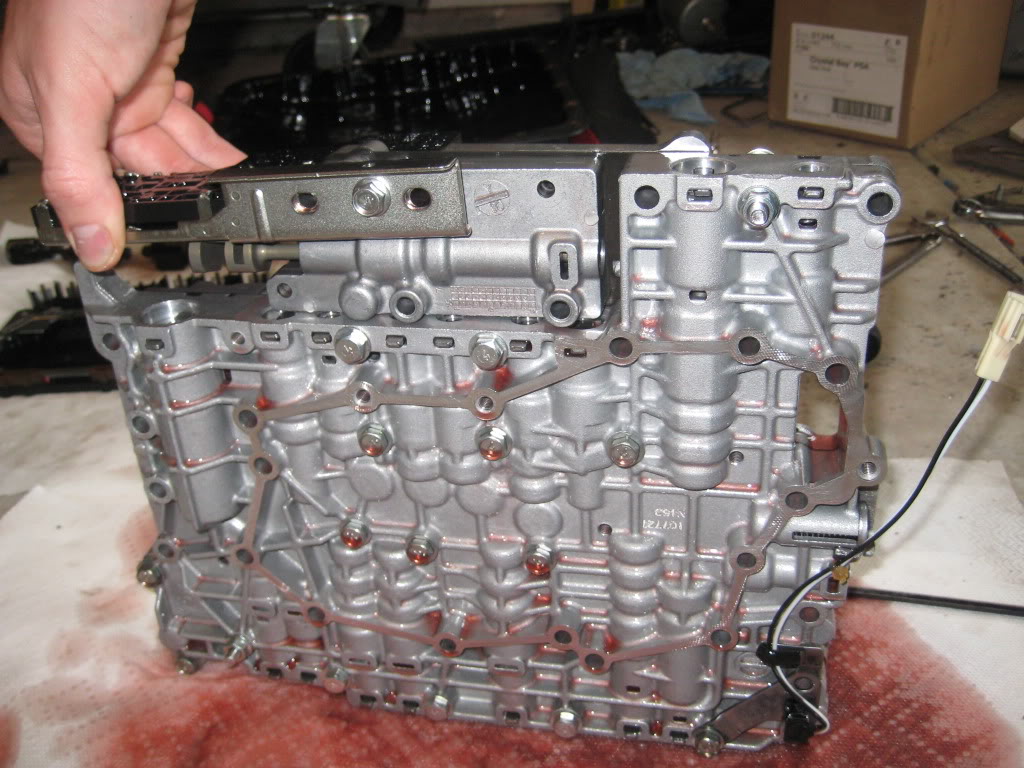
16) INSTALL VB
I got my brother to help since it is awkward to hold, hook up wires, align and bolt up
follow instructions for bolts, but make sure you get this metal stud in the little clip up in the tranny
17) bolt up the pan .. torque to 95 inch lb (service manual says 7.9 ft lb) .. then bolt the bracket for the o2 sensor wires back up
18) lower the car down and fill up the transmission (mine took just over 7 quarts) .. start engine, run through each gear P, R, N, D ... after 5 minutes check cold side of dipstick ..
once you get it right .. bolt the dipstick down and
DONE !!!
just hope it works .. take it for a drive .. be easy for a few miles and shifting through all gears a few times (get air out of vb)
then let it rip .. just watch out for telephone poles and ditches .. haha
it was raining when I finished .. every shift over 4K threw the car sideways and tires spinning
If anyone has any questions just shoot me a PM ..
I AM NOT responsible if you mess up your car, tranny, fingers, etc
this is just a tool to help someone decide if they want to do this mod themselves or pay someone
and if you do decide to do it yourself, this should help make the install go smoothly :thumbup:
.................................................. ................................................
Tools -
10mm, 14mm, 19mm sockets / 14mm wrench
drain pan
torque wrenches (ft lb for drain plug .. inch lb for everything else) - I had to buy inch lb torque wrench .. $40 @ napa
funnel
5mm allen head socket
stiff wire (use to help get shims out valve body)
dikes / pliers
flat screwdriver
punch or 1/4" drive extension (drive in tapered orfice)
light hammer
Supplies -
8 quarts NISSAN S-MATIC ATF (do not use anything else) $8.12 / quart with discount (work at dodge dealer) .. they wanted $18
two rolls of paper towel or shop towels
Transgo Valve Body Upgrade Kit $295 (really fast free shipping from forged performance .. also avail. @ GTM)
Vaseline or suitable assembly lube / grease (hold ***** in place)
Instructions -
Download both VB Removal and Transgo Install pdf files off GTM website
Start One Day Trial with transgo website and download three more files
(Study all and become familiar with the parts, bolts, etc before starting)
1) Jack car up and set on jack stands, then drain tranny fluid (4 quarts), re-install drain plug at 35 ft lb
2) Remove two bolts holding the bracket that 02 sensor wires mount to .. one on passenger side with 14mm wrench .. drivers side with socket .. then remove wire clip from bracket for easy install
unclip o2 sensor wires and push everything out of the way
3) Take 10mm bolts out of tranny pan and drop, drain, and put to the side (wont need it for a while)
there will be another quart or so in the pan
then you see this
4) Get out the instructions .. unhook the wires on the bottom .. then take out and label bolts according to the diagram (A, B, C, ETC) ... I used paper with letters on them to organize the bolts (or you could use bags)
get organized b/c there are ALOT of pieces to keep up with
NOTE - Unclip the two things circled in red before unbolting .. clip on side of the VB sucks when your holding the vb up .. haha
5) BE CAREFUL dropping the valve body .. there are wires you have to disconnect on top (around 6" of slack in them)
put a glove on or paper towel between your hand and the valve body .. this is where I cut my finger .. the pickup is razor sharp
after that little struggle .. you get this
go ahead and take a break b/c that was the "easy part" ..the harder part is next
6) Following the instructions for removing electronics / solenoids .. remove / label bolts and keep solenoids in order
7) Remove / Label filter bolts .. then remove the manual valve body and watch for the spring and ball inside
8) Remove Temp Sensor and Relief Ball & Spring
Around now you should have something that looks like this
9) Again follow the instructions to remove the upper to lower vb bolts .. and lower to upper
then lift the upper vb off WITH the separator plate so the ***** don't fall out of the upper .. flip over as an assembly and set down (no mods to upper)
only lower vb and separator plate get worked on
also .. take note where the ***** are in the lower vb section (yours may differ by VB)
10) The fun part begins .. installing the kit .. take out the transgo vb install instructions and follow them for location and color of springs
DO ONE AT A TIME and double check everything
I used a piece of thick wire with a hook on the end to help push out the shims .. installing springs on left side is easy, right side are stiffer / harder
and your organized mess of parts should look like this now
11) Measure each drill bit in the kit and / or order them from small to large .. then carefully drill out the seperator plate holes according to the instructions
BE VERY CAREFUL AND DOUBLE CHECK THE LOCATIONS BEFORE DRILLING
I noticed the holes are shiny that need to be drilled out .. if you locate a hole and it isnt shiny .. dont drill it out and check it again
12) Make sure the separator plate is clean of metal shavings, check all of the ***** in upper and lower VB (I put Vaseline on them to be safe and hold them) .. then Vaseline the filters onto the separator plate
carefully flip upper vb / separator plate over onto lower and make sure the filters stay in place and aligned
Torque to - 65 to 70 inch pounds
then start assembling reversal of the instructions .. make sure to put the bolts in the correct holes
13) Re-Install manual valve body, vb filter, temp sensor and relief ball / spring
NOTE - Everything torques to 65 to 70 INCH lb
Vaseline the ball to help keep it in place
14) Re-Install Electronics board, Soleniods (in order), and wiring
15) Tap the "tapered orfice" into the hole in the transmission before putting the valve body back in .. make sure it is below the surface
I used a 1/4" drive extension .. book says punch .. but either works
16) INSTALL VB
I got my brother to help since it is awkward to hold, hook up wires, align and bolt up
follow instructions for bolts, but make sure you get this metal stud in the little clip up in the tranny
17) bolt up the pan .. torque to 95 inch lb (service manual says 7.9 ft lb) .. then bolt the bracket for the o2 sensor wires back up
18) lower the car down and fill up the transmission (mine took just over 7 quarts) .. start engine, run through each gear P, R, N, D ... after 5 minutes check cold side of dipstick ..
once you get it right .. bolt the dipstick down and
DONE !!!
just hope it works .. take it for a drive .. be easy for a few miles and shifting through all gears a few times (get air out of vb)
then let it rip .. just watch out for telephone poles and ditches .. haha
it was raining when I finished .. every shift over 4K threw the car sideways and tires spinning
If anyone has any questions just shoot me a PM ..
 (I edited it for us 5AT owners .. haha)


Thread Starter
|
Registered User
Joined: Oct 2009
Posts: 23
Likes: 9
From: McDonough, GA
just south of Atlanta, Ga
McDonough
(just added it to profile .. just signed up on here recently before doing the vb upgrade)
McDonough
(just added it to profile .. just signed up on here recently before doing the vb upgrade)
Trending Topics

Thanks for the great DIY! The info you provided was great. I used it for the removal and install of the valve body but, I decided to send it to injected performance for the actual modification.


Adrian,
How much did the kit cost? Also I live in Griffin and would love to try and do this mod. If you are interested in helping or getting paid to do it, I would love to talk about it.
Thanks....
How much did the kit cost? Also I live in Griffin and would love to try and do this mod. If you are interested in helping or getting paid to do it, I would love to talk about it.
Thanks....
Thread Starter
|
Registered User
Joined: Oct 2009
Posts: 23
Likes: 9
From: McDonough, GA
It costs $295 shipped for the "kit" from GTM Motorsports, or Forged Performance
I got mine from forged .. really fast shipping since they are in marietta, ga (just above atlanta)
would of gone and picked it up but didnt have time off work during the week and its free shipping
I got mine from forged .. really fast shipping since they are in marietta, ga (just above atlanta)
would of gone and picked it up but didnt have time off work during the week and its free shipping

SuhWEET awesomeness! Thank YOU SO MUCH for trailblazing this! This will be my next mod. . .when I get time. 
Two questions:
1. Do you have a tranny cooler and/or trans temp gauge?
2. Does the vaseline have any negative effects? I guess it is just oil "jelly." <--- sorry total newb question.
Two questions:
1. Do you have a tranny cooler and/or trans temp gauge?
2. Does the vaseline have any negative effects? I guess it is just oil "jelly." <--- sorry total newb question.
Thread Starter
|
Registered User
Joined: Oct 2009
Posts: 23
Likes: 9
From: McDonough, GA
I dont have a bigger cooler or a temp gauge ..
I will probably upgrade the cooler later on .. dont really run the car hard right now, just daily traffic with some fun
this is my most favorite mod so far .. makes the auto fun, just gotta be careful when its cold or wet b/c the back end likes to move around if you get on the gas too much
as for the vaseline .. my friends dad was a tranny specialist and told me that trick .. just melts once it warms up .. doesnt hurt anything
think I saw somewhere you can use some type of assembly grease too