

How To Remove Timing Chain Cover, Valve Cover, Timing Chain

Joined: Jul 2006
Posts: 15,043
Likes: 22
From: Pothole Central and still ridin slammed...Boston
How To Remove Timing Chain Cover, Valve Cover, Timing Chain
Here's a nice DIY that will help out those of you that want to polish your timing cover or began a motor build. I found this online and thought I'd share with everyone here. I cleaned it up and edited it along with some picts to help you along.
First and foremost, remove each of the four small covers on the top of the timing cover.
Remove all 22 bolts holding the timing cover, BUT BEWARE, there are 2 bolts from inside the oil pan that also hold the timing cover on. FAILURE TO REMOVE THOSE 2 BOLTS WILL RESULT IN DAMAGE TO YOUR TIMING COVER!!!!
OK, now that you got that out of the way, proceed to remove the cover.
Revealing a mess of chains and gears that you do not want to touch until you have some guidance from a mechanic, or you have more time to read the service manual about a dozen times.
Proceed on to some other items, valve covers, engine mounts, etc.
Here are the photos:
Getting started you can see the oil filter still attached to the oil cooler base. They are easily removed along with some of the water cooler lines.
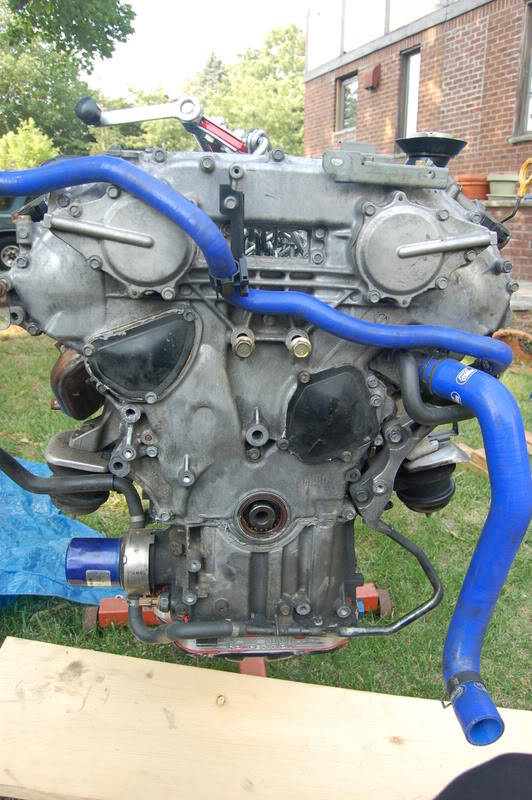
Off with the 4 small covers
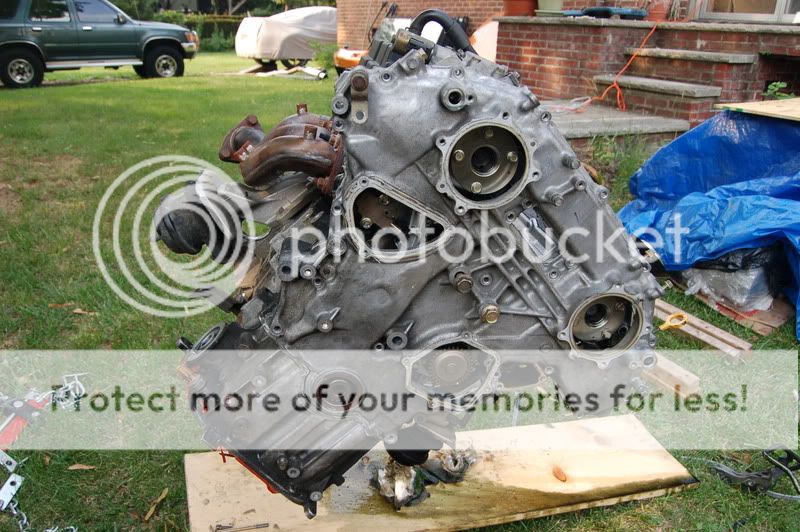
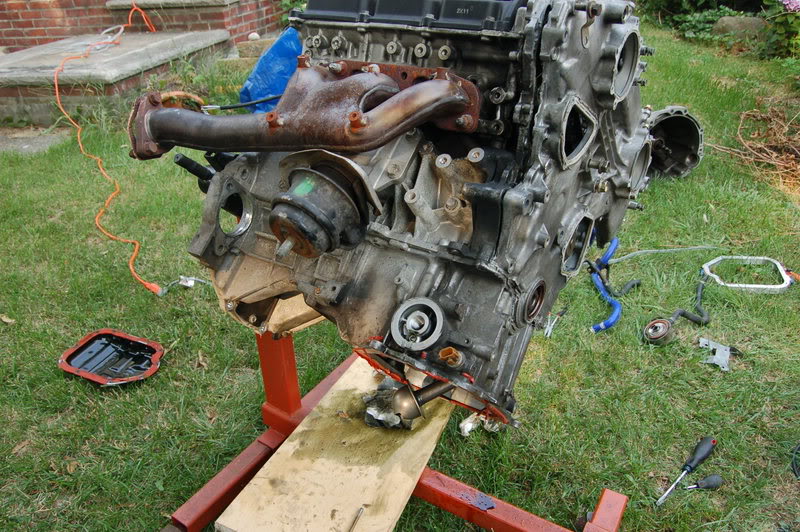
Here you can still see the engine mount and exhaust manifold still attached:
Remove the oil pan to expose the critical 2 secret bolts that will prevent you from removing the timing cover:
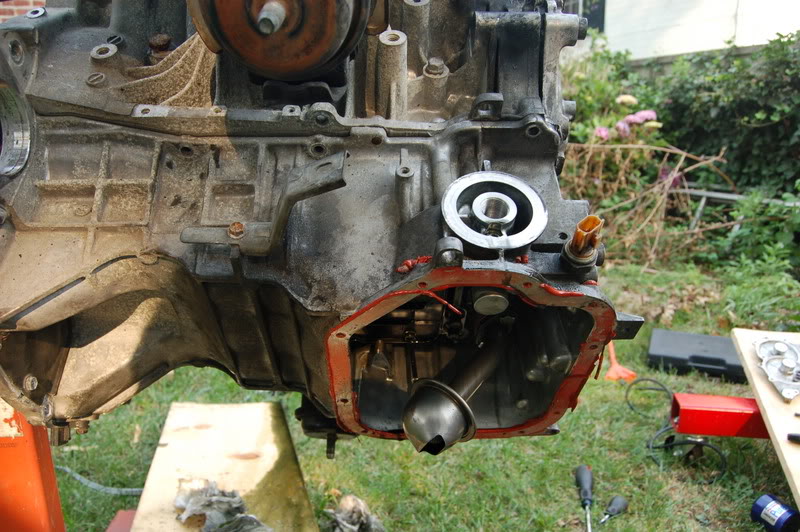
Very difficult to see but they are the forward most bolts. If you look closely you will see empty bolt holes, since I already removed the 2 bolts.

Now the timing cover is free to be removed:
Valve covers held in by 10 bolts (I think) on each bank:
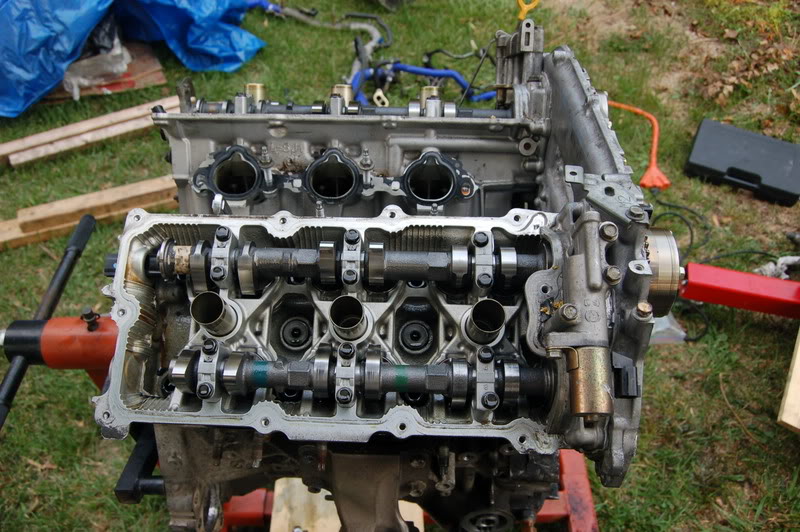
There is also a special valve covering the corner of each valve cover. You can see the 2 valve devices at the far end of the block. Each is held by 3 bolts. Simply remove the 3 bolts and remove that as well. Be careful not to lose the gasket.
Remove the 2 engine mounts here.
[MG]http://img.photobucket.com/albums/v677/rrmedicx/DSC_0020-6.jpg[/img]
You will also have to remove the lower girdle and transfer than to the new block as well. It thought it was included in the short-block. You'll have to get that cleaned, because it has a lot of dirt and grime on it.
Timing Chain Removal
Now that you have noticed the engine represented below is without a timing cover...see below. The trick is how to remove the chain.
It has a couple of tension points that keep it very tight. There is essentially no slack in the chain. Nothing like your BMX bike you had as a kid, when the chain would fall off and you would just pull it a little over and start pedaling to remount it...No sir. This is much more advanced.
You will see below, The first item you will attempt to remove is the chain tensioner. It has a slotted tongue that sticks out and is kept in place by a move-able locking pin. Objective is to turn the key and release the tension in the chain. Once you have a little slack it will allow you to remove the other tensioner.
See photos below:
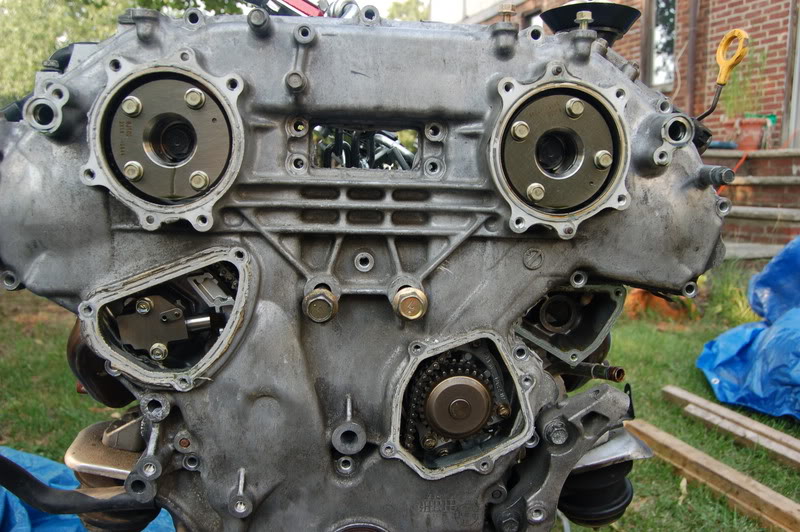
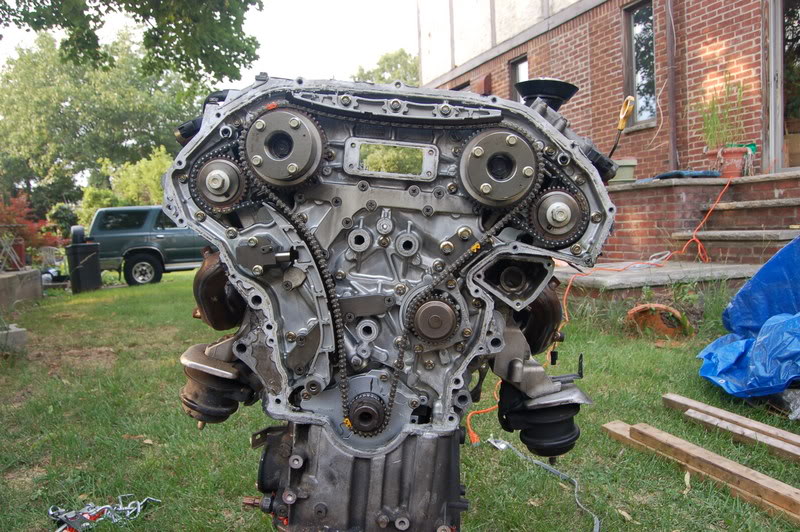
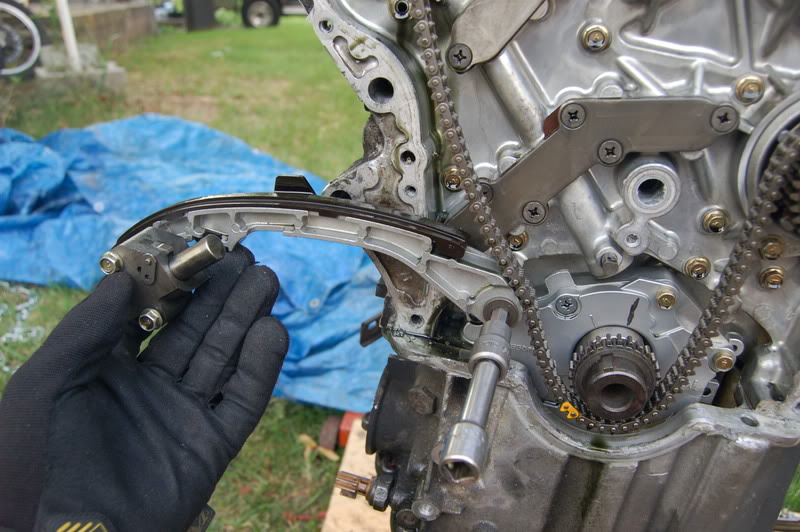
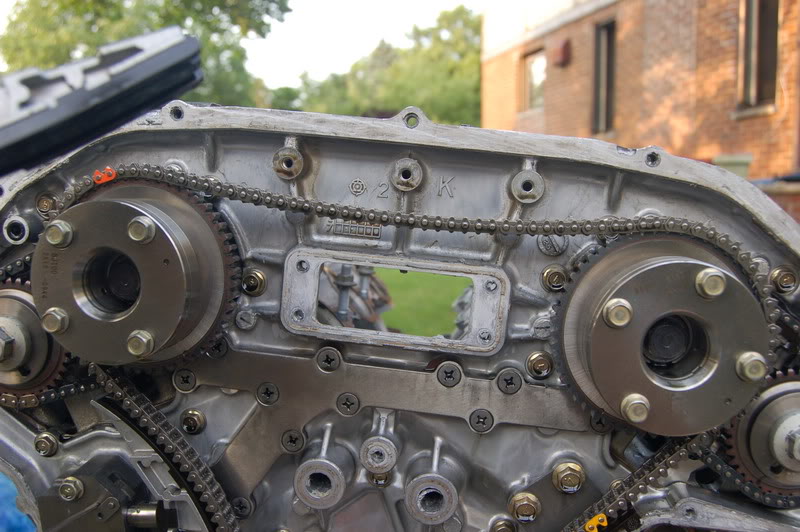
Here is the timing cover removed exposing the cam gears and timing chains.
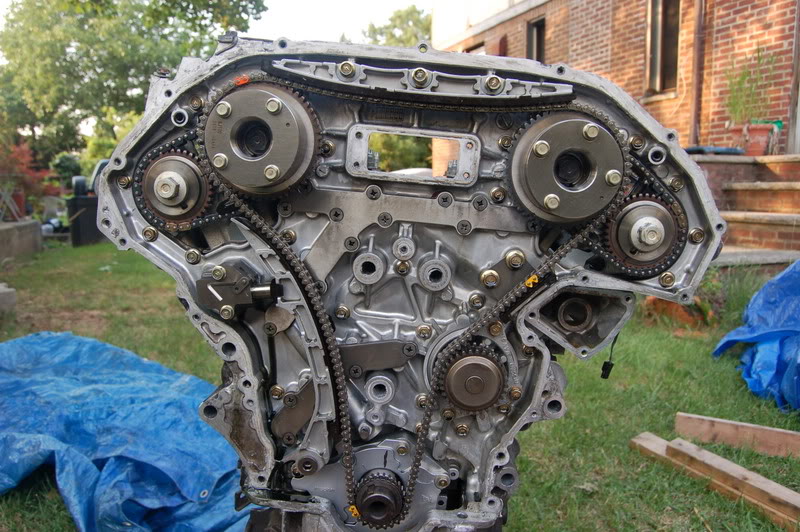
That gadget in the center is the primary chain tensioner. It has a tongue that is slotted and sticks out to apply pressure to the chain guide. This keeps the chain tight and in place.
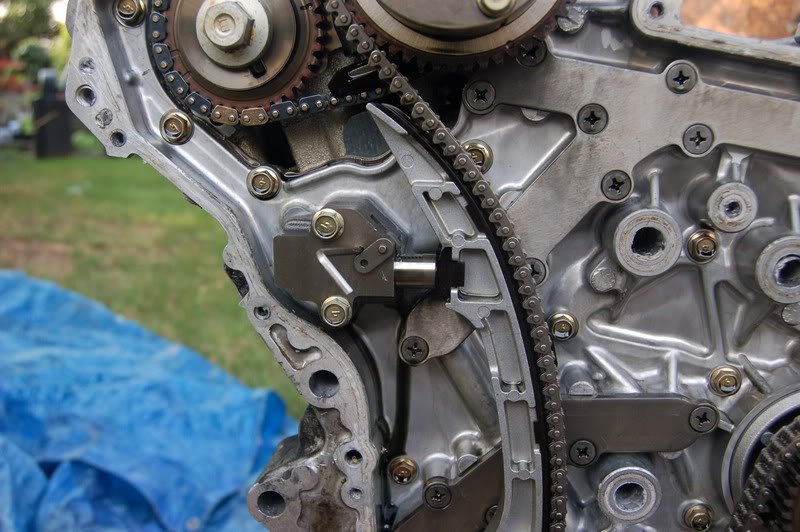
This little lever helps to release the locking mechanism. Watch as it is turned
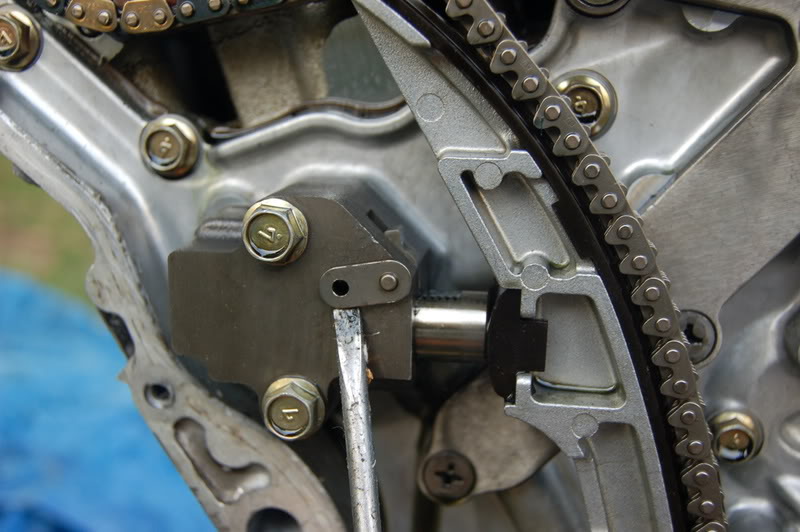
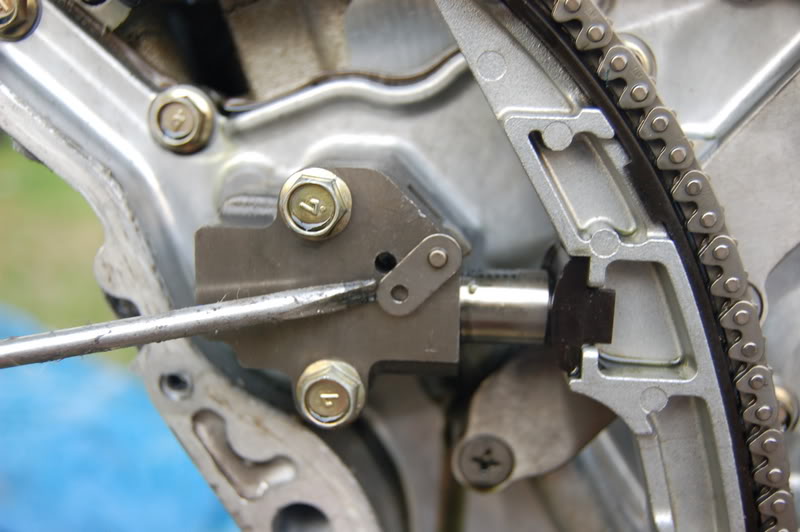
Keep in mind that this device is driven by oil pressure and you really need to push against it in order to release the little oil that is left in it.
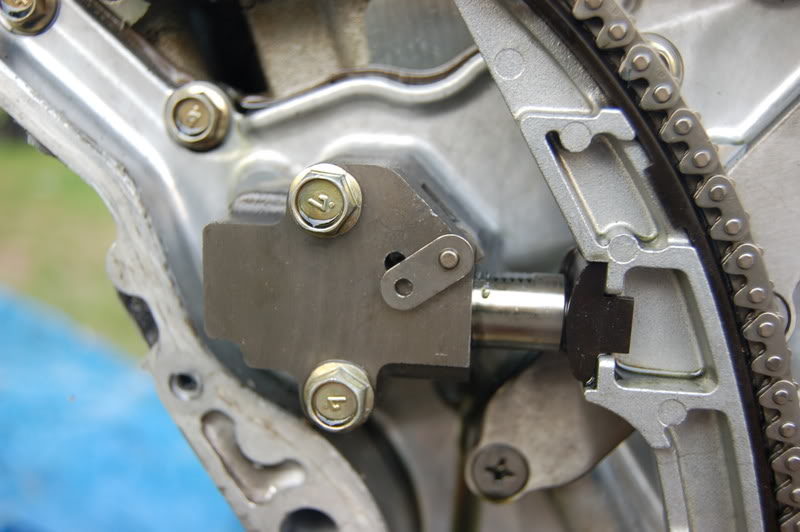
Once it is loose, remove the tensioner and this releases a lot of slack in the chain and chain guide.
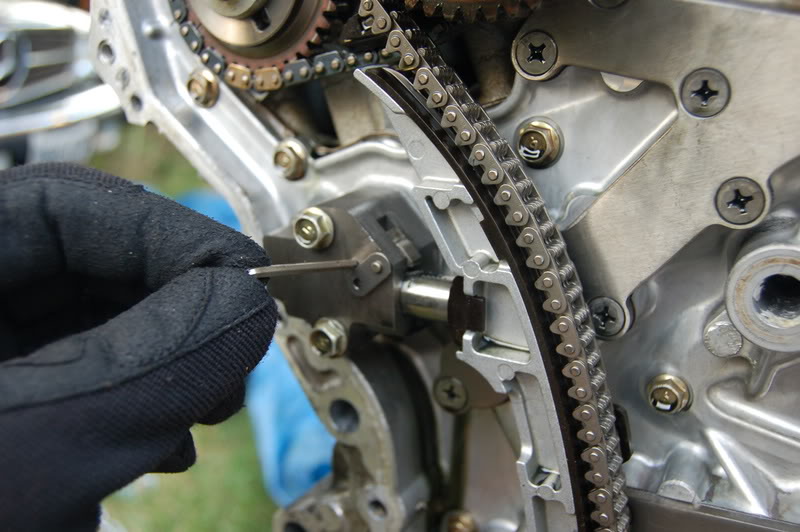
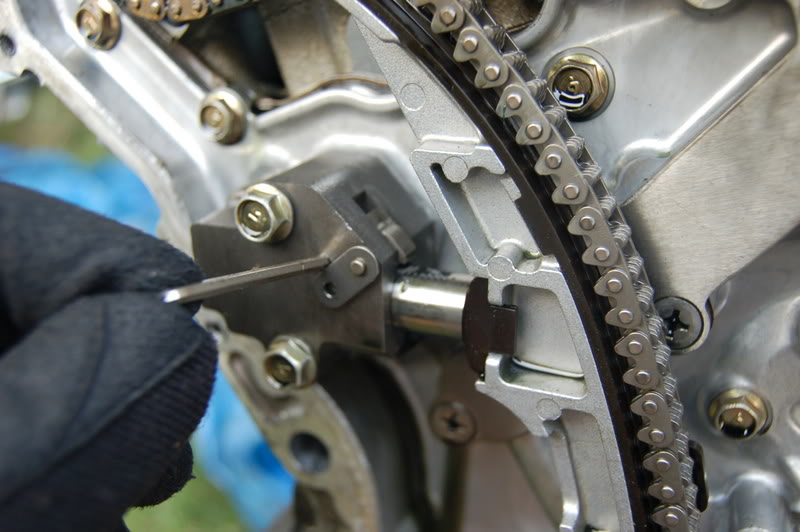
Remove the chain guide/tensioner
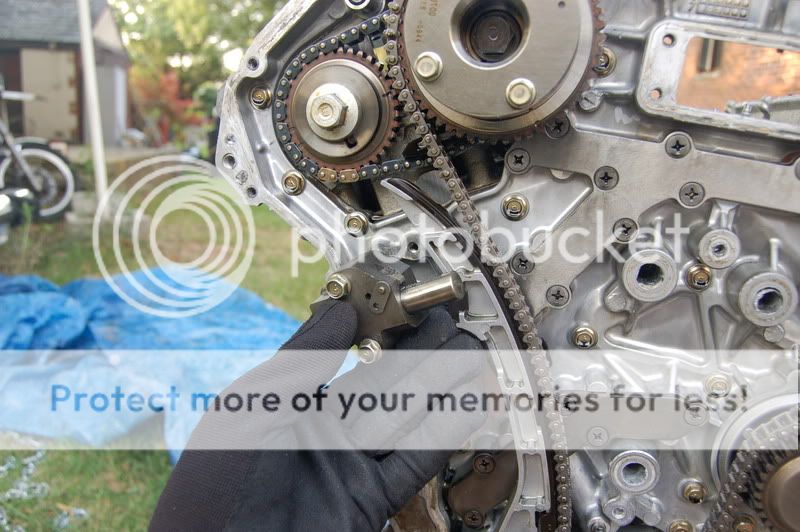
You can next remove the upper chain guide/tensioner:

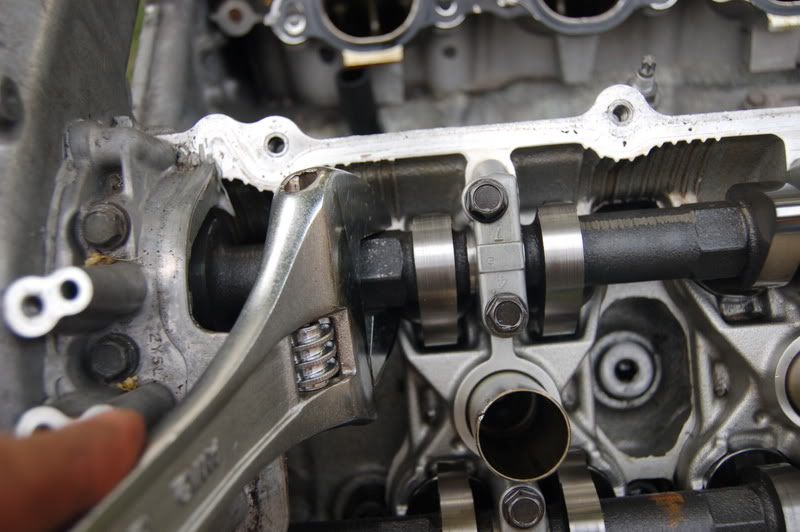
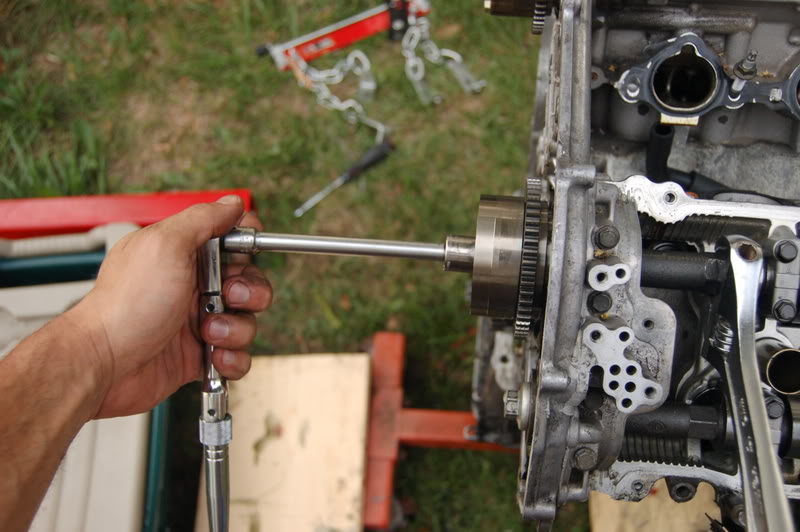
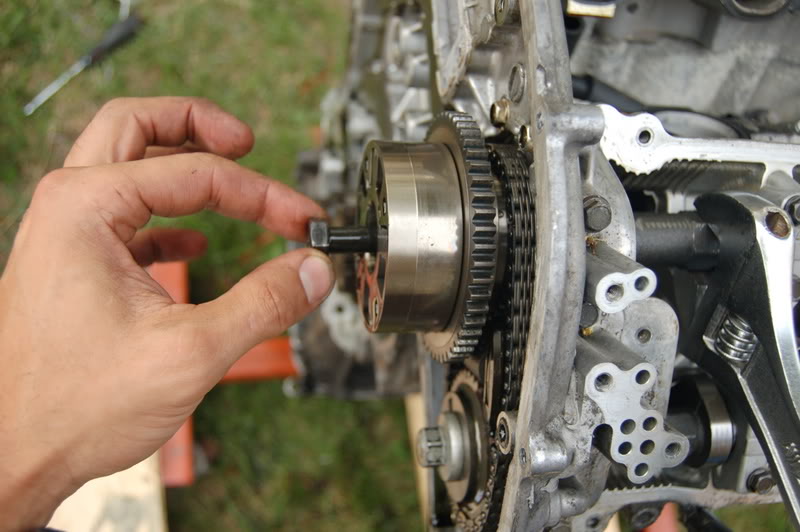
Then go to the actual cam which has slots for an adjustable wrench to hold it in place. You use your right hand to hold the cam steady and use your left with a ratchet to remove the main bolt that holds in each cam to the gear.
You'll see what is meant in the pictures below
 )
)
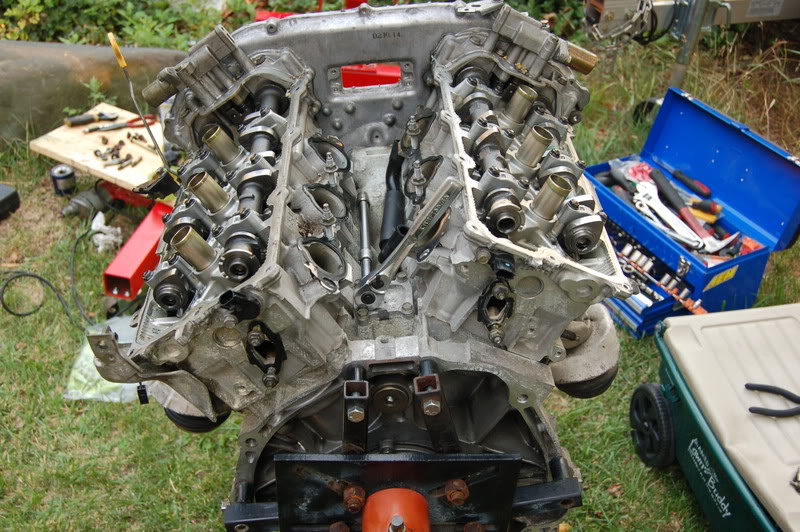
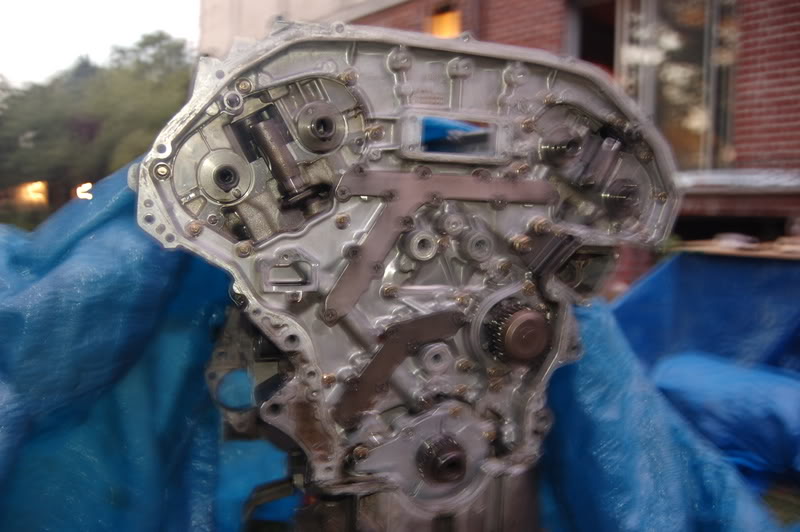
Repeat this process for each of the 4 cams. (2 Intake and 2 exhaust)
Now your engine should look something like this:
First and foremost, remove each of the four small covers on the top of the timing cover.
Remove all 22 bolts holding the timing cover, BUT BEWARE, there are 2 bolts from inside the oil pan that also hold the timing cover on. FAILURE TO REMOVE THOSE 2 BOLTS WILL RESULT IN DAMAGE TO YOUR TIMING COVER!!!!
OK, now that you got that out of the way, proceed to remove the cover.
Revealing a mess of chains and gears that you do not want to touch until you have some guidance from a mechanic, or you have more time to read the service manual about a dozen times.
Proceed on to some other items, valve covers, engine mounts, etc.
Here are the photos:
Getting started you can see the oil filter still attached to the oil cooler base. They are easily removed along with some of the water cooler lines.
Off with the 4 small covers
Here you can still see the engine mount and exhaust manifold still attached:
Remove the oil pan to expose the critical 2 secret bolts that will prevent you from removing the timing cover:
Very difficult to see but they are the forward most bolts. If you look closely you will see empty bolt holes, since I already removed the 2 bolts.
Now the timing cover is free to be removed:
Valve covers held in by 10 bolts (I think) on each bank:
There is also a special valve covering the corner of each valve cover. You can see the 2 valve devices at the far end of the block. Each is held by 3 bolts. Simply remove the 3 bolts and remove that as well. Be careful not to lose the gasket.
Remove the 2 engine mounts here.
[MG]http://img.photobucket.com/albums/v677/rrmedicx/DSC_0020-6.jpg[/img]
You will also have to remove the lower girdle and transfer than to the new block as well. It thought it was included in the short-block. You'll have to get that cleaned, because it has a lot of dirt and grime on it.
Timing Chain Removal
Now that you have noticed the engine represented below is without a timing cover...see below. The trick is how to remove the chain.
It has a couple of tension points that keep it very tight. There is essentially no slack in the chain. Nothing like your BMX bike you had as a kid, when the chain would fall off and you would just pull it a little over and start pedaling to remount it...No sir. This is much more advanced.
You will see below, The first item you will attempt to remove is the chain tensioner. It has a slotted tongue that sticks out and is kept in place by a move-able locking pin. Objective is to turn the key and release the tension in the chain. Once you have a little slack it will allow you to remove the other tensioner.
See photos below:
Here is the timing cover removed exposing the cam gears and timing chains.
That gadget in the center is the primary chain tensioner. It has a tongue that is slotted and sticks out to apply pressure to the chain guide. This keeps the chain tight and in place.
This little lever helps to release the locking mechanism. Watch as it is turned
Keep in mind that this device is driven by oil pressure and you really need to push against it in order to release the little oil that is left in it.
Once it is loose, remove the tensioner and this releases a lot of slack in the chain and chain guide.
Remove the chain guide/tensioner
You can next remove the upper chain guide/tensioner:
Then go to the actual cam which has slots for an adjustable wrench to hold it in place. You use your right hand to hold the cam steady and use your left with a ratchet to remove the main bolt that holds in each cam to the gear.
You'll see what is meant in the pictures below
) Repeat this process for each of the 4 cams. (2 Intake and 2 exhaust)
Now your engine should look something like this:


This is actually a really interesting topic. Our engines have timing chains, so they're pretty much "worry free" when it comes to that area, however, the thing that causes most problems is the tensioner. I've read on other forums of people having problems with the tensioner as early as 70k. That'll be one hell of a DIY.
Joined: Jul 2006
Posts: 15,043
Likes: 22
From: Pothole Central and still ridin slammed...Boston
^Yeah I actually started taking apart my motor that I am building and this DIY is comming in handy big time. I want to take the cover off for polishing and some other small items here and there.

Originally Posted by bythabay
This is actually a really interesting topic. Our engines have timing chains, so they're pretty much "worry free" when it comes to that area, however, the thing that causes most problems is the tensioner. I've read on other forums of people having problems with the tensioner as early as 70k. That'll be one hell of a DIY.
Trending Topics
Joined: Jul 2006
Posts: 15,043
Likes: 22
From: Pothole Central and still ridin slammed...Boston
You would have to remove the timing cover completely. The timing cover is one peice.
Originally Posted by JOKER
Do you have any Idea if it is possible to determine if there is a problem with a tensioner by removing a lower left cover while engine remains in the car?
Originally Posted by Hi-Tech_G
You would have to remove the timing cover completely. The timing cover is one peice.
The one that covers the tensioner.
Can tensioner be replaced trough that cover?

Originally Posted by JOKER
Do you have any Idea if it is possible to determine if there is a problem with a tensioner by removing a lower left cover while engine remains in the car?
looks like Nissan put in that access cover to be able to service the tensioner, should there be a problem with it, or if one is crazy enough to try and attempt a cam install in the car.
knock out the 3 bolt cover and u should be good to go. It may be tight in the car, but do able

finally found a thread helping me with the front cover
removing it in a few weeks to begin my motor work, polishing everything
also if theres any steps anywhere on removing all the pulleys since my motor will still be in the car when removing the front cover. found one thing mentioned the crank pulley but curious if its much work to remove the rest.
removing it in a few weeks to begin my motor work, polishing everything
also if theres any steps anywhere on removing all the pulleys since my motor will still be in the car when removing the front cover. found one thing mentioned the crank pulley but curious if its much work to remove the rest.


