
My SPC A-Arm installation


Joined: Apr 2004
Posts: 8,001
Likes: 8
From: Orlando, FL
My SPC A-Arm installation
I was fortunate enough to get the first SPC A-Arm set in Florida from IAPdirect.com for testing on my 2004 G35 coupe. I finally met Peter, the owner of IAP, and he's a really nice guy with a clean operation.
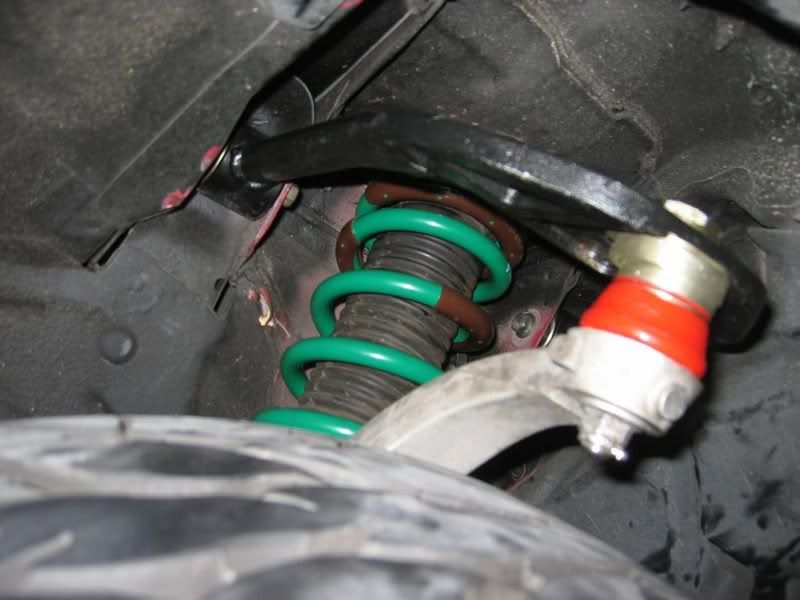
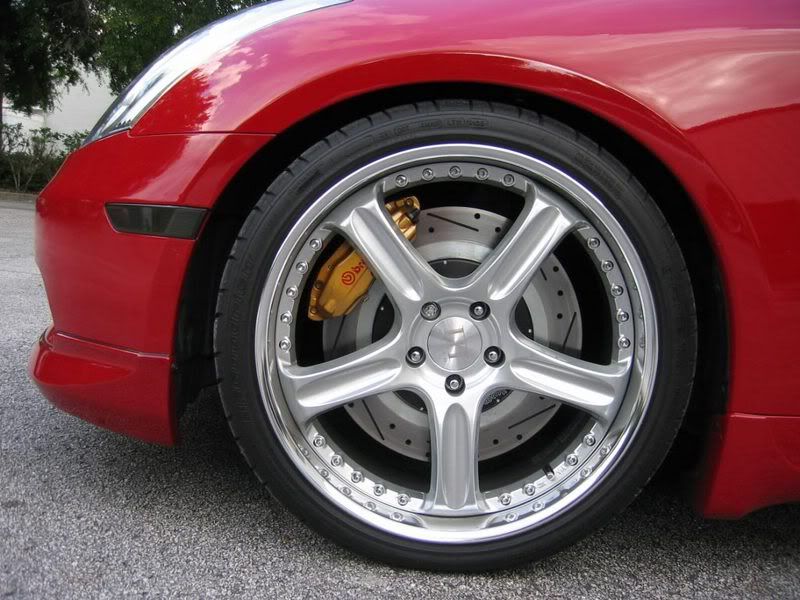
The A-Arms were part of a project to swap out the springs (350Z S-Techs), shocks (Tokico D-specs), brake lines (Goodrich stainless), brake rotors (Fast Brakes custom drilled/slotted rotors, 15.2 front, 13 (stock size) in rear w/ caliper spacing bracket for the Brembos), SPC camber arms, and SPC toe bolts. So some of the pics will show some of those parts being replaced too.
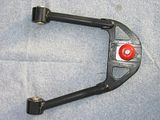
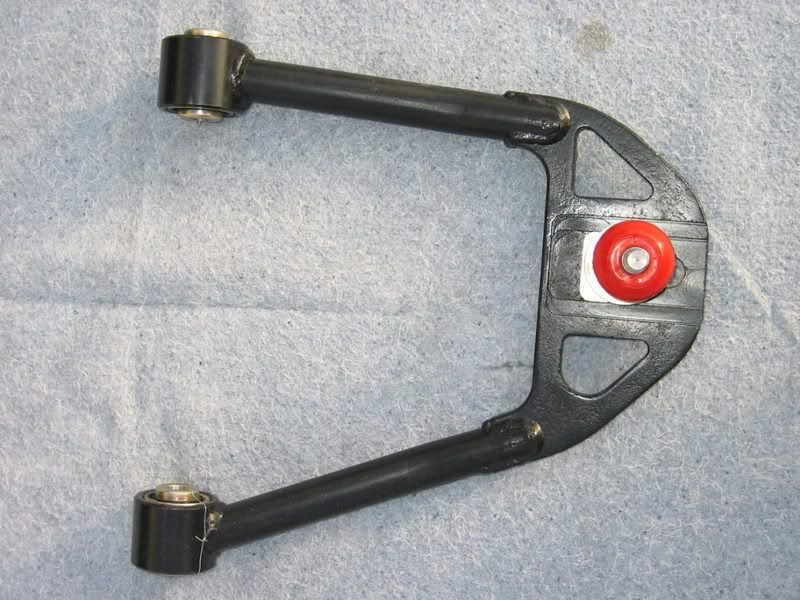
The design of the SPC A-Arms allow more positive camber adjustment than with probably all of the A-Arm kits out there due to the inclusion of hub spacers in the kit that go between the steering knuckle and the hub. My drop on the S-Techs isn't severe enough to require the spacers. The A-Arms gave enough adjustability.
I forgot to weigh the SPC A-arm to compare them with stock..
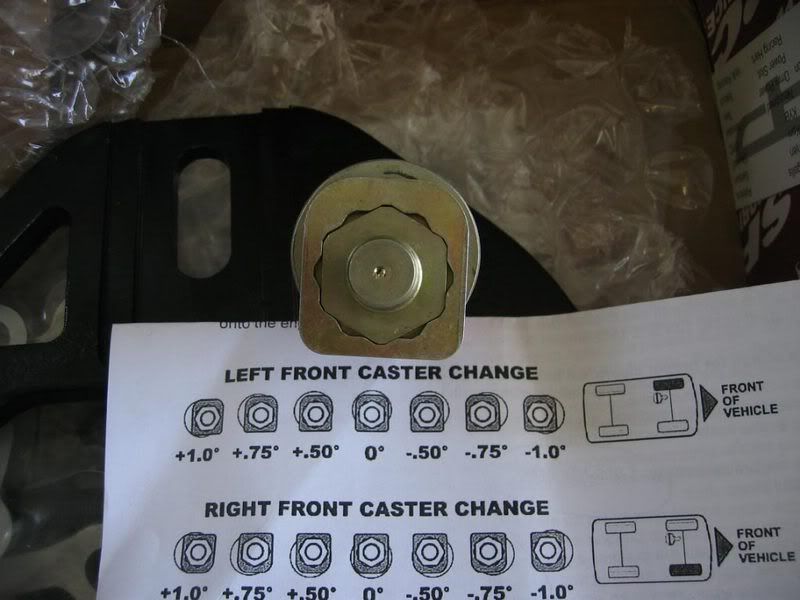
Also, the SPC units allow adjustment of the caster of the car using a notched cam type of spacer, but I left them at zero caster.
OK, now for the install: You need 14mm socket, 17mm socket, and a 27mm socket (for the adjusting nut). A 1 1/8 inch socket or wrench will also work for the adjusting nut. Keep in mind that this unit is an initial production sample. Peter assured me that the production units will be finished better. We installed them in my garage and needed no special tools, except for the spring compressor, which wasn't entirely necessary.
The install was pretty simple and could be done within a couple of hours or so.
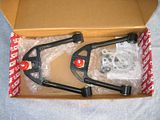
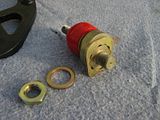
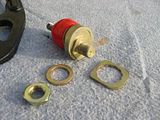
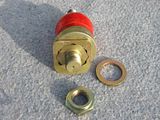
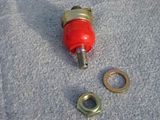
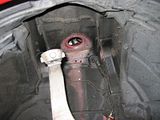
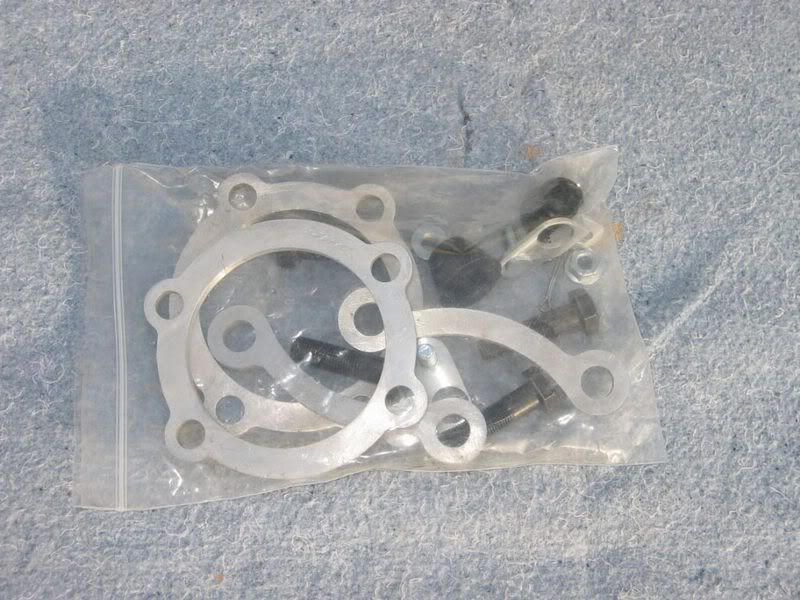
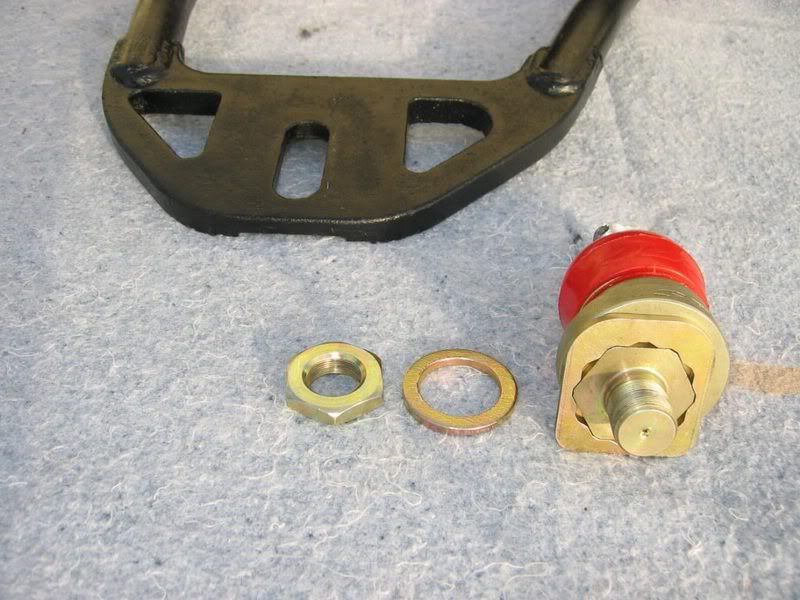
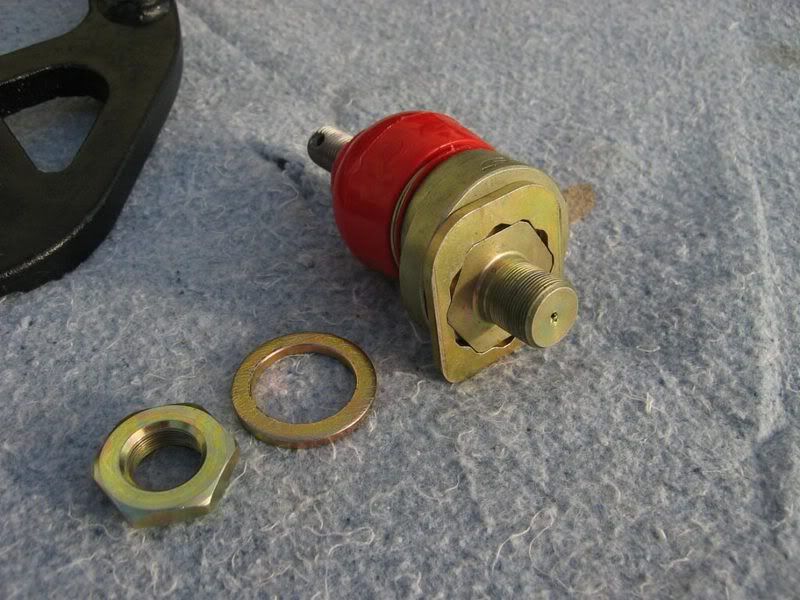
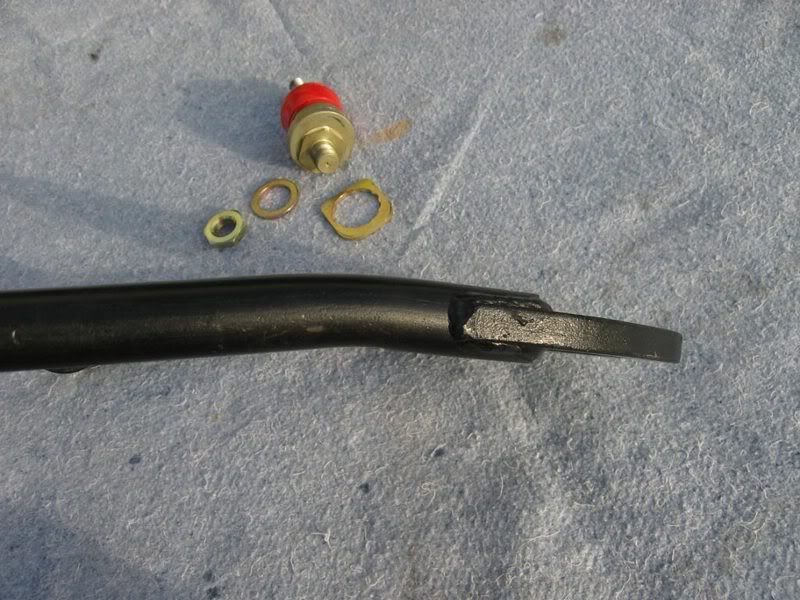
First some pics of the kit.


After you remove the wheel, remove the cotter pin holding the stock a-arm bolt onto the steering knuckle. It's 17 mm. I was doing a brake rotor upgrade so I went ahead and removed the rotors and calipers at the same time.

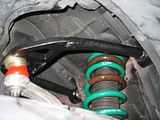
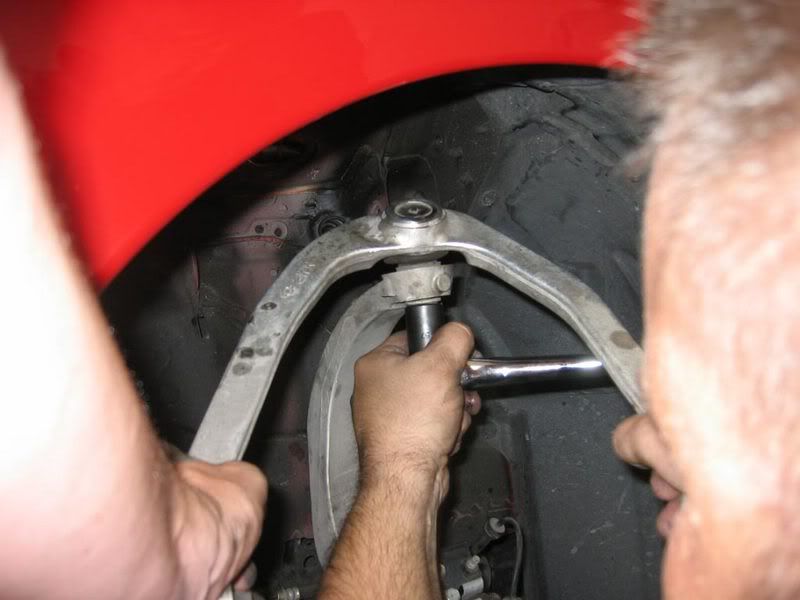
The threaded shaft spun on the A-arm as we tried to remove the nut, but we were able to remove the nut once we got the other two bolts holding the A-arm to the chassis out, spun the A-arm around, and pushed down on it to apply pressure to the shreaded shaft that the nut is on.
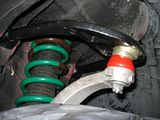
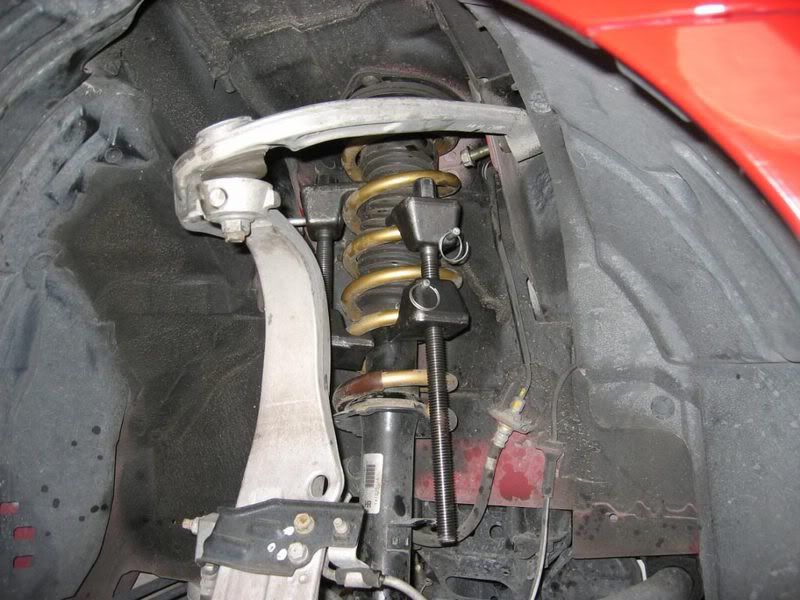
However, before we could swing the A-arm around to apply pressure to the threaded shaft and remove the nut, we had to remove the bolts holding the A-arm to the body. The rearward bolt (14mm) came out easily, but the front bolt doesn't have enough room to com all the way out because of the position of the shock. We used a spring compressor to drop the shock down to shift the shock over slightly to give enough room to remove the bolt.
On the other side, we simply slid down the boot on the boot on the OEM shock to allow enough room to slide that front bolt out of the way.
We have since done another A-arm swap on roncfpz's 350Z with Tein CS coilovers. We simply removed the three nuts holding the coilovers to the strut tower, dropped the coilovers a little toward the back of the car, and removed the frontmost bolt. We reversed the procedure to reinstall the A-arms. This should work for stock shocks too.
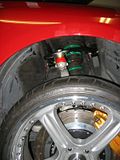
This pic shows us applying pressure to the A-arm to remove the nut.

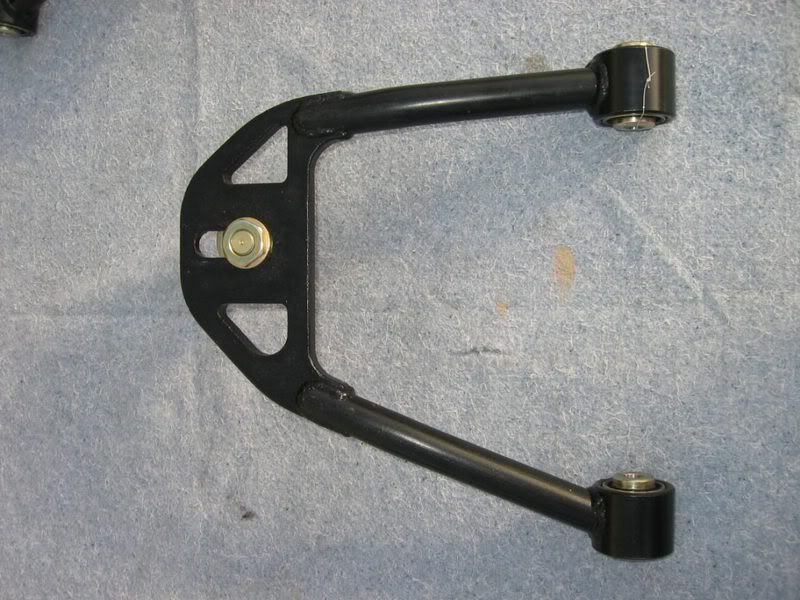
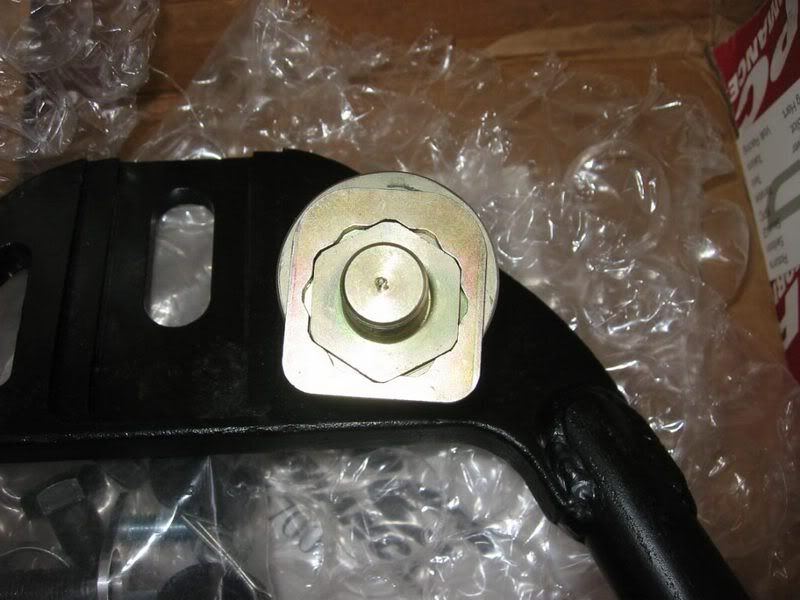
Next, we oriented the caster to 0 and tightened it down with a 27 millimeter socket before mounting the A-arm. Double check that you have the caster cam (?) oriented correctly before installing the A-arm. I had to go back and set both sides to zero caster after they were on the car, BUT, it's really easy to change caster once the A-arms are on the car. Just remove the 17mm nut, swing the A-arm down, and correct it.


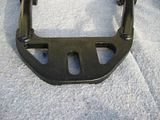
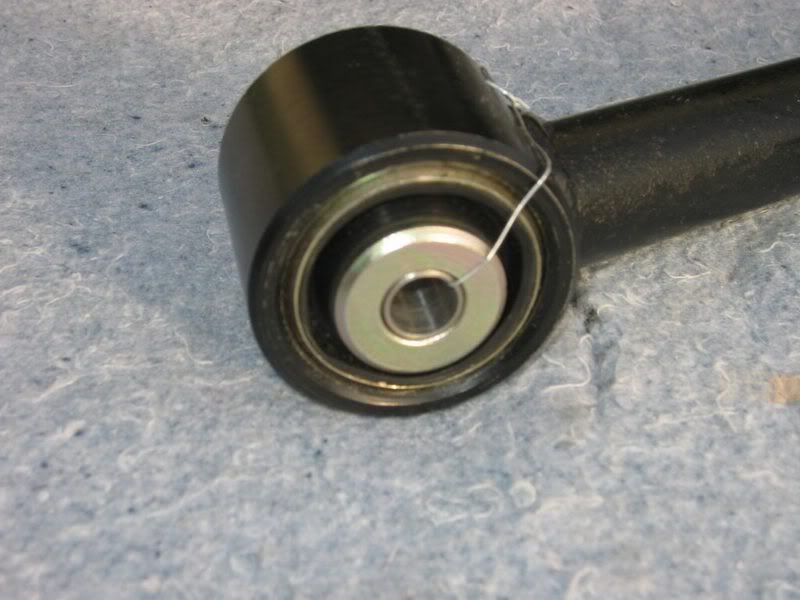
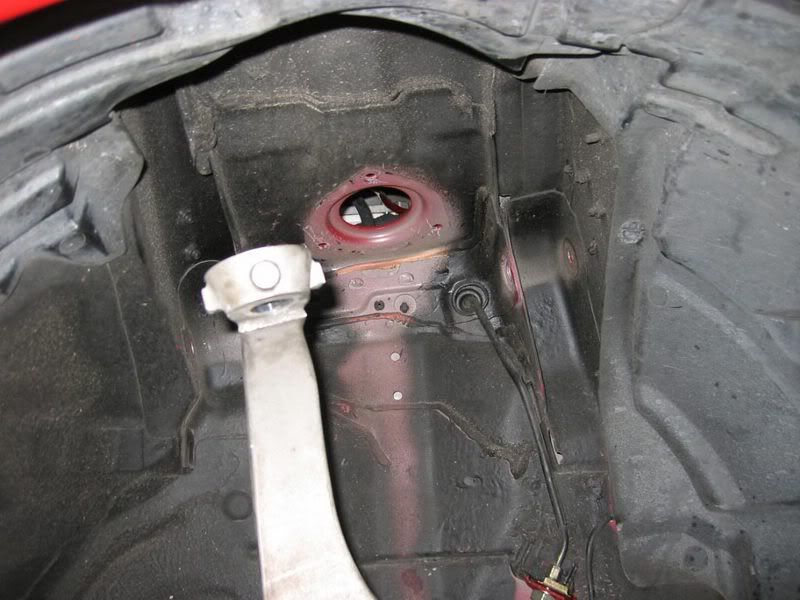
Next, cut the wires holding the two roller bearings into the SPC A-arm assemblies where they mount to the car body. Be careful, the bushings will slide out. It also took a little rubber hammering to get those bushingsto fit into the mount location of the strut tower. Insert the 14 mm bolts and tighten.
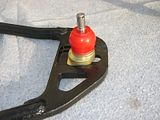
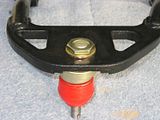
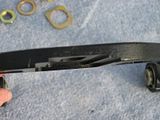
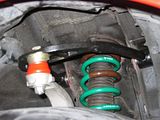
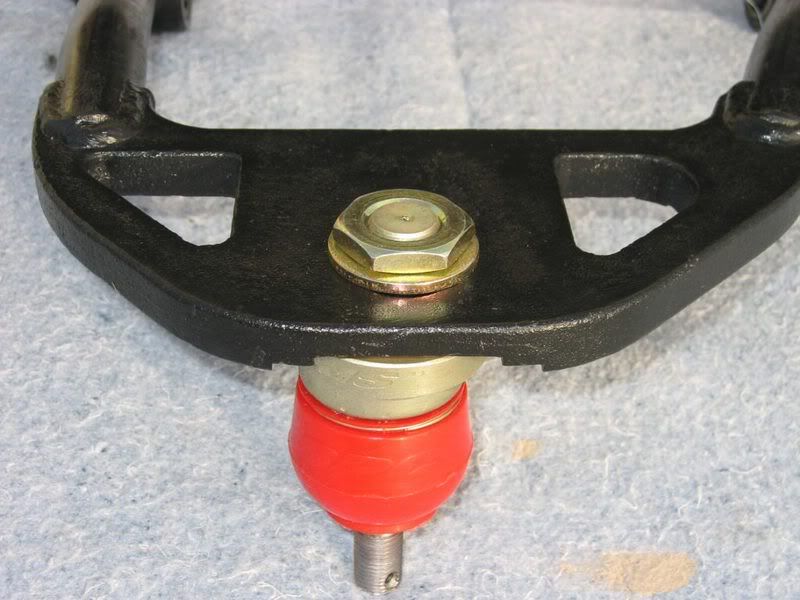
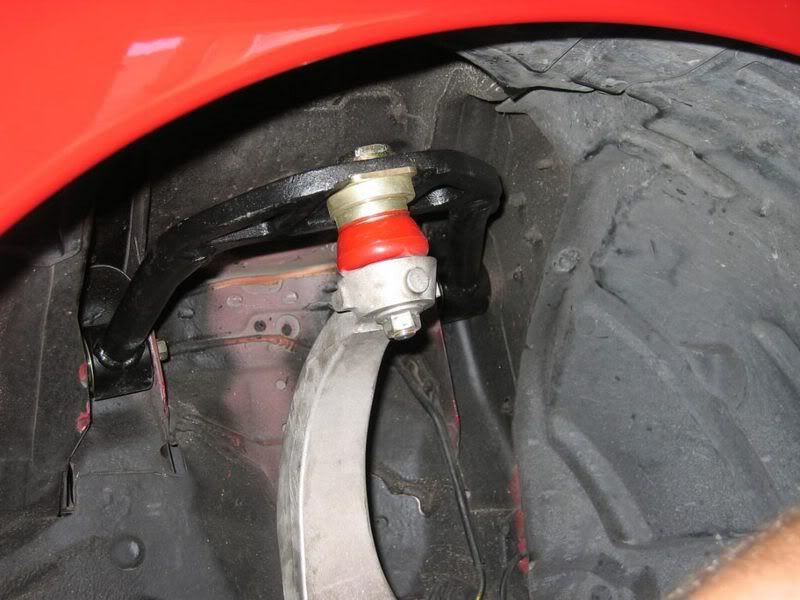
Lastly, insert the new conical bushing in the SPC kit where the steering knuckle goes onto the A-arm. Then, put the new 14 mm nut onto the threaded shaft (red rubber boot) and tighten it. Reinsert the new cotter pin that is supplied in the kit. The photos show the wide range of motion of the shaft beneath the red rubber boot.


The A-Arms were part of a project to swap out the springs (350Z S-Techs), shocks (Tokico D-specs), brake lines (Goodrich stainless), brake rotors (Fast Brakes custom drilled/slotted rotors, 15.2 front, 13 (stock size) in rear w/ caliper spacing bracket for the Brembos), SPC camber arms, and SPC toe bolts. So some of the pics will show some of those parts being replaced too.
The design of the SPC A-Arms allow more positive camber adjustment than with probably all of the A-Arm kits out there due to the inclusion of hub spacers in the kit that go between the steering knuckle and the hub. My drop on the S-Techs isn't severe enough to require the spacers. The A-Arms gave enough adjustability.
I forgot to weigh the SPC A-arm to compare them with stock..
Also, the SPC units allow adjustment of the caster of the car using a notched cam type of spacer, but I left them at zero caster.
OK, now for the install: You need 14mm socket, 17mm socket, and a 27mm socket (for the adjusting nut). A 1 1/8 inch socket or wrench will also work for the adjusting nut. Keep in mind that this unit is an initial production sample. Peter assured me that the production units will be finished better. We installed them in my garage and needed no special tools, except for the spring compressor, which wasn't entirely necessary.
The install was pretty simple and could be done within a couple of hours or so.
First some pics of the kit.


After you remove the wheel, remove the cotter pin holding the stock a-arm bolt onto the steering knuckle. It's 17 mm. I was doing a brake rotor upgrade so I went ahead and removed the rotors and calipers at the same time.


The threaded shaft spun on the A-arm as we tried to remove the nut, but we were able to remove the nut once we got the other two bolts holding the A-arm to the chassis out, spun the A-arm around, and pushed down on it to apply pressure to the shreaded shaft that the nut is on.
However, before we could swing the A-arm around to apply pressure to the threaded shaft and remove the nut, we had to remove the bolts holding the A-arm to the body. The rearward bolt (14mm) came out easily, but the front bolt doesn't have enough room to com all the way out because of the position of the shock. We used a spring compressor to drop the shock down to shift the shock over slightly to give enough room to remove the bolt.
On the other side, we simply slid down the boot on the boot on the OEM shock to allow enough room to slide that front bolt out of the way.
We have since done another A-arm swap on roncfpz's 350Z with Tein CS coilovers. We simply removed the three nuts holding the coilovers to the strut tower, dropped the coilovers a little toward the back of the car, and removed the frontmost bolt. We reversed the procedure to reinstall the A-arms. This should work for stock shocks too.
This pic shows us applying pressure to the A-arm to remove the nut.
Next, we oriented the caster to 0 and tightened it down with a 27 millimeter socket before mounting the A-arm. Double check that you have the caster cam (?) oriented correctly before installing the A-arm. I had to go back and set both sides to zero caster after they were on the car, BUT, it's really easy to change caster once the A-arms are on the car. Just remove the 17mm nut, swing the A-arm down, and correct it.
Next, cut the wires holding the two roller bearings into the SPC A-arm assemblies where they mount to the car body. Be careful, the bushings will slide out. It also took a little rubber hammering to get those bushingsto fit into the mount location of the strut tower. Insert the 14 mm bolts and tighten.
Lastly, insert the new conical bushing in the SPC kit where the steering knuckle goes onto the A-arm. Then, put the new 14 mm nut onto the threaded shaft (red rubber boot) and tighten it. Reinsert the new cotter pin that is supplied in the kit. The photos show the wide range of motion of the shaft beneath the red rubber boot.


Joined: Apr 2004
Posts: 8,001
Likes: 8
From: Orlando, FL
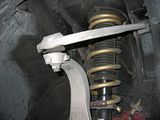
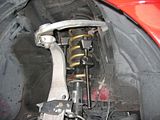
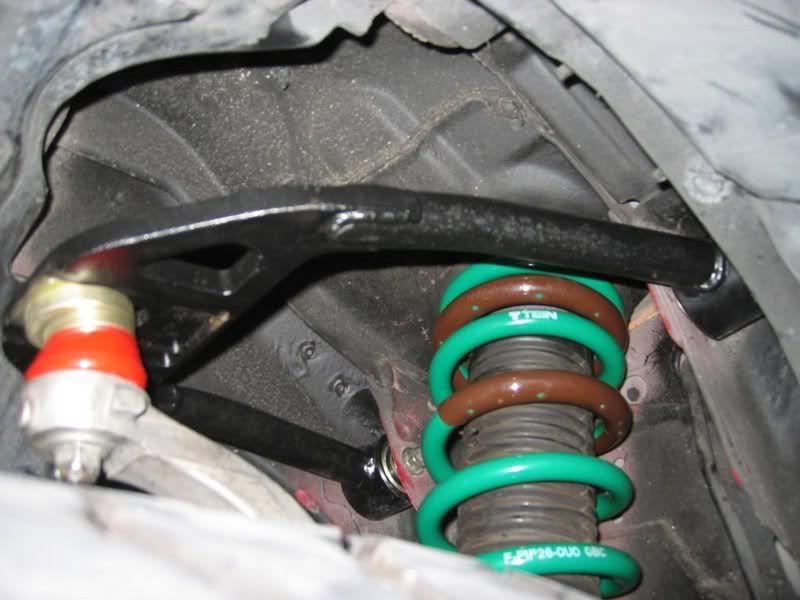
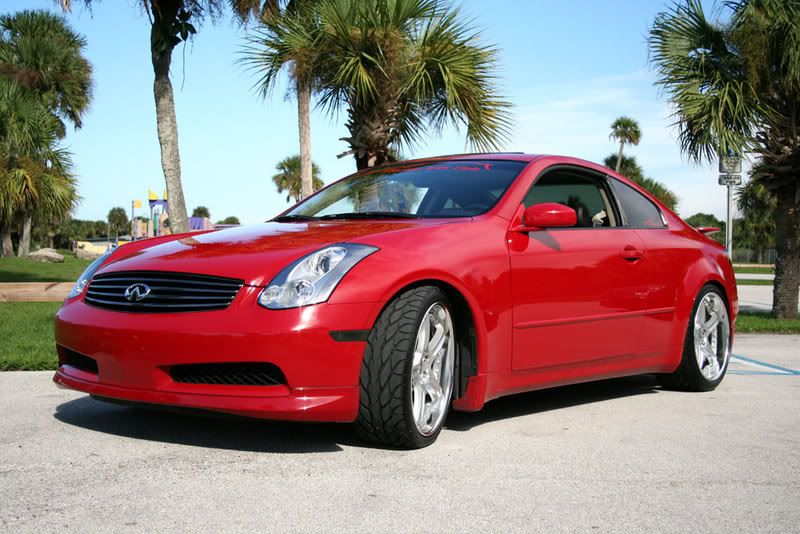
Finally, the finished product.
I have had the A-arms on the car for about 5 weeks now. They have been to the alignment shop and the alignment guy had no problem adjusting them to get the alignment within spec. They have over 2500 miles on them now and I have had no issues with them. They don't make any noise, like some do. They are easy to install and they are a well built product. They do weigh more than stock, but all aftermarket A-arms will likely weigh more than the stock aluminum units. For those the want to adjust caster or that have extreme drops, these are the only choice on the market right now.
I didn't install the shims between the hub and the steering knuckle. It will take more effort to install those shims, but if you need the extra positive camber, the shims will provide it to you.
Thanks to my buddies from the Florida G35 Club who came to my house and helped with all the parts installation - Chuck, Ian, Shermie, Jose, Ryan, and my brother, Wade.

Joined: Apr 2004
Posts: 8,001
Likes: 8
From: Orlando, FL
Originally Posted by cato
Looks great. Time to replace those stock sway bars!
That was a very good write up, Sean. Thanks for making this...
Anyone reading this who are interested in the SPC camber kits, Peter at www.iapdirect.com is the guy to contact...
Anyone reading this who are interested in the SPC camber kits, Peter at www.iapdirect.com is the guy to contact...
Nice Writeup Sean! Thank you for your help. 
Ian, thanks for the post!
The kits will be here this Friday!! Only a handful of these left with no current ETA on the next batch.
Take care guys.
Ian, thanks for the post!
The kits will be here this Friday!! Only a handful of these left with no current ETA on the next batch.
Take care guys.
Photographer
Joined: Nov 2002
Posts: 5,050
Likes: 0
From: St.Pete, FL

Great pictures, writeup, and tutorial, Sean!
Your detailed instructions and pictures could probably substitute for an installation manual.
I was especially interested in how SPC was going to provide caster adjustability with only a single adjustment bolt. Your pictures and writeup clearly explain that. Quite an ingenious method.
Can we make this a Sticky?

Thread
Thread Starter
Forum
Replies
Last Post