
Valve Cover Paint Job - DIY


Joined: Jan 2008
Posts: 3,684
Likes: 28
From: Vegas
Valve Cover Paint Job - DIY
So I have a (almost) new set of valve covers that I'm installing due to the leaking oil in cylinders #3 and #6. Along with the covers I have a set of new ignition coils I'm installing. However, before I do the install I thought that this would be a good chance to dress up the engine bay a little.
What better time to paint the valve covers right?
I decided that I was going to paint the covers blue because my catch can, jwt pop charger, and stillen engine damper were all blue and in the engine bay already.
Here's a pic with all the necessary goodies for accomplishing the job.

I used the simple green to clean the valve covers first. Spray and let stand for 5 min or so. I sprayed both sides of the covers. After that, wash off the VC's. Repeat process but this time use a tooth brush to agitate and clean any tougher areas. Follow with a thorough rinse. Let air dry for a few minutes then use a cloth (microfiber is best) to dry and prep the side we are going to paint.
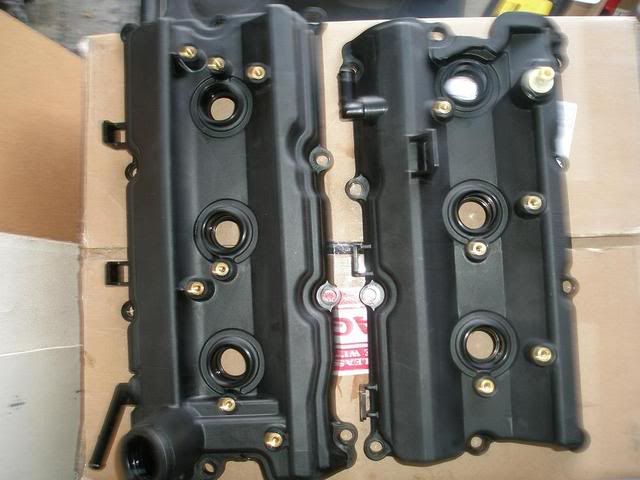
This is what mine looked like after I dried them off.
At this point if you have a lot of irregularities you can sand/wetsand the VC's down. I was fine with the current condition of mine, otherwise I would have used 320/400 grit.
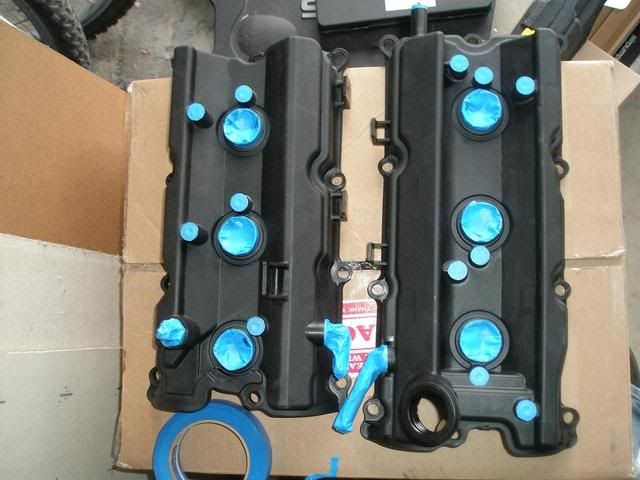
Next Step is to finish preparing the VC's for the adhesive promoter (primer) and paint. Tape up all areas. You can also tape any designs if you feel so inclined. Here's what mine looked like. In the pic you'll see I missed one spot on the right side VC. I taped that up later.
Spray 3 coats of the adhesive promoter on, allow 2-3 min between coats. This dries fairly fast. Be sure to get hard to reach areas as well. The adhesive promoter I used was clear so no need for a picture.
Start painting within 10 min of the last coat of primer. Here is mine after 2 coats of the paint I chose. (I chose this paint because it will withstand 500* temperatures)
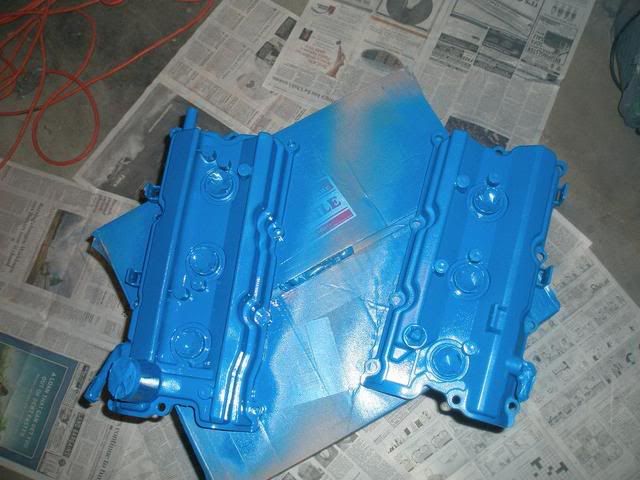
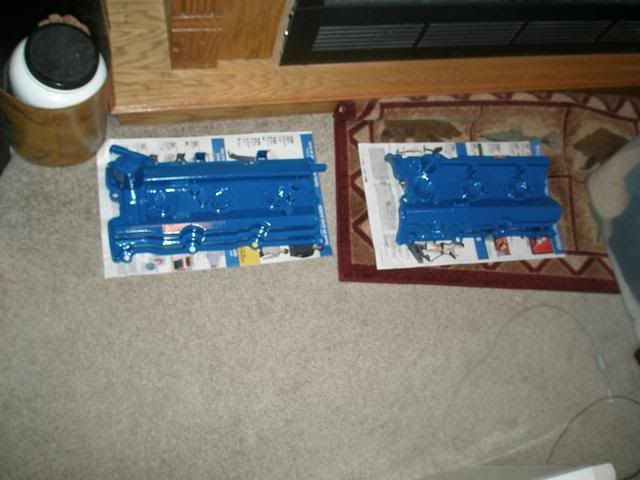
I applied 3 coats of paint to my VC's. Here is what they look like. I brought them inside to dry. It still gets cold in the garage overnight right now. This will ensure that the paint is ready for the clear coat (It needs 3 good drying hours).
Clear coat pics. Applied 3 coats of this as well. Brought it inside to dry faster.
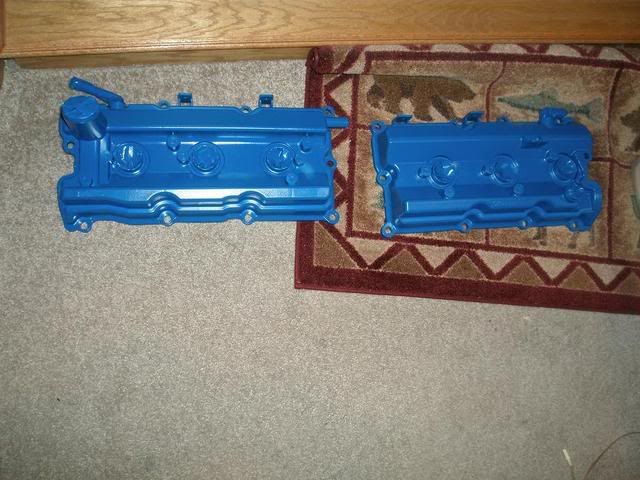
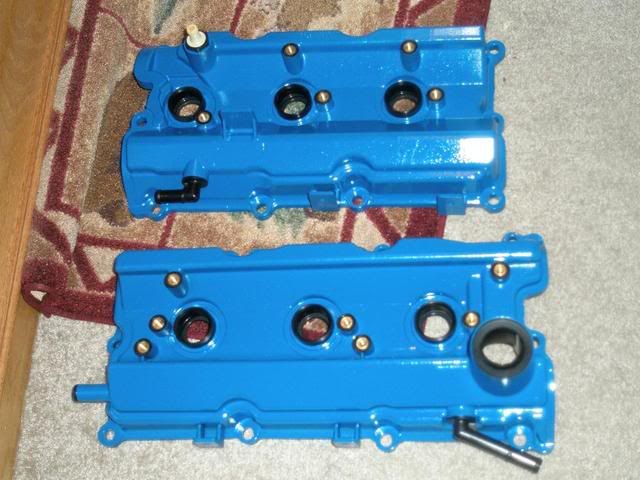
Removed all the taped areas. Finished look, ready for install.
INSTALL
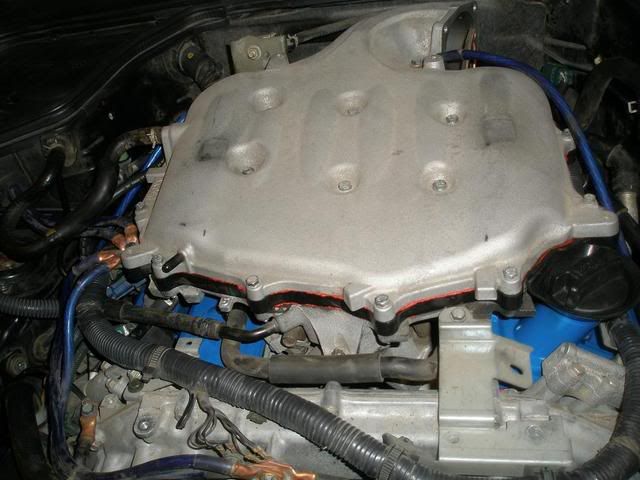
To start with...
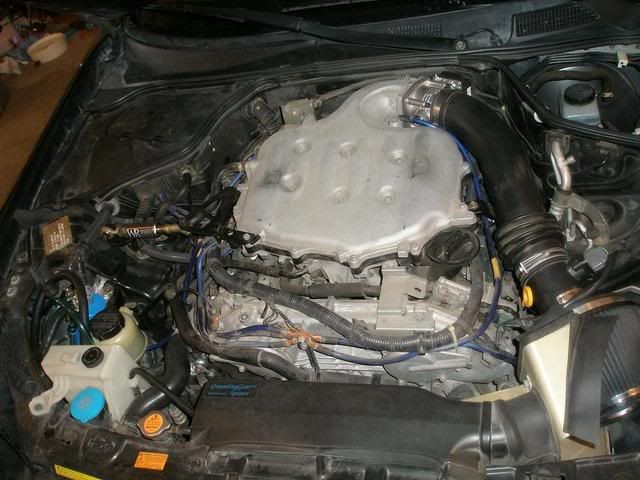
Remove upper and lower plenums
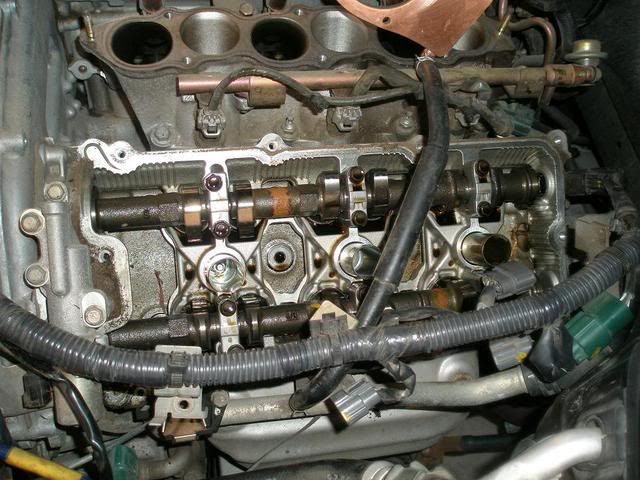
Heres the stock valve covers
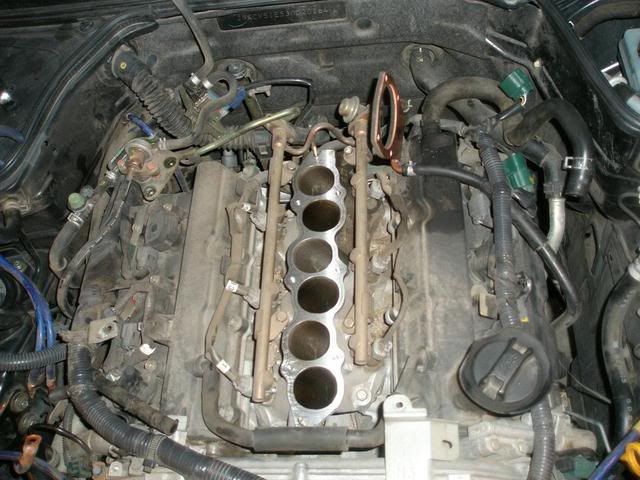
Removed the drivers side, now you can see what's inside!
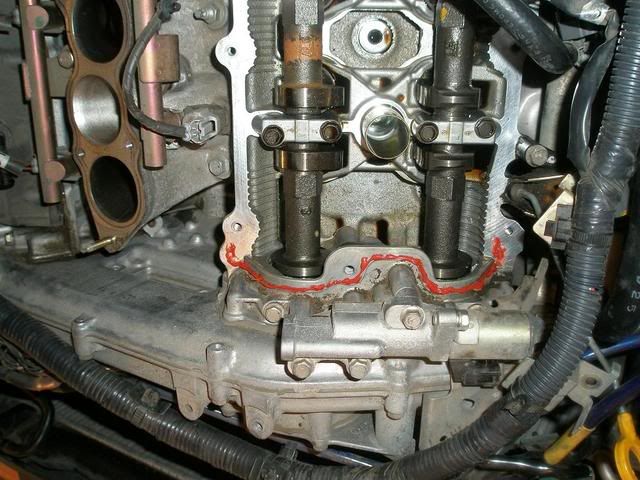
Before installing, you need to use RTV here.
Drivers side in, side by side comparison.
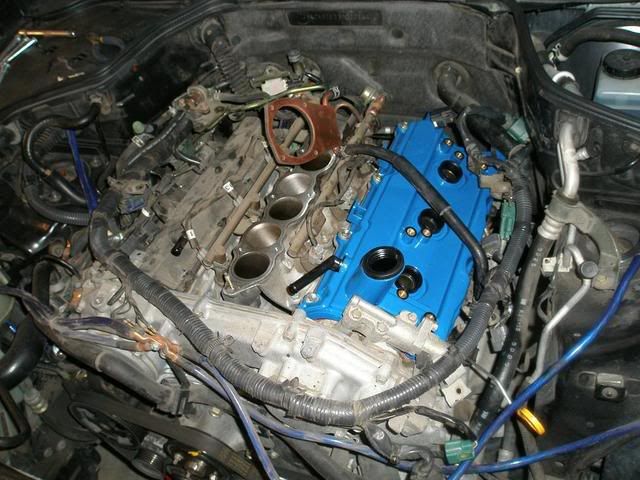
Both installed now.
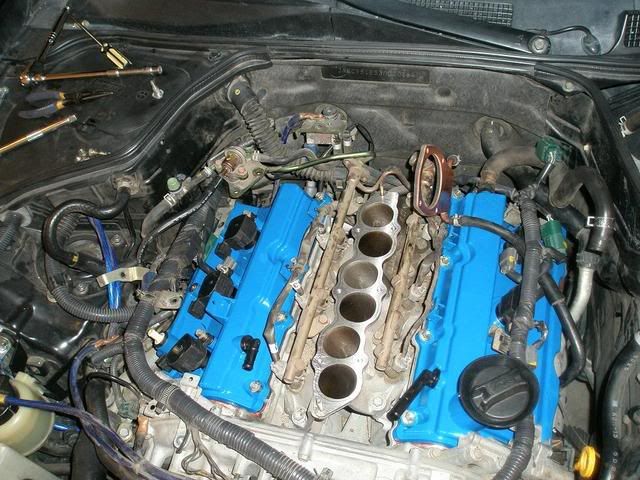
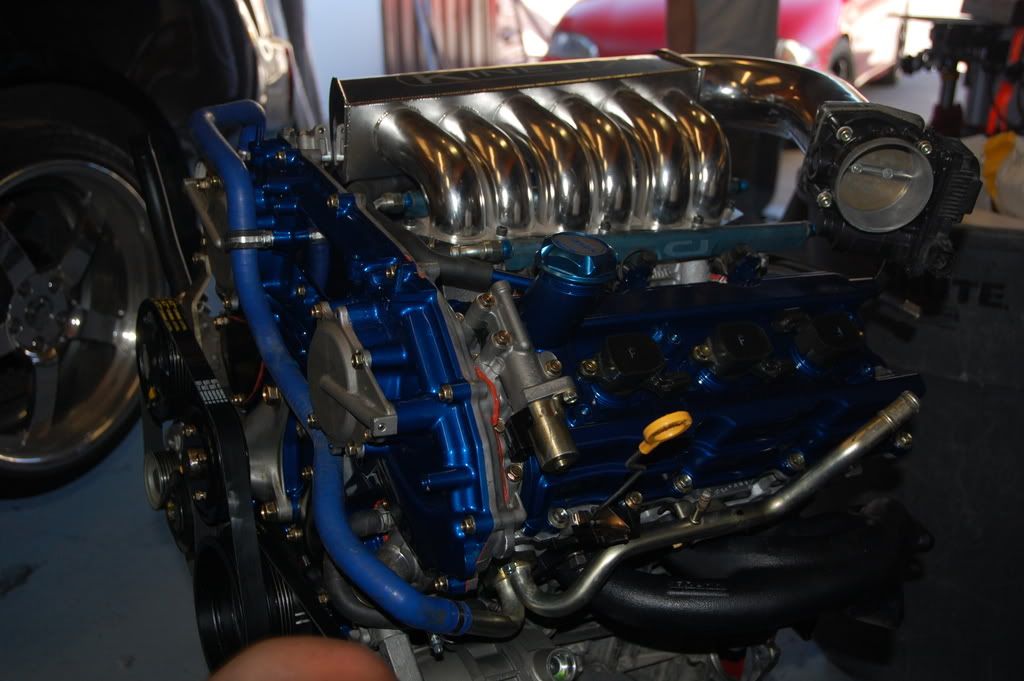
With plenum back on.
NOTE: This is not my final product. I have plans with the Plenum. Should be polished up and on soon.
What better time to paint the valve covers right?
I decided that I was going to paint the covers blue because my catch can, jwt pop charger, and stillen engine damper were all blue and in the engine bay already.
Here's a pic with all the necessary goodies for accomplishing the job.
I used the simple green to clean the valve covers first. Spray and let stand for 5 min or so. I sprayed both sides of the covers. After that, wash off the VC's. Repeat process but this time use a tooth brush to agitate and clean any tougher areas. Follow with a thorough rinse. Let air dry for a few minutes then use a cloth (microfiber is best) to dry and prep the side we are going to paint.
This is what mine looked like after I dried them off.
At this point if you have a lot of irregularities you can sand/wetsand the VC's down. I was fine with the current condition of mine, otherwise I would have used 320/400 grit.
Next Step is to finish preparing the VC's for the adhesive promoter (primer) and paint. Tape up all areas. You can also tape any designs if you feel so inclined. Here's what mine looked like. In the pic you'll see I missed one spot on the right side VC. I taped that up later.
Spray 3 coats of the adhesive promoter on, allow 2-3 min between coats. This dries fairly fast. Be sure to get hard to reach areas as well. The adhesive promoter I used was clear so no need for a picture.
Start painting within 10 min of the last coat of primer. Here is mine after 2 coats of the paint I chose. (I chose this paint because it will withstand 500* temperatures)
I applied 3 coats of paint to my VC's. Here is what they look like. I brought them inside to dry. It still gets cold in the garage overnight right now. This will ensure that the paint is ready for the clear coat (It needs 3 good drying hours).
Clear coat pics. Applied 3 coats of this as well. Brought it inside to dry faster.
Removed all the taped areas. Finished look, ready for install.
INSTALL
To start with...
Remove upper and lower plenums
Heres the stock valve covers
Removed the drivers side, now you can see what's inside!
Before installing, you need to use RTV here.
Drivers side in, side by side comparison.
Both installed now.
With plenum back on.
NOTE: This is not my final product. I have plans with the Plenum. Should be polished up and on soon.
Last edited by Tollboothwilley; Mar 4, 2009 at 12:19 AM.


Ohio G Club moderator
iTrader: (31)
Joined: Jan 2008
Posts: 3,369
Likes: 4
From: KY tri state area/FL keys

so far so good..waiting for completion pics
Trending Topics


Thread
Thread Starter
Forum
Replies
Last Post
yassy
G35 Sedan V35 2003-06
3
Aug 9, 2015 07:31 PM