
GTM Vortech tension Pulley Install DIY


Joined: Nov 2003
Posts: 3,126
Likes: 10
From: The Valley, AZ
GTM Vortech tension Pulley Install DIY
Ok... I like this MOD so far, the belt is super tight and no sign of slipping at all... I am hitting 8.8 PSI on the 3.12 pulley and the throttle response seems alot more crisp as well.
Ok 1st Pic is of stock set up / dirty engine bay, yuk:

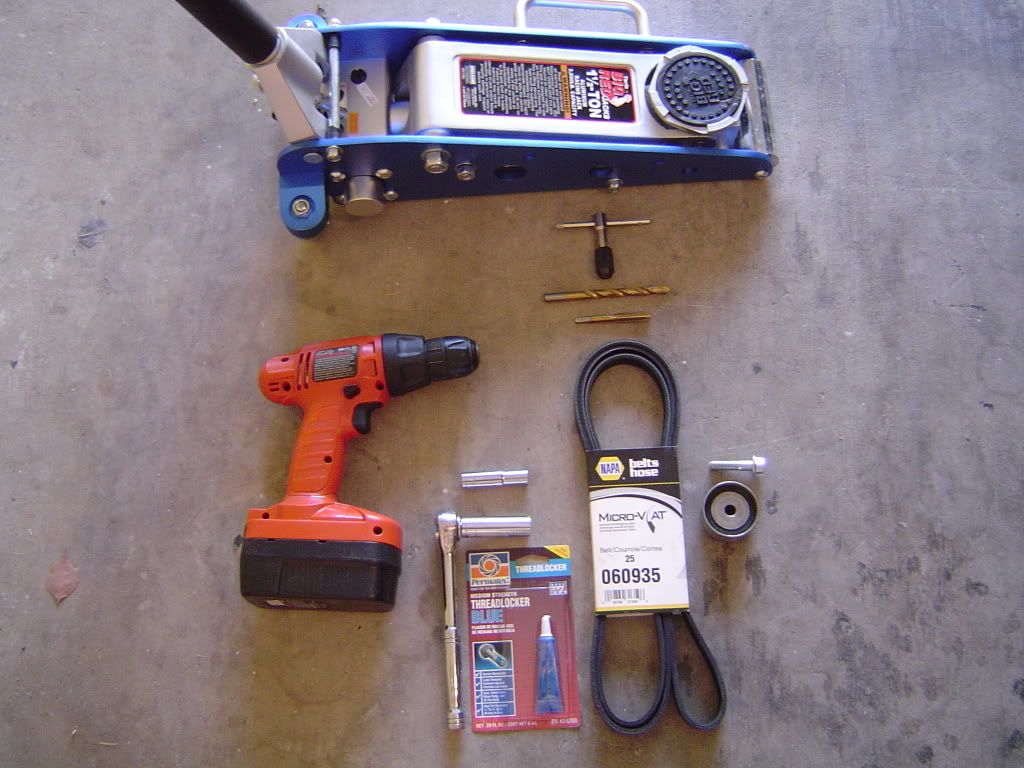
2nd pic: is tools needed: Drill (charged), Jack, rachet and extension...10mm, 12mm, 14mm needed. 10mm drill bit and a 10mm X 1.25 tapper, 060935 NAPA belt, Threadlock (blue), Pulley (GTM), Bolt 10mm x 40 x 1.25... and thats about it.

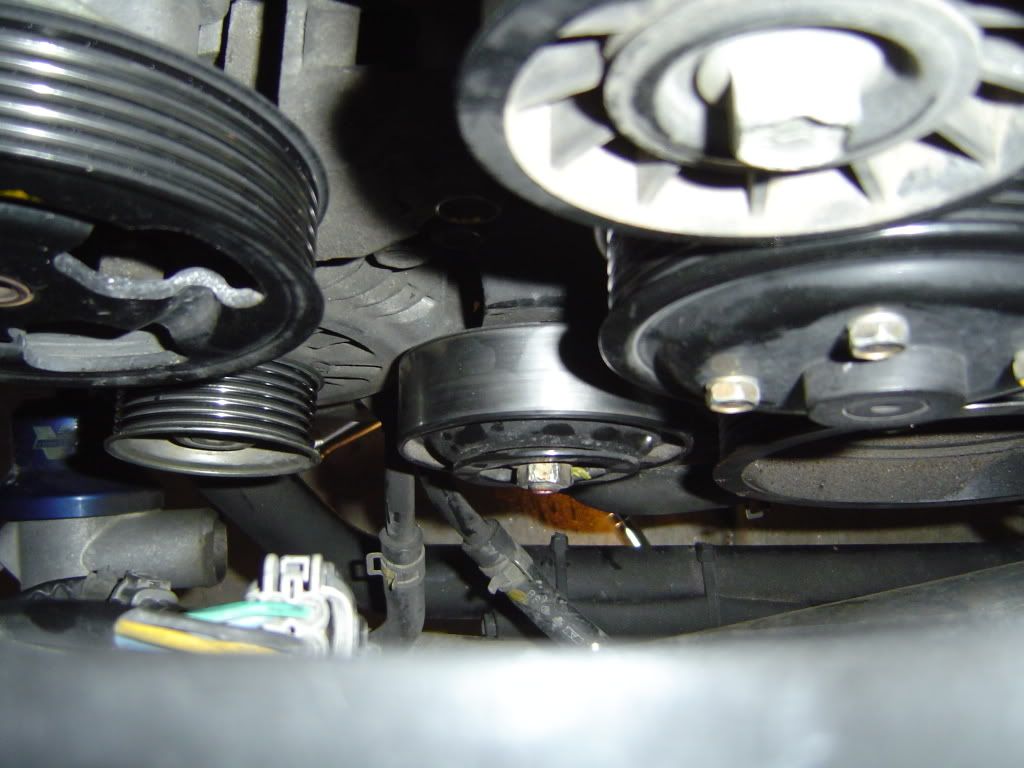
3rd Pic: loosen the bolt on the tensioner pulley (middle pulley in pic) 12mm

4th Pic: Loosen the the tension on the pulley via the gold colored bolt pictured here and remove the belt: 12mm w/ extension needed

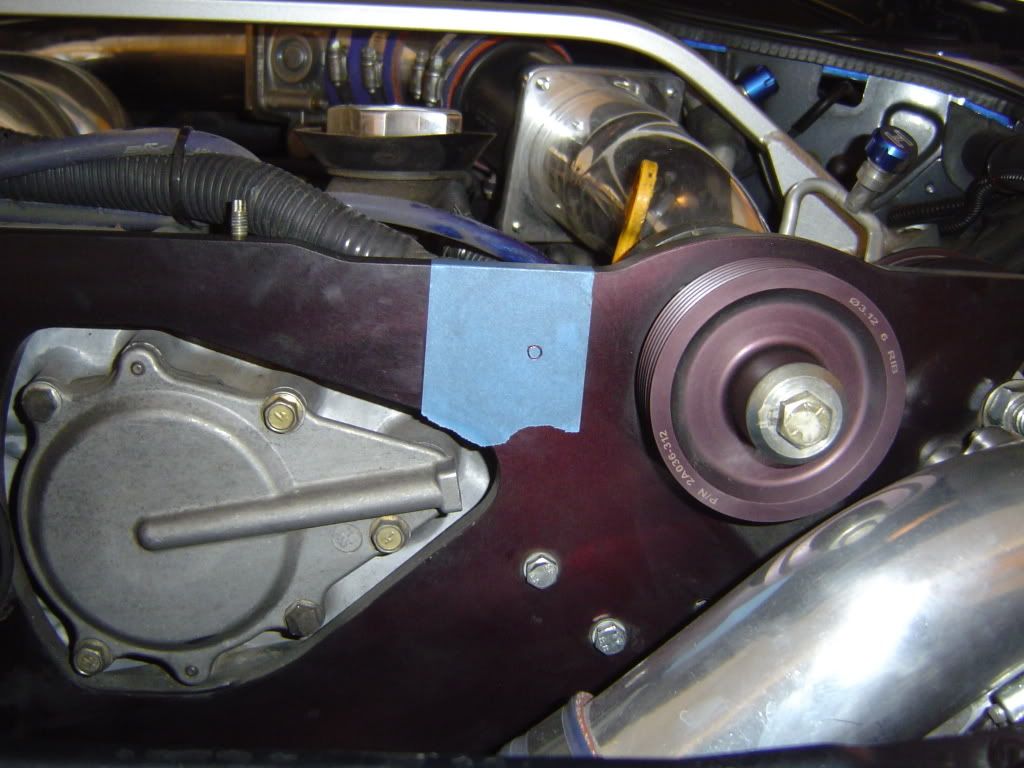
5th Pic: Put painters tape on the area you will be working on. This will be easier to see your mark to drill and will also help the drill bit to bite into the bracket and not slip on you, as well as keep the bracket from chipping. Hold the pulley up backwards and find your optimal place to drill, use a pen to trace the center of the pulley onto the tape... Here you can see my mark.

6th Pic: Mask off under where you will be drilling with shop cloths as well as your air filter. You will be drilling into metal and you DO NOT want the shavings getting in your engine bay. Now drill your hole... STRAIGHT.

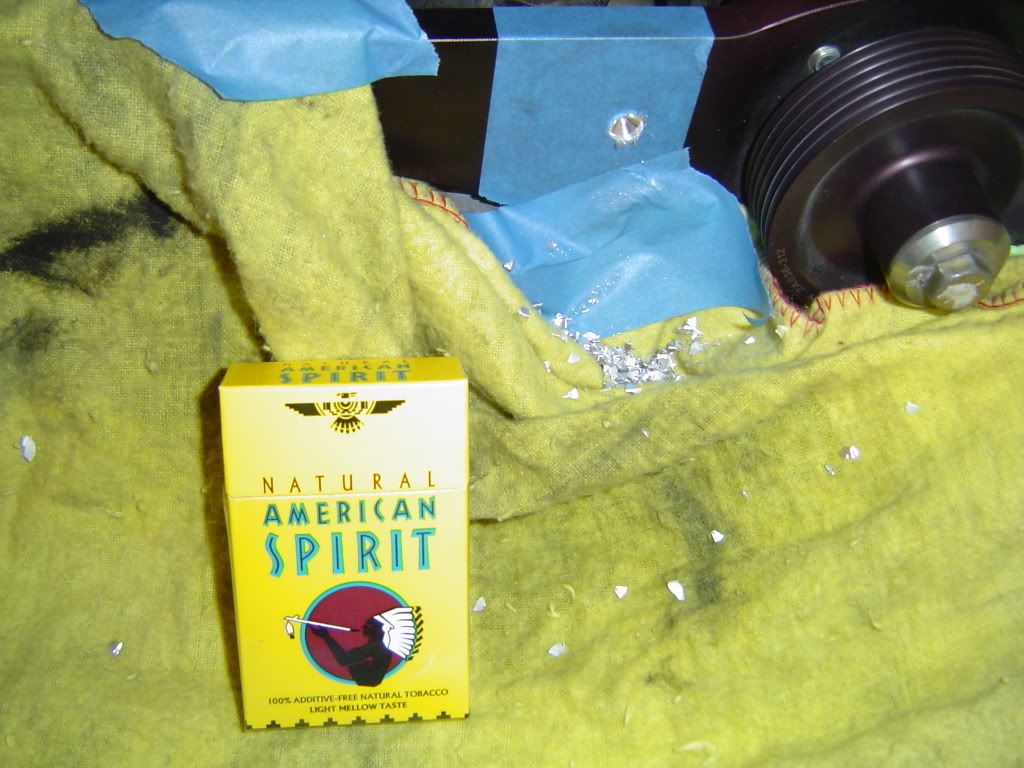
7th Pic: Smoke Break! (Healthy Ciggs )... Had to re-charge the drill. (note the metal shavings)

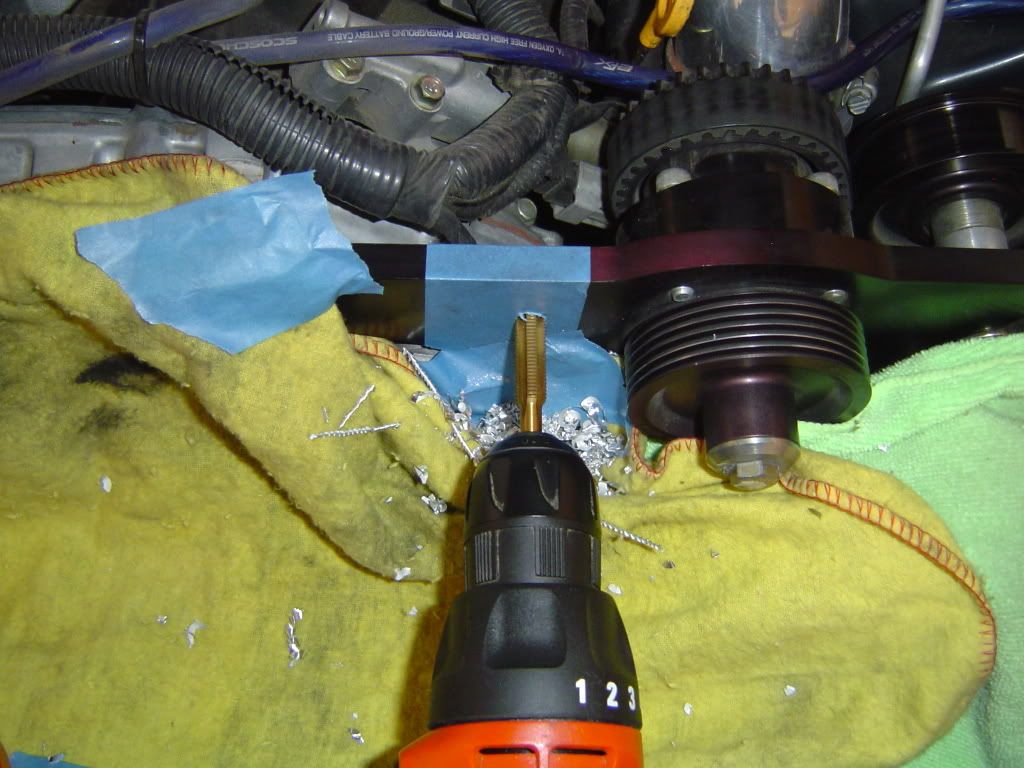
8th Pic: After your hole is drilled, it is time to tap the bracket... (thread it so you can screw the bolt in) I started using my recharageable drill but changed to a corded drill for this as the cordless kept bogging down.

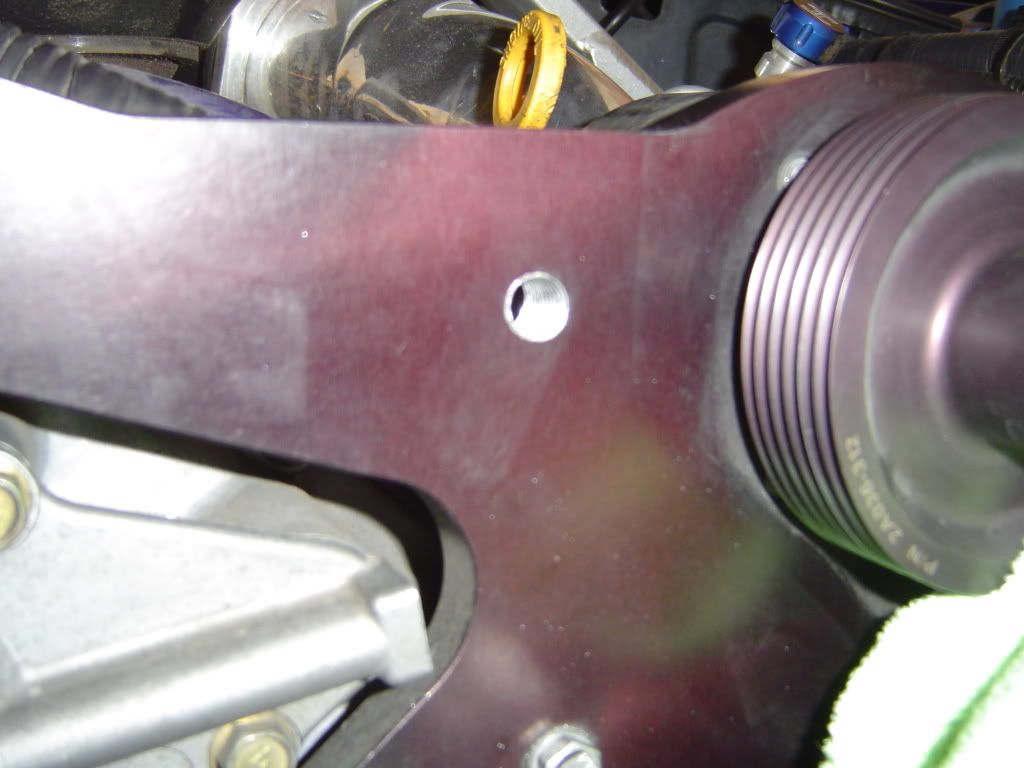
9th Pic: completed threaded hole. (note the clean hole, no chipping... painters tape works well for this)

10th Pic: Pulley getting ready to install, use BLUE threadlock on the end of the bolt so if you have to remove in future you can.

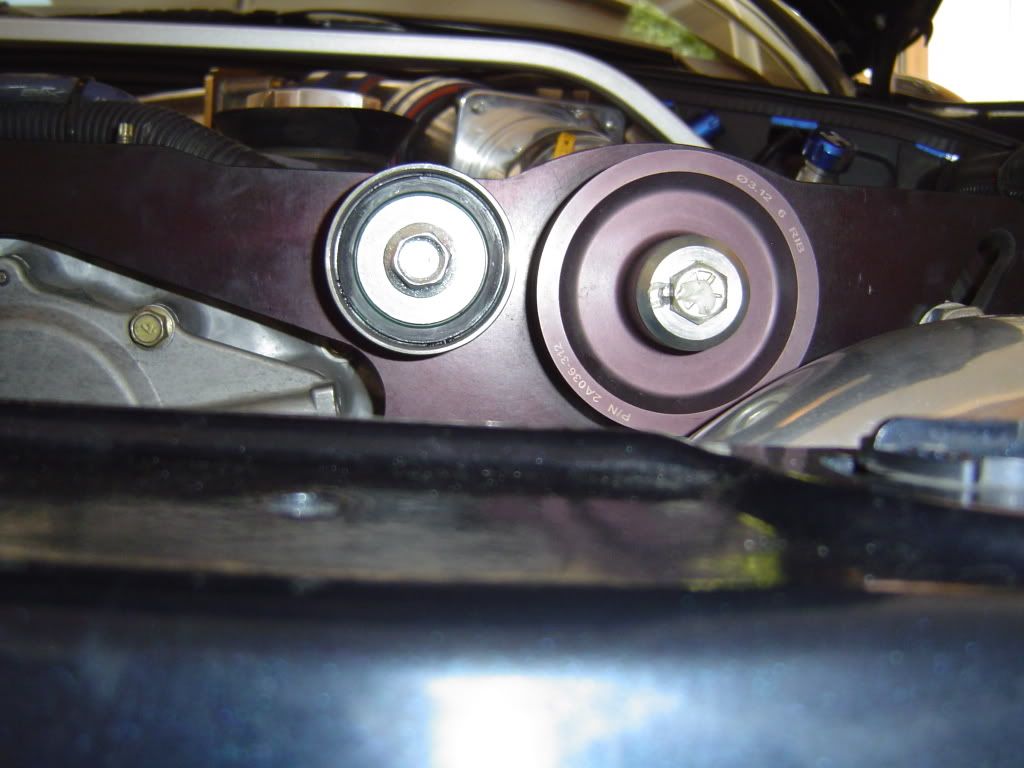
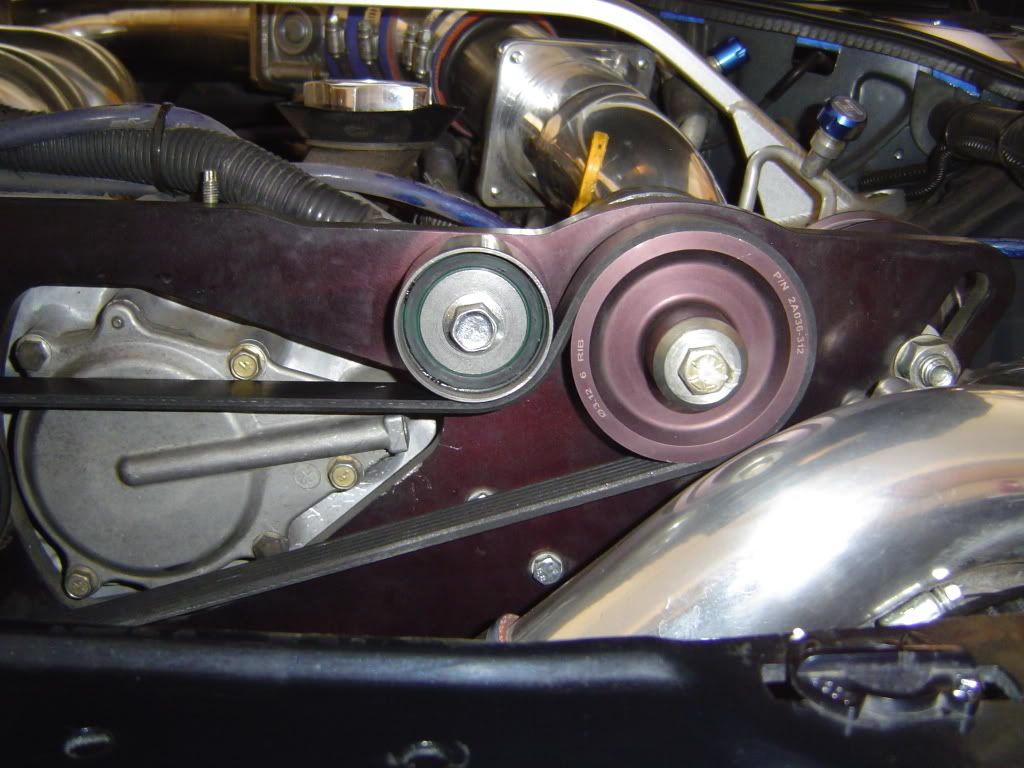
11th Pic: Pulley installed and ready for belt to go back on. 14mm needed here to tighten bolt.

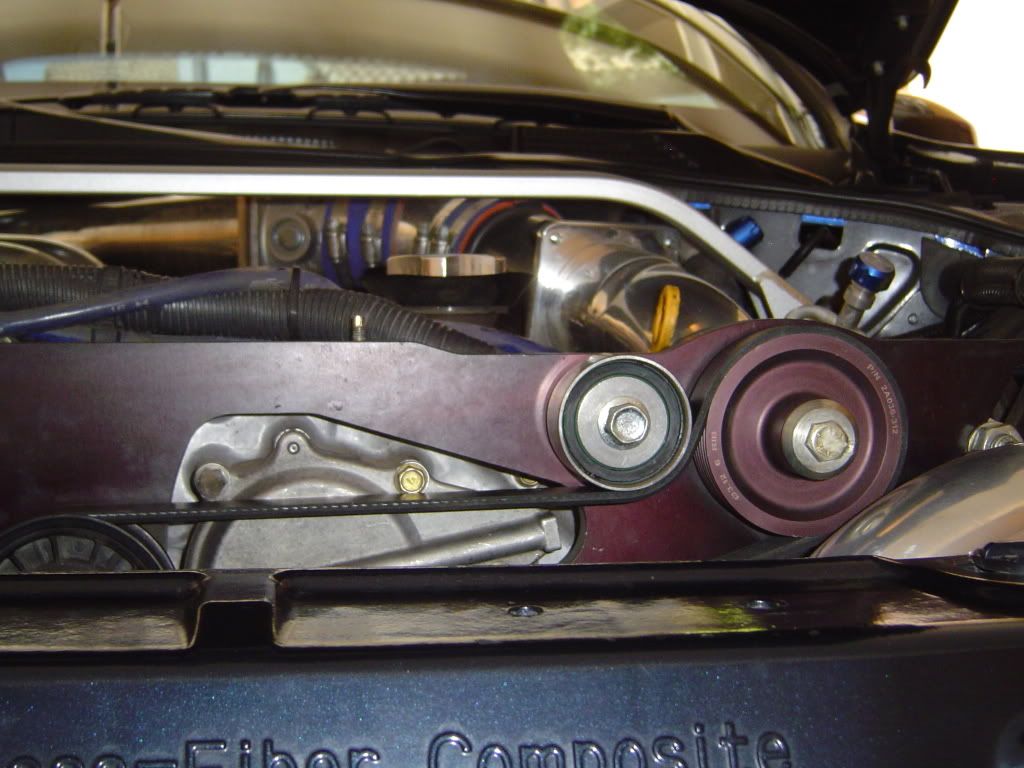
12th & 13th Pic: Belt put back on... This was a Pain in the A$$! It was tight even with tensioner pulley loosened up as much as it could get.


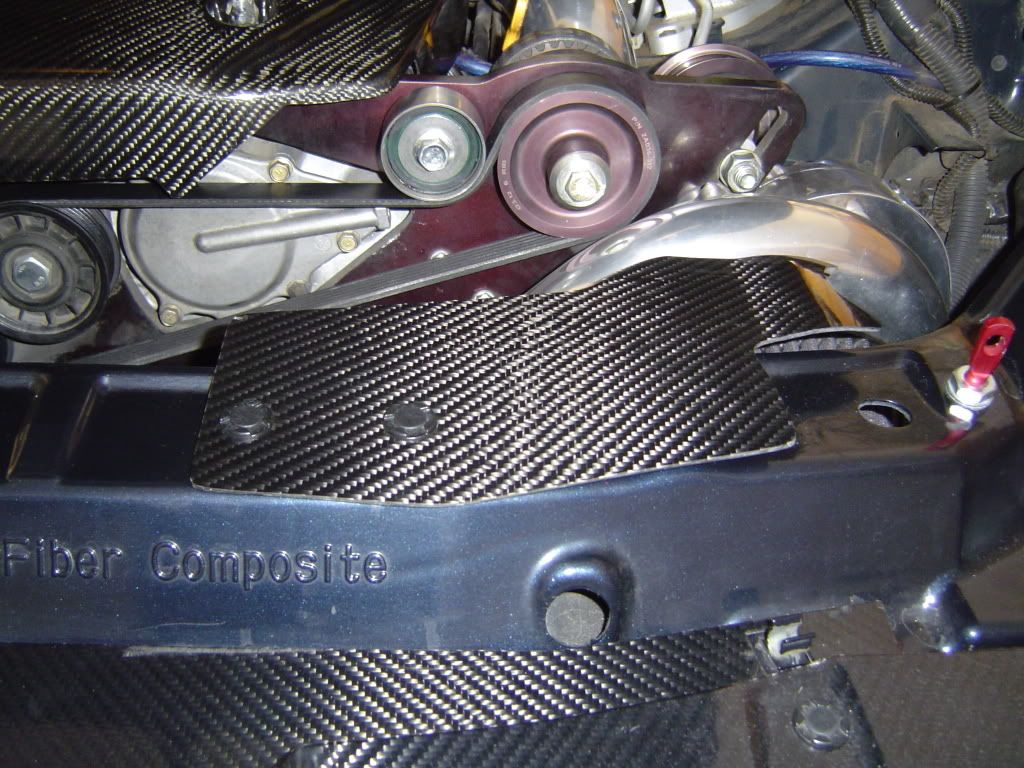
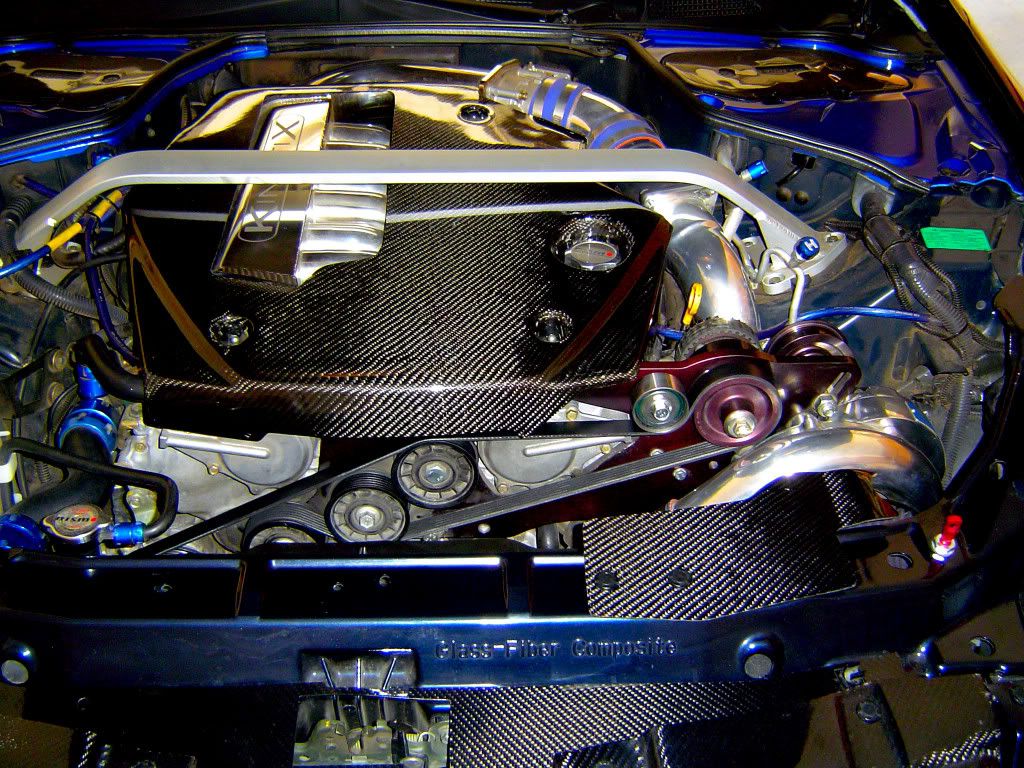
14th & 15th Pic: Buttoning her up to take on a test drive!!


You are now ready to experience non slip Vortech enjoyment!! Now go out and DRIVE!!!
I hope this is found usefull to anyone wanting to do this MoD... Thanks goes out to George and Sam at GTM for the pulley and for calling me when I had a question. I like that kind of service.... Heck, I PM them and Sam picks up the phone and calls me... They don't PM, but actually call you up when you have a question.
Ok 1st Pic is of stock set up / dirty engine bay, yuk:
2nd pic: is tools needed: Drill (charged), Jack, rachet and extension...10mm, 12mm, 14mm needed. 10mm drill bit and a 10mm X 1.25 tapper, 060935 NAPA belt, Threadlock (blue), Pulley (GTM), Bolt 10mm x 40 x 1.25... and thats about it.
3rd Pic: loosen the bolt on the tensioner pulley (middle pulley in pic) 12mm
4th Pic: Loosen the the tension on the pulley via the gold colored bolt pictured here and remove the belt: 12mm w/ extension needed
5th Pic: Put painters tape on the area you will be working on. This will be easier to see your mark to drill and will also help the drill bit to bite into the bracket and not slip on you, as well as keep the bracket from chipping. Hold the pulley up backwards and find your optimal place to drill, use a pen to trace the center of the pulley onto the tape... Here you can see my mark.
6th Pic: Mask off under where you will be drilling with shop cloths as well as your air filter. You will be drilling into metal and you DO NOT want the shavings getting in your engine bay. Now drill your hole... STRAIGHT.
7th Pic: Smoke Break! (Healthy Ciggs
)... Had to re-charge the drill. (note the metal shavings) 8th Pic: After your hole is drilled, it is time to tap the bracket... (thread it so you can screw the bolt in) I started using my recharageable drill but changed to a corded drill for this as the cordless kept bogging down.
9th Pic: completed threaded hole. (note the clean hole, no chipping... painters tape works well for this)
10th Pic: Pulley getting ready to install, use BLUE threadlock on the end of the bolt so if you have to remove in future you can.
11th Pic: Pulley installed and ready for belt to go back on. 14mm needed here to tighten bolt.
12th & 13th Pic: Belt put back on... This was a Pain in the A$$! It was tight even with tensioner pulley loosened up as much as it could get.
14th & 15th Pic: Buttoning her up to take on a test drive!!
You are now ready to experience non slip Vortech enjoyment!! Now go out and DRIVE!!!
I hope this is found usefull to anyone wanting to do this MoD... Thanks goes out to George and Sam at GTM for the pulley and for calling me when I had a question. I like that kind of service.... Heck, I PM them and Sam picks up the phone and calls me... They don't PM, but actually call you up when you have a question.


quoted here:
Ok... I like this MOD so far, the belt is super tight and no sign of slipping at all... I am hitting 8.8 PSI on the 3.12 pulley and the throttle response seems alot more crisp as well.
Ok 1st Pic is of stock set up / dirty engine bay, yuk:

2nd pic: is tools needed: Drill (charged), Jack, rachet and extension...10mm, 12mm, 14mm needed. 10mm drill bit and a 10mm X 1.25 tapper, 060935 NAPA belt, Threadlock (blue), Pulley (GTM), Bolt 10mm x 40 x 1.25... and thats about it.
3rd Pic: loosen the bolt on the tensioner pulley (middle pulley in pic) 12mm
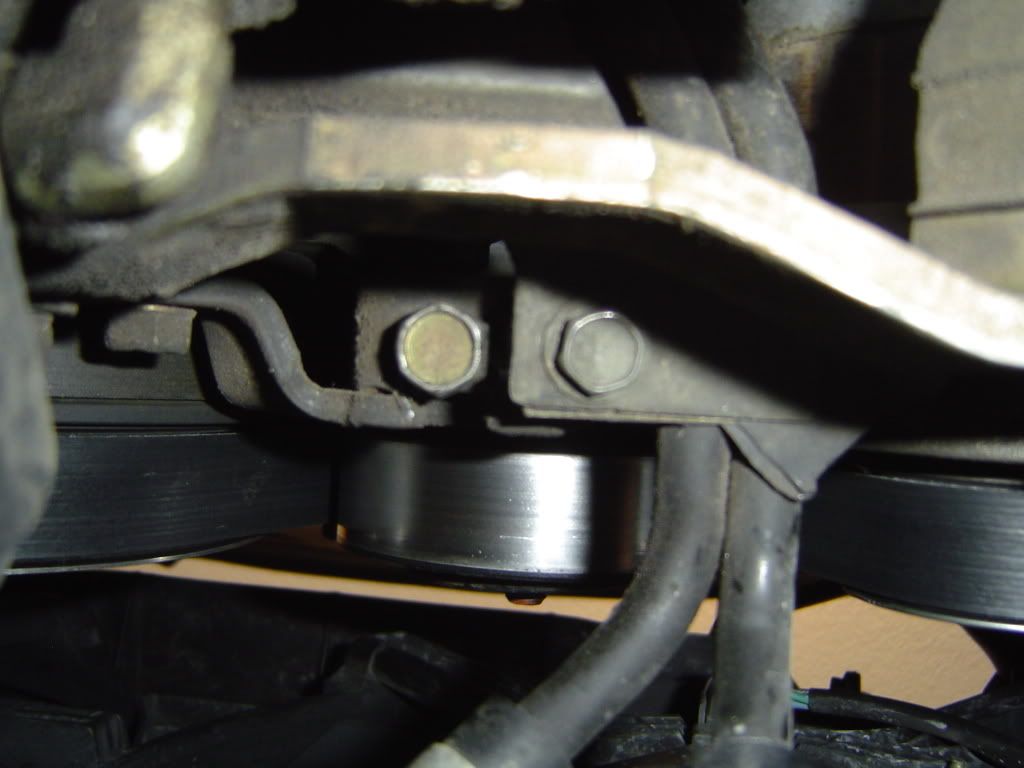
4th Pic: Loosen the the tension on the pulley via the gold colored bolt pictured here in the middle and remove the belt: 12mm w/ extension needed (note: this pic / bolt is under the car looking up)
5th Pic: Put painters tape on the area you will be working on. This will be easier to see your mark to drill and will also help the drill bit to bite into the bracket and not slip on you, as well as keep the bracket from chipping. Hold the pulley up backwards and find your optimal place to drill, use a pen to trace the center of the pulley onto the tape... Here you can see my mark.
6th Pic: Mask off under where you will be drilling with shop cloths as well as your air filter. You will be drilling into metal and you DO NOT want the shavings getting in your engine bay. Now drill your hole... STRAIGHT.

7th Pic: Smoke Break! (Healthy Ciggs )... Had to re-charge the drill. (note the metal shavings)
8th Pic: After your hole is drilled, it is time to tap the bracket... (thread it so you can screw the bolt in) I started using my recharageable drill but changed to a corded drill for this as the cordless kept bogging down. Take your time tapping the bracket, you do not want to "F" this up...
9th Pic: completed threaded hole. (note the clean hole, no chipping... painters tape works well for this)
10th Pic: Pulley getting ready to install, use BLUE threadlock on the end of the bolt so if you have to remove in future you can.

11th Pic: Pulley installed and ready for belt to go back on. 14mm needed here to tighten bolt.
12th & 13th Pic: Belt put back on... This was a Pain in the A$$! It was tight even with tensioner pulley loosened up as much as it could get.
14th & 15th Pic: Buttoning her up to take on a test drive!!
You are now ready to experience non slip Vortech enjoyment!! Now go out and DRIVE!!!
I hope this is found usefull to anyone wanting to do this MoD... Thanks goes out to George and Sam at GTM for the pulley and for calling me when I had a question. I like that kind of service.... Heck, I PM them and Sam picks up the phone and calls me... They don't PM, but actually call you up when you have a question.
Ok 1st Pic is of stock set up / dirty engine bay, yuk:
2nd pic: is tools needed: Drill (charged), Jack, rachet and extension...10mm, 12mm, 14mm needed. 10mm drill bit and a 10mm X 1.25 tapper, 060935 NAPA belt, Threadlock (blue), Pulley (GTM), Bolt 10mm x 40 x 1.25... and thats about it.
3rd Pic: loosen the bolt on the tensioner pulley (middle pulley in pic) 12mm
4th Pic: Loosen the the tension on the pulley via the gold colored bolt pictured here in the middle and remove the belt: 12mm w/ extension needed (note: this pic / bolt is under the car looking up)
5th Pic: Put painters tape on the area you will be working on. This will be easier to see your mark to drill and will also help the drill bit to bite into the bracket and not slip on you, as well as keep the bracket from chipping. Hold the pulley up backwards and find your optimal place to drill, use a pen to trace the center of the pulley onto the tape... Here you can see my mark.
6th Pic: Mask off under where you will be drilling with shop cloths as well as your air filter. You will be drilling into metal and you DO NOT want the shavings getting in your engine bay. Now drill your hole... STRAIGHT.
7th Pic: Smoke Break! (Healthy Ciggs
)... Had to re-charge the drill. (note the metal shavings) 8th Pic: After your hole is drilled, it is time to tap the bracket... (thread it so you can screw the bolt in) I started using my recharageable drill but changed to a corded drill for this as the cordless kept bogging down. Take your time tapping the bracket, you do not want to "F" this up...
9th Pic: completed threaded hole. (note the clean hole, no chipping... painters tape works well for this)
10th Pic: Pulley getting ready to install, use BLUE threadlock on the end of the bolt so if you have to remove in future you can.
11th Pic: Pulley installed and ready for belt to go back on. 14mm needed here to tighten bolt.
12th & 13th Pic: Belt put back on... This was a Pain in the A$$! It was tight even with tensioner pulley loosened up as much as it could get.
14th & 15th Pic: Buttoning her up to take on a test drive!!
You are now ready to experience non slip Vortech enjoyment!! Now go out and DRIVE!!!
I hope this is found usefull to anyone wanting to do this MoD... Thanks goes out to George and Sam at GTM for the pulley and for calling me when I had a question. I like that kind of service.... Heck, I PM them and Sam picks up the phone and calls me... They don't PM, but actually call you up when you have a question.

Thread
Thread Starter
Forum
Replies
Last Post
StreetStandard
Engine-Vendor
117
May 22, 2020 08:21 AM
EricF
G35 Sedan V36 2007- 08
3
Aug 28, 2015 08:27 AM