
Got an 03-05 spoiler that you want to remove? (DIY)


Thread Starter
|
Registered User
Joined: Dec 2008
Posts: 1,985
Likes: 156
From: Rochester NY
Got an 03-05 spoiler that you want to remove? (DIY)
DON'T!!!! That's how I'm starting this because it is in EVERY way, shape, and form, a PITA!!!! Wait for someone to swap with or buy a wingless trunk. I'm waiting on suspension to come in and needed something to do yesterday so this happened.
I don't know if Nissan/Infiniti has a special tool to facilitate this. Without one, you will be doing some cutting. So be prepared.
Tools needed:
1) Heat Gun
2) 10mm wrench
3) flathead screwdriver (not needed but makes things quicker if you got chubby nub fingers)
4) saw capable of cutting plastic
I'll be borrowing some pics from https://g35driver.com/forums/body-in...runk-swap.html as well.
You'll have to remove the trunk liner. It'll take you about 2 minutes or so and it's the only part of this process that's easy. The Trunk Release just pops out


Next, you pop the 11 clips. This is the part that you may need a flathead screwdriver for.


Next, unplug the connector for the 3rd brake light.

Next, grab your 10 mm and unscrew these nuts..lol...nuts

Everything is going good so far. You're all happy. Seeing some end in sight. Probably haven't even broken a sweat yet. Good job. Go grab yourself some chicken nuggets and an orange soda.
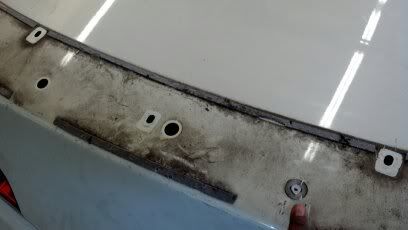
This is where things get "fun". There are 6 plastic push pins holding the trunk down. I've tried to illustrate approximately where they are.
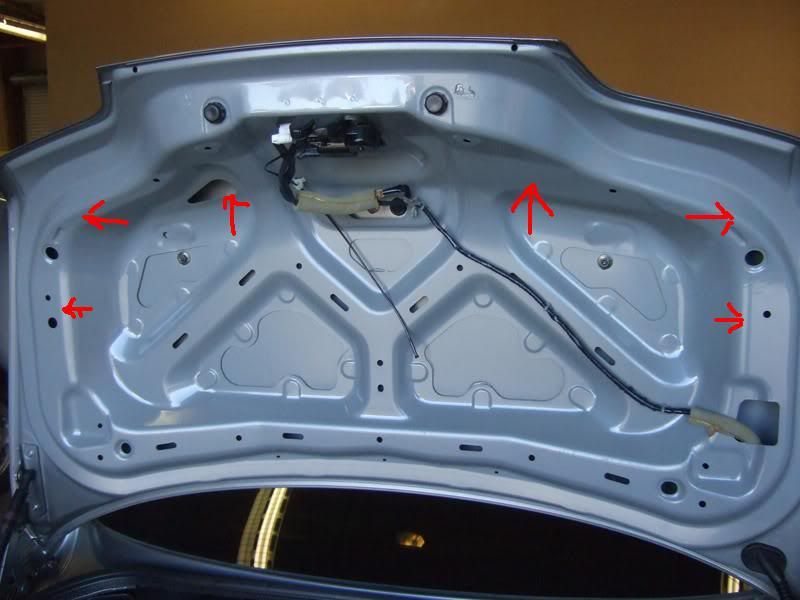
conceivably, most of them are accessible...conceivably.
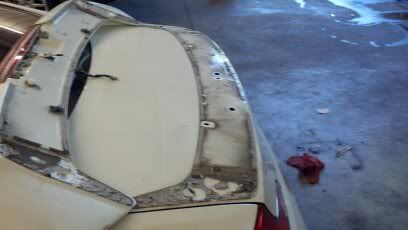
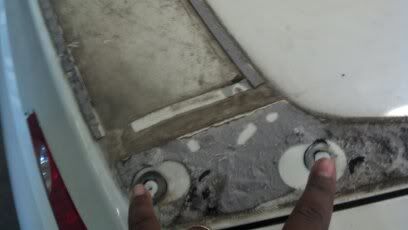
If you figure out how to get to all of those, kudos. Let's move to the other side. These pictures are going to show a finished trunk(by finished, I mean wing removed)
Pay CLOSE attention to the edges. That is where most of the glue/double-sided tape lies. Your best bet is to grab a heat gun to loosen it. You can not take a fishing line through it because of the plastic pins. Those will have to be cut.
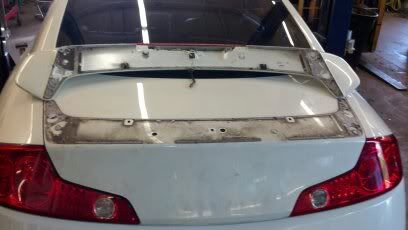
You can see MOST of the wholes, but I've pointed out where some pins lie in wait to jam you up in your efforts.
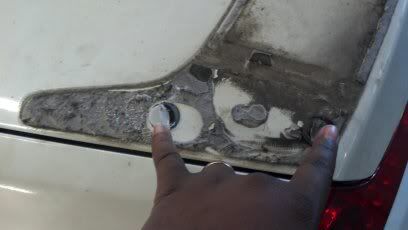
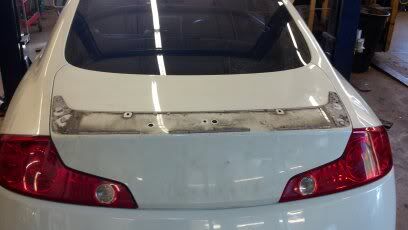
And viola
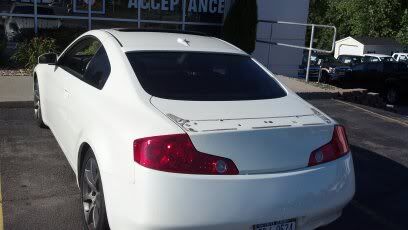
I still need to clean that, fill the holes, and paint..which I'll probably do in a couple of weeks as I'm taking the trunk off Monday.
Some other things of note, if your car came with a spoiler, your 3rd brake light is integrated into it. You will need to find a solution for that in order to be legal in many(if not all) states. In the https://g35driver.com/forums/body-in...runk-swap.html thread, there's directions on how to remove the rear deacklid for a stock brake light install. I'll be hitting a junk yard for someone else's $5 3rd brake light and wiring it in.
If you have any questions, ask. Hope this helps.
I don't know if Nissan/Infiniti has a special tool to facilitate this. Without one, you will be doing some cutting. So be prepared.
Tools needed:
1) Heat Gun
2) 10mm wrench
3) flathead screwdriver (not needed but makes things quicker if you got chubby nub fingers)
4) saw capable of cutting plastic
I'll be borrowing some pics from https://g35driver.com/forums/body-in...runk-swap.html as well.
You'll have to remove the trunk liner. It'll take you about 2 minutes or so and it's the only part of this process that's easy. The Trunk Release just pops out
Next, you pop the 11 clips. This is the part that you may need a flathead screwdriver for.
Next, unplug the connector for the 3rd brake light.
Next, grab your 10 mm and unscrew these nuts..lol...nuts
Everything is going good so far. You're all happy. Seeing some end in sight. Probably haven't even broken a sweat yet. Good job. Go grab yourself some chicken nuggets and an orange soda.
This is where things get "fun". There are 6 plastic push pins holding the trunk down. I've tried to illustrate approximately where they are.
conceivably, most of them are accessible...conceivably.
If you figure out how to get to all of those, kudos. Let's move to the other side. These pictures are going to show a finished trunk(by finished, I mean wing removed)
Pay CLOSE attention to the edges. That is where most of the glue/double-sided tape lies. Your best bet is to grab a heat gun to loosen it. You can not take a fishing line through it because of the plastic pins. Those will have to be cut.
You can see MOST of the wholes, but I've pointed out where some pins lie in wait to jam you up in your efforts.
And viola
I still need to clean that, fill the holes, and paint..which I'll probably do in a couple of weeks as I'm taking the trunk off Monday.
Some other things of note, if your car came with a spoiler, your 3rd brake light is integrated into it. You will need to find a solution for that in order to be legal in many(if not all) states. In the https://g35driver.com/forums/body-in...runk-swap.html thread, there's directions on how to remove the rear deacklid for a stock brake light install. I'll be hitting a junk yard for someone else's $5 3rd brake light and wiring it in.
If you have any questions, ask. Hope this helps.


I tried today to get mine off today. I'm at the point of trying to get the pins to release. You never said how you got the pins out. I tried to pry them off and had no luck. I put a considerable amount of force on them too. So, how did you do it?


Yea right this is very simple. Ive switched spoilers on my 05 recently and it was not easy.
I didn't cut my pins, if u have a big steady screwdriver that doesn't flex, u can separate them, but they will most likely break at the spoiler. I used a long blade box opener to cut all the glue and a plastic trim removal stick to pound through what ever i cudnt read. once I broke all the glue on the sides, i ran through the back tape and front tape(which is where protecting ur finish gets hard.)
I didn't cut my pins, if u have a big steady screwdriver that doesn't flex, u can separate them, but they will most likely break at the spoiler. I used a long blade box opener to cut all the glue and a plastic trim removal stick to pound through what ever i cudnt read. once I broke all the glue on the sides, i ran through the back tape and front tape(which is where protecting ur finish gets hard.)
Trending Topics


tbh my 3rd brake light shakes like mad when the bass hits, wouldn't mind a spoiler.

Thread
Thread Starter
Forum
Replies
Last Post
RemmyZero
V36 DIY
10
Apr 23, 2018 11:13 AM
Ninjay16
Audio/Video/Electronics
11
Feb 26, 2018 06:14 PM
FS[NorWest]: 04 OEM Faceplate and CD/Tape Unit
Oregon13
Audio/Video/Electronics
5
Mar 1, 2016 12:06 AM