
DIY Window grease streak fix


Thread Starter
|
Registered User
Joined: Mar 2014
Posts: 11
Likes: 1
From: Minnesota
DIY Window grease streak fix
Things you will need:
1. Patience
2. A second set of hands (not required but makes it a lot easier due to the automatic doors, unless you are on a level surface)
3. Long 10mm socket.
4. Flat head screw driver, large/long one and a short skinny one. (or a small pocket knife)
5. A sharpie marker (required!!!)
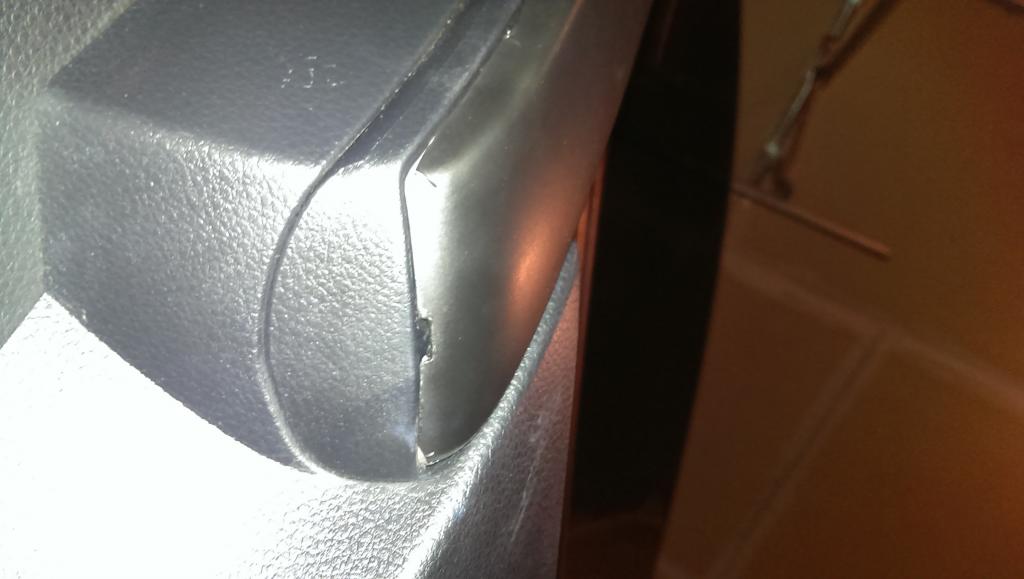
First I will show you the reason as to why the grease stain is there.
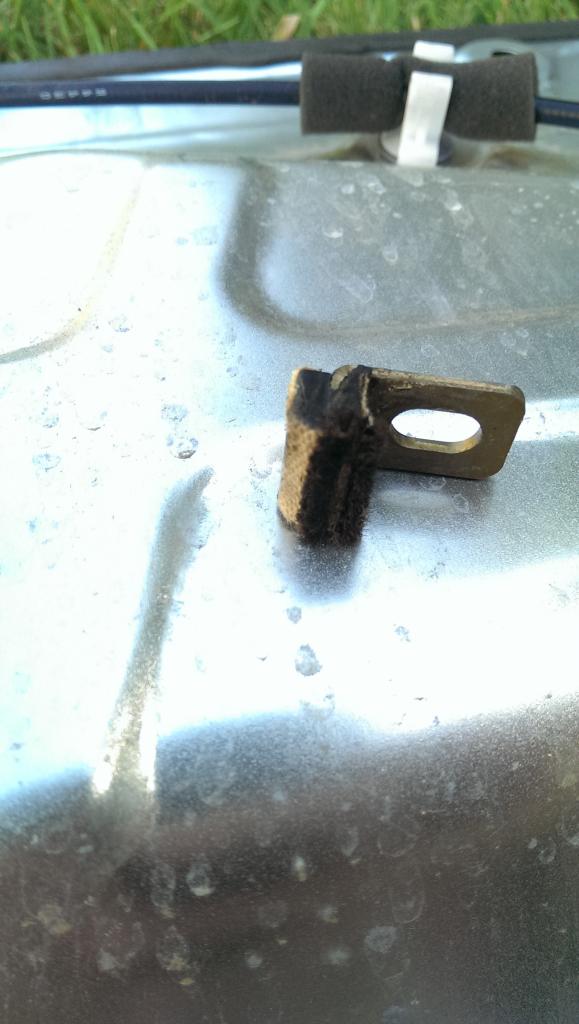
Yes. That stupid little rubber/felt POS.
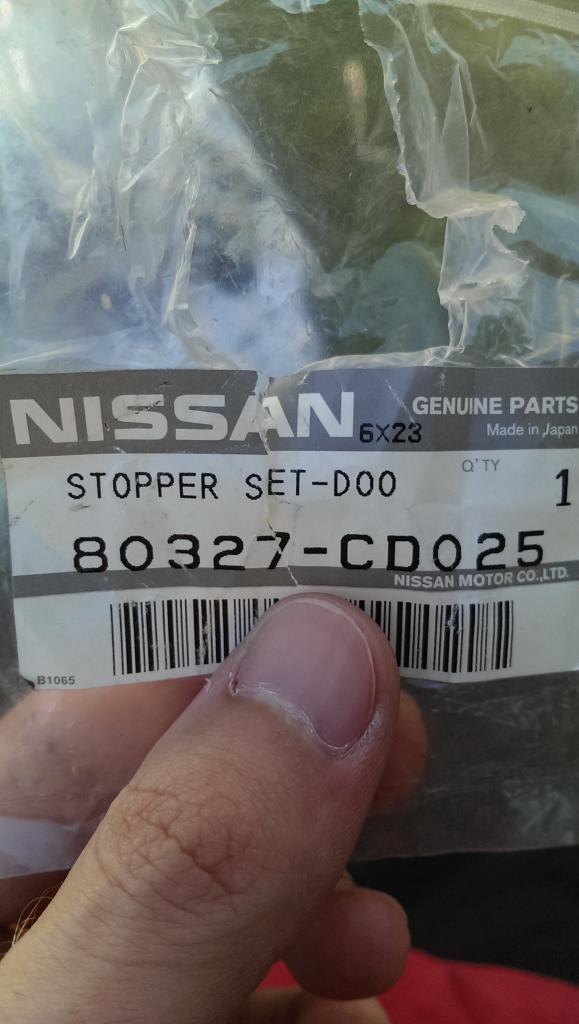
Here is the name of the new part. When you order it, it is two pieces for EACH door, so order two kits if you want to fix both sides obviously.
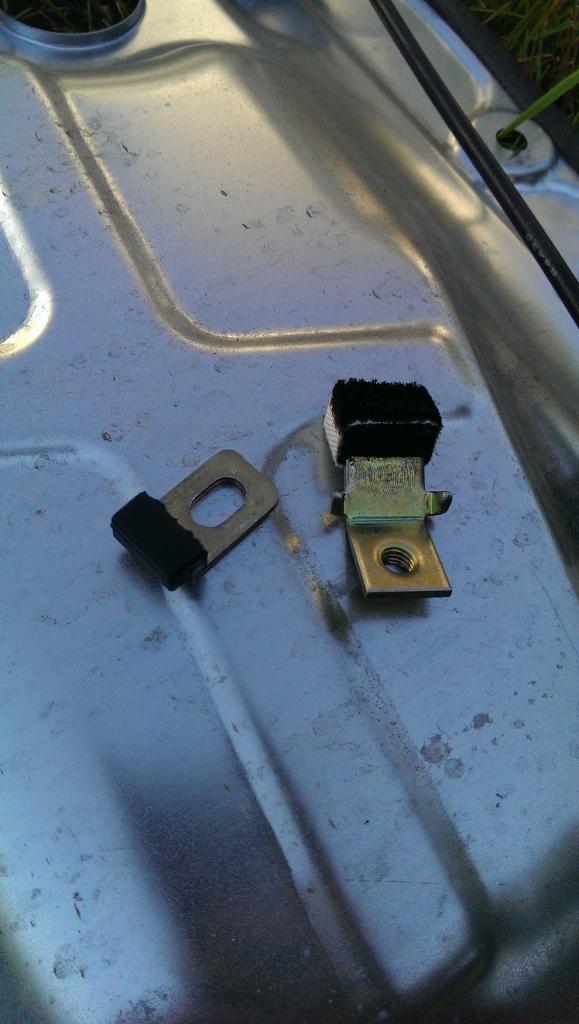
These are the new parts.
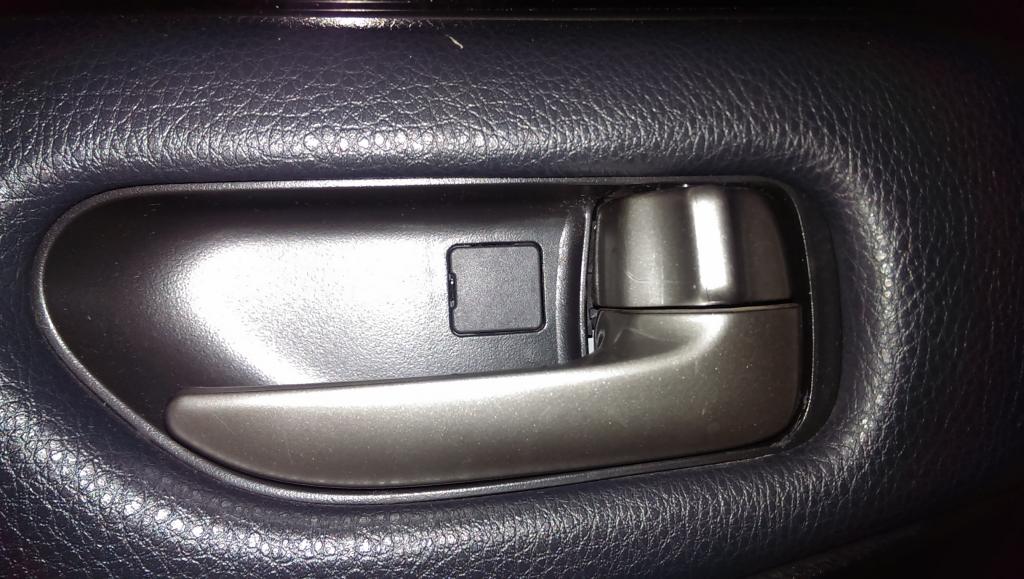
First task is to get the door panel off. There are three bolts holding it on that you have to take off first. One is behind this cover, behind the door handle. Pull the plastic clip off to expose the bolt head.
Then the other two are under the door handle cover. BE CAREFUL WHEN REMOVING THIS! It is EXTREMELY easy to break off pieces. I found it easy to pop the bottom out first, then slowly work my way up, pulling firmly where the pins hold it to the door so it has no unnecessary stress points which will lead to it breaking.
After pulling that off it will expose two 10mm bolts, unscrew these with your 10mm long socket. Use the long screwdriver or a magnet to get the screws out if you want, they will just fall out when you pop the door panel if you don't want to waste the time. Before yanking the door panel off. You will have to stick a flat head under the door panel and pop the push pins out.
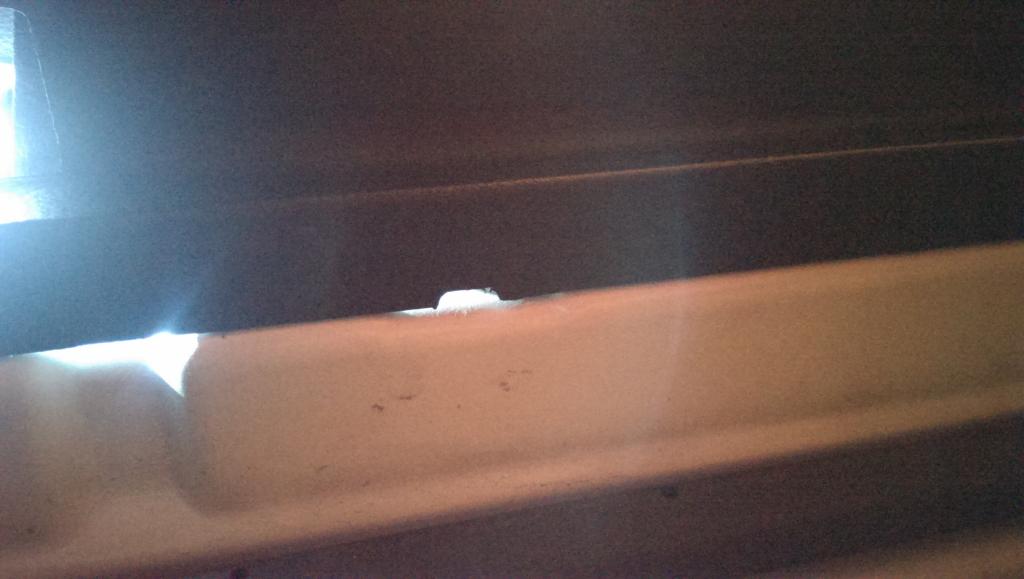
Here is one of the (eight?) holes where the screwdriver goes in.
When you pop the clips around the edge of the door, just grab the inside handle and pull up, the rest of the panel should pop out from the window. This is where I think the other person extremely helpful, not only to hold the door open, but to hold the door panel up too so it is not hanging by the wires. There are four things you need to disconnect. First is the door lock actuator heads, these are the things that control the door lock and door handle. they are simple to release, just pull the door handle and switch the lock into the unlocked position, they should come out no problem. (I counted this as two things so people don't panic thinking something is missing from their car) Don't worry if you forget which one went on top or the bottom. They are not interchangeable as you'll see when you are putting the panel back on. Second is the entrance/welcome light at the bottom of the door. You should be able to see the little push pin that you have to depress before pulling the harness out. The last item is the door control panel and the speaker I think? This is the red box I have on the picture below. Again very simple, just depress the pin and it should pop right out.
Side note, I found it easier to pop the door control panel up, and disconnect the four pins holding it to the wiring, rather than disconnecting the wiring. You'll see why I recommend this later on..
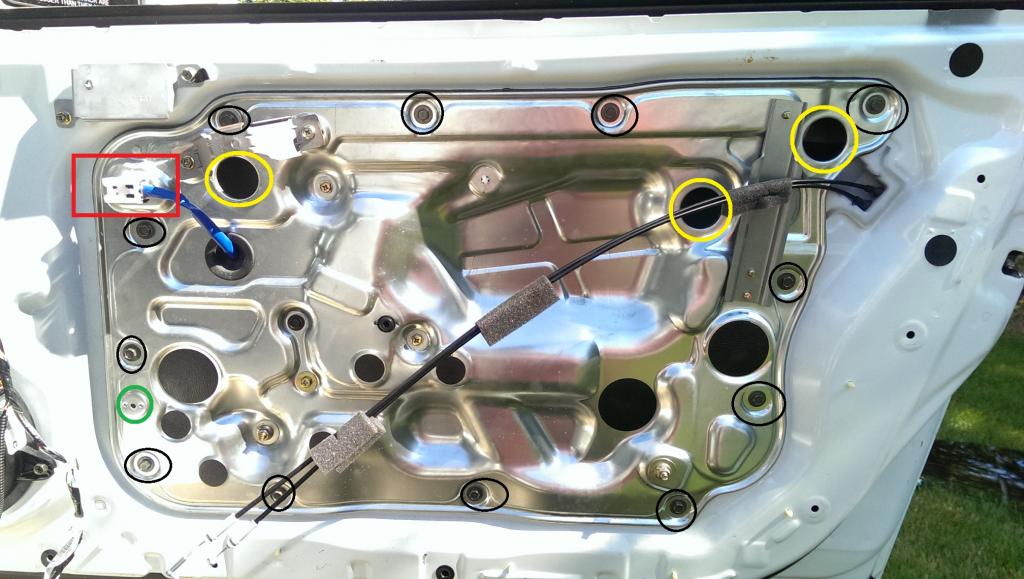
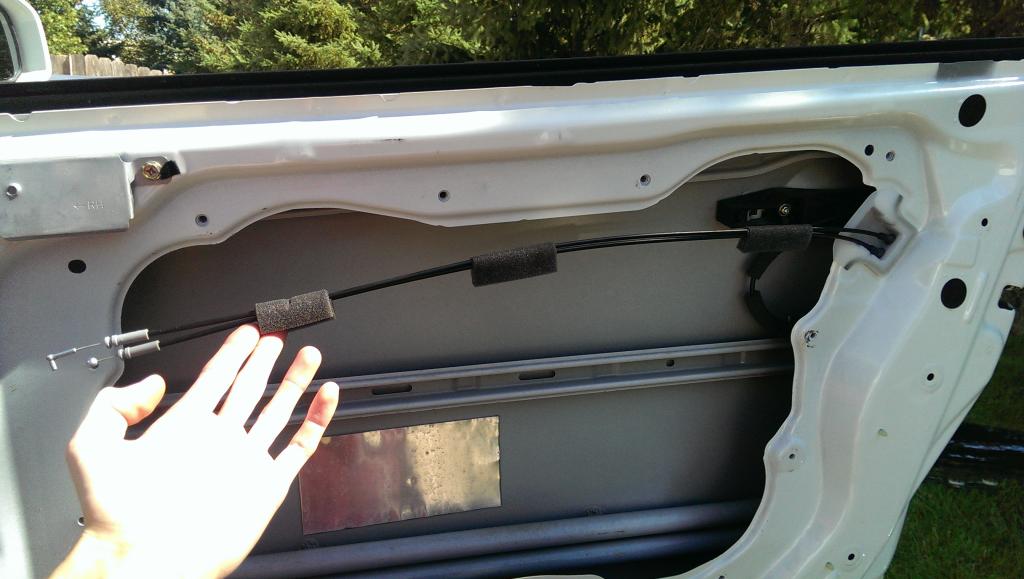
Here is a picture showing what you will be left with when the panel is off.
Black circles: 10x10mm bolts that need to be removed
Red box: Door control panel
Yellow circles: Three plastic covers over the window bolts, removing them will expose the bolts
Green circle: Entrance/welcome light wiring push pin, you will know what I am talking about when this silver panel comes off.
The silver door panel may seem to be sealed on, might just be because of the rubber seal around it mixed with a hot day? Either way, I just pulled mine and it popped off.
I was not kidding about the sharpie.. Here is where you will use it. Since we have the feature where the window rolls down slightly when we open the door, this next part can prove to be a bit tricky. DO NOT use my bolt locations as a reference to your window bolts. If you are off the slightest bit afterwards after you reinstall your window, it will either hit the top edge of your frame, or it simply won't close enough to properly seal against the rubber seal.
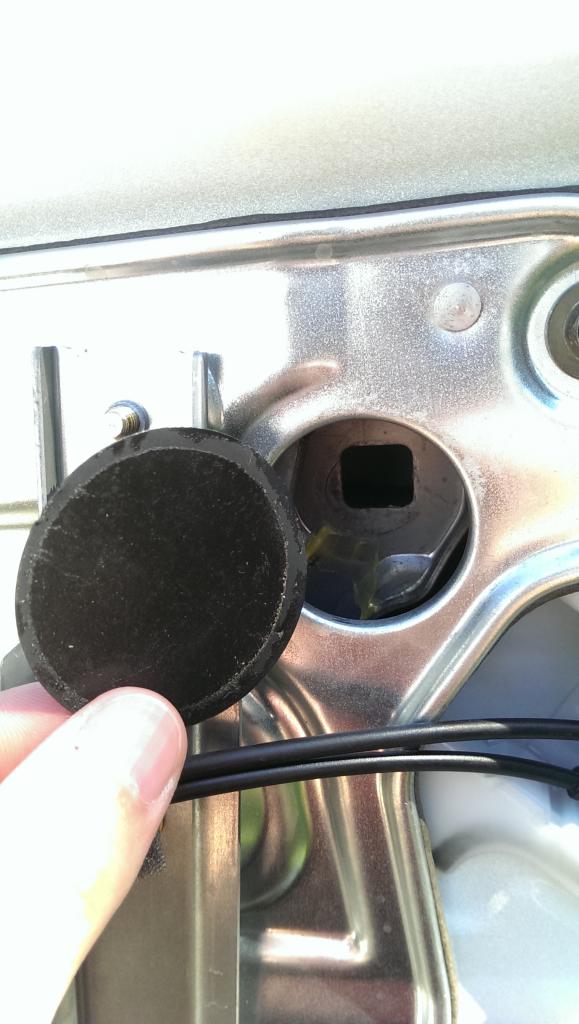
These are the plastic covers removed exposing the bolts. Before you touch these three bolts, circle where the bolt head/washer is currently so you have the exact position when you put the window back in.
After circling the bolts, unscrew them. Don't worry if they fall down inside the door, you can get them in a few seconds. After you unscrew the three window screws, grab the window and carefully wiggle it back and forth until its all the way out. (Because I like my car clean, I took this time to wipe down the entire window due to it being so dirty on the bottom half of the window, up to you obviously)
For the next part I found it easier to turn the cars power on and roll down the window arms all the way before moving on. This allows the silver panel to be easily removed (and reinstalled) without you having to maneuver it much because the window arms are jutting upwards into the car door. Now unscrew the 10x10mm bolts that were circles in black above. Grab the panel firmly and pull it, it should pop off pretty easily. When you take this panel off, you will see your window screws that fell down into the door. If the panel doesn't come off, get a match and burn the whole car. (If you take this route, make sure to let me know and I'll have you say Hi to my friends in prison for me)
Now look at where the grease mark was and you'll see that little greasy felt pad that I showed you all in the first picture. Take your 10mm socket and remove the screw holding it in place. After you remove it, put it in an envelop and send it to Infiniti/Nissan HQ and praise them on such a wonderful design. Here is a picture showing how the new parts are installed.
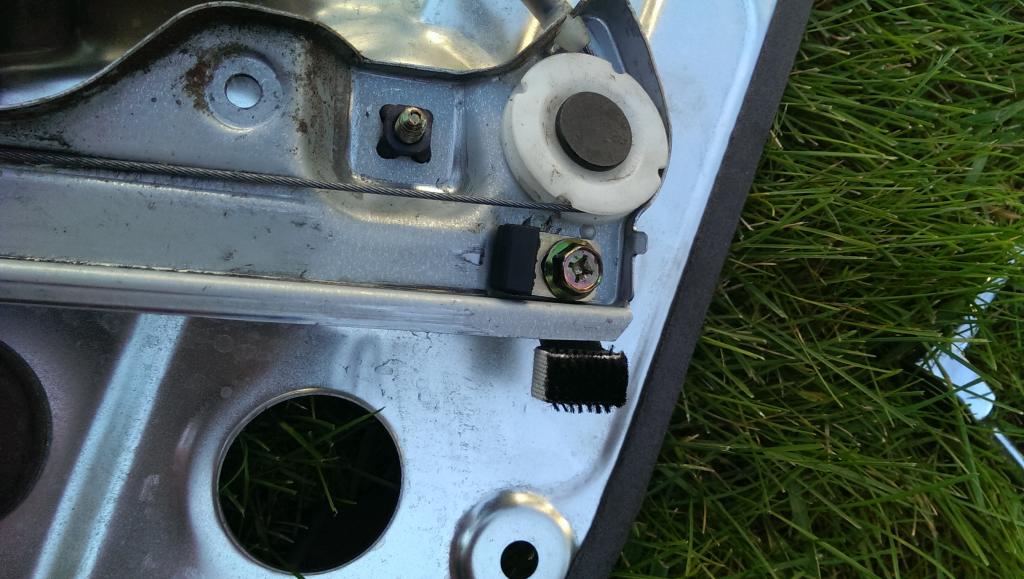
My apologies for the tilted picture.
After that is installed, just reverse this process to put your door back together. Make sure your window bolts line up!!!!! Don't put the inside door panel back on until you are 100% certain the window shuts completely and doesn't hit anything. Also I recommend you carefully close the door instead of slamming it just in case the window is off to prevent it from hitting the body of the car.
I think that is everything, sorry for the lack of pictures. Feel free to comment below if you feel I have missed anything.
I will also add this picture of the door lock actuator. This is the part that is causing your power door locks to not lock/unlock. I think it's quoted as a $1,000+ job from a Stealership. I got both actuators for under $300. If you are fixing the streak, replacing a window motor, or taking your door apart just for the sheer fun of it. You may want to monkey around inside your door to see if it is something you want to tackle. It does require you to take apart the outside door handle assembly. I will warn you it is pretty tricky to do.

Here are the cables from the actuator that connect to the inside handle/lock.
I may do a DIY on the actuator if I can find someone by me who wants it done.
1. Patience
2. A second set of hands (not required but makes it a lot easier due to the automatic doors, unless you are on a level surface)
3. Long 10mm socket.
4. Flat head screw driver, large/long one and a short skinny one. (or a small pocket knife)
5. A sharpie marker (required!!!)
First I will show you the reason as to why the grease stain is there.

Yes. That stupid little rubber/felt POS.
Here is the name of the new part. When you order it, it is two pieces for EACH door, so order two kits if you want to fix both sides obviously.

These are the new parts.

First task is to get the door panel off. There are three bolts holding it on that you have to take off first. One is behind this cover, behind the door handle. Pull the plastic clip off to expose the bolt head.

Then the other two are under the door handle cover. BE CAREFUL WHEN REMOVING THIS! It is EXTREMELY easy to break off pieces. I found it easy to pop the bottom out first, then slowly work my way up, pulling firmly where the pins hold it to the door so it has no unnecessary stress points which will lead to it breaking.

After pulling that off it will expose two 10mm bolts, unscrew these with your 10mm long socket. Use the long screwdriver or a magnet to get the screws out if you want, they will just fall out when you pop the door panel if you don't want to waste the time. Before yanking the door panel off. You will have to stick a flat head under the door panel and pop the push pins out.
Here is one of the (eight?) holes where the screwdriver goes in.

When you pop the clips around the edge of the door, just grab the inside handle and pull up, the rest of the panel should pop out from the window. This is where I think the other person extremely helpful, not only to hold the door open, but to hold the door panel up too so it is not hanging by the wires. There are four things you need to disconnect. First is the door lock actuator heads, these are the things that control the door lock and door handle. they are simple to release, just pull the door handle and switch the lock into the unlocked position, they should come out no problem. (I counted this as two things so people don't panic thinking something is missing from their car) Don't worry if you forget which one went on top or the bottom. They are not interchangeable as you'll see when you are putting the panel back on. Second is the entrance/welcome light at the bottom of the door. You should be able to see the little push pin that you have to depress before pulling the harness out. The last item is the door control panel and the speaker I think? This is the red box I have on the picture below. Again very simple, just depress the pin and it should pop right out.
Side note, I found it easier to pop the door control panel up, and disconnect the four pins holding it to the wiring, rather than disconnecting the wiring. You'll see why I recommend this later on..
Here is a picture showing what you will be left with when the panel is off.
Black circles: 10x10mm bolts that need to be removed
Red box: Door control panel
Yellow circles: Three plastic covers over the window bolts, removing them will expose the bolts
Green circle: Entrance/welcome light wiring push pin, you will know what I am talking about when this silver panel comes off.
The silver door panel may seem to be sealed on, might just be because of the rubber seal around it mixed with a hot day? Either way, I just pulled mine and it popped off.

I was not kidding about the sharpie.. Here is where you will use it. Since we have the feature where the window rolls down slightly when we open the door, this next part can prove to be a bit tricky. DO NOT use my bolt locations as a reference to your window bolts. If you are off the slightest bit afterwards after you reinstall your window, it will either hit the top edge of your frame, or it simply won't close enough to properly seal against the rubber seal.
These are the plastic covers removed exposing the bolts. Before you touch these three bolts, circle where the bolt head/washer is currently so you have the exact position when you put the window back in.

After circling the bolts, unscrew them. Don't worry if they fall down inside the door, you can get them in a few seconds. After you unscrew the three window screws, grab the window and carefully wiggle it back and forth until its all the way out. (Because I like my car clean, I took this time to wipe down the entire window due to it being so dirty on the bottom half of the window, up to you obviously)
For the next part I found it easier to turn the cars power on and roll down the window arms all the way before moving on. This allows the silver panel to be easily removed (and reinstalled) without you having to maneuver it much because the window arms are jutting upwards into the car door. Now unscrew the 10x10mm bolts that were circles in black above. Grab the panel firmly and pull it, it should pop off pretty easily. When you take this panel off, you will see your window screws that fell down into the door. If the panel doesn't come off, get a match and burn the whole car.
(If you take this route, make sure to let me know and I'll have you say Hi to my friends in prison for me)Now look at where the grease mark was and you'll see that little greasy felt pad that I showed you all in the first picture. Take your 10mm socket and remove the screw holding it in place. After you remove it, put it in an envelop and send it to Infiniti/Nissan HQ and praise them on such a wonderful design. Here is a picture showing how the new parts are installed.

My apologies for the tilted picture.
After that is installed, just reverse this process to put your door back together. Make sure your window bolts line up!!!!! Don't put the inside door panel back on until you are 100% certain the window shuts completely and doesn't hit anything. Also I recommend you carefully close the door instead of slamming it just in case the window is off to prevent it from hitting the body of the car.
I think that is everything, sorry for the lack of pictures. Feel free to comment below if you feel I have missed anything.
I will also add this picture of the door lock actuator. This is the part that is causing your power door locks to not lock/unlock. I think it's quoted as a $1,000+ job from a Stealership. I got both actuators for under $300. If you are fixing the streak, replacing a window motor, or taking your door apart just for the sheer fun of it. You may want to monkey around inside your door to see if it is something you want to tackle. It does require you to take apart the outside door handle assembly. I will warn you it is pretty tricky to do.

Here are the cables from the actuator that connect to the inside handle/lock.

I may do a DIY on the actuator if I can find someone by me who wants it done.
Last edited by Hookster1494; Sep 13, 2014 at 02:38 PM.

Thread
Thread Starter
Forum
Replies
Last Post
Machine Head
G35 Sedan V35 2003-06
19
Sep 4, 2015 07:22 PM