
UH OH!!! I've pulled out the jack stands again......Muuhaahaa.


 ...upside down, looking back at the rest of the exhaust system.

Joined: Oct 2002
Posts: 2,474
Likes: 11
From: Vero Beach, FL
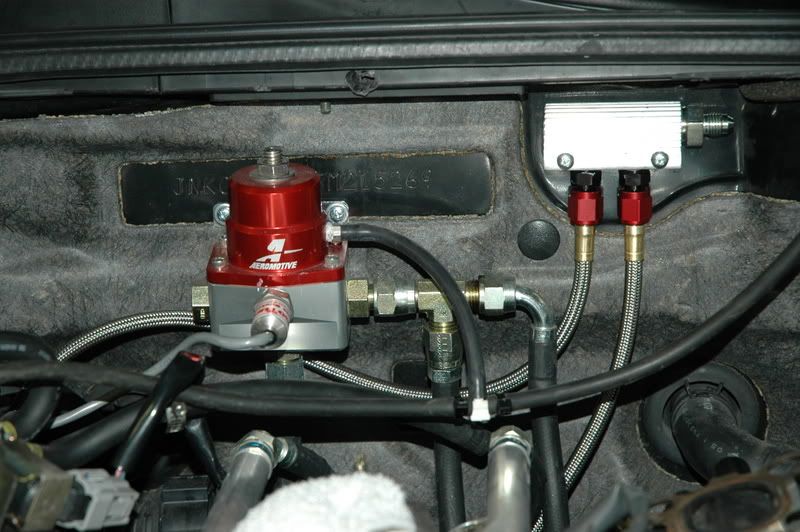
here's a couple shots of the oil feed system and one of my return lines into the AAM pan spacer. All the feed connector and elbows remind me of a jungle gym. ")


Joined: Oct 2002
Posts: 2,474
Likes: 11
From: Vero Beach, FL
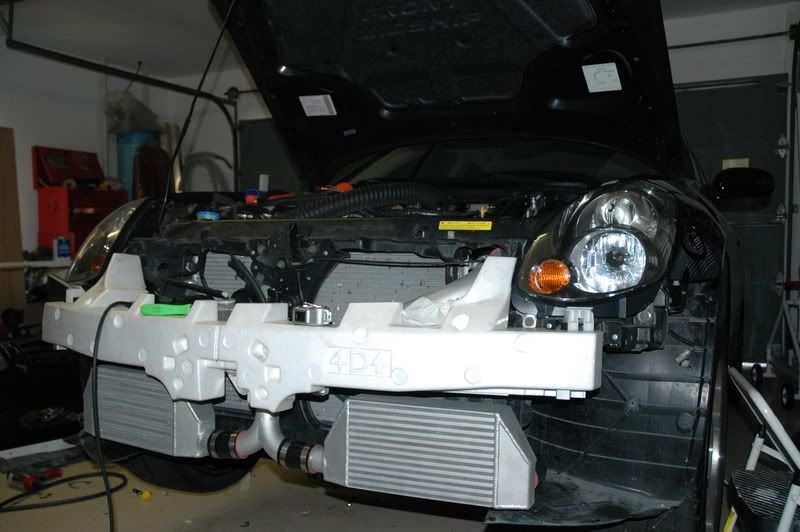
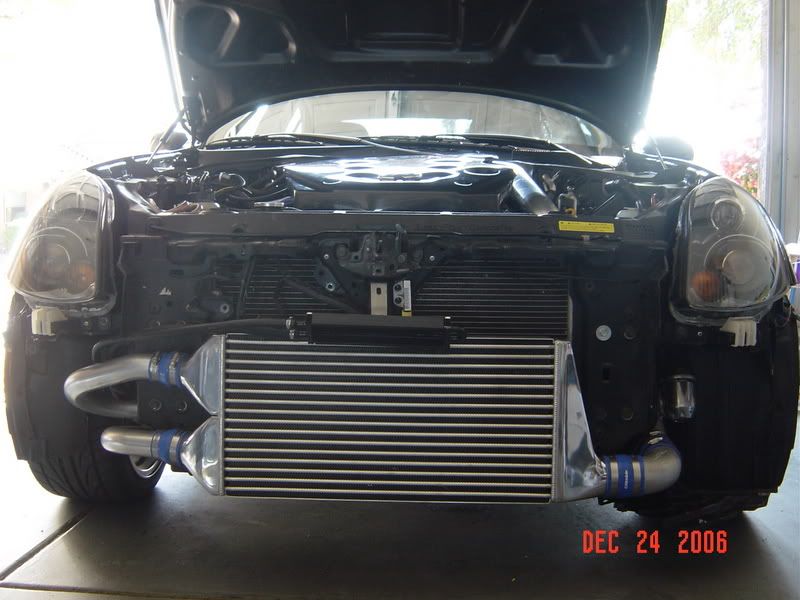
here are some intercooler piping shots. normally, this would be a very boring set of shots, but what is cool is that I was able to chop up the existing Greddy pipes that I wasn't using in the kit and make new pipes to mate up with the SFR intercoolers.

This pipe is the one tha normal ran across the front of the car. You can see where I ground the mounting bracket off it. now it goes toward the driver's side IC.

This is a better shot of that pipe.

and finally it feeds the intercooler.

quick shot of the driver's side tubing.
This pipe is the one tha normal ran across the front of the car. You can see where I ground the mounting bracket off it. now it goes toward the driver's side IC.
This is a better shot of that pipe.
and finally it feeds the intercooler.
quick shot of the driver's side tubing.
Joined: Oct 2002
Posts: 2,474
Likes: 11
From: Vero Beach, FL
here's a shot of a custom 2 port vacuum manifold I made to feed the wastegates. I decided that the wastegates are a very importnat item and I don't want to chance having vacuum hose melt going to one of the wastegates. That would spell instant overboost and sudden melt down. So, I fabbed up this little 2- port vacuum manifold and tapped it for -4AN lines. I also replaced the "banjo" bolts on the wastegates with -4AN fittings.
Joined: Oct 2002
Posts: 2,474
Likes: 11
From: Vero Beach, FL
finally, this is the cool pipe (oops, forgot to take the plastic wrap off) from SFR that come up through the front radiator supprt to feed the throttle body. What is cool is that SFR welded in a bung for the MAF sensor, so I can ditch the ugly plastic MAF housing. even though it is not in this pic, I also retapped the greddy RS valve so that I can use a -4AN fitting and braided line to it also. I don't know what the fitting on the greddy was. It must be some odd sized pipe thread. It is not 1/8" NPT, for sure............but is was nothing a nice tap can't handle!!!


Joined: Oct 2002
Posts: 2,474
Likes: 11
From: Vero Beach, FL
Originally Posted by chinaman_87
I see. have any closeup pics of of the headlights assembled?
you're goona laugh. I changed my mind after doing the driver's side,a nd made a different shroud for the passneger side. No one has ever said anything....actually, I don't give a rat's a$$ though. here are the pics.
DRIVER's SIDE - --- some brushed stainless steel measuring cup used for a shroud.

Passneger side ----- some aluminum grease drip cup combined with a mercedes SL500 shroud.

the projectors are TSX projectors I bough off of Ebay. I used the stock bulbs and just sanded off the coating on the D2R bulbs....then I notched the bulb to fit a D2S housing.
Joined: Oct 2002
Posts: 2,474
Likes: 11
From: Vero Beach, FL
the greddy kit was wierd....I received a bag full of stainless steel hardware. I couldn't figure out where it all went.
for some reason, they gave me double the amount of studs that are required for this kit.....I had 12 studs for the heads, and enough studs to fill everyhole on the manifolds and turbo housings, downpipes, etc with studs. I used the too!!! There was only one spot where I could n't use a stud and it was only because it was so damn hard to reach that it was easier to put a washer on a bolt and get it up in there.
for some reason, they gave me double the amount of studs that are required for this kit.....I had 12 studs for the heads, and enough studs to fill everyhole on the manifolds and turbo housings, downpipes, etc with studs. I used the too!!! There was only one spot where I could n't use a stud and it was only because it was so damn hard to reach that it was easier to put a washer on a bolt and get it up in there.
Joined: Oct 2002
Posts: 2,474
Likes: 11
From: Vero Beach, FL
here's a shot of some of the tools I used...................................

these are all JUST 12mm!!!!!
Now, Imagine that each one of these is part of a ful set. Each one of these 12s has a different purpose and need......add to that all the wierd extensions, wobbles, swivels, etc and you can start to imagine how complete a set of tools you need.
If I didn't have all this stuff ( and more), it would never have made sense to DIY this kit. You would easily spend more money in tools than it would cost you to pay a shop to do this install!


Great pics. Scary how tight it is in there with those turbos isn't it!
I'm not sure if you are going to have the same problem but I ended up adding additional BOV's because only having one on the IC outlet side gave me some compressor surge. It was just too far for the air to travel to go out the BOV and some was going back out the turbos instead.
When do you think it will be up and running?

Originally Posted by QuadCam
here's a shot of some of the tools I used...................................
these are all JUST 12mm!!!!!
Now, Imagine that each one of these is part of a ful set. Each one of these 12s has a different purpose and need......add to that all the wierd extensions, wobbles, swivels, etc and you can start to imagine how complete a set of tools you need.
If I didn't have all this stuff ( and more), it would never have made sense to DIY this kit. You would easily spend more money in tools than it would cost you to pay a shop to do this install!
Yeah I found a Matco wobbly socket set to be a life saver. That kit is ~$400 alone! I used a friends.

Jeeezzz....DIY install on a twin turbo....you have some ballz!  Reading your write up w/ hoses & all I'm so lost & don't even know what you're saying (seriously)... Bet you can't wait to turn that key & see if it turns over!
Reading your write up w/ hoses & all I'm so lost & don't even know what you're saying (seriously)... Bet you can't wait to turn that key & see if it turns over!