
Taking engine apart


Thread Starter
|
Registered User
Joined: Sep 2013
Posts: 38
Likes: 1
Taking engine apart
Hello all!
I posted a while back about an overheating problem, we'ved changed everything on the outside including bleeding the air out of the system to no avail.
A bunch of fellas here on G35driver mentioned that it's the headgasket. Seeing that's almost and probably the last thing on the list, I decided to tackle the headgasket myself. I've asked quite a few times on other forums as well, if there were a DIY head gasket removal, but no one really answered nor is there probably one for this vehicle on these forums.
I started taking the engine apart from top-> down, and trying to get to the head gasket. I've gotten thus far, and need some minor assistance.
The timing for the pistons are exposed, and taking a bit of a break. (all that took me really 1-2 hours at most) my question for the next steps would be,
do I need to remove the timing chain to remove that housing on top of the pistons?
Is the headgasket what will be exposed next?
I'll post some images.
Image #1
It started off as this....
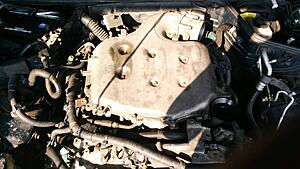
image #2
the top cover came off (couple of bolts on top, that's all)
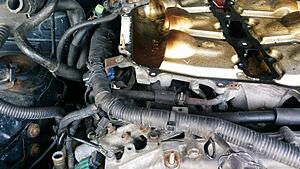
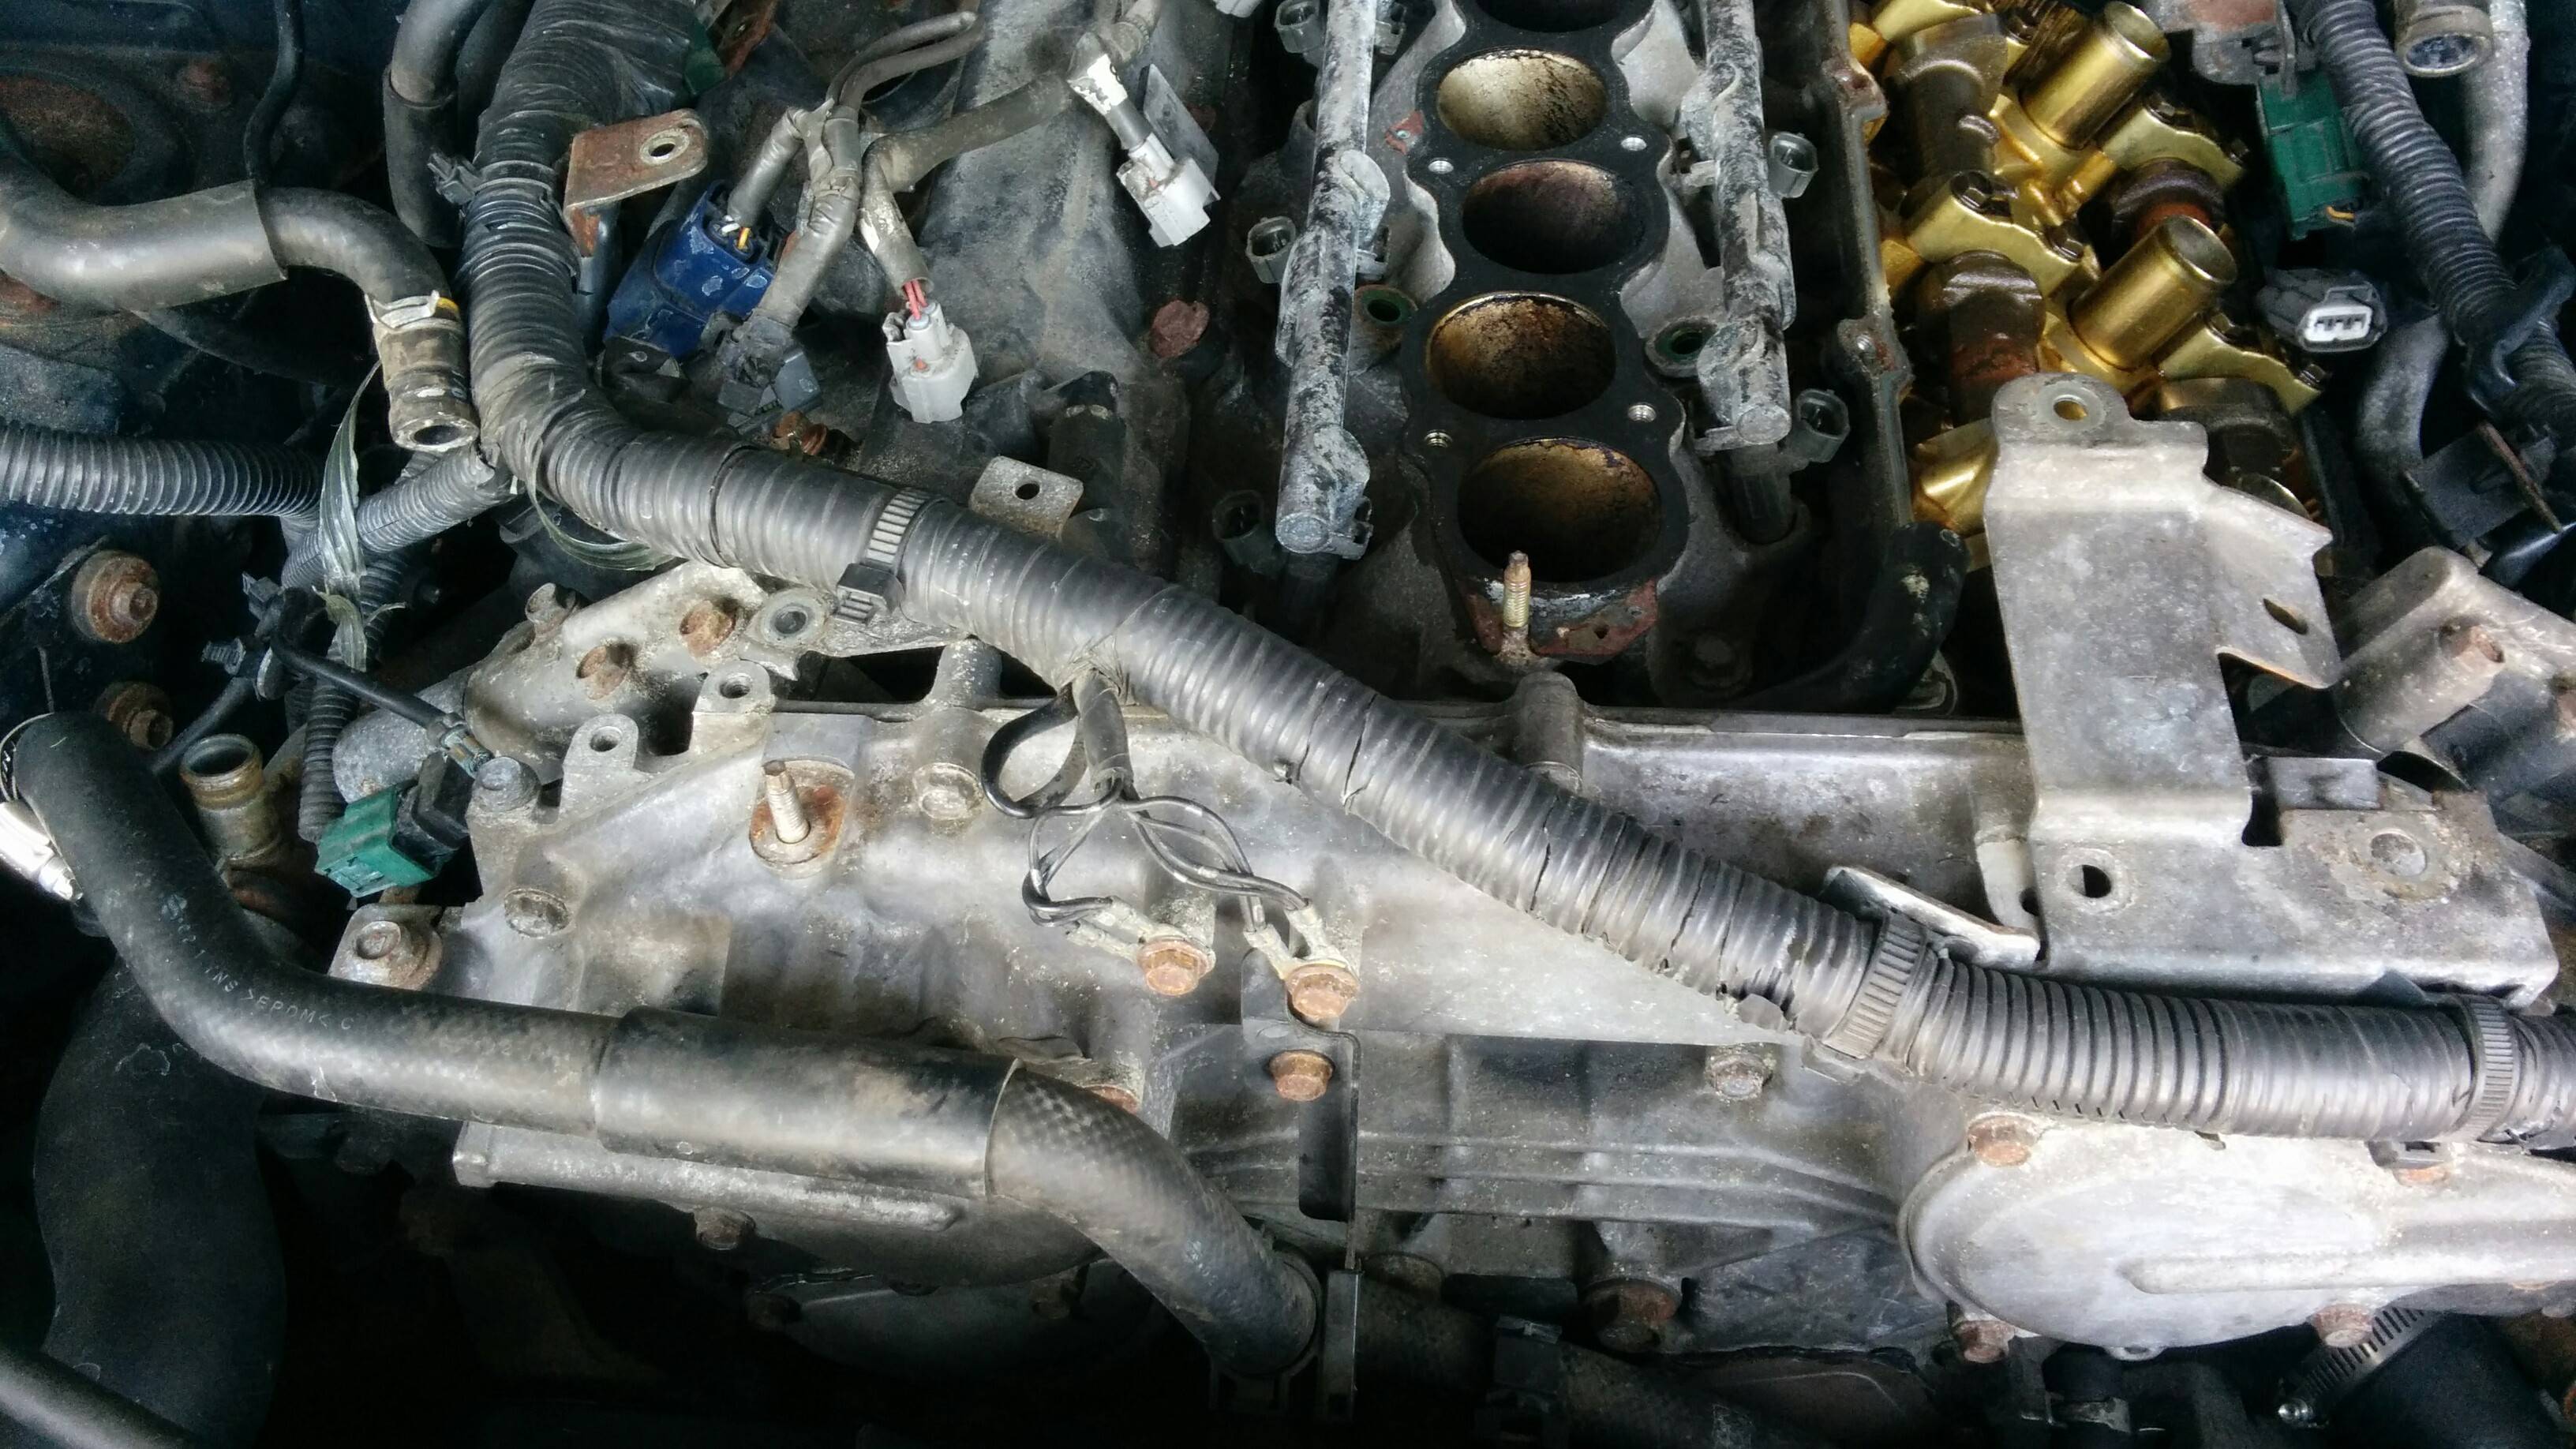
image #3
that top part came off.... and the side cover that covers the timing (not timing chain) for the pistons came off as well.
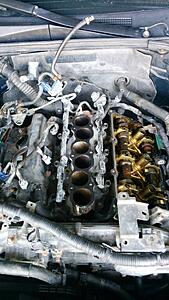
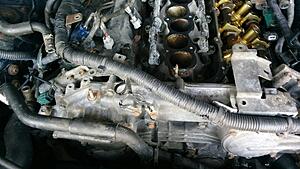
image #4
to remove this cover... I'll need to remove the allan key bolts... 2 in the middle and 3 on either side and under the rod that time the pistons....

image #5
BUT in order to remove the rods from image #4, i'd need to remove the timing chain. I've already located the tensioner for it (not that bad) to remove the chain, to remove the rods, to remove the piston housing.
(around.. 17 bolts to remove the front cover of the timing chain housing... two large .."16mm??" bolts on the outside, and I imagine there being 4 more on the inside...)
Other than that, does anyone else know how much more I've got to work on this before I get to the head gasket... to fix the overheating problem? so far, all the gaskets I've encountered were in top notch with no issues.
I posted a while back about an overheating problem, we'ved changed everything on the outside including bleeding the air out of the system to no avail.
A bunch of fellas here on G35driver mentioned that it's the headgasket. Seeing that's almost and probably the last thing on the list, I decided to tackle the headgasket myself. I've asked quite a few times on other forums as well, if there were a DIY head gasket removal, but no one really answered nor is there probably one for this vehicle on these forums.
I started taking the engine apart from top-> down, and trying to get to the head gasket. I've gotten thus far, and need some minor assistance.
The timing for the pistons are exposed, and taking a bit of a break. (all that took me really 1-2 hours at most) my question for the next steps would be,
do I need to remove the timing chain to remove that housing on top of the pistons?
Is the headgasket what will be exposed next?
I'll post some images.
Image #1
It started off as this....

image #2
the top cover came off (couple of bolts on top, that's all)

image #3
that top part came off.... and the side cover that covers the timing (not timing chain) for the pistons came off as well.
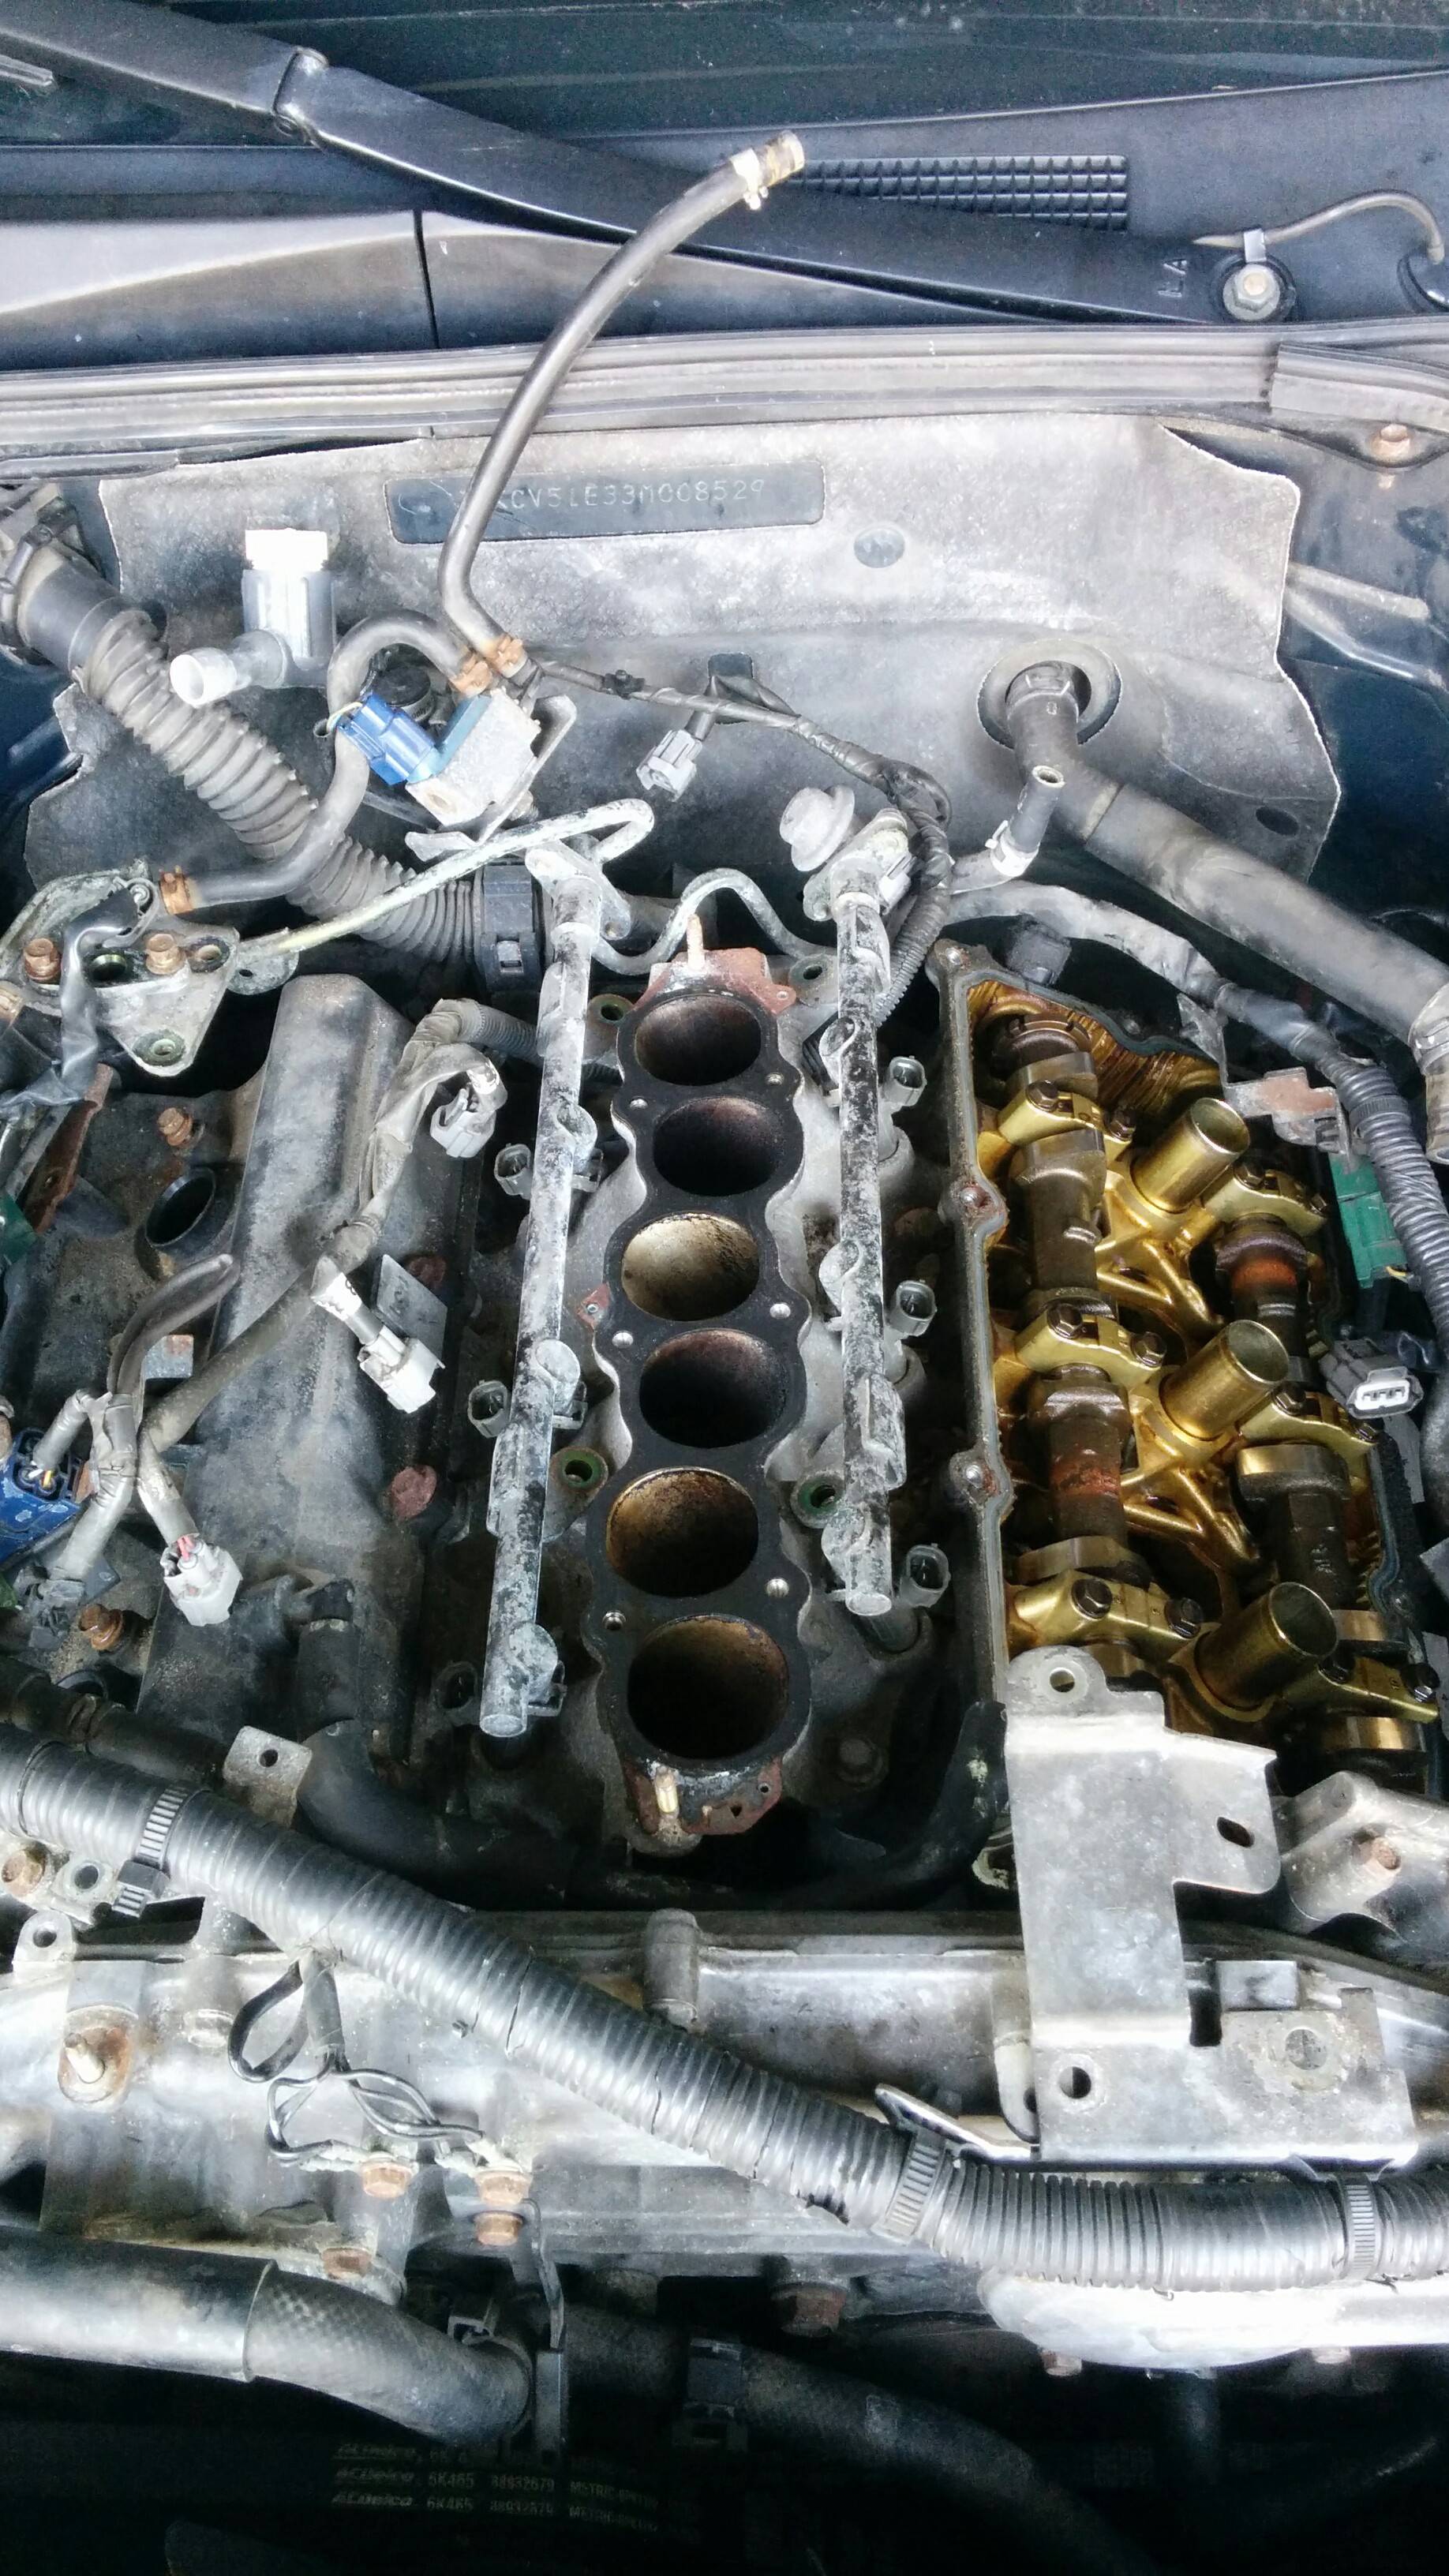
image #4
to remove this cover... I'll need to remove the allan key bolts... 2 in the middle and 3 on either side and under the rod that time the pistons....
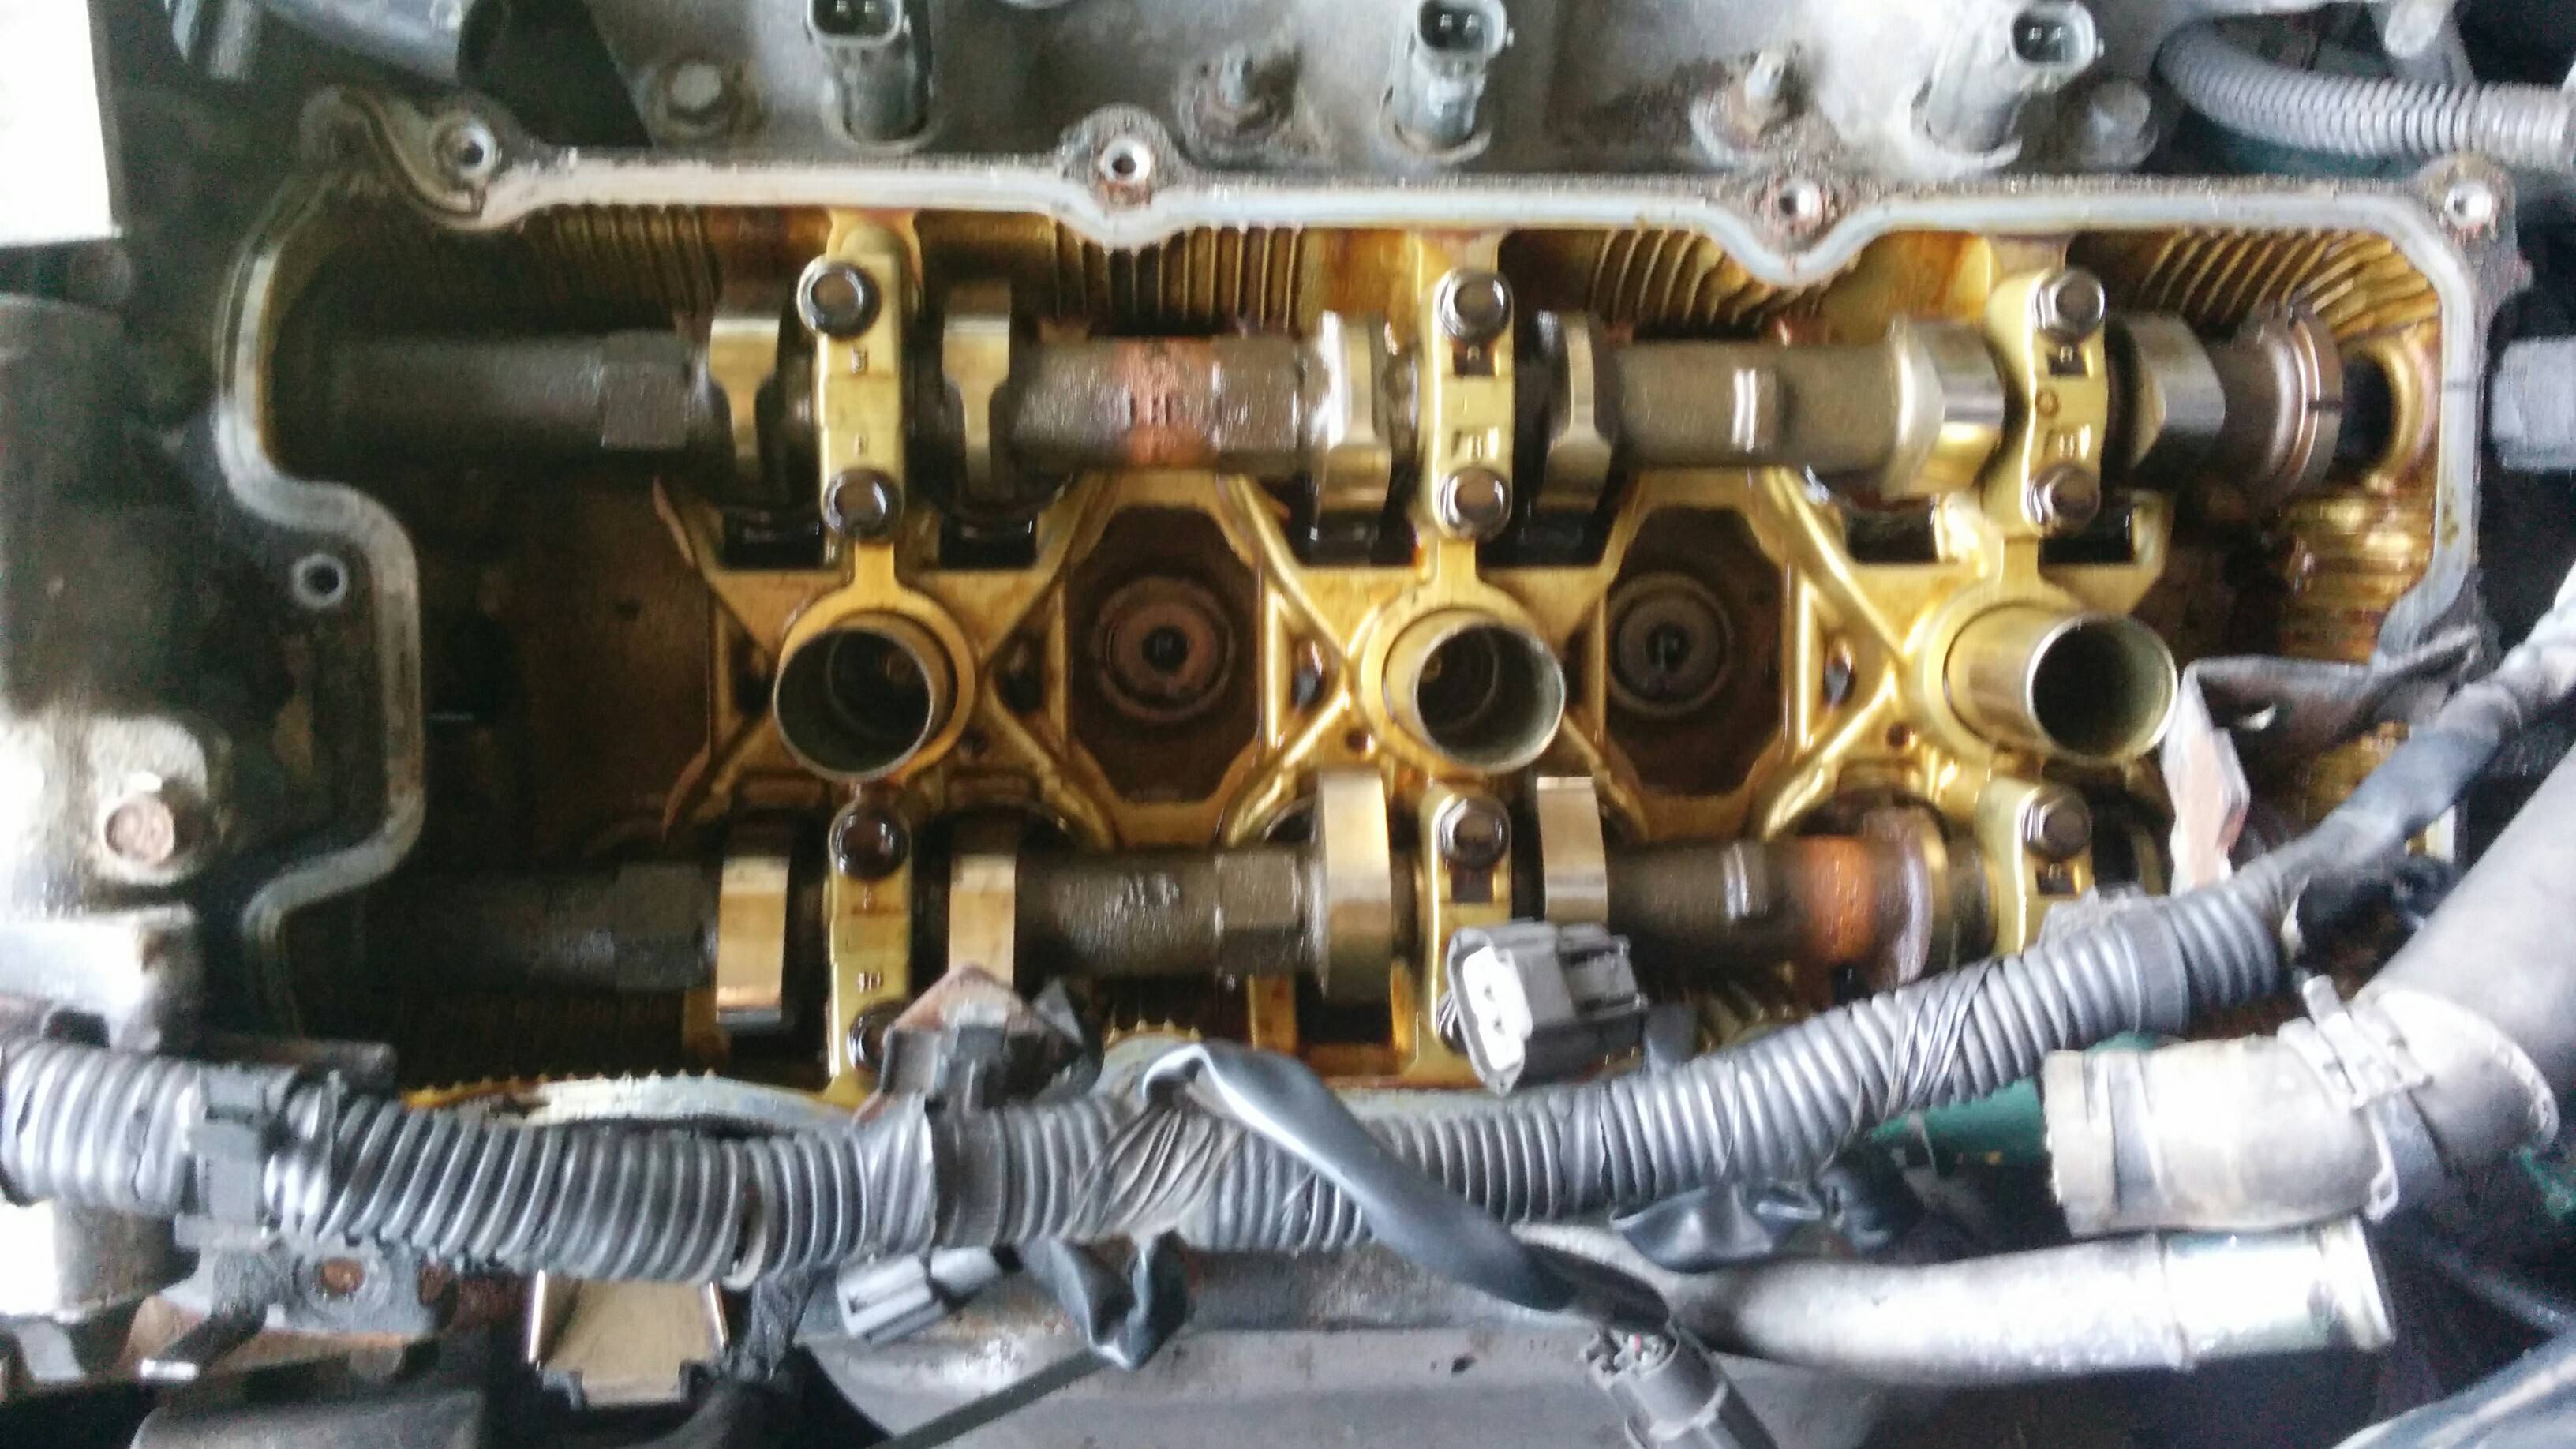
image #5
BUT in order to remove the rods from image #4, i'd need to remove the timing chain. I've already located the tensioner for it (not that bad) to remove the chain, to remove the rods, to remove the piston housing.
(around.. 17 bolts to remove the front cover of the timing chain housing... two large .."16mm??" bolts on the outside, and I imagine there being 4 more on the inside...)
Other than that, does anyone else know how much more I've got to work on this before I get to the head gasket... to fix the overheating problem? so far, all the gaskets I've encountered were in top notch with no issues.

lol...
no where near done...
On G35frenzy.com i posted a while ago a DIY on this.
Don't know may have happened with that site.
You have to flip the engine upside down to gain access to the lower FRONT COVER screws.
You have 2 covers, FRONTAL and REAR... It takes like 43 bolts.... Plus gaskets, o-rings, and a whole lot of patience.
after reading this over...
YOU DO NOT REMOVE THE 2 BOLTS WITH ALLEN SCREWS
Those are water passages. will do you absolutely nothing.
Next up,
First thing you want to do is go to the dealership and/or search around here and look up the Torque specs for the entire engine assembly so you can learn how much this whole project will run you.
Next
DRAIN ALL FLUIDS
Furthermore,
It is easier working with the engine outside of the engine bay as you will have to flip the engine over to be able to remove the front covers. Which is accessed through the oil pan (yes you have to remove that too)
Once you have removed the front covers you'll notice much of a PITA it will be to put the camshafts back in place with no help.
You will need paperclips to hold the chain tensioners in place.
Once you've opened the motor you may as well change the tensioners along with chain guides.
The dealer or finding the manual will give you the timing position. it's imperative you get this right or KABOOM !
next up,
the vq head bolts are under the cams not the 2 allen bolts...you have to remove and install EVERYTHING in a specific order. you cannot just start yanking bolts off because you will snap a camshaft or something else.
DO NOT lose the order of the valve lifter buckets. they are shimmed for each specific side and you cannot mix the camshafts. everything separate and keep everything in order or prepare for failure.
HEAD studs/bolts are TORQUE TO YIELD meaning once you've used them once and removed now they are garbage.
So you'll need to buy new ones.
If you're doing this to save money....You're heading in the wrong direction.
If you're doing this for pride or just because then you have a solid project ahead of you.
Honestly from experience, and I mean this with all the respect in the world that you deserve. You have NO idea what you are doing. If this is simply a project to experiment I can assure you; you've grabbed the toughest of them all. VQ's are known for seasoned mechanics to be the absolute hardest motor to dis and re- assemble.
How ever i can give guidance i am here but good luck.


Holy $hit this is not going to end well... LMAO
OP please immediately stop what you are doing and tow your car to a reputable mechanic who can complete the task for you.. You have absolutely no clue what you are getting yourself into and will probably end up destroying your motor
OP please immediately stop what you are doing and tow your car to a reputable mechanic who can complete the task for you.. You have absolutely no clue what you are getting yourself into and will probably end up destroying your motor
Trending Topics

Dude, you started this without even reading a Haynes manual or downloading the FSM??? Not knocking you, but man you have got a lot of work cut out for you. I did my water pump, timing chain, tensioner, primary chain, and guide rails all by myself AND it was the first major project I did on a car EVER. That took me several weekends to complete and driving around a second car I was lucky to have access to. I did save over 1K in labor and got a lot of experience out of it, but what other tests did you do to verify it was the head gasket? I spent at least a month or two just reading up and researching videos.
Look up the following people on YouTube and watch their vids.
2012nugget
TuroFM
Eurotech solutions (This is the vid, I used for my timing chain job. He's a BMW technician and ACTUALLY ended up having to do a head job, because he made some mistakes on on his gf or sister's Maxima and broke some parts.) I highly recommend you watch all of his Maxima vids.
Front cover you need to remove lower oil pan there are two hidden bolts and use a skinny putty knife to slice through the RTV to separate the cover.
You can re-use metal gaskets if they are still sound.
Buy a ton of ziploc bags and put all the bolts in and label them.
Head bolts need a new set they're use once and toss. You also have to torque them in an specific order.
Buy all replacement parts from Nissan/Infiniti and make sure you clean off all the RTV good.
I have a DIY thread I made for the timing chain: https://g35driver.com/forums/engine-...ing-chain.html
Last edited by coffeysm; Aug 9, 2014 at 10:57 PM.

Truth is if you are completely and independently stout of a mechanic with a wide variety of access to tools and workbooks you will find this project to be fairly adventurous.
I took my motor apart when it blew the head gaskets.
and it was my first break down of the VQ. mind you I have never had full experience with this series of motor i just applied a lot of common sense since I am used to the 4cyl Nissan motors.
Never the less I saved thousands and i was able to install parts to my car that mechanics would crave to charge you for.

Registered User
Joined: Nov 2004
Posts: 92
Likes: 10
From: Nutley, NJ
This is what the START of a head gasket job looks like
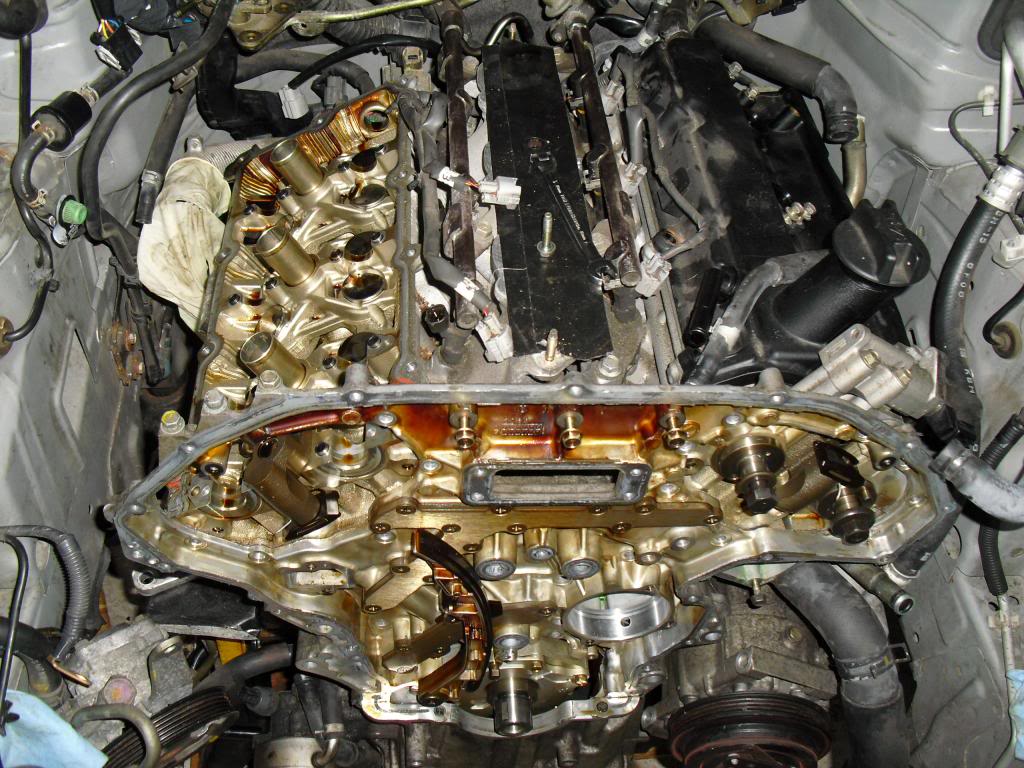
notice the jacks under the engine compartment
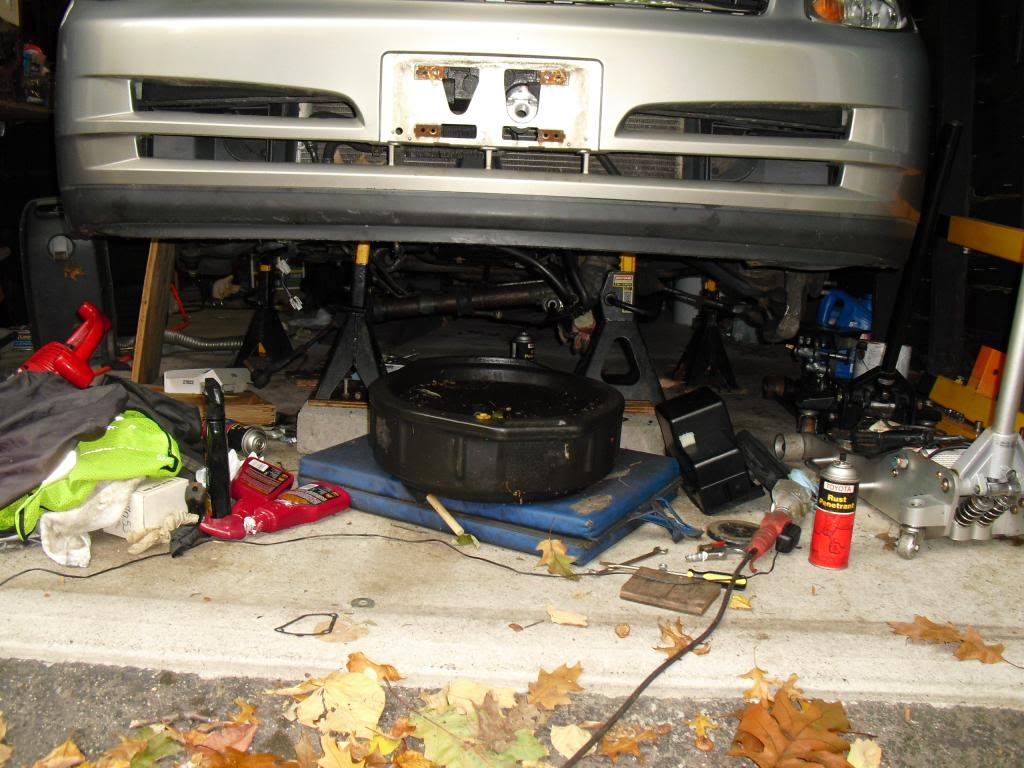
That's what's holding the engine up as the subframe needs to be removed. It's not rocket science buy you do need to know what your doing.
notice the jacks under the engine compartment
That's what's holding the engine up as the subframe needs to be removed. It's not rocket science buy you do need to know what your doing.
Download the FSM and follow the disassemble directions in the "EM" Engine Mechanical section. I tackled my first head gasket replacement on a Nissan 4cyl SR engine only using the factory manual.
The short answer to your question is that yes, the timing chain is going to have to come off in order to remove the heads. You also still have to finish removing the lower intake manifold/injectors. It is much easier with engine out and on a stand (like I had) but it can be done in the car. Just wear mechanic gloves to limit busted knuckles due to lack of space.
The short answer to your question is that yes, the timing chain is going to have to come off in order to remove the heads. You also still have to finish removing the lower intake manifold/injectors. It is much easier with engine out and on a stand (like I had) but it can be done in the car. Just wear mechanic gloves to limit busted knuckles due to lack of space.