
DIY: Super bright LED map light/courtesy light


Thread Starter
|
Registered User
Joined: Dec 2015
Posts: 40
Likes: 3
DIY: Super bright LED map light/courtesy light
Tired of your dim yellow interior and courtesy lights? With less than $20 and a few minutes of your time this can be changed.
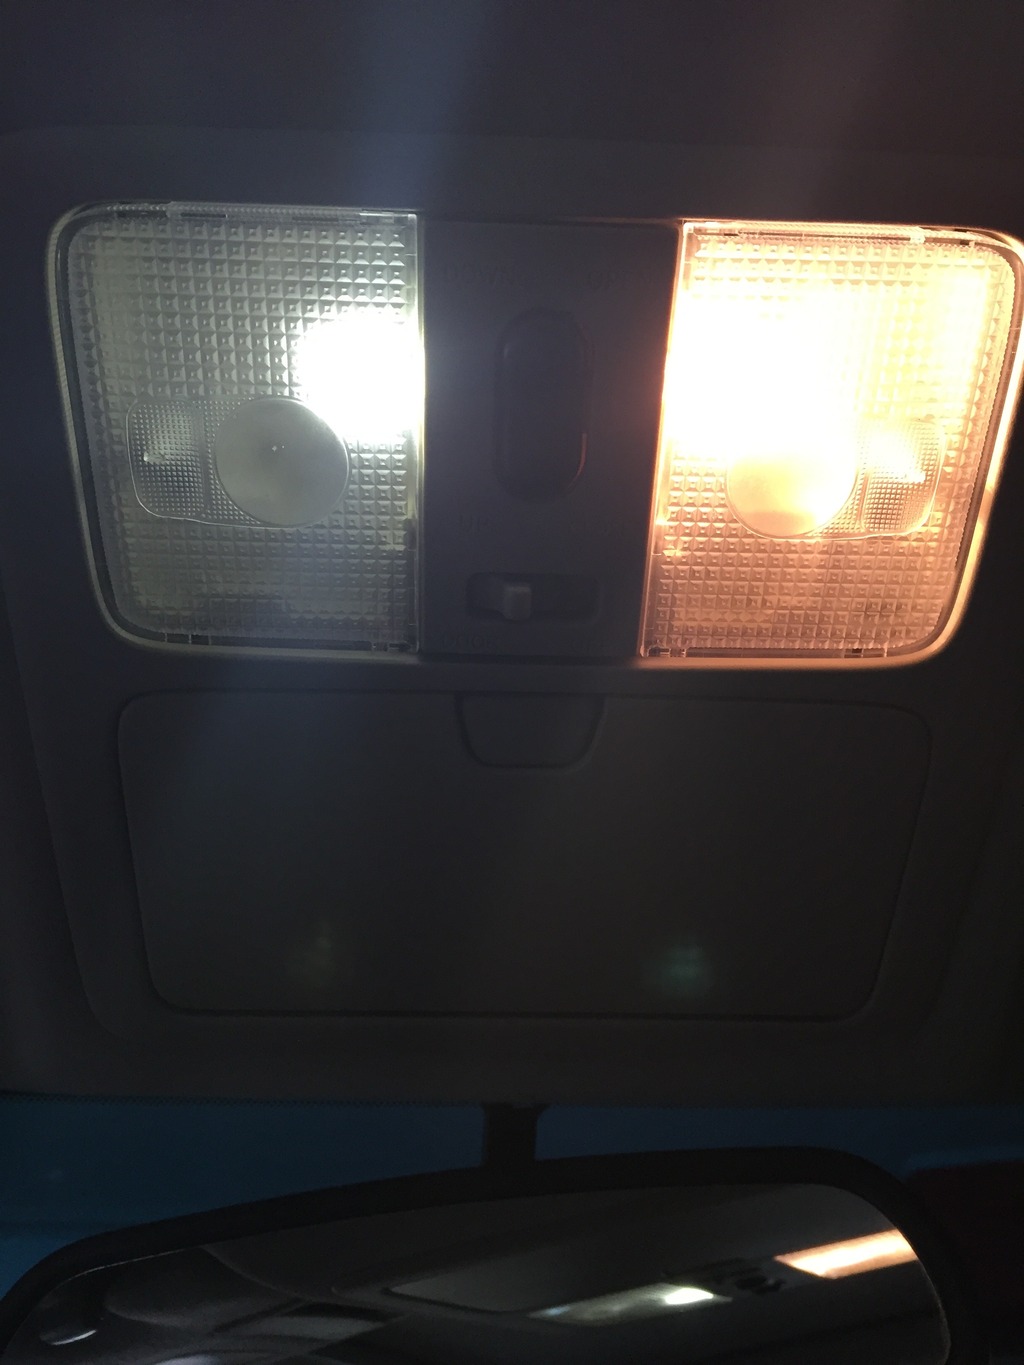
Below is an example of the difference between Infinity OEM light (right) and an LED light (left)
This is an instructional thread on how to change both your interior map lights, and door courtesy lights.
What you will need
1/8" drive socket wrench
10mm 1/8" drive deep socket
Small flathead screwdriver
Thick plastic card
Gloves
Small plastic bags
Marker
Tape
Q-Tip
70% Isopropyl alcohol
LED part number
4x 3022-NW4 (9~14.8 VDC 30* beam angle)
www.superbrightleds.com
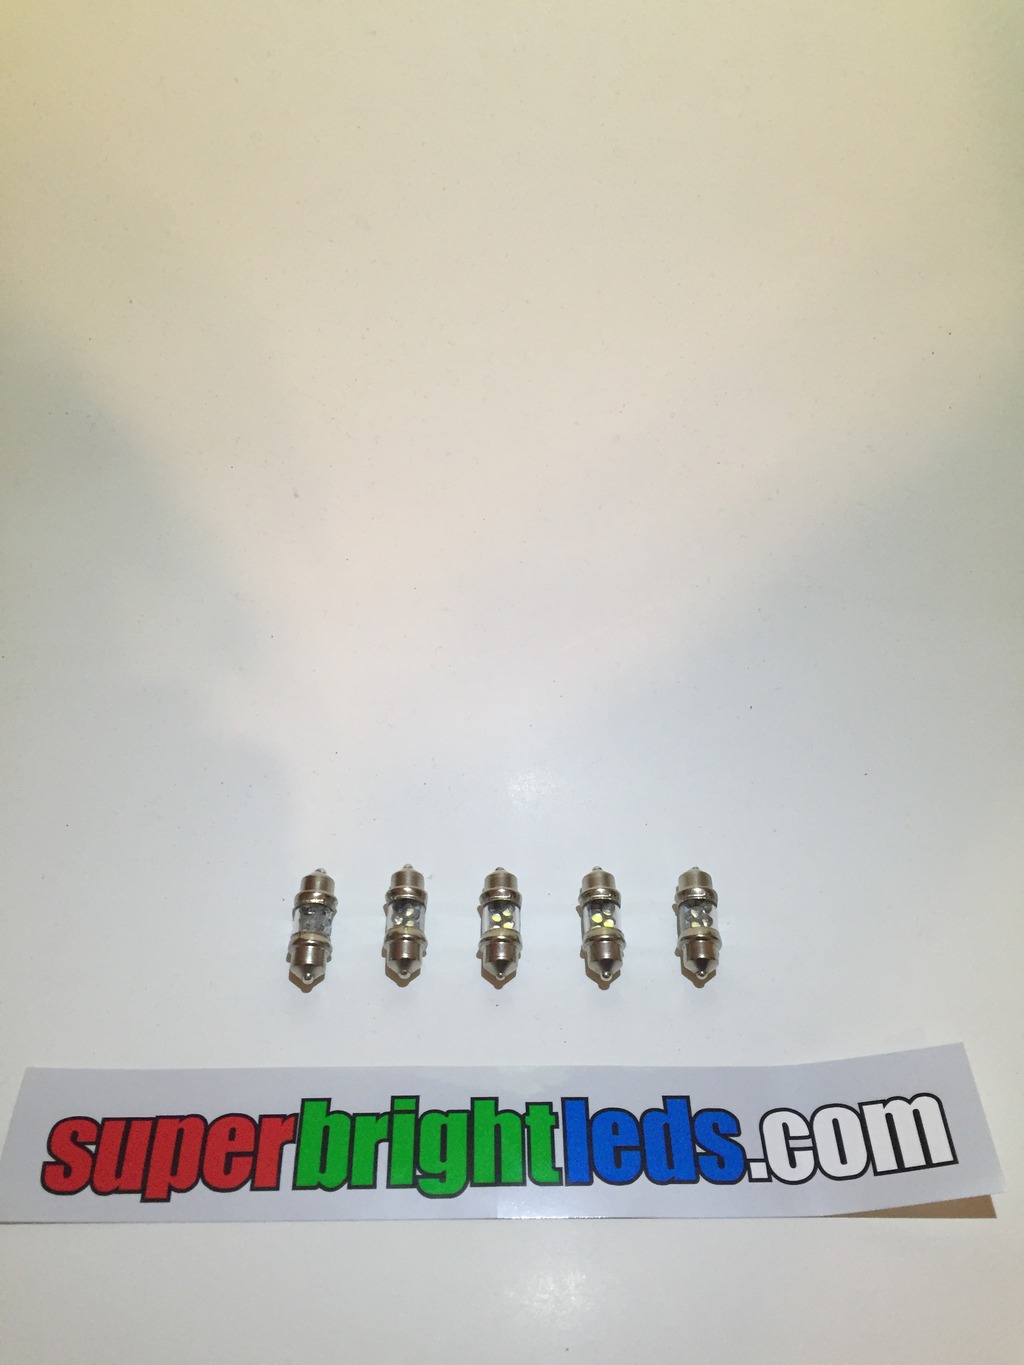
These LED's are available in many different colors. Natural white was used for this write up.
Start by pulling the hood release lever located under the dash next to the drivers side door.
It is important to disconnect the battery during the installation of these lights because with the door open, the lights will have a hot current, and there is a chance to short a fuse.
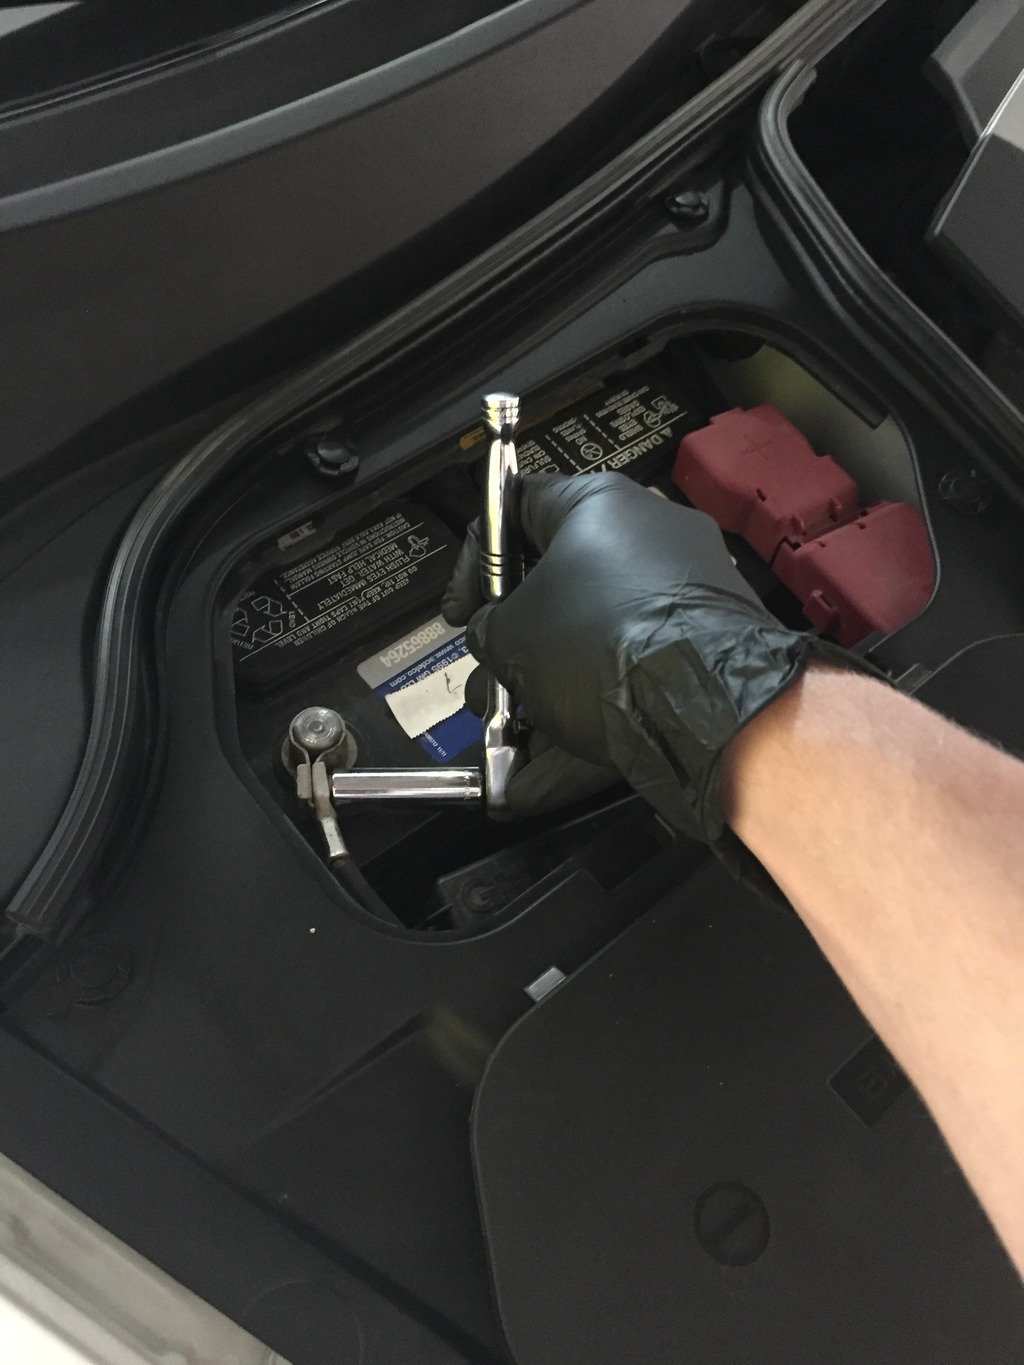
Locate your G35's battery. This will be on the passenger side near the firewall under the battery cover. Remove the cover by pressing the two tabs simultaneously and pulling upward.

With the cover removed, use a 10mm deep socket to disconnect the negative battery cable. Be sure to move this to the side so that it can not make contact with the terminal.
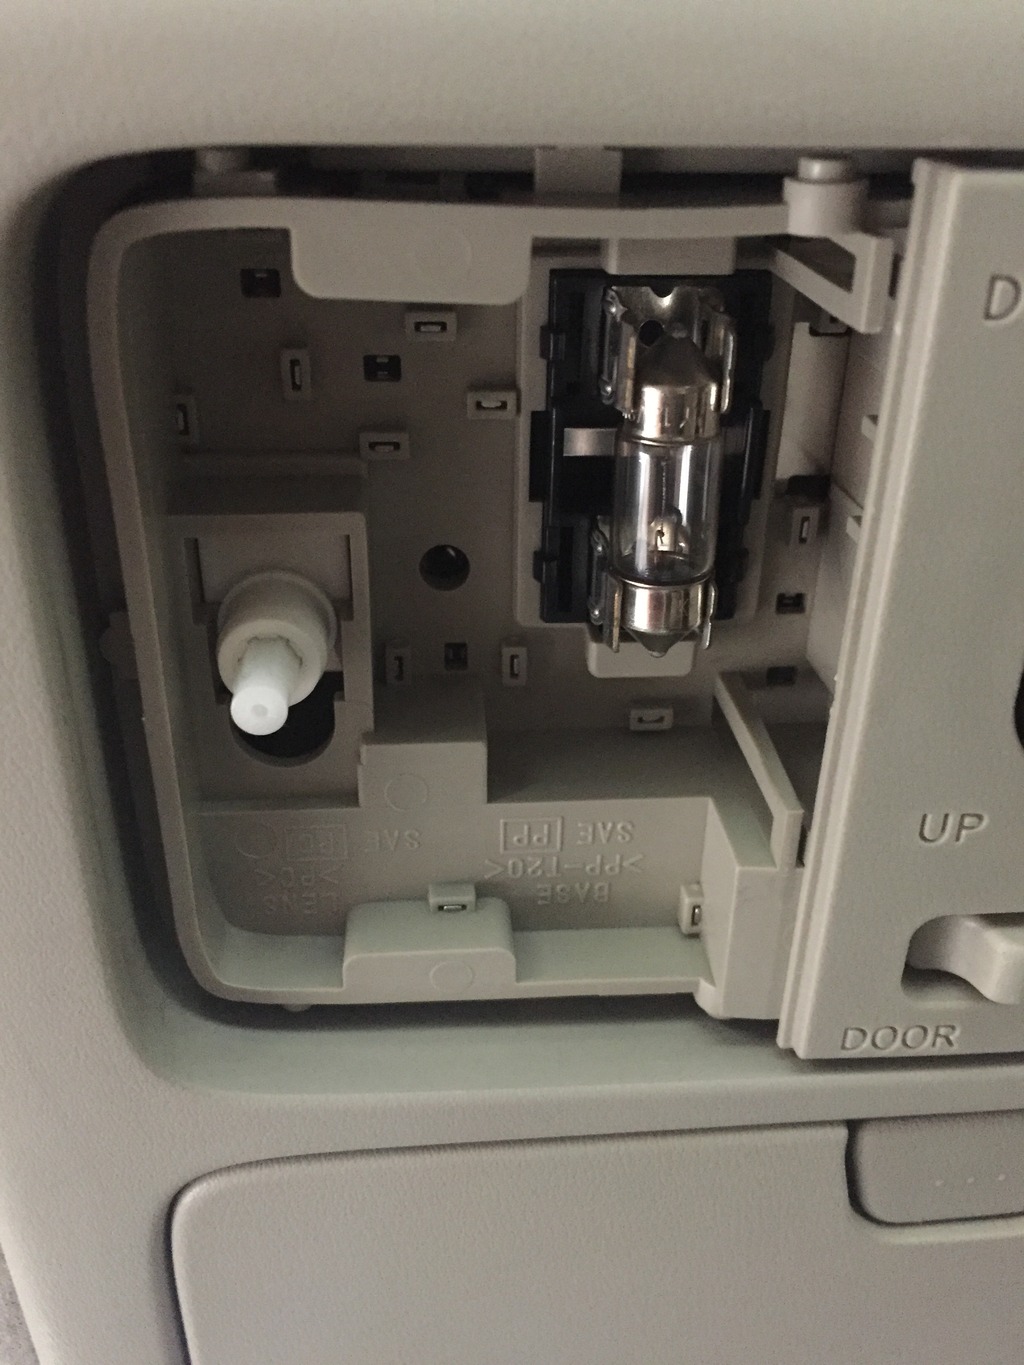
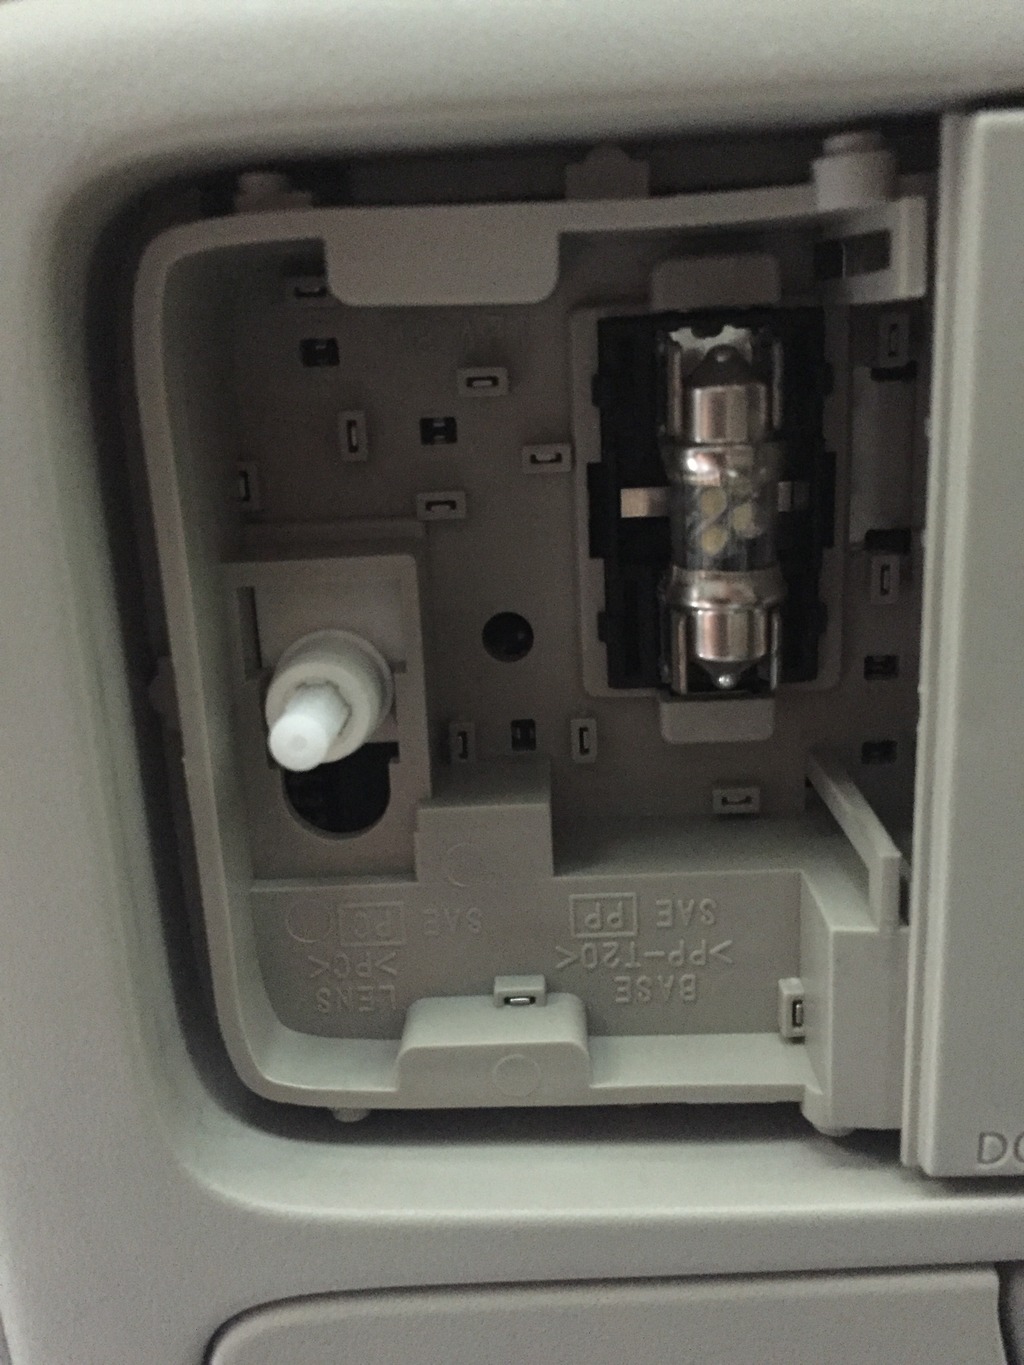
Now that there is no power going to your lights, removal of your cars OEM bulbs may begin. Start by using a hard plastic card that you do not mind damaging, such as your fathers credit card, and placing it within the gap seen in the picture below. Use the card to very carefully pry the plastic cover downward. There will be two tabs along this edge that need to be freed.

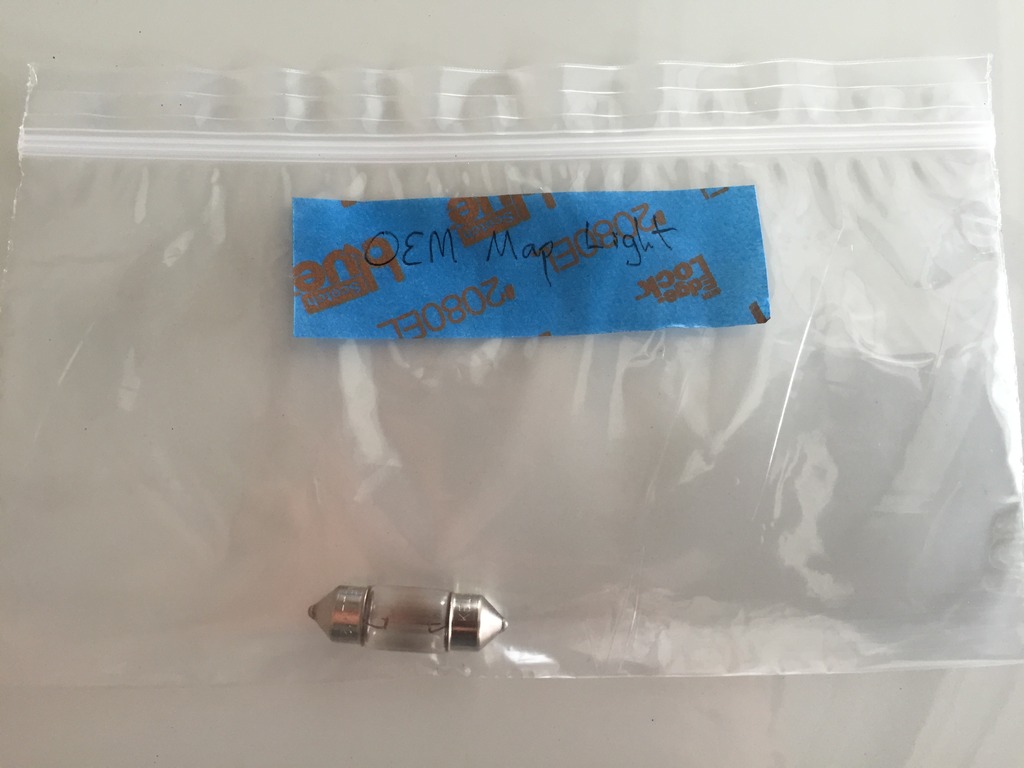
The OEM bulb will now be accessible. Remove the bulb using your gloved fingers. Be sure to put any parts that you remove into a labeled bag. You never know when you may need to use these again.
Once the OEM bulb is removed, use a Q-Tip with alcohol to clean the contact points.

At this point you may install your superbrightled light. Make sure to install this with the diode facing downward.
Repeat the same measures on the second map light.
For the door courtesy lights a small flathead screwdriver must be inserted into the gap between the light cover and the door. Two tabs secure this cover to the door panel. Pry these tabs away from the door.
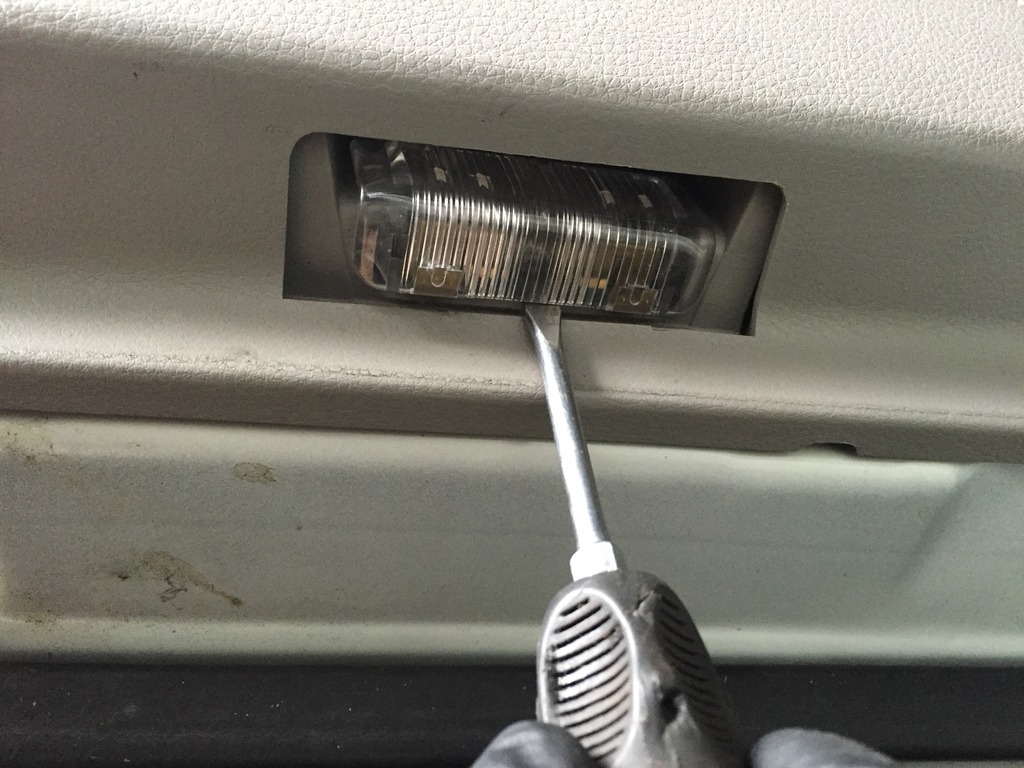
Once this is freed, pull down the cover which contains the light. This cover will only move an inch or so. Be careful to not do any damage.
Use the same flathead screwdriver to remove the OEM light from this casing.
Clean the contact points and install the LED.
Make sure that the diodes will face downward once the casing is reinstalled.
Reinstall the casing with your LED light fitted.
Repeat this on the passenger side.
With all of your lights installed it is time to reconnect the battery cable and close the battery cover.
Enjoy your new lights and feel free to ask any questions! Please look forward to future overly detailed DIY write-ups by Jake The Snake
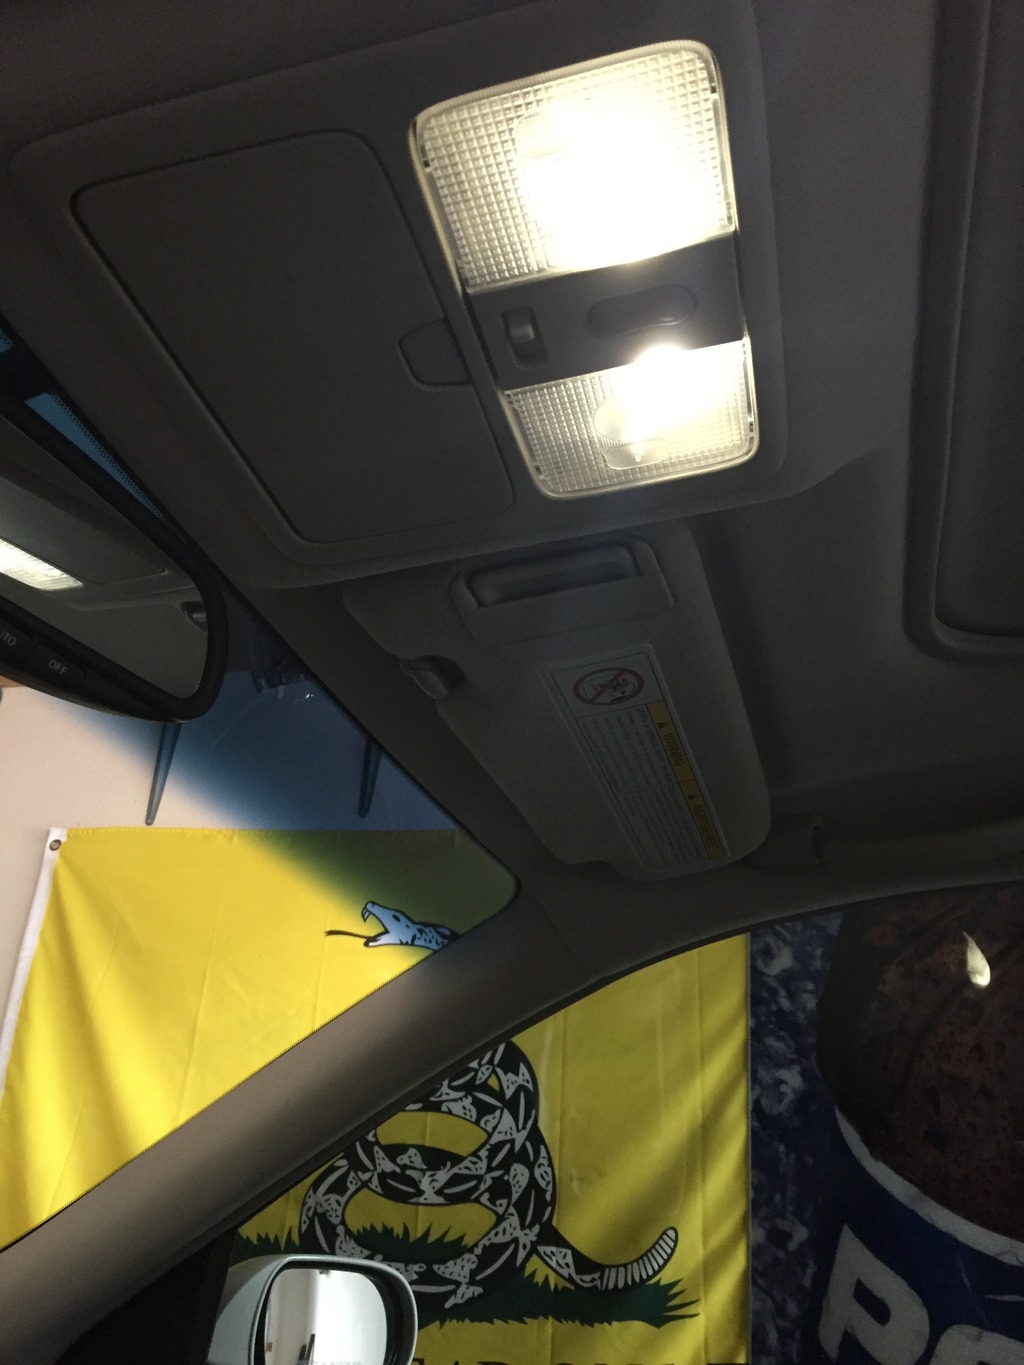
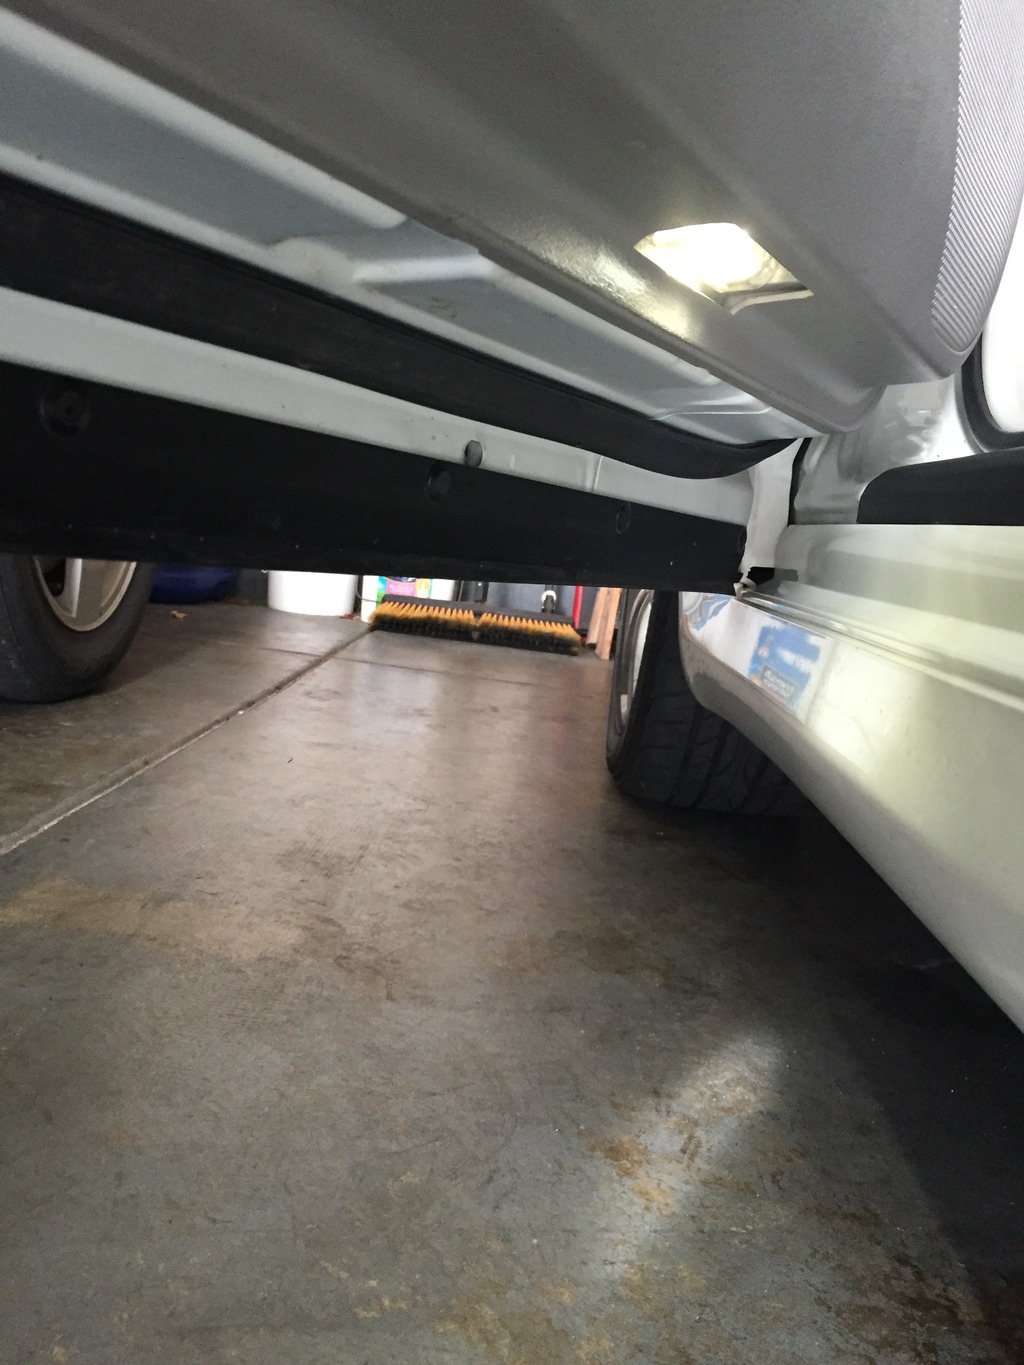
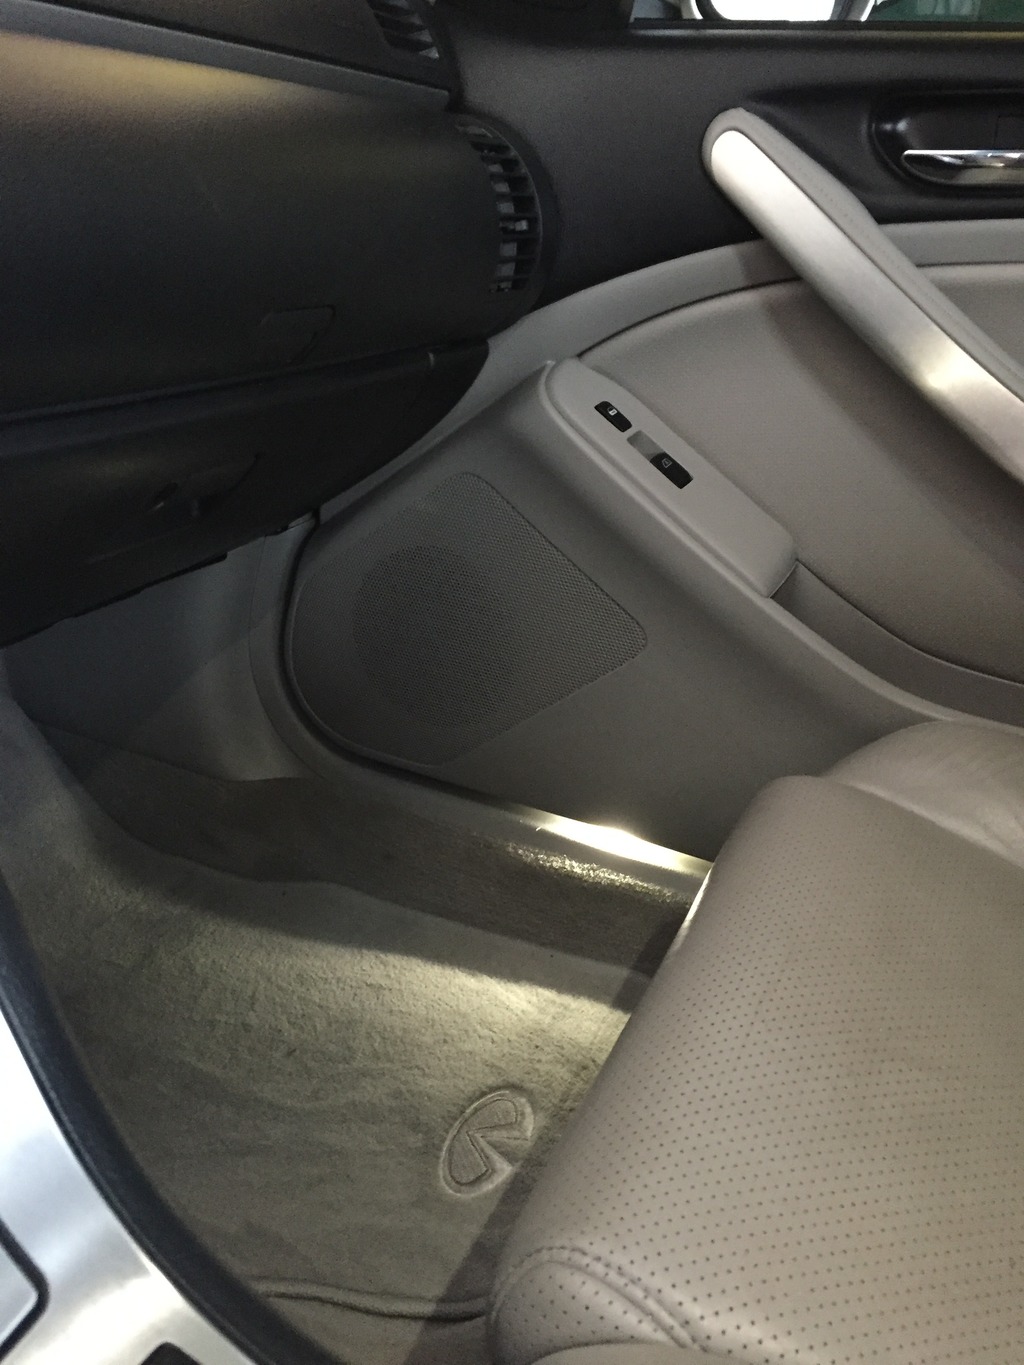
Below is an example of the difference between Infinity OEM light (right) and an LED light (left)

This is an instructional thread on how to change both your interior map lights, and door courtesy lights.
What you will need
1/8" drive socket wrench
10mm 1/8" drive deep socket
Small flathead screwdriver
Thick plastic card
Gloves
Small plastic bags
Marker
Tape
Q-Tip
70% Isopropyl alcohol
LED part number
4x 3022-NW4 (9~14.8 VDC 30* beam angle)
www.superbrightleds.com

These LED's are available in many different colors. Natural white was used for this write up.
Start by pulling the hood release lever located under the dash next to the drivers side door.
It is important to disconnect the battery during the installation of these lights because with the door open, the lights will have a hot current, and there is a chance to short a fuse.
Locate your G35's battery. This will be on the passenger side near the firewall under the battery cover. Remove the cover by pressing the two tabs simultaneously and pulling upward.

With the cover removed, use a 10mm deep socket to disconnect the negative battery cable. Be sure to move this to the side so that it can not make contact with the terminal.

Now that there is no power going to your lights, removal of your cars OEM bulbs may begin. Start by using a hard plastic card that you do not mind damaging, such as your fathers credit card, and placing it within the gap seen in the picture below. Use the card to very carefully pry the plastic cover downward. There will be two tabs along this edge that need to be freed.

The OEM bulb will now be accessible. Remove the bulb using your gloved fingers. Be sure to put any parts that you remove into a labeled bag. You never know when you may need to use these again.


Once the OEM bulb is removed, use a Q-Tip with alcohol to clean the contact points.

At this point you may install your superbrightled light. Make sure to install this with the diode facing downward.

Repeat the same measures on the second map light.
For the door courtesy lights a small flathead screwdriver must be inserted into the gap between the light cover and the door. Two tabs secure this cover to the door panel. Pry these tabs away from the door.

Once this is freed, pull down the cover which contains the light. This cover will only move an inch or so. Be careful to not do any damage.
Use the same flathead screwdriver to remove the OEM light from this casing.
Clean the contact points and install the LED.
Make sure that the diodes will face downward once the casing is reinstalled.
Reinstall the casing with your LED light fitted.
Repeat this on the passenger side.
With all of your lights installed it is time to reconnect the battery cable and close the battery cover.
Enjoy your new lights and feel free to ask any questions! Please look forward to future overly detailed DIY write-ups by Jake The Snake


Last edited by Jake The Snake; Dec 12, 2015 at 04:46 PM.


Thread Starter
|
Registered User
Joined: Dec 2015
Posts: 40
Likes: 3


Thread
Thread Starter
Forum
Replies
Last Post

