
Alcantara Steering Wheel (lots of pics)


Alcantara Steering Wheel DIY (lots of pics)
So I momentarily put my carbon fiber diffuser project on hold since its cold and I don't feel like sitting in the garage. So I got started on a spare steering wheel I have. I wanted to make the wheel thicker add a flat bottom, while also covering it in genuine black alcantara white stitching. I also threw in an orange stripe at the top. I will say that sewing and crap like that is not my strong side and in general the whole thing cost me a lot of cursing, ripping, restitching, and yelling at the sewing machine, so if you'd like to attempt this on your own....well you have been forewarned.
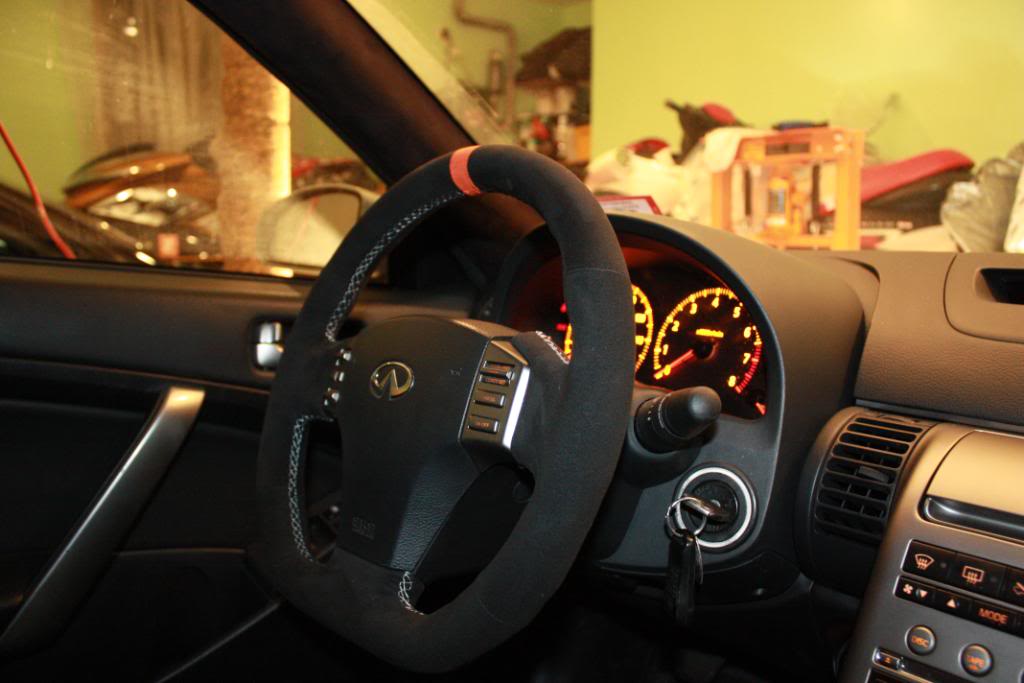
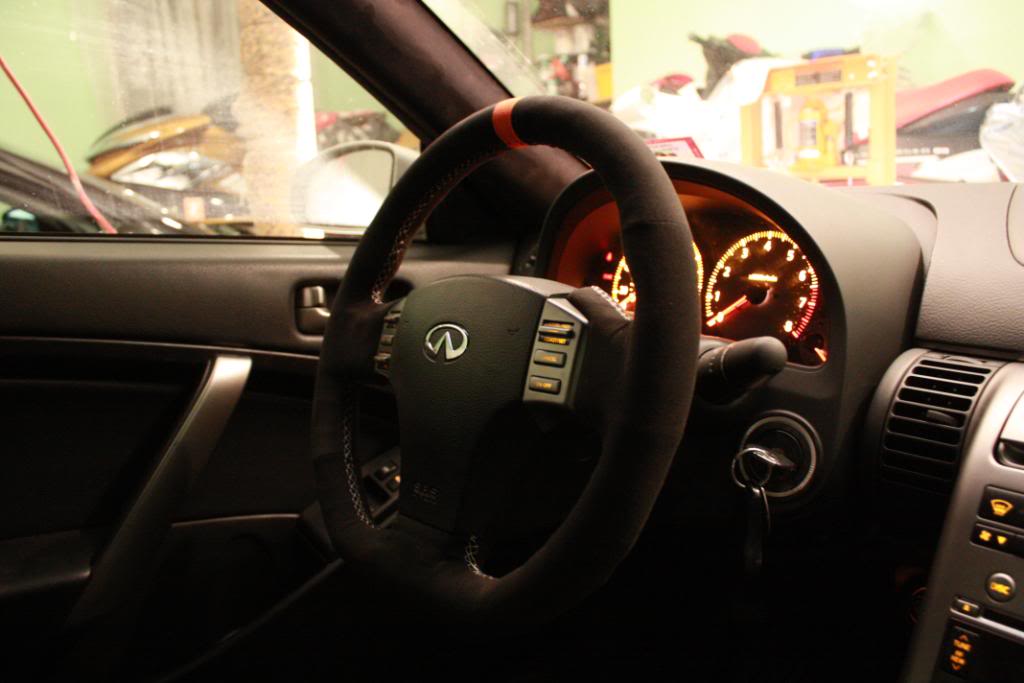
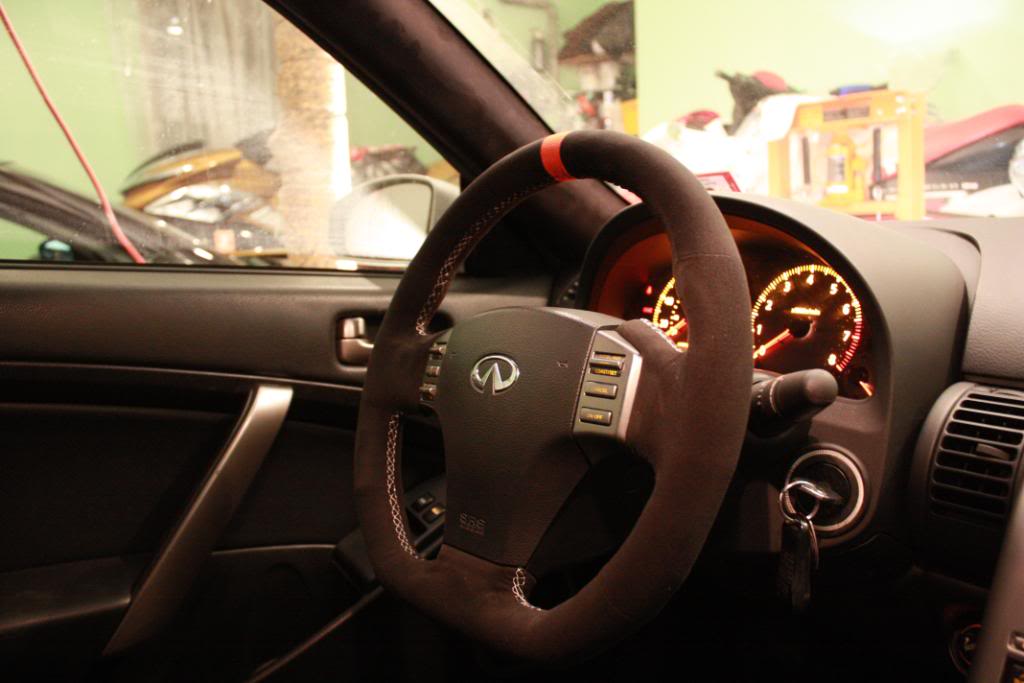
Edit: Here are the final installed pics:
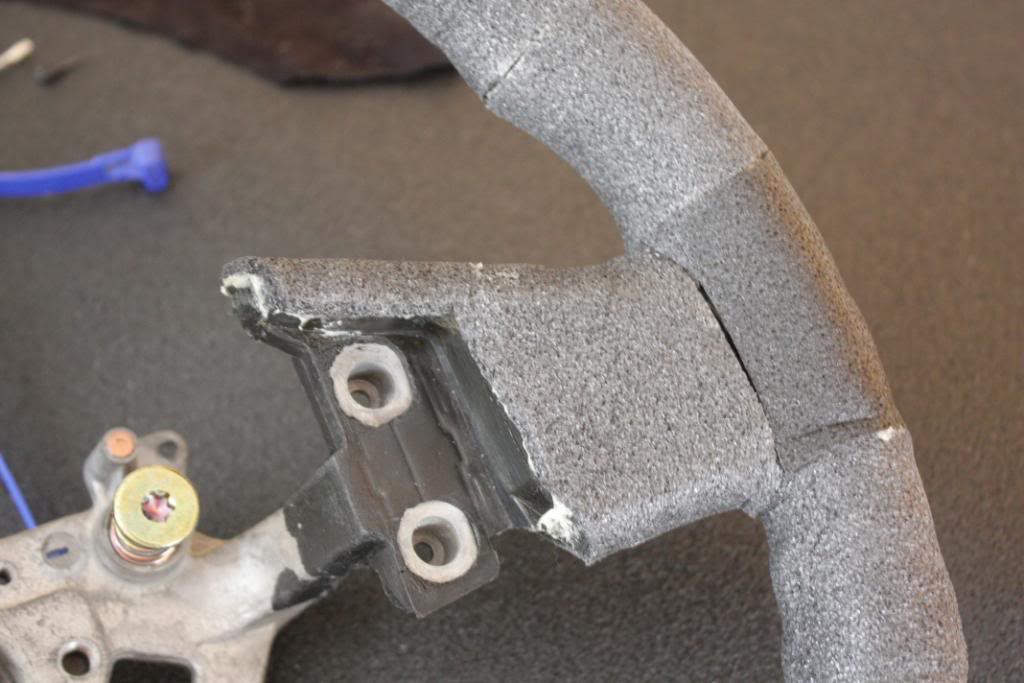
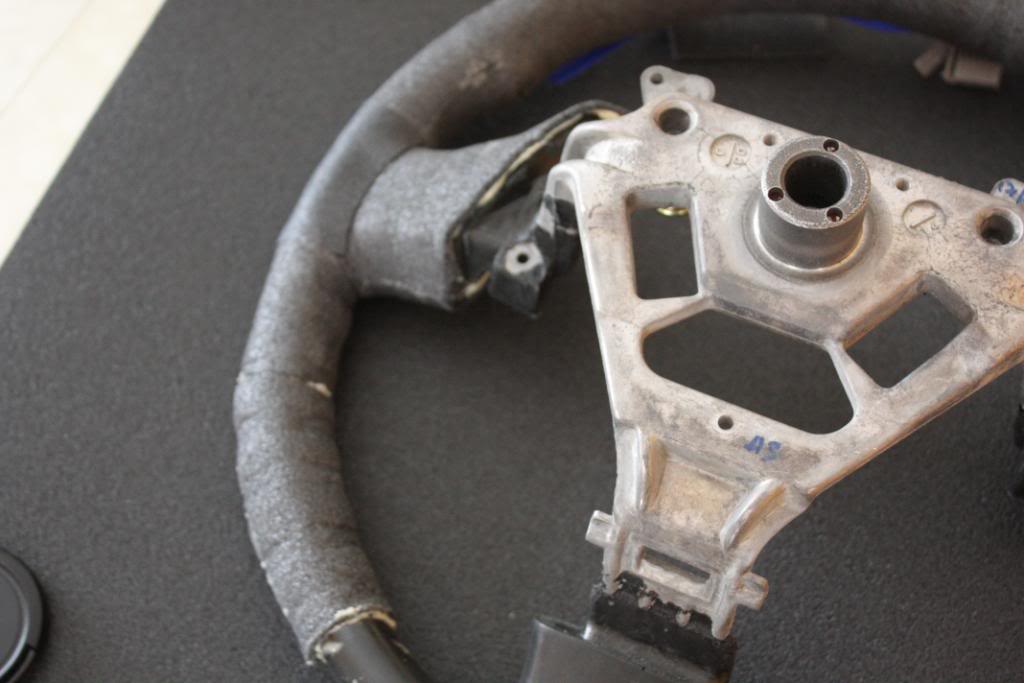
1st thing I did was cut of the bottom. I wasn't fully satisfied after this pic so I went in and cut off some more to make the wheel even more "flat bottom-ish". Btw the inner band is some heavy duty steel so you need powertools to cut it off...a dremel will not do.
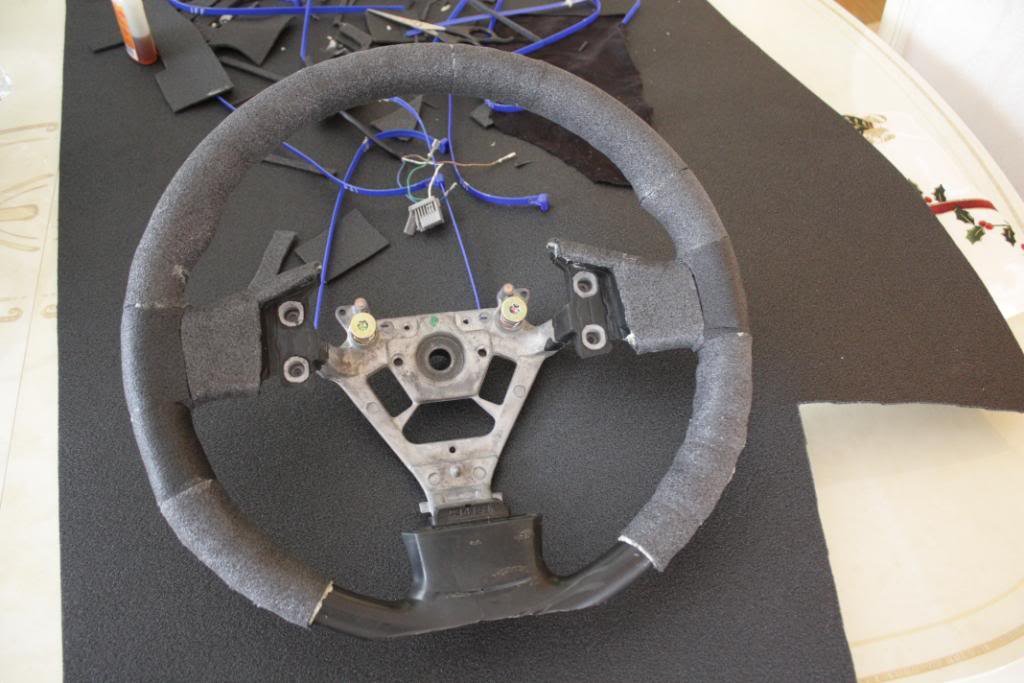
Once I was satisfied with the bottom I completed covering the thing in some high density 1/8 thickness foam. I at first though it might not be enough but 1/8 inch is definitely enough looking at the completed wheel. The foam was glued on with gorilla glue and I used zip ties to hold the foam while the glue dried.
.
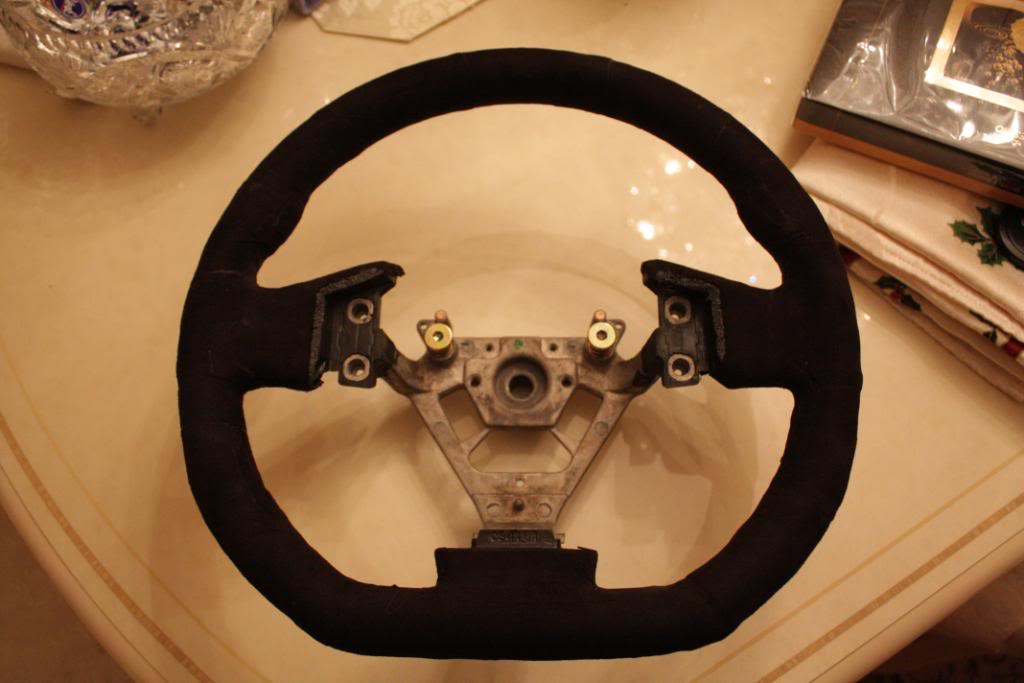
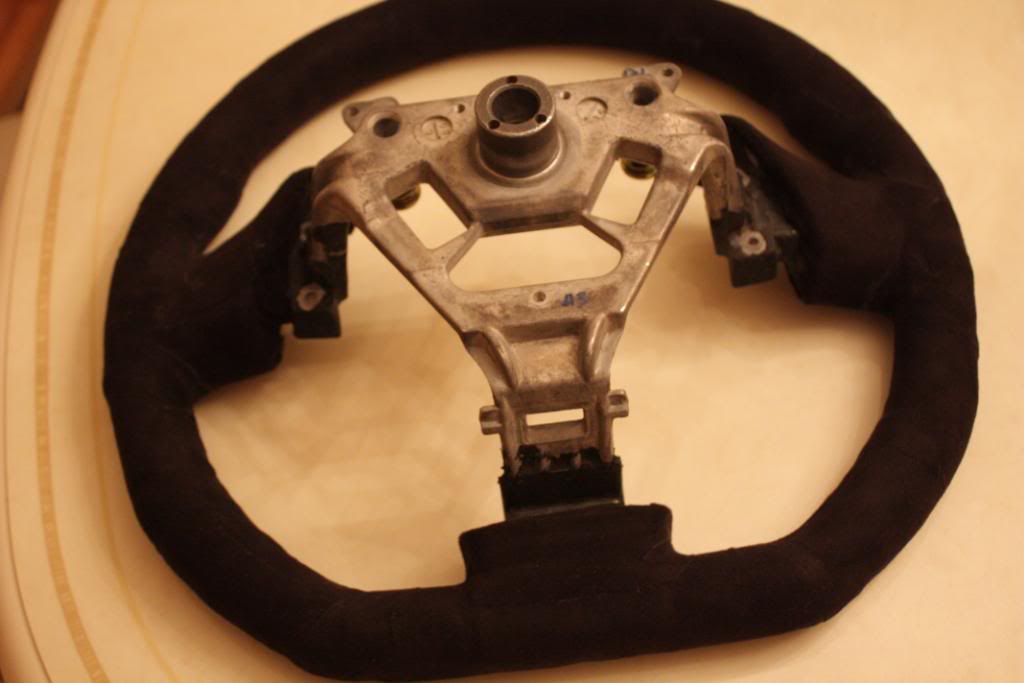
Next I had a good amount of el cheapo (not a real brand btw lol) faux suede that I had from previously doing my headliner and pillars that I used to cover the foam. You sort of have to do this to cover up the seams of the uneven foam.
.

.
Here's an in process shot of what the orange suede looks like on the black wheel:
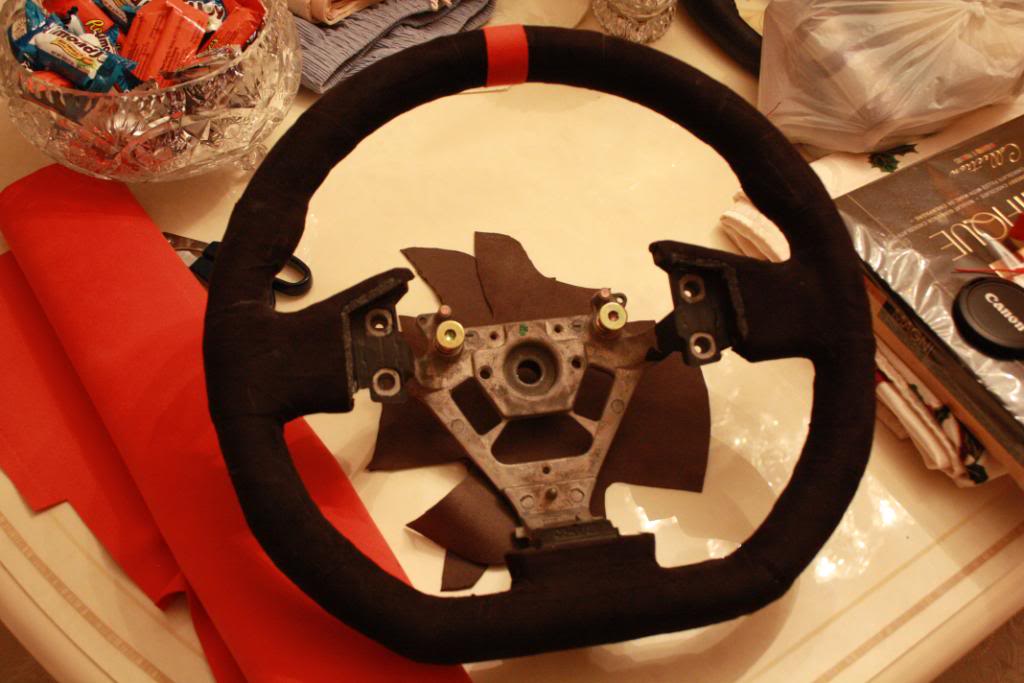
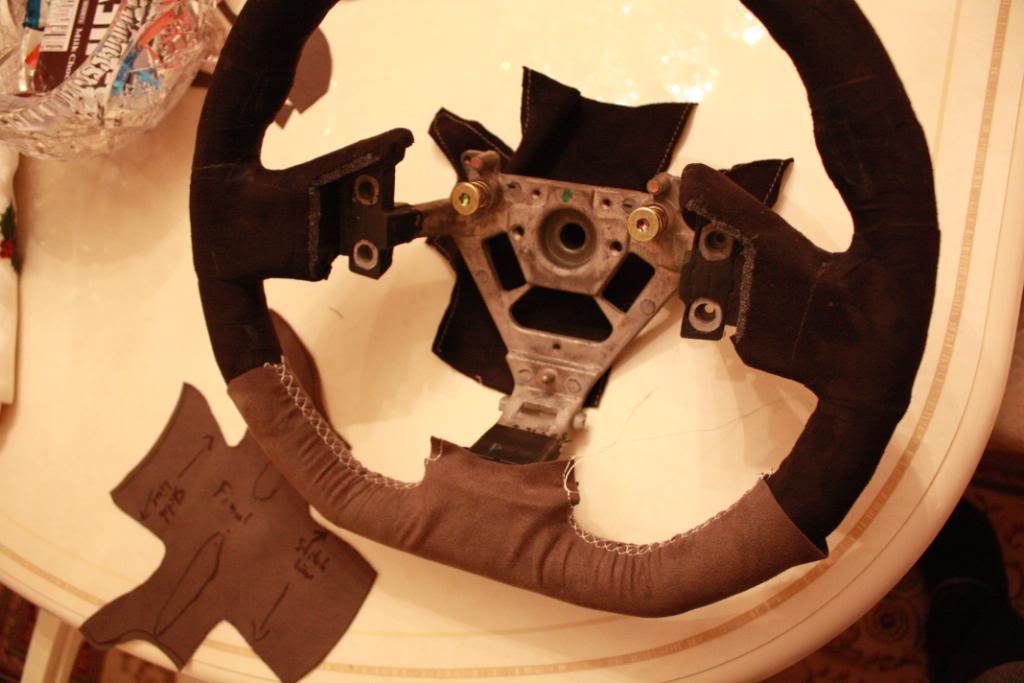
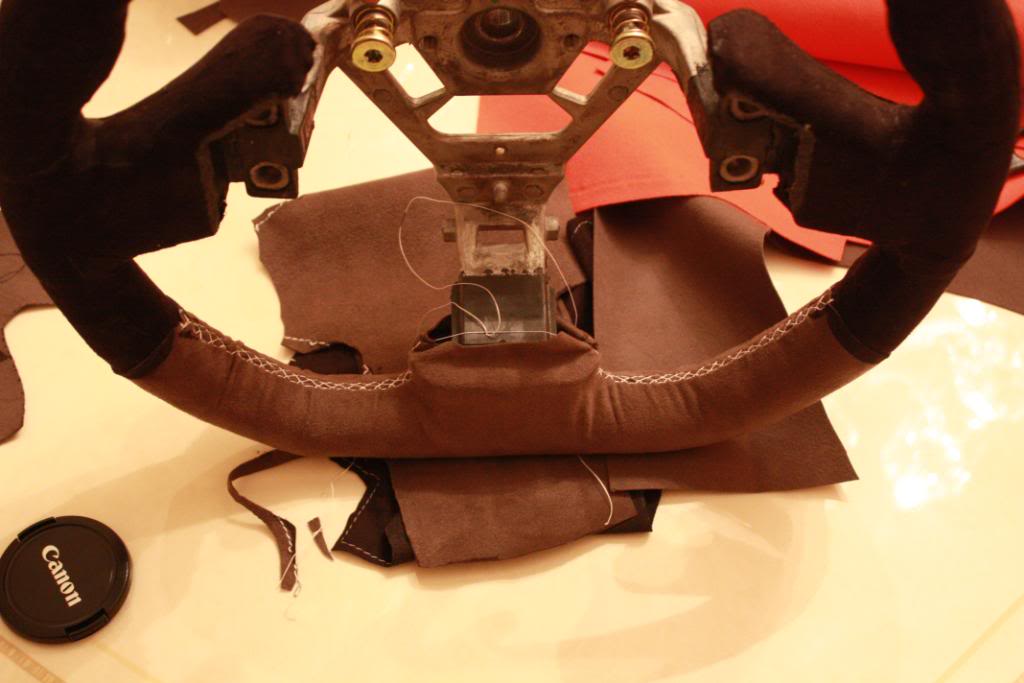
Next I had some spare gray suede lying around that I used to cut out templates and practice stitch the pieces onto the wheel. The templetes were based on the old leather wheel cover which I cut apart and used to make new suede pieces. These didn't fit very well at first due to the extra foam but every new practice template got me closer...and there were quite a few practice templetes....this was probably one of the more frustrating parts of the process.
.
.
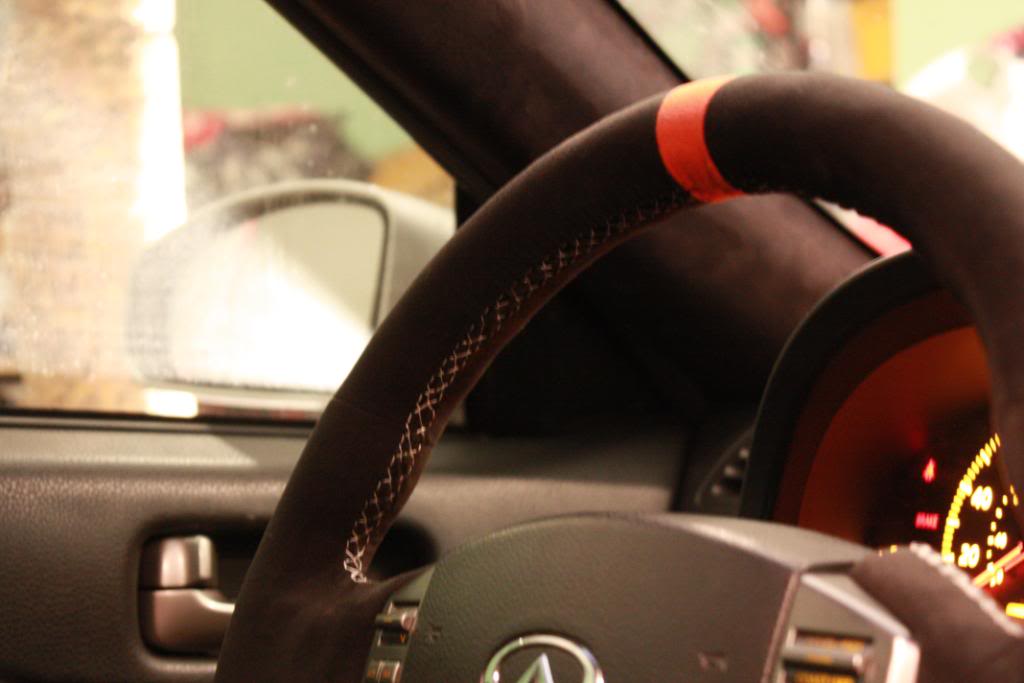
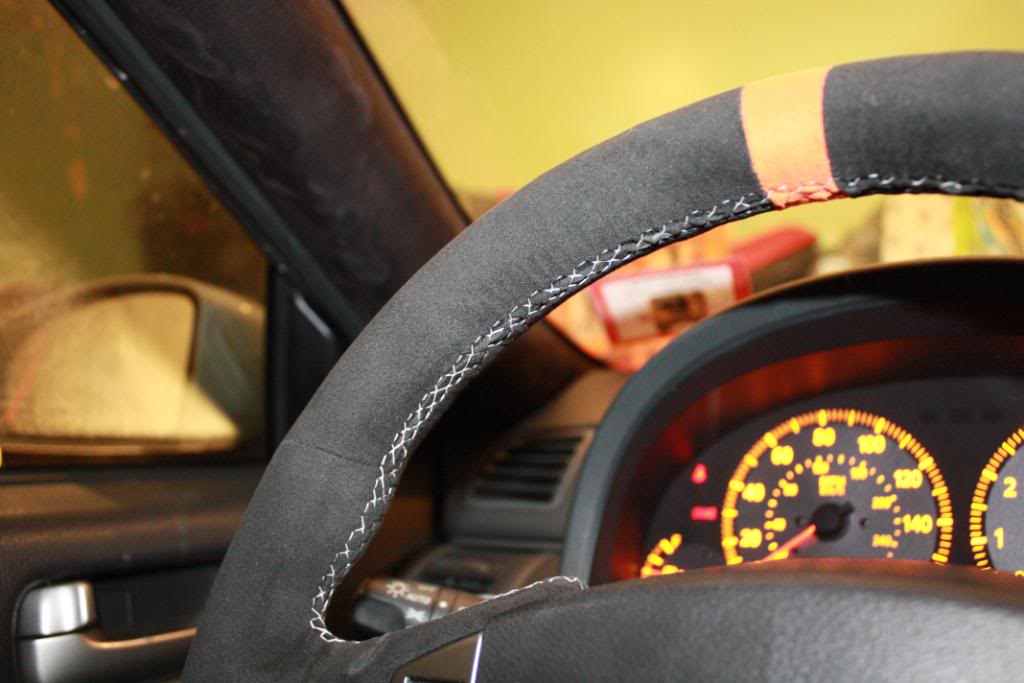
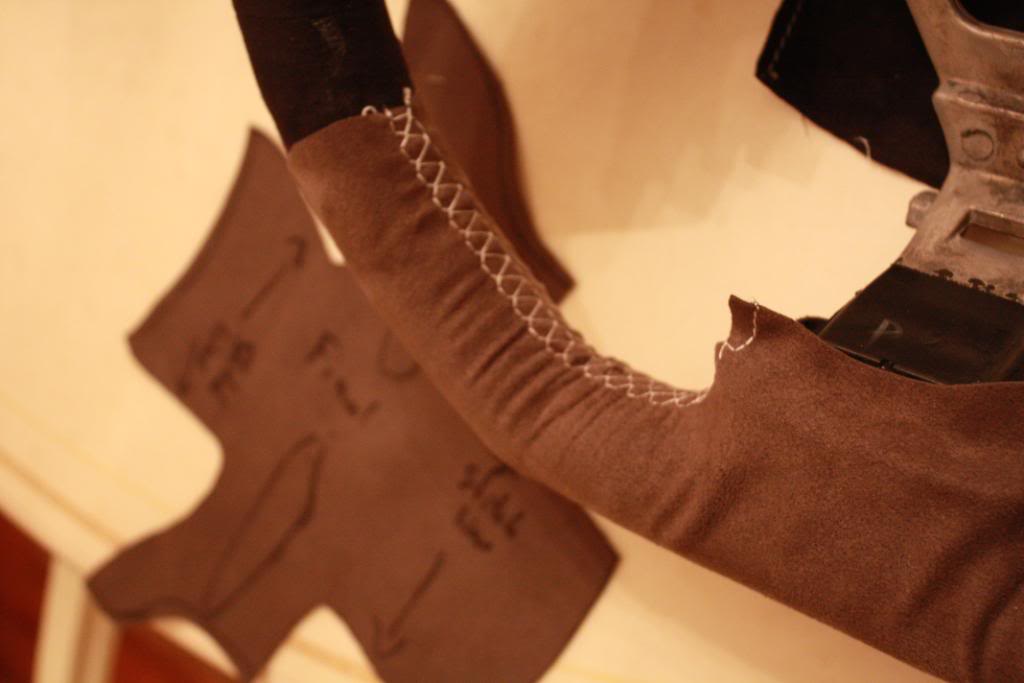
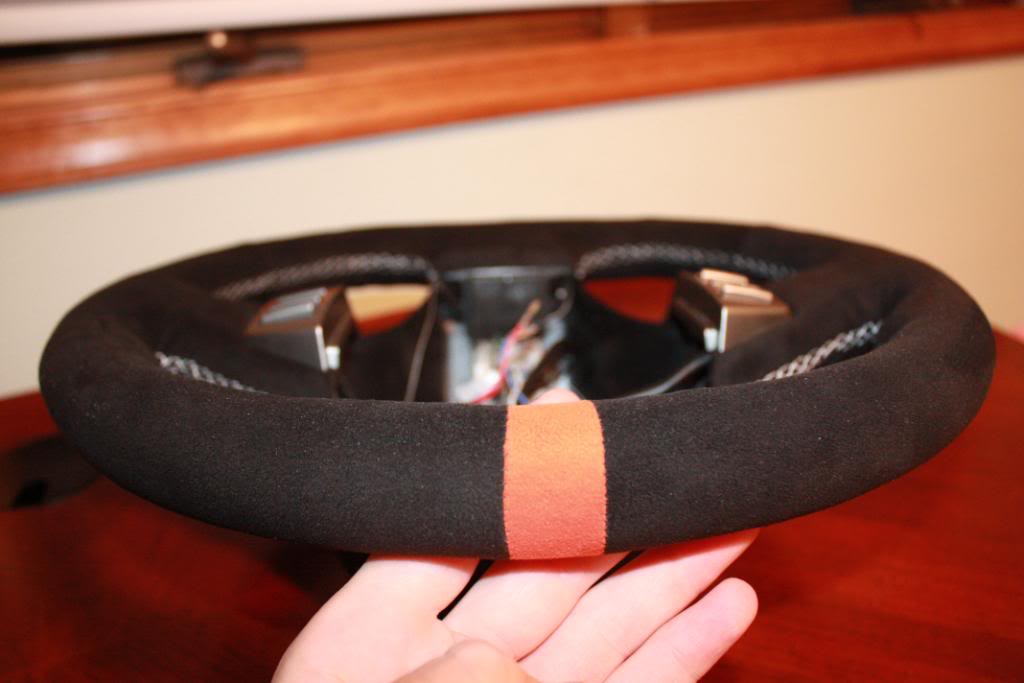
The stitch pattern I used was pretty simple. It essentially involved two parallel lines done with the sewing machine and then zig zagged together freehand with a needle and thread. If anyone here attempts this DO NOT USE COTTON THREAD, its wayyy too weak. I used nylon thread (0.28mm diameter) which you can pick up at the bead neckless / bracelet isle at a local michaels or m.c. moore. Btw its a really gay isle so try not to be seen ...just saying.
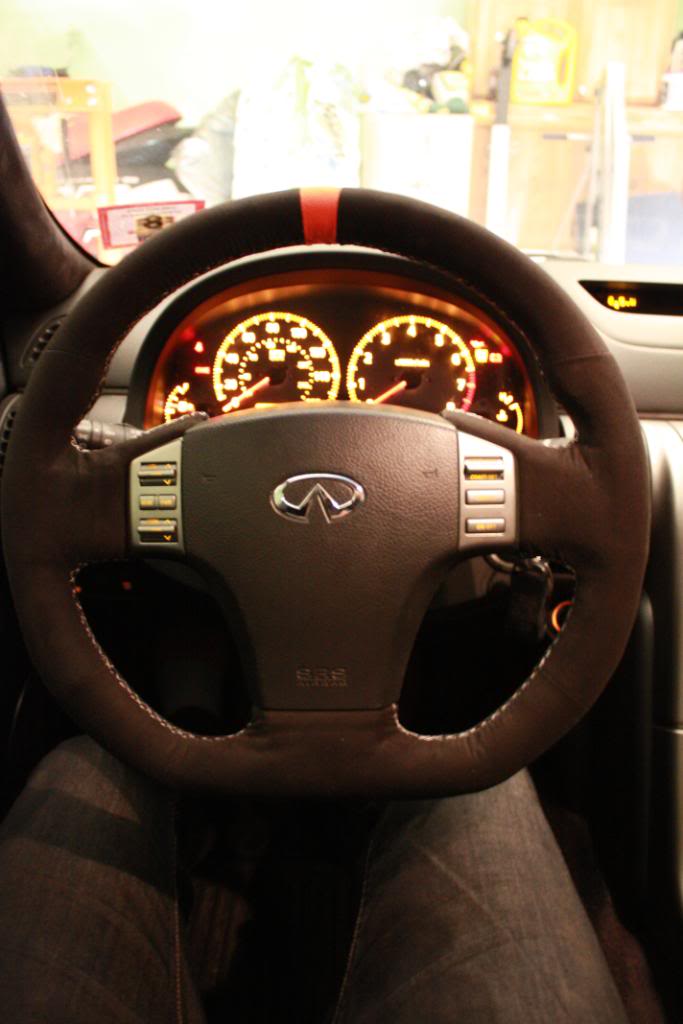
Once the templetes worked out and I had a good idea of what Im doing I cut out the real alcantara, sewed in the stich lines and began threading. I however quickly realized that the sewing machine doesn't necessarily always make equally spaced patterns so you end up with a few too many loops on one side or the other, to avoid having things miss align, like for example a bright orange ring at the top of the wheel you need to count exactly how many loops there are on each side of the stitch line so that if necessary you can skip a loop or two here and there to get things to line up. Took me a good while to figure that one out and if anyone here needs a better explanation just ask...believe me that its an important piece of the puzzle.
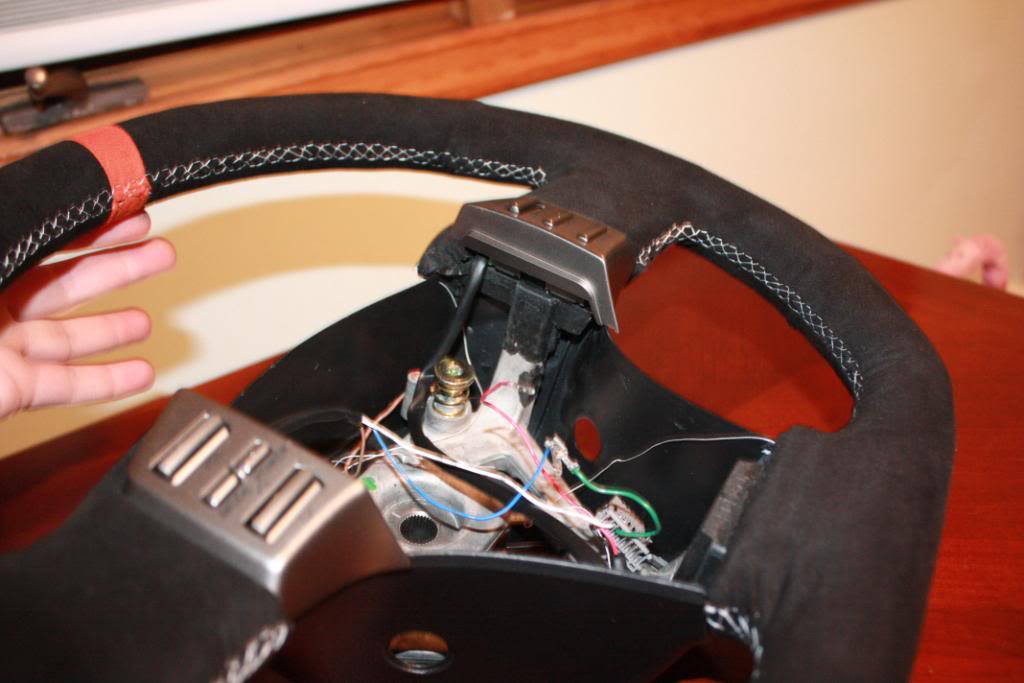
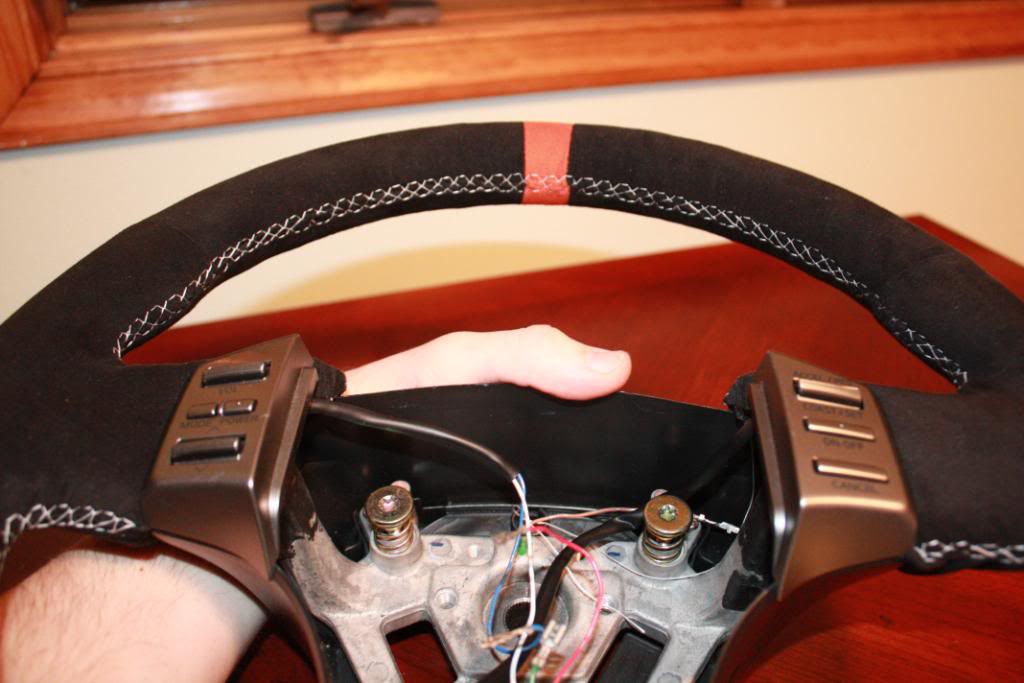
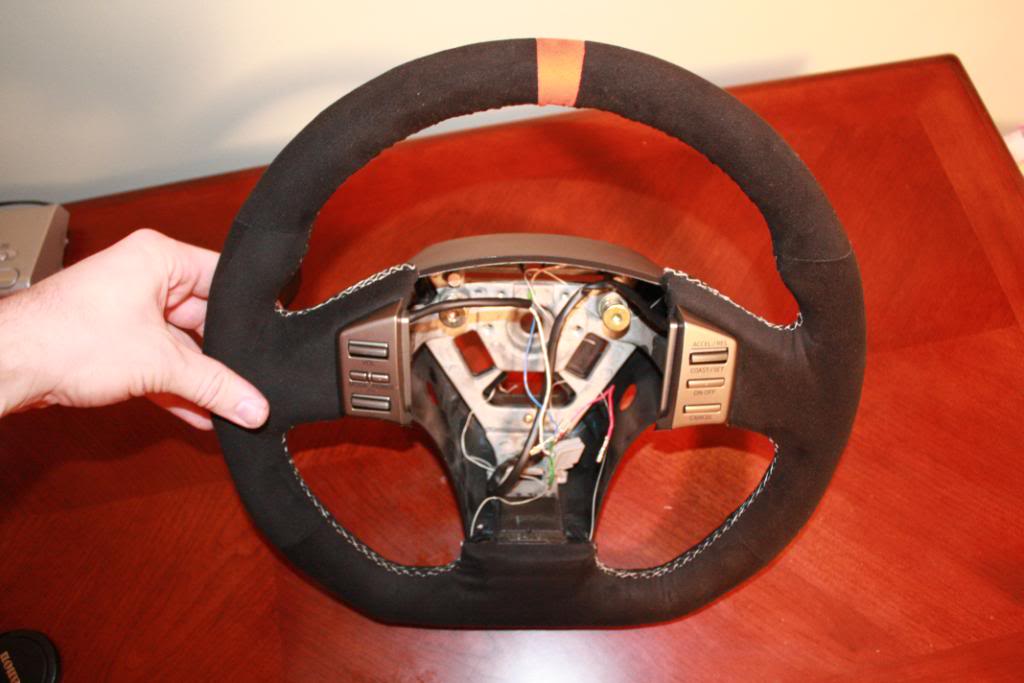
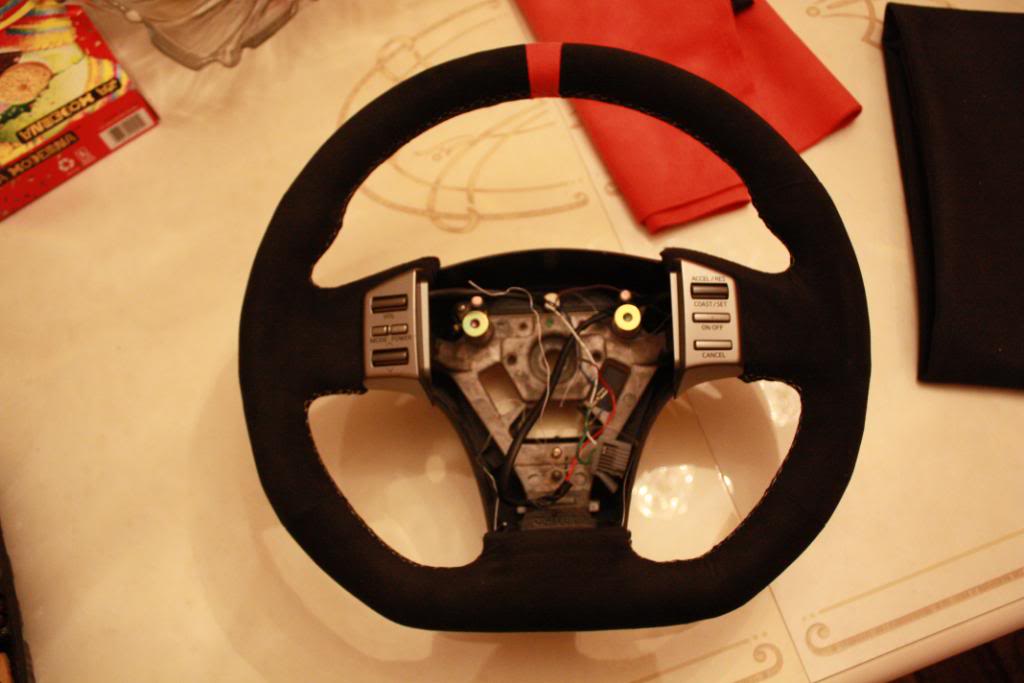
The final result with the genuine Alcantara and the Sensuede suede stripe should end up looking like this:
.
.
.
Overall Im very satisfied, but would I do it again...probably not even though Ive said that about almost every single mod to my car

.
I'll update the thread with in car pics this weekend and also if anyone asks the orange stripe is actually a lil more "orange" than the pics show I'm just too lazy to set up the camera.
Cheers,
Mario
Edit: Here are the final installed pics:
1st thing I did was cut of the bottom. I wasn't fully satisfied after this pic so I went in and cut off some more to make the wheel even more "flat bottom-ish". Btw the inner band is some heavy duty steel so you need powertools to cut it off...a dremel will not do.
Once I was satisfied with the bottom I completed covering the thing in some high density 1/8 thickness foam. I at first though it might not be enough but 1/8 inch is definitely enough looking at the completed wheel. The foam was glued on with gorilla glue and I used zip ties to hold the foam while the glue dried.
.
Next I had a good amount of el cheapo (not a real brand btw lol) faux suede that I had from previously doing my headliner and pillars that I used to cover the foam. You sort of have to do this to cover up the seams of the uneven foam.
.
.
Here's an in process shot of what the orange suede looks like on the black wheel:
Next I had some spare gray suede lying around that I used to cut out templates and practice stitch the pieces onto the wheel. The templetes were based on the old leather wheel cover which I cut apart and used to make new suede pieces. These didn't fit very well at first due to the extra foam but every new practice template got me closer...and there were quite a few practice templetes....this was probably one of the more frustrating parts of the process.
.
.
The stitch pattern I used was pretty simple. It essentially involved two parallel lines done with the sewing machine and then zig zagged together freehand with a needle and thread. If anyone here attempts this DO NOT USE COTTON THREAD, its wayyy too weak. I used nylon thread (0.28mm diameter) which you can pick up at the bead neckless / bracelet isle at a local michaels or m.c. moore. Btw its a really gay isle so try not to be seen ...just saying.
Once the templetes worked out and I had a good idea of what Im doing I cut out the real alcantara, sewed in the stich lines and began threading. I however quickly realized that the sewing machine doesn't necessarily always make equally spaced patterns so you end up with a few too many loops on one side or the other, to avoid having things miss align, like for example a bright orange ring at the top of the wheel you need to count exactly how many loops there are on each side of the stitch line so that if necessary you can skip a loop or two here and there to get things to line up. Took me a good while to figure that one out and if anyone here needs a better explanation just ask...believe me that its an important piece of the puzzle.
The final result with the genuine Alcantara and the Sensuede suede stripe should end up looking like this:
.
.
.
Overall Im very satisfied, but would I do it again...probably not even though Ive said that about almost every single mod to my car
.
I'll update the thread with in car pics this weekend and also if anyone asks the orange stripe is actually a lil more "orange" than the pics show I'm just too lazy to set up the camera.
Cheers,
Mario
Last edited by Row2k; Mar 4, 2015 at 04:51 PM.


Thanks! I'm going to use the updated light up controls that I have on my other steering wheel. The orange LEDs should work nicely with the orange stripe


