
Redid my headlights


Thread Starter
|
Registered User
Joined: Jan 2011
Posts: 157
Likes: 0
Redid my headlights
Ok I took the whole weekend to do this. Removing that tint was a complete pain in the *** and took the most time. If it wasn't for that tint, I would have done the whole thing in a few hours.
Ok here's the pics:
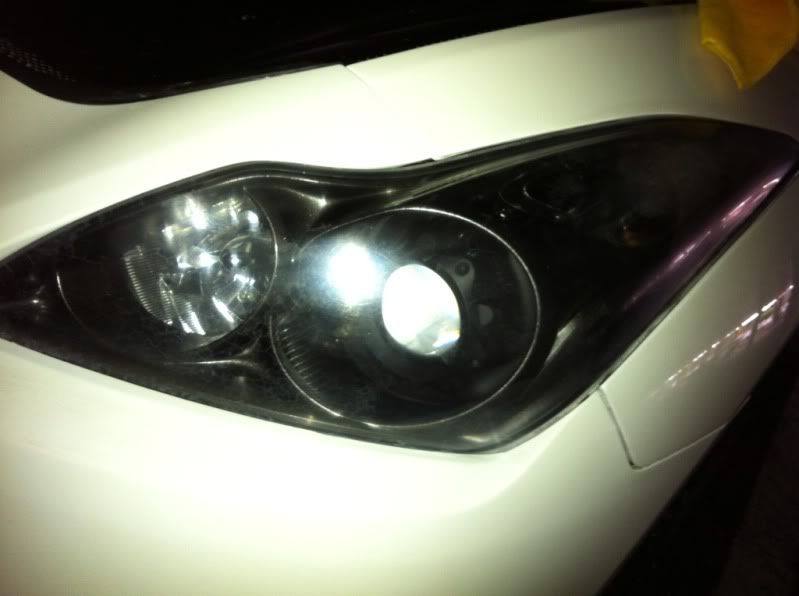
This is how it looked like.
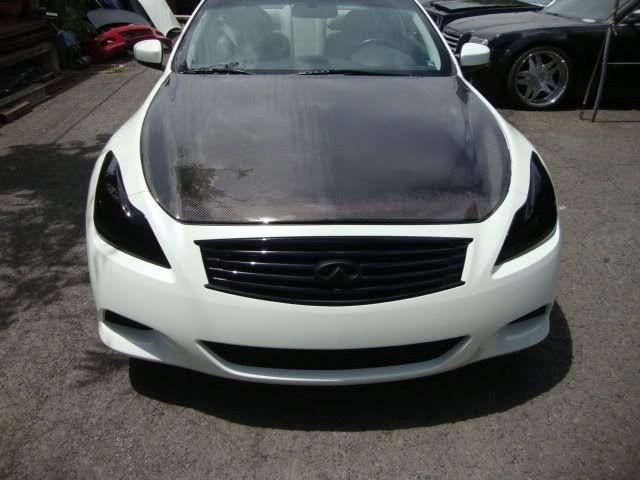
I did not notice how much light output was affected until about two weeks ago when I drove a 2011 sedan loaner. That's when I realized I have to fix it.
Removing tint with laquer thinner. This section took about half an hour and lots of elbow grease.
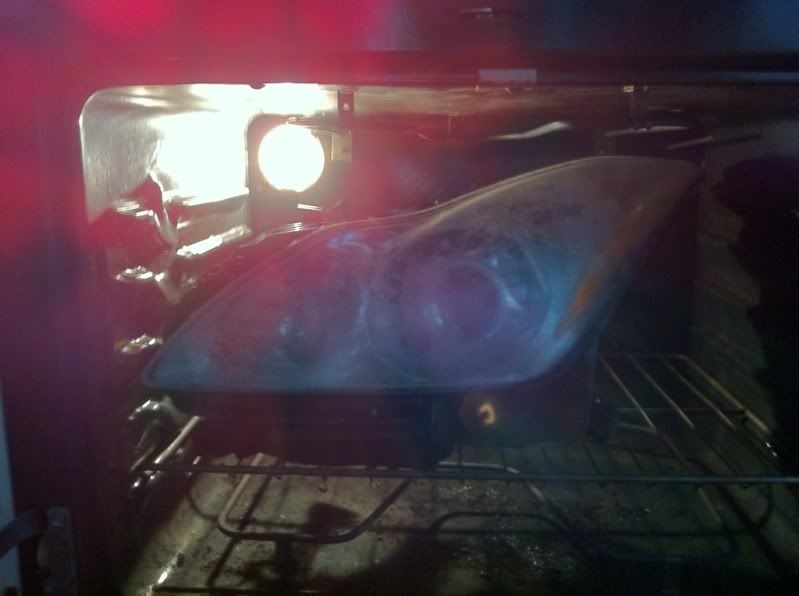
What's for dinner? Roasted headlight.
Tint removed and sanded.
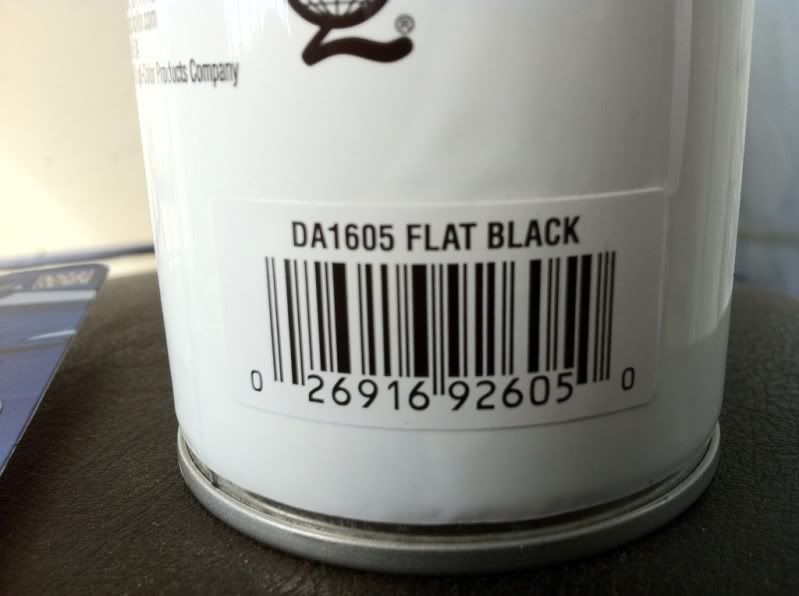
Housings painted. Headlight bezel is flat black and housings I painted them with rust oleum black night metallic paint.
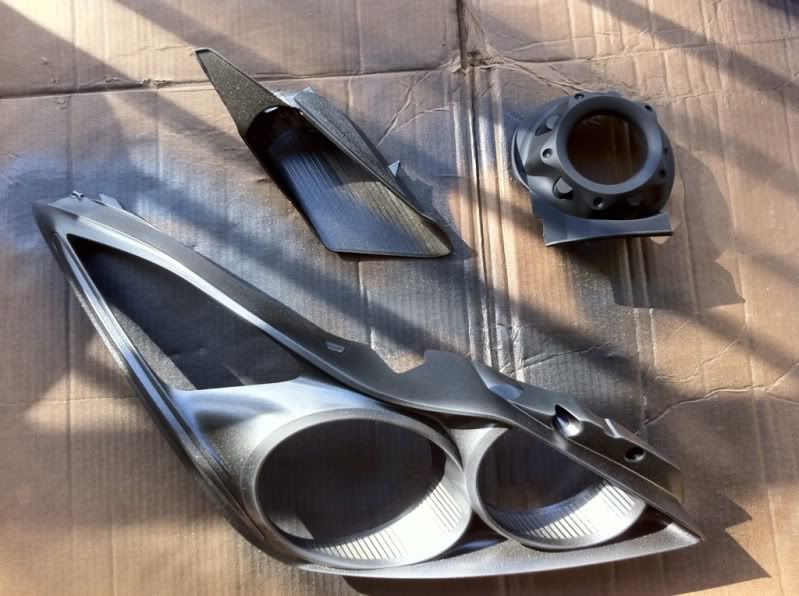
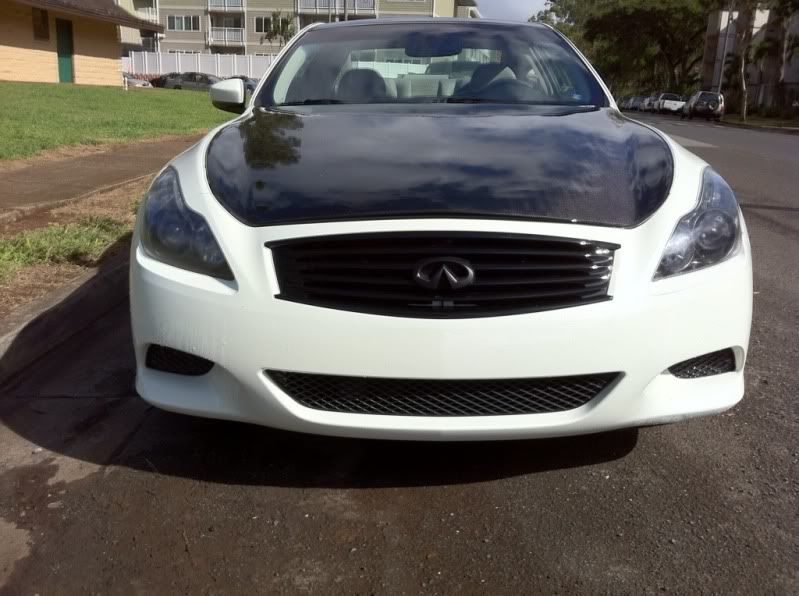
Finished work.

Paint used:

The headlights still need some more restoring work. I used 1000, and 2000 grit sand paper and wet sanded it. I'm gonna try 600 and 800 and the use the 1000 and 2000.
And of course after all this work, some ******* breaks my driver side mirror. Haters.

This happened last night at the waimalu shopping center parking lot. Not only the mirror was busted, but whoever broke it took the time to disconnect the plug harness and fly the mirror away. I'm not sure if this was random or if there's someone hating. A few weeks ago my car got spat on at the waikele parking lot near chilis. People suck big time and I hope karma gets whoever did that BIG time.
Which brings me to think that I should get rid of the CF parts and just put it back to stop. So if someone has an IP G37 and would like a seibon hood, trunk + spoiler (over $2500 worth) let me know and I'll do a swap.
Ok here's the pics:
This is how it looked like.
I did not notice how much light output was affected until about two weeks ago when I drove a 2011 sedan loaner. That's when I realized I have to fix it.
Removing tint with laquer thinner. This section took about half an hour and lots of elbow grease.
What's for dinner? Roasted headlight.
Tint removed and sanded.
Housings painted. Headlight bezel is flat black and housings I painted them with rust oleum black night metallic paint.
Finished work.
Paint used:
The headlights still need some more restoring work. I used 1000, and 2000 grit sand paper and wet sanded it. I'm gonna try 600 and 800 and the use the 1000 and 2000.
And of course after all this work, some ******* breaks my driver side mirror. Haters.
This happened last night at the waimalu shopping center parking lot. Not only the mirror was busted, but whoever broke it took the time to disconnect the plug harness and fly the mirror away. I'm not sure if this was random or if there's someone hating. A few weeks ago my car got spat on at the waikele parking lot near chilis. People suck big time and I hope karma gets whoever did that BIG time.
Which brings me to think that I should get rid of the CF parts and just put it back to stop. So if someone has an IP G37 and would like a seibon hood, trunk + spoiler (over $2500 worth) let me know and I'll do a swap.

OH WOW, i'm sorry to say bro but your headlights are fawked!!!! NEVER use lacquer or paint thinner on the headlights!
I learned the hard way myself and had to throw a set away, trust me man, I've painted/repaired over 50 sets of G35/350z/370z lights last year so I know what I'm talking about....
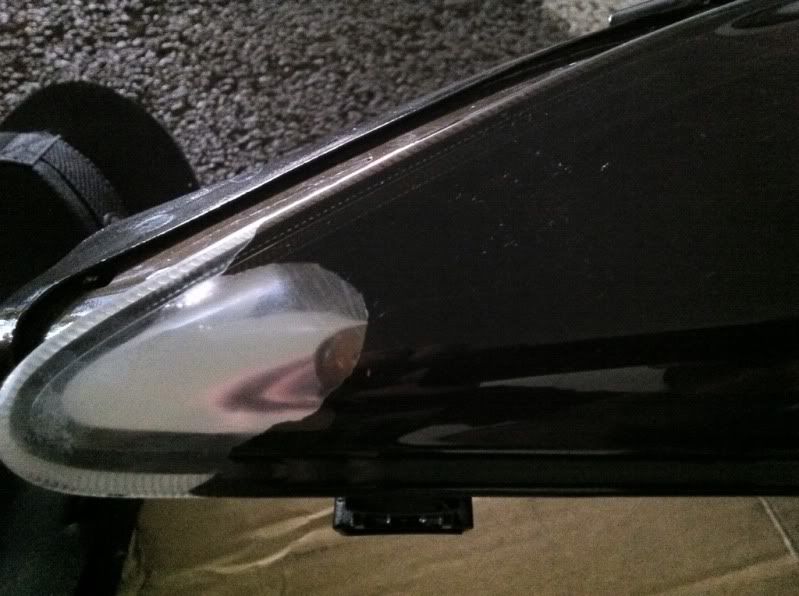
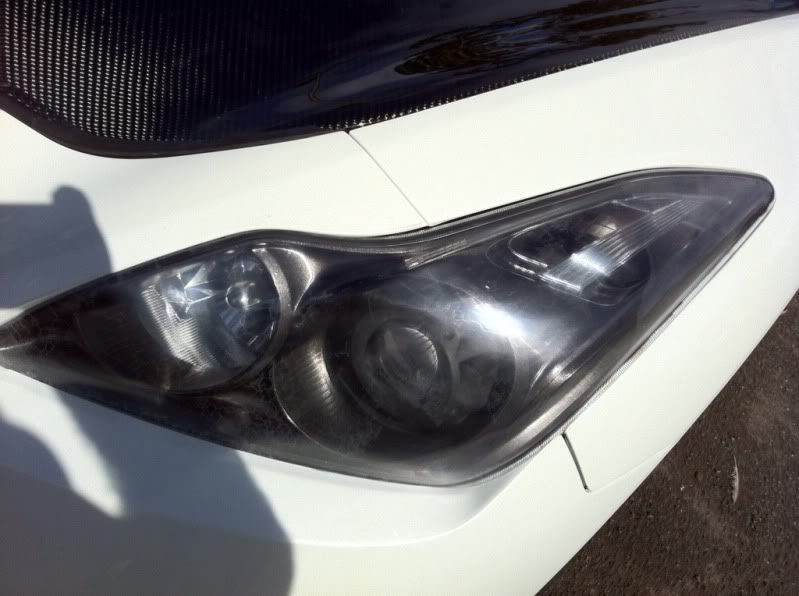
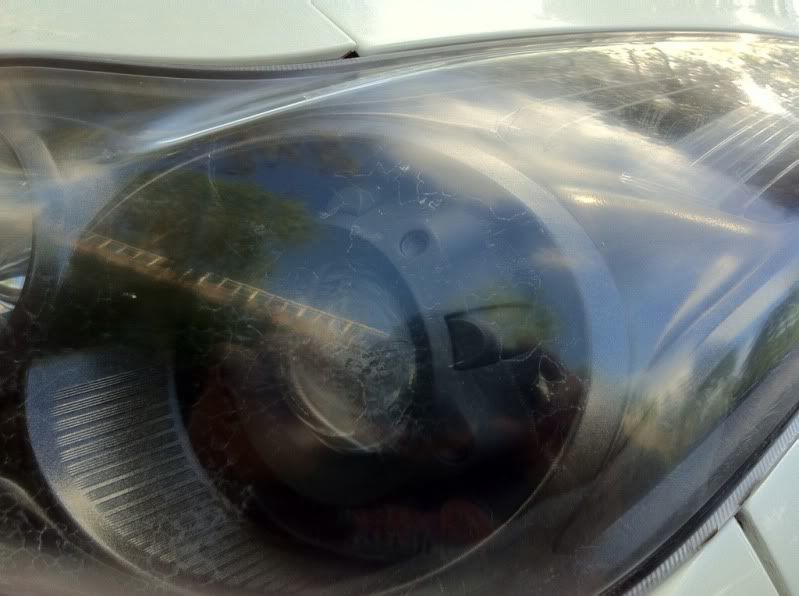
you see the cracking in the plastic there, in this picture here, that's the lacquer thinner that got through and, it's only gonna get worse from here... this is what happened to my own headlights a few years back that i ended up throwing away... i was removing tint from them as well
the inside side of the lens is twice as sensitive as well because of the touchy heat coating..
I learned the hard way myself and had to throw a set away, trust me man, I've painted/repaired over 50 sets of G35/350z/370z lights last year so I know what I'm talking about....
you see the cracking in the plastic there, in this picture here, that's the lacquer thinner that got through and, it's only gonna get worse from here... this is what happened to my own headlights a few years back that i ended up throwing away... i was removing tint from them as well
the inside side of the lens is twice as sensitive as well because of the touchy heat coating..
Last edited by Adon; Dec 19, 2011 at 09:56 PM.
Thread Starter
|
Registered User
Joined: Jan 2011
Posts: 157
Likes: 0
Well I took the risk. I knew there was a chance I could ruin them but I gues I'll be buying some headlights in the next few months LOL! Couldn't think of another way of removing the tint. I tried to just sand it down but it was close to impossible.

Registered User
Joined: Mar 2011
Posts: 164
Likes: 1
From: Hawaii
heat gun or blow dryer and 3m adhesive remover.... and as for the black. black primer is perfect for headlights cause it gives it that professional flat black look that headlight housings are. when theres a glossy finish in the headlights, it looks tacky in my opinion. but for the record, your headlights look 10x better now then before.
Thread Starter
|
Registered User
Joined: Jan 2011
Posts: 157
Likes: 0
It came out not as glossy as I expected it. I put 3 coats but I'm happy with the end result. I like the contrast the flat black headlight bulb bezel gives. But yeah I agree, it looks much better and it's much brighter too! Even though the lenses are ruined, it is still safer than with that dark tint.
It's true, the inside has a special coating and it started peeling on a G37 headlight I was doing. All of it was buffed out in the end. Now the headlights are reseated but it's really cracked and moisture is passing through.
Thread Starter
|
Registered User
Joined: Jan 2011
Posts: 157
Likes: 0
Trending Topics
do the insides of the 06 projectors have a special coating as well? i was planning on using my Mothers headlight restoration kit to buff out some imperfections on my lens
Last edited by redpearl99; Dec 24, 2011 at 03:42 PM.

Neeto, wish you the best of luck bro 
just wanted to share a few of my experiences as well hopefully it helps some of you guys reading who wanna do lights, trying to be helpful
RedPearl yea they all have this heat coating on the inside, so be careful!
The only thing you should do to the inside of the lens is just run normal temperature water over it just to get all the dust out, never do anything else to it like touch it with a towel or your hand. I mean you can do that very lightly and it would be ok but still risky in my opinion.
I remember doing a set of lights that was already damaged prior to me working on them, and they were cracked tabs with holes which was allowing condensation in, and just that temperature change alone inside the headlight from hot to cold started completely tearing the coating apart.
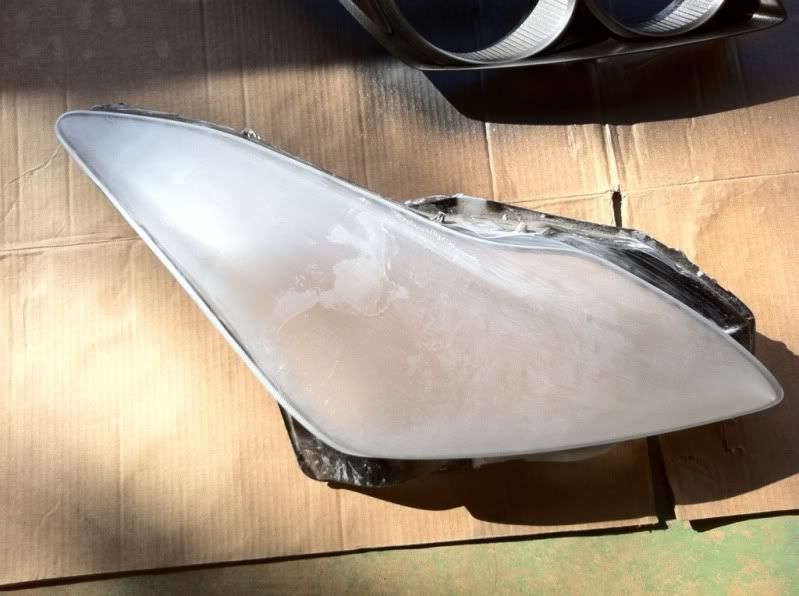
And then there was another set where I have no idea what happened the coating just started peeling for no reason, so knowing the lens was a loss I just kept rubbing it down to see if I could clean it all fully off, I spent days and could not do it however I tried, this is what I was left with.. you can see the frosty part there is the coating still left, and the clear areas is where I scrubbed it off


and a lot of people don't use high temperature/heat resistant paint.....
let me show you this, I have always used heat paint myself and even in some cases it's not enough, take a look at these little bumps which is the heat from the projector melting literally right through this layer of heat resistant paint and melting the plastic underneath... one should use MANY layers of heat resistant paint for proper results


just wanted to share a few of my experiences as well hopefully it helps some of you guys reading who wanna do lights, trying to be helpful
RedPearl yea they all have this heat coating on the inside, so be careful!
The only thing you should do to the inside of the lens is just run normal temperature water over it just to get all the dust out, never do anything else to it like touch it with a towel or your hand. I mean you can do that very lightly and it would be ok but still risky in my opinion.
I remember doing a set of lights that was already damaged prior to me working on them, and they were cracked tabs with holes which was allowing condensation in, and just that temperature change alone inside the headlight from hot to cold started completely tearing the coating apart.
And then there was another set where I have no idea what happened the coating just started peeling for no reason, so knowing the lens was a loss I just kept rubbing it down to see if I could clean it all fully off, I spent days and could not do it however I tried, this is what I was left with.. you can see the frosty part there is the coating still left, and the clear areas is where I scrubbed it off
and a lot of people don't use high temperature/heat resistant paint.....
let me show you this, I have always used heat paint myself and even in some cases it's not enough, take a look at these little bumps which is the heat from the projector melting literally right through this layer of heat resistant paint and melting the plastic underneath... one should use MANY layers of heat resistant paint for proper results
Thread Starter
|
Registered User
Joined: Jan 2011
Posts: 157
Likes: 0
Thanks for the pictures! Maybe I'll give you my lights to see if you can save them. I never touched the inside of the lens because I didn't think it was necessary, I used the thinner only on the outside.

Registered User
Joined: Oct 2010
Posts: 690
Likes: 23
From: Denver
Im getting ready to paint my housings. Im glad I read this first. I am worried about condensation once I am done. My buddy did his 07 g35x and his get condensation. I will not be happy if this happens.
I like yours now!! looks good from far!
I like yours now!! looks good from far!
condensation is always gonna be a potential issue, but it's a very simple fix anyway, all you do is just open up your headlight bulb tab like you would when changing a lightbulb, no need to take headlight off or anything and just let it evaporate overnight in a warm environment and condensation will disappear... if it's a persistent issue, then a reseal with more silicone is necessary
but I can tell you out of the 50+ set I've done for my local guys here, only 2 sets had condensation issues, one of them the light was damaged in a prior accident so the housing had a hole in it so that was the cause..
And the other one condensation appeared and my buddy took too long to give me the lights for me to reseal them, so what ended up happening the inside of the lens where the water was pooling up ended up getting heated by the projector lens so basically kind of like a boiling water type of deal...
this eventually ate through the inside heat lens coating and it could not be fixed.