
DIY: Custom Single Exhaust Look for Under $100


Thread Starter
|
Registered User
Joined: Apr 2012
Posts: 31
Likes: 1
From: Columbus
sport package coupe, 1JZ swap
DIY: Custom Single Exhaust Look for Under $100
For anyone who is a fan of the single exhaust look but don't want to blow a thousand bucks on a full kit, this is a really easy and cheap way of getting that look, no welding required. You're going to need a universal 11" muffler (I got one from autozone for about $60), a 45˚, 2-1/2" inner diameter elbow, some exhaust sealant, an exhaust strapping kit (also at autozone), an adapter of appropriate proportions to fit the muffler and 45 elbow together, and 3 U-clamps, 2 of which will be 2-1/2" and the third will vary depending on the size of the inlet of the muffler and inner diameter of the adapter.
The first thing you'll need to do is jack up the back of your car to give yourself more room. Once the car is up, take off the stock muffler, then cut the pipe about 2-1/2" behind the flange. Check to see if everything fits right and the muffler is in the right position by sliding all the parts together, sliding the 45 elbow over your cut in the original exhaust piping and holding the muffler up with your jack. Once it looks right, take everything off, put exhaust sealant in all the connections, fit it all back together, put the apparatus back on the exhaust and hold it in place with your jack as you position and tighten the U-clamps. Once everything is tightened to the point where it doesn�t move, take your strapping kit and attach it to the car using one of the heat shield nuts and loop it around the exhaust anywhere you see fit. You may need to cut your bumper a little to make sure the muffler doesn�t hit it. I used a pair of bush shears, nothing fancy. That�s about it. The connection to the original exhaust piping may not be flush but it works.
You may need to use your own methods if you get any other size muffler, but a 45˚ elbow attached to a cut 2-1/2� behind the flange should get you the right angle to get any muffler out the left exhaust cut, just a matter of adding or cutting pipe. It�s a little jankety but it works.
Also: sorry for the lack of in-progress pictures. I had a bunch but then I got a new phone and they didn�t transfer. It�s pretty simple though so it should be easy to figure out anything that might not be clearly explained in the text by a final product picture.
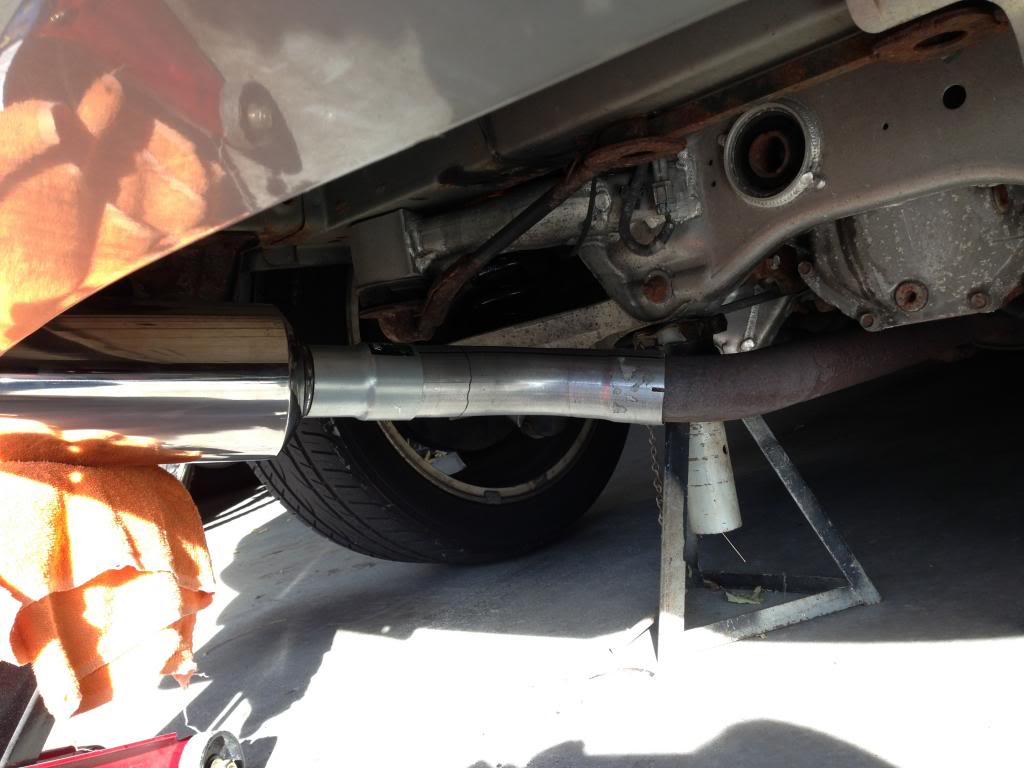
Checking the fitment
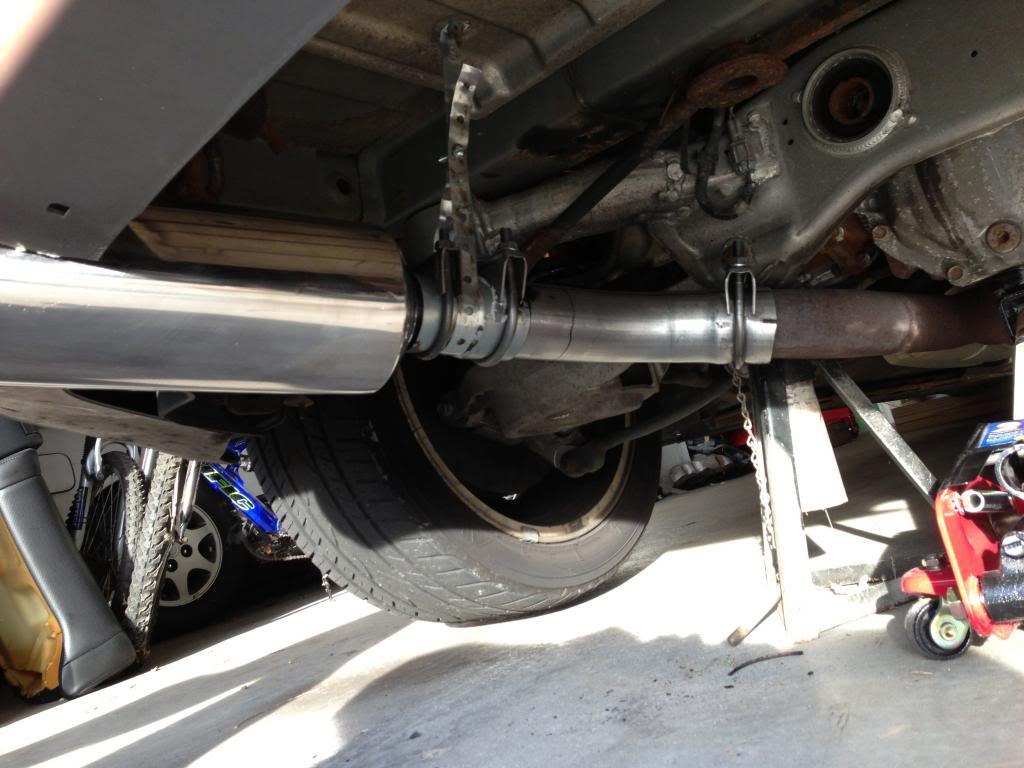
This is how it should look once you're done

You can see where I had to cut the bumper because it was touching. I ended up needing to cut more but I don't have a picture of that.
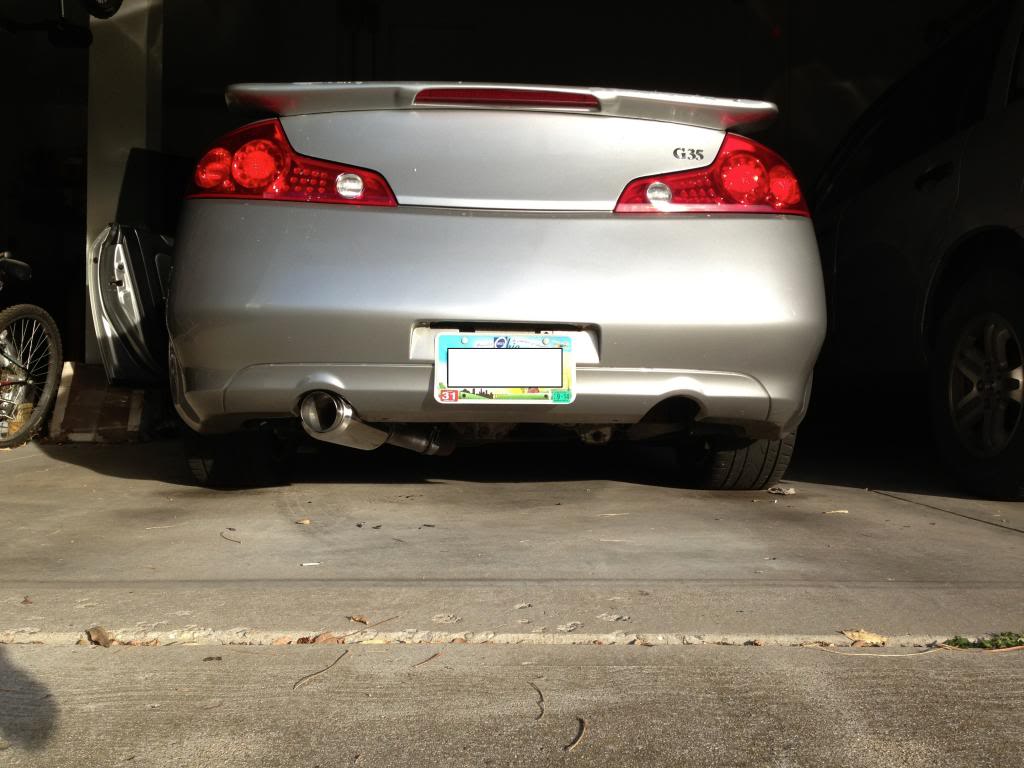
And this is how it looks from the back when you're all done! There you have it. An approximately $80 single exhaust conversion. Now all that's left to do is go seduce some ears wit dat VQ purr
The first thing you'll need to do is jack up the back of your car to give yourself more room. Once the car is up, take off the stock muffler, then cut the pipe about 2-1/2" behind the flange. Check to see if everything fits right and the muffler is in the right position by sliding all the parts together, sliding the 45 elbow over your cut in the original exhaust piping and holding the muffler up with your jack. Once it looks right, take everything off, put exhaust sealant in all the connections, fit it all back together, put the apparatus back on the exhaust and hold it in place with your jack as you position and tighten the U-clamps. Once everything is tightened to the point where it doesn�t move, take your strapping kit and attach it to the car using one of the heat shield nuts and loop it around the exhaust anywhere you see fit. You may need to cut your bumper a little to make sure the muffler doesn�t hit it. I used a pair of bush shears, nothing fancy. That�s about it. The connection to the original exhaust piping may not be flush but it works.
You may need to use your own methods if you get any other size muffler, but a 45˚ elbow attached to a cut 2-1/2� behind the flange should get you the right angle to get any muffler out the left exhaust cut, just a matter of adding or cutting pipe. It�s a little jankety but it works.
Also: sorry for the lack of in-progress pictures. I had a bunch but then I got a new phone and they didn�t transfer. It�s pretty simple though so it should be easy to figure out anything that might not be clearly explained in the text by a final product picture.
Checking the fitment
This is how it should look once you're done
You can see where I had to cut the bumper because it was touching. I ended up needing to cut more but I don't have a picture of that.
And this is how it looks from the back when you're all done! There you have it. An approximately $80 single exhaust conversion. Now all that's left to do is go seduce some ears wit dat VQ purr


well this is pretty bad man, not worth the trouble..you can pick up a 30/40 dollar n1 muffler and pay an exhaust shop what 20 bucks to weld it on...Unfortunately there's been an ongoing trend of cheap mods degrading the brand of class "infiniti"...looked down upon here
Thread Starter
|
Registered User
Joined: Apr 2012
Posts: 31
Likes: 1
From: Columbus
sport package coupe, 1JZ swap
really? man... i didn't know that. i was just trying to do something for myself and i don't know how to weld so i used u clamps. i mean it sounds good at least.
Trending Topics


Thread Starter
|
Registered User
Joined: Apr 2012
Posts: 31
Likes: 1
From: Columbus
sport package coupe, 1JZ swap
theres no rasp. but I get it. my ideas are bad, I'm significantly poorer than everyone here and I should not post things unless they are what everybody else does, are expensive or really hard to do.

I get what you are saying about being different, why not buy a used quality muffler on ebay, pay a muffler shop 30 bucks and call it a day! Sometimes it worth waiting and saving instead of threads like this..