
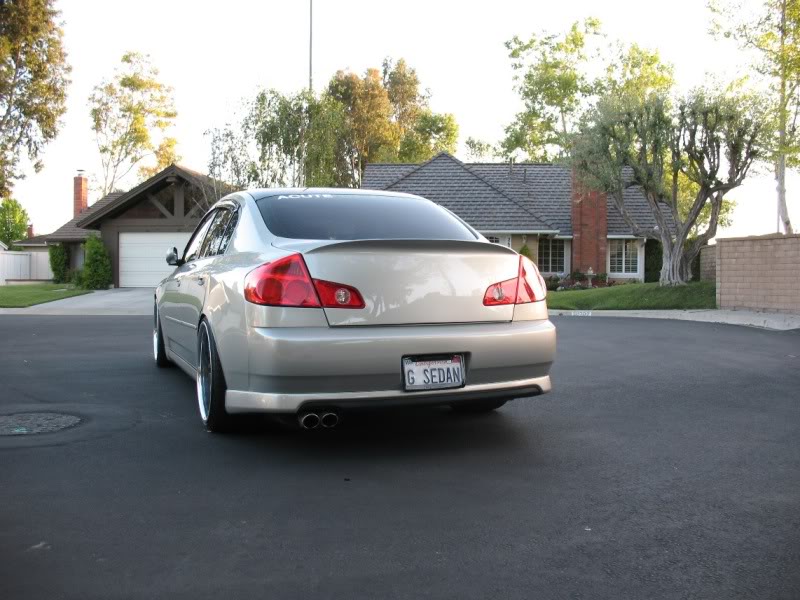
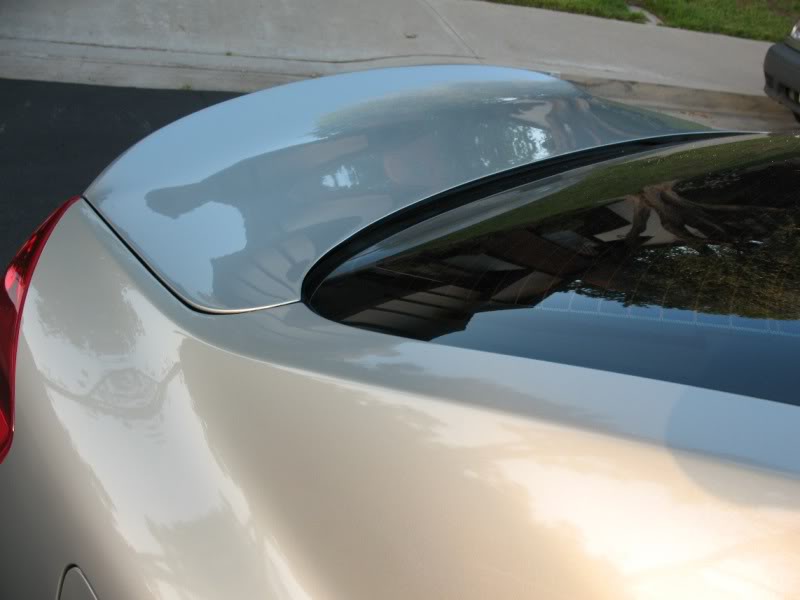
Hikkatadori Sedan Trunk Installed


#32
 04-27-2010, 02:14 AM

#33
04-27-2010, 11:43 PM

 The 2 little plastic circular pieces on the latch, try rotating them counterclockwise, you may find the adjustment you're looking for.
#34
04-27-2010, 11:47 PM
#35
04-28-2010, 12:05 AM
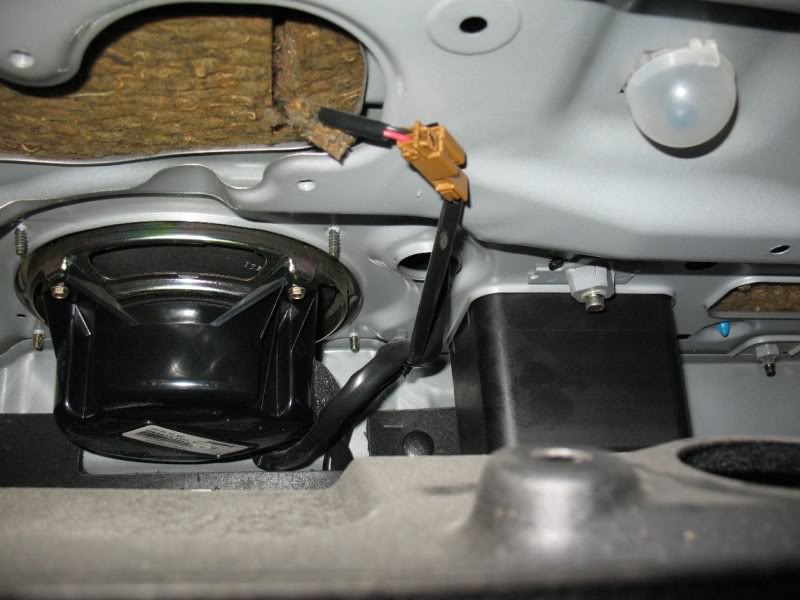
No, there is no adjustment on the latch itself. Make sure though that it's sitting flush and pushed all they way in though. There is a small guide that sticks out the back of the latch that should be sitting inside and pushed back. Sorry, its hard to describe. I think I have a few pics if this doesn't make sense
The adjustment ***** everyone keeps talking about are located on the far right and left of the inside of the trunk. On the lid, you will see two square holes. Not sure if you re-used those adjusters or not on the hd lid.
Try making sure the latch is pushed back like I mentioned before. That may help bring the lid tighter down and align it better.
#36
04-28-2010, 12:21 AM
Chris post a pic, I have no idea what you are talking about regarding that small guide.
Those readjustment kobs actually work? I have them on the lid but they seem like they're just sitting there semi-loosely, dont forsee any good adjustments coming from them.
I believe the latch was pushed all the way back, in fact I wanted to elongate the holes a bit to make um sit further back, but that may f up the alignment. I'm gonna have to work on it a bit.
#37
04-28-2010, 12:44 AM
The ***** do work but I don't think it will in your case as those tend to adjust up. You can make sure they are all the way down though. Loosen the star nut on it and turn the round **** till it meets the star nut. lol...star nut...no idea what it's really called
Here is a pic of the guide I was telling you about. Don't elongate the holes. I think that might mess things up for you. Make sure this guide is all the way back (or is it forward?...you'll get the idea when you see the guide) after you loosen up the bolts.
IMG_4876.jpg?t=1272429654
Here is a pic of the guide I was telling you about. Don't elongate the holes. I think that might mess things up for you. Make sure this guide is all the way back (or is it forward?...you'll get the idea when you see the guide) after you loosen up the bolts.
IMG_4876.jpg?t=1272429654
#38
04-28-2010, 02:15 AM
ohhhh that thing!
okay I'll makre sure it slides all the way in. I did see a slot in the trunk for it. I'll do it as far as I can while sill allowing the bolts to hold the latch in. I didn't want to elongate the holes cuz when I start hacking things up, I usually end up f'in it up LOL!
I know exactly what you mean about the start nut, gonna make sure it's all the way tightened.
#40
04-28-2010, 03:37 AM


#43
04-29-2010, 11:24 PM

#45
04-29-2010, 11:28 PM