
DIY: Fix your scratched shift knob 07+ Sedan


The OP (EWG35) hasn't posted here in almost 3 years. You'll be lucky if he returns to repost the pictures.
I remember seeing the pictures. It turned out great and looked as good as new. Follow the instructions and you cant go wrong. It's an easy DIY.
If anyone does do this, make sure you get some new pics to correspond to the instructions in the first post. That would be helpful.
I remember seeing the pictures. It turned out great and looked as good as new. Follow the instructions and you cant go wrong. It's an easy DIY.
If anyone does do this, make sure you get some new pics to correspond to the instructions in the first post. That would be helpful.

Registered User
Joined: Jun 2012
Posts: 29
Likes: 2
From: Colorado
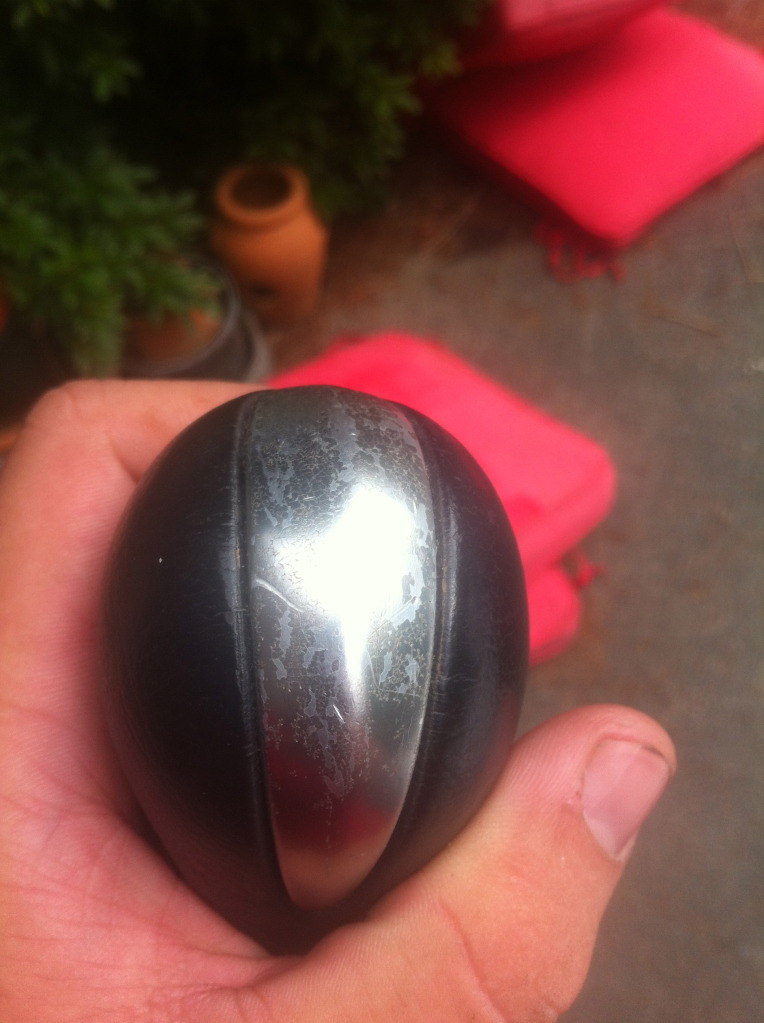
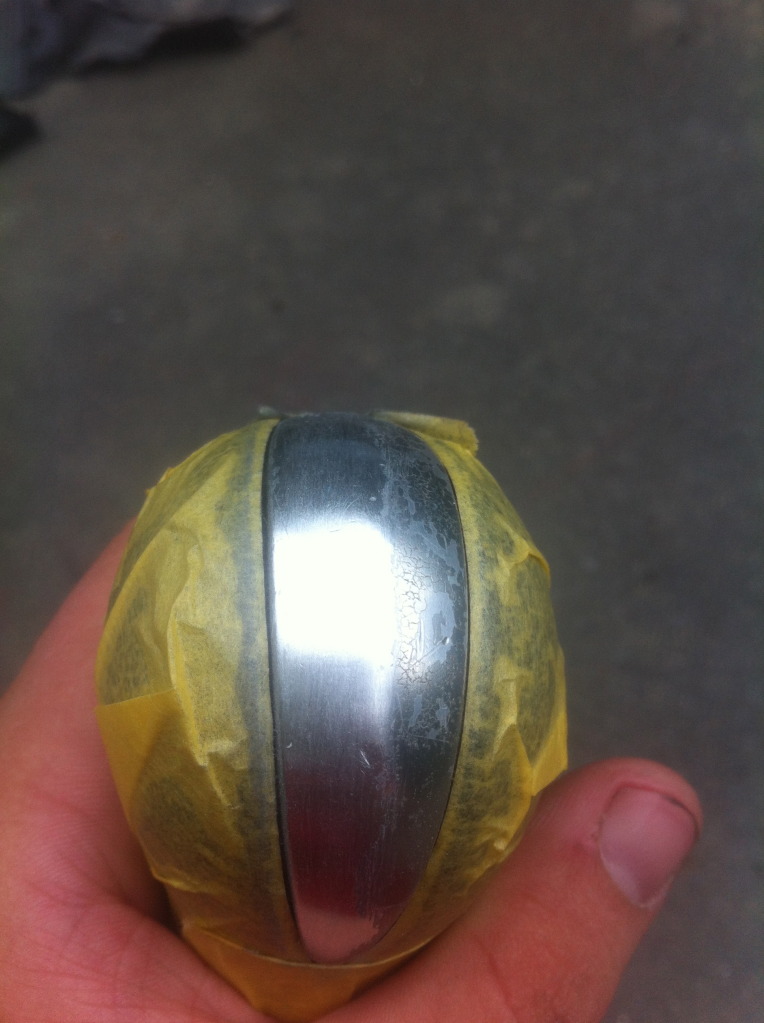
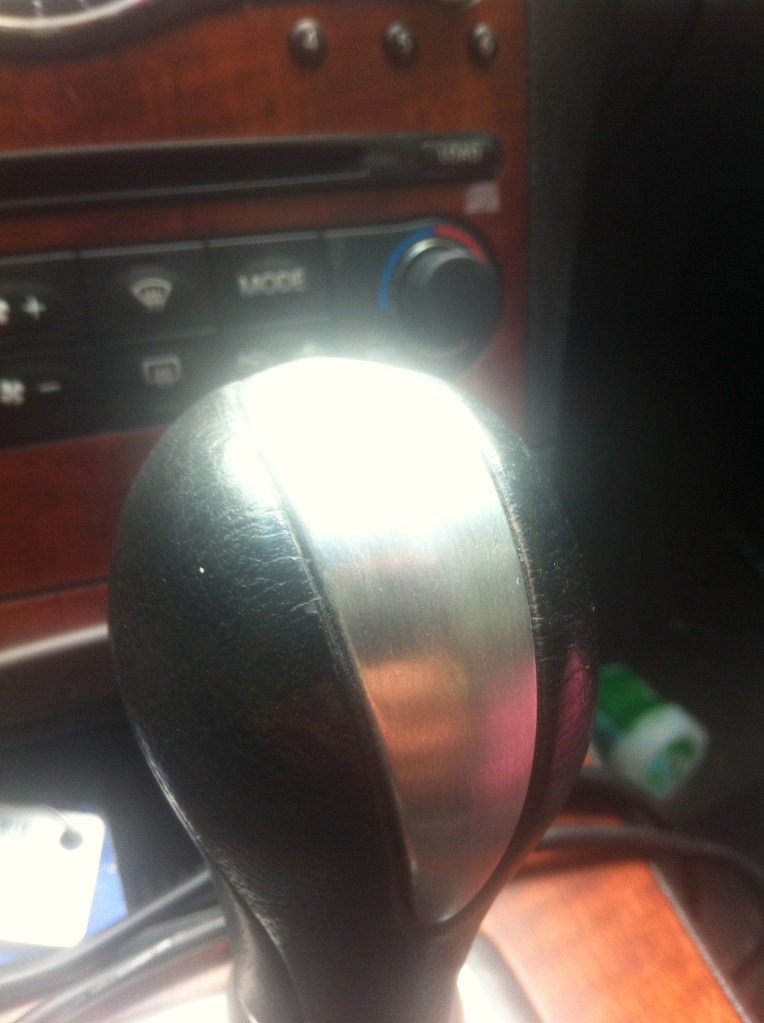
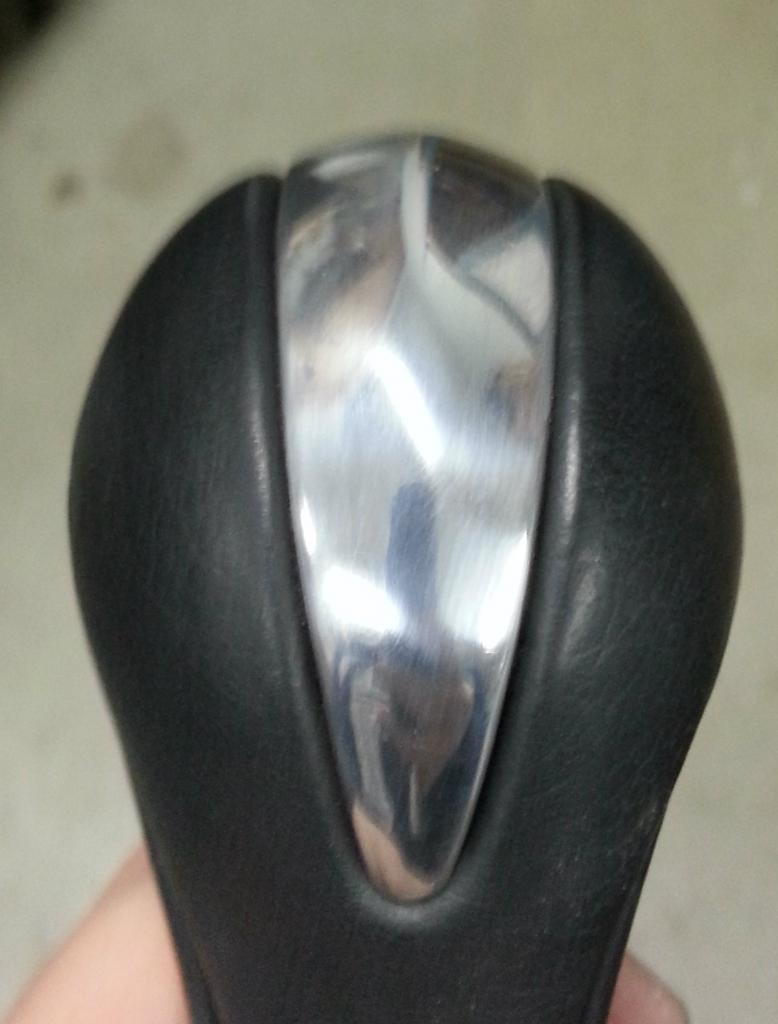
Just did this last night. Love the results. I did not do the clear coat paint - I prefer the look of bare aluminum with a "brushed" finish. I masked the leather off with thick gaffer tape and then I used fine grit sandpaper to remove the deep pits and scratches that were in mine and then finished it off with the same sandpaper. I just made sure I had clean strokes in the same direction to get the brushed look right. Here's before:

And here's after (craptastic cell phone pic):

Love the result.
And here's after (craptastic cell phone pic):
Love the result.
Last edited by selahvie; Aug 20, 2012 at 12:27 PM.

Registered User
Joined: Jun 2008
Posts: 13
Likes: 0
From: Upstate NY
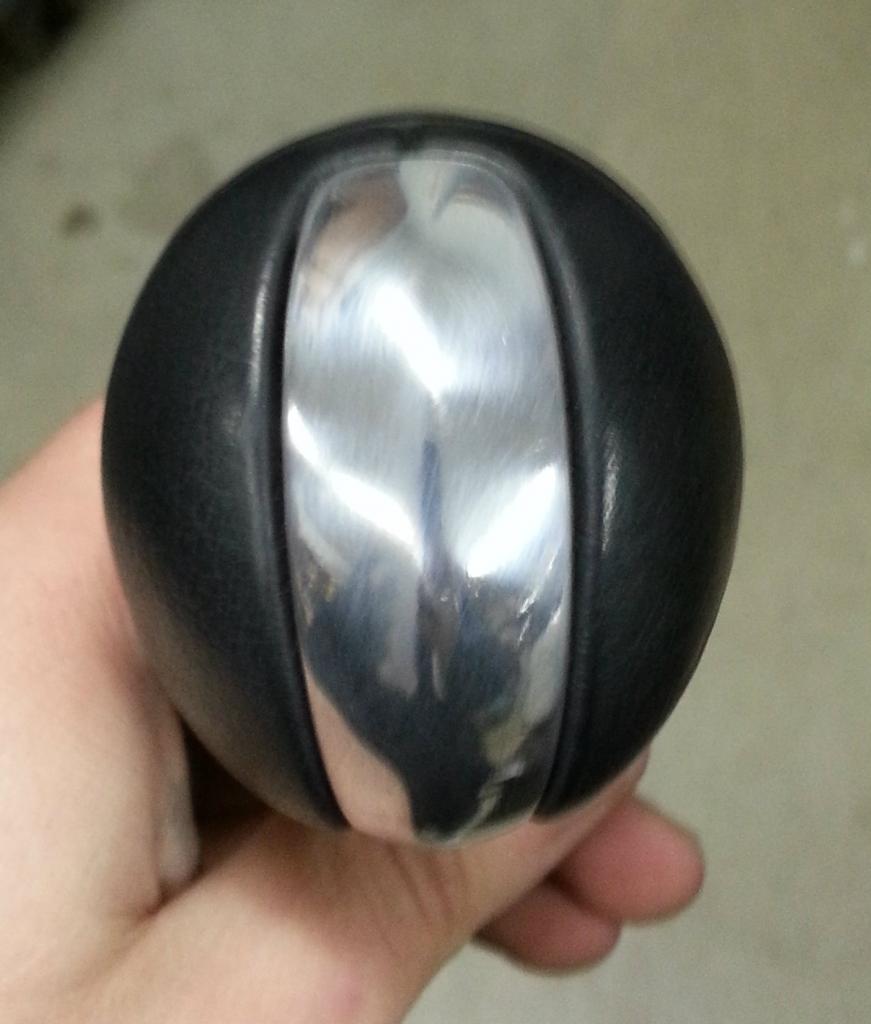
Just did mom's. It was one of the things that was annoying me whenever I got in the car.
I just used steel wool, going in the same direction with my strokes to leave a brushed look
Sh*tty cell phone pics
Before
Half done
After
I just used steel wool, going in the same direction with my strokes to leave a brushed look
Sh*tty cell phone pics
Before
Half done
After


Registered User
Joined: Dec 2012
Posts: 20
Likes: 0
From: Ottawa canada


tks in advance

I used painters tape and taped the aluminum off so that I didn't screw up the leather. Then I sanded the paint off with some #2 steel wool then moved to #00 steel wool. Followed that with a two step polishing kit. It was a fast cut compound and buffing wheel then a red rouge polishing compound. Don't go overboard because it seemed like I was somehow burning through the surface and it was losing some shine. Kinda odd but I can't explain it.
Posted from G35driver.com App for Android
Posted from G35driver.com App for Android
Registered User
Joined: Dec 2012
Posts: 20
Likes: 0
From: Ottawa canada
I used painters tape and taped the aluminum off so that I didn't screw up the leather. Then I sanded the paint off with some #2 steel wool then moved to #00 steel wool. Followed that with a two step polishing kit. It was a fast cut compound and buffing wheel then a red rouge polishing compound. Don't go overboard because it seemed like I was somehow burning through the surface and it was losing some shine. Kinda odd but I can't explain it.
Posted from G35driver.com App for Android
Posted from G35driver.com App for Android

Registered User
Joined: Sep 2007
Posts: 46
Likes: 3
Big shout out to the original OP!
I had always assumed that the flaking off metal coating was on a plastic substrate. I should, of course, have checked it myself; however, this thread set me straight
Here are photos of the simple process:
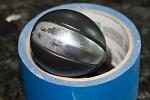
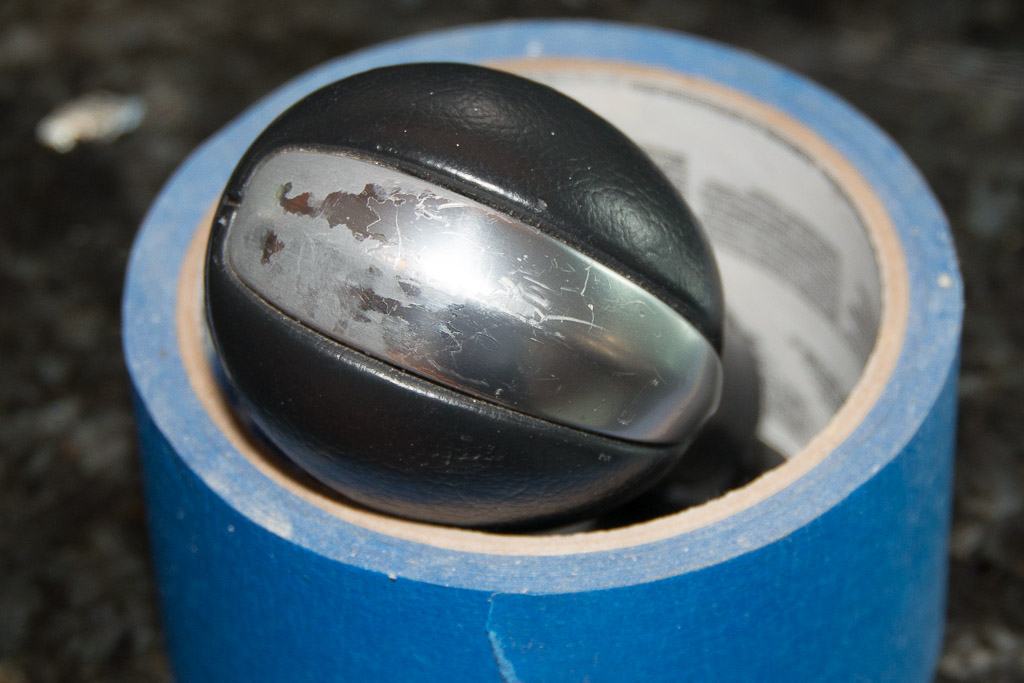
Before. Note the heavily oxidized gray colored aluminum substrate:
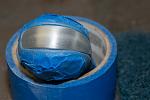
First pass with course pad to remove flaking metal and buff out scratches:
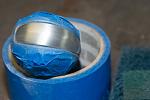
Second pass with finer ScotchBrite to give the brushed look:
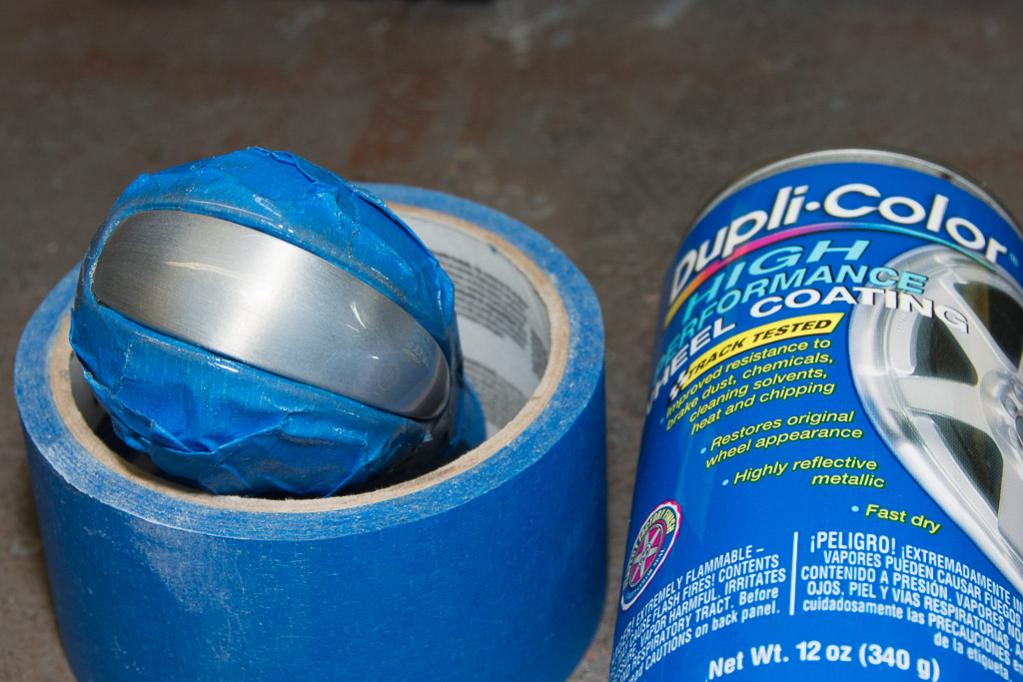
Clearcoated with DupliColor wheel coating

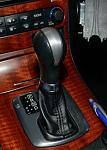
Installed and looking good!
I agree that the uncoated brushed metal looks the best, but I don't recommend you leave the finished surface uncoated. Either polish it like the poster above did or coat it with a clearcoat like I did. The bare brushed surface will surely oxidize over time as you can see from the first photo.
I'm a happy camper again
Sunil
I had always assumed that the flaking off metal coating was on a plastic substrate. I should, of course, have checked it myself; however, this thread set me straight
Here are photos of the simple process:
Before. Note the heavily oxidized gray colored aluminum substrate:
First pass with course pad to remove flaking metal and buff out scratches:

Second pass with finer ScotchBrite to give the brushed look:

Clearcoated with DupliColor wheel coating
Installed and looking good!

I agree that the uncoated brushed metal looks the best, but I don't recommend you leave the finished surface uncoated. Either polish it like the poster above did or coat it with a clearcoat like I did. The bare brushed surface will surely oxidize over time as you can see from the first photo.
I'm a happy camper again
Sunil

Ditto - what a great and quick weeknight project. Hard to beat the improvement in looks for the time and effort! Thanks all for the instructions and pics!
Big shout out to the original OP!
I had always assumed that the flaking off metal coating was on a plastic substrate. I should, of course, have checked it myself; however, this thread set me straight
Here are photos of the simple process:
Before. Note the heavily oxidized gray colored aluminum substrate:
Attachment 159510
First pass with course pad to remove flaking metal and buff out scratches:
Attachment 159511
Second pass with finer ScotchBrite to give the brushed look:
Attachment 159512
Clearcoated with DupliColor wheel coating
Attachment 159513
Installed and looking good!
Attachment 159514
I agree that the uncoated brushed metal looks the best, but I don't recommend you leave the finished surface uncoated. Either polish it like the poster above did or coat it with a clearcoat like I did. The bare brushed surface will surely oxidize over time as you can see from the first photo.
I'm a happy camper again
Sunil

Thread
Thread Starter
Forum
Replies
Last Post
mjfenix
G35 Coupe V35 2003 - 07
18
Aug 17, 2017 05:49 AM
vstypicals
Buying, Selling & Leasing Discussion
6
Jul 20, 2015 10:55 PM